Jennifer Haggerty's Blog Posts

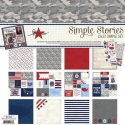
Hello! Jennifer on the blog today to share two layouts I created using the Hero Simple Set. I have to say I do love using the simple sets because you have everything you need to create your project!  Of course I adore the bigger collections with more embellishments but the simple sets are a lot of fun.  I also really wanted to create layouts with Hero because of my military background!  
 
For my first layout, "Battle Buddies"  I cut the striped edges from the B-side of "Brave" and adhered to three sides of my white cardstock. I then lined the bottom of the page with pieces from "Loyalty" and "Courage. I love that the colors of Hero are the traditional red, white and blue along with grey and camo mixed in!   
 
 
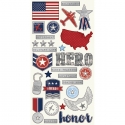
I used the camouflage letter stickers from the 6x12 Expression Stickers for my title as well as accented with tiny heart and star stickers from the same sheet. 
 
 
Using my Silhouette, I cut different pennant shapes from the patterned papers and adhere under my photo. I love the star/circle stickers and they make a great accent! Here, I adhere a light blue sticker with a staple over two of the pennants. 
 
 
I'm a huge fan of creating banners so I continued with the theme across the top of my page. I stitched through with my sewing machine as well as added brads from my stash to create some depth.  Also, the cute little star stickers from the 6x12 Fundamental Stickers make cute accents!  
 
 
The Fundamental Stickers also include many fitting sentiments such as this "Basic Training" sticker. I also used a small amount of washi tape and wood veneer stars from my stash.  Lastly,  I added a few ink splatters to my background.  
 
 
____________

For my second layout, "Honor",  I adhered an 11x11 piece of the dark blue "Brave" onto the B-side of "Loyalty".  I also added a strip of the B-side of "Courage" as well.  And my layouts aren't complete without stitching and you can see I stitched around the edges. 


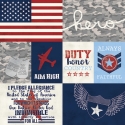
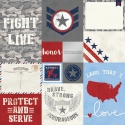
For this layout I wanted to utilize the Journaling Cards of Elements 1 and 2. I layered two of the 4x6 cards underneath my photo as well as a 3x4 card for my title and journaling.  I used the "honor" sentiment sticker from the 6x12 Fundamental Stickers over the heart as well as added a sentiment from the 6x12 Expression Stickers. At the top of my journal card, I added a star/circle sticker and secured with a staple. 
 
 
I also added two additional star/circle stickers to the edge of my photo as well as some bakers twine to accent.  
 
I typed my journaling on my electric typewriter and adhered it just inside my photo so that only three edges are shown.  Again, I added washi tape as well as a a wooden veneer star.  
 
 
​Underneath my photo, I used a star cut file from my Silhouette using white card stock as well a more ink splatters to accent.  
 
 
Thank you for stopping by today! I hope you will be inspired to document a patriotic event or even a loved one's military career! The Hero collection is perfect for both!  


Supplies

Hello! Jennifer on the blog today to share layouts I created using the Heart Simple Set. I am so in love with this line! The colors are bold without being overwhelming; the sentiments are heartfelt and perfect for honoring a loved one! I will admit there were tears shed while making these pages!  It's not always easy scrapping about my mom, but it is definitely therapeutic.  I miss her so much and I cherish photos of her even more now that she is gone.  
 
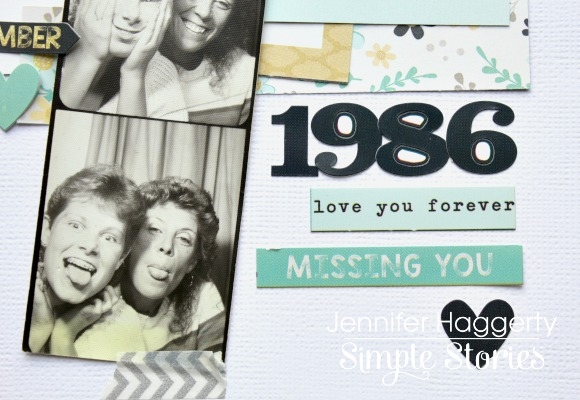
For my first layout, "Forever In My Heart", I utilized the journaling cards of Elements #1 and #2 layering them under and around my photo strip.  The 3x4 and 2x2 sized cards are the perfect size to accent your photos. Over Christmas, my dad had surprised me with old pictures that I thought were destroyed in a basement flood.  This old photo strip was included and its absolutely a gem. 
 
 
I used the letter stickers from the 6x12 Expression Sticker sheet and a sentiment from the Fundamental Stickers for my title. The navy and gold look classy together!  Also included in the Fundamental Stickers are cute hand drawn star stickers! I used a cluster next to my title.  
 
 
​I also used the number stickers to document the year the photos were taken, as well as added a few sentiments from the Expression Stickers. 
 
 
I love adding a little dimension to my pages so I used a wooden veneer ampersand from the Life in Color collection.  
 
 
Showing one of the 3x4 Journaling Cards from the Elements #1 sheet. This saying can't be more true and I'm glad it is included in the collection.  
 
 
The plaid print is one of my favorites of this line! I used a 2x2 plaid heart element from the Element #2 sheet and stitched with my sewing machine.  
 
 
************
For my second layout, " Always Remember", I used both side of Forever In My Heartcutting 6x12 sheets to split the page.  I also cut a strip of the grey/white dot of the B-side of Never Forget.   For my title, I used the letter stickers from the Expression Sticker sheet as well as the "Remember" Simple Stories Silhouette cut file.
 
 
I love the Circle Hearts Cut File designed by Simple Stories for the Silhouette shop! I used the celestial print of the B-side of  Love You and layered coordinating stickers over the top.  


I typed my journaling on my typewriter using the bold yellow of Never Forget and then accent with coordinating stickers.  
 
 
​Thank you for stopping by today!  I hope this inspires you to document about a loved one you have lost!  I think creating special pages is a wonderful way to honor someone who has passed.  

Supplies

Hello friends! It's Jennifer on the blog today with my first post for Simple Stories! I am beyond excited to be here to share layouts I created using the new Carpe Diem Scrapbooking collection!  The colors of this line are so lovely and versatile for just about any theme!  

For my first layout, I started with the colorful circles of Make It Happen as my background. I used the b-side of the same paper along with the pretty teal of Brand New Day and stitched through with my sewing machine (which I use A LOT! )  

I enjoy mixing things up and using different elements for my titles!  Here, I used the bright pink letter stickers from the Expressions Cardstock Sticker sheet and a cute Simple Stories cut file from the Silhouette shop.  I love how the Black/White Dot pattern contrasts with the pink!   To accent my title, I layered a cute chipboard arrow and sentiment from the Bits and Pieces pack underneath. 

Creating clusters of little embellishments is definitely something I love to do when making layouts!  I used both chipboard and cardstock stickers along with a Carpe Diem Bradz to give dimension to my cluster.  

Another favorite Simple Stories' embellishment are the adorable Photo Clips! Here, I added a pink heart clip to the top of my photo and secured with a staple. 

I had the idea of using a heart background cut file on my page but couldn't quite find the right one. So, I duplicated identical heart images and cut using the Don't Mind Me print. 

I adhered the negative cut onto white cardstock as well as inserted a few hearts using the b-side of Don't Mind Me.  

I love that Carpe Diem has both vintage and modern elements so that you can scrap just about any photo! I used this cherished picture of my grandparents when they were dating!  

I started with white cardstock and cut my title on my Cameo Sihouette. I then backed the letters with both the Pink/White Dot and the b-side of Fist Bump. 

One of my absolute favorite Simple Stories embellishments are the Chipboard Frames! They are so cute and fun to accent your pages!  Here, I affixed a frame over one of the 3x4 Journaling Card Elements to jot down a little information about my photo! 

Again, I created a fun cluster of embellishments using Cardstock Stickers, a cute Photo Clip, and a self-adhesive Bradz.  I also added splatters of spray ink as well as Enamel Dots around my photo. 

Thank  you for stopping by today!  Be sure to check out this collection in its entirety here! Have a wonderful day!

Supplies

Pages