Odessa Reichel's Blog Posts

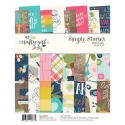
It’s Odessa with a cute 4x6 album I’ve put together with some photos from a recent weekend road trip with my family using the Simple Stories Bliss Collection! Even thought it’s still pretty snowy, I picked Bliss because of it’s light spring-y feel for our spring break road trip to Minneapolis. I kept things simple with lots of all sorts of stickers - words, phrases, chipboard and more! Bliss has lots of super usable phrases and icons that were easy to match up with pictures.

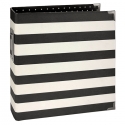
I love the plain chipboard cover of the 4x6 SN@P! binders! I went with a teal spine and decorated it with some cut down cardstock in a nice wood grain and added some of the Bits & Pieces and stickers to personalize it.

The first page of the album is my favourite! The left pocket is more cut down cardstock. I love the handy photo crops so I can see exactly what I am cutting and get it the right size. I used some of the Basics alpha stickers and embellished with some stickers from the Bliss 4x6 sticker pack to make a title. On the right I used an iced coffee cup with an illustration of Minnesota, again cut with the photo crops with a cute heart from the chipboard stickers. See through elements are so fun to add to mini albums!

Throughout the album I used coffee sleeves or cups cut down as dividers for each day. For the sleeves, I cut down cardstock to the same size and glued it to the back so I could add some journalling.

The cardstock in the Bliss collection is really really pretty so I let it shine on this spread, cut down to 4x4 with a simple chipboard sticker on it. I added some more stickers to the photos on the spread for an easy but cute layout.

Throughout the mini album I used lots of the Basics alpha stickers as a focal point and word strips to capture how I felt about this pictures. Here I also used one of the 3x4 elements to fill up my pockets and quiet down a busy spread.

This is my second favourite spread in the album. A cute picture from our trip that goes really well with Bliss on one side and one of my favourite quotes of the trip from my younger son using the Basics alpha stickers again.

Here I used one of the photo flips. When we go on trips I collect bits and pieces of ephemera to go with my pictures and this cut out from a fast food tray liner was perfect in the photo flip above our lunch picture. I just folded down the sticky edge of the photo flip and attached it  to the back of the page protector.

When we go on trips, I always pick up some film for my instant camera for my older son. He loves taking pictures with it and I love seeing things from his point of view! I added his favourite ones to a 3x4 photo booklet and slid the back of it into one of the page protector pockets for a quick flip book. It was the perfect way to add in his pictures.

I had so much fun making this mini album. There are so many fun sizes of page protectors and accessories that it’s easy to add all of my pictures and things into an album.

Supplies

Hi everyone! Odessa here with some pages I’ve been working on in my SNAP album. When I saw the Crafty Girl collection I knew I had found the perfect collection to work on some pages all about me. Crafting is my life and I just love the bright colors, cute icons and smart phrases in the collection! And what better to put them in than the chic Black Stripe Designer Album?

I started with a cute drawing of myself and some craft goals I have this year and then got busy embellishing! I had a sideways 3x4 picture that I stuck down to a pink patterned paper cut down from the 6x8 pad with some of the adorable painterly washi tape. The washi paired perfectly with the all the stripe colors in the Live. Love. Create. 3x4 card so I had all the colors to pick from for my embellishments. The colors in Crafty Girl all go so well together which makes putting together pages so easy - you can just use anything together! I added some of the SNAP Basics letter stickers along with some words and phrases from the Crafty Girl sticker sets. Then I stuck down some Bits and Pieces and this page was done!+

For the next set of pages I just had to pull out one of the totally frameable pages from the 6x8 pad! Eat. Sleep. Craft. Repeat is pretty much my motto. I added a few stickers from the combo sticker sheet because glitter just had to be mentioned and it was perfect. 

On the left side I have a couple of pictures and a 4x6 card. I used some of the chipboard stickers - those buttons are adorable - and stickers from the 4x6 sticker set to really personalize this page. The phrase stickers from that set feel like they are made for me! On the selfie I used the stickers to frame the picture and get a little bit of journalling in and on the coffee picture I used a centred phrase sticker and that cute button to accent the picture. Finally I added a few little things to the 4x6 card to personalize it. I find it so hard not to personalize elements like that, if I don’t they feel naked next to everything else.

For my last spread I used the back of the 6x8 paper from the previous page to do a little layout and then a collection of 3x4 pictures and cards on the other side.  I couldn’t help but sing a little while I was putting down the “makers gonna make!” 4x4 card which I lined up with a horizontal 4x3 photo for a simple centred layout. I added both a chipboard sticker and a word from the 4x6 sticker set in between the pictures as a border. Then I stared laying down some more stickers around it, some washi and a journalling spot from the bits and pieces. 

On the right side I have all the colors going on in my pictures so I went with a nice pencil crayon 3x4 card. I embellished it with some more alpha stickers and stickers from the sticker pack to title the page, since color is probably my favorite part of getting crafty! One of my favorite design elements is placing a heart or other simple icon in the centre of something so when I saw the wheel of yarn picture a heart just had to go on there. I added a simple phrase and the bun of one of the crafty girls to finish up that pocket. I knew I had to use the crafty tote bag chipboard sticker and it was perfect in the middle of the picture with all the yarn. The picture has a lot going on and didn’t need much so a nice central embellishment was spot on. 

I just love the phrase stickers in the 4x6 sticker pack. They were just what I needed to add a little DIY poem in the negative space in the bottom of the page. A little button and one of the arrow stickers and this set of layouts was all done!

I hope you enjoyed hearing about how I document my crafty fun and are inspired to pick up the Crafty Girl collection to document your own craftiness!

Supplies

Pages