Hello blogging friends!

I am sharing some fabulous Simple Stories Love & Adore layouts with you today. For this first one, featuring a photo of my niece and her boyfriend, I really wanted to play up the hearts. This awesome cut file is from JustNick Studios. I loved that it had this big "X" in the middle. I thought it was perfect to showcase the Love & Adore washi tape. This heart washi tape is a new favorite of mine. To make the hearts pop even more, I backed portions of the cut file with the beautiful ombre pink pattern paper from the collection.

Here is a closer look at that heart washi tape.

 
That beautiful chipboard sticker banner anchors my photo. I added a pop of yellow with a chipboard sticker heart and enamel dots.

 
The chipboard sticker "XOXO" makes a great title layered over some bits and pieces die cuts. You can also see some of those cute phrase stickers here.
 
 
I love how this layout came together so easily.
 
 
________________________________
 
For my second layout, I wanted to scrap this awesome selfie my daughter took where she is giving her dog a smooch. Take a look ...
 
 
I concentrated most of my embellishments near the photo. The paper is so beautiful by itself  I did not want to cover it up too much, To frame my photo I used a fun new cut file from JustNick Studios called Ring Around My Heart.
 
 
There are lots of gorgeous layers of eye candy here. Check out those phrase stickers I used again on this layout.
 
 
I used the chipboard word "Sweet" for my title and the "I Love Your Face" bits and pieces die cut for my subtitle. Perfect! Just look at that dog's face ... lol.
 
 
In the upper left is another cluster of embellishments. I love tucking the round stickers from the 4x6 sticker sheets underneath so the text at the top peeks out. The sticker I used here says "KISS".
 
 
Thanks so much for stopping by today. Stock up on the Love & Adore collection for scrapping the photos of those you love.

SaveSave

SaveSave

SaveSave

SaveSave

SaveSave

SaveSave

Supplies

Hello everyone ! Welcome to the blog today. I am super excited to be sharing some pocket pages with you that I have created. The Love & Adore collection is simply adorable and so versatile. Its so easy to work with that I decided to use it with some everyday photos from January. Here is a closer look.
 
 
Typically I like to do my pocket pages weekly. This month is going to be a little different. We have had a few family adventures that I want to also add into my album. So I made the decision to save those photos for their own pages and combine week 2 and week 3 together. So that is what I have done here. 
 
For my title card I started out by cutting this awesome heart out from a 4x6 journaling card. I loved the pattern and the color of the heart but needed some more room to add my dates and stuff. I add it to a piece of white cardstock to make the heart stand out more. Since this was going to be my title card I had to figure out where to add my dates. I went with a label and tucked it underneath that hello chipboard piece. 
 
 
I went ahead and chose this journaling card with lots of white space and those hearts in a row at the bottom. I needed a card that I could add a longer story onto it and this one was perfect. The story goes with the photo below it. As you can see those great hearts on the bottom of the card. I accidentally discovered that the leftover/inside piece of the yellow chipboard heart fit perfectly inside these hearts. It adds a little piece of dimension to the card. 
 
The next card holds a photo of my son and has some journaling underneath the photo. I was working in my scrap room while the kids were playing outside one afternoon. My son thought it was so funny to sneak up and shoot his nerf gun at the window. The card itself has some embellishments on it already and it was perfect to add a few stickers and some enamel dots to finish it off. Simple and easy. 


Let's move over to the other side of my spread. It turned out that I had more to say about these weeks then I had smaller pockets. I added in this 4x6 journaling card to recap the week so to speak. On the bottom of the card I added that cute chipboard banner for some eye candy. The color scheme came together super easy this time with a lot of pinks, blues, and reds. I chose to create a filler card with this blue arrow patterned paper. On top of the card I layered some stickers and a cluster of embellishments up at the top. 
 
 
Don't be afraid to cut up your journaling and filler cards and use them as you need. That is what I did here with the watercolor strokes card. Originally it was a 4x6 card and I was looking for a  journaling card for my story about making things. So I cut it down to 3x4 and went from there. I wanted to talk about how we all have been making things lately. My husband has been baking bread and I have been busy making crafty things. I got to work and used a combination of letter stickers and the word sticker "be" as a title for my journaling card. I added some strips of washi tape underneath. It acted as a longer home for my title. 
 
 
I couldn't resist using these big and fun chipboard X and O pieces. So I used them right on top of my photo. It left this perfect little pocket to add my journaling on the other side. I also added in some of the bits and pieces above the X and O chipboard pieces. 
 
 
Thank you all so much for coming over to the blog today. I hope you have some inspiration to use in your pocket pages. Be sure to go out and pick up the Love & Adore collection for all those things you love in your life ! 
 
Hello Simple Stories fans! 
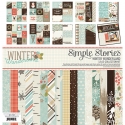
Chantalle back with you today to share some pages I have created with the beautiful Winter Wonderland. What I love the most about this collection are the soft tones and the combination of elements which can be used for both frosty memories as well as the every day! I have captured my Sister and sweet little Niece on a snow outing as well as my Nephew and his beloved dog, Mason, just hanging out.
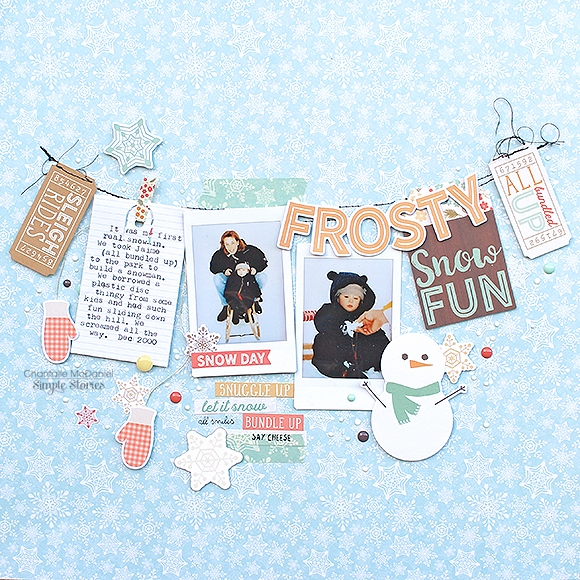
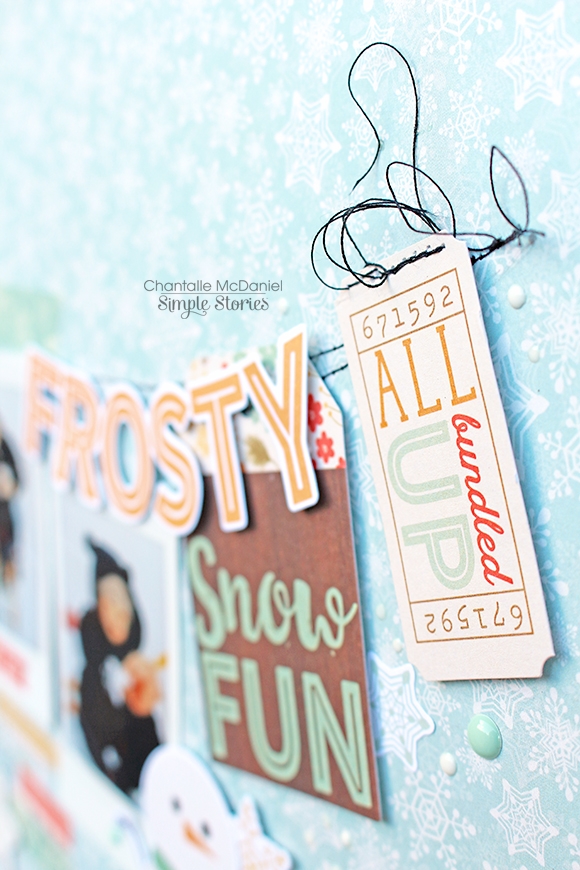
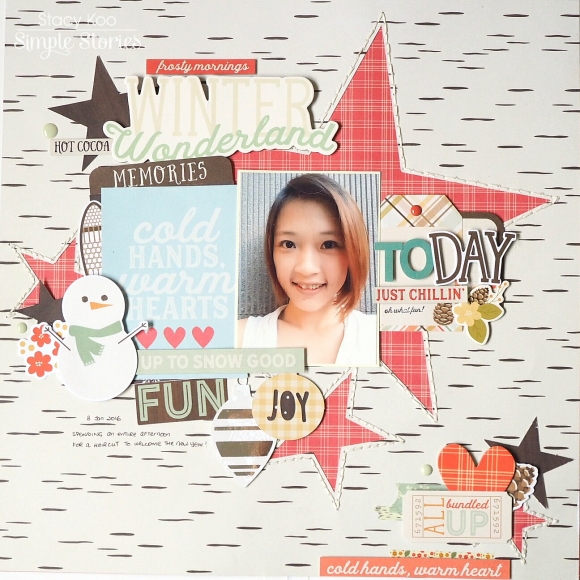
 
Frosty Snow Fun
 
I remember this day so clearly. Seeing snow was a huge novelty for me. Visiting my Sister overseas from South Africa I looked so forward to seeing everything in white and listening to the dampened sounds outdoors. We all rugged up and headed to the park where we rode down the hills on our little sled. We borrowed a large plastic disk-type thing from some children. I remember screaming with laughter as my Sister and I flew down the hill. The disk went so fast! A day worth capturing for sure!
 
 
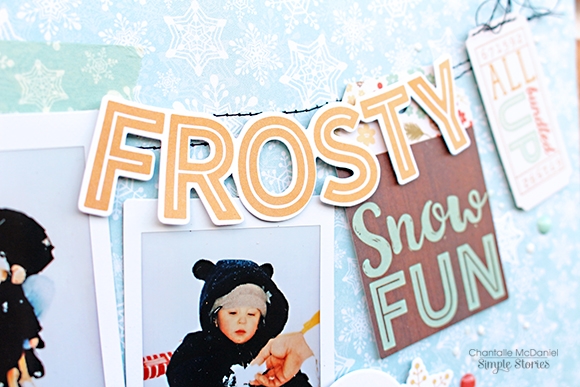
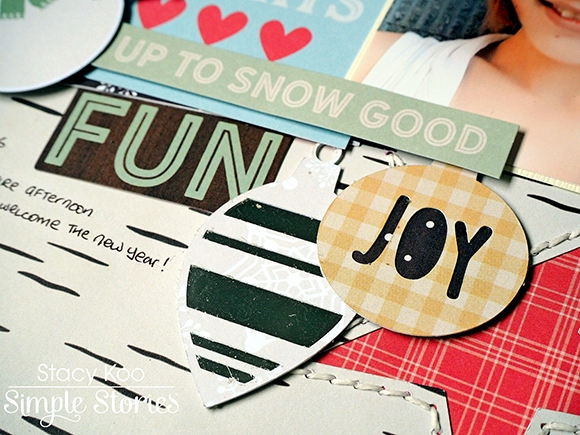
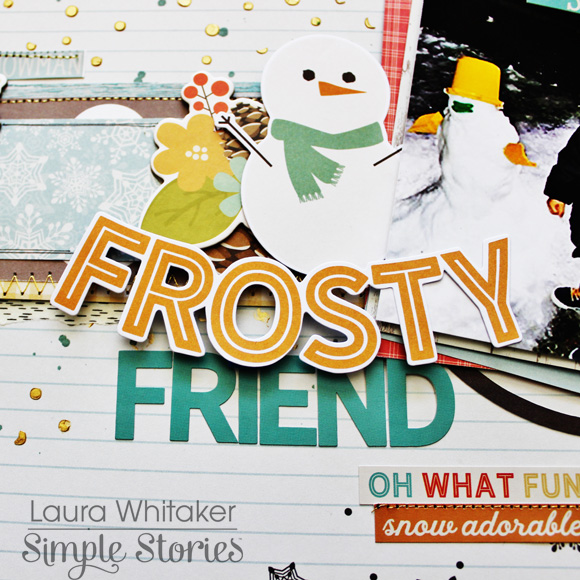
The banner style was kicked off by this little word ‘Frosty’ from the Bits & Pieces pack. I also found some sweet little tickets which were perfect for the story I wanted to tell. 
 
 
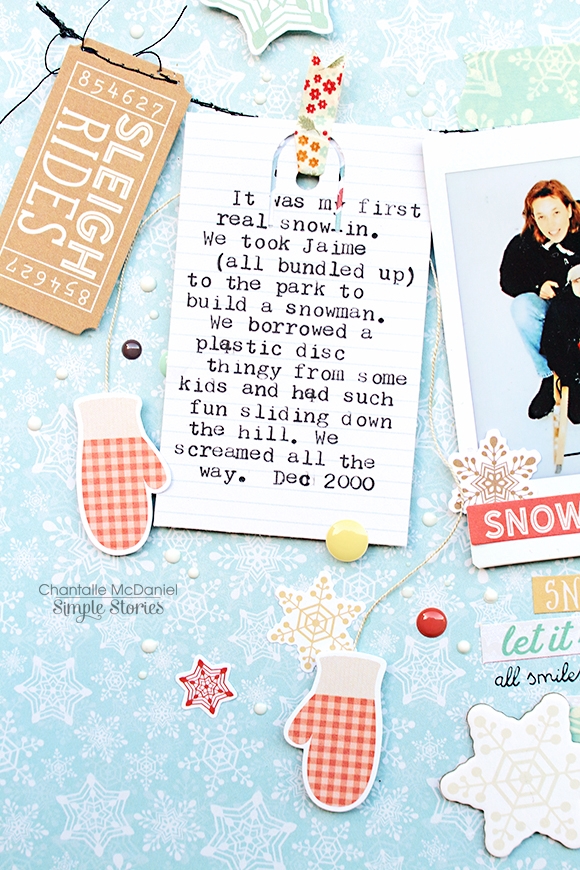
The vertical lines were reinforced with the orientation of the Intax prints and so I chose to pop my journaling onto a tag shape, which I created with a punch. Now you’ll notice that my tag is not exactly perfect! I will admit, that after two spelling errors I didn’t fancy typing it all up a third time after punching through the text accidentally! Oh dear, lol. The perfectionist in me is screaming at it not being exactly correct, but you know what, I am learning to embrace the imperfect. I can read it and that is what counts. Don’t be afraid of small imperfections! 
 
A bit of washi tape fed through the punched hole gives this tag a nice bright pop to finish it off. I’ve also joined the two adorable mittens (Bits & Pieces pack) together with some embroidery floss. Draping them behind the tag makes them appear as if they are hanging on the ‘line.
 
 
I would usually use white thread for machine stitching, but chose to use black this time. I really like the way it compliments the darker shades in the photos as well as the typed text.
 
 
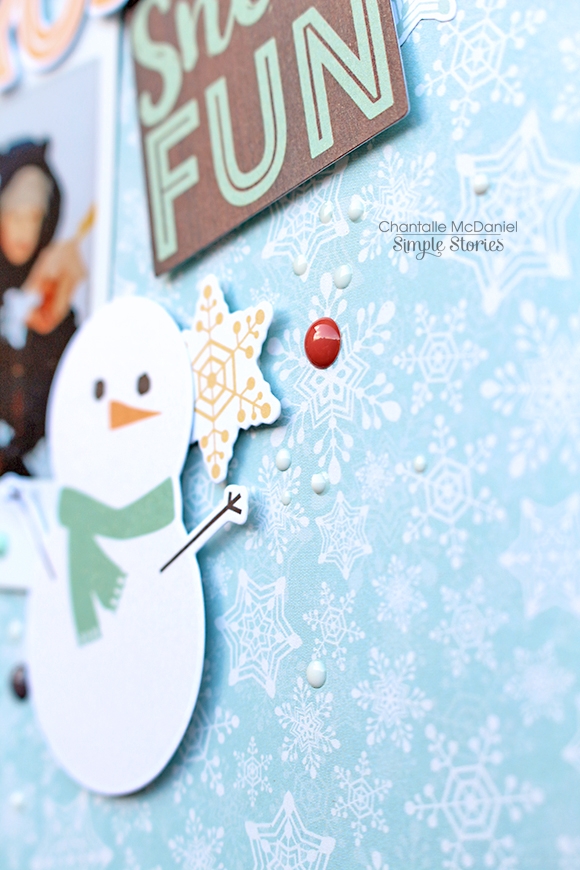
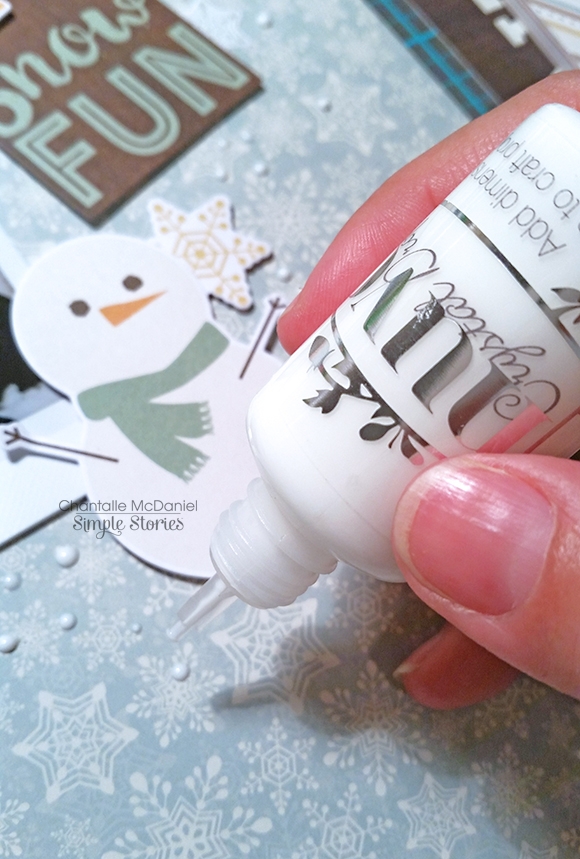
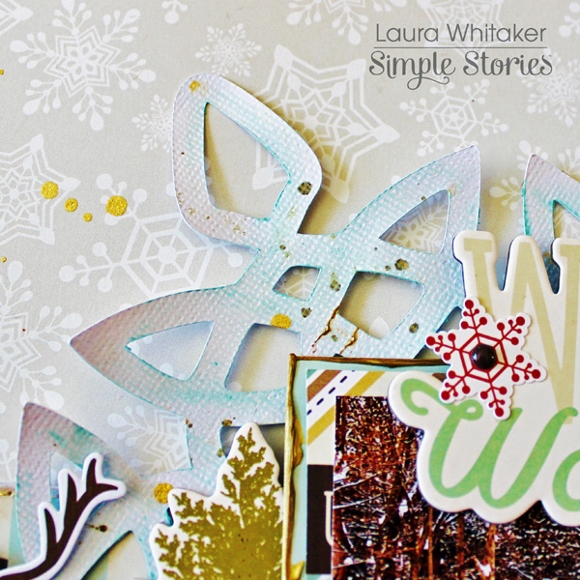
To give the appearance of a snow flurry, I have added lots of very small little glossy accents. 
 
 
These were created with some white dimensional medium. I love the glossy finish, just like a real enamel dot!
 
 
A good idea to add interest without too much clutter is adding sections of a matching washi tape. Here you can see how I have added some of the same print as the paper. One can see it’s a different element but it doesn’t distract as much as a totally different pattern.   As ever, I love using a bit of chit chat on my pages. Some Combo Cardstock Stickers and a little bit of Roller Stamping add just enough. 
 
 
_____________________________
 
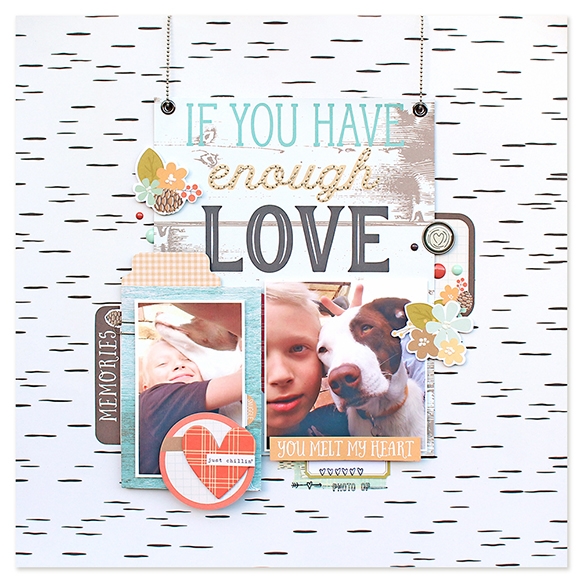
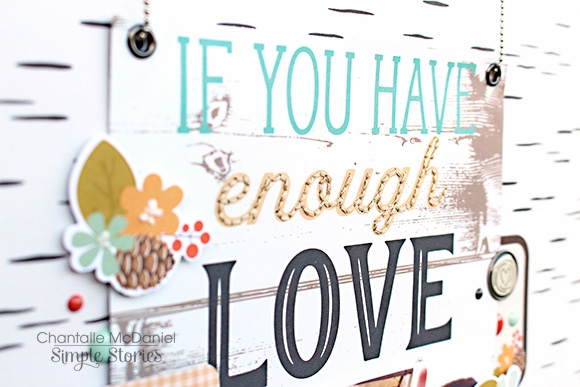
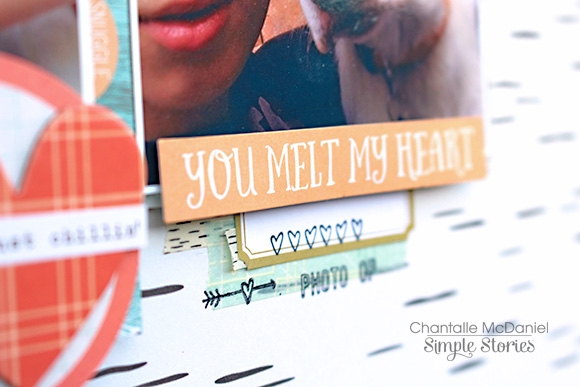
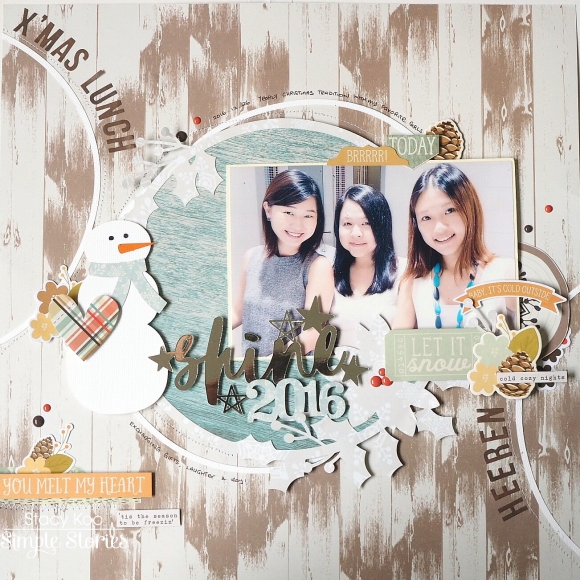
This page uses the same collection but has a totally different feel. I’ve embraced the natural elements like flowers and woodgrain to tell this story about one crazy dog who is loved beyond measure. 
 
 
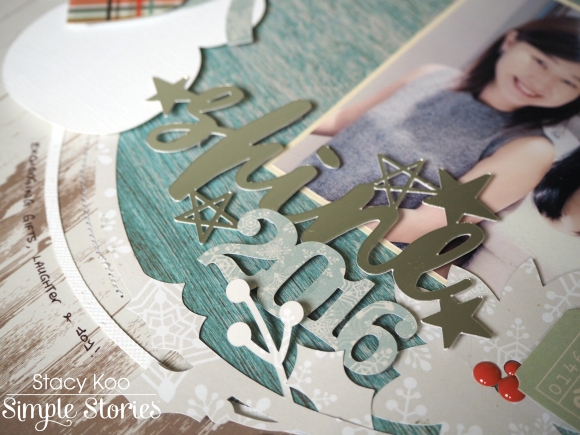
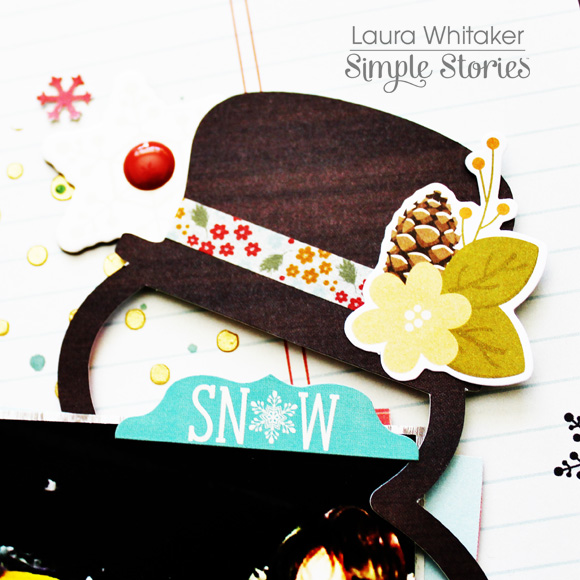
The title was cut from a large 6x12 Element from the 2x12, 4x12 & 6x12 Paper Elements. It spoke of winter but I cut that section off and used the lower half to create a banner style heading which I have ‘hung’ using some ball chain.


I did’t want to overcrowd this page as I wanted to keep it more masculine and let the photos do most of the talking. I’ve added subtle detail to my flowers with some more of that white dimensional medium.
 
 
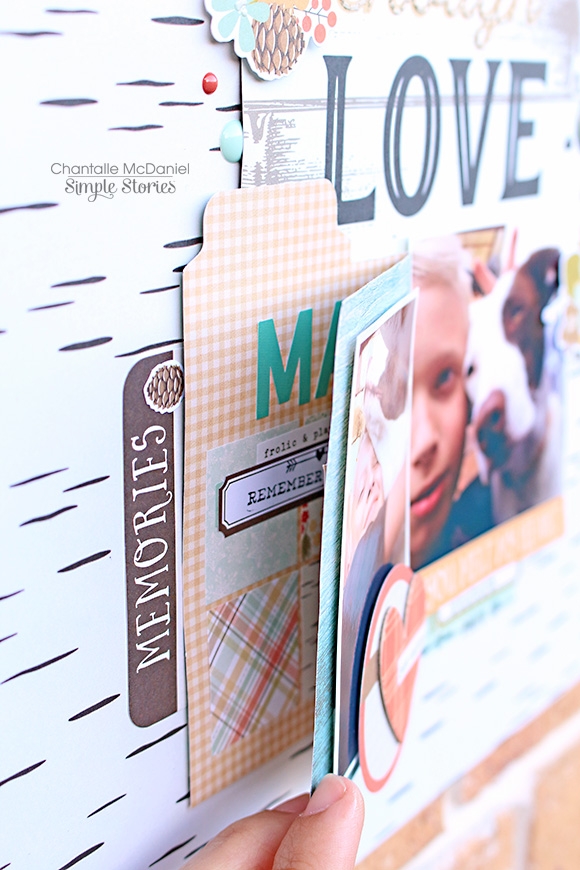
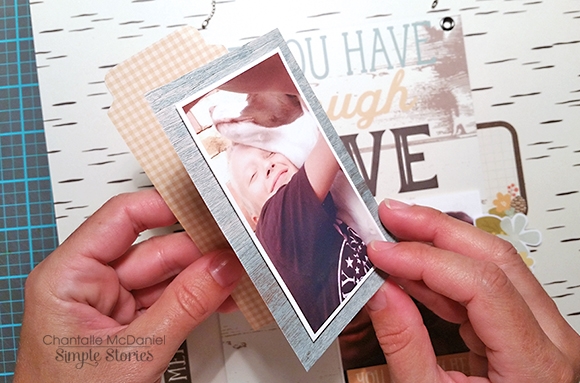
I’ve chosen to keep my journalling hidden inside a little mini folder which I created with a new Punch Board.
 
 
With my photo mounted nicely on the outside, I turned my attention to the inside.
 
 
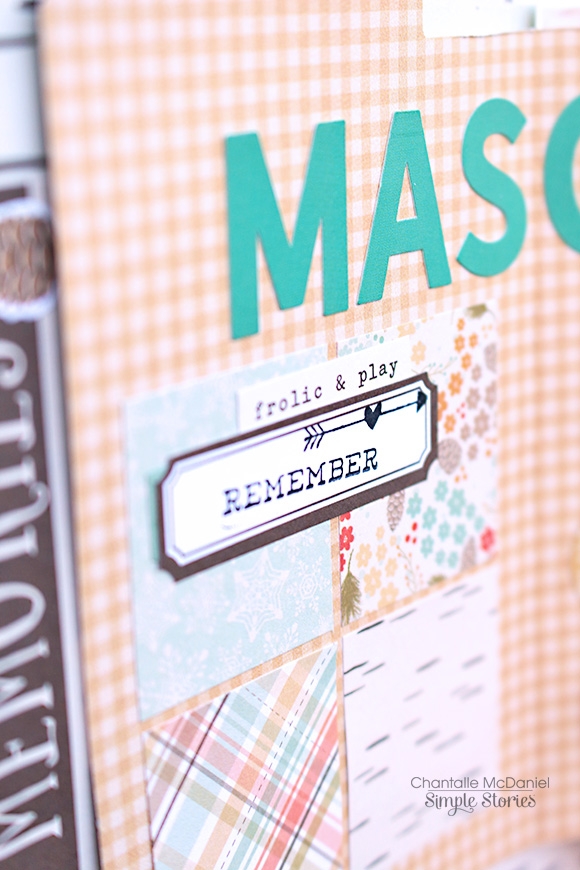
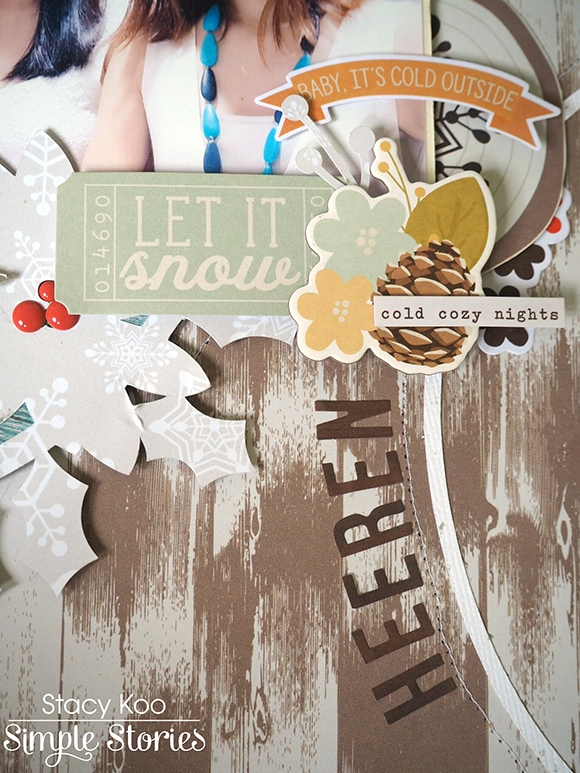
I’ve used the teal cardstock stickers from the Combo Cardstock Sticker sheet to spell out the name of the dog and some stickers from the 4x6 Sticker pack to embellish the inside left. This sticker pack is so so handy - it’s got die cut shapes, alphabet stickers, sentiments, squares for use in your Carpe Diem planner, and more! The stamping was created with the new Faith & Emoji Love Roller Stamps.
 
 
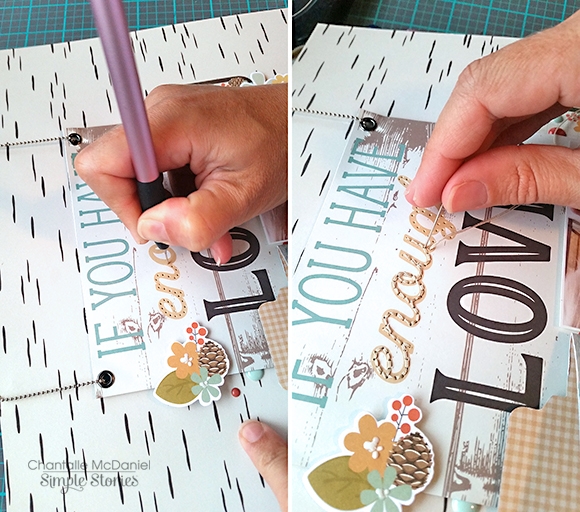
I felt my title lacked interest so I used a paper piercer to pop some stitching guides in to the word ‘enough’. I then used some matching embroidery thread to create a stitched version of the word.
 
 
The little details add a touch more colour and a bit more chatter.
 
 
Thanks so much for joining me today!

Supplies

Hi everyone!  Theresa here sharing a peek into my Marigold Carpe Diem planner setup for February!  This is still one of my favorite collections!  It doesn't snow where I live, but we don't live too far from snow and it's still pretty chilly here!  

I added some of my favorite die cuts and stickers to the front pockets of my planner. Always ready to grab and use!  I also have one of my Doc-It Journals handy to journal with!

This tree pattern from the Silver White Winter sheet is my favorite design!  I decided to use it as a dashboard.  I placed the little die cut bird on one of the branches and decided to stop there!  The bird fits in perfectly and I love the simplicity!

I also used the Winter Wonderland collection in my Doc-It Journal!

I added some chipboard, word stickers and enamel dots right into my photo.  The snowy background goes perfect with snowflakes!  I love all the snow and ski quotes in this collection!

Here is a look at my monthly layout.   I used the teal number stickers from the Posh collection which matched perfectly with the teal stickers from the Winter Wonderland cardstock sticker sheet!  I used the larger numbers for a couple birthdays we are celebrating, it makes those dates pop out a little more than the rest!  I hope younger enjoying your winter wonderland!

Supplies

Now that we’re well into January, well into winter and for many of us, well into A LOT of snow, we thought it would be fun to share an up close look at some of the popular Winter Wonderland products & inspiring projects from our creative team!  

When it comes to paper crafting, it’s all about the paper, right?!  Regardless of what crafty project you’re working on, paper is the perfect starting point.  These are some of our Winter Wonderland favorites, and judging by our diminishing inventory, they’re some of YOUR favorites too!

Washi tape, stickers, die cuts and 3x4 cards – OH MY!  With Winter Wonderland, you’re sure to find just the right embellishment to add those perfect finishing touches to your ‘snow fun’ projects.

From layouts, to mini books to planners, Winter Wonderland is just what you need for adding a little seasonal touch for your paper crafting & planning needs.  Speaking of paper crafting & planning, here are a few projects to get you inspired to document your winter memories.

Be sure to check out & follow our Winter Wonderland Pinterest board for more Winter Wonderland inspiration!

Hello Friends! Alexandra here with some Christmas pocket pages to share with you.

 I've used Simple Stories' CLASSIC CHRISTMAS which I find to be both an easy and pretty match with the pictures taken during the holidays

Here are the pages as they appear in my 12x12 SN@P! Album

I also used the Classic Christmas colletion to document week 50 

The scare of that week: having a tire explode on the fast lane of the express way! Of course that had to happen when it was like 0F outside but I was lucky in the end, got help and snapped the picture you see above.   On one card, I underlined the days of the week with a red pencil and then on the card with the three bubbles, I wrote down about three moments or impressions.

The classic color scheme goes so well with all pictures, festive or not festive!

Supplies

Hello crafters! Stacy here on the Simple Stories blog today, sharing 2 layouts using the Winter Wonderland collection. This collection really beams, even if it is used with non Winter photos! 

It has always been a tradition with my girlfriends to meet up for a Christmas gift exchange and a meal together. This year, we had a blast and I needed to document this yearly affair with the Winter Wonderland collection.

Using my Silhouette Cameo this time, I cut some svg files for the Shine title and Circle Wreath. Then I ran the layout through the sewing machine, giving the circular elements a border with the running stitch.

How about a heart from the sticker sheet to accompany the snowman? Layering up with elements in the Bits and Pieces pack is easy!

I like to add locations of the places visited in the photo. In this case, I used the alphas in the sticker sheet as a sub title. Enamel drops are a must to add a tinge of color and texture!

The phrases in the Bits and Pieces pack are very versatile for any layouts. I used the Washi Tapes in the series behind the phrase in order to give it a highlight. 

_________________________________

The next layout was inspired by stars! I cut many stars into the pattern paper, and then backed it up with a contrasting color to highlight the star cuts. 

More Simple Stories Silhouette cuts! Christmas bubbles go hand in hand with this layout, and they are easy to use. Here you can also see some hand-stitching which I had done around each of the stars. 

More washi tape, stitched star and cool phrases! I even made use of the negative of the star cut from the pattern paper and used it as part of the decoration. I was in the hair salon for 4 hours waiting for a haircut. The weather had been rainy, and it was cool out there. The waiting kept me in anticipation on my new look!

Adding stamped words to layouts are a favourite! The Classic Christmas roller stamp has so many phrases to choose from, and it really does not need to be christmas!

This collection's colors and elements are perfect to use along any photo, snow or not! Hope you like these layouts today! 


SaveSave

SaveSave

SaveSave

SaveSave

Supplies

Hello Friends its Kristine Davidson with you today.  I will be sharing 2 layouts with you using the gorgeous winter collection called “Winter Wonderland”. It has beautiful soft colors and great images for those winter pages.  

My first layout is called Winter Chill - 

I used a pattern paper for my background on this layout and then started layering with other pattern papers and I wanted to highlight some of those papers. In order for me to do that I used the Oh What Fun paper to create a brown border around those papers. That created a bit of a definition for me, which I like. 

Layering with dimensional adhesive is nothing new on my pages and this layout was no exception. Creating a cluster of embellishments on the right bottom corner of my pictures was a great place to add a snowman, some skates, and a few word strips.

I love flowers and even if this is a winter layout I find that these blue/yellow/white flowers add such a beautiful touch to my page.  I added those on the left side of my page but didn’t over do it.

I love the trees and the deer stickers. I wanted to add those to both of my pages so I did. They are similar, but I am ok with that ;)

_______________________________________
 

My second layout is called SNOW

The girls were outside taking photos and it was just the perfect day. It was a mild winter’s day and the birch trees in the background were a perfect match to this paper collection. It wasn’t snowing that day but the snow in the background certainly shows that it was a winter’s Day.

This layout is really similar to the first one. I added more brown paper on the back of my pattern papers for dimension, some snowmen which is super cute by the way, and also the deer and tree on the right hand side.

You could probably do something similar to this and create a 2 page layout for yourself. Try adding a dark color around your light pattern papers and see if you like that ;)

Thanks for visiting us at Simple Stories today, if you enjoyed my layouts please come find me on instagram @KristineDavidson

Have a great day!

Supplies

Good morning friends! Brenda Smith here with you today to share a planner spread in my Carpe Diem using Love and Adore. I know, I know. This line is very much related to Valentine's and it's only January, but I couldn't wait. And as you will see, the line is very versatile and will work for any spread, any time of the year. 

I first started by prepping the front of my binder by filling the pockets. I used the Bits and Pieces to fill up the pockets in a way that was visually appealing to me but also full of embellishments I could see myself using over the next month or so. 

I am absolutely addicted to the packet of 4x6 stickers that coordinate with this line. They are the perfect size for planners but work well on just about any other projects as well!

While the horizontal Carpe Diem inserts for memory planning are what made me fall in love with the CD planner, I have become quite partial to these vertical inserts for planning my everyday. I love that there's enough space to write down everything I have to get done but also plenty of space to decorate as I see fit. 

Traditionally I like to stick with flat elements to avoid too much lumpiness with my closed planner, but recently I've been adding chipboard and enamel dots and quite like the dimension they add to my spreads. I find the enamel dots to be the perfect finishing touch and allow me to add little bits of color to balance the page. 

The little patterned strips are from the 4x6 stickers pack and are one of my favorite methods of getting a bunch of color on the page without overwhelming it too much. 

I love that the Simple Stories chipboard pieces are not too chunky. I added the "crazy for" from the 12x12 fundamentals sticker sheet. The paper strips at the bottom were ripped for a little extra texture. 

On this side, I went a little heavy on the bits and pieces and the sticker strips. Give me just these two items from a collection and I could happily create for a while! I just love how easy it is to make a fun page.

I used the lined space on the side to write a little reminder/encouraging note to myself. I repeated the ripped paper and placed enamel dots around in an effort to tie the two sides together. I outlined the "XO" from the Bits and Pieces because it was fading into the background and I wanted it to pop a little more. 
 
What do your Carpe Diem's look like after the Holidays? Be sure to tag us on Facebook and Instagram so we can see what you're doing!

SaveSave

Supplies

Hi there!  It’s Shei here today. I’m so happy to be back on the blog sharing two layouts.  Let’s get started!

For my first layout I decided to work with the fun and colorful #Whatever Simple Set.  

I chose white cardstock as my background and I glued on it some journaling cards from the “3x4 & 4x6 Journaling Card Elements” paper. 

I used a picture of my sleeping cat. It’s always sleeping, so all these journaling cards that represent lazy moments are perfect for this project.

In this collection you can find two sheets from each paper/pattern. So I used one to glue the journaling cards and the other to cut some details like letters or the color ink stains. Then I glued these little details with 3D foam squares to give more dimension to the layout.

Furthermore, I sewed some details in different journaling cards: a yellow heart, a black line across the colorful ink stains and a white dashed line frame around the “Namaste” card.

Finally, I glued some stickers from the “6x12 Sticker” to put the icing on the cake.

_______________________________

For my second layout I chose the fun and colorful “#Whatever Simple Set again. I started with the “#nailedit” as my background. I’m totally in love with this paper!!

I’ve used a cool a black and white photo of me and my bestie. I like use black and white pics when the collection is very colorful.

I glued a white strip to focus attention on the pic and all the embellisments and to bring more brightness to the whole project.

 I’ve titled my layout “#Wathever” using the word from the “6x12 Sticker”. The flowers, the stars, the heart, the arrows, the ampersand and the other embellisments are from the “6x12 Sticker” too.

Thank you so much for taking the time to read my post! I hope you enjoyed my layouts! See you next month!

Never stop smiling! Kisses!!

Supplies

Hey friends!  Missy back today to share two layouts using the Winter Wonderland collection.  Have you ever had a collection really challenge you?  Well, considering this line is all about Winter, snow, skiing and sledding, I was definitely challenged.  I live in sunny Florida, and we are all about the sunshine, beaches and pools.  So I had to get creative with my projects!  This taught me to really study the collection and pull from it what works for me.  I looked at the florals as more of a Fall piece and tried to play on the more neutral patterned papers.  I scrapped two outdoor photos and used the pieces that helped me showcase them.  Here is what I came up with. 

My first layout is about going on a hike up a mountain in a state park in Georgia.  My friend and I found this really cool structure that looked like an old stone fireplace that must’ve been from a house many years ago.  I decided to recreate it using a fun cut file from Just Nick.  I cut it on kraft cardstock and then backed it with the beautiful blue woodgrain Warm Winter Wishes paper.  I love how it looks!  I fussy cut some hearts and flower clusters to layer around my photo.  I also smudged some white gesso on the background and used some coordinating Shimmerz Paints colors to add some watercolor effects.  I think all these neutral colors really convey nature and the outdoors really well.

I love these little hearts and flower clusters.  I layered a few of them around my photo and added some tangled thread under them.  I went small with my title and used the small dark brown alpha stickers from the 4x6 Sticker sheet.  I really love that gorgeous blue color popping in from the background.

I added another fussy cut flower cluster to the left of the photo as well as more thread and a few brown enamel dots.  I did add some foam under my photo to raise it up and create some depth.  I also did some machine stitching around the photo area with some dark brown thread.

I created another small cluster for the top right of the layout just to add a little bit of interest up in that area.  I also added in a label sticker.

Here’s one more look at the background cut file and the layers behind my photo.  I used a few papers from the 6x6 Paper Pad behind the photo as well as a few die cuts from the Bits & Pieces pack.  When you are struggling for an idea, cut files are a great way to give the papers you have a totally different look.

_____________________________________

For my second page, I continued with an outdoor photo of my husband and daughter riding the Honda.  I love all the green in the photo, so the trees in this collection were perfect.  I went with a white cardstock background and added a bit of watercolor in blue and a light golden color.  I added a scribbly circle die cut I had lying in my stash just to add a little something extra to the background.  I layered a die cut tree and a sticker tree behind the photo.  For my title, I made it big and bold with an alpha cut file from The Cut Shoppe.  I used papers from the 6x6 Paper Pad to cut them and then backed the open spots with vellum.  I love large titles, and I love how this one is arranged to frame the photo.

After I glued down the letters, I stitched through them all with brown thread.  I added my journaling to the left side of the page to balance it all out.  I had a lot of white space left over in that area, so it was the perfect spot for it.

I love that the die cut tree is a different color than the sticker tree.  It makes them look more realistic!  And I like that they’re different sizes.  They were perfect since my photo has lots of trees in it.  For an extra pop of that orange red color, I added in some tangled thread and then a small floral sticker right onto the photo.

I thought this little wooden circle was so cute, and I layered some foam under it to raise it up.  I added a fussy cut flower and leaf cluster under it along with some thread.  And I found another tree that was smaller, so it was perfect for this spot.

Here you can see a lot of the paint splatters I added in a matching blue color.  I also fussy cut those cute clouds from 6x6 papers and stitched them down with blue thread.  I really love the pop of blue they give, and I also ruffled the tops of them to give them a little bit of dimension.

I had so much fun putting these pages together!  I hope you’ve gained some inspiration on how you can use themed collections in a completely different way!  Thanks for stopping by!

Supplies

Hey there, it's Laura here with you today sharing two layouts using the gorgeous Winter Wonderland collection! I am loving the colours in this wintery collection, of course it has traditional cool blues and grey, but there are also beautiful soft honey yellows and a lovely warm coral which is such a cozy addition to this palette!


I am documenting this photo taken of my backyard facing into the woods behind us.  I have a fascination with photographing the woods since moving to this house a year and a half ago.  I love watching the changes that occur here throughout the seasons.


I started my page by die cutting a large snowflake from white cardstock and then used Gelatos and mists to add some subtle colour to it. It is hard to tell in this photo, but thanks to the addition of some clear but shimmery Glimmermist, it really sparkles.
 

I was really inspired by this large chipboard element to document this story, so I knew it had to function as the title on my page.

 
I added a strip of birch tree patterned paper on top of this pretty snowflake paper to create the basis for my entire page.  I layered the large die cut snowflake, my photo and title centrally on my layout to create my focal area.  Next, I layered up some ephemera bits and pieces as well as some stickers to create a trio of embellishment clusters. 

I repeated this beautiful coral colour and some stitching in all of my clusters.
 

I finished off my page with some journaling and some gold mist splatters.

For my second layout, I chose to document this photo of my grandson and his little snow friend, sent to me by my son.  Normally I scrapbook about a year behind, but I couldn't resist adding this photo to a page immediately!
 

I loved this notebook lined and snowflake scattered ptterned paper and definitely felt it needed to be a background.  I added gold texture paste "snowfall" created with a mask from My Favorite Things, to reinforce my wintery theme and draw the eye to the centre of the page.
 

I created this die cut of a snowman just for this page, and love how it looks cut from this gorgeous dark wood-grained paper.  I couldn't resist adding some seasonal flair to his hat with Washi and a die cut!
 

My photo is tucked into the snowman, to which I layered chipboard, die cut and sticker elements, as well as a tag behind and around.  All of the snowflakes that I used got a little enamel dot in their centres. I love the pops of colour they add!
 

My title is a combination of a cardstock sticker and alphas stickers, both from the collection.  I layered them together and added an embellishment cluster above them.
 

To finish things off, I added a small cluster to the upper left side of my page and some journalling.

I cannot tell you loud enough how much I love this collection, it makes me so happy and that says a lot as I am not a lover of winter! Ha!  I think this is a definite must have if you have winter photos to scrapbook!

Thank you so much for visiting today!

Supplies

Hey planner friends! It’s Meka today here on the Simple Stories blog. I’m bringing my Carpe Diem planner into 2017 with the Winter Wonderland collection.  This is a great kit with some non-traditional colors mixed in for those of us who live in places where the weather seldom feels, and the scenery rarely looks truly wintery.

My front pockets have been decorated with cheery winter icons and words from the Bits and Pieces pack, and stuffed with planner goodies I’ll be using over the next couple of weeks.

I absolutely adore the Silver White Winter 12x12 cardstock pattern. I’ve left it unadorned as my first divider, with just the original Reset Girl Choose to Shine transparent Carpe Diem planner dashboard as an overlay. The cutie pie snowman is attached to it with a jumbo paperclip affixed sideways.

The 4x6 sticker pack included narrow labels and stickers trips that were perfect for labeling divider tabs. Just a small snip off the end of the labels and it’s just about the simplest bit of fun and function you can do!

Still in vacation mode last week, I opted for a journal-style spread for this layout. The horizontal inserts that come with Posh boxed planner kit are perfect for letting free-form thoughts flow.

Perhaps too free-flowing, I re-learned a lesson– always jot down the week’s events before starting in on a layout! I totally fudged my dates, but a 3x4 journaling card element adorned with a few stickers was all it took to set the story straight.

This week it’s back to business. I used the Planner Essentials vertical format weekly inserts to record the week’s priorities. The pages were decorated with planner favorites— layers of stickers and coordinating washi tapes from the Winter Wonderland collection. This time I added watercolor to the page at the end. It worked out well to blend and tie in some of the elements on the page.

Oh, and that not-so-wintery weather I mentioned? That gave me cause to transform a “100% chance of snow” sticker into something a bit more appropriate for this 75 degree January climate!

I hope you enjoyed this Winter Wonderland setup in my pretty ivory Carpe Diem planner.  Come visit me at https://www.instagram.com/yespleaseplanning. Hope you’re having a happy new year!

Supplies

Hi planner friends! I hope you had a wonderful holiday and you’re staying warm and toasty wherever you live!  I’m back to show you my January calendar setup using the Winter Wonderland collection in my A5 Ivory Carpe Diem Planner.

Now that the holidays are over, it’s time to go back to the beautiful and cool winter theme and the Winter Wonderland collection is perfect for these winter months ahead.  I filled all of the pockets with 3x4 journaling cards, some of the chipboard stickers that I turned into paper clips, and the matching 4x6 sticker sheets.  I also made a simple pocket folder to store extra stickers and journaling cards using the Wonderland cardstock.


For the month of January, I mostly used the Winter Wonderland cardstock stickers and the matching 4x6 stickers to decorate the pages.  The square stickers from the 4x6 sticker set fit perfectly in the calendar boxes and add a pop of color.  


Along the top of the pages, I used a small piece of the Warm Winter Wishes cardstock as trim and added a few of the card stock stickers.  This collection also includes a trio set of washi tape that I used on the calendar boxes and along the bottom trim.


I hope you’re enjoying the winter season and enjoy using the beautiful Winter Wonderland collection in your Carpe Diem planner. 

Supplies

Hey Everyone! This is Jennie! Today I’m showing you how you can use the Winter Wonderland Collection without having to use snow photos. I live in Maryland and the closest thing we’ve had to snow are flurries that look like someone spilled sugar from a powdered donut. 


Sn@p Letter Stickers are my favorite for almost every project! I love the fact that they come in every color and no the 4x6 Stickers include one sheet of these letters.

This collection has 3 gorgeous washi tapes! I love to layer them and add a word sticker.


I love how the weekly card turned out. The labels from the 4x6 Stickers are great for stamping dates and adding journaling.

No snow doesn’t mean that it's warm. It’s pretty cold here but you can also use this collection for documenting Frozen costumes.

Enamel Dots are one of my scrappy staples. I like to add them to the center of flowers to give them a little extra detail.

Lettering is one of my favorite hobbies. This paper is really smooth so it’s really easy to use with my brush pen. If you plan to do this practice on a scrap paper first. The background needed a little extra something so I stamped “thumbs up” over and over using the Make it Happen Roller Stamp


I hope you enjoyed these pages while drinking hot cocoa!

Supplies

It’s a brand new year & for many of us, that means a list of goals longer than our arm!  :)

If planning & staying organized are among your goals for 2017, we’ve got you covered! 

Check out our brand new LIVE.LOVE.PLAN. Pinterest board here with nearly 400 pins (and growing!), full of inspiration & ideas for your Carpe Diem planner!

Here’s to a fantastic 2017, meeting your goals, & staying organized in a fun and creative way while you’re at it!

Good morning friends! Brenda Smith here with you today sharing a few 6x8 spreads I made in my all-about-me album. I was excited when I saw the new Simple Set called #Whatever because I knew it would be perfect for documenting some of the not-so-easy moments of motherhood. 

While I focused primarily on the use of #Whatever on these spreads, I used up some of my leftovers from past Simple Stories collections. I found that I Am and the Carpe Diem scrapbook line had elements that coordinated perfectly with my spreads. 

One thing that I do when my photos have too many colors going on or they clash with the spread, I'll turn it black and white. I love how the black and white contrasts with the colorful letters of the "Insta Cool" sticker. 

The "Sharing my story" banner is from the Carpe Diem line and was just the embellishment I was looking for. I gave it a little dimension by popping it up with some thin foam adhesive. I love adding depth to my pages and thankfully the Simple Stories 6x8 page protectors are roomy enough to allow for such dimension. 

In my main pocket page album, I sometimes hesitate to get too personal with my feelings and emotions because I feel like the focus should be on the family. However, with this 6x8 album, anything goes. 

For better or for worse, I usually try to keep the main pocket page album mostly upbeat and talk about the good, happy times. But when allowing myself the freedom to tell whatever story I want in this album, I find that I'm using up some photos that would otherwise just sit on my phone. 

I accented with a little bit of paint to bring out the bright color palette of #Whatever. 

In this spread, I had more fun with mixing and matching collections. I used the floral paper from I Am and you'd never know that it didn't come from the same kit. 

The lighthearted, cheeky tone of this kit goes perfectly with the playful photos I've been taking lately. I admit that I get into a slump of taking only perfectly posed, smiling faces photos of my kids. But sometimes it's fun to include the outtakes and this kit makes it easy to incorporate them. 

I like to keep a stash of doilies because I find they add the perfect delicate touch when layering. 

How are you using your Simple Stories collections? Have you had any success in combining kits? Make sure to tag us @simplestories_ and hashtag #simplestories when sharing on Instagram so we can come check it out!

SaveSave

Supplies

Pages