Hello fellow crafters! Stacy Koo here on the Simple Stories blog today and I am using the gorgeous Reset Girl collection in 2 of my layouts!

I was drawn to this collection pretty much! It is currently used in the layout of my journals and organizers. Being a crafty soul, I can totally relate to all of the sentiments and images in this collection!

When I first laid hands on this collection, some of the elements have already inspired the idea of these 2 layouts. It seems to me that I didn’t have to think twice! Sometimes I let the paper do the work, and I go through that particular inspiration to come up with a layout.

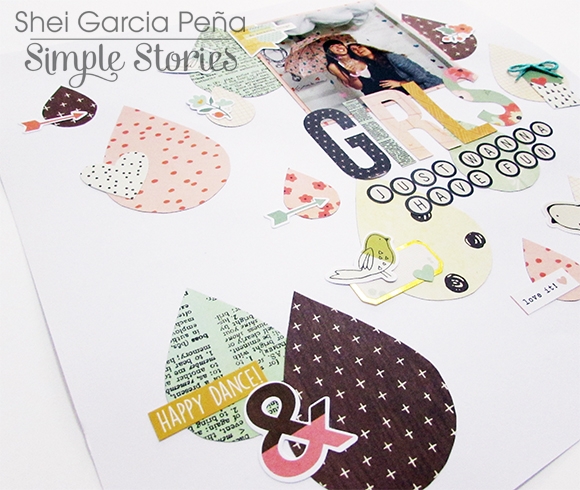
For my first layout, I was inspired by 2 things: the hexagons which you find in the bits & pieces pack, and the lady with wide open arms in the 4x6 Horizontal Elements

For the background, I used a pattern paper from the Sn@p Basics collection. Basic collections like these help me emphasize on the hexagon sewing techniques and showcasing the other decorative elements clearly. I hoard a few packs of these basic collections, because I always get to use them in a project or another! Here is a closer look at the stitching with some DMC thread and the title.

I have also done some fussy cuttings from The Reset Girl collection2x12, 4x12, 6x12 elements I find that the words “You Go Girl” fits the idea of travelling. In this photo, I went to Thailand with one of my best crafty pals and the entire trip was a blast!

As you can see, I am in love with how the 4x6 Horizontal Elements co-relates to the photograph! Sometimes the inspiration just comes to you and I love how easy it was to fix my mind to all the pretty elements in the pack. Fussy cutting images also help me to utilize the pattern papers in different ways!

The other cluster of embellishments all specify a single theme – travel. This collection is super versatile. I like how the elements fitted together - the organizer / passport, travel tickets, flight tickets, camera – they remind me of every single moment during this trip! I like how this collection comes with the small and big pieces! It gives me so much more possibilities!

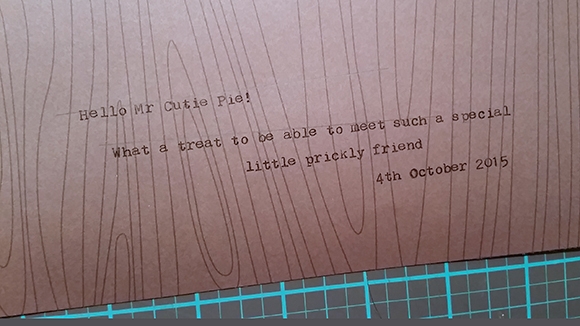
In addition, I added a stamp just above the date of the travel. Yes you heard me right, there is a roller stamp in this collection and you must have this! 

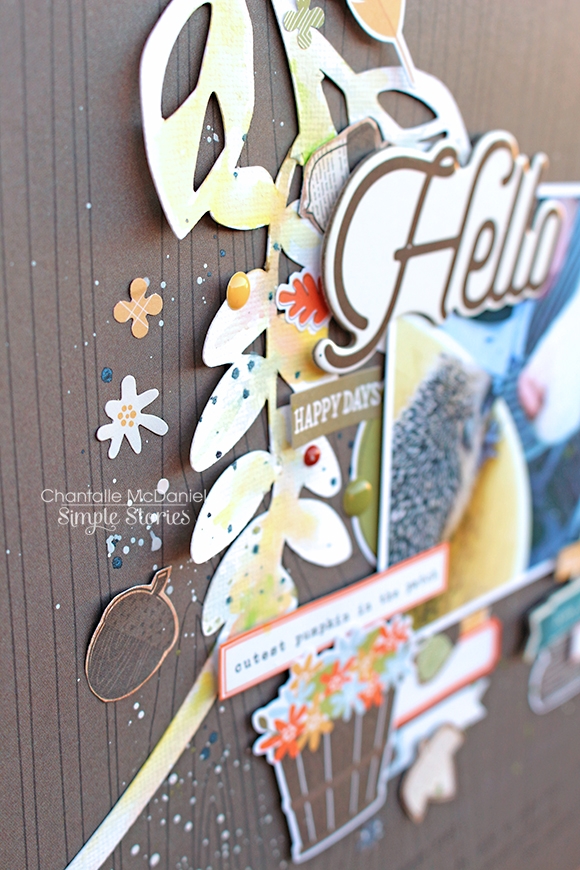
On to the next part of the embellishments, I added a single chipboard decoration. Because it shines in perfect harmony to my travel theme, there isn’t a need for more! Just pack it up with some layers below from the bits & pieces pack! I love how the words shine in the light!

Another embellishment I love is the using of clips! This clip is a total blast – I love the gold rims highlighting the rounded jewel. 

___________________________________

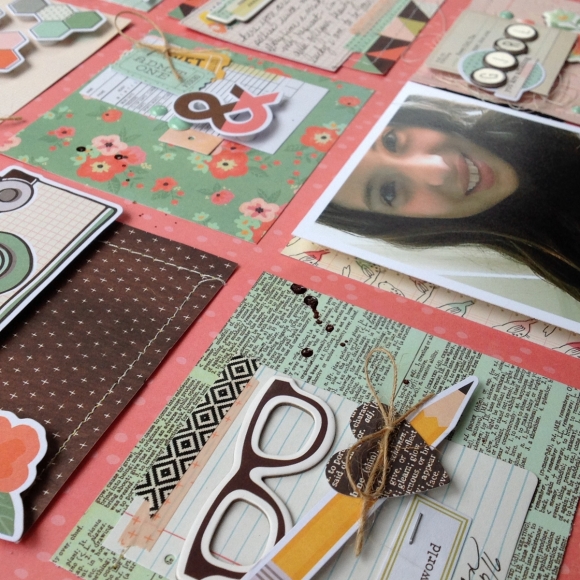
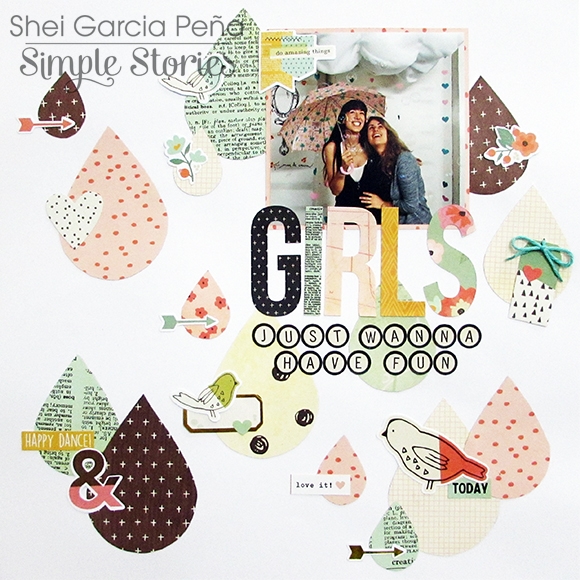
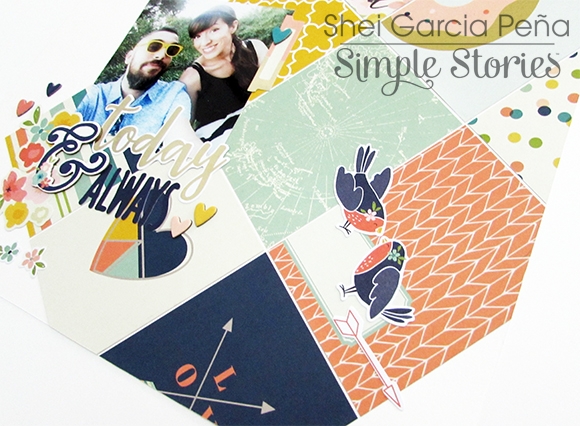
On the second layout, I was inspired by some of the pattern papers in the collection: Like A Boss and 24/Seven pattern papers. With the photograph on hand, it was easy to find these inspirations from the collection. My best crafty pals give me the best reset when days are tough, through the creative process we go through together!

I started by cutting the pattern paper Like A Boss into its individual triangular pieces and layered it as the background. Then I did some machine sewing all around the layout to define this piece. I like to use sewing as a frame to capture attention to the center of this piece.

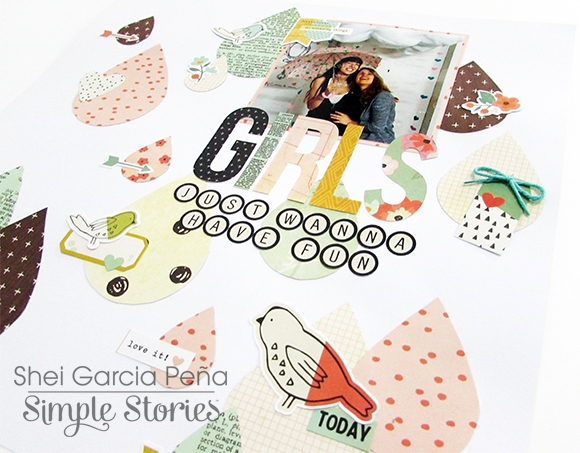
The next part started with layering. I like to layer the pieces near my photo to create attention. It is really easy to find the piece you need from the bits & pieces pack and then top it up with the journal stickers from the Combo Sticker.

I have also added some clear stickers to my layout. These clear stickers are so cool! You don’t have to be afraid that the background will interfere with the colors and arrangement of your elements since the backgrounds is clear! The fun part – it comes with cute hashtags!

Another close up on the clear stickers and a cute little stamp sentiment from the roller stamp!

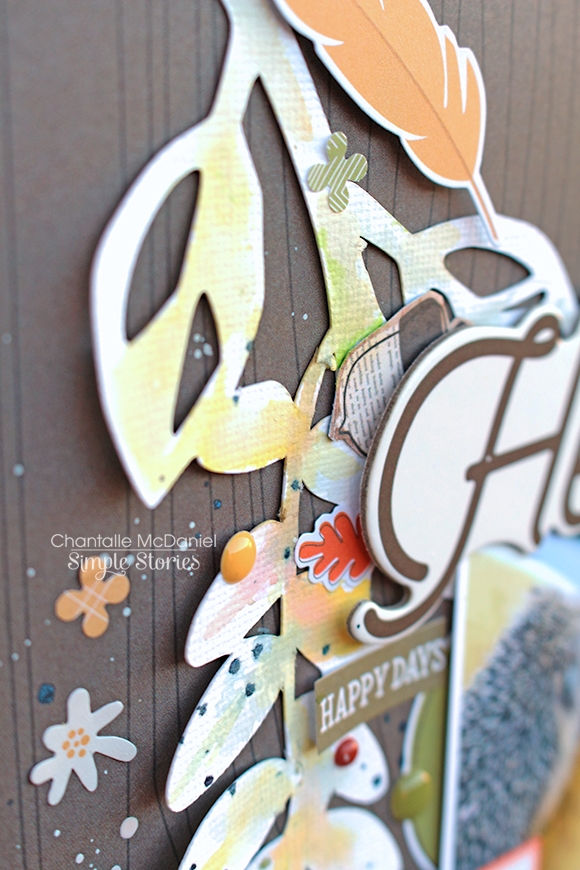
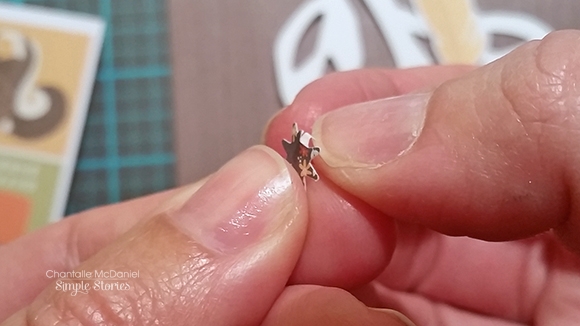
The other part of embellishment comes from fussy cuttings. There are so many gorgeous things you can use in this collection, especially with the shiny elements! 

Last but not least, the fussy cut from the 24/Seven pattern paper! I had to use this piece, the gold trims really stands out and it best fits what I think of my crafty pals! You girls are truly amazing!

Hope you liked these layouts that I have shared with you today!

Supplies

Hello Friends, It’s Kristine Davidson with you today and I am going to share 2 layouts using the Reset Girl Collection. The colors in this kit are so versatile that they can be used for any season. I was drawn for my 2 pages and loved adding some extra colors with it. 
 

The first layout I'll be sharing is called "Reset"

If you take a look at this layout – it is filled with layers and so many diecuts. I seriously could not stop myself from adding and adding and adding and … you get the point. I love how all the colors blend so well together and create a busy focal point but not to the extreme of getting lost.

I created a title using my silhouette cameo and added a small diecut on the bottom right to create a bit of a “subtitle”.

_______________________________________________________________

My Second layout for you today is called "Girl, You are Amazing"

I created this layout based on a sketch from Creative Scrappers. It is also one of my favorite go to patterns. I love creating each little square, adding photos where I’d like to have them and of course adding little details to finish up my page.  

The chipboard pieces and diecuts from this collection can be used for so many themes. If you purchased the diecuts you can use them in your planners or yours pagesJ

To see more of my work you can find me on instagram @KristineDavidson 

Thank you so much for reading and being a fan of Simple Stories!

Supplies

Good morning friends! Brenda Smith here with you today to share a planner spread I made in my Ballerina Pink Carpe Diemusing the Posh collection. 

I really like to use the vertical inserts for my weekly planning pages because the layout just makes sense to me for this type of project. I started this vertical spread in the way I start most. First I cover the little grey header above the vertical boxes. For this spread, I used little strips from the Weekly Stickers and washi from the Modern Meadow set from the Reset Girl line. 

The next thing I do is grab the vertical box stickers from the Weekly Stickers package. I try to balance the weight of my spread by not having too many stickers or embellishments in any area without equal visual weight on the opposing side. I added the dates using the Number Stickers in navy. I like the whimsical look the oversized numbers give. 

After I’ve placed all my vertical stickers, I focus my attention on the bottom of the page. I usually like to do some extra decorating down there and take it as an opportunity to add some scrapbook paper and embellishments to my spread. I used my favorite paper from the Posh line, Love Life, and trimmed down to size.

Next, I took some hole reinforcement stickers from the Planner Basics stickers to add a little additional visual interest to an otherwise boring area of my spread. I tried several different color combinations of hole reinforcements for this spread but landed on aqua and teal. I added the October 2016 calendar sticker from the Mini Monthly Calendar Stickers to the top right and love being able to see the month at a glance without it detracting from the spread.

Then I get out my Bits and PiecesWord Label Stickers, and Designer Stickers in addition to the Planner Basics and Weekly Stickers to finish off the embellishing of this spread.

Lastly, I used the sketch pen and my Silhouette Cameo to add the “pen” (words) to my page. I like the clean look it gives the page and it really doesn’t require that much effort.

How have you been creating in your Carpe Diems? If you are sharing on Instagram, be sure to tag @simplestories_ and @CarpeDiemPlanners and use the hashtag #CarpeDiemPlanner so we can find you and give some love to your posts.  

Hi there!

It’s Shei on the blog today. I’m so happy to be back sharing two layouts. Let’s get started!

My first layout is a fun way to tribute the friendship and female world. It was therefore created with the beautiful and feminine The Reset Girl scrapbook collection. 

I used a funny photo of me and my best friend. Here, as usual, we are laughing and clowning around! I framed it using the “Lookin' Good” b-side paper. I titled this project "Girls Just Wanna Have Fun" inspired by popular and cheerful Cyndi Lauper's song "Girls Just Want To Have Fun". I used the colorful word "GIRL" and the ABC from "Combo Sticker" paper to do so. To get the letter "S" from word "GIRLS", there is a little trick. I have cut its silhouette from "Lookin' Good" paper ;)

This time I used white cardstock as my background. I love it, as you know from my previous works. I thought I'd create my background with different papers of the line and I used most of them to give color. I cut different sizes of water drop shapes from many papers ("Lookin' Good", "Ready, Set, Reset", "24/Seven" and "Get Your Crafty On" b-side papers and "You Got This" both sides paper) and I glued them all around the white cardstock. To finish, for embellishing I used a lot of die-cut pieces from “Bits & Pieces” like arrows, flowers and birds. They are all precious!! I created a cute hanging tag, combining a turquoise thread bow with a die-cut tag, just to spice up the project and I also used some words and phrases from "Combo Sticker" to finish off.

_________________________________

The theme for my second layout is eternal love. For this reason I used the lovely and colorful Posh collection and a photo from me and my life mate. We really like to take selfies together with a piece of the place where we are. I love this pic of us and I wanted to scrapbook it right away! ;P


I have titled it "Today & Always" using the word and letters from "Bits & Pieces" and "Combo Sticker" papers. I used some colorful 3x4 cards from the "SN@P! Pack" and I glued them on white cardstock, which, as always, I used as a background. I really love all pieces from this kit!!!! It was very difficult to choose 9 of all of them.

To finish I put a few chipboards stickers and some wonderful die-cut pieces from the "Bits & Pieces" all around the layout to jazz it up.

Thank you so much for taking the time to read my post! I hope you enjoyed my layouts! See you next month!

Never stop smiling! Kisses!!

Supplies

Hello Everyone! This is Jennie and today I’m sharing a week with goofy moments, a picnic and a carnival. When you think about the Posh collection you think about classy and ladylike photos but the colors are gorgeous and a few of the icons are very playful like the bicycle and this cute dog. In case you haven’t heard, Simple Stories had a contest to name him and his name is Winston!

The blue in the journaling cards makes the blue in the photos stand out and my daughter’s shirt goes perfect with the light coral. Aren’t you a little bit happy when your photos match the paper?

I like to add little embellishments to most of my photos. I always say memories are for my family but playing with paper is for me. Small stickers like the Word LabelsDesigner Stickers and Clear Stickers fit perfect in spots where you don’t have a lot going on like the grass on these photos.

I kept the title card super simple because we love Winston! These Sn@p Alphas have been a staple in my pocket pages since I’ve started! They are so versatile! In this card I used the Sn@p Color Vibe Lights.

Almost every week I get to document a not so glamorous moments. I bet everyone has a day like that. I made a small cluster with Totally Chic Washi Tape, DIY Alphas (from way back in the day!) and Posh Word Labels.

I put the Stickers birds on top of the photo to give the illusion that they are flying over her. I sometimes over think composition. Washi tape is a good way to frame a photo when you don’t want to use a mat or put a frame over it.

This was an extra fun week so I had to add a little insert. I used a 6x8 Pocket Page. They fit perfect in the 12x12 Albums. I used circle die cuts from the Bits and Pieces and glued them back to back. I also punched out some circles to mix with the sequins.

 The 6x6 Paper Pad is perfect for these circles because the patterns and images are smaller. 

I hope you enjoyed these pocket pages and got a few ideas to use on your own!

Supplies

Hey, friends!  Missy back here with you today, and I have two fun Halloween layouts to share using the Happy Haunting Simple Set.  Halloween is my favorite holiday to scrap, and I decided to create a layout about my daughter dressing up as the Hulk a few years ago.  If you know her and her personality, you’d know that this was the perfect costume for her…haha!  I love that there is a lot of green and purple in these photos, so I wanted to bring them into the layout to contrast with all the orange and black in the collection.  I started off brushing some Shimmerz Texturez  in a circle on a sheet of white cardstock.  I found a cute circle frame cut file from The Cut Shoppe and placed that over the paint.  I came in with some purple and green watercolors to peek out from the cut file and the photos.  I backed some of the open spots of the cut file with papers from the collection.

I cut the word “Halloween” from the 3x4 4x6 Elements sheet and paired it with some of the black Snap Bolds Alphas to create my title.  I fussy cut that cute pumpkin from the same paper and added some foam under him to pop him up a bit.  That cute spider web is from the 6x12 Cardstock Sticker sheet.  I also added some machine stitching.  I just love the mix of green & purple with this line!

I added a few phrase stickers down here at the bottom as well as a green button from my stash.  I love adding those little bits & pieces from my stash to add pops of color here and there.  Since there is no green in this collection, this was a great way to do that.  I also added some tangled thread for an extra pop of black.  I think the orange Texturez looks so neat under the circle frame!

Here’s a closer look at that adorable spider web sticker.  I positioned the pumpkin so it looks like the spiders are about to crawl on him.  I added a few bat stickers, too.

This turned out to be a pretty simple layout once I got the paint down and the cut file layered over it.  I think when you have super cute photos with bright colors, less is more when it comes to embellishing!

____________________________________

For my second page, I decided to start with a neutral background.  I pulled out some light kraft cardstock from my stash to build on.  I love how the oranges look against it.  It’s such a great Fall color, and to bring out the oranges in the collection I sprayed some orange ink first.  I used a small grid stencil with some gold ink spray to add a bit more interest and color.  I came in with some dark brown and black splatters.  Since my photo has a lot of orange and a lot of pumpkins, I decided to play on that and create lots of die cut pumpkins.  I found another cut file from The Cut Shoppe and cut several pumpkins using a few different patterned papers.  I created a row of pumpkins under the photo, which I backed with a few scraps of coordinating patterned papers.  Again, since my photo was pretty busy, I didn’t want to overwhelm the page with a ton of embellishments.

I lightly glued all the pumpkins together and lined them up centered with my photo.  I stitched through them all with shiny gold thread since I had some gold in the background.  I fussy cut the “happy haunting” piece from patterned paper and added foam under it as well as some tangled thread.  I kept everything on a centered vertical design and added a few lines of journaling down at the bottom.

Here’s a closer look at the layers behind the photo.  I love how the gold spray looks mixed with the orange…so pretty!  I cut “October” from the 3x4 4x6 Elements paper and used it as a cute embellishment here.  I also used my edge distress tool to roughen up the papers’ edges.

Here’s the other side of the photo.  You can really see the texture from the stencil and splatters here.  The machine stitching also creates wonderful texture as well as shine.

One last close-up of the top area.  I used some of the black Snap Bolds alphas to create the title.  I added in a few orange stars from the 6x12 Cardstock Stickers and some more metallic gold stitching.  I used my handwriting to finish off the title.  Again, a pretty simple layout, but I love how it turned out!

I hope these pages give you some fun ideas to try with the Happy Haunting Simple Set, it’s got everything you need to create something for Halloween!  Thanks for stopping by, and have a Happy Halloween!!

SaveSave

Supplies

Hey planner ghouls! Meka here today, excited to share my Halloween décor in my Carpe Diem planner. The Happy Haunting Simple Set is full of sweet and spooky treats for the holiday.

The kit comes with a sheet of element cards that I cut apart to embellish my planner pockets. I prefer a combo of straight and organic shapes in varying sizes. To achieve that variety, I cut out the ghost, witch’s hat, and pumpkin from the element cards and placed them in and on the pockets with stickers from the 6x12 cardstock sticker sheet.

For the dashboard pocket page, I used Trick or Treat, a 12x12 double-sided cardstock. It has the perfect contrast of plaid and polka dots. To create the pocket, I folded the bottom portion of the polka dots over to the plaid in front, then doubled that on itself and glued shut—instant pockets! A few paper scraps and stickers made for easy embellishment.

For quick and easy deco clips, gold paper clips were attached behind stickers. The black, white, and orange metal clips from The Reset Girl line add fun and function. I swapped the epoxy from one of the orange Posh metal clips with a TRG one. Totally unnecessary, I know, but this girl loves her gold hardware!

Dividers were cut to size using my existing dividers as a guide. With the remaining paper pieces, I punched a set of tabs using a tab punch, and cut tiny labels in more solid tones so the words would be visible.

I initially planned on creating one layout, only for the week of the 31st. A few coordinating washi tapes and the letters B-O-O-! (from Simple Stories’ neutral-toned Sn@p Basics sticker pack) were the perfect pairing to allow the Happy Haunting stickers to take center stage.

I had a few stickers left over, so I decided to decorate the week before Halloween, as well.  I chose the vertical format weekly inserts for this week, and challenged myself to create a black and gold color theme. The Posh Designer Stickers pack and Clear Stickers pack have gold foiled words that helped tie it all together. I love how it turned out. Such an unexpected treat!

I hope my Halloween planner décor was a bit of a treat for you! Visit me on Instagram and let me know how you’re spending your Halloween. Whatever you do, make it a safe and happy one!

Supplies

Hello friends!

I have been having a little fun getting ready for Halloween which is just around the corner and catching up on some Halloween scrapbooking, too!  Of course, the Happy Haunting Simple Set is just perfect for that! 
 

Hello Pumpkin

This first layout features a photo of my grandson, taken a couple of years ago, and since he was a wee little guy at the time I opted to create a "sweeter" layout.  I love this orange ombre paper in the kit and knew immediately that I would want to use it for a background, it is awesome that you get two sheets of it because the other side is a gorgeous wood-grained paper that I love just as much!

I started my page by die cutting a super simple pumpkin outline and then cut a few strips of patterned papers, since I love layers and "white" space I chose to create a page that has both of these things.
 

I pulled in a few left over elements from other Simple Stories collections like this phrase die cut from the Hello Fall collection, the silver foiled clear sticker from the Life in Color collection and the small alphas and and bradz from the Carpe Diem Scrapbooking collection!
 

I think this cardstock banner sticker from the Happy Haunting collection is the perfect way to add some sweetness to my layout!  I added a bit of foam behind it to give it a little pop!  Actually the sticker sheet for this collection has so many icons that are just perfect for creating several Halloween inspired pages! I also added in some machine stitching with black thread for a bit of fun texture.
 

The silver foiled star stickers are also from the Life in Color collection, and the enamel dots were left over from the I Am collection.  Once my layout was finished I added a bit of white mist.  I am in love with the way this page turned out and cannot wait to pop it into his album!
 

Happy Haunting
 
This second layout features a "spookier" photo, this time of my youngest son hanging out in the "graveyard" that he and my husband created in the front yard of our previous home on Halloween night.  Because he was 11 in this photo and feeling like a big kid, I challenged myself to also make a layout that wasn't overly cute for him.
 
I started by using the reverse side of the ombre paper, which has a fabulous wood-grain and is super realistic looking!   I also used one of the cut apart cards as my title, because I do not do a lot of pocket albums, I love to use these cards in other creative ways.
 
 
I hand- stitched on a spiderweb which adds great texture. After that I layered many strips of patterned papers vertically on my page, adding some foam behind a few of them.
 

I pulled in cardstock stickers to accentuate my page and that spoke to a more grown up look. I also added in enamel dots from the You are Here collection. I finished off this layout with sprinkles of black and white mist.
 

Look at that wood-grain,  it is so realistic! Swoon!  I have so loved working with this collection and feel another couple of pages are in my near future!
 
Thanks so much for visiting today!


Supplies

 Hello Friends! Alexandra here with a brand new pocket page spread using The Reset Girl collection. 

It is such a beautiful collection for all kinds of occasions. Here we have recent pictures taken both outside and inside.

Our daughter Gabrielle Rose was visiting and brought us presents from Thaïland. We had lunch downtown Chicago, watched the Cubs advance to the World Series for the first time in 71 years...

In terms of journaling, I really wanted to have a majority of handwritten text.

I included mine, our daughter's and asked my husband, a die-hard Cub fan, to write a couple of lines about the victory.

I also used a few 3-D chipboard stickers, a great way to use dimension and a bit of fun to a spread.

Thank you! 

Hi planner friends!  It's Vanessa & I’m back again to show my last full week for October using the Hello Fall collection.
 
 
I used a mixture of the Carpe Diem Hello Fall stickers and stickers from the Posh collection to fill in the vertical boxes.  Along the bottom, I used the Hello Fall cardstock stickers and trimmed some cardstock to use as a trim.  Throughout the month, I still used the paper clips that I made from the Hello Fall chipboard stickers and they’ve held up well.


Again, on the second half of my weekly page, I cut a small strip of cardstock from the Hello Fall collection to use as trim on the bottom page and added some of the cardstock stickers.  I also used the 4x6 weekly planner stickers from the Posh Collection to fill in some of the boxes and to add some color.


I hope you’re enjoying the Hello Fall collection, as it works wonderfully with  the other Carpe Diem collections.  Thanks for stopping by and I’ll see you next month!
Hello friends! It's Jennifer here on the blog today to share my 6x8 SN@P! Binder I created using the new Hello Fall collection!   I'm usually a layout creator for the team but I had the opportunity to change things up and create a mini book!  Albums are second favorite on my list of scrapbook creations!  
 
I started with the 6x8 SN@P! Binder in Brown which includes kraft chipboard dividers, SN@P! Pages, and pocket pages! So you will definitely have a variety of elements to use in your book! I used some of the beautiful fall prints from Hello Fall to cover the front of my album including the woodgrain leaf and acorn print of "Harvest Season"
 
 
I love to layer on my pages and Simple Stories has many fun embellishment to choose from!  I started with 3x4 Journaling Card Elements for my base then started adding different embellishments including die cuts from the Bits and PiecesBradz, andChipboard pieces.  How cute are the new Decorative Clips?!  
 
 
This is one of my most favorite times of the year! Hello Fall captures the beauty of fall with its warm colors and classic prints! The SN@P! Binder is perfect to document a fun fall event or some favorite photos!  One recent warm October afternoon, I bribed my kids to take some good photos at a local pumpkin farm!   At the ages of 10 and 13, they are so fond of the camera! Here, I used one of the kraft inserts and covered with the beautiful wood grain print of "Falling For You" as well as added the Capture This Moment Simple Stories Silhouette Cut File.
 
 
The SN@P! Pages included in the album are fun to work with, too,  as they are "ledger type" prints and you're able to add lots of color!  
 
 
The deep orange of "Sweater Weather" is gorgeous in person! I added one of my favorite photos of my daughter as well as a fun circular cut file. I then finished by adding in small embellishments including die cuts, chipboard pieces, and Bradz.  I love how it turned out! 
 
 
Showing some of the die cuts and stickers that are included in the collection!  I love the little squirrel as well as the multi-colored leaves!  I also added  a cute sentiment found in the Bits and Pieces as well as added my date on a ledger sticker from the 4x6 Sticker Set
 
 
For this page, I fussy cut a portion of the hexagons from "Warm and Cozy" and placed it behind my photo.  I then added in chipboard and sticker elements to accent!
 
 
I love including pocket pages in my mini albums and you receive an assortment of sizes in the SN@P! Binders!  Here, I used the 3x4 Journaling Cards to go along with my photos.  
 
 
I love the transparency of pocket pages so its always fun to add a pocket of sequins and small embellishments such as wood veneer shapes!  I will then use my sewing machine to stitch around the edges to ensure my embellishments are secure. 
 
 
I love the 4x4 Journaling Card Elements as well!  I paired one with this black and white photo of my daughter.  
 
 
I also created a 6x8 sheet to fit the insert included in the binder! I adhered two of my 4x6 photo to the B-side of "Celebrate Fall"and accented with a cute decorative pin and sticker! 
 
 
​Thank you for stopping by today! Be sure to check out this collection in its entirety on Simple Stories Products Page! Have a wonderful day! 

SaveSave

Supplies

Howdy!  Layle here with you today.  We have a fun week planned for you - a Simple Stories & JustNick Digital Cut Files Team Up!

Both design teams have swapped 'products' and will be sharing on our blogs all week long for some great inspiration!  Let me tell you, if you fancy digital cut files then you're in for a treat!  Nicole Nowosad, creator of JustNick, is super talented and has a fabulous library of cut files available! 

Today creative team member Mary-Ann Maldonado joins us with not one but two Hello Fall layouts - 

Every year, my family ventures out for apple picking.  It is a tradition of ours, to go at least twice during the season.  We make everything from Apple Crisp and Apple Pies to Apple Sauce.  Both of my layouts today revolve around our recent trip to the farm.  For my first layout, I may be spilling the apple cart, and telling you one of the main reasons we all love to go pick.  They serve hot, fresh and squishy Apple Cider Donuts.  Oh.  My.  I  can not tell you how amazing they are right out of the fryer.  They truly melt in your mouth. 


Don't they just look divine?  Cinnamon sugar goes everywhere.  Anyway, this week we are teaming up with Just Nick Studios which was perfect for both of my layout ideas.  I used the berry branches from the 'Sweater Weather' cut file to accompany the Gather Together and Hello Fall collections. 


You can see the cut file here.  I layered the file twice to add whimsical branches peeking from behind my photos.  


To help complete my title, I used the 'Handcut Letters 2' file.  When creating the word DONUTS, I touched the letters together, then welded them so the cut would all be one piece.  I am showing you the second photo of the title because I wanted to focus on the bottom date.  I must tell you, underneath that sticker is the date, but it is stamped upside down.  Ugh, not the first time!  So, I used one of the banner stickers from the 4x6 Stickers to cover it and tried again.  


I used the Simple Set Gather Together in conjunction with the Hello Fall.  Both of these collections blend well together.  

_______________________________


This year, the orchard was overflowing with apples.  It was amazing how many apples were on each tree.  We were the first to enter the field where we picked.  It was s sea of red.  We always eat our weight in apples and my boys goof around in the trees too.  


I enlarged a picture of just the plush apple tree to use as a focal point.  Sort of like a background paper.  I backed it with a piece from The Reset Girl collection and the obvious choice of woodgrain from the Hello Fall.  I was searching the Just Nick Studios store for an apple and Nicole, from JNS connected me with the FREE September cut file she created for the Scrapbook and Cards Today blog.  


Look how cute they are.  They actually had a heart and a leaf, but I removed those before applying.  


I lined the right side of the large photo with various leaf cut files, apples and photos.  My attempt at recreating the voluptuous apple tree photo!  The ladder was perfect for 'climbing' the tree! 


I finished the layout with the title 'fall' from the 'Sweater Weather' cut file. 


Again, I combined both, Gather Together and Hello Fall with the JustNick cut files.  


Love what you've seen so far & want to see more?  You can find JustNick here - 

Website
Blog
Facebook
Instagram

Thanks so much for joining us this week in our team up with JustNick Studios!  


SaveSave

Howdy!  Layle here with you today.  We have a fun week planned for you - a Simple Stories & JustNick Digital Cut Files Team Up!

Both design teams have swapped 'products' and will be sharing on our blogs all week long for some great inspiration!  Let me tell you, if you fancy digital cut files then you're in for a treat!  Nicole Nowosad, creator of JustNick, is super talented and has a fabulous library of cut files available! 

Today creative team member Brenda Smith joins us with a Reset Girl Pocket Page spread - 

Good morning friends! Brenda Smith here with you sharing a pocket page I have been putting off making. Not because I didn't want to scrap this event, but because I loved my photos so much I wanted to wait for the absolute right product to scrap them with. The colors of The Reset Girl scrapbook collection and the fun, whimsical cut files from JustNick were the combination I was waiting for. 

I'll admit, I'm one of those girls who's had a Silhouette machine for quite a while but has mostly let it collect dust. But these cute cut files from JustNick were the inspiration I needed to brush off the dust. 

I tried to pick out cut files that seemed evocative of our trip to this music festival in May. Luckily for me, the JustNick shop had plenty of viable options to choose from. I made sure to get some background cut files, some fancier cuts, and some layerable pieces. 

On this side of the spread, I used the Dandelion Background cut file to help create my title card. I used the alphas from the Combo Sticker sheet to finish off the card. 

The Floral Flourish Circle perfectly housed the bulk of my journaling for this side. I love the contrast of the lacy, delicate cut file with the harsher black ink droplets. 

There are some planner-specific elements in the Reset Girl line but there is plenty in the collection to make everyday pages. I tried to stick to the lighter, brighter patterns and elements to go along with the natural beauty in my photos. 

 
This card was made in a matter of moments because once I added the Leaf Cluster cut file, there wasn't much more that needed to be added. If I'm not sure where my cut files are going to go when I cut them out, I play it safe and cut out in white cardstock. I can almost always make a white cardstock cut file work wherever I want it to go. 
 
 
On this card, I used two cut files that I'm sure I'll use over and over again: the brushstrokes and the Funky Piecharts. I placed several of the Funky Piecharts in varying sizes throughout the spread because I like how versatile they are as layers. They add an extra little bit of color and pattern without overwhelming too much. The brushstrokes are just a good alternative to the rectangles of patterned paper I usually layer with on my cards. This provides a little more visual interest to my pages. 
 
Using these cut files on my project for today has made me realize that there really isn't that much extra effort that goes into cutting some shapes out for playing with in my pages and I'm definitely going to be implementing them more into my designs. 
 
Love what you've seen so far & want to see more?  You can find JustNick here - 

Website
Blog
Facebook
Instagram

Check back in tomorrow for great inspiration using JustNick cut files!


Supplies

Howdy!  Layle here with you today.  We have a fun week planned for you - a Simple Stories & JustNick Digital Cut Files Team Up!

Both design teams have swapped 'products' and will be sharing on our blogs all week long for some great inspiration!  Let me tell you, if you fancy digital cut files then you're in for a treat!  Nicole Nowosad, creator of JustNick, is super talented and has a fabulous library of cut files available! 

Today creative team member Allie Stewart joins us with two lovely layouts -

 
For my first layout, I used the JustNick Basketweave Background cut file and The Reset Girl collection!
 
 
I cut the Basketweave from white cardstock, and backed each rectangle with green patterns featured thoughout The Reset Girl collection. Next, I sewed vellum over the top so it made the background a little less busy. Starting with a Library Pocket as a layering piece, I placed my photo and layers on the page. I cut flowers from the "Like a Boss" paper, and added them behind the photo. 
 
 
My title came from another patterned paper: I think fussy cutting is a fantastic way to get more mileage out of your collections! I added a few more embellishments, and the layout was complete!
 
 
My second layout was created using the Hello Fall collection and Leaf Cluster cut file.
 
 
I backed the Leaf Cluster with patterns from the 6"x6" paper pad. I use up almost all of my 6"x6" pads by backing cut files! Once I had the cut file on my background, I stitched down the middle of the leaves to add interest and secure the cut file to the page. Next, I used bronze Stickles for the dots of the leaves. 
 
 
I loved the large" FALL" in the chipboard set, and immediately wanted to use it as part of my title. I added the "Hello" chipboard with it to create the full title, which happens to be the name of this collection! To finish the page, I added lots of word stickers and some die-cut leaves. 
 
 
I was so inspired by the Just Nick files and had so much fun pairing them with Simple Stories products! Thanks for joining me to!
 
Head over to the JustNick blog & check out what her team has created with our products!

Love what you've seen so far & want to see more?  You can find JustNick here - 

Website
Blog
Facebook
Instagram

Check back in tomorrow for great inspiration using JustNick cut files!


Howdy!  Layle here with you today.  We have a fun week planned for you - a Simple Stories & JustNick Digital Cut Files Team Up!

Both design teams have swapped 'products' and will be sharing on our blogs all week long for some great inspiration!  Let me tell you, if you fancy digital cut files then you're in for a treat!  Nicole Nowosad, creator of JustNick, is super talented and has a fabulous library of cut files available! 

Today creative team member Violet Ballew joins us with a spooooky Carpe Diem planner -

My favorite Color is October! I am so glad October is here. As I sit here drinking a pumpkin spice latte and looking at my planner spread, October is what inspired me this month for my divider set up. I used the Happy Haunting Simple Set and had the opportunity to incorporate JustNick digital cut files.

I started off by picking which digital cut file I wanted to work with and the JustNick 31, Happy Little Monsters, and Scribbles were perfect for what I wanted to achieve in my planner this month. 

I added Tabs to the dividers and I absolutely love the way they came out. It keeps everything organized and in it's place. The orange and black with plaid and distressed paper and all the cool spooky stickers from the Happy Haunting Collection Kit were a match made in planner heaven. 

I wanted something spooky on my next divider and realized that everything was just too cute to spook! I was able to use the collection stickers and distressed wood paper and some of the Happy little monsters with scribbles to create an outside ghost Fest.  The ghost Journaling Card made the perfect center piece on my next divider and decided he was going to be a planner nerdy ghost. Lol. 

Last but surely not the least is my favorite part of Creative Planning. The pockets! I know I probably mention that every time I blog, but it is so true. Once again I used the Just nick "31 and "Happy little Monsters" cut files to create paperclips. I added goggly eyes to add a little more characters to the little monsters, ghost, cat and I think they are so stinkin cute!

As the days get shorter and nights are longer, grab a cup of coffee and cozy up with a nice warm blanket and plan away.

I want to take this time to say a special thank you to Simple Stories and Just Nick for the privilege to use their products and create something fun and seasonal in my planner. I had a blast and will continue to use the cutting files and collection kit throughout all of October. Thank you again to everyone who took the time to stop by the blog.
 
Head over to the JustNick blog & check out what her team has created with our products!

Love what you've seen so far & want to see more?  You can find JustNick here - 

Website
Blog
Facebook
Instagram

Check back in tomorrow for great inspiration using JustNick cut files!

SaveSave

SaveSave

Supplies

Howdy!  Layle here with you today.  We have a fun week planned for you - a Simple Stories & JustNick Digital Cut Files Team Up!

Both design teams have swapped 'products' and will be sharing on our blogs all week long for some great inspiration!  Let me tell you, if you fancy digital cut files then you're in for a treat!  Nicole Nowosad, creator of JustNick, is super talented and has a fabulous library of cut files available! 

Today creative team member Marcia Dehn-Nix joins us with two Posh layouts -

Hello Simple Stories friends! Marcia here. This week we are teaming up with JustNick Studios who sells awesome digital cut files you can download to use with your electronic die cut machine. Today I am using some of those digital cut files with the gorgeous Posh collection. Posh is so pretty with it's gold accents. It definitely has a classy feminine feel to it ... Posh is the perfect description for it. I decided to scrap some girly layouts with it. This first one is of my daughter at her Veterinary School white coat ceremony.


I used the Broken Heart digital cut file from JustNick Studios for the big heart behind my photo and pieced different solid colored pattern papers behind it. To create some texture, I stitched around my heart with a gold metallic thread.
 
 
The Broken Heart cut file is similar to the hearts you will find in the Posh collection. Like this sticker heart I place near my journaling.
 
 
There is a lot of gold mixed in the bits & pieces die cuts, stickers and chipboard and it really gives this collection a classy look. I used some of the clear stickers over my photo. "You Can Do Anything" was perfect! I couldn't resist using these adorable blue birds in my embellishment clusters along with some of the flower bits and pieces die cuts. 
 
 
I love these tabs from the Bits & Pieces die cuts and they work so well with the phrase stickers.
 
 
The chipboard "dream" makes a dreamy title indeed and I combined it with some of the alpha stickers.
 
 
My second layout is a two-pager. I recently went to a paint night with my daughter, sister, and nieces. My first paint night ever! We had so much fun. I wanted to use lots of my photos to document the night. Who knew I could paint?
 
 
I used the JustNick Studios Infinity Hearts digital cut file to create those circles with hearts and the scallops under the photos are another digital cut file; Simple Scallop Strips.


To create my title, I used the JustNick Studios Simple  Set Alphabet and once again combined it with the alpha stickers from the Posh collection. I layered some heart chipboard stickers and some flower die cuts to help draw attention to the title.


Yes, I used more of those adorable blue birds here too... who could resist! 
 

The Posh collection has some beautiful washi tape and I used a couple different ones on my layout. This one might be my favorite washi tape...


Thanks so much for stopping by today. Be sure to check back all week for more Simple Stories and JustNick Studios inspiration.
 
Head over to the JustNick blog & check out what her team has created with our products!

Love what you've seen so far & want to see more?  You can find JustNick here - 

Website
Blog
Facebook
Instagram

Check back in tomorrow for great inspiration using JustNick cut files!

SaveSave

Supplies

Howdy!  Layle here with you today.  We have a fun week planned for you - a Simple Stories & JustNick Digital Cut Files Team Up!

Both design teams have swapped 'products' and will be sharing on our blogs all week long for some great inspiration!  Let me tell you, if you fancy digital cut files then you're in for a treat!  Nicole Nowosad, creator of JustNick, is super talented and has a fabulous library of cut files available! 

Today creative team member Chantalle McDaniel joins us with two Hello Fall layouts -

Hello Simple Stories fans and welcome back to the blog today for a special JustNick swap. I’m a big fan of Nicole’s designs and am very happy to be able to work with her cut files again!

I’ve created two projects to share with you, both using the beautiful new Hello Fall collection and the JustNick Stems 2 and Rustic Leaf Frame cut files.

This page captures a little family escape after my DD was ill with a week-long bout of fevers a couple of years ago. Inspired by the beautiful colour palette in the Hello Fall line, I have used a touch of mixed media to add a bit of rustic charm to my page.

Unfortunately, capturing the true sheen of metallic paint on camera continues to elude me! I have used some copper and bronze acrylic paints with a brayer on some heavy duty cardstock.

I really like the way these stems are arranged in a grid pattern for display. It definately influenced the way I laid them out after I had cut them on the Silhouette Cameo. TIP: To save time, I trimmed my chosen sheets from a Hello Fall 6x6 pad down a bit and laid a piece in each of the four corners of my cutting mat. This way, I was able to cut four different shapes in one run.

 
These awesome large letters are from a pack of Hello Fall Chipboard Stickers. I’ve left out the ‘F’ so it just spells ‘all’. (In Australia we use Autumn more commonly, so I will keep my big ‘F’ for another project.) Behind the lettering, you can see a snip of the die cuts and metallic paint peeking through. 
 
 
To complete my title, I have used the word ‘together’, which is a chipboard sticker from an older 'We are Family’ collection. It was just the right phrase, size and colour. Lucky me!
 
 
To document the day, I’ve run some white cardstock through my typewriter and then stitched the journalling to my page using a sewing machine.
 
 
You’ll notice a few more details behind that journalling… some fine golden thread and some crackle texture paste which has been applied through a botanically themed stencil. I just love the way one can see a bit of the bottom layers through the fine cracks.
 
 
These Stem cut files are so versatile. Change up the colours and you’ve got spring/summer foliage or add a touch of glitter for a festive touch.
 

______________________

My second page captures the moment my Sister’s dog met a hedgehog for the first time. I sincerely hope that one day, I too, will get to meet one of these cuties in real life!

For this page, I have used the Just Nick Rustic Frame cut file with some white cardstock. I’ve rotated it slightly and snipped it in half, arranging each half on opposite sides of the page.

Before I adhered my cut files down, I ran a sheet of Hello Fall ‘Piles of Smiles’ through my typewriter to add some notes directly to my page. As a guide, I drew some light pencil marks beforehand, so I would knew exactly where to type.

I then adhered the cut file frame and built my other elements around them.

It was so only after I was pretty much done that I realised the page was missing something… a few splashes of colour applied with a water brush pen and some watercolour paints really tied all the elements together and made the white cut files feel less stark.

There are few finer details on this page like fine mist work and some mini stickers. I created these little DIY numbers by using a punch and some Hello Fall Stickers. 

Being self adhesive, as soon as I had peeled away the backing paper, these guys were ready to go!

I just adore this little prickly fellow!

Thanks so much for stopping by today! Until next time.

Head over to the JustNick blog & check out what her team has created with our products!

Love what you've seen so far & want to see more?  You can find JustNick here - 

Website
Blog
Facebook
Instagram

Check back in tomorrow for great inspiration using JustNick cut files!

SaveSave

SaveSave

SaveSave

SaveSave

Utah friends!  Come see us at the Salt Lake City Pinners Conference, November 4th and 5th!


You’ve pinned lots of cool stuff on all those Pinterest boards, haven’t you?  Now come to the Pinners Conference and see it all come to life with fun shopping and over 100 creative classes.  Even better, we’ll have a Carpe Diem booth with the latest and greatest Carpe Diem planner products available!

Click HERE to register and use code FREESHOPPING for free access to the trade show floor; use code SIMPLESTORIES to receive a 10% discount on classes of your choice when you register.

Speaking of classes, join Marketing Director Layle Koncar on Saturday, November 5th at 3:30 for a Creative Planning class!  This hour long class will touch briefly on the history of planners (in a fun way!), the why behind using a planner, what creative planning is and different ways you can build/customize a planner in a creative way. 

We hope to see you there!  Register today!

Pages