Leah O’Neil's Blog Posts

Hello creatives! Leah here with you today with a super fun tutorial on how to upcycle a Carpe Diem Planner packaging box into decorative and functional storage for your craft or planner supplies. How many of you have kept the pretty packaging your Carpe Diem planners and traveler’s notebooks came in? I have quite a few and I never throw them away because they are so cute and functional. I love to use them just as they are for little storage trays for my supplies when I am working on a project. I have been wanting to dress one up for a while and since I’m working on setting up my new craft space, this felt like the perfect time to give it a whirl. Of course, I turned the camera on so I could share the process with you.

I’m not sure how much the packaging boxes differ in size with each size planner, but for this tutorial, I am using the box for an A5 planner.

Editing this footage was a challenge because there was so much to share, and some trial and error. Even after whittling it down quite a bit, the video still ended up being nearly 20 minutes long. You may want to go grab a beverage and get cozy before hitting play on this one. ;)

Insert video

I love that this box is not only providing storage now, but it’s also displaying the products right in front of me on my desk, which entices me to use them.

As you saw in the video, the pockets attached to the back of the box are really easy to make and switch out, so I definitely plan to do this again with whatever collection I work with next!

Here are some closer photos of the finished project and the different pieces.

You can rearrange the two separate pockets in any way you want to within or around the box, but the best part about these is how you can tuck them into your planner to take some of your supplies with you on-the-go.

Displaying some of my favorite products around me is something I have always done to motivate and inspire me to create whenever I’m in a creative rut. Now I can do that with this box and get the duel functionality of some added storage as well. The display box can easily lay down and looks just as cute as a tray. Because all of the pieces I made are flat, I can also throw some other supplies in there too if I want to move around to another part of the room or in the house.

I’m curious, what other ways have you all been using the packaging boxes that your Carpe Diem Planners came in? Tag me over on Instagram @sunny.leah to show me, and let me know if you give this tutorial a try! Until next time friends, happy creating!

Supplies

Hello again everyone! Leah here today and I’m excited to show you some different ways I’ve been using the Carpe Diem Planner sticker tablets to experiment with new weekly layouts in my Typewriter Circles TN.

I have been using the daily insert for my day-to-day plans for a while and I am still loving it. At home, decorating my planner pages is a creative outlet for me, so it’s important to me that whatever layout I am using allows space for the décor and the planning. However, one thing I’ve been missing with this daily layout is not having a weekly view. The good news is, there are lots of options to easily incorporate a weekly view into my TN. Carpe Diem Planners has a horizontal weekly insert which I may try out soon, but I decided to experiment with a couple of other formats this month within the inserts I currently have in my TN.

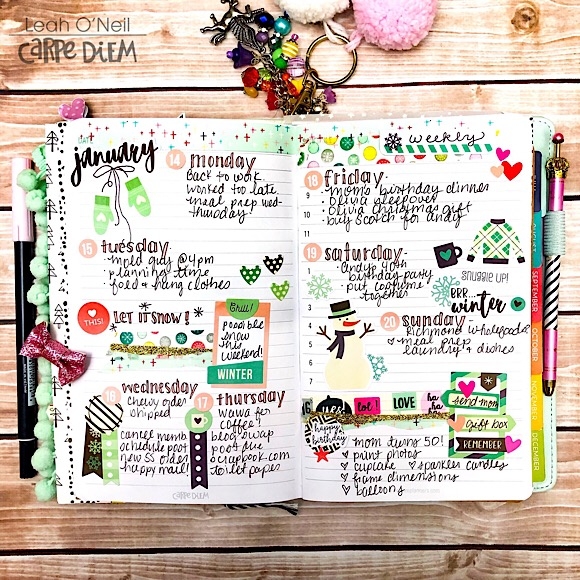
Because the daily insert is undated, one simple option is to use one day’s pages as a weekly view in between weeks. There are hours listed on the right page, but since the numbers aren’t super bold, I don’t feel the need to cover them up, although it would be easy to do so with a thin strip of washi tape. I like the ease of building my weekly view right into the daily insert I’m already using.

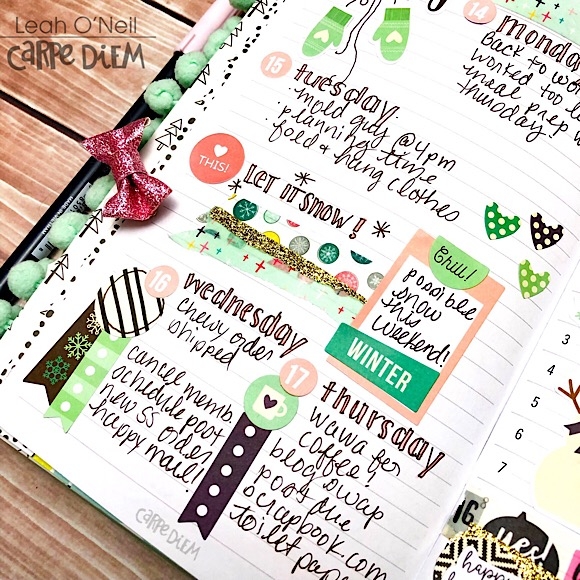
I used a lot of the January stickers from the A5 Seasons sticker tablet to decorate this layout. The color palette for January was pretty subdued with lots of wintery shades of blue. I really wanted to brighten things up by adding in pops of pink. I pulled a few pink functional stickers from my favorite sticker tablet, Planner Basics, to use on the layout. I tied the blues and pinks together by using a couple of my favorite colorful washi tapes that had similar blues and pinks in the design.

Carpe Diem Planners has a few basic sticker tablets that do not belong to any particular collection. What I love most about these tablets is just how flexible and functional they are. You get loads of stickers in each one and there are so many colors to choose from, so you will always be able to coordinate them with other sticker tablets or Simple Stories collections.

For this week’s layout, I decided to design my own weekly layout in a separate grid notebook insert. While this does mean my week will be in a separate insert from my daily planning pages, both inserts would still be right next to each other in the same TN which works just as well for me.

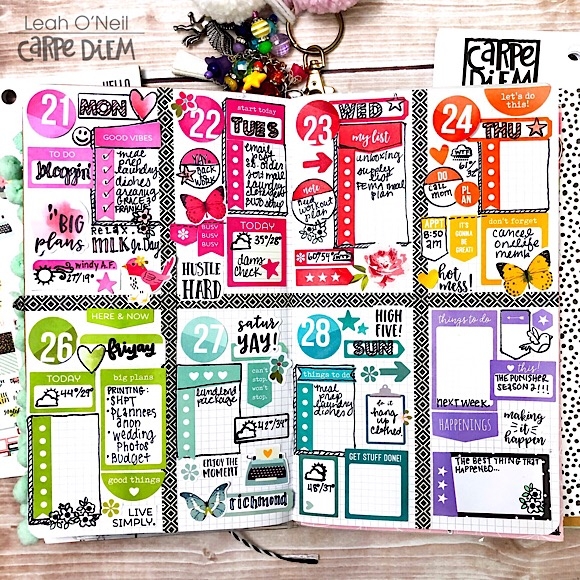
I created this simple layout by dividing two pages into 4 sections using thin washi tape. This created 8 total sections, one for each day of the week and one to write in tasks for the following week. I decided I wanted to go for a fun rainbow color scheme to decorate this layout so I chose a neutral black and white washi tape to create the boxes.

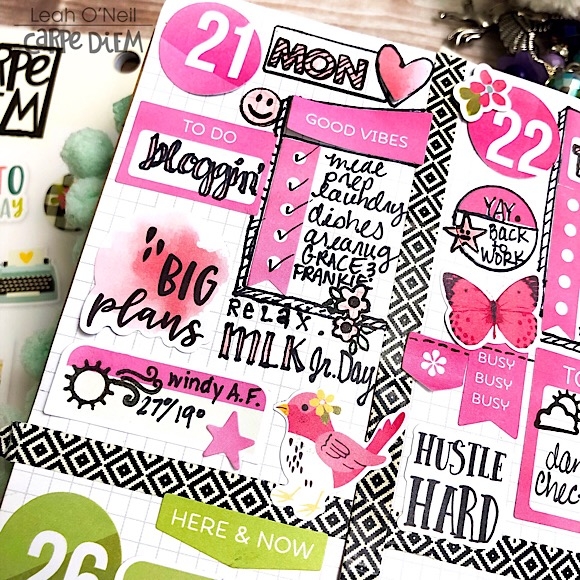
I really love that I was able to take stickers from the Planner Basics, Calendar, and Numbers sticker tablets and group them by color into the separate boxes on my layout. While these stickers are all more functional by design, I added a little whimsy to the layout with a few flowers, birds, and butterflies from the Hello sticker tablet that coordinated with the colors on my spread.

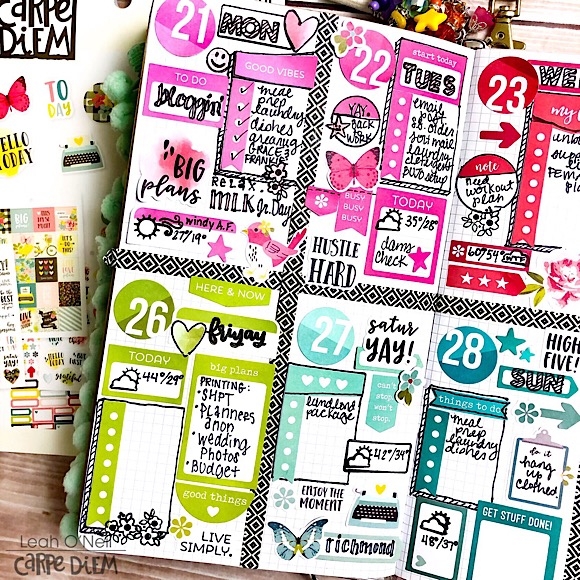
When using a bunch of stickers like this in a confined box, you can sometimes end up with little “awkward” corners or spaces between stickers where you know there isn’t enough room to write anything. To fill these spaces, I used some icons from the Get it Done and Seasons stamp sets. I decided to use black ink so that the stamped images and words wouldn’t compete with the colors.

While there is a lot going on in this layout, grouping stickers together by color helps create some order. If I had used this many stickers in this variety of colors, shapes, and sizes without grouping them together by color, the layout would have had a much different impact. Everything would have been “floating” separately and the eye wouldn’t have known where to look.

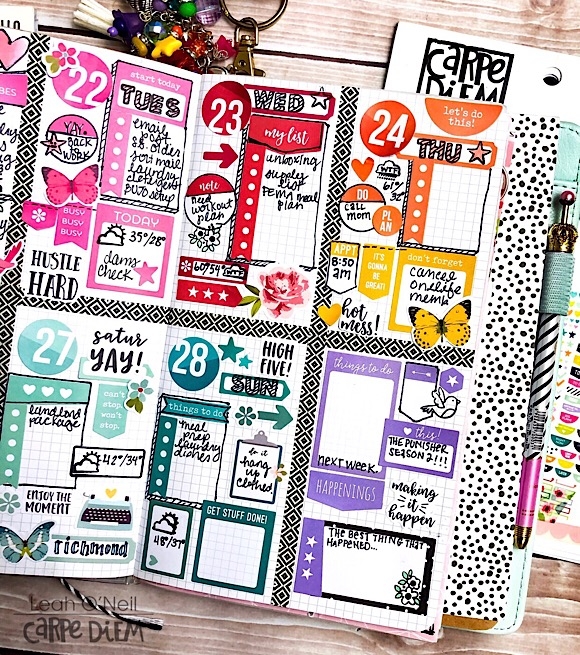
I decorated ahead of time this week, and since I’m going to be planning as I go, there are some elements that I repeated in each box to establish some consistency and to allow for greater functionality. For example, I have designated space for a checklist on each day. I also added the weather forecast. On days where I knew I had a scheduled event or deadline, I added a separate sticker to write it in so that I wouldn’t take up space under the checklist.

Do you have a set planning style/format that has been working really well for you? The search for “planner peace” can be a bumpy one, but unless you get really lucky, most of us don’t figure out exactly what works on the first try (or second, or third, or tenth…). Sometimes you just have to keep experimenting until something clicks with your brain. If you are not consistently using your planner, then that’s a good sign that your current format isn’t working for you. Don’t be afraid to switch things up and try something new, and don’t think you have to spend a bunch of money to do it. You can test out different formats in a single blank notebook using just a pen at first. The beauty of having these undated, customizable TN inserts is that I am not obligated to stick to one specific style or layout when planning. I can adapt my planner to my needs and change up my format any time.

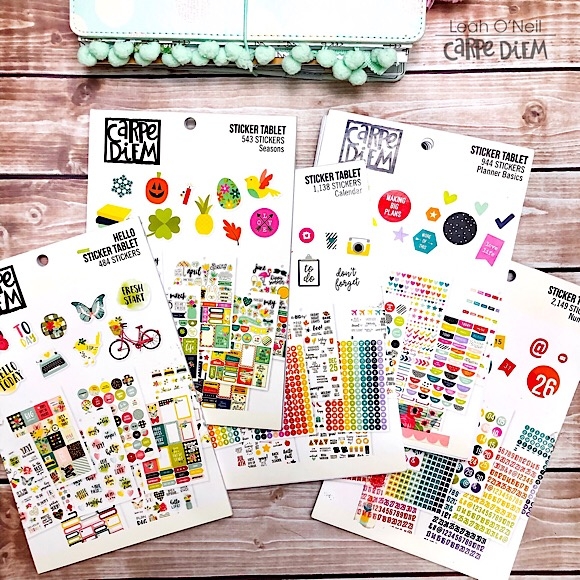
No matter where you go or where you end up, you cannot go wrong with the value and versatility you get from the Carpe Diem sticker tablets. They are flexible enough to transition with you throughout your planning journey. 

Follow along with me on my planning journey over on my Instagram @sunny.leah. Until next time friends, happy planning!

Supplies

Hello creatives! I hope you all have been having a wonderful holiday season. Leah here with you all today showing you more into my December TN before I start transitioning my setup for the new year. If you’d like to see how I decorated the front pockets and the cover of the front notebook, you can check out my last blog post here. I’m excited to show you how I’ve been documenting December and using the Simple Stories free printables to help me keep track of holiday plans and December stories, and to capture more of “me” in my holiday memories. 

I’ve been participating in the December Daily project for a couple of years now. The holiday season can get a little crazy and very busy, so I’m usually not very successful in sitting down to create every day. Sometimes I have a week or longer that go by where I may not have had time to work on my December Daily album. However, I always try to be as consistent as I can about at least jotting down the stories and memories so I don’t forget them before I can work on crafting the layouts. I’ve been getting a lot of use out of the December free printables to help me do this. I’m keeping the printables in a separate notebook behind my December Daily insert.

What I love about the free printables is that you can really use and customize them in any way you wish, but they are also cute and festive enough to use them exactly as they are. Not only are they helping me keep track of all my important lists and information throughout the busy holiday season, they have also helped me plan out some of my December Daily layout ideas and document parts of this season of my life that I want to remember.

I am planning to incorporate some of these planning pages and lists directly into my December Daily because they document so much of what I’m actually doing this time of year. These are great “filler” pages for those days in your album where you don’t feel like you have a particularly “document-worthy” story to tell. In reality, we all have days where we are really busy with work or other “boring” life things and don’t do anything eventful. I like to use some of those days to tell parts of my real, personal day-to-day story. While I absolutely love documenting extra special memories like time spent with family or doing fun holiday activities, an important part of this project is capturing the essence of who you are and where you are in your life during this time, and I feel that my lists and planning are a big part of who I am.

Because I plan to move several of these printables over into my December Daily insert eventually, I purposely chose not to glue them down into the notebook they are in now. I tucked most of these into this notebook and am holding them in lightly with a small piece of clear tape. I also used washi tape or non-permanent/repositionable tape under some pages, but I avoided using anything too sticky that would prevent me from easily moving the pages later.  

I limited myself to using primarily just the printables to keep things simple and functional in this notebook for the sake of time. The goal is to have a notebook to easily jot things down in to plan and track my December.

Because I’ve been giftwrapping, I had a couple of doilies and decorative tissue paper laying around that I was able to layer into the pages for a little added flair, but these printables are really so cute on their own, I would have loved them either way.

Since this contents of this notebook are so simple and functional, I decided to amp things up for the cover. I’ve shared my process before on how to easily create removable covers for TN inserts, which you can check out here on Youtube, but I tried something new for this one and added an interactive shaker element. The glitter “snow” is such a fun detail to compliment the snowy/wintry theme of the Simple Stories Freezin’ Season collection that I used to create and decorate this cover.

This is the first time I’ve created a shaker insert cover so there were a lot of missteps and errors along the way, which I promptly found ways to cover up and conceal. ;) However, this is definitely a process video I’d like to film for YouTube soon. Let me know over on Instagram if that’s something you’d be interested to see.

Here is one example of where I’ve already incorporated the monthly calendar from the free printables into my December Daily. I always like to add a calendar in my album that just captures the “main events” from the holiday season. Since this is not where I keep my day-to-day plans, I can really add lots of décor.

You can see I went a little sticker crazy here… I think my favorite thing on here are the color Christmas bulbs which are a stamp from the Seasons stamp set that I colored in with my Tombow markers. The ugly sweater, holly leaves, and snowman are all stamps from the same set that I added color to as well. You’ll notice I don’t stress myself too much about trying to color in the lines. ;)

Anyway, I’m excited to get to working on more of the pages and layouts in my December Daily notebook. Have you checked out the free printables Simple Stories offers every month? You can check them out here, or via the “Project Downloads” icon on the Simplestories.com home page in the future. Stay tuned here on the blog or over on the Carpe Diem Planners Instagram to see the other fun ways people are using the printables.

Until next time friends, happy holidays!

Supplies

Pages