October 2014 Blog Posts

Hello Simple Stories fans!!  Its Cari & I'm excited to share with you today this fun little project - perfect for those little trick or treaters or to just use as decoration.

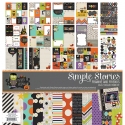
I used the Frankie and Friends collection - such a fun release!

I love using my Silhouette Cameo so I decided to create some little treat boxes using the new collection.  The colours and designs are adorable and so perfect for Halloween.  When I saw these fabulous Frankie and Friends cut files in the Silhouette online store, I knew that I wanted to use them right away (you can find them here).  So I grabbed some patterned papers and began cutting out the shapes.

I created the Mummy box using "October 31st" patterned paper. I then cut the mummy face from "The Great Pumpkin" paper and some black card stock .   I added a few die cuts as well.

The witch box is so fun with her purple hair!!. I used "Spooktacular" paper for her hair, "Trick or Treat" for the box and added a Enamel Dot on her hat as well as some die cuts.

The pumpkin box was so simple to put together as it didn't have as many cut elements to adhere.    I used "Spooktacular" for the box, "The Great Pumpkin" for the pumpkin shape and finished with the 'sign post' die cut.

And lastly is little Frankenstein.  This is my youngest child's favourite because he wants to dress up as Frankie for Halloween this year.  I created this one entirely from patterned papers ("Happy Haunting", "Trick or Treat", and "Monster Mash") from the collection and only used a bit of black card stock for the hair. 

Now I just need to fill them up with some goodies!!

Thanks for stopping by!  

Happy Halloween!!

Supplies

Hello Simple Stories fans! Happy Halloween! In preparation for tomorrow's costumed, candy-crazed celebration, I created a couple of spook-tacular cards to share with you using the adorable Frankie and Friends collection.

First up is "Where's the Candy?" I built this card around a piece cut from the 4x6 Horizontal Elements paper. I worked my embellishments around the pre-printed design, adding in stickers, chipboard, a die cut and plenty of enamel dots.

Next up is "Halloween Favorites". This card is designed around a vertical journaling card from the 3x4 & 4x6 Elements paper. I used the same embellishments as I used on the first card, but achieved a completely different look. I layered two pieces of chipboard to give the card additional depth. I wanted to add die cut and arrow stickers to the card, but they all had sentiments at the end and an angled design and didn't fit in the spaces where I wanted to use them. What did I do? I trimmed away the portion I didn't want, and ended up with the straight arrows you see here.

I hope you enjoyed seeing these fun Frankie and Friends cards. If you happen to see Frankie or any of his friends out trick-or-treating, please be sure to tell them I said hello. Have a fun and safe Halloween!

Hi Everyone, it's Marie here to show you a Life Documented spread using Frankie and Friends.

_HOL9601


As a mother of a teenage girl I miss the days of trick or treating.  For the past few years my daughter has been having a Halloween Party at our house with her friends instead.  I was so excited to see the new Frankie and Friends papers because they were the perfect way to document this new tradition.
_HOL9586

I naturally had to choose the 4x6 card which says "Let's Party."   I added lots of enamel dots to give it some added punch.
 
_HOL9627


_HOL9624

My favorite embellishment might be the ribbon button that says "#1 Boo Crew," which fits right in with a picture of the girls all together in their costumes.

  _HOL9591

The right-hand page shows a photo of the gift bags and some of our spooky decor.
 
_HOL9606

Whether this year you are taking little ones trick or treating, going to a party, or just relaxing at home, I hope you have a very fun Halloween!

Supplies

Hi there!  Sue here today to share with you a 2 page spread I created using the Frankie and Friends collection!

One of the things I love the most about this collection is that it not only works well for little kids, but is mature enough to work for tweens and teens as well.

One of my favorite ways to incorporate pocket pages into my scrapbooking is just what I did here - combine and traditional 12x12 layout on the left side of my spread with a pocket page layout on the right side.  Adding the pocket page lets me quickly and easily add additional photos without taking a lot of time.  It's the best of both worlds!

Happy Halloween!

Supplies

Hello, friends! Kim Kesti here sharing a quick set of cards perfect to give as a set, or to attach to a fun Halloween treat. Of course, I am using the whimsical and adorable Frankie and Friends collection.

First, I cut six cards from one sheet of 12 X 12 cardstock (bonus!); each card measures 4” X 6” before folding. Next, I trimmed one sheet of the 3x4 Elements patterned paper, this actually gives me 12 choices of paper for my card fronts (go ahead, make six more)!

Here are my six finished cards. I embellished the patterned paper with Chipboard Stickers, Decorative Brads and Bits and Pieces all from the Frankie and Friends collection. Did you notice the little hole punched in the upper left corners?

This is so I can hook them all together with a library ring. This set is going to be a little gift for a friend.

And, since gifts just cry out to be prettied up…

I quickly added another piece of Frankie and Friends patterned paper to a gift bag. So quick, easy and adorable!

Are you all ready for Halloween?

Hello, Simple Stories fans! Teri here today, and I'm here with another Life Documented project. I'm excited to share with you a couple pages made with the Seasons SN@P! Set.  

One of my memory keeping goals right now is to get some of the old pictures I've not put into my scrapbooks in the books. I've sadly let a lot of photos just pile up and slowly some of the memories have started slipping away.

A couple years back, I went on a Halloween weekend adventure with my friends, hitting a couple local pumpkin patches. Sure, we are all well beyond the Trick or Treating stage, but we sure had a great time exploring the patches and hunting for the perfect pumpkin.

Because of the time of year these adventures happened, I wanted my pages to be rich with Halloween icons. So I used anything spooky or Fall'ish I could find in the Seasons SN@P! set. Spiders, pumpkins, leaves... they all have a place on these pages!

One of the things I just love about Simple Stories' SN@P! Sets is you get a bunch of fun elements that you can use as they come.  But you can also spice them up with embellishments to make them a little more personal.  I think this spider square is just so cute! To add to his cuteness, I stitched a little floss through the card and tied a little bitty bow.

I added a little floss on the Fall Square too. I also added a few enamel dots. I think little touches like that just make pages seem a little more personal.

This die-cut owl (from SN@P! Seasons Squares & Pieces) is probably my favorite element on the page! I added the twine bow and the buttons, which are actually enamel dots. 

I kept on with my theme of customizing the SN@P! Set elements on the right page.

I especially like the card in the right corner. I adhered the leaf die-cuts to a circle and then stitched floss through them. I just love that look. 

Let's talk albums for a minute. These pages are going in my 12x12 SN@P! faux leather album in teal. I frequently scrapbook out of order so I really appreciate that the album's ring binding allows me to do that. I used the SN@P! Pocket Pages Design 6 and 10 for these pages. It's so nice that Simple Stories has so many different styles of Pocket Pages. I realy like not having to commit to the same style of pages all the time.

See you again soon!

Today I am here sharing two layouts I created using some of the DIY Christmas products that were meant for 'off the page'.  I love to use things in different ways and I don't mind pulling paper/embellishments, etc... from anywhere as long as it supports my story.

My first layout, Christmas Love was based on the banner pieces from the Bunting Banner Kit.  I loved the big chalkboard Dec 25th tag and the large tree and used them to build my layout because they told the story of my son's Christmas Day.  

I used the mini clothespins and twine that are included in the Bunting Banner Kit to "hang" pictures of my son's Christmas on the line, like a stocking might be hung from a mantle.  I chose to split the Christmas tree onto the bottom of both sides of my page to add interest to my page.  

I 'fussy cut' the word Christmas from the 'B' side of the Festive paper, then outlined the letters to make them stand out on my red background paper.  I added a little tag on the word as my pen slipped and marked my letter, oops!

My next layout, Merry & Bright, used a similar design of hanging things and it again focused on the banner pieces from the Bunting Banner Kit; the poinsetta and the Merry & Bright tag which I used as my title. 

I chose my background to match the lights on Cinderella's Castle at Walt Disney World.  

Pops of red were used to guide your eyes through the layout hitting on all the main points of my layout (picture, title, sentiment, and journaling).  Did you notice the envelope wraps work amazingly well for journaling spots too?

Sprinkles of enamel dots and stars continued the theme of twinkling lights thus furthering my design.

What fun items can you repurpose to fit your scrapping story?

Supplies

Hi there!  It's Emily.  I always have trouble crafting holiday projects  AFTER the holiday is over. More than likely, I won't scrap my Halloween photos until this time next year. There's something about being in the mood. Christmas in July is never my thing, Christmas in December is. Same goes with Halloween. I am usually left with piles of last year's Halloween paper and it gets stored away and often unused the next year. Not this go around! Simple Stories has done it yet again with an amazing line. The "Frankie & Friends" collection is just the right amount of paper and embellishments to scrapbook those photos that I have from last year and still have enough to make a few more Halloween crafts for this year. 

In this layout, I used a photo of my daughter and I from last year. I think she made an awful cute Bat girl! I don't take a lot of photos, but I know that I will be able to use every last piece of this kit because it's so stinkin' cute!

I take cutesy photos of my daughter so the eerie Halloween stuff isn't really my thing, so collection is perfect! 

Thanks for stopping by today & have a Happy Halloween! 

Supplies

Pages