Hello everyone! Leah here again, ready to show you how I have decorated my planner for July using the Hero Simple Set! The Fourth of July is one of my FAVORITE holidays. I try to remember to be grateful every day, but on this holiday especially, I am reminded of the strong appreciation I have for how far we have come as a nation, for all the people who have brought us here, and the heroes that continue to protect our freedom every day. I love all the traditions we have to celebrate this holiday… spending time with family, enjoying the summer weather, the fireworks and sparklers, the cookouts! The sense of celebration and patriotism really brings the American people closer together, even during times when the nation has felt the most divided. Because the month of July always makes me feel extra Patriotic, I decided to use the Hero Simple Set to add some U.S.A. themed décor to my planner!
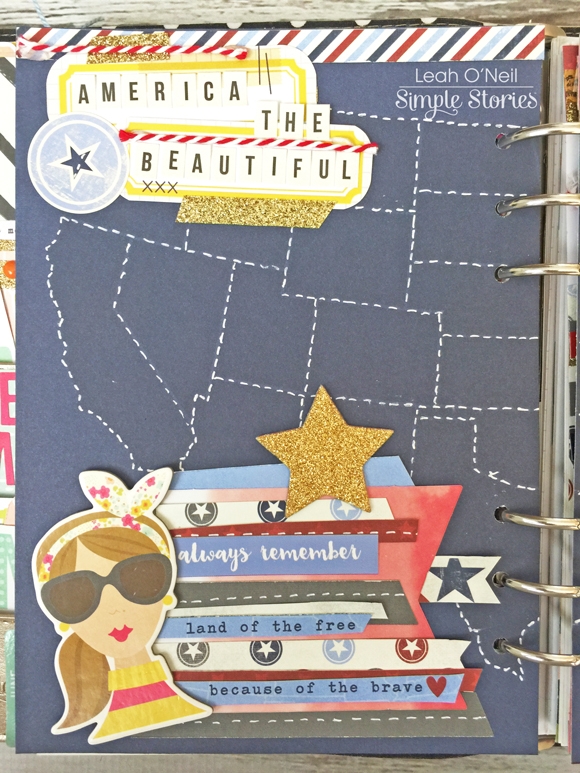
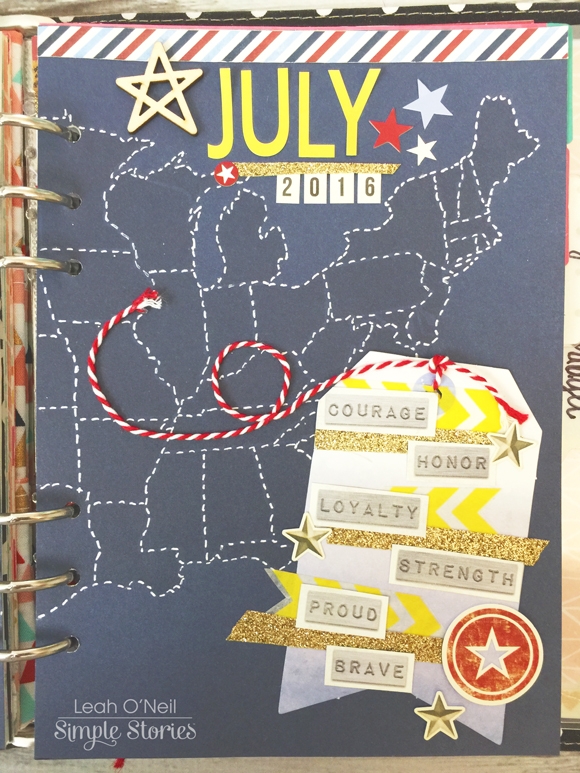
One of my favorite papers in the Hero collection kit is the one titled “Brave.” I love the shadow of the Continental U.S. map in the background. I wanted to find a way to incorporate this page into my planner so I decided to cut it in half and create a two-page decorative “dashboard” for the month of July. I chose to highlight the map by tracing all the states with a stitched white line, using a white Uni-Ball Signo gel pen. I really love the sewn effect it created!
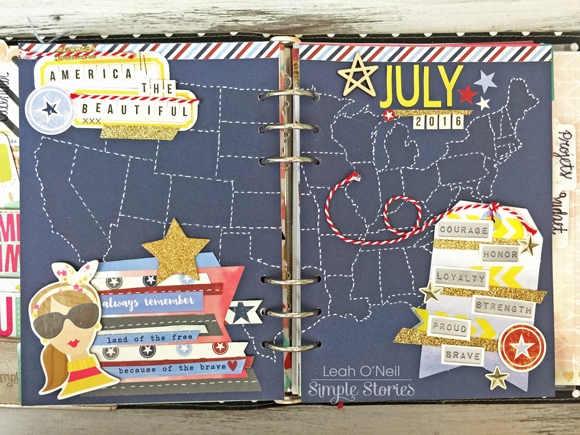
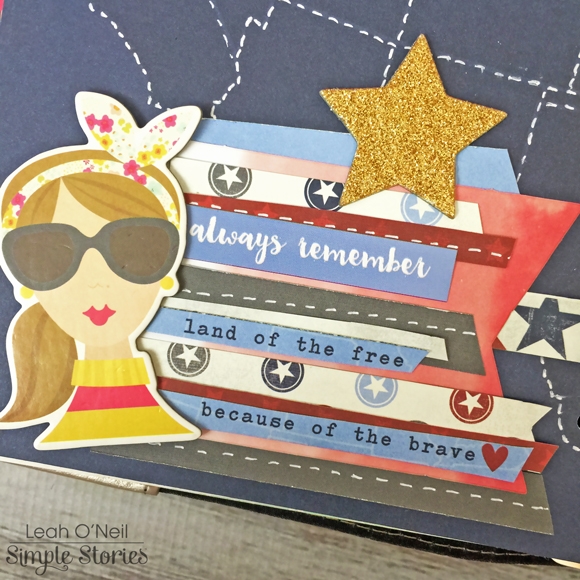
To dress up the left page, I started with a red watercolor cardstock tag that I picked up in a pack at Michaels awhile back. I layered different colored paper strips and word phrases from the Hero 12x12 papers (using the title strips that many people trim off and throw away). I added a chipboard sticker from the Sunshine and Happiness collection (the girl with sunglasses) to make the page feel more fun and summery. I also added a gold glitter chipboard star I had in my stash (from Michaels), and used the white gel pen to draw in more of the white stitched lines.
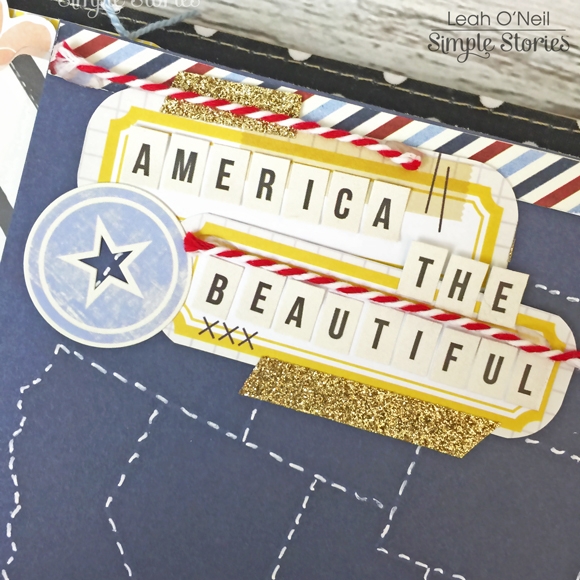
At the top of the page, I added a title using a few more items from my craft stash. The yellow frames around the words are cut out of a card from the Life in Color SN@P! Pack. The letter stickers that spell out “America the Beautiful” are from the Sunshine and Happiness 12x12 Expressions cardstock sticker sheet. I added a couple small pieces of gold glitter washi tape, red-and-white string, and a sticker from the Hero 6x12 Fundamental Stickers sheet.
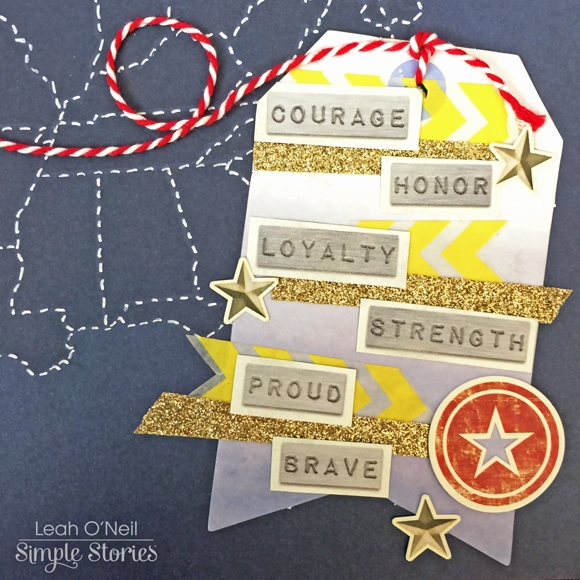
On the right side of my July dashboard, I used a blue watercolor tag as a base and added strips of yellow and gold glitter washi tape. I cut out the words from a 12x12 Elements sheet and arranged them how I wanted on the tag. I added some star stickers from the Fundamentals Sticker sheet and tied red-and-white string to the tag. I laid out the string how I wanted it on the page and then glued it in place.
The “July 2016” at the top of the page was created using more letter and number stickers from the Sunshine and Happiness 12x12 Expressions Sticker sheet. I also added more star stickers from the Hero sticker sheet and a wood veneer star from my stash (from the Life and Color collection).
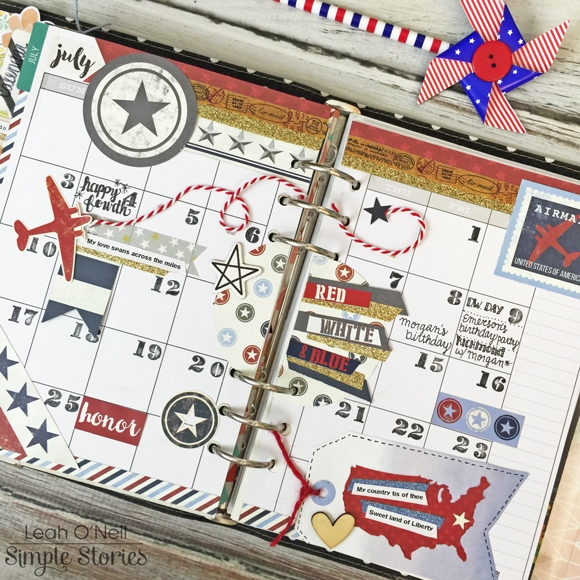
For my July monthly layout, I used a 3-inch circle punch and banner punch to cut out a few shapes from the 12x12 papers in the Kit. All of the other pieces are cut out of the 12x12 Elements sheets or are stickers from the 6x12 sticker sheets.

Some more layered paper strips and words are in the center – I arranged them in a way that reminds me of a firework. In the bottom right corner, I used another blue watercolor tag and added a red United States sticker from the Fundamentals sticker sheet, blue glitter washi tape and some words printed using my label maker. I put the white star sticker over VA since that’s my home! I used a marker to draw a stitched line around the edge of the tag and added some red string for a finishing touch.
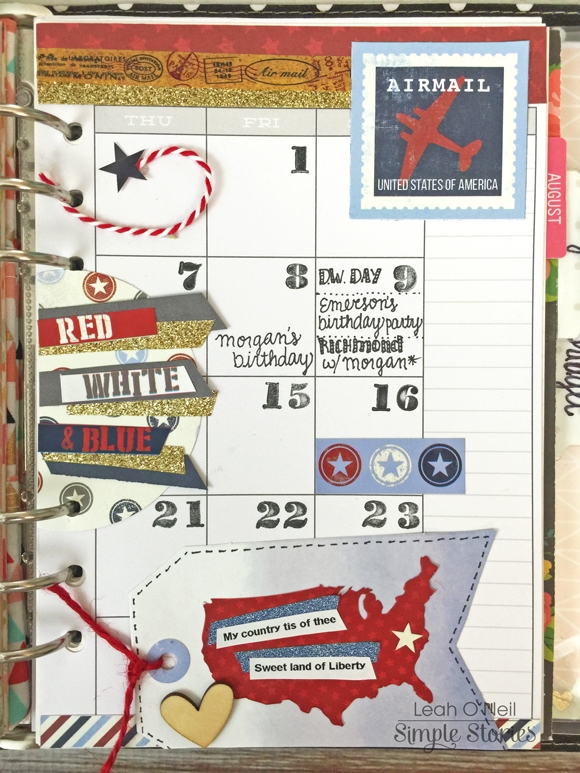
My favorite part of this whole layout is the part with the red plane sticker. I got the idea to use the red-and-white string to create a flight path that ends with a blue star sticker, which is supposed to represent a “destination.” Using my label maker, I typed out the words “My love spans across the miles.” This part of the layout has special meaning to me because it reminds me of all the love my dad expressed across the miles during his many deployments as I was growing up.

I loved making my planner Patriotic for July! It can be so fun to let yourself run away with a theme in your layouts! I may have also gone a little crazy in the Target dollar spot and bought a few red, white and blue sticky notes and pens to use in my planner as well…
Happy Independence Day everyone!