


Happy Fall, Y'all!!
Nathalie here, bringing you some inspiration for the new Fall season. In case you have not notice, I love Autumn!, and what better way to document it that by using the new Simple Stories Vintage Blessing collection The colors, designs, and overall feeling of this collection are perfect, especially for all those family portraits, and colorful nature shots, but better yet let me show you:
FAMILY

For the first project, i pulled a picture of my kids, the littles, and my younger sisters to create a page all about this new family generation. I am a sucker for large titles, so I set to build one that could combine as many of the colors and patterns of the collection in one.

Using a simple font from the Silhouette store, I cut each letter from the word family out of papers from the 6x8 paper pad. At the same time, i used the Silhouette Software to weld the letters together (just in the screen), and then use the formed word to create an offset -the white base of the title- where i could glue the letters together.

I glued the letters to the white cardstock base, and used some hand stitching to secure it all together, add texture, and bring the handmade feeling of the collection to the page.

To bring in more of the vintage feeling of the page, i glued one of the papers from the Wood and Gingham 12x12 paper pad to the "So Thankful" paper. I was careful not to add glue around the lines of the wood grain design, and instead used an exacto knife to carefully slit the paper open, and stressed the edges of each wood slat.

There are so many beautiful stickers and die cuts in this collection that it was so easy to combine them into clusters around the page. Here is the final layout:

The final look of this page is simple, yet full of color and different textures. The perfect combination to safe keep a moment in our family's life. But now, let me show you how the same collection can be used to document the beauty of the season.
________________________________________
AUTUMN
Have I mentioned, I love FALL! One of my favorite things to do at fall time is take long walks around the river bank. My baby (our Boston Terrier) is my most loyal companion, even when i am taking a few pictures of leaves along the way. So I set to create a layout that captures our daily walks:

For this page, I wanted to bring a bit of the outdoors in; that meant recreating some of the foliage for the page. For this, I used the Cut Shoppe's "Leaf It To Me" cut file to create leaves from some of the 6x8 papers.

While the machine cut the leaves and vellum to back each leaf, a colorful background was created on watercolor paper that had been stitched to the "Happy Life" paper from the collection. I made sure to add the mixed media just to the area where the picture and leaves would be placed.

Once it was all dried, the page came together rather easily. Once the leaves were put in place - I used foam adhesive, glue and pop dots to attach the leaves in place), the picture was then nestled a the bottom right corner of the mixed media.

To continue the flow of the leaves's trail, clusters of stickers and ephemera were created at the corners of the picture that was set on the leaves.

All the small details in the stickers, and ephemera pieces of this collection are perfect t
o bring the fall colors in the picture to the page. I just love the end look of this page!

Don't you just love the versatility of this collection?! What can i say, it is FALL PERFECT! I hope you all are inspired to use the Simple Stories Vintage Blessings collection to document those close to the heart moments in your life!
Remember you can always contact me if there is any questions on how this came together.
See you all soon!
Hello, its Meredy here showing off my newest experiment, the Carpe Diem Traveler’s Notebook.
When I saw that Carpe Diem was coming out with a Traveler’s Notebook in black and white, I was super excited to try one out! I am not usually a TN person, but I fell in love with the design of the Aztec pattern, isn’t this a beauty!? I thought I would give it a go for my weekly planning and set it up for fall.

I used the Bits and Pieces from the Vintage Blessings Collection to decorate the front of the notebook that came with the Traveler’s Notebook. With a few pieces on the front of the notebook and some in the pockets, I was all ready to go.

Since the notebook is unlined I made my own week on two pages just by making a horizontal line every couple of inches and using Sn@p Alpha stickers. I added the washi down the middle as I do in a ring binder and went to town decorating the pages with more bits and pieces.

I was surprised by how easy it was to set up the Traveler’s Notebook as a planner by just using some embellishments. I have definitely found my new favorite planner!


Hi everyone! It's Traci ... back to share my newest SN@P! album with you. Christmas is absolutely one of my favorite times of the year so playing with some Christmas goodies this week was lots of fun. When I saw the new Very Merry collection, I fell in love with the traditional red and green colors mixed in with pops of black, so I decided to use this fun black and white striped binder album, and I couldn't wait to tie a big red ribbon around it!
We went on a snow-tubing adventure while my family was in town. My "Florida family" did not have winter coats, but Meme did! My stepmom dug several ski jackets (from the 90's) out of her closet and the kids LOVED it! We were the brightest, most neon group on the tubing slope .... ha ha! So much family fun!
I had a lot of fun reliving our crazy "Very Merry" memories when I created this album. I hope you will enjoy playing with this collection as much as I did!
Hello Friends!
It is Kristine Davidson with you today and I'll be sharing 2 layouts using the latest collection from Vintage Blessings.
The first layout is called " Love & Laughter "
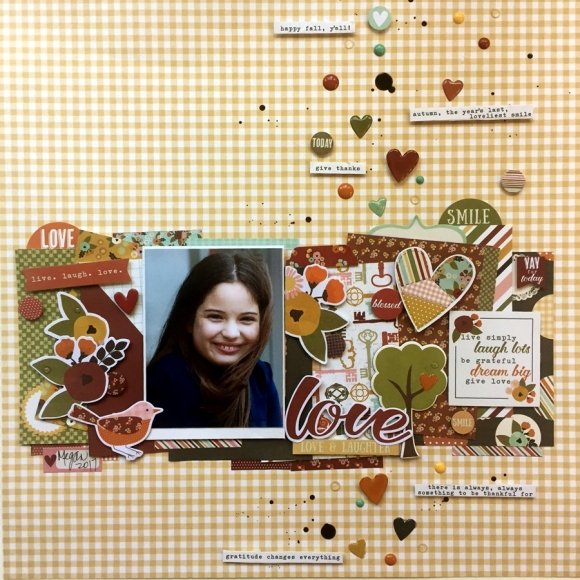
This layout was created with 1 piece of 12x12 patterned paper and the rest was used with 3x4 journal cards that I cut out from the Journaling Card Elements paper. So simple to create a layout using these cards as 3x4 pieces of paper and not necessarily journaling cards. You can use the reverse side, only parts of the card or trim what you need!
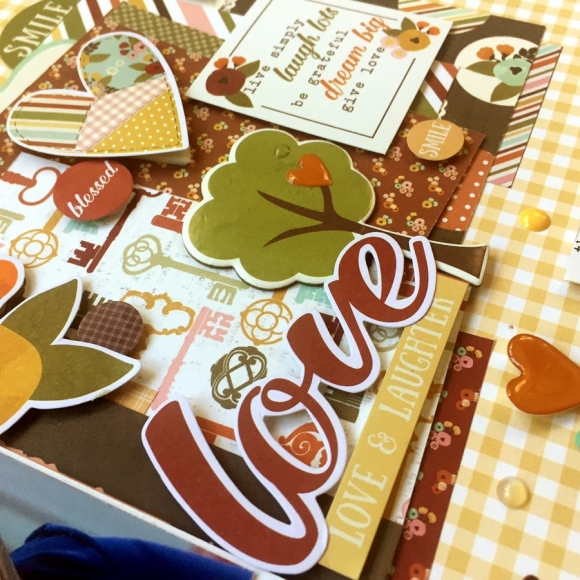
I added a few pieces of stickers from the 4x6 sticker pack, a few chipboard pieces and some enamel dots. I did add some glossy accents on the hearts to add a bit of glossy shine and dimension.
________________________________
My second layout is called " Thankful "

I used a bit more papers on this layout. I love how they are match each other and the picture kind of fits perfectly with this collection!


I used the Thankful chipboard piece to create my title. For some extra depth and dimension I used some dimensional adhesive underneath and of course layered around the title and photo.
I hope you enjoyed and found some inspiration today ! Remember to share your pages with us on instagram using #SimpleStories


Fall icons & vintage graphics paired with warm tones of ruby red, harvest gold, moss green and hints of robin’s egg blue accentuate the thankful sentiment of the Vintage Blessings collection.
The papers in the new Vintage Blessings collection inspire nostalgic feelings of home. The the robins egg and blush pink are a wonderful contrast to the traditional browns, oranges and yellows of fall. This line is filled with beautiful accents like doilies, birds, houses, and so much more!
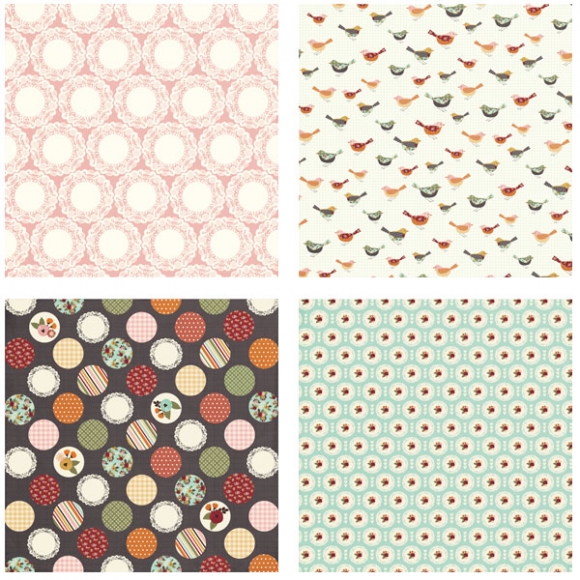
The Vintage Blessings Collection Kit is filled with beautiful papers and stickers to help you create pages and pages of autumn and family! With 2 coordinating washi tapes, more stickers & die cuts Bits & Pieces, you’re sure to find just what you need to add a gorgeous touch to all of your projects.

Each of these projects showcase the many different ways the Vintage Blessings collection can be used to create gorgeous projects. Whether it's cards, mini-albums, layouts or home decor, these are sure to make you happy & feel like creating for the fall!
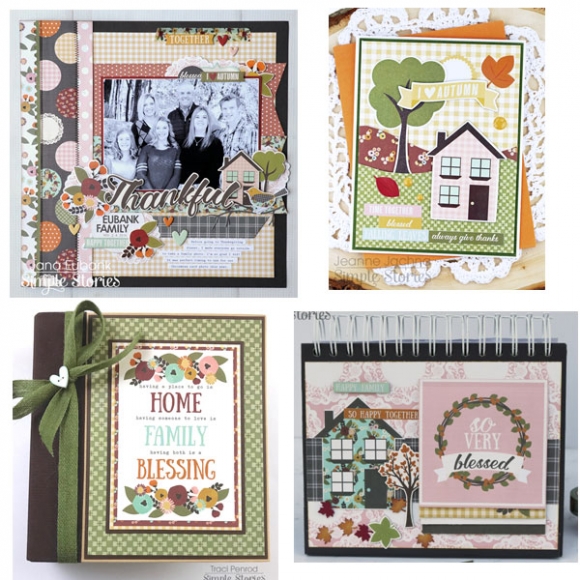
Be sure to check out & follow our Vintage Blessings Pinterest board for more project inspiration now & in the future!
Hey everyone! Nicole here on the blog today to share a few layouts with you using the new Beautiful collection. I don`t know about you, but when I first saw this collection, I thought “wow, that is really beautiful”. I know, pretty obvious, but I also thought it was perfect for scrapping some recent photos of my daughter on our recent family vacation.
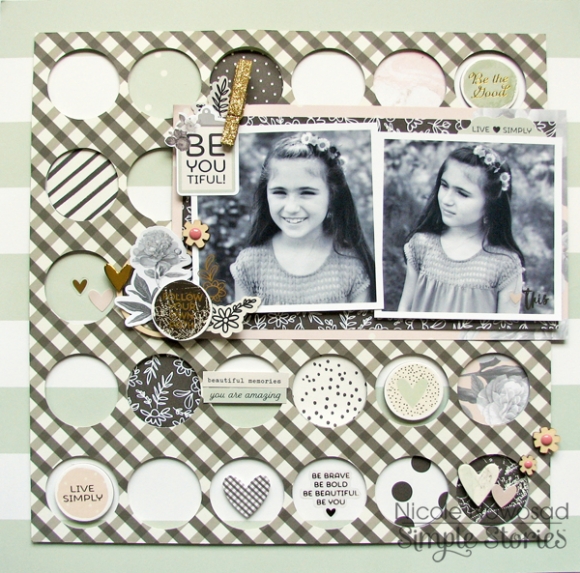
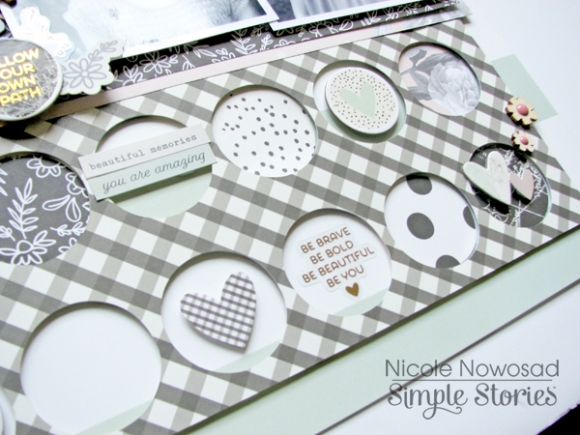
I wanted to create a grid of sorts on my page to incorporate some of the fun little details in this collection, so I diecut a simple circle background to help me along! I added in lots of diecut cardstock stickers and chipboard into my open areas, along with punches of patterned paper too!
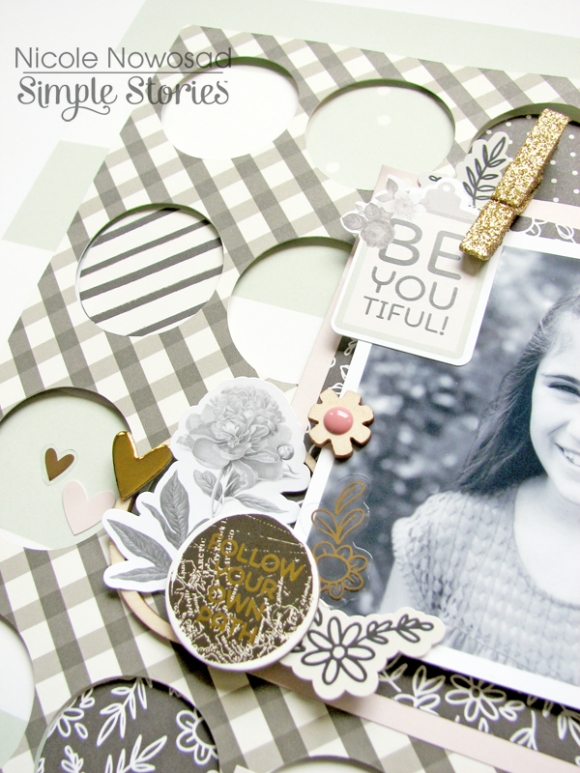
I couldn’t resist adding a few of the great clear stickers to the inside of those same circles, I just love how they look like they were almost printed on the patterned paper background.
___________________________________________
Now, this collection is really pretty – but it is great for masculine pages too! I decided to challenge myself to use this same collection with a masculine twist, and I think it turned out great.
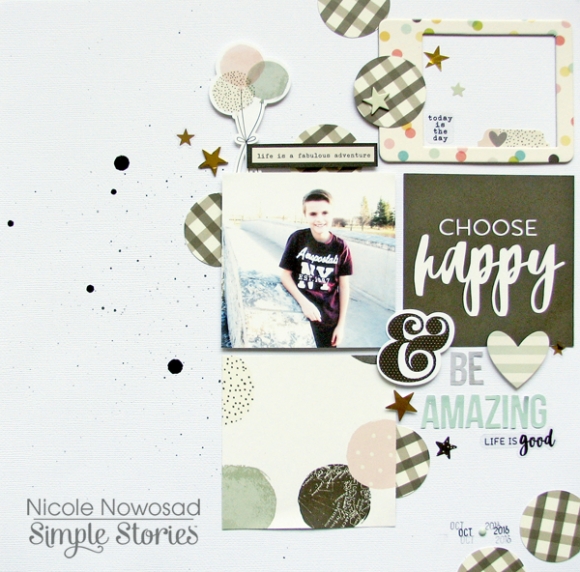
I used a basic grid for this page too, this time alternating between patterned paper from the collection and 4x4 Elements. It is really so easy to make a page come together when you start with a basic grid and color scheme.
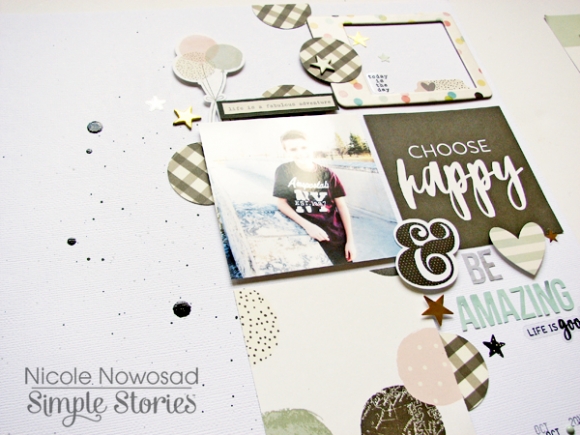
I added in some of the less “pretty” cardstock stickers, like these fun balloon shapes and a lot of punched circles from the black gingham patterned paper to add around my basic grid design.
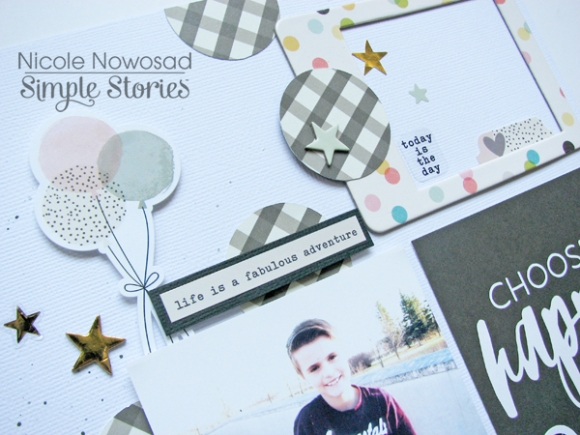
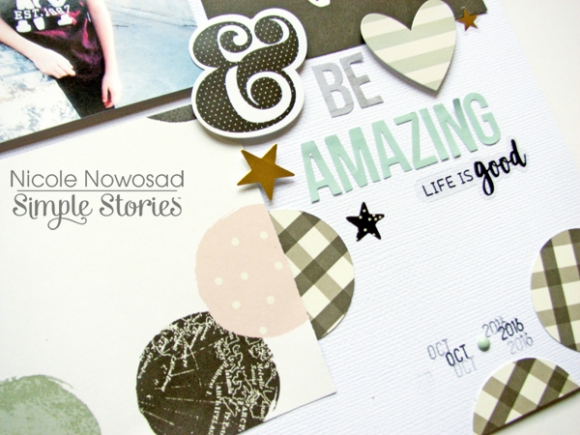
Although I used the same collection for both pages, I was able to take advantage of the girly and masculine side of things for two uniquely different pages and I hope you are inspired to do the same!

Hi everybody! It’s Lori, marketing manager at Simple Stories, and today we’re talking about planning!
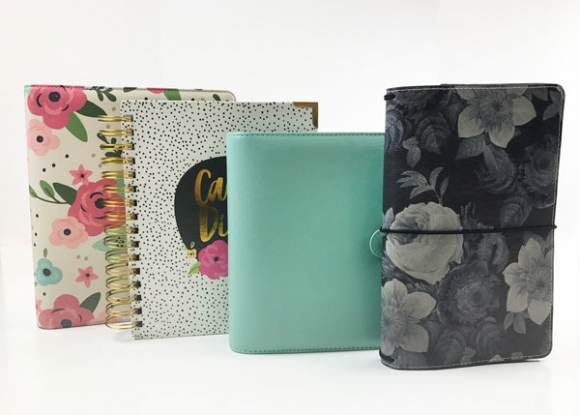
Everyone is loving our latest release of Carpe Diem planners and Travelers Notebooks! With so many options now available, we’re hearing the same question from lots of you, “How do I choose which planner is right for me?”
Oh my. Decisions, decisions.
If you’re one of those people who aren’t sure which route to go when it comes to choosing a planner, ask yourself a few questions to get you started on the right track:
This is the first question you should be asking yourself when selecting your planner. How will you use your planner and what will be the purpose of the planner? Everyone plans, plots and tracks goals in different ways. Some people want to track appointments and to-dos. Others want to doodle and dream. The purpose of planning will guide you to the planner that’s right for you.
Will you be carrying your planner with you daily or is your planner going to stay on your desk? Do you tend to record lots of notes throughout the day or do you only write minimally? Does it need to fit in your purse or will any size do?
Do you want to add pages to your planner on your own or do you want everything pre-designed and bound together in one notebook? Do you want a fold-over, spiral-type planner, or would you prefer more of a binder?
Planners come in a wide-range of prices. Binder-type planners are more expensive because of the hardware mechanisms, and they are easy to customize. Spiral planners are less-expensive, but you can’t do too much to personalize the contents.
Now that you’ve got some ideas in mind for using your planner, let’s quickly review each of our Carpe Planner types so you can make the right decision for you!
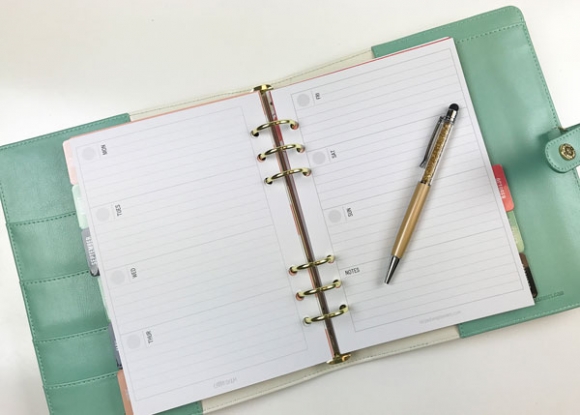
Our Carpe Diem A5 Planner is our beloved first-born. We have a special love for this baby of ours, and many people have found that this planner is a perfect fit for them. With lots of insert types to choose from, this 6-ring planner is customizable for everyone. Whether you use it for hourly appointment scheduling, fitness tracking or menu planning, there are insert options available to make your planning easier. And if you have our Carpe Diem A5 Punch, you can add any papers you’d like so you have all of your important items in one place.
The Carpe Diem A5 Planner measures 8 inches wide by 9.4 inches tall. At 1.375 inches deep, there’s lots of room to add pages to your planner so it’s just-right!
Select an A5 Planner if you:
· Want customization options with inserts and tabs
· Want to add additional pages to your planner to fit your needs
· Want a wide selection of colors and prints
· Want to plan a few months at a time
· Want a larger area of paper to record items, notes, etc.
· Want to track monthly important dates, goals, birthdays, to-dos
· Plan hourly appointments
· Track to-dos

Our Carpe Diem Spiral Planner is one of our latest additions to the Carpe Diem family. We are thrilled to introduce a gorgeous planner at an inexpensive price point for our customers who are looking for a grab-n-go option. Our spiral planners are beautifully designed with pages you can fold over and keep compact on your desktop. This option is perfect for those people who are looking a planner with 16-months in one notebook. Sticker sheets are included for coordinated decorating.
The Carpe Diem Spiral Planner measures 8 inches wide by 8.75 inches tall, so this notebook will fit in a bag or backpack with ease.
Select a Carpe Diem Spiral Planner if you:
· Want a 16-month calendar in one notebook
· Want an inexpensive option for daily planning
· Want to track monthly important dates, goals, birthdays, to-dos
· Want a spiral notebook with the ability to fold over pages
· Want a pre-designed planner & stickers in one grab-n-go package
· Plan appointments
· Track to-dos

Our Carpe Diem Personal Planner is another of our new additions to the Carpe Diem family. Ever since we launched our A5 Planner in July of 2015, our customers have pleaded for us to release a personal sized option. Now we have, and everyone’s celebrating! Just like its A5 sister, the 6-ring Personal Planner has insert options to select from, and pages can be added to the planner to customize the planner for you and your needs.
The Carpe Diem Personal Planner measures 6 inches wide by 7.5 inches tall. This compact planner is perfect for carrying in a purse or bag!
Select a Personal Planner if you:
· Want customization options with inserts and tabs
· Want to add additional pages to your planner to fit your needs
· Want a wide selection of colors and prints
· Want to plan a few months at a time
· Want a smaller, 6-ring planner option
· Want to track monthly important dates, goals, birthdays, to-dos
· Don’t need a lot of space to record things
· Plan hourly appointments
· Track to-dos

The Carpe Diem Travelers Notebook is another great option introduced to the Carpe Diem family in our Q2 2017 release. While the Travelers Notebook is new to our product offerings, it’s certainly not new to the planning and stationery world. Made of high-quality simulated leather, the notebook itself is slightly flexible and expands to wrap around multiple Travelers Notebook Inserts. This notebook has an elastic band closure to keep all of your notes and books together in one tight package.
The Carpe Diem Travelers Notebook measures 5.5 inches wide by 8.625 inches tall. This notebook can hold multiple inserts and keep you organized in a completely customizable way.
Select a Travelers Notebook if you:
· Want freedom to customize the entire notebook
· Want to add additional notebooks to fit your needs
· Want a wide selection of colors and prints
· Want to plan, doodle, bullet journal, capture to-dos or dreams
· Want a smaller, flexible cover option
· Want freedom to record whatever, however you want
Hopefully we’ve been able to help you today so you can choose the right planning option that’s ideal for you. Remember, planning is very much a personal thing. Choose one system or multiple, the choice is yours. The most important thing is that you’re committed to planning and you’re having fun while you’re doing it!
