Nathalie DeSousa's Blog Posts

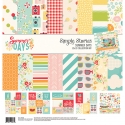
Hi there!  Nathalie with you today showcasing the fun and colorful, "Summer Days" collection.  I am sure you all are enjoying the long and warm days of Summer, and what better way to document them than with  this new and super gorgeous collection from Simple Stories.  Here is a few projects that show you how versatile this collection can be:

SUMMER

We are so lucky to have an outdoor swimming pool in our backyard for all those hot summer days, but i think my little niece is the one who enjoys it  the most -on all the days she visits us-.   So i chose to document a picture of my niece at her happiest!

I love cut files!, so this time i chose to use the "Summer" cut file from JustNick Studio to stitch the  large sun image in the background.  A bit of watercolor, and golden splatters completes the background.  

The mat  was then trimmed about a quarter of an inch on all sides, and machine stitched to the b side of the Sunny Days paper.  The title of this page was  then created with the same cut file, however this time, i chose to back the cut out with all the different papers from the collection.   Don't you just love all those summer designs!!

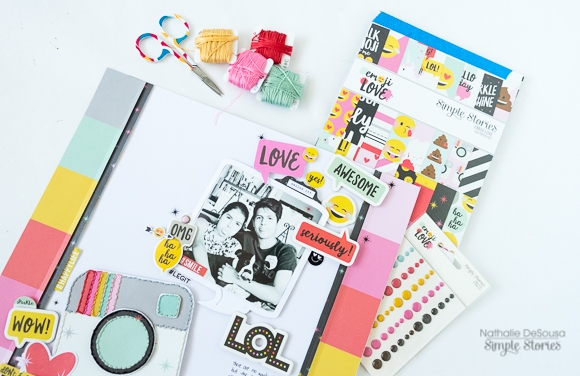
I placed the picture on a  bit of a slant, and used pieces from the combo sticker sheet, bits and pieces, 4x6 stickers, and those gorgeous decorative brads to create clusters at the corners of the picture.  I just wanted to reflect the elements and colors from the entire collection in the clusters.

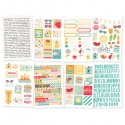
I love this collection brads and stickers, and what better way to use them in your layouts than to layer them.  All the small word stickers included in the 4x6 sticker pack are just perfect to add to small tabs, flags and onto those small corners of your projects.

Here is the completed layout.  I love all the textures and colors that are displayed in this project.  The  summery designs are the perfect complement to all your summer memories.
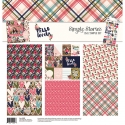
_______________________________ 


BEACH LIFE!


This second project is all about reflecting our love for the beach using the colors of the Summer Days collection papers.   We recently took a month long vacation to my native Ecuador;  every time we visit my family, my kids only request is to be taken to the beach.  So i picked one of the pictures of my daughter and one of our cousins roaming the beaches of Mompiche (Ecuador) for this page.


This page started with the Heart is Full background cut file from JustNick Studio.  This time, i used the Hello Sunshine, and So Much Fun papers from the Summer Days collection to back the hearts in the cut out.  In addition, some of the hearts were backed with vellum.  Once all the hearts were backed, then the entire circle was backed with light blue vellum., so that it brings some of the sea color to the page.


The circle was then glued to the Sn@p Basic's Aspen/White Notebook design.  Using the different colors of the collection on the heart cut outs gives you the freedom to use some of the papers in the collection to back and layer the picture.  


Can you tell i am loving the brads in this collection?   I think I have used at least 1 brad in each of the layouts i have created with the Summer Days collection - I have reordered brads for my stash!!-.  Once again, I used pieces from all the embellishments in the collection to create clusters at the corners of the picture.  In addition, I added a word sticker to each of the vellum hearts in the background.  This brings color and lots of interest around the page.


To complete the visual triangle, and to balance the page, I added a small cluster at the bottom left corner of the page. By simply layering elements from the Sticker combo, and 4x6 sticker sheets along with another one of the decorative brads, the clusters were created.  In addition a large piece of the Good Vibes washi tape along the bottom edge of the page balances the page to completion.


To complete the page, I used the alphas that are included in the 4x6 sticker sheets to complete the title of the page ( the color completely matched that of the sea water in the picture).   I love the fresh and clean feel of this page, and how it brings the color of picture to life!  


This lovely and so fun Summer Days collection is perfect to document all the glory of your summer day adventures!.  So don't forget to check it out.


Thank you for stopping by today, and don't forget to contact me if you have any questions on how these pages came together.   Have a great summer, and see you all soon!!!


Supplies

Howdy friends!  Layle back again with you for day 3 of our week long Simple Stories & Maya Road Product Swap! 

Both design teams have swapped products & teamed up for some great inspiration all week long!

Today creative team member Nathalie DeSousa joins us amazing layouts from our Hello Lovely Simple Set and the Summer Days collection -

__________________________________

Hello there!  Nathalie back with you today, and I am so happy to share what i have created for the Simple Stories & Maya Road product swap.

My first layout is all about summer,  my daughter's fascination with ice cream floats, some of the Maya Road goodies, and the super fun Summer Days collection.

The staring point for this layout was the "Lazy Days" paper in the collection.   The spin wheels in the paper was the inspiration for this layout.  So i set out to create a few spin wheel cut-outs using the Cut Shoppe's Spinwheels cut file.

The cut outs were backed using the Lazy Days, So Much Fun, Hello Sunshine, Gotta Wear Shades papers from the Summer Days collection.   The lovely  decorative brads were then used in the centers of each of the spinwheels.

To bring in the colors of the collection to the page, a few splatters of watercolor were used to create a mixed media background on the page.  Once this dried,  the page was trimmed on two of edges, as to continue the movement of the spinwheels, and then attached to the B side of the Lazy Days paper.  All the spinwheels were also glued to the page as if cascading from the top of the page.

And now to embellish the page.  First, I created clusters around the picture using some of the combo stickers, bits and pieces and 4x6 stickers from the collection.  The little mason jar sticker full of lemonade gave me the idea to create a mason jar of my own for this page.

Some white acrylic paint was used to add some color to one of the Maya Road Vintage Wood Mason Jar.  To pull more of the colors from the Summer Days collection, some water crayons were used to color the Medium Vintage Paper Flowers , and Ken Oliver's Small Vintage Paper flowers.  Once the wood jar was dried, a piece of Lime Green Jute Twine cording was wrapped around its neck, and all the flowers were then glued to the page.   I just love how the Maya Road products add that charming accent to the page!

To finish the page, the Alphas in the 4x6 stickers were used to create the title.  Oh! I really like the overall look of this page.  It is bright, happy and full of texture, in total a great fusion of both Simple Stories and Maya Road Products.

__________________________

The Hello Lovely Simple Set has quickly become one of my favorite Simple Stories collections (this far!).  This time, I set to use it to document a picture of my nephew and my daughter -yeah!, I used pink for a boy layout, and the results are lovely-.  

For this layout, I wanted to use as many of the patterns of the collection in one single page, so I pulled the Free Love cut file from Just Nick Studio to create the large title.   

Each letter in the cut out was then backed with the So Very Lovely, Fab-YOU-lous, and the journaling cards from the collection.   Once all the cut outs were backed,  i chose the So Much Happiness paper from the Life in Color collection to serve as the layout's mat.

This picture of my daughter and nephew is one of my favorites, and so fitting for the title and feeling of the page.  The 4x6 cards from the cut-apart paper were used as layers behind the picture.   The floral designs of the collection are so beautiful, so I used some fussy cut flowers and stickers from the 6x12 sheet to create a large cluster around the picture.  The little key charm from Ken Oliver Vintage Heart and Key charm from Maya Road fits perfect in this little cluster.

The beautiful Maya Road Pink and Red Vintage Paper flowers  were used to create clusters at the corners of the title.  The colors in the flowers matched perfectly those of this collection. 

In addition, the Ken Oliver Heart and Key charm from Maya Road add hints of gold, and complement the look of the title and the page.  

Finally, some pieces from the Faith collection Sticker combo were added around the page.  And as a final touch a few splatters of gold ink were added to the page, and to the Maya Road flowers.    

I love the simplicity of this page, and  how the Hello Lovely can easily be used to create a boy layout.  I am sure you all will also love this collection.

Thanks for stopping by!

__________________________________

Now for even more fun!!  Enter via the Rafflecopter widget below and we'll draw one lucky winner next Monday to win both a Summer Days & Cabin Fever collection kit!   

a Rafflecopter giveaway

After you enter, head on over to the Maya Road blog to see what their team has created.  

Want to follow Maya Road and keep up with all of their great projects & products?  Here you go!

Join us again here tomorrow for more inspiring projects!


SaveSave

SaveSave

Supplies

Hi there, Nathalie here with some new projects using some of the fun and beautiful collections from Simple Stories.  

This time i chose to document two different snapshots of my fun loving family!, and the new collections Cabin Fever and Emoji love were perfect to bring this pictures to live.  Let me show you:

TAKE A HIKE

My husband is passionate about camping and the great outdoors, something he has passed on to our kids.  For this picture of our family hiking around Lake Simcoe, I used the colors and patterns in the new Cabin Fever collection to complete this page.

To create the background, two cut files from the Cut Shoppe were fused together to create a compass. The  star in the middle of the compass was backed with vellum, while the two outer rings of the compass were back with the 'Roughing It', and 'Under The Stars' papers from the collection.  The compass was then glued to the right of the b side of the " Nature  Hike" paper, and trimmed to fit within the edge of the page.

There are so many coordinating embellishments in this collection, that i just had to use as many as i could to frame the picture.   I layered some of the 4x6  element cut-out cards from the collection behind the picture, and glued it between the N and W corner of the compass.   I created the first cluster at the center of the compass by using some sentiments from the Combo Sticker sheet, Bits and Pieces, and 4x6 sticker sheets.

A second cluster was created around the top corner of the picture, here i used pulled some of the beautiful flower chipboard stickers, the boot print brad, and some stickers and die cuts from the collection.  I love the brads from this collection!,  in fact I am hoarding a few of them in my stash!!

Can you tell I love cut files?  I used another design from the Cut Shoppe to create the title of this piece, I used the remaining piece of the "Under the Stars" paper to back the cut-out, and glued it below the picture.  I had to repeat the foot print design -as in the brad-, and chose the Chipboard stickers;   this time, a small cluster was created with some of the Bits and pieces, Combo sticker sheet and another brad ( i love the brads!!!). 

To finish the page, I trimmed a bit of the left and bottom edges of the page, and glued the entire mat to the "Summer Camp" paper from the collection.  I added  a few lines of journal around the perimeter of the compass to complete this page.   I love how i was able to combine the picture with the earthy tones of this collection.   Trust me, you need a bit of Cabin Fever to document your outdoorsy adventures!

 __________________________________________

LOL

This project is all about the super fun Emoji Love collection, and one of the funniest pictures of my 3 kids.   Sometimes the stars align, and you get that lucky shot, this is exactly how this picture came to be, and  the best way to document it was using all the icons in the collection.

The idea for this layout came after sharing this picture with my family overseas.   It all started from a camera snapshot, followed by the picture going to our family group, and then the reactions  are still coming in.  So, I started by recreating the camera icon in this collection.  I drew the image on trace paper, and used it to build the icon from papers from the 6x8 paper pad and some hand stitching.   This took a bit of time, as I wanted to add details, and texture to this element.

To make the colors of this layout shine, I opted to use white cardstock as the base.  I cut two wide strips of  "YAY" paper, and glued it to the sides of the cardstock; next  two strips of the "Too Cool" paper were cut ( narrower than the previous strips), and glued on top of the previous strips.   The finished camera element was then glued to the bottom of the page, and I used Chipboard stickers, die cut pieces, the combo sticker sheet , and brads to add the cluster on the camera.

To recreate the posting, I cut a speech bubble out of cardstock, and used it to frame the picture of my kids. It was then glued above the camera element, and lots of icons were then glued around it.  Since there is so many icons, speech bubbles and emojis in the collection, I pulled pieces from all the embellishments in the collection to create the clusters around the picture.  I even used the LOL chipboard sticker as the title for this piece.  Here is final layout:

OMG, this layout is just the perfect representation of  this social media post.   I love it!.   The emoji collection is by far one of the funnest collections to date.

I hope the two projects  here inspire you to document those fun family moments. The new Simple Stories collection are so diverse, fun, innovative that you can easily scrap from outdoor hikes to the common social media post.  The possibilities are infinite with the new Simple Stories collections.  I cannot wait to see what you create with them.

Thanks for stopping by today!

Supplies

Pages