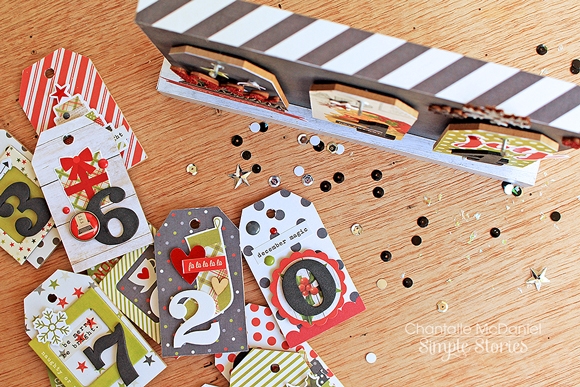
Hello again and thank you for popping in today, as I share this festive December countdown calendar with you. I’ve created it using a do-it-yourself tag calendar and some Claus & Co. goodies. It looks great on my mantle and my kids are having fun replacing the numbers as the days of the month go by.

After arranging the bits and pieces from the calendar I had a think about the amount of numbers I would need, as well as which papers and embellishments I wanted to use. I have been hoarding a sheet of ‘Charcoal Stars/Stripes’, as I just love the soft distress of this print. I think using the darker colour in the background along with the woodgrain print for the base has given this calendar a nice clean feel and I’m very proud to show it off in my home!

Here’s how I went about putting it all together:
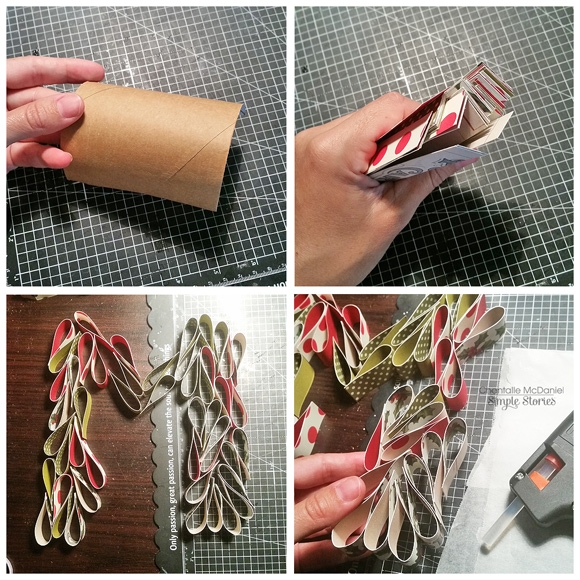
The calendar kit comes flat packed, so I separated al the pieces, sanded down the tags and had my husband drill some pilot holes for the hooks for me. For the base, I have used a sheet of ‘Oh Joy’, creating a faux woodgrain effect.
For the body of the calendar and the edges, I have used ‘Charcoal Stars/Stripes’. As you can see, I used Helmar 450 to adhere my paper to the wooden base. It’s one of my favourite adhesives. (For a lasting finish, it would probably also be a good idea to seal your project so it looks beautiful for years to come.)
Next I moved on to the tags. They come pre-punched which is great as it takes the guesswork out of making sure everything is even. I chose to use mostly Claus & Co. Sn@p cards to cover my tags, as the sizing was pretty much spot on and I had a great variety of prints and foil details to choose from. The Sn@p packs also come with some bonus die cuts too!

If you want to show a specific area of a print, a quick way is to just hold the tag and paper up to a light source so you can gauge the area you want to cover.
If you want to cover both sides of your tags, be sure to cover one side, then punch the hole while you can still see it, then cover the other side and punch again.
When all the bases of my tags were covered, I set about embellishing them.
The fun part!

The numbers 1 and 2 would be used a couple of times, so there were two for each of those, along with a ‘0’ and a couple of blanks ones, as I didn’t want to do the numbers 06 for Day 6 iykwim.
Here is the static ‘December’ tag. I’ve used some Claus & Co. wood veneer as well as some Bits & Pieces and cardstock stickers…

The veneer has been given a glittering finish. To achieve this I:
1. Coloured my veneer in using a red marker. This will give the base an even coat of colour and prevent show-through.
2. I then have it a good coat of Glossy Accents
3. Finally I gave it a good dose of fine red glitter. I thought it would dry with a more raised effect actually. Next time I will give another layer over the top!
Here’s a look at the rest of my tags. It’s the perfect time of year for a bit of sparkle!
A bit closer…
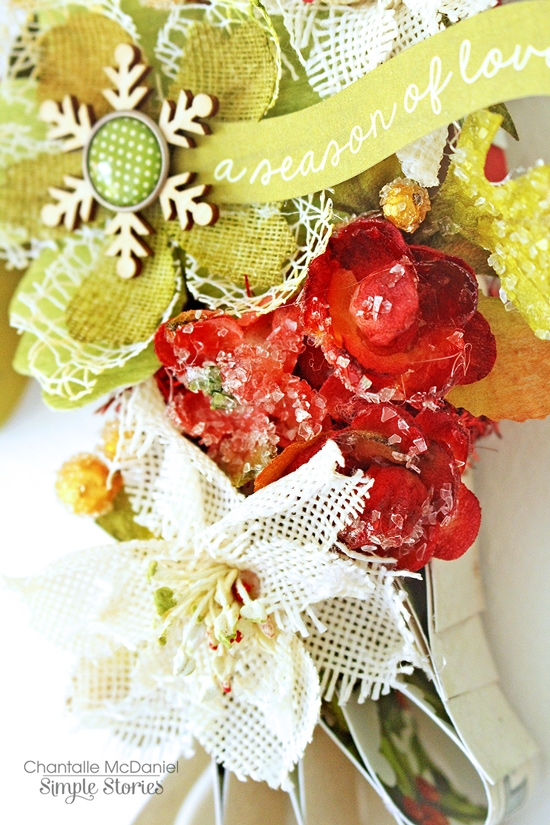
I’ve finished these off using Claus & Co. Expressions and Fundamental stickers, Bits & Pieces, wood veneer, Photo stickers (my current crush!) chipboard frames, brads and enamel dots.
I love how they each have their own little character.
The final little touches on the calendar were these adorable wood veneer snow flakes. I have again, used a couple of different markers to colour these. It’s quick and effective and a metallic paint marker is an easy way to glimmer up a plain piece.
This project would make a fabulous gift for someone special at this time of the year.
I hope you have enjoyed today’s post. You will find a list of materials used below. To keep up with my other crafty creations, you can find me over on Instagram @chantallemcdaniel. Thank you so much for stopping by!