Tara Chaussee's Blog Posts

Hi everyone! Tara Chaussee, aka SecretBees Studio, here to share my newest mini scrapbook with you! Colorado is a wonderful and near perfect place to go camping! I have lots of great memories of spending days in the woods hiking, climbing and fishing so I was thrilled to see the new Cabin Fever collection! Everything in this collection is absolutely cute and charming and has the best details!  Since I spent much of my camping days in tents, I thought it only fitting to create this adorable set featuring a tent and mini album!

I designed the tent to be a pyramid box and knew that I wanted it big enough to hold a small scrapbook. I cut all of the pieces from chipboard and then had the best time covering them with a mix of the awesome Cabin Fever papers and embellishments!  This tent is so cute and realistic- it even has mesh covering the windows and door! 

The tent is 6.5" square and stands about the same height. The four triangle flaps are re -inforced with grommets and tied together with rustic twine that unties to reveal the super cute mini scrapbook inside!

The mini itself is 4 inches square and has seven pages that are covered in more of the fabulous Cabin Fever patterned papers and fun embellishments! I tied the pages together with more twine and added a sweet trio of camping charms too! Inside there is a pocket holding some tags as well as two interactive pull out pages for even more camping photos! Take a look!

One of the tags is from the Bits & Pieces pack and I have added lots of details to both pages with the combo and 4x6 stickers!

The chipboard stickers are amazing and so realistic not to mention totally adorable!

Above is one of the interactive pull out pages made with some of the 3x4 journaling cards. I used a small sticker form the 4x6 sticker sheet as a tab at the bottom!

More adorable chipboard pinecones and flowers together with stickers from the combo sheet!

Smores are such an important (and tasty) part of camping! More great stickers and chipboard on these pages!

Oh so cute! The papers in this collection go so well together and have amazing patterns and details! It was such a joy to layer all of them together with the fabulous stickers, chipboard and bits and pieces to create this adorable little memento! 

Supplies

Howdy friends!  Layle here - happy Friday and happy day 5 of our week long Simple Stories & Maya Road Product Swap! 

Both design teams have swapped products & teamed up for some great inspiration all week long!

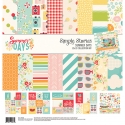
Today creative team member Traci Chaussee joins us with a super summery mini book with products from our Summer Days collection -

__________________________________

What an exciting month to get not only adorable products from Simple Stories but to ALSO get amazing products from Maya Road which I adore!  Of course I received a sweet Maya Road mini chipboard album so I knew it was the perfect time to combine it with the Summer Days collection for an amazing mini scrapbook!

The Maya Road Recollection Chipboard Binder is a chunky little book with 4 tabbed chipboard pages. I decided to not add any additional pages to the album but made each of the chipboard pages interactive with the adorable 'Summer Days' paper, chipboard, stickers and Bits & Pieces! Wait until you see all the fun inside!

The cover of this fun and colorful Summer album is pretty much dedicated to the Maya Road products I received! I used a large Ken Oliver metal button to create a charming 'knob' for the front complete with some hanging charms! I also made the long charm on the spine of the album using the sweet metal embellishments along with another tassel and a paper rose. These were attached to some jewelry chain with jump rings and then secured to the album from the inside with a twine knot.

I used the adorable mason jar stamp and die from Maya Road to create a mini mason jar shaker that I filled with small stickers from the 'Summer Days' collections as shaker elements! For extra shine, I added small glittery hearts and stars! Too cute! The die cuts a whole mason jar but I used an exacto knife to cut the center out and then covered it with acetate.

Of course, no mini album of mine would be complete without a pocket! I created this large one on the inside front cover by using two of the 4x6 vertical elements cut to size and angled for easier use! Even though these elements are already super cute,  I added on more with a sticker, chipboard flowers and enamel dots!

When I saw this Summer Bucket List on one of the 4x6 cards, I just knew it would be on the first page of this album! Who doesn't make a bucket list for the season?! For a colorful and interesting background, I cut out mini frames from the fun patterned papers and added stickers from the 4x6 sticker pack to the inside of each. Super cute!

For the second page, I used some of the journaling card elements to create a small flip book. The journaling cards were mounted on solid color card stock and embellished with stickers, chipboard pieces and ephemera! Adorable both closed and open!

I cut a section of the 4x6 vertical elements and scored them before folding them back and forth to create this fun pull-out section that is all ready for Summer photos. I took two decorative brads, snipped off the prongs and adhered  them together for a small tab and embellished the pages with cute pieces from the collection!

A large fishtail flag from the horizontal elements for this page! There is room for small photos on the front and then it lifts up to reveal more photo spots and charming embellishments! You can see some of the 'Summer Days' washi tape on the side of this page. Such a colorful addition!

For this page I made a large pocket from a square of the 4x4 elements that was cut to fit. I used two more of the 4x4 elements to make a double sided slide out tab that can hold pictures or mementos!

Another pull-out on this page, made with the cute 4x4 element cards. I used the smaller stickers to create the tab for this one and also to decorate these smaller pages! There is a rectangular pocket at the top of the page that is perfect for holding smaller journaling cards or photos!

Since there are so many super cute 3x4 journaling cards, I couldn't resist making a double flip book! Each section has a fun front and then space on the back for photos! I added in lots of the adorable chipboard and stickers to embellish this page!

More cuteness on the last page with a large frame ready for that perfect Summer photo! I cut 1.25" x 1.5" chipboard rectangles for the frame and covered them with the patterned paper before adding stickers, metal embellishments and enamel dots! A great way to end this super cute Summer mini album!

__________________________________

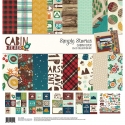
Now for even more fun!!  Enter via the Rafflecopter widget below and we'll draw one lucky winner next Monday to win both a Summer Days & Cabin Fever collection kit!   

a Rafflecopter giveaway

After you enter, head on over to the Maya Road blog to see what their team has created.  

Want to follow Maya Road and keep up with all of their great projects & products?  Here you go!

Join us again here tomorrow for more inspiring projects!


Supplies

Hi everyone! Tara, from Secretbees Studio here today with a super cute home project that is not only functional but looks awesome too! Sometimes we (our family) need a little reminder of the things that have to be done around the house. Using a regular picture frame and the adorable Simple Stories 'Domestic Bliss' paper collection, you can create a charming way to help them remember!


I picked up a simple 8x10 frame at my local craft store for this project. You can use any size, but this one is great for showing off the beautiful 'Domestic Bliss' papers and embellishments! You will also need dry erase markers for this - any color will do. Gather all of your supplies and get ready to make something awesome!

I started by using some of the letters from the 4x6 stickers to create a title for my chart. It's always a good idea to use a ruler, or another piece of paper to align your letters evenly! Once positioned where you want them, press firmly so they stay in place.

 
I also layed out  how I wanted my chart to look with the patterned papers, stickers and embellishments before I put it in the frame. The colorful weekly list is one of the 4x6 vertical element cards in the paper pack and worked perfectly! Keep in mind that if you are layering lots of paper together with thick embellishments, it may be harder to fit behind the glass.
 
 
The finished product is sweet and charming and so much better than the actual housework! My favorite part is the kitty sitting in the laundry basket with the sentiment 'Every Day I'm Launderin'. Too funny! I added some special touches to the outside of the frame using more of the chipboard, stickers and washi tape from the collection to make it even cuter!
 
 
Writing with dry erase markers is smooth and easy and will not leave any residue behind when you need to change things up!
 
 
There are so many adorable sentiment stickers in this collection that I couldn't resist using one layered over a label sticker to make a tag for the metal slot at the bottom of the frame.
 
 
A close up of the tag I made using one from the Bits & Pieces layered with stickers and chipboard! I just love the laundry basket brad in the center of the twine bow!
 
 
This home project was so easy and fun to create that I made another one for the weekly dinner menu! The 'Domestic Bliss' collection even has cute embellishments for that!
 
 
Once the week is over and you need to write something new in, just take a tissue or paper towel and wipe off the old. Easy peasy!
 
 
Thanks for taking the time to check out my project! I hope this inspires you to create something cute and functional for your home!


Supplies

Pages