Tara Chaussee's Blog Posts

Hi everyone! Tara here with Secretbees Studio! Due to popular demand, I have made another Traveler’s Notebook similar to this one that was a huge hit! However, because I used the stunning and gorgeous 'I Am' paper collection by Simple Stories for this notebook, I decided to make it more of a personal journal!

The 'I Am' collection is all about telling your own personal story and is full of beautiful images, patterns and uplifting sentiments. I was super excited about all of the rose gold foil accents in this collection- they are fabulous! This notebook measures 9 1/4 inches x 6 1/4 inches including the laminate borders. I used the pretty patterned papers to make the cover of my journal as well as some folders with pockets and charming inserts!

Included in my journal are some of the new Carpe Diem Traveler’s Notebook inserts so I will have plenty of room to doodle, draw and write. I dressed everything up with all of the exquisite stickers, chipboard and bits & pieces. There are just oodles of pretty things in this collection and they all coordinate beautifully together.

I know this collection has been around for a few months but I wanted to make something really special with it and really personalize it since it would be all about me! I felt so happy and empowered while I was making this lovely notebook since it has the most wonderful affirmations throughout the entire collection!

The most important story you have to tell is the one about you! Believe me, this soft and feminine collection will document your story in the most gorgeous way and will bring out all that is wonderful about you! Since so many people asked for a tutorial on how to make one of these notebooks I could not refuse! There is one over at my YouTube channel that I hope you will check out so that you can make one of these beauties for yourself!

Supplies

Hi everyone! It’s Tara from Secretbees Studio  One of my favorite things of summer are all of the beautiful flowers! I really enjoy creating my own pots of flowers and watching them bloom and blossom over the season. A little part of me is always sad to see them go so I created a bouquet of paper flowers that will last forever!

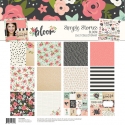
For this adorable paper cone bouquet I used the lovely Simple Stories 'Bloom' paper collection along with lots of the coordinating embellishments for a lush and full arrangement. The large flowers were cut with Silhouette cut files and large flower dies. I also stuffed in a few sweet rolled flowers made with some smaller dies. I attached my flowers to wooden sticks and then used hot glue to make sure they all stood up in the bouquet.

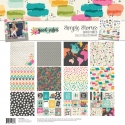
To go along with the blooms, I added in a few of the lovely stickers of the collection and highlighted them with other goodies like the 'Bits and Pieces' die cuts and small word sentiments. For even more charm, I added in beautiful paper curls made from the patterned papers!

The tag on the outside of the paper cone was made with a couple of the die cut pieces and I simply added a word sticker, a rolled rose and a bit of twine. I used a bit of thicker adhesive to add dimension to the tag before attaching it to the cone.  I attached a handle to the back of the cone to make this into a lovely door hanger I can enjoy long after my summer pots of flowers are gone!

Supplies

Hi everyone! Tara here with Secretbees Studio  I am always changing up my office and looking for fun and happy supplies and organizers to brighten my space. I have been searching for a new desk organizer but haven't been able to find the perfect one so I just decided to make my own! 

With it's vibrant colors and dazzling array of patterns, The Simple Stories 'Good Vibes' paper collection was the ideal way to add color and charm to my desk. I used medium weight chipboard for the organizer and gave it plenty of compartments to hold supplies. Mine measures 6.5" square which made it easy to cut the patterned papers to fit the compartments. Polka dots are one of my favorites and between the 12x12 papers and the 6x8 pad, there was enough to cover all of the inside areas. For the larger outsides, I mixed up the patterns and used some of the fun floral designs! 

To really make the bright colors pop, I then added a strip of the bold black and white aztec print around the bottom edge and used the smaller sized matching washi tape to accent the tops of the dividers. Then, using a combination of the bits & pieces, chipboard and combo stickers along with the 4x6 stickers pad, I embellished and decorated as many of the outside areas as I could for the cutest organizer around! 

I didn't stop there though! I jot down notes and ideas all the time on post it notes so I made a holder for those as well. Using a youTube tutorial and more of the awesomely delightful paper, I created this small box that holds my sticky notes perfectly! Of course, I had to embellish it as well with the stickers and chipboard! I love that the 'Good Vibes' chipboard fit so well on the top- looks great! 

I also made a small notebook with the collection, adding a 3x4 element card and a couple of stickers to the front, and covered some wooden pencils to match! Now I have a seriously cute organizer and paper holder that makes me and my desk very happy!! 

Supplies

Pages