"Happy" Layouts with Bloom & Grow
Hello Friends, It’s Kristine Davidson with you today. I am going to show you 2 of my latest layouts created using the Bloom & Grow collection. This collection has so many great colors and can be used for pretty much any themed layout.
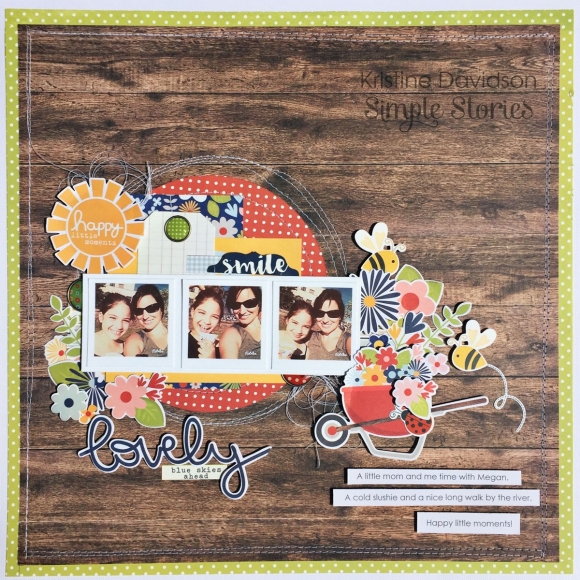
The first layout I'll be sharing is called " Happy Little Moments"

I started with the wood grain background paper called "Dig It". This as my base makes it easy to add assorted colors from this collection while not making my page too busy. I added tons of flower diecuts and subtitle using the word 'lovely' with a word sticker.

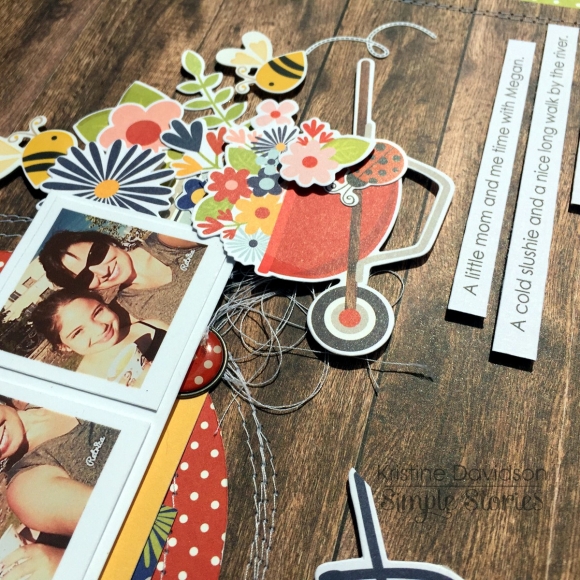
Adding some sewing to my layouts is something i've done for quite some time and the little thread bunched under my photos was inspired by Missy Whidden. I love the little extra detail it gives to my page. I usually add some form of twine but I avoided that this time and created texture with this thread.
Journal Strips are easy to do since I am more comfortable journaling this way compared to journal tags or other. I type my journaling on a word doc and print it on a 4x6 piece of cardstock and then cut up to make strips. Most of my layouts have this form of journaling.

I cannot leave a page unfinished without adding dimensions. Of course I used my dimensional adhesive under the flower diecuts! One must always use popdots!
_______________________________________________________________
My Second layout for you today is called "Happy With My Gnomies"

My nephew being so cute while hanging out with his mom and myself. He is at the age where he enjoys having his picture taken, so I'll take advantage of that for now ;)
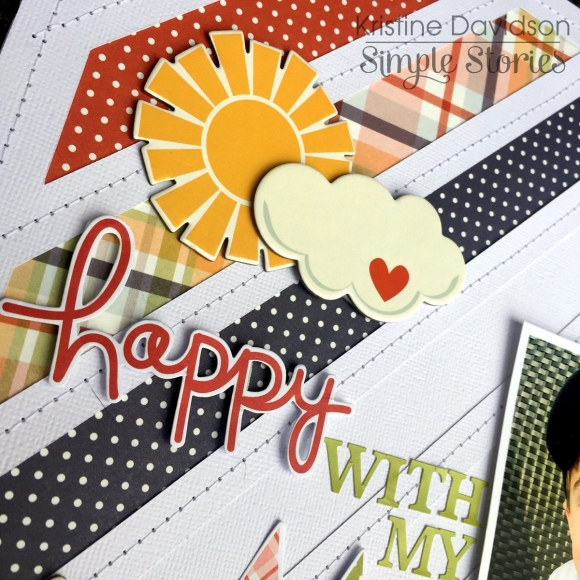
To start this page I used a diecut background that I created using my Silhouette Cameo. It's a simple background and so perfect to use some left over pieces of paper. I used a variety of colors and also a mixture of papers for this layout.
The little gnomes were perfect for that smiley face of his. I just felt like it added Fun to my page.

A closer look at the dimensions of my stickers and diecuts. You can also see I did some sewing on the cardstock alpha stickers, and the diecut background.

Adding chipboard pieces to a page can sometimes be challenging especially if you love layers or aren't sure how to position those larger pieces. Stack them! Add some popdots to one side of your chipboard piece and then the other side position it on top of your first chipboard piece. This creates dimension and looks great on a layout.
To see more of my work you can find me on instagram @KristineDavidson
Thank you so much for reading and being a fan of Simple Stories!


