November 2019 Blog Posts

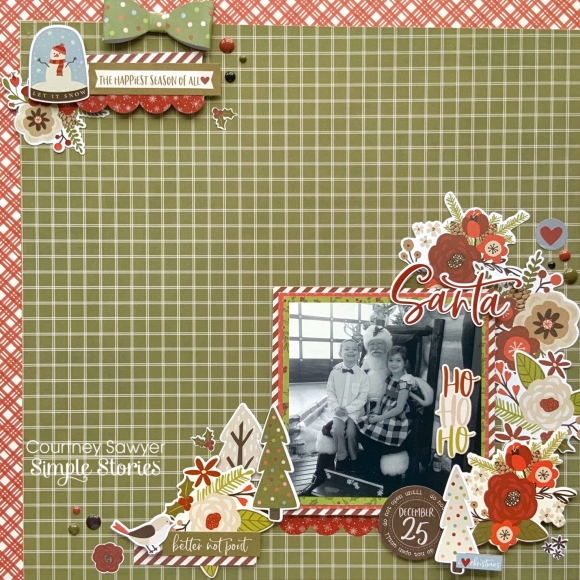
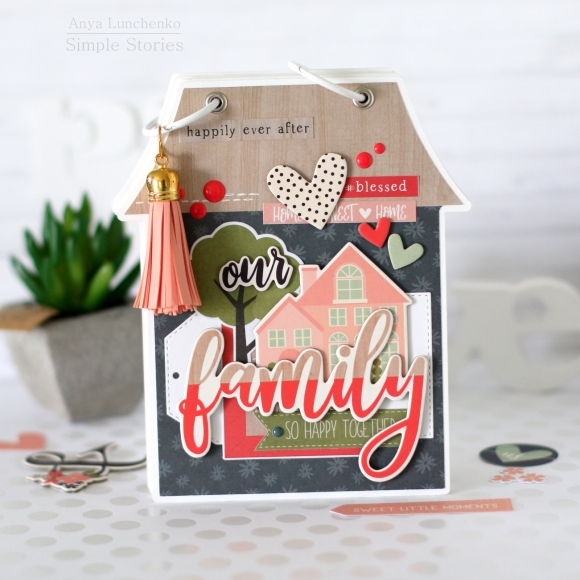
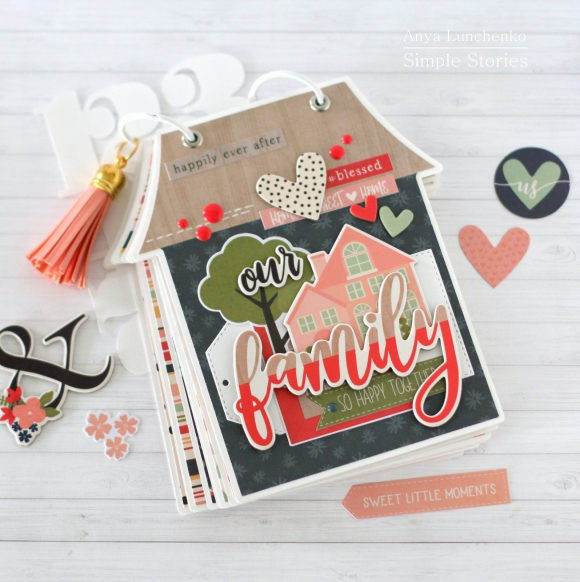
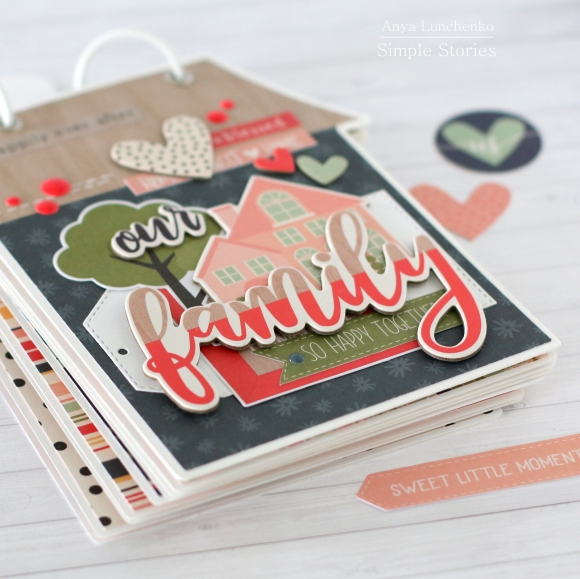
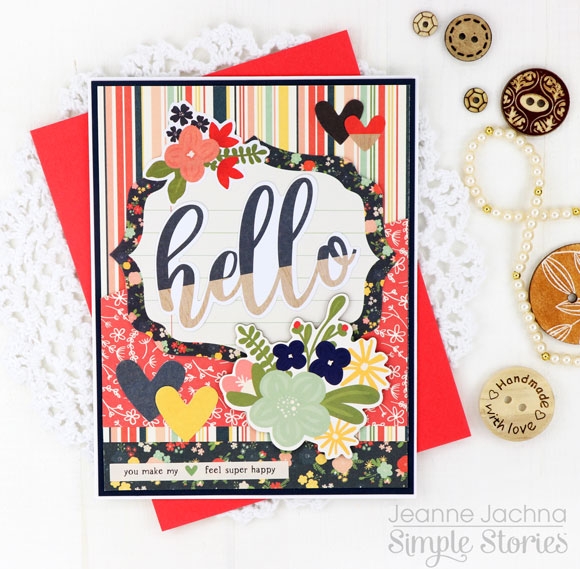
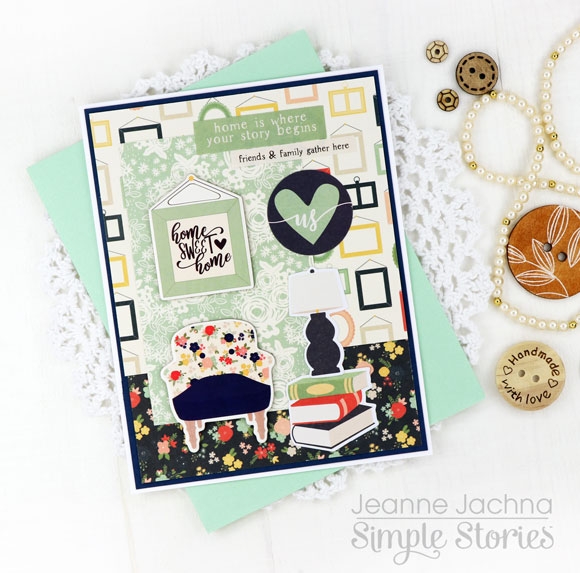
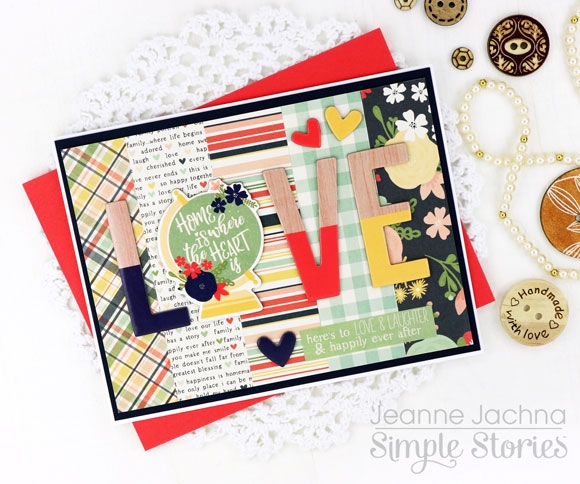
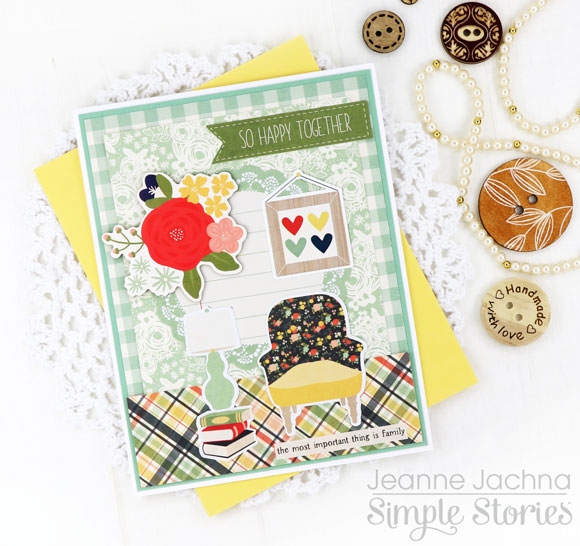
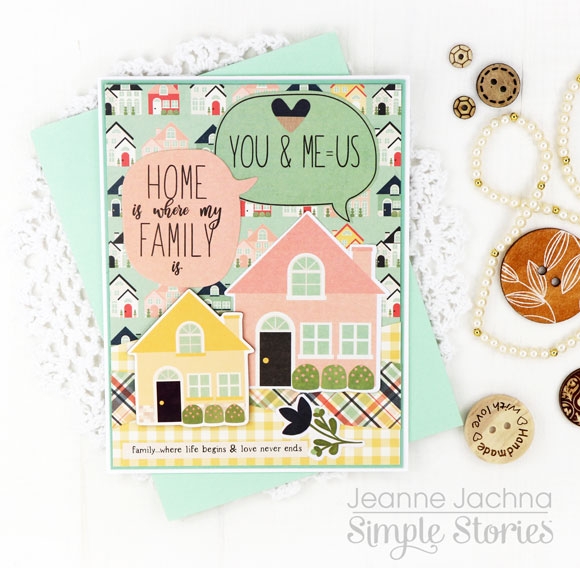
A big hello to you friends!  I hope you’re having a great day!  Today I’m sharing EIGHT cards made with the Simple Stories So Happy Together Collection.  This collection celebrates everything that makes a house a home.

That could mean welcoming someone to their new home, welcoming a new addition to their home or just celebrating the friends and family that make our lives complete.  Being told your loved never gets old.

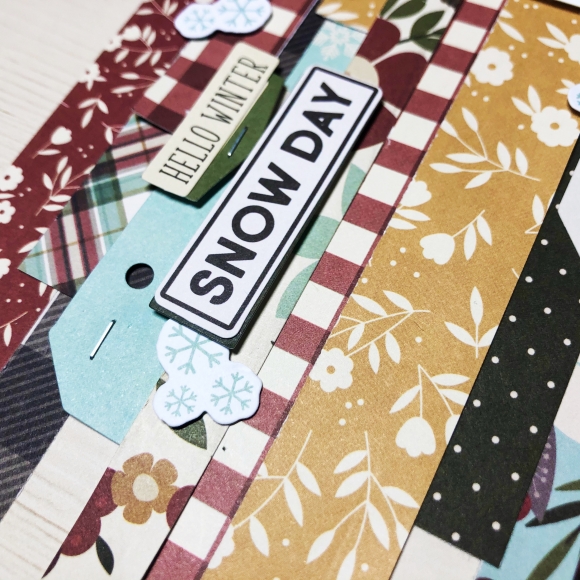
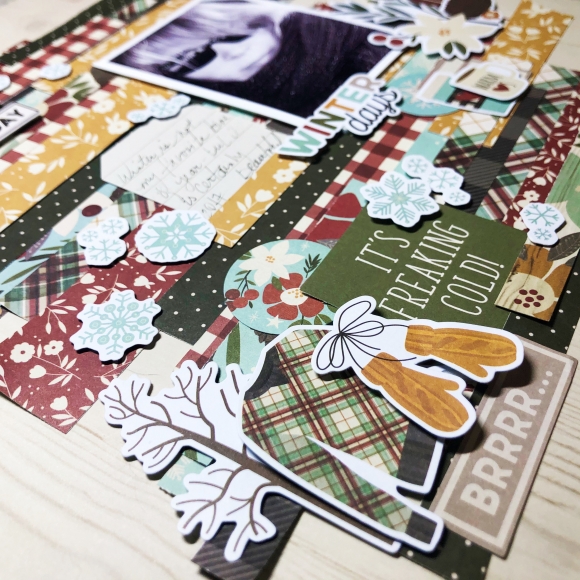
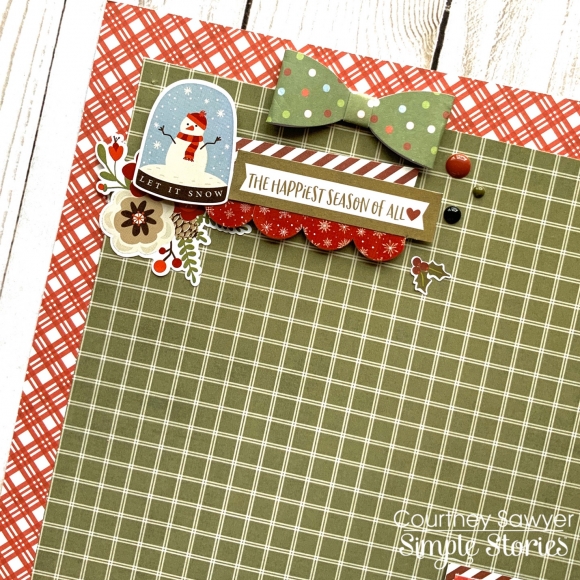
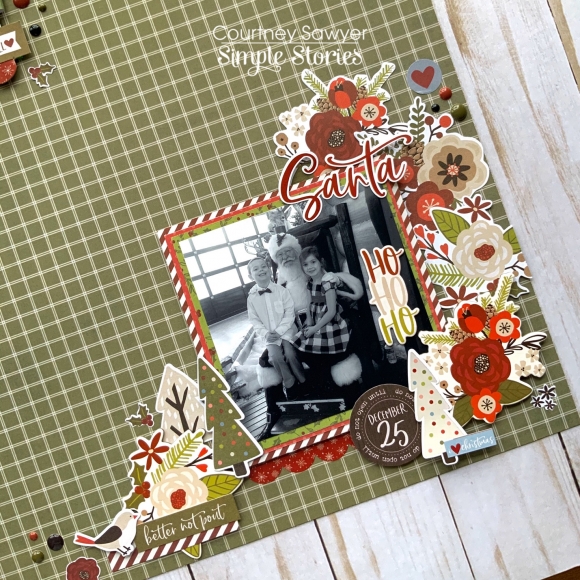
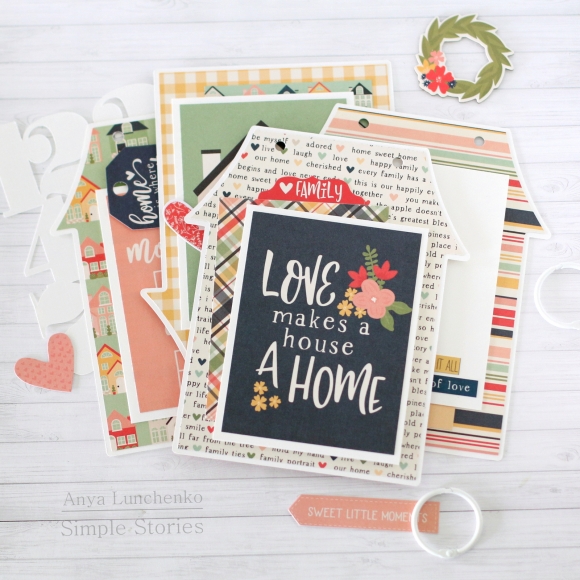
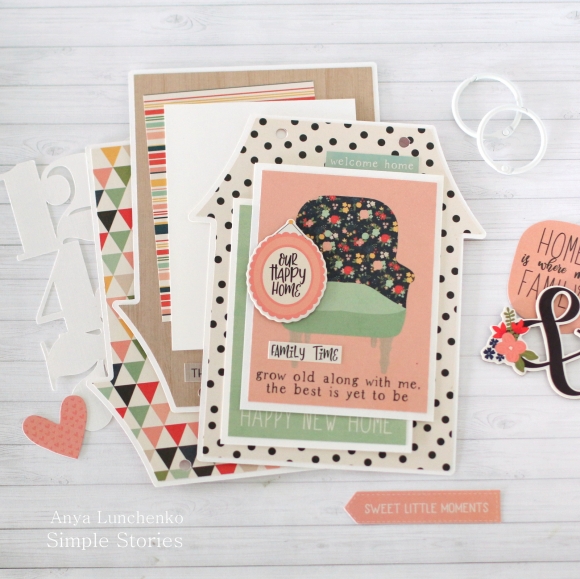
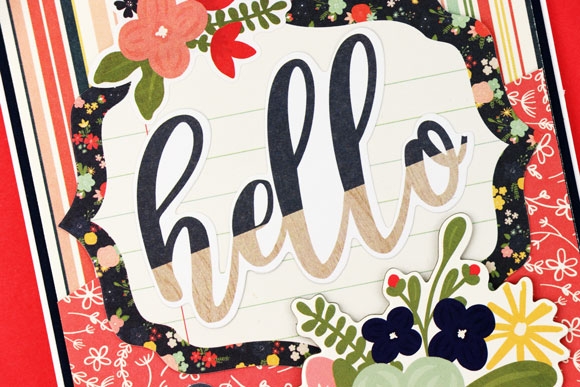
You’ll find lots of fun papers in this collection. florals, newsprint, plaids, gingham stripes, and more like this one covered with picture frames in coral, navy, yellow and mint.

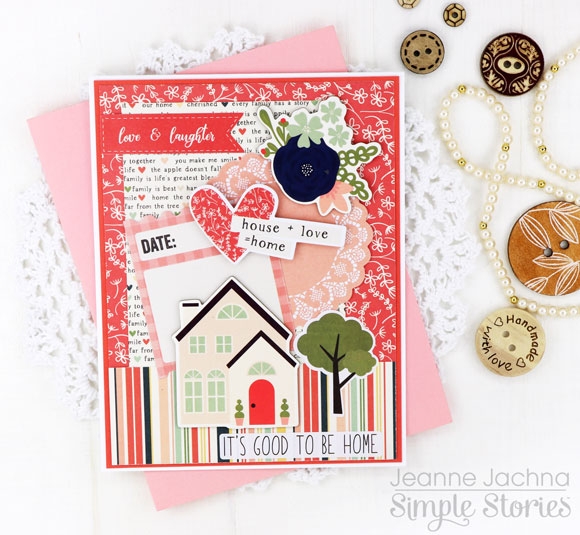
The collection includes Bits and Pieces printed and die cut images of homes complete with landscaping, flowers and comfy chairs.   You’ll also find journal Bits and Pieces great for personalizing your one of a kind creations. I love the clever sentiments printed inside picture frames!

The chipboard pieces are my favorites because they’re thick and add lots of dimension to your projects.  Because they’re stickers you just peel off the backing and you’re read to adhere them anywhere you like.

If you’re a card maker like me you’ll love the 6x8” paper pads.   If you cut them in half, you’ll have two 4 x 6” panels perfect for A2 card fronts.  The patterns are the same as the larger size sheets but in a smaller size scale.  The pads even include sheets of journaling cards.

The Paper Basics sheets are solid print papers ideal for layering under pattern paper backgrounds for a clean look.

These cards are great way to welcome someone new into the neighborhood, celebrate a new addition to the family or just show appreciation for those who mean the most to you in life.

It’s true, home is where the heart is and that means it’s wherever we find ourselves together surrounded by all those that we love the most. 

Supplies

Hi friends! It’s Kylie back with you all today to share another layout I have created. I’ve been having loads of fun with the ‘Winter Farmhouse’ collection.

 Often, I get jealous of my friends in the Northern Hemisphere and all the lovely falls of snow they receive. It very rarely snows in my corner of the globe down under, however this year it did! Perhaps saying ‘snow fall’ is stretching it, it was more like a dusting! Nevertheless, I had some great photos to scrap and knew this collection would be perfect.

I selected the papers ‘Hello Winter’ and ‘Warm and Cozy’ as borders to my background page, which was from the co-ordinating Simple Basics kit.I loved the combination once they were all layered together. Using a heart border punch from my stash I also created a decorative border from the ‘Brick/Dots’ paper to sit at the top and base of my layout.

As a feature to my layout I used a ‘Wonderful’ phrase cut file which was designed by Paige Evans. Using my 6 x 8 paper pad I backed each letter with a different paper print and once completed I adhered it to my background using foam tape so that it sat up a little for dimension.

With so much colour already in my layout I decided to print my photo in black and white. This also helps to still draw the eyes attention directly to your photo. I also kept embellishments to a minimal and used a few of my favourite chipboard stickers.

To complete my layout and add a little more balance I couldn’t resist adding the cute snowman sticker to the base of my design.

Thanks so much for stopping by today! I hope you have enjoyed seeing my layout and it gives you inspiration for your own scrapbooking.

Take care,

Kylie.

Supplies

It's time for our annual Black Friday Digital Sale! Find all of your favorite Simple Stories collections in digital format at 50% OFF! You're sure to find just what you need for ALL of your digital crafting projects! Visit our Digital Store today to stock up on your favorites and enter code BFCM2019 during checkout. Hurry! Sale ends at 11:59 pm MT, Monday, December 2, 2019.

Hi! Odessa here with some more Christmassy SN@P! inspiration. I used the oh so cute Say Cheese Christmas collection to work on a couple of pages in my December album. The colours are so much fun and it’s all so playful!

I really liked the 2x2 cards that spelled out Merry on the 2x2 Elements page so I made a fun page focused on them with some cute Say Cheese Christmas Bits and Pieces and Chipboard stickers in the additional pockets. On the other side I combined some fun pics (new Christmas mugs!!) with some of the whimsical elements from the collection.

The pinks and greens together in Say Cheese Christmas are so good. I like putting die cuts in the 2x2 pockets to add some layers by letting what’s underneath peek through.

Under all those 2x2 squares is a bright photo of macarons and some general holiday ephemera. Say Cheese Christmas is perfect for fun and magical holiday stories.

On the bottom of my colourful photo I used the festive banner sticker from the Combo Sticker sheet with a big word from the Bits & Pieces pack. It’s perfect!

On this page I have a recipe on one side and just some more holiday fun on the other. The left side of the page is more subtle in colour while the right side pops!

I used one of the 4x6 Elements cards to add in a recipe which has been so important to me in this album. Baking is such a big part of Christmas for us that there are pages dedicated to recipes we made so we can look back on them. This big journal card was the perfect size. The other embellishments and cards on the page are similar colours and designs to keep it harmonious.

On the other side I went bold and bright. This particular page protector has a long 2x8 pocket along the side and 2 4x4 pockets. I cut a strip of squares to fill the 2x8 pocket - it fits and looks great! Next to it is a 3x4 photo on top of a cut down 4x4 piece of cardstock with those festively fun banner stickers to anchor the corners.

I thought the combination of the 3x4 Element that said “Not a creature was stirring, not even a mouse” contrasted with a photo of my cat in front of the tree would be really fun so I used the Photo Flips. I used a tab sticker so it’s a bit more obvious to flip it open with the photo of my cat adhered to the same cardstock as used in the photo on the bottom. I added some stickers like that little Santa hat on top of her head to be a little more playful. The Hello Santa 4x4 card really finishes it off.

Supplies

It’s Kristine here today to share a layout I recently created using the Winter Farmhouse collection. 

I wanted to use so many patterned papers from this collection so I decided why not use them in strips. I took a few of my favorite papers and cut them in assorted sizes. What a great way to use many patterns and colours. 

I used the wood grain background to start my layout and then layered my strips of paper. I then added some Bits and Pieces to create clusters and add more colours to my page. 

This isn’t hard to recreate. You can also do this with leftover or any of your favorite simple stories collections! 

Supplies

I am so excited to share my very first Snap project and Oh my goodness I had so much fun creating my album. First off, I would like to show how beautiful this "So Happy Together" Collection truly is. The colors are so bright and cheerful. I fell in love with the yellow color so I decided to use the yellow stripe 6x8 binder
 
Just look at all these amazing papers. They are all so pretty. The  color combinations are pretty amazeballs.
My family is everything to me so this collection is perfect for memory keeping for my family's adventures. I will be adding more to this album in the future. I would love to fill these pages with photos and memories.
I really wanted the word "family" to stand out so I created a very simple cover for my album.

 I cut out these 2x2 elements from one of the 12x12 papers. I just arranged them how I wanted. Super easy to do.

 Most of the paper elements I used are from the 12x12 papers that I cut up.

 Tags, tags, and more tags. I decided to cut up small tags and inserted them inside these 2x2 pockets. I also added eyelets to add dimensions. I just thought they look really pretty and I can add photos or journals later on.

 I made this large tags from the basic kit papers. By adding the twines, it will make it a lot easier to pull out the tags.

 You can have so much fun with all the different sizes of pocket pages available.

 Home is where the heart is.

Thank you for stopping by and viewing my very first Snap project. I promise you that you will be seeing more Snap projects from me as I am totally addicted creating them.


Supplies

Hey y’all, Courtney here. Today I am up on the blog sharing a layout that I created using the Holly Jolly line. I used two 12 x12 sheets of paper to create my background, Holly Jolly and Peace and Joy.

I layered a few of the papers from the 6x8 paper pad behind my photo to add a little more color. Then I used a ton of the gorgeous florals from this collection to frame out my photo. I wanted to use all of them, but I decided I should save a few for another layout. I used the florals from the ephemera pack, the combo sticker sheet, the 4x6 sticker book, and the chipboard.

 For this layout I decided to create two clusters. One is a combination of ephemera, the combo sticker sheet, and the 4x6  sticker pad as well as one of the adorable paper bow clips that coordinate with this collection. I just love all of the snow globes and wanted to incorporate one in this layout. My second cluster is centered with my 4x4 photo. I used this adorable photo of my two oldest with Santa.

I hope you enjoyed the layout that I created using the Holly Jolly collection.

Supplies

Hello friends and family! Don't you agree that those two words are so important in our life and for that reason need to be documented more often? How about a cute little mini book? Anya here today and I am happy to share my scrapbook obsession – a mini book!

To create this mini album I started with a house shape. I downloaded mine from the Silhouette store, but if you don't have a digital cutting machine you can print a shape, fussy cut it and use it as a template to cut all of your pages. Digital cutting machines are helpful, but it didn't stop me from making shaped mini books when I didn't have one.

I covered all of the pages with coordinating patterned papers and decorated some them with different elements, leaving some of the pages blank for the freedom of photo placement. As always, one of my favorite ways to add more photos to a mini book is to add a small “card”, which has a 3x4” element piece on the front panel and has spots for two photos when you open it.

My favorite elements to decorate the cover for a mini book are chipboard pieces! They withstand the wear and always look awesome, adding details and depth. I hope you'll find some time to make a similar mini book soon, but I must warn you: creating these may become addicting, just like it was for me! Thank you for visiting and we hope you will stop by again for more inspiration from the Simple Stories team!

Supplies

Pages