November 2019 Blog Posts

Hi friends! Nicole here today to share a project with you using the Say Cheese Christmas collection. I just love the whimsical patterns and bold color in this collection and it is perfect for capturing those fun holiday photos!

I decided to use a lot of the patterns in this collection in the bold title on my project. I diecut each letter on my digital die cutting machine and then popped them all up with foam adhesive onto my page.

The fun mix of patterns adds a lot of color and whimsy to my project, without taking away from the photo on the page. I added in some fussy cut pointsettia flowers amid the title to fill in some open areas.

I finished off the page with a striped paper to bring together all the colors on the project and balance out all the fab color on the page!

Supplies

Hello there, so who’s feeling Christmassy? I’m starting too, for me it’s the smells that get me in the mood, the Christmassy scented candles, the gingerbread lattes, the mince pies!! I thought I’d start my Christmas preparations by decorating the 6x8 SN@P! binder that I’m going to use for documenting our Christmas memories. I’m using the red SN@P! binder and decorating with the Holly Jolly Simple Stories Collection. 

These binders come with chipboard dividers included and are so easy to decorate using the 6x8 paper pad.

I simply just glued a sheet onto the front of the binder, and used a ‘tab’ sticker from the 12x12 sticker sheet.

Then I decorated each one by layering up a 3x4 element and of course, you guessed...I drew around each layer with a black fine tip pen!

To add a little more detail I chose a floral sticker for each divider and also used a few enamel dots! Easy Peasy! To decorate the front of the binder, I did exactly the same...so simple!! The only difference is I used a 4x4 element and a chipboard floral piece instead of a sticker. Now I’m all set, ready to start filling my SN@P! binder!


 If you would like to see more pictures using Simple Stories products then checkout my IG account  Heartsbyemma (@heartsbyemma) • Instagram photos and videos

Supplies

Hello, it’s Cara here today with a fun layout with the adorable Holly Jolly collection! If I am able to get a photo of all of my 6 children with no one making a face (… almost), I’m going to scrap it, and that’s just what I did here!

I layered lots of pretty papers from the collection to frame the photo and then I just had fun putting as many pretty embellishments on this page as I could. I stopped just before it started looking like an elf throw up on it. 

Since it’s an Advent calendar themed page, I used the countdown numbers from the Mini Sticker Tablet along the bottom but using the larger ’25’ from the other number set in the same sticker book. Since the children all have their advent calendars still wrapped in the photo, I mimicked those gifts by stacking a few present stickers in a cluster in the corner.

I love all the chipboard pieces in this collection so I sprinkled a few throughout the layout, Pairing them with stickers and die cuts, is a great way to add variety and depth to your layout. And besides, you can never go wrong with a gingerbread man!

This fun and festive collection is really easy to add a little Christmas cheer to your page. 


Who is excited to start their advent calendar on December 1? I sure am!

Supplies

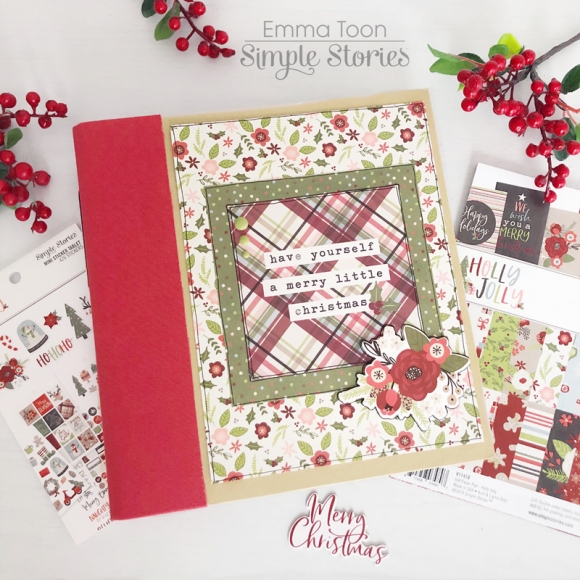
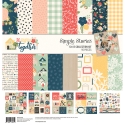
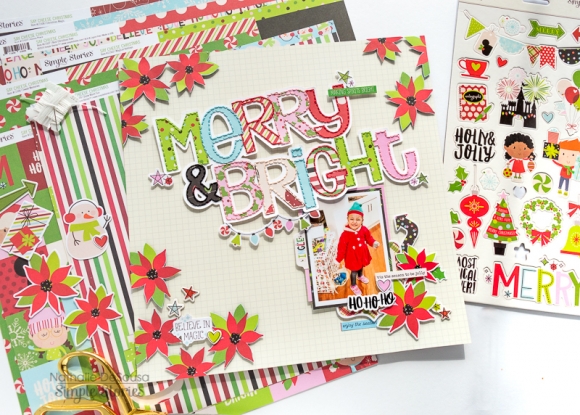
Hello Friends! It’s Dorymar back on the blog today to share a beautiful 6X8 Sn@p Album I designed with the stunning So Happy Together.   I fell in love with this collection as soon as I saw it: flowers, hearts, pastel colors, they work beautifully together! This collection is perfect to document memories of your family and friends, so here is my fun project!

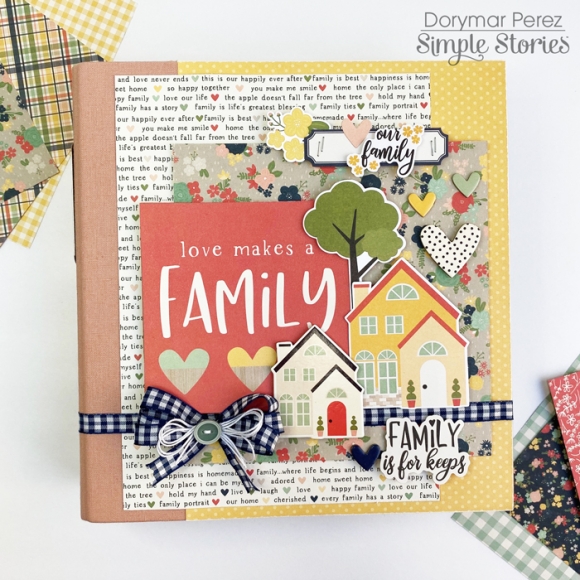
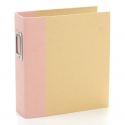
This collection is full of beautiful pastel colors, that's why I selected the new 6x8 Blush Sn@p Binder, because it combines perfectly well with the collection.

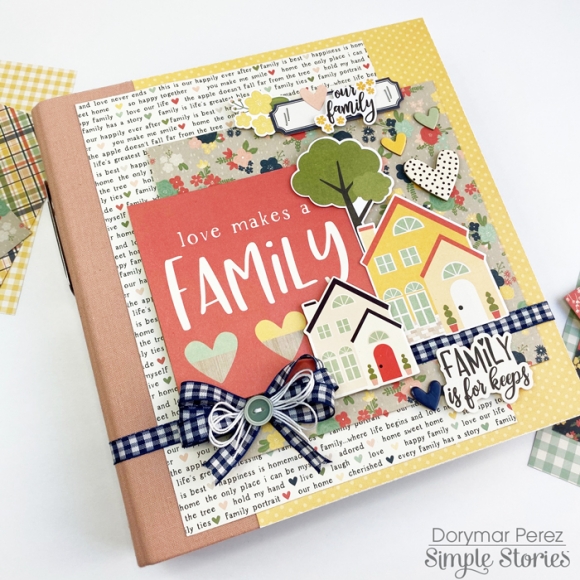
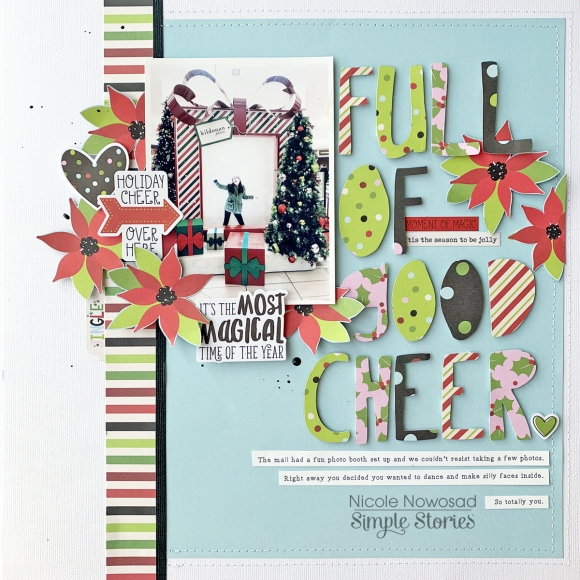
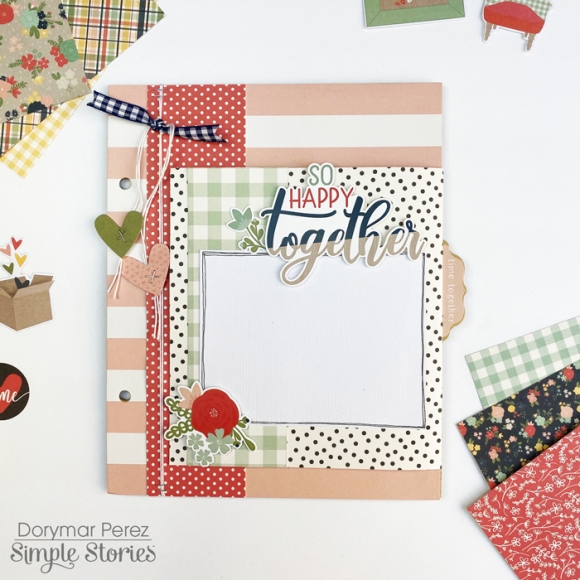
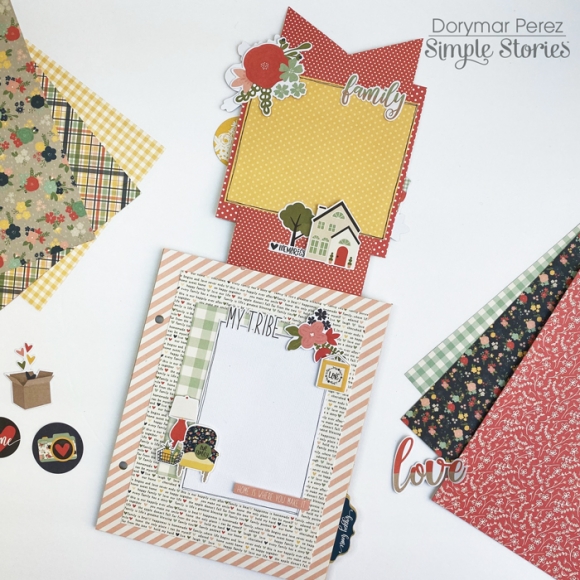
The collection is dedicated to home, family and friends, on the cover I wanted to capture the main theme for what I’ll use this project, THE FAMILY. I used several elements of the collection to make the perfect combination. On the cover I used 6x8 papers, die cuts of the ephemera packs, chipboard, 3x4 journaling cards, etc.  All are glued with foam tape to create layers and each element can stand out perfectly.

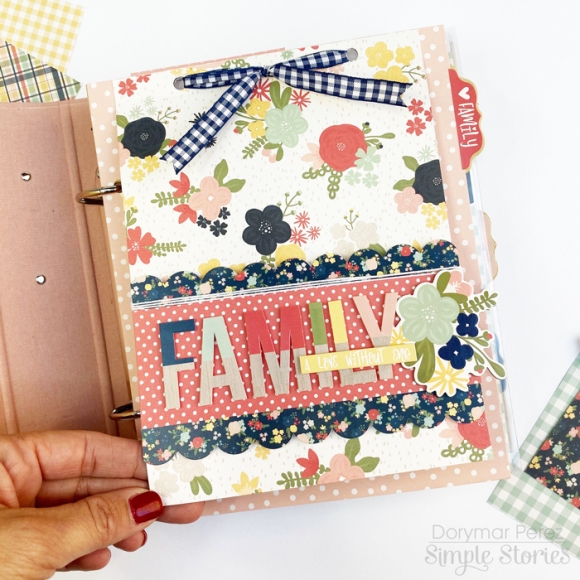
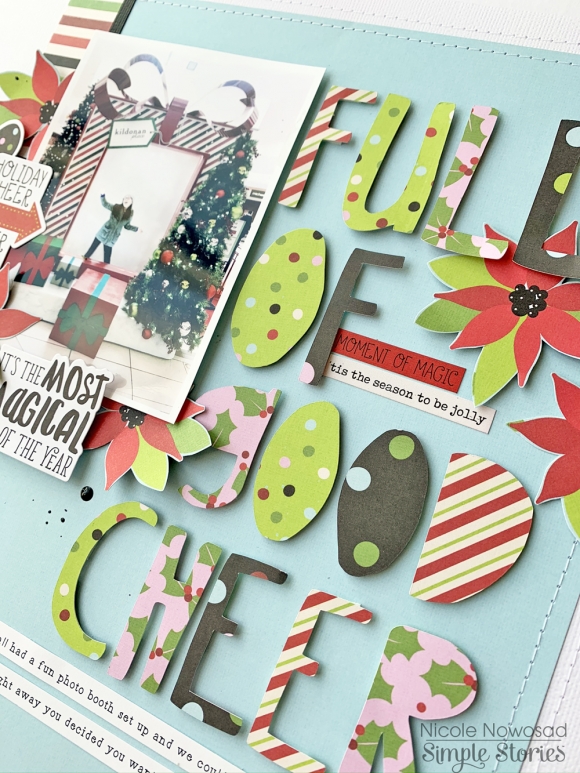
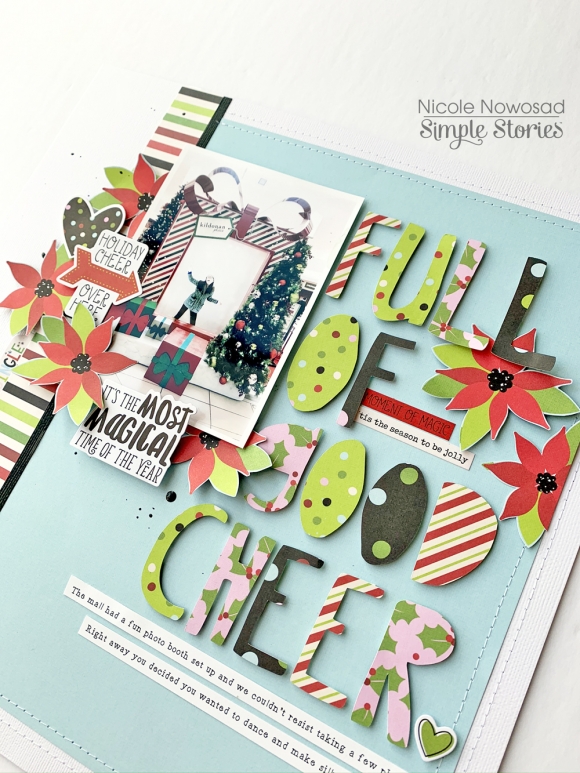
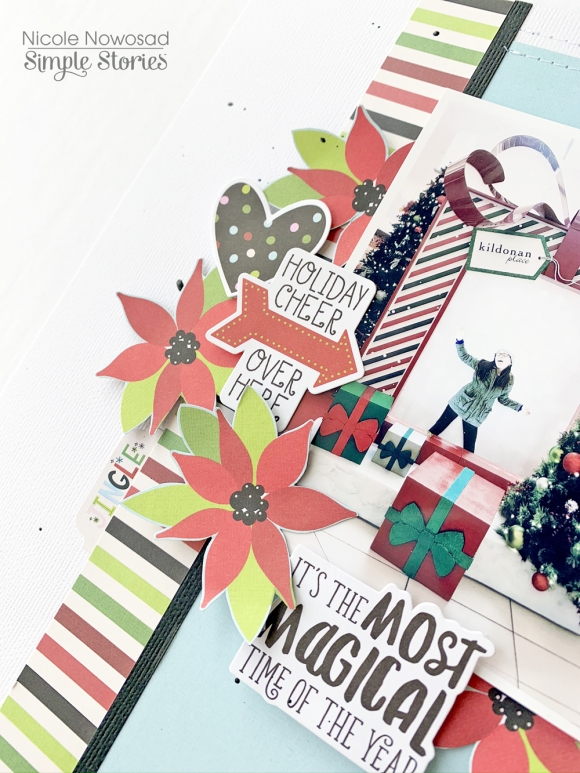
For my first page I created an open up flap using the Sn@p page as a base and a 6x8 patterned paper from the 6x8 Paper Pad. I created two holes at the top of the page to add a beautiful ribbon, I selected the FAMILY word and a cute sentiment from the Sticker Sheet as a title.  I added cute bunch of flowers and white twine to finish it up!

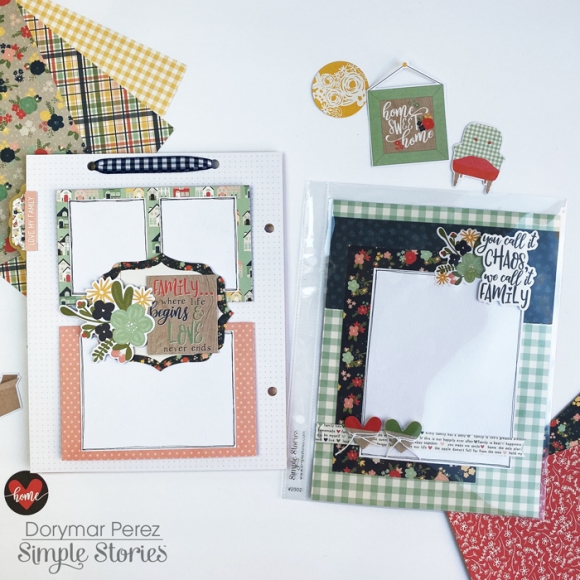
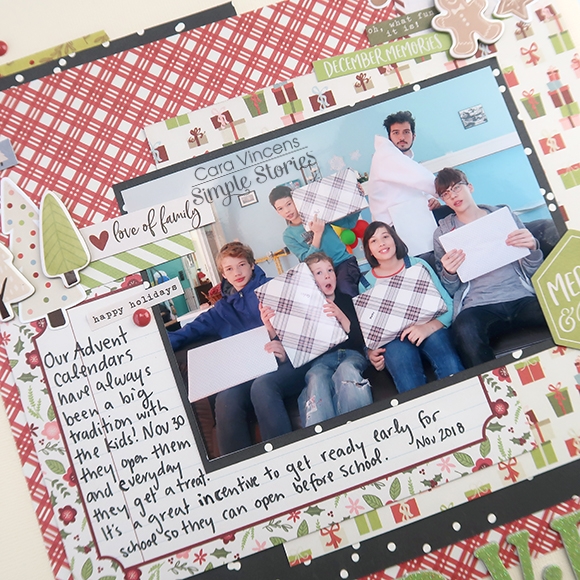
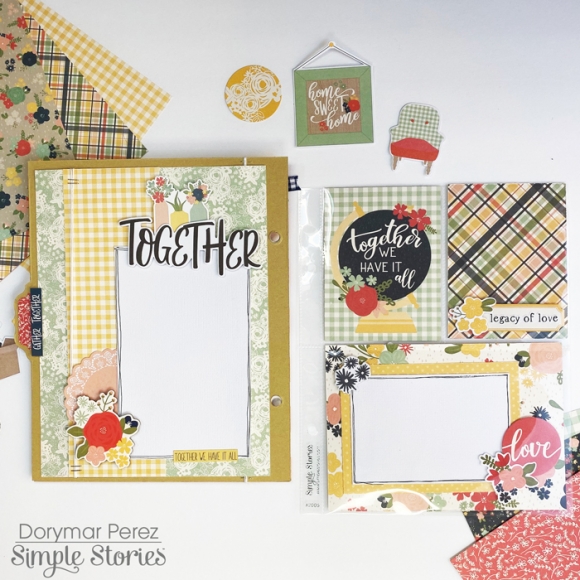
On left page I added two removable mats using magnets. On the top they have space for photos and on the back there is space for the journal. For the layout on the right, I used as a base one of the 6x8 patterned paper, I cut different sizes of paper to create fun layers behind the photo mat.  I decorated around with stickers.

 I used some embellishments from the collection to create small cluster in the center of the page. They match perfectly together.

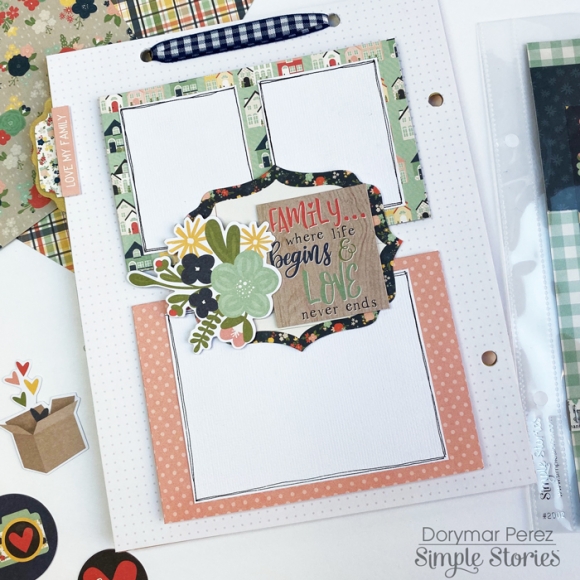
I love to create a different size of pages inside my albums, on the right page I reduced one of the pages of the album to 4.5 and used a 4x6 journaling card as a mat for the photo. Around it I incorporated messages from the mini sticker tablet, die cuts and the beautiful family word from the chipboard stickers.

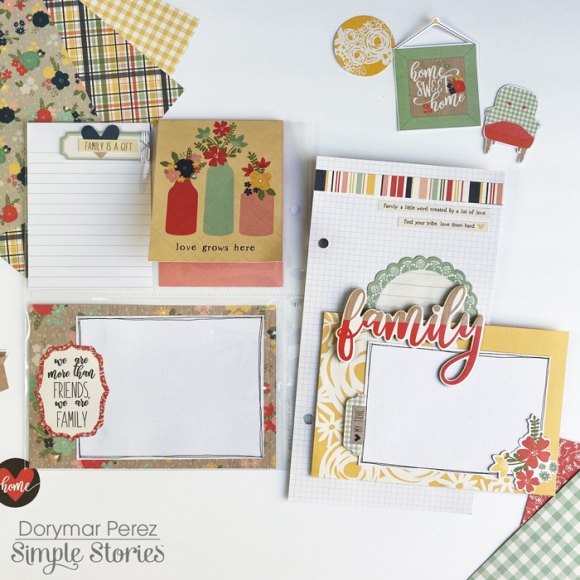
On the back of the page I created two pockets.  To made them, I glued the 4x6 card from the front of the page with a pocket to the side and on the back, I glued the 4x4 card creating a pocket on the top. I used several paper sizes to create the inserts and tag.

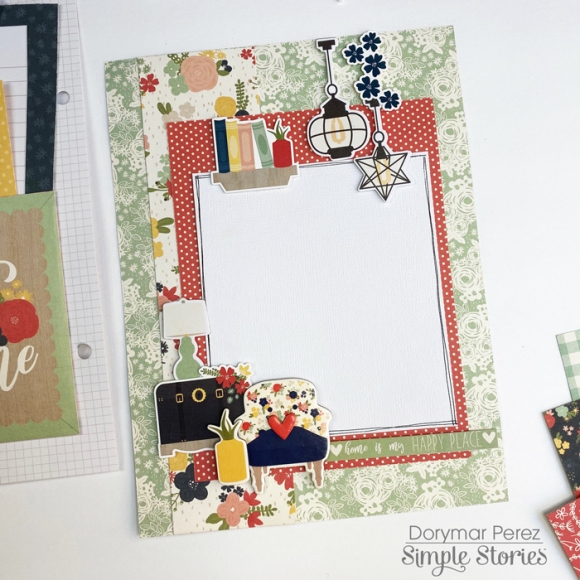
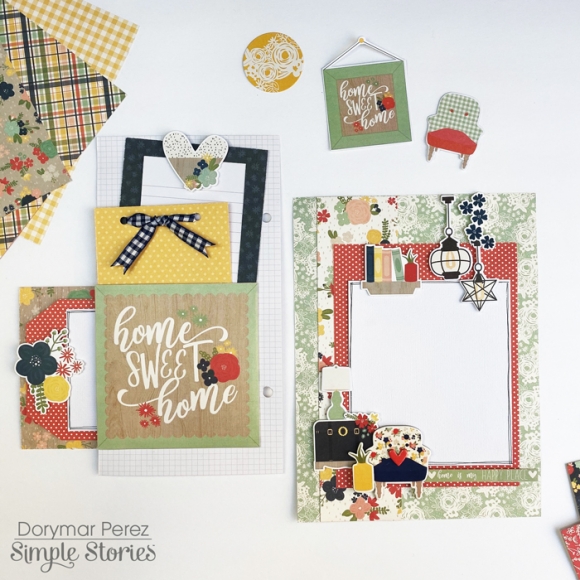
The collection has many cute house elements, for this layout, I created clusters with the embellishments of the collection to simulates a house living room. They look super cool.

Since I love to have space for a lot of photos, I added a few flaps.  This gave me more space for extra photos.   

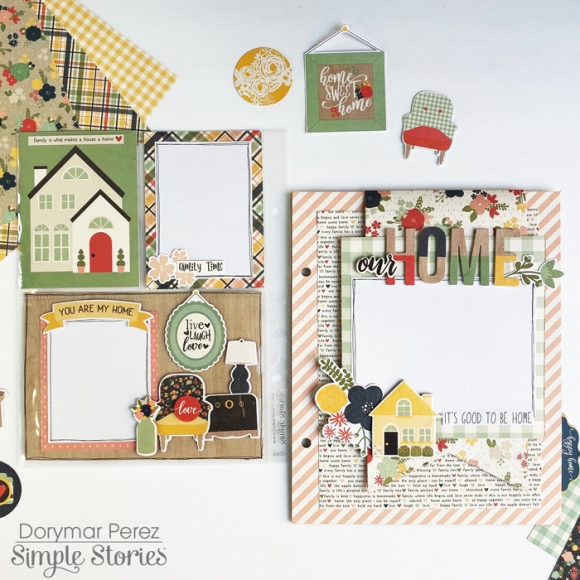
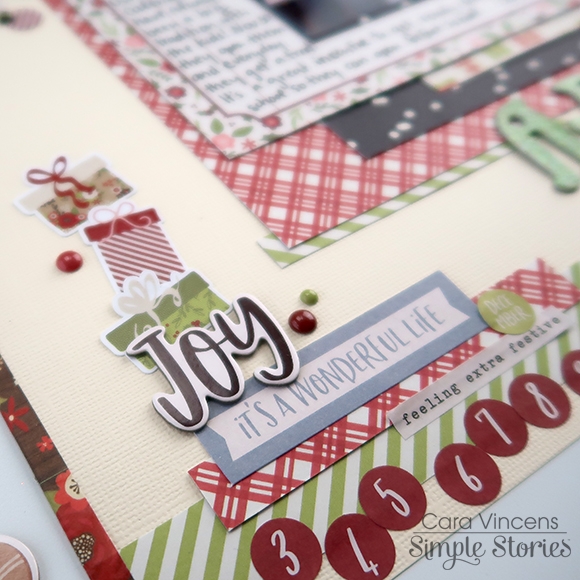
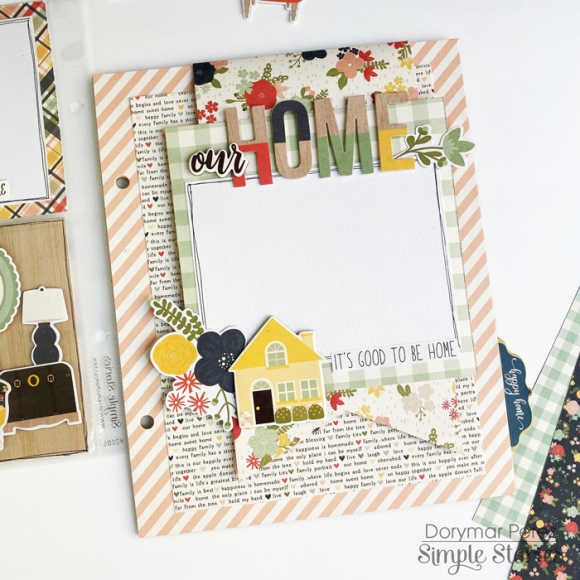
These two pages are ones of my favorites because I love the patterns, the colors and, the embellishments.  I was able to use many of my favorite beautiful elements of the collection and it has space for many photos.

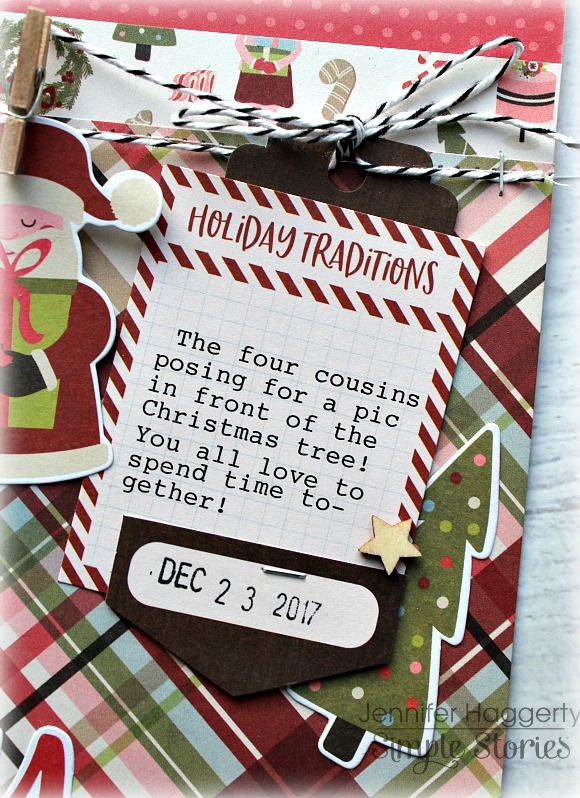
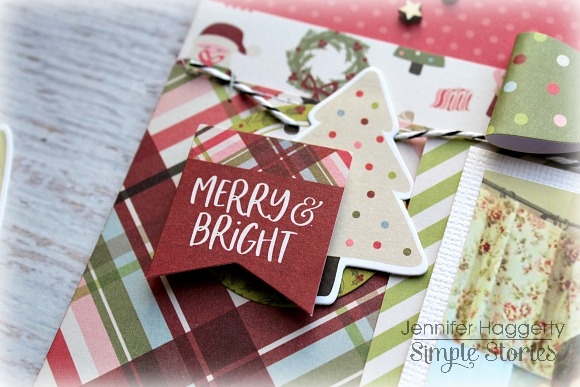
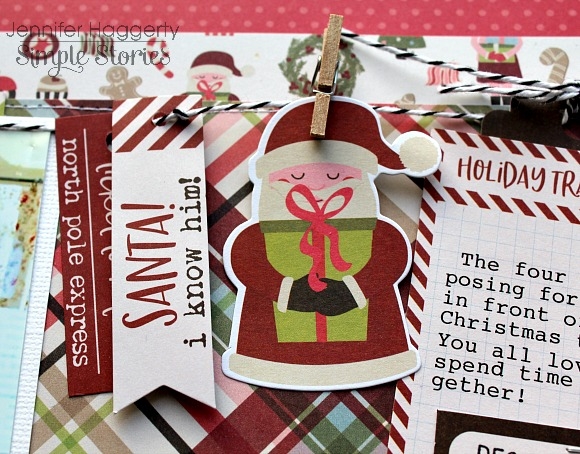
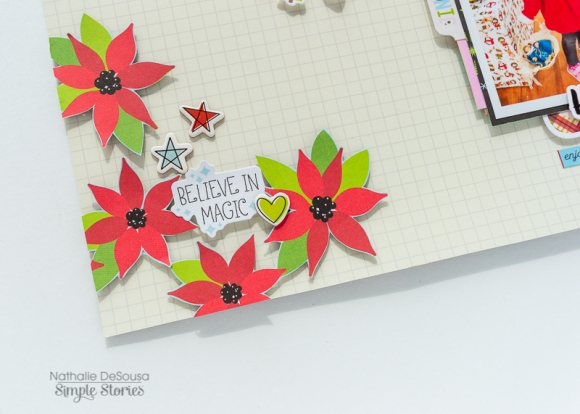
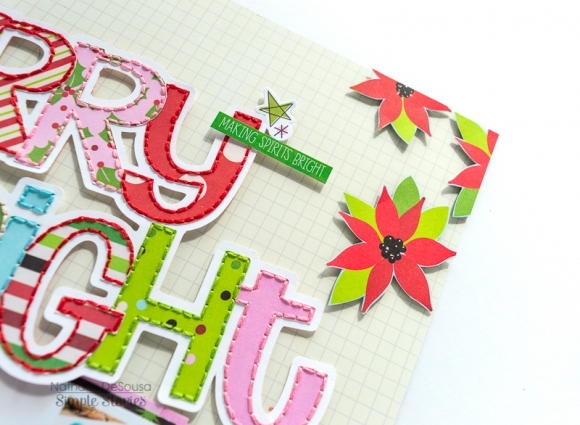
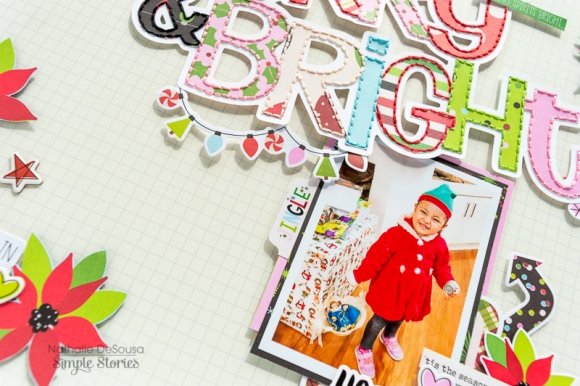
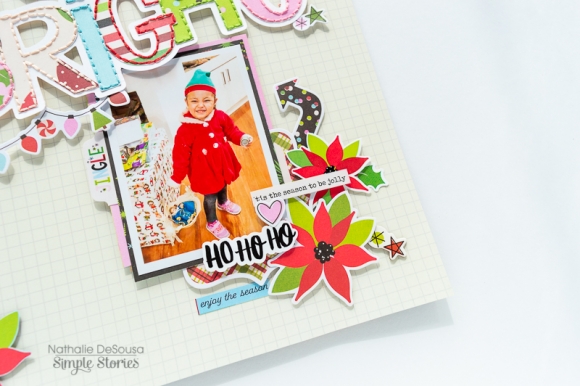
Here are a few close-ups of the spreads.  As you can see, I used many of the collection’s beautiful embellishments.

I hope I've inspired you to document your home and family memories in a fun snap album with the fantastic So Happy Together collection.

Supplies

Every year I look forward to the Christmas cards that come from family and friends. It's a wonderful way to send a small "gift" to someone each year letting them know that you are thinking about them and are grateful for the impact they have had in your life, even if you haven't seen then for awhile!

Hello! It's Jana Eubank and today I wanted to share a few Christmas card ideas using the beautiful Country Christmas collection.

When I am designing cards, I like to design the focal point of the card first and then move backwards to the paper layers and card base underneath.

I spread out the embellishments I plan on using over the surface of my desk. It looks best (and is the most fun!) to combine a variety of materials, like paper die cuts, stickers, and chipboard elements. From there, I shuffle things around, auditioning pieces in different ways to create a variety of embellishment clusters. Sometimes I start with a 3x4 card or a frame as a background; other times I choose my favorite Bits & Pieces die cut that I really want to use as the focal point of my design. The fun part is playing around and combining things together. Don't overthink it too much. Listen to your creative heart and go with the flow!

Once I have my clusters and focal points put together, I am ready to decide what size card base I should put them on. I try different colors of paper layers underneath each clusters and add decorative paper strips as colorful accents. My final step is to add additional detail, if needed, like twine, enamel dots, or buttons.

I hope you'll give this technique a try this year! Turn on your favorite holiday album or Christmas movie, keep a mug of hot cocoa nearby, and spend the afternoon playing with your supplies! It's a great way to create special cards (gift tags, too!) for loved ones.

Merry Christmas!

Supplies

Hello friends! It's Jennifer on the blog to share another awesome Simple Stories Christmas collection! Holly Jolly includes the traditional red and green holiday colors along with touches of pink and black for contrast  I  began with the Red/Dots sheet from the Simple Basics Kit as my background. I then adhered the eye catching plaid of Cozy Christmas along with Oh What Fun in the middle of my page. 

 I  used the whimsical die cut words from the Bits and Pieces pack for my title; they look perfect adhered right next to my photo! For accent, I  added a few Enamel Dots as well as wood veneer stars from my stash. 

I  wanted to document a favorite Christmas Eve photo of my kids with their cousins from a couple years ago!  The Journal Bits and Pieces includes these little half circle sentiments that are perfect to tuck under pictures or other embellishments! I  also added two sentiment stickers found on the bottom half of the Combo Sticker sheet. 

Once I  adhered my photo, I  created a banner of sorts with bakers twine and embellishments from the collection! I  combined three pieces in the Journal Bits and Pieces to create a tag for my journaling.  I  adhered a cute multi-colored Christmas tree from the Bits and Pieces behind the tag to add dimension.

I  love the little pennants with sentiments from the Journal Bits and Pieces! I  adhered one with foam tape layered with a journal circle and multi-colored tree.  I  used a hole punch on the circle so I  could string it through my bakers twine.  

It was tough to decide on which die cuts to use as there are so many cute shapes and sentiments!  Here, I  affixed this Santa with a mini wood clothespin to my bakers twine.  

Thank you for stopping by the blog today! Check out Holly Jolly in its entirety by going to the Products page! Plus you can see what's coming soon from Simple Stories! Have a great day!

Supplies

Hi everyone! Tara here with Secretbees Studio.  Cold weather and snow may be here again (ugh!) but that means staying inside and crafting with beautiful paper collections like Winter Farmhouse. It's full of rich colors and great patterns in wonderful wintry images.

To show off this gorgeous collection, I made an adorable mini album that also adds charming Winter decor to your home! This tri-fold mini measures 6x6 square and folds out to three sections on each side. It will hold a total of five large photos of your favorite snowy memories! Here is a photo of the album opened up to the inside.

The other side has the cover and two additional sections for photos. Each page has been decked out in a mixture of the gorgeous patterned paper and embellished with the darling winter themed stickers, chipboard and sentiments!

Once you have viewed all of the photos in this super cute album, just fold it back up and display it with your other winter decor. It is created with a fold at the bottom so it stands perfectly and looks awesome!

Supplies

Hi there Simple Stories friends!  Nathalie with you today with a new project that brings the joy of the Christmas season to a layout.  When I saw the new  Simple Stories Say Cheese Christmas, I knew that the colorful designs and papers will be perfect to document this picture of our Goddaughter as an elf last Christmas.

I started by creating a fun title for the page. I chose an alphabet from the Silhouette store, and cut each  letter from different papers from the Say Cheese Christmas collection.  In addition, I arranged the letters in order -for the title- and created an offset around the words.  I cut this offset from white cardstock and used it as a base to handstitch the letters of the title together.

For the background of the page, I chose the Sn@p Basics Hickory/Cream grid paper . I chose to fussy cut a few florals form the Making Spirits Bright paper and attached them around the  outer edge of the background using foam adhesive

Once the title was glued to the background, the layout came together quickly, First i used a few of the papers to frame the picture and add layers behind it. I tucked the picture under the title, and started to add small embellishments around it,

All the cute and festive stickers and ephemera pieces were perfect to add sentiment to this page. Plus they are so easy to combine that it makes this page come together in just a few minutes.

I hope this has inspired you to check the new Simple Stories Say Cheese collection.  You are going to fall in love with the designs, colorful images and how versatile it can be.

Til' next time

Supplies

Pages