February 2015 Blog Posts

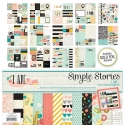
Good Morning everyone, Wendy here today to share some layouts I created with the gorgeous I AM collection.  
 
 
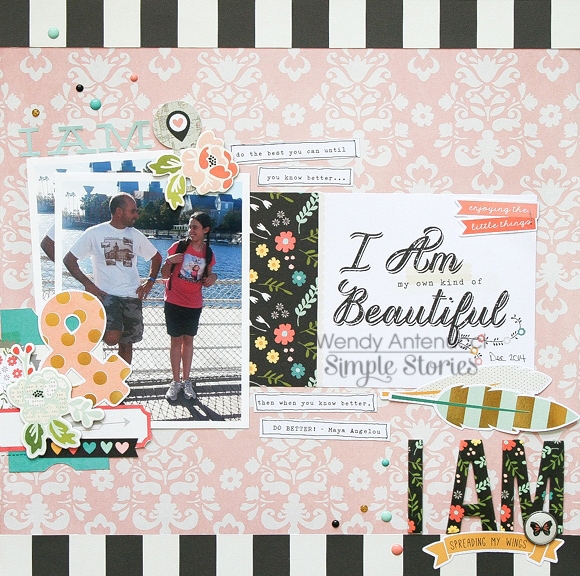
My Own Kind of Beautiful, was created to help my 'soon to be' teenage daughter know who she is. This collection is perfect for building up our children to become all they can be with affirming words.  Sometimes our children might not be acting like what we hoped, but we can call forth who they really are by our choice of words.  The words I wanted to convey to my daughter were on the SN@P! Card, "I am my own kind of beautiful" and that is where this layout began.  I pulled a picture of my daughter to pair with the saying and from there I began to embellish the pink background I chose.
 
 
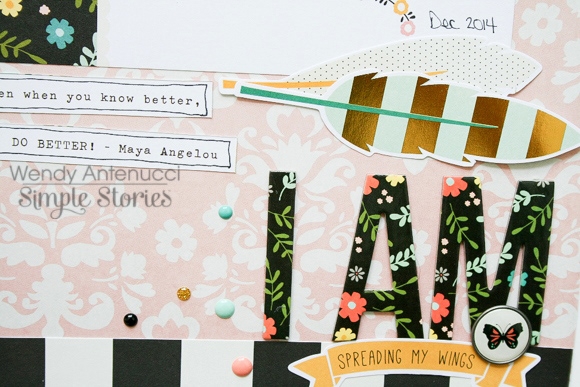
I chose to keep my design simple with the rectangle at the center of the page and then I built three embellishment/title clusters around the page to guide the eyes.   My first was the chipboard I AM piece that I used to bring a boldness to my message and the page.  A bradz (got to love those new kinds with no prongs!), a few die-cut pieces, and some sprinkling of dots finished that cluster.
 
 
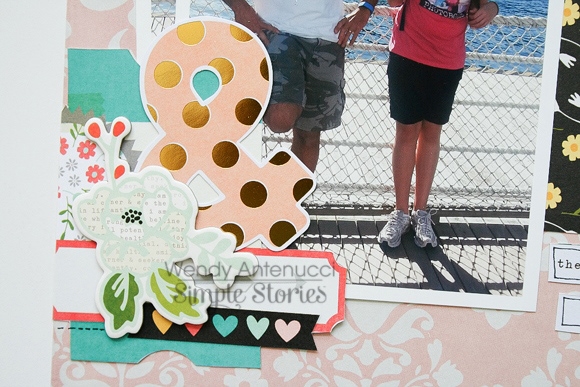
My next embellishment cluster was really just a pretty grouping of some of my favorite pieces, again a pop of black and an area to write something (which I forgot at the time).
 
 
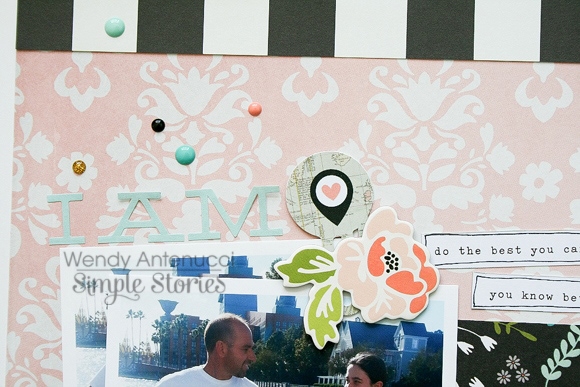
My last cluster was a softer I AM with a location clip to mark that this is where we are right now and it is good!  I finished the page with strips of black and white paper at the top and the bottom to keep the black visual triangle going and I feel it keeps my pieces on my page by providing a boundary.  
 
My next layout, I AM Enough was my thoughts on 2014 and where they year had taken me.  
 
 
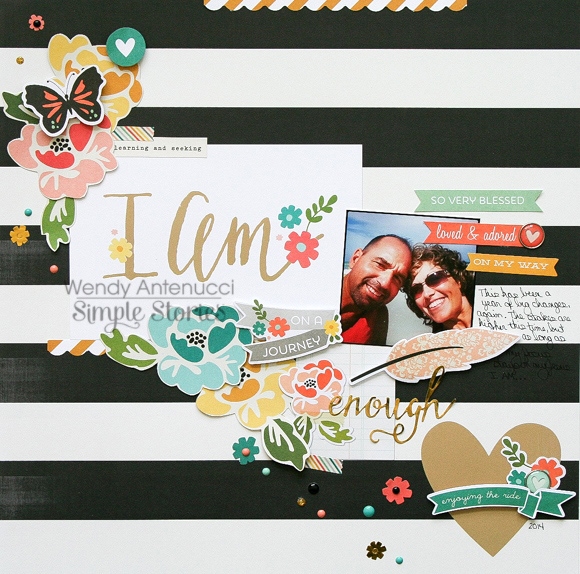
I love flowers and I love fussy cutting so you see a trail of flowers on a diagonal which is one of my favorite design ideas based around another 4x6 card that became my title.  I also added in a sticker with a word that summed up the year for me.
 
 
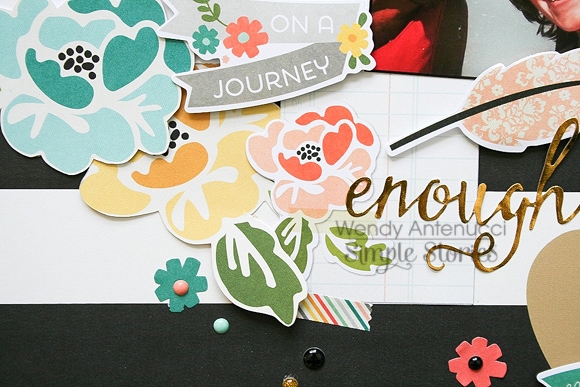
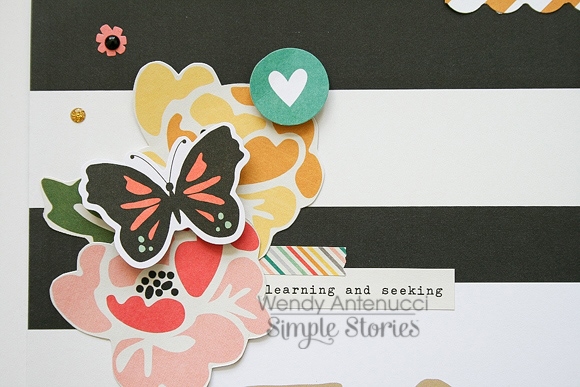
Even though I was working with a diagonal, as the previous layout, I also have three embellishment clusters.  The first had part of my title with my word.  The next included flowers and die-cut pieces with sayings that gave more depth to my thoughts of the year.  A butterfly to show change and a sprinkling of dots to further embellish the group.
 
 
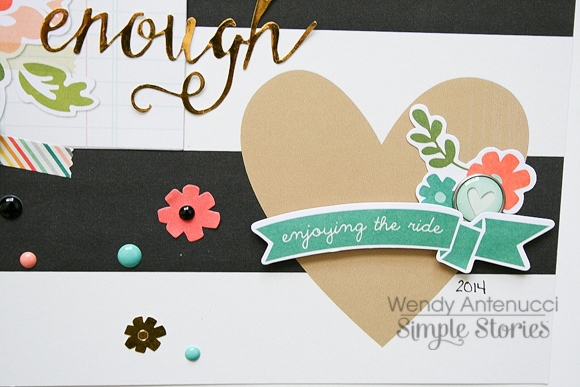
And my last cluster, dressed up the heart that came on my background paper.  I always allow my paper to help me build my clusters, it takes less thinking and more going with the flow :)


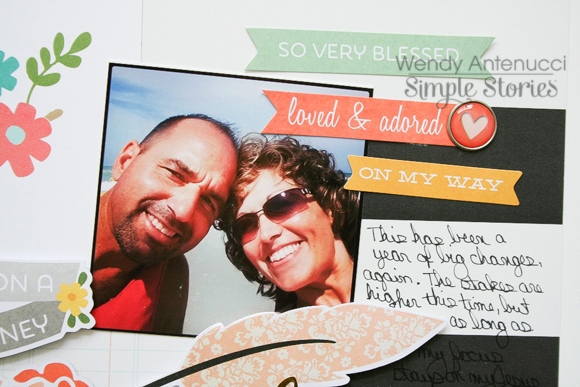
My last piece was a picture of me and my hubby.  As the page was not built around a picture, I chose a small picture that I liked.  I added a few more die-cut phrases, a bradz, and my thoughts to finish documenting 2014.
 
Thanks for joining me today, I have another I am layout, Dreaming Big on my blog if you'd like more inspiration with this collection.  Have a great weekend, and remember I AM is enough!

Supplies

Hello!  This is Amber, founder and creative director of Simple Stories, back again for my monthly 'behind the scenes' Life Documented blog feature.  

I've had so much fun using my SN@P! Life Documented Planner, and hope you are too.  There's a ton of information in my last blog post with tips and ideas on how you can get started using your planner, plus we featured some awesome FREE Printables that you can download here

This month I'm focusing on how you can use your planner to incorporate photos and memory keeping using some of our cool products from the Life Documented Scrapbook collection.

MIX AND MATCH

Our Life Documented collection features both planner and scrapbooking products, designed to mix and match with each other.  One of my favorite products from Life Documented are our SN@P! Cards - we offer 4 different packs and they come with a ton of cards.  

Even better, there are 2 duplicates of each design in several of the Life Documented SN@P! card sets, so you get a good variety - 2 each of your favorite designs, without a bunch of repetitive designs. Each pack has a different theme, from the Week in Review set with a 4x6 card for each week of the year, to the 2015 set that features the 12 months of the year, as well as a Journaling set and Day to Day set.   When you combine the 4 sets together, that's over 600 cards for the year!

We designed the cards with a fun color palette of multicolor patterns and solids to be mixed and matched so you can customize however you like. 

COOL COLORS - FEBRUARY

Check out some fun possibilities for February with cards from the 4 different Life Documented card sets, with a mixture of pink, teal, red, and colorful hearts for a touch of and whimsy.

DOCUMENT YOUR LIFE!

One thing I love about our planner system is it easily incorporates your day to day planning plus memory keeping, even if you're not a scrapbooker.   It's so easy to highlight some of your favorite memories and photos - no scrapbooking involved!  Our system is unique in that our planner albums include the divided pocket pages,  perfect for adding some of your favorite photos and 3x4 & 4x6 cards.

You can see here how I simply used the pocket pages included in the planner, a few Life Documented SN@P! cards and photos that I easily printed from my phone using a quick app from my local drugstore, to highlight some of my memories from the month.  The back of the January Monthly Divider is the perfect place to record a few highlights from the month, along with a few label stickers from the collection.  Because the planner has rings, I can add as many pages as I want.  When my planner starts to become full I'll start to store my monthly divider pages and pocket pages in a separate album so I can easily flip through and have memories recorded for each month.

PLAN YOUR PAGES

If memory keeping is your thing, then we also have really cool inserts enabling you to easily plan your 12x12 layouts and Pocket Page spreads - the Life Documented Planning Inserts.  These inserts feature a grid to sketch your pages, along with lists for products to use, memorabilia to include and notes. 

In addition, there's a journaling page for each week that you can use jot down notes and highlights for each day of the week.  Whether you're a pocket page scrapbooker or a traditional scrapbooker, this is a great tool to help you document your life.

TIP:  We designed the squares on these inserts to represent a double-page spread - with grid marks to represent an inch - so you can easily sketch your own pocket page configurations or 12x12 pages.  It's easy to do using the side of our planner bookmark to make even lines!

Here are the two 12x12 pocket pages I created after I had used the Life Documented Planning Inserts to plan my pages - it made it so quick and easy to put my pages together after only a few minutes spent planning & sketching!

FREE PRINTABLES!

Now we get to the really fun part!  We've designed these FREE printables for February to coordinate with your Life Documented planner.  Even better, we'll be offering free printables each month!  

Click here to download February's Free Life Documented Printables

There are a 5 free printables this month, including:

February Month in Review
Things to Do, Places to Go, People to See Checklist
Project Planner
Recipes to Try/Music to Check Out Checklist
Books to Read/Movies to Watch Checklist

TIP: The February free printables are on a single PDF document with 6 pages - print off what you want and the quantity you need.  We've added cut marks to each printable, so you can easily trim your pages to size.  

Thanks so much for letting me share my insight and vision for our Life Documented Planner system - it's a dream come true for me to finally have my dream planner.  I already feel like my life is so much more organized.  I hope you're inspired to plan and organize your life with our Life Documented Planner system as well!   See you back here next month!

Supplies

Traditionally folks make resolutions at the start of a New Year, but the planner in me bucks that trend. Instead, I make lists – lots of them! Things I want to accomplish, healthy goals, places I want to go, a honey-do list, and learning targets.

I started my 2015 list with a blank page from the Life Documented Basics Inserts pack and decorated it with letter and icon stickers from the collection.

The calendar stickers separate each of the main categories and represent the most important things on the goal list.

Here is an overview of how I use the monthly calendar pages. I note important appointments and celebrations here.

I use icon stickers to highlight the theme of the month and some calendar stickers to remind me of important things coming up. I like adding a sticky note to the side for notes and changes.

I’ve been using the Weekly planner inserts to capture a quick snapshot of the most important weekly goals and appointments. I kept this streamlined, adding a few pops of color with washi tape and a handful of calendar stickers. I love how I can turn to this page and see my entire week in one spot.

The Life Documented Planning Inserts are the perfect spot for jotting down design ideas and keeping track of photos to be printed.

Instead of writing down a daily account on these planner sheets, I use them to journal about the stories I want to highlight that month. Instead of plugging in a date, I write down the main subject and highlight with a light gray brush marker. It’s a great way to document the day to day things that are sometimes lost as time passes.

Finally, a sneak peek of the theme I chose for the coming week. I used a palette of grey and yellow. It’s my small attempt at brightening up a bleak time of the year. This is exactly what I love most about the Life Documented Planner – how it can be custom decorated to fit my needs (and wants)!

Supplies


Click here to download the I AM... eBook!


This past weekend my family and I took a day trip to the EMP (Experience Music Project) and I managed to take over 200 pictures! I wanted to put my favorites in an album, but I admit I was feeling overwhelmed at the task. Then I pulled out the new 4x6 SN@P! Binder and my entire album came together in under an hour. 

One of my favorite features of this album are the different size Pocket Pages (which are included). I love the layered look of 3x4, 4x4, and 4x6 photos stacked on top of each other.  I am going to need to stock up on these sizes!

I used the new Gold SN@P! Pack inside the album.  The metallic, kraft, and black colors worked perfectly with the "rock n' roll" photos, and are very on trend right now.

I added a single page of journaling, but to save time I mostly let the photos speak for themselves.

With the different Pocket Page configurations it was possible to place up to 12 photos in a single spread, which was definitely an easy way to get all of my photos in the album instead of sitting on my computer.

The EMP has many different sections such as music, movies, and games.  I divided up my album much like the themes of the rooms in the museum.  I ended with my favorite section which was movie costumes and props.  They even had the hat from the Wicked Witch in The Wizard of Oz, and the glove from the 6-fingered man in The Princess Bride.  

I've enjoyed sharing my album with you today, and I hope it helps show how quickly an album can come together using Pocket Pages and a SN@P! Pack!

Hi there! Suzanna here to share with you two layouts I created using the utterly amazing I AM and Say Cheese II collections! These collections are available to retailers now so be sure to stop in and snatch them up before they are gone! They are sure to disappear quickly.
 
My first layout is about my daughter, Mia. I am very fortunate that her name uses the same letters "I am" and I was able to use the very plentiful "I am" stickers for her name in the title of the layout. I used the 6x12 element page cut apart and reconstructed around the picture for this layout. Sometimes, based on the direction that your subject is facing, you need a little shifting and manipulating as I did here.
 
 
The bulk of the embellishing of this layout was done utilizing stickers, smaller chipboard pieces, Washi Paper Tape, Bradz and Enamel Dots to "supplement" the labels found on the 6x12 Element page. Some of the defining characteristics that don't really apply to an 8 year old I chose to cover with elements that were more appropriate. In many ways, this is my journaling. I just wrote on a small piece of washi at the bottom of the layout where the picture was taken and the date.
 
 
The bottom of this 6x12 picture was white space and a bit distracting.   Cutting the banner from a 4x6  card was the perfect cover up. It provided me with a space to put the title of my layout with further embellishments.
 
 
The next layout that I would like to share with you today I created utilizing the Say Cheese II collection. Our first trip to a Disney theme park was to Disneyland California when my kids were rather little.  I'm not sure that the "grandness" of it all really struck the kids. Honestly, I'm not sure they really knew who half of the characters were.  We aren't big TV watchers and so they would have had little exposure to the characters. This layout is of their first visit to Disney and their first "encounter" with Mickey.
 
 
Again, with this layout, the majority of the patterned papers come from Element pieces and SN@P! Cards with lots of little embellies here and there to supplement. I used the chipboard frame to frame a picture of Mickey signing the homemade autograph book that I had made the kids before we left for California.
 
 
I often find that there are elements of the patterned paper that I really like which "limit" the use of the paper if I don't cut into it. Don't be afraid to fussy cut and layer your background pieces over your pictures. Take for example the heart on the left hand side of the main pictures. If I hadn't fussy cut the inner most part of the heart, it would have been hidden underneath the picture. It's not a bad place for it to be but I wanted the full effect of the heart. The label sticker was perfect to help hold the heart layer down onto the picture.
 
 
I love using larger sized pictures for my layouts and the element pieces of these collections make scrapping larger pictures so easy! What size picture is your preference?
 
Thanks for stopping in today!


Supplies

Hi everyone!  Shellye along today with a perfectly adorable and "Enchanted" door hanger for any little princess in your life. 

I started with a sheet of heavy weight chipboard and an album die from Top Dog Dies, but any pre-made chipboard shape would work. Next, I cut the shape from the "Dreams Come True" paper and distressed around the edges with a walnut ink before attaching to the chipboard base.

The edge was trimmed in a pom pom ribbon along the back of the chipboard.  For a nice finishing touch, I also covered the back in a coordinating paper.

The focal point of the hanger was made with a couple of die-cut hearts from the Enchanted 6X6 Paper Pad and the center piece is a smaller chipboard shape hosting the sweet sentiment that was cut from the 4X6 Journaling Card Elements paper.

Extra dimension was added with various chipboard stickers pieces, decorative Bradz, Enamel Dots and Bits & Pieces die cuts.  To create the hanger, two holes were punched at the top and a strand of 1.5" grosgrain ribbon was strung through and then knotted at the ends.  Two boutique style bows were made and then attached above the knotted ribbon ends.  Now it's all ready for gift-giving or hanging!

Click here to download the I AM... SN@PBOOKING Album Guide!

Supplies

Pages