July 2015 Blog Posts

Hello, again!   This is Amber, founder and creative director of Simple Stories.  I'm here for another installment of my monthly Document IT blog feature.  I'm so excited to share something that we've been working on for what seems like forever - earlier this month we revealed our new SN@P! Carpe Diem A5 Planner & accessories collection.  Judging from all of the buzz we're seeing and reading out there on social media, you're excited too!

If you've been following along with my Document IT! monthly blog feature this year, you know the story of how we initially 'dipped our toe' in the planner world with the release of our Life Documented collection in 2014; if you're not familar with that story, you can read more about it here.  The Life Documented collection was so well received that we decided to 'jump in with both feet', so to speak, with Carpe Diem!

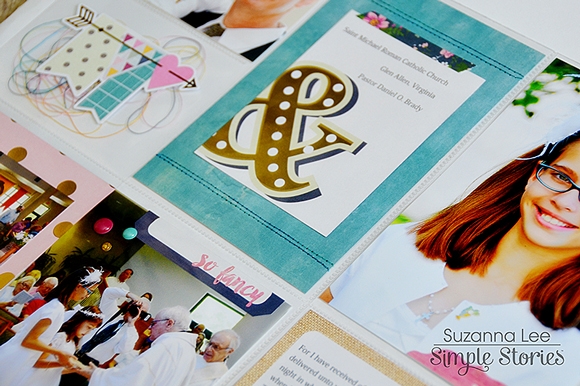
At Simple Stories, we're know for producing quality products to help you share your memories in a simplified way, and now we bring that same philosophy to the planner world and we couldn't be more thrilled.  This week we had the opportunity to showcase these beautiful new pllaners & accessories at a retailer tradeshow, and we want to do the same here on our blog!  You may have already had a chance to check out these new products in our reveal blog post here; today we're giving you a first glance at the planner itself and the fabulous a la carte products that will be shipping to retailers mid November!

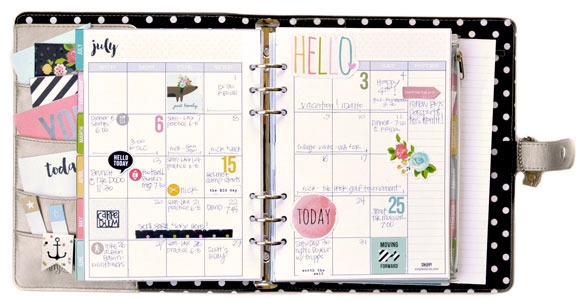
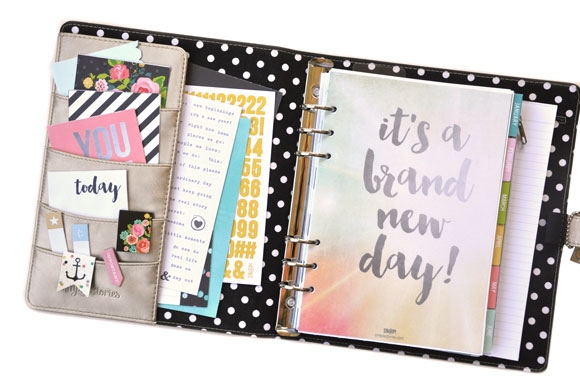
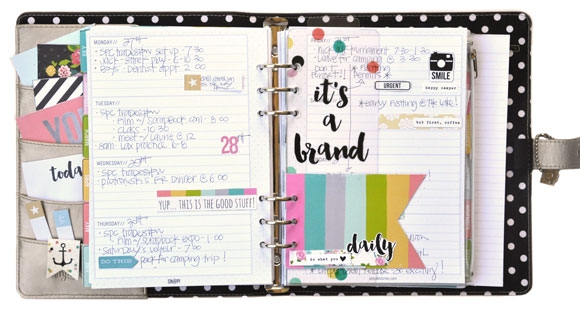
The planners are available in 6 fun colors - platinum, coral, robin's egg blue, pink, teal & black.  They're crafted with split leather exterior and a printed fabric black & white polka dot interior. Each planner includes everything you need to get started planning - 1 plastic dashboard with silver foil, 12 monthly tabbed dividers/12 monthly pages (12 2-page calendar spreads), 72 weekly insert pages (2-page spread for each week of the year), and 7 extra pages for contacts, important dates and notes. That's not all!  Each planner also comes with a metal charm, elastic pen loop and an A5 tablet.  

At an MSRP of $44.99 - we think you're gonna love it!!

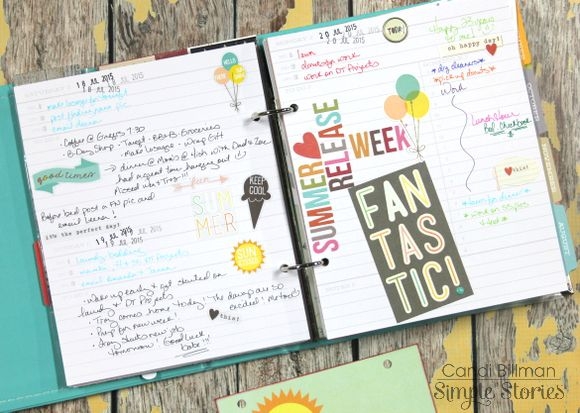
In typical Simple Stories fashion we've created fun, whimsical and colorful designs that will keep you planning happy all year long.

Like what you're seeing so far?  Want to see more?!  Here's a video from the retailer trade show that walks you through the contents of the planners, the a la carte accessories and the sample planner we put together that you see in the photos above - it's the next best thing to seeing it in person!!

Because we KNOW you have tons of questions, we've put together a handy dandy list of Carpe Diem Frequently Asked Questions that you can download here.  Have a question that's not listed, shoot us an email at support@simplestories.com and we'll get you an answer :)

FREE PRINTABLES!

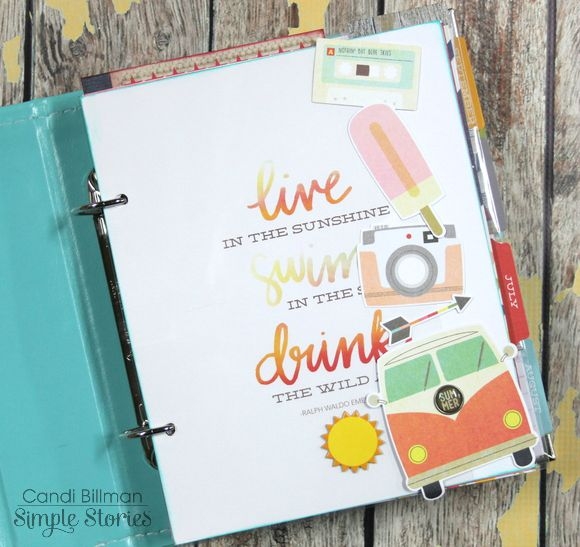
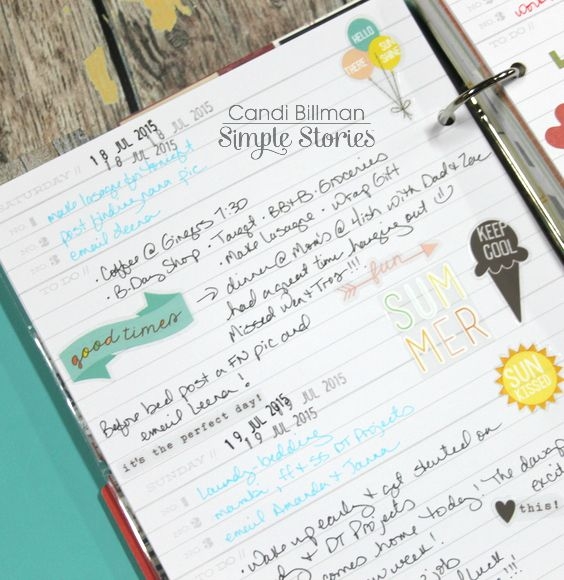
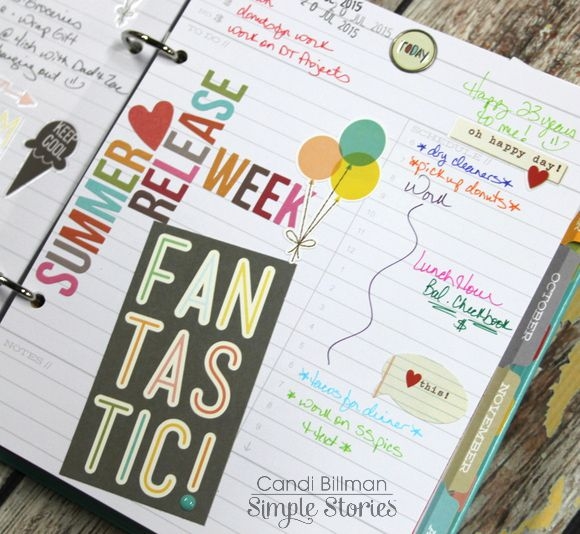
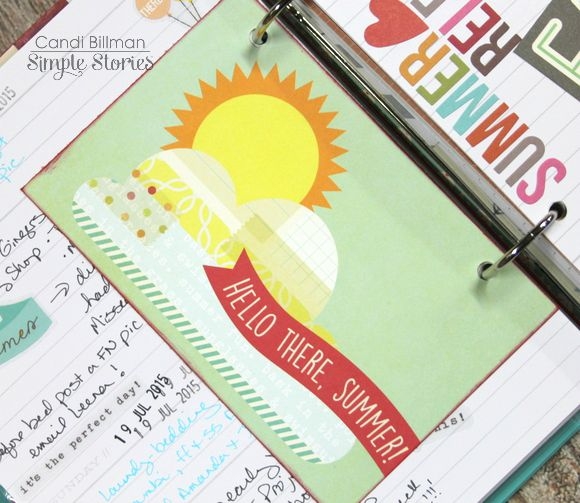
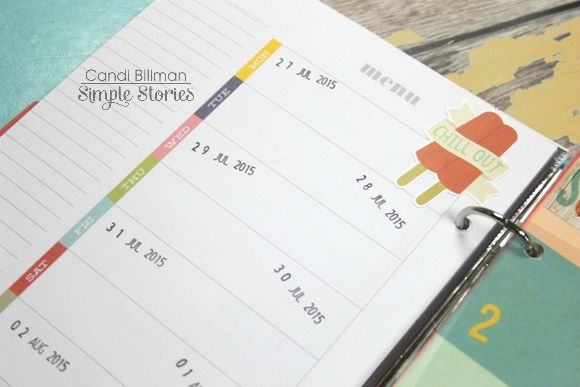
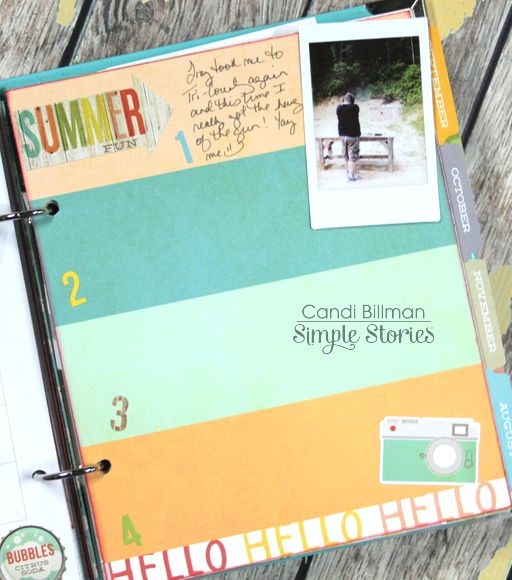
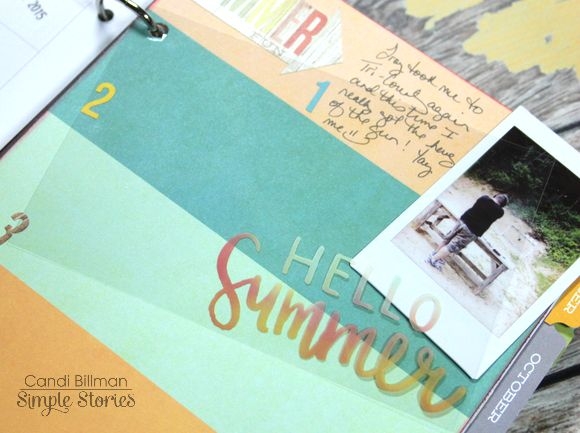
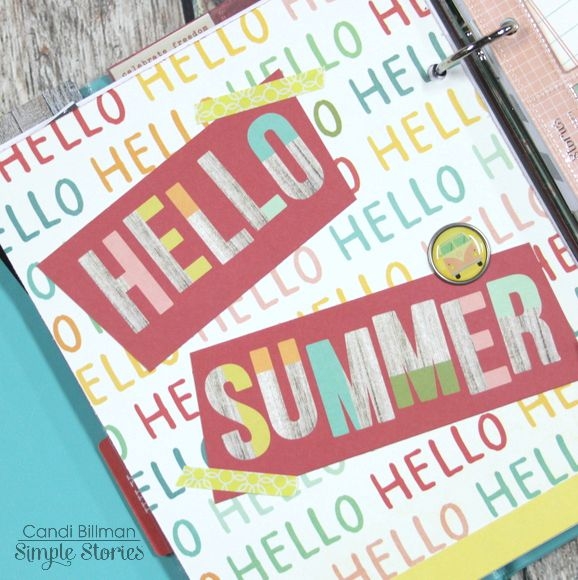
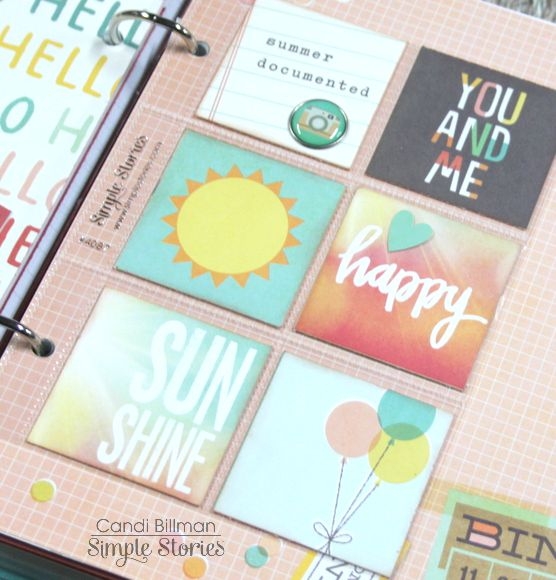
Now we get to the really fun part!  We've designed these FREE printables for July to give you a taste of the colors and designs of the new Carpe Diem planner & accessories!  

Click here to download July's Free Life Documented Printables.

There are a 3 free printables this month, including:

July Month in Review -  in both A5 & SN@P! 6x8 sizes
Decorative Lined Insert - in both A5 & SN@P! 6x8 sizes
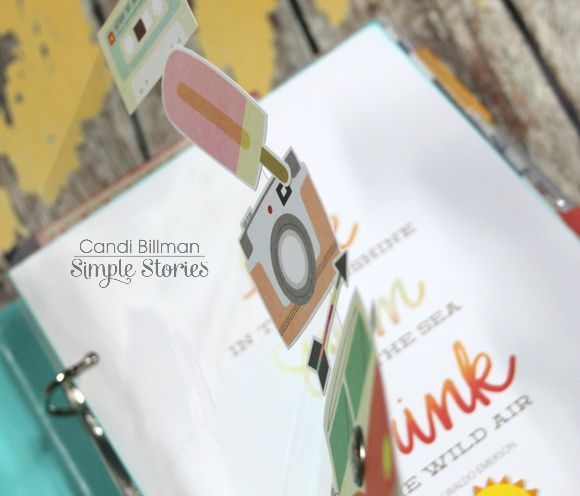
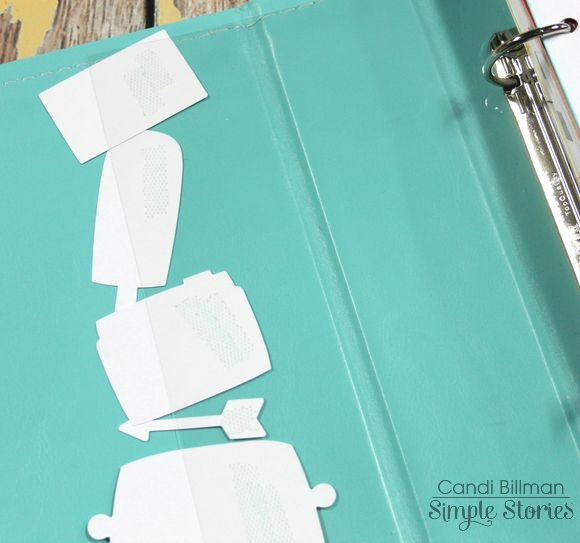
Fun Cut Outs

TIP: The July free printables are on a single PDF document with 6 pages - print off what you want and the quantity you need.  We've added cut marks to each printable, so you can easily trim your pages to size.  

Thanks so much for letting me share the details about our new SN@P! Carpe Diem Planners!   See you back here again next month!  Oh yah, one more thing... for those of you that that still love our 6x8 albums and Life Documented inserts...let's just say we have a little something up our sleeves... :)
Hi everyone!
 
Teri here, and I'm excited to share some fun Summer-inspired projects created with Simple Stories'Summer Vibes collection. Is it just me? Does it seems like Summer just started, and yet school is right around the corner? Sigh. I know, right?! In my efforts to squeeze in as much Summer fun as possible this year, I decided to create some cards and a tag with a Summer twist! And the Summer Vibes collection was the perfect choice for that.
 
 
One of the things I love to do is treat my friends with little treats just so they know I appreciate them. So I created this little tag with a fun little beach scene to hang onto a bottle of soda.
 
 
The base of the tag is a chipboard frame attached to a SN@P! card. I poked a hole in the top so I could bring a little twine through it and hang it on the bottle of soda.
 
 
I'm a fan of making cards so, of course, I made some Summer-inspired cards too! 
 
This one was just a fun and quick card to put together.
 
 
I just love that "Oh Happy Day" sentiment on the SN@P! card I used. To make it stand out, I added a torn piece of paper tape to the top of it. and then I embellished it with a couple enamel dots. 
 
 
I anchored the radio and tanning lotion bottle to the bottom of the card. I used my scissors to slice off the bottom of each. 
 
This was another quick card to put together. 
 
 
There's just something about buses. They scream Summer and the beach! You agree?
 
 
The "hello there" banner was part of a larger die-cut banner. I again whipped out my trusty scissors and snipped off just the part I wanted for my card.
 
Speaking of the beach, this card really reminds me of the beach with a surfboard, flipflops and sunglasses! 
 
 
I layered all of those chipboard pieces together. While they are self adhesive, I wanted one of the shoes and sunglasses to really pop off the card so I adhered them onto my card with foam tape. Foam tape really helps just give embellishments a little extra pop. LOVE that.
 
 
The final card I made is this Hello Sunshine card. 
 
 
I did a little bit of layering here, adhering the frame to patterned paper and then placing it slightly under the "Hello" sentiment. And then I added some embellishments to the mix. I wanted the card to be fun so I purposely used a mixture of embellishments on it. 
 
 
I think it turned out pretty cute! 
Thanks for stopping by today! Hope to see you again soon!

Hey There!  It’s Vicki here with a little So Fancy fun.  I have to say that I love the So Fancy line for my daughter but I also really love it for documenting some of my adventures with my friends!  When I was pulling photos for my post this month I came across this picture captured last fall when a few friends and I visited Montreal after a teaching event.  This is what I love about scrapbooking.  One photo can bring back so many good memories and fill your heart.  This one did just that.  Take a look at the page I created…

My friends and I ran in to a few ladies from the teaching event.  Love this gang right here!  The So Fancy line created the perfect backdrop for the perfect photo from a snapshot in time.  I love the 6x12 Element strip with the “note” paper is perfect for my journaling and the colors from this line really highlight the photo.

I layered So Fancy Chipboard, stickers and Bits & Pieces for my title with the help of a few foam adhesive squares.  It’s a little blast of happy.  Again echoing the feeling in the photo.

I tied in the aqua with the camera chipboard in the lower right corner and the gold frame.  I love to create little layers of embellishments.

The subtitle is a mix of the So Fancy Expression Stickers.  These are perfect for personalizing your projects and I especially like them for sub titles and “side stories”.

 
I really enjoyed putting this page together and taking a moment to remember a great day spent with good friends!  I may just have to search out a few more of my “friend” photos and do another project with this So Fancy line!  I will have to wrestle it out of my daughter’s hands!!!
 
Thanks for stopping by!  Have a great and crafty day!

Supplies

Happy Tuesday!  Candi here with you today and I am anxious to use the Summer Vibes Collection in my planner again!  This collection, along with my teal binder...perfect match :)
 
I created a new dashboard/flyleaf by taking an 8 1/2 x 11 transparency and trimming that down to about 5 x 8.  Along the right hand side, I added several Bits & Pieces with some adhesive...the embellishments are "hanging" off the edge.  Behind my transparency, I added a 6 x 8 journal page.  


I can't leave anything "empty" so on the back side of the 6 x 8 journal page, I added some cardstock stickers and a few journaling card elements...


Currently I am using the daily planner inserts and there is just so much room for jotting down your daily tasks along with adding some great stickers.  Here is a peek at a few of my days...


I love adding journaling cards in between my planner inserts...super fun adding different elements along the way!


Below I am using two different sheets from the basic planner inserts.  One for my current project and the other for my meal planning.  


I took the 12 x 12 Oh Hello double sided sheet and trimmed that down to fit inside my planner, which is 6 x 8.  After I trimmed it down to size, it left me 4 "blocked" areas, so I thought I would document 4 highlights of my Summer!  I already filled in my first highlight...the shooting range!!!


On the back side of the Oh Hello double sided sheet, I cut out "Hello Summer" from the Summer Vibes Collection Kit and used some washi paper tape to hold it in place!


These 2 x 2 elements are just so cute...I had to trim some of them out and put them inside a 4 x 6 insta-pocket page!  I even added a few embellishments on top of the pocket page.  Maybe I will add some 2 x 2 pics on the back side or even jot down memories from my month :)


On the back side of my August monthly divider, the colors were just not going along with the Summer Vibes Collection...so I fixed that by adhering down a 6 x 8 journaling page!  There is enough room to add a photo or to jot down notes...


Right now I don't have August set up, but I wanted to show you what I have added in my monthly divider that pertains to August.  There is a little vintage shop that is only open every other weekend.  They print out the cutest little postcard with their opening dates, so I punched a hole in the corner and added that to August. This way I know exactly when they are open.  I am also joining in on the Week In The Life Project by Ali Edwards and the perfect way to keep track of my week.........Life Documented Planner Inserts!!!!!!  I added a few stickers and stamped out the dates for each day, now I am all set to jot down memories from the week!


Later this week I will be planning out August and setting up my planner inserts for the month!
 
Thanks for stopping by!  I hope you all have a great week ahead!!!
 
See you next time...
Candi

Supplies

Don't you just love the new collections that Simple Stories has created?  I think this was my favorite release so far!  Wendy here today to share some of what I created using the So Fancy collection .
 
 
The colors in the So Fancy collection were perfect for my Easter pictures, even if the collection wasn't specifically created for such an event.  I had a few pictures I really wanted to use on this layout so I focused more on adding color in through my paper choices.  I chose the navy blue floral to match our clothes, but the floral added a nice Easter touch and an outdoorsy feel.  
 
 
I used the pink on the top to lighten the page up some and to create an area for some embellishing.  I then carried my pink throughout my paper creating a visual triangle.
 
 
Sn@p! cards are one of my favorite products that Simple Stories creates, so I used one to finish up my page.
 
 
My next page, was a totally different take on the So Fancy collection.  I was dying to try out the Mood Board paper; with such a great paper I didn't want to add too much to my page so I concentrated on fitting my elements into the page without making them stand out.
 
 
My title cluster carried the page from one side to the other and while big, it blended in quite well I think.
 
 
Some stickers and a few die cuts were my next touch.
 
 
I added in some journaling on the lines already provided on the paper and added a small chipboard heart for a little pizazz.
 
 
Wow, I really love how many different adventures can be documented with the So Fancy collection, don't you?  I have one more layout using this collection here on my blog  this one featuring my son, hope to see you there! 

Supplies

Hey everyone, it's Amy here to share a layout I created using the fabulous Stars and Stripes Simple Set. I love this line, and couldn't wait to document our recent Fourth of July celebration at the beach.

Although I used mostly the Stars and Stripes collection, I did add in some embellishments from the Gold Sn@p! Pack along with some wood veneer from Say Cheese II.

This is such a great patriotic collection, and I loved creating with it.

Hi there Simple Stories fans! Suzanna here today to share with you a pocket page spread created using the So Fancy collection! Recently my daughter celebrated her First Communion and I really wanted something feminine yet girly to record these special memories for her. So Fancy was just the thing I was looking for!
 
 
I had so many pictures that really, pocket pages are the way to go and include them all. I chose the highlights for the front pages with plenty of "supporting evidence", AKA embellishements. Later, I can go back and size and print some of the other pictures for the backsides. I love that by using two different pocket pages, I am able to have both vertical and horizontal pictures. Really, with pocket scrapping, there is always some combination that will accommodate what you HAVE rather than needing to cut and trim and work existing photos and supplies.
 
 
I like to have at the very least one, more often than not two, confetti pockets. I broke out my Fuse for the first time and sealed in some of the die cuts and various other "bits". LOVE the way it turned out! I can't wait to play with it some more. The left hand page, with the banners in the confetti pocket, has variegated thread in the pocket as well - another fun addition to the sequins and die cuts you can add.
 
 
The bulk of my pockets are filled with SN@P cards but I did use some of the cards from the 12x12 sheets as well. For the title, I had to use my watercolor pencils, without water, to color over the "Y" to create a fourth complimentary shade. I believe the way that the fussy cut letters were cut, and still saving plenty of extra paper unscathed for future use, the "L" and "Y" were the same color. This type A, highlighted, bolded and underlined personality could have none of that! Quick and easy fix, thanks to color pencils. Just stay in the lines!
 
 
The gold bits and pieces scattered through out the die cuts, chipboard and SN@P cards in this collection are just the right amount of pizzazz and bling. Being such a special occasion, I couldn't omit that golden touch! To add a personal touch to the cards, I stitched on them, both hand and machine stitching.
 
 
With all of the goodies one can mix and match in this collection, the sky is the limit with what you can! This and any of the Simple Stories collections in fact!
 
Thanks for stopping in today!
 

Supplies

Pages