March 2019 Blog Posts

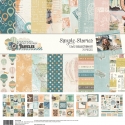
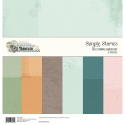
Hello Friends! It's Kylie (http://www.instagram.com/paper_sweetpea) with you all again today. I'm so happy to be sharing my latest blog post with you and the insprition behind it. When I first saw the Say Cheese 4 collection by Simple Stories released I instantly had a light bulb moment. There are so many creative ways to use this collection but for me I knew it would be perfect to use creatively in my two children's planner.

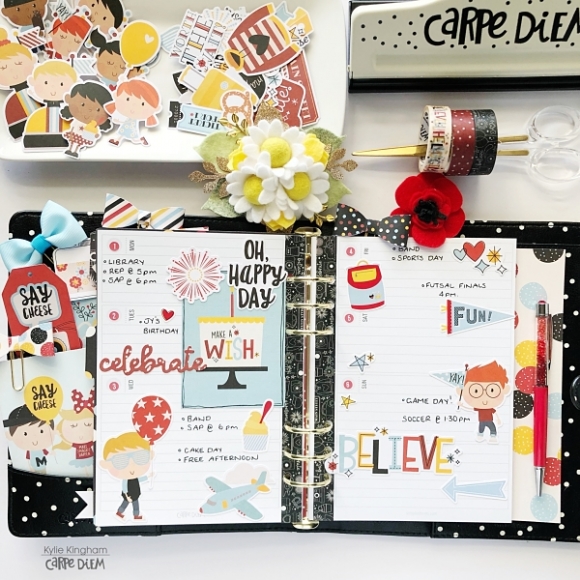
Like many parents, I'm kept busy with school, after school activities, sports, appointments etc. For a while I had wanted to keep a seperate planner for keeping everything together, so now with the help of the Say Cheese collection I have it set up all ready. I am using my beautiful Black Speckle A5 planner.

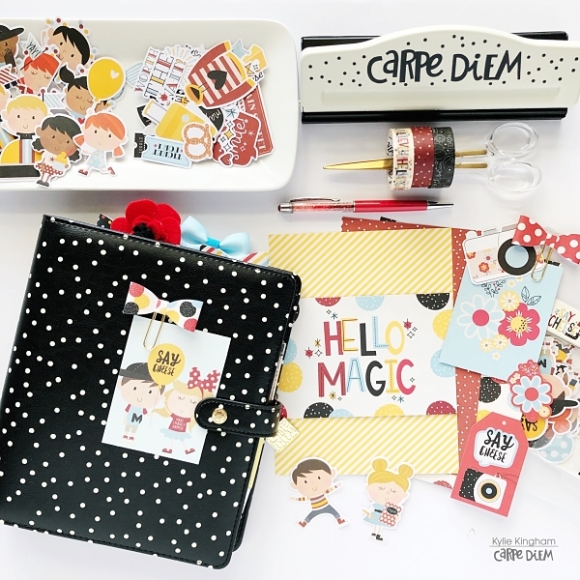
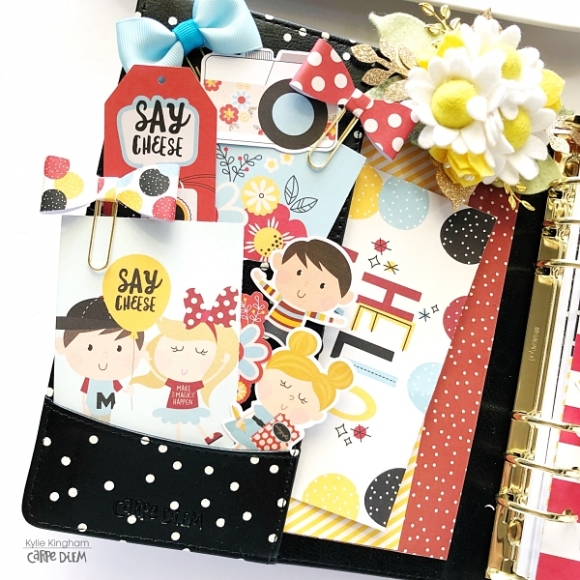
I thought the Happy Kids Bits & Pieces were just too cute and perfect for using throughout my pages, on my dividers and for filling my pockets!

Keeping embellishments and papers in my pockets not only look pretty but it also helps for when you are planning on the go!

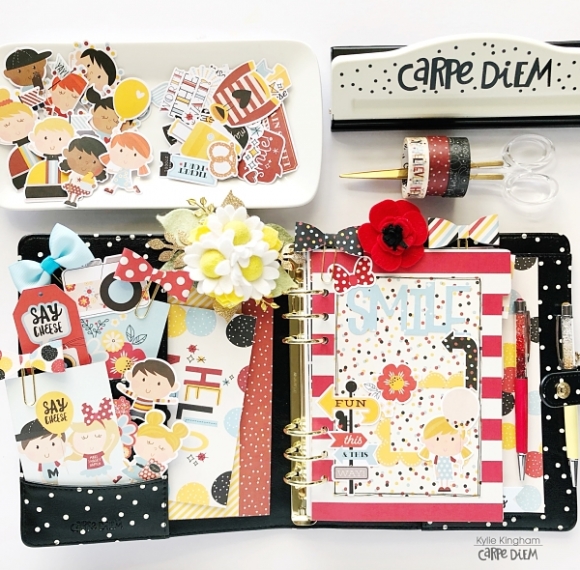
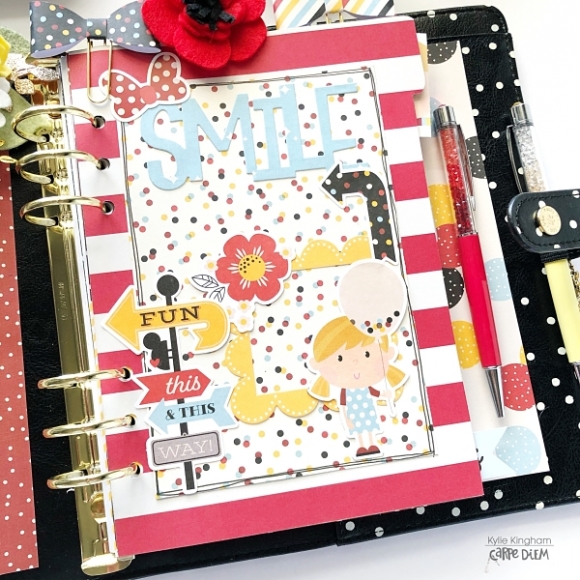
I've divided my planner into two sections. One for each of my munchkins! Using my A5 divider templates I created a divider for each of them, layering some beautiful papers. The Fun Words metal dies were perfect for adding a title to each divider in contrasting papers.

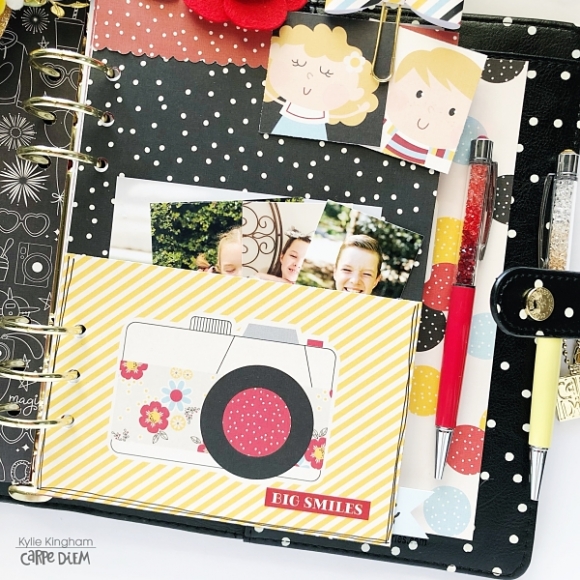
I also created a pocket divider for storing some photos in. I cut out one of the 4x6 elements to use as my pocket. It was pretty much a perfect fit for my divider, I only had to trim off a little from the side edges. Using double side tape I added it to both sides as well as the underneath, before adhering to my divider page.

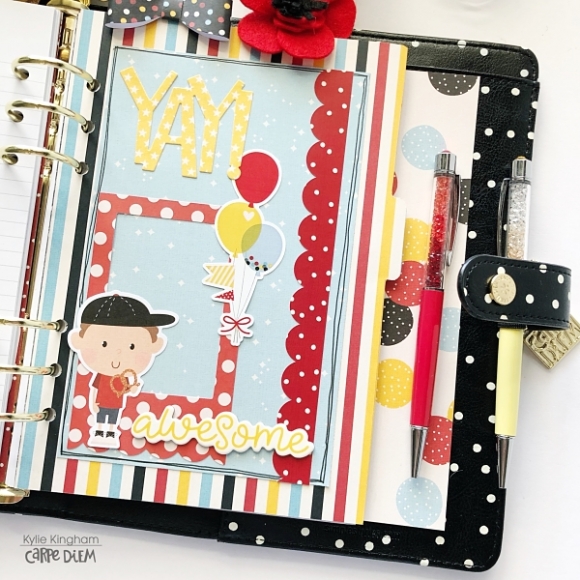
This is my second divider, perfect for my son! I've layered lots of the stickers, chipboard stickers and die cuts. I thought they all turned out really cute!

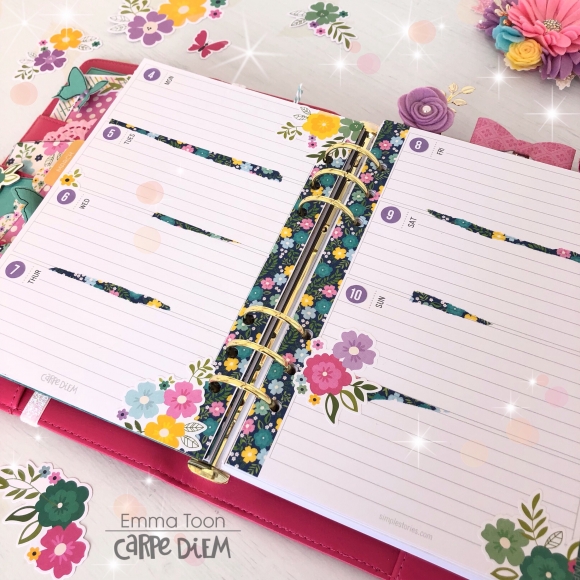
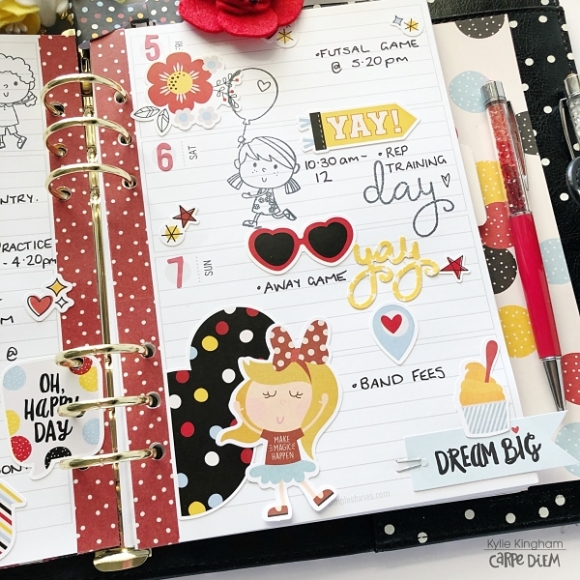
I'm using my horizontal inserts in my planner and use each day to map out activities I need to remember. I've used the Happy Kids stamps as well as the die cuts for my pages. The stamps would be beautiful with colour added to them but I decided I like the monochromatic effect for my pages. 

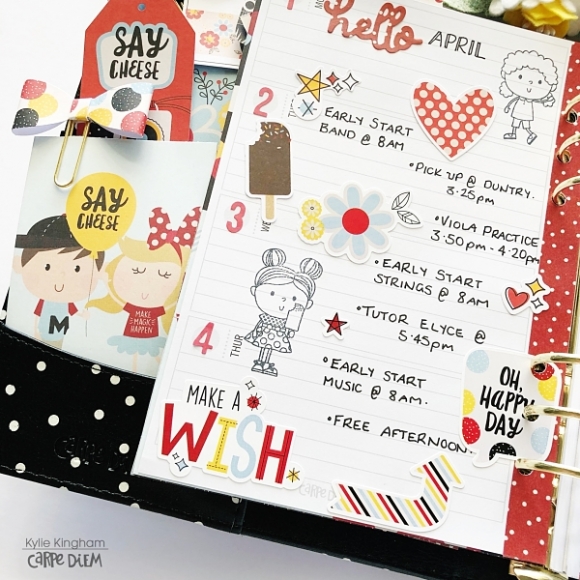
The Happy Words metal dies were the perfect size for using as highlighted or sub titles in my planning. By using them with various papers really added some nice colour. 

My son has a birthday in April so I love how I have been able to record it with the Say Cheese collection.

Thanks for checking out my latest planning! I hope you have found it interesting and inspirational!

Supplies

Hi Planner Friends! It’s Rachel and I’m on the blog sharing my travel planner setup for this summer using the Simple Vintage Traveler Collection ! It is never too early to start planning, right? We have two great trips coming up this summer and with a big move as well, I thought it would be a good idea to get this Aztec Traveler’s Notebook ready to go before all the moving and traveling begins!

For both trips, we will be traveling lite, so I wanted to try and prep this travelers notebook ahead time to limit the amount I am bringing on the trip.

To do this, I decided to not only decorate the covers of the inserts, but also a majority of the insert pages. I used the Combo Stickers, papers scraps from the decorated covers, washi, 4x6 stickers and the stamps. With pre-decorated pages, I will be better able to focus on documenting instead of decorating while I’m on my trips.

I have three inserts inside this travelers notebook cover. The first insert is a slimmed-down weekly insert with only the number of weeks I will need for my two trips. To do this, I simply removed the staples from a weekly insert and pulled out the pages I needed. I also added two dot grid insert pages and adhered June and July monthly printables to these pages. I am left with an insert that is totally customized to what I need, and a lot less bulky! I kept the Kraft paper cover and decorated directly on top. I used the Take Detours Paper from the collection and decorated with the Combo stickers and 3x4 card from the SN@P pack that I fussy cut to use as a big label to write the dates and places we will travel to.

One thing I love about this collection is the muted colors, that will easily match any kind of travel photos that I take, or memorabilia I collect. I am also a big fan of the vintage vibes along with the photo real elements. This collection is great for someone looking to just add photos and journaling. With the pre-made clustered elements so much of the decorating “guess work” is done for you, allowing you to focusing documenting the memories!

The second insert is the more “functional” insert . The cover was super simple to put together (again, this collection does the heavy lifting for you!) with a trimmed down piece of the Off the Grid Paper, Combo stickers and SN@P Cards, washi tape and 4x6 Stickers!

This lined insert will house all the logistics of our trips including our flights, accommodations, packing list, agendas, transportation and lists like things to do and places to eat. I have pre-decorated a few pages but, for the most part, this insert will be a lot of pen and paper. It is always nice to include one insert like this that you don’t mind looking a little messy. With very minimal trimming, I can also half letter size pages into the insert, or slip inside the elastic band.

The third insert is my memory keeping insert. This graph insert will be part journal, part scrapbook and part junk journal (for all those receipts, brochures, business cards, map I inevitably accumulate during my travels). On previous trips, I would have separate notebooks for each and would always come home with three, half-completed inserts. My goal is to fill one insert with all my travel memories from this summer, and not hold onto a bunch of items I think I will use later to document(and never do!)

To make it a little easier on myself, I have decided to prep a few pages outside the insert using the the 6x8 paper pad and from the Simple Basics Kit. Having a few unbound pages gives me dedicated spaces to create more scrapbook type layouts that I can adhere into the notebook once they are completed. This is especially helping if I plan on stamping, as it gives me a flat surface to stamp on. For two of the pages, I used the layered frames, removed the extra cardboard from the back and adhere only part of the frame so that I can slip my photos right inside. I will be able to add a little bit of journaling, and those memories will be documented!

We can’t talk about a planner setup without talking about the pocket! I used mostly elements from the bits and pieces and a few scraps of paper. When traveling, my goal is to have pockets that aren’t bulky, with decorated pieces I can add to my pages later. If my pockets are bare by the end of the trip, that is good, because it means I did some documenting on my trip!

I hope you enjoyed this look inside my travelers notebook! What are best tips for documenting your travels?

Supplies

I tend to get snap-happy with my camera on holidays and always have many photos I love and want to include in our scrapbooks. Two-page layouts to the rescue! Hi, everyone! Jana Eubank here! Today I have a double page Easter layout to share with you using the Bunnies & Baskets Simple Set.

I placed my photos in two rows, but wanted to call more attention to the group shot of my kids. I matted this photo with yellow cardstock, and then placed it on a block of The Hunt Is On paper, with it's cute Easter egg pattern. In the corner I added a cluster of stickers accented with a button.

I fussy-cut the large characters and icons from the 3x4 & 4x6 Elements Paper to use for my layout. They are the perfect scale for a double-page spread! I also used the journal card to house my journaling on the left page.

I wanted my title to really stand out and decided to create a little scene with the bunny and basket next to the "Hoppy Easter" sticker. I die cut a sunburst on my electronic die cutting machine to place behind the bunny, anchoring all of the elements together in one cluster.

Before adding the sunburst to the page, I used my sewing machine to zig-zag stitch along each ray, creating lots of texture! Manually die cut clouds and enamel star stickers from my stash round everything out.  

Finally, I added this cute chick in the bottom right corner of the layout with more die cut clouds and a phrase stickers from the 6x12 Sticker Sheet. 


Supplies

Hi everyone!  It's Traci, back to share my Little Princess Sn@p album with you.  These pages were especially fun for me to create because I'm a mom of two boys.  Pink and princess themes haven't always been something I did a lot with ... until now!  My granddaughter has made my albums more colorful, and a lot more pink!

The 6x8 Little Princess paper pad is SO CUTE!  I loved this page so much I just adhered a few little bird die cuts with foam adhesive to give the paper some dimension.

I also had fun adding enamel dots (yes! they're back! Yippee!) around the little frame on the 3x4 card, and then repeated them around my 4x6 piece.
 

I used bits & pieces die cuts (love that dragon!), chipboard pieces, and those cute bow clips to embellish the pages.

I even tucked some darling bows into my 2x2 layout!  I think these insta-pocket pages add so much fun to a sn@p album.
The colors in this collection are perfection!!
This will be my last post here at Simple Stories so I want to thank you all SO much for letting me share my love of Sn@p Albums with you over the last two years!  Please come visit me over @artsyalbums on Instagram, and at my Artsy Albums blog, where my album addiction continues!

Blog * Facebook * Instagram * Pinterest

Supplies

 
Every girls dream is to be a princess waiting for her prince charming and live happily every after.
I decided to use the "Little Princess" Collection to set up a fairy tale theme TN for my 3 year old daughter. She's at that age where she loves all the princesses.
 
  The little girl inside of me was so excited and I felt giddy when this collection came out. This collection has many gorgeous papers that I couldn't decide what to use for my front insert cover. 
I decided to create a simple and yet colorful insert cover. I used the paper with the quote "Believe in Happily after" This paper is already decorated with lots of flowers and it didn't really need much more embellishments. I just added the chipboard "Princess" sticker to the top, the princess chipboard sticker to the right bottom and scattered some butterflies with the flowers. I finished it off with adding some enamel dots.
 Of course, every princess deserves planner pockets full of love with magical embellishments.
Deep down inside we all want our own "happily ever after"
 I just love the side view of this set up with the princesses tabs sticking out to the side.
I had so much fun creating this section. I used different papers in which I cut them in different sizes and layered them to give it more of that 3D appeal. I also used my flower punch for the edges. I used couple of bits & pieces to decorate the middle area. I am planning to add pictures of my daughter later on when we visit Disneyland to see the princesses.
 Gotta love the side view which shows the layers I created.
As I mentioned in the beginning, I set up this TN for my 3 year old daughter. She love tracing her hands and I love documenting it. We can look back at this page to see how much she's grown.
 I also let her write and draw on the page as you can see here. I then decorated around her drawings. For now I didn't let her add stickers and washi tapes since I have a little OCD and I want everything to look perfect. Maybe later on when she's old enough I will let her add her stickers and decorate her own page with the washi tapes. Until then, mommy will control the pages.
 The planner community has always been my inspiration in creating my projects and layouts. I love love seeing every one's beautiful work. Everyone is going gaga over pen sleeves that I was inspired to create my own to match my Princess Set Up. I used the "hello princess" double sided paper and cut into the size I wanted to hold my pens. I cut two square pieces. One to go in the front and one in the back. I laminated both pieces and I sewed all around the sides except for the top.
I ran over a little challenge while creating this pen sleeve. I first used a 10mm laminating sheet but it was too heavy and too hard to sew. So I decided to use 5mm instead and it worked out well. I was able to sew through both laminated pieces.
I am super excited for my daughter to fill the pages with her drawings and I cannot wait to add pictures.
Thank you for stopping by and hope you have a great day.

Supplies

Hello! It's Jennifer on the blog today to share a layout I  created with the new Say Cheese 4 collection! I  was so excited to hear that Simple Stories was adding on to their Say Cheese line! What is even better is that all of the collections can be intermixed and used together! I originally was going to scrap some of our family vacation photos from this past fall to Orlando, but decided to  pull out some "vintage" pictures of me and my first trip to Disneyland!

I  love all of the new additions in embellishments this year including the Say Cheese 4 Chipboard Word Stickers! They make for great titles as I  used the "Magic" for my layout.  I  accented with some stickers from the Combo Sticker Sheet and 4x6 Stickers. I  also got out my Say Cheese Roller Stamp to add the line of hearts under my sentiments!

Say Cheese 4 also includes a pack of Tags and Frames which I  used to create a banner of sorts across my page! I  love the scallop red/white dot frame backed with a 3x4 Element that I  cut out. I  then added some typed journaling to the center as well as popped up a geotag sticker at the bottom.

Another fun addition of embellishments are these Bow Clips! You receive four different prints in a pack which are great for sliding under a photo or at the top of a page!

To create a colorful background on my white cardstock, I  used the new Magic Dots 6x6 Stencil with some yellow Distress Oxide ink! I  then used some spray ink to splatter reds and blues to my background as well as added some enamel dots from my stash.

I  adore this die cut from the Bits and Pieces pack and thought it would look cute at the end of my frame! 

Thank you for reading today!  Check out the Say Cheese 4 collection in its entirety by going to the Products page! Have a great day!

Supplies

Hi everyone! Tara with Secretbees Studio here! Simple Stories has some new paper collection releases and they are fabulous! One of my new favorites is the 'Simple Vintage Traveler'. I love to travel and I think one of the best (and cutest!) ways to document a trip is a mini album!

I made this mini into a travel folio with lots of places for photos, journaling spots and mementos! There are even some hidden pockets too!The folio, which measures 5"x7 3/4" when closed, has a tie closure and I included a luggage tag from the Bits & Pieces along with some travel charms as accents.

This inside flap has both a photo and journaling spot as well as a hidden pocket with a pull-out card! The tickets on the edge are from the combo stickers included with the kit! The other flap is actually a large pocket with a long pull-out card that features quite a few spaces for photos or journaling.

The flaps open up to reveal a pocket with a large tag that also holds photos. The pocket has a few sticker embellishments and been stamped with one of the new clear stamps from the 'See The World' stamp set! In the center are a couple of multi photo flips that have been decorated with small stickers and sentiments.

The center of the folio has three sections. The left flap features a beautiful frame from the Layered Frames packet and the right flap has one of the Bits & Pieces adhered to the corner to hold a couple of photo and tag card! For the center, I folded a Simple Stories pocket page in half to hold more photos. Behind the pocket page is another hidden pocket holding another cute card!

The center section folds up and flips over to reveal the back of the folio. There is another frame, ready for a photo, and a pocket that hold a travelers notebook that I made using a piece of the patterned paper. I cut notebook paper down to size and used that for the inside of the notebook. Super cute! Now I just need to got a trip so I can fill up this folio!

There is so much more amazing detail to this folio that you really should see! Head over to my YouTube channel to check out a short walk-through video to see it all!

Supplies

Hello again, it’s Emma back with you today, and I’d like to share a little bit of fairytale magic! I’ve been setting up the beautifully bright new Pink A5 Carpediemplanner and what a gorgeous planner it is!! 

I’ve used the A5 Good Vibes Monthly Inserts and the A5 Horizontal Weekly Inserts to get this planner all set up ready for use. 

You might be surprised that a mid forty year old would choose the new Little Princess Collection for setting up her planner....well, probably not that surprised actually if you follow me on Instagram!! ;)

The colours in this collection are so bright and cheerful and well what can I say about the florals, other than as always with Simple Stories, the florals are fabulous!!!


I’ve chosen the pink polka dot from the 6x8 pad and the then the teal from the Simple Basics 12x12 pack as my main focal colours. I’ve used off cuts in the pockets which I have slid behind two of the frames from the Tags & Frames pack and punched out a couple of teal butterflies which I’ve embellished with the Enamel Dots, YAY for the Enamel Dots to be back again!!! 

For the dash I’ve used the teal floral paper which I cut to size using the A5 template and the Carpediem A5 hole punch, boy does it make it super easy to create dashboards & dividers!! 


The 6x8 pad makes it so simple to make dividers, or in this case to cover dividers...I wanted to cover the March divider from the Good Vibes set as I wanted my ‘little princess’ theme to continue, I cut down a couple of the 6x8’s which you’ll see here and a bit further down my blog, to cover the front & back, a little bit of glue and the fabulous floral washi as a border and hey! It’s as simple as that!!


The monthly overview page is something I rarely use, but I do always need extra space for scribbling little reminders down, so I have covered up the various titles really easily with a few punched out circles and it has then left me with a prettily decorated page, perfect for jotting down those few reminders! 


I love to incorporate little sections using the various sized snap pockets, here I’ve used the 4x4 cut apart sheet and a section of a snap pocket that I’ve cut down, it just adds a bit of fun to my planner, sometimes I even add some sequins too, which make a shaker pocket, they’re really easy to do and just seal with some washi! 


As always with my monthly spread I’ve used the ‘I can’t live without’ Numbers Sticker Tablet! I’ve done a border of the floral washi and a few floral stickers and that’s pretty much it, so quick and simple but I think it’s a great way to add some colour! 


Here’s the other side of the March divider which I covered with one of the 6x8 pages and a border of washi. 


Did you see how this collection has a whole pack of floral ephemera?!...I think it was especially for me!! ...and also a whole sheet of florals in the sticker pack!! Look how I’ve decorated my weekly pages using only the floral stickers and some strips of washi!! I’m really pleased with how it turned out!! 

Well, that’s all from me for today, 


If you would like to see more pictures using Simple Stories products then checkout my IG account  https://www.instagram.com/heartsbyemma

Supplies

Pages