December 2019 Blog Posts

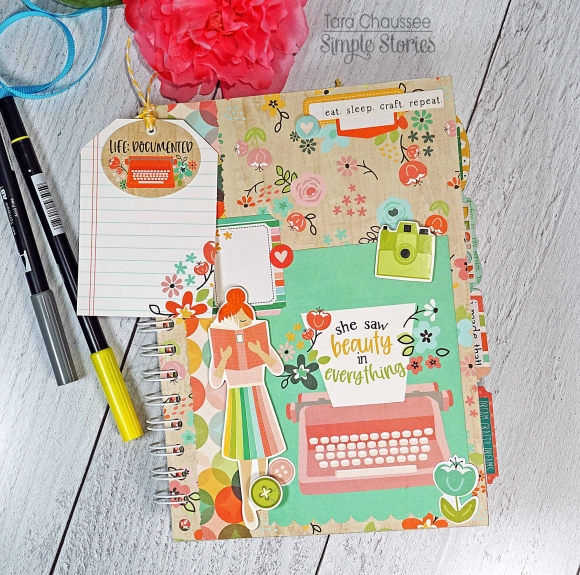
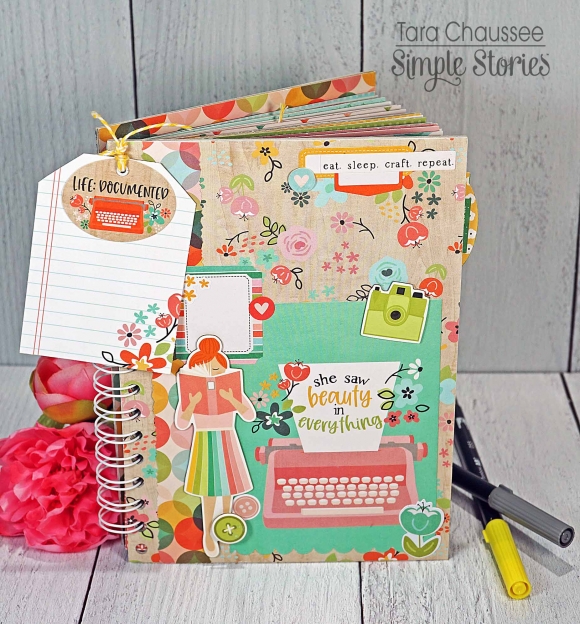
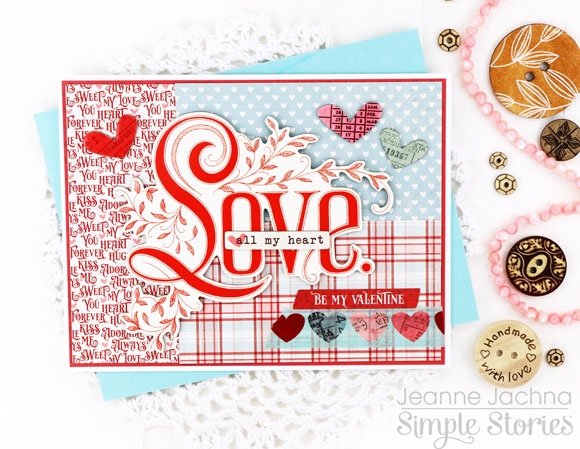
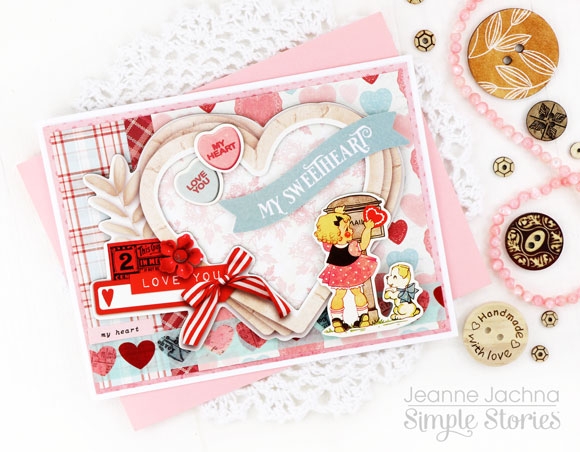
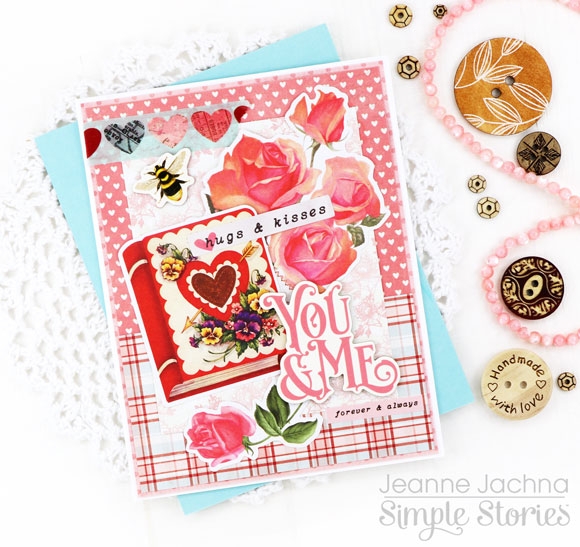
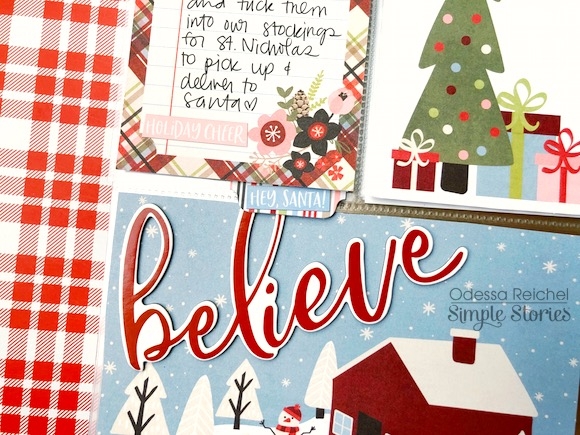
Hello, Simple Stories fans! It's Dorymar here sharing a lovely SN@P! Album created with the My Valentine Collection.  This collection is so gorgeous! It has a wonderful mix of vintage elements and beautiful colors.

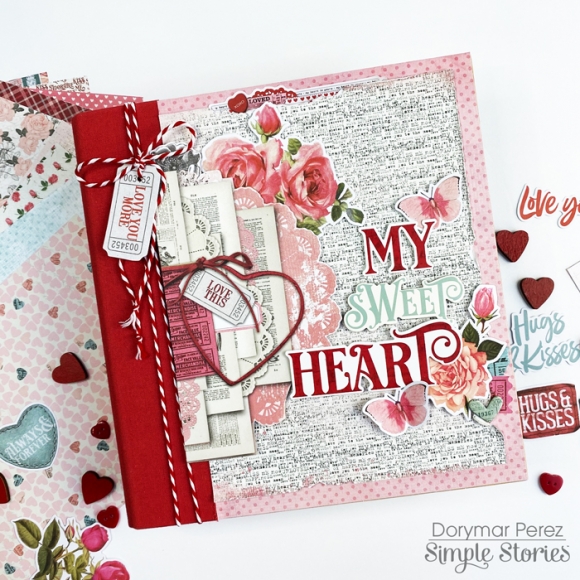
I selected the 6x8 Red Snap Binder for this project because it matches perfectly with the collection and highlights the beautiful colors. For the cover, I used many elements and added layers to make the project more fun!

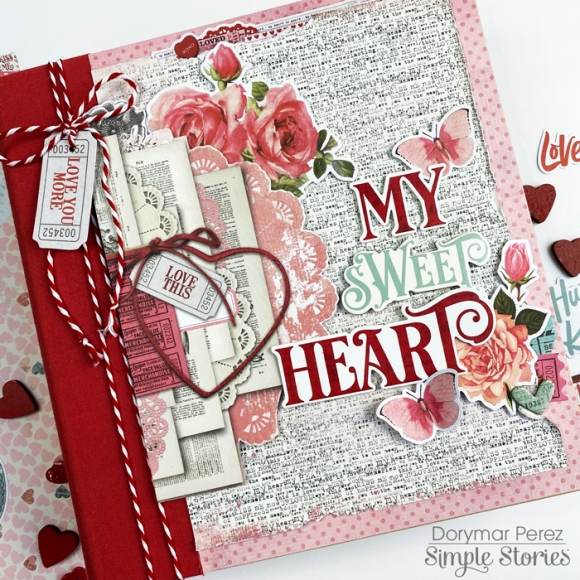
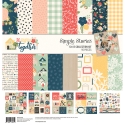
I used pieces from the Combo Sticker, Die Cuts, Chipboards, Mini Sticker Tablet and paper from the 6x8 paper pad to decorate the cover.   I love how the elements, colors, and designs combine perfectly to make a wonderful project.

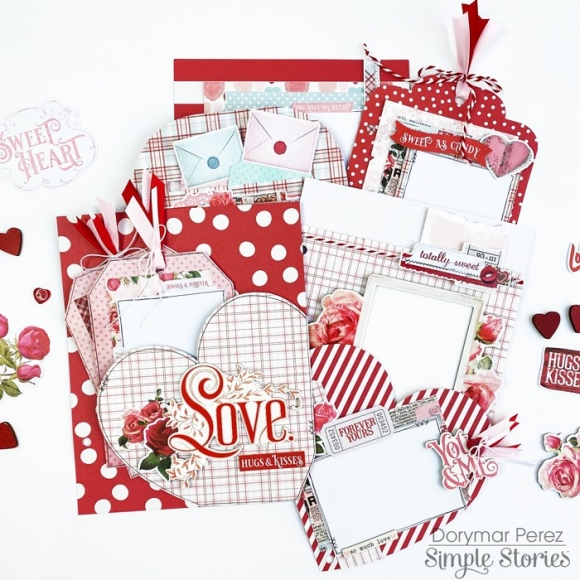
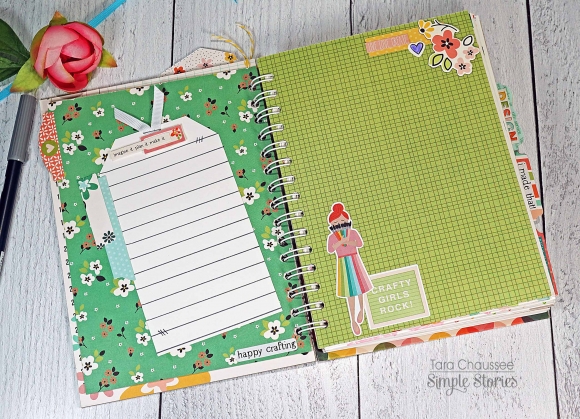
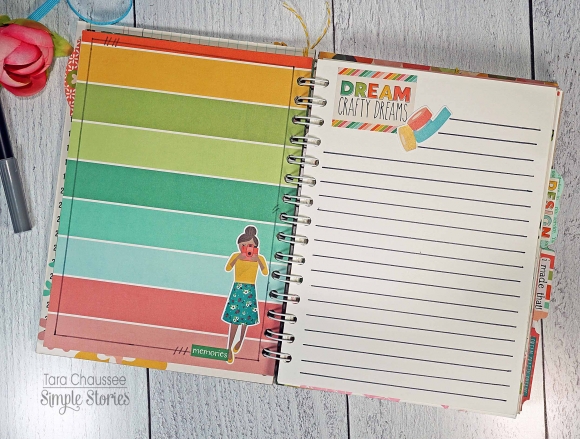
I love creating my own divider pages, in this case, I will share ideas on how you can customize the pages included in the Snap Binder. 

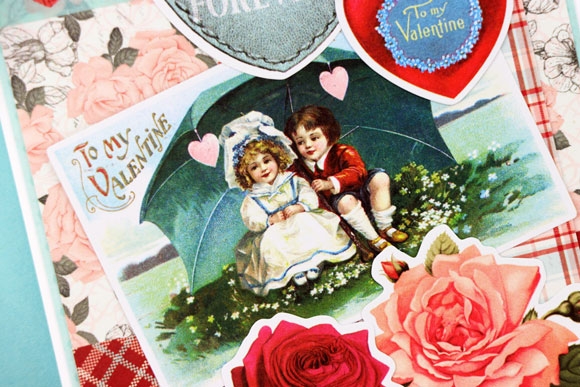
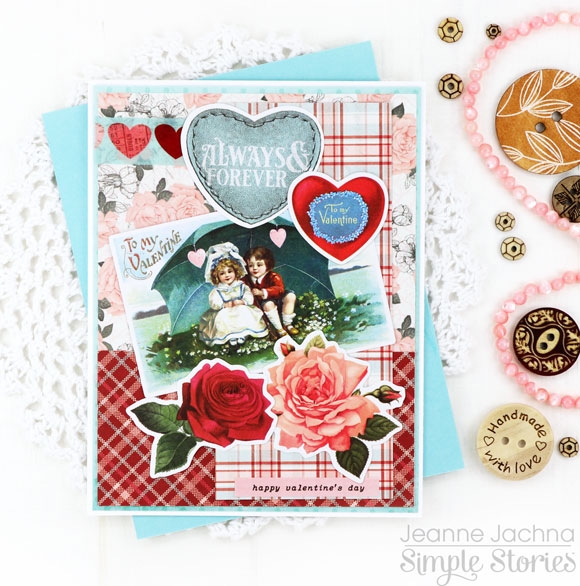
The collection includes beautiful layered frames with various designs that make the task of decorating easier.  I adhered all the die cuts with dimensional tape to create layers and highlight each element. I distressed the edges of the papers to continue giving the vintage touch to the project. Also, I added twine and staples to incorporate texture into the page.

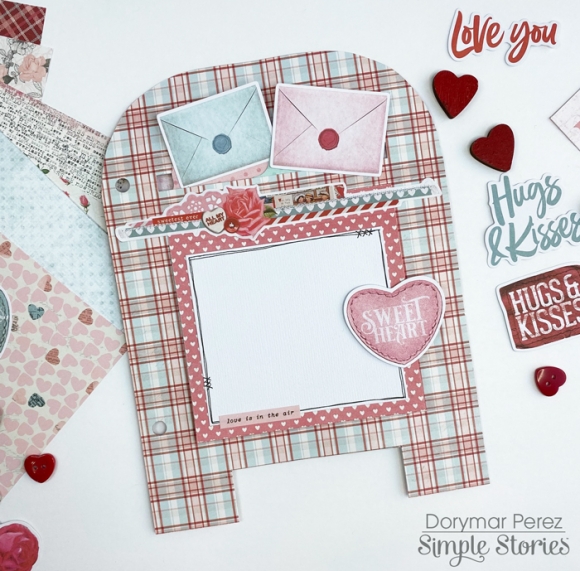
One of the typical things we see in the Valentine's collections are the mailboxes, because it’s one of the seasons that we send cards to our loved ones. I used one of the papers from the paper pad and drew a mailbox to create a beautiful page divider in my album.

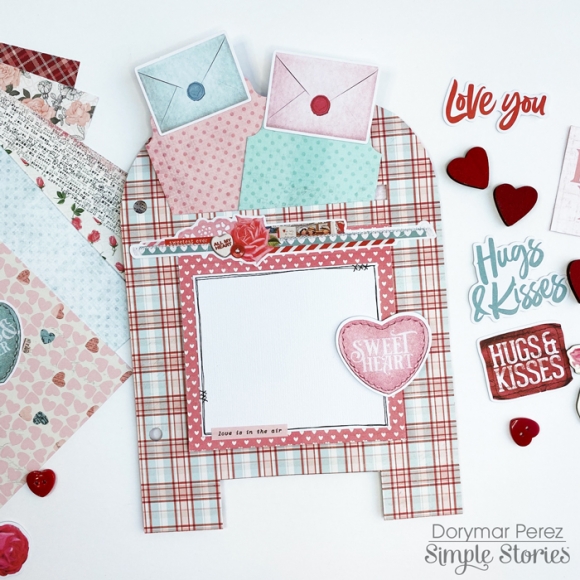
This mailbox has a pocket on the top and has two beautiful tags to add photos or journaling.  On the front it has a flap that opens and allows more space for memorabilia. It’s so gorgeous!

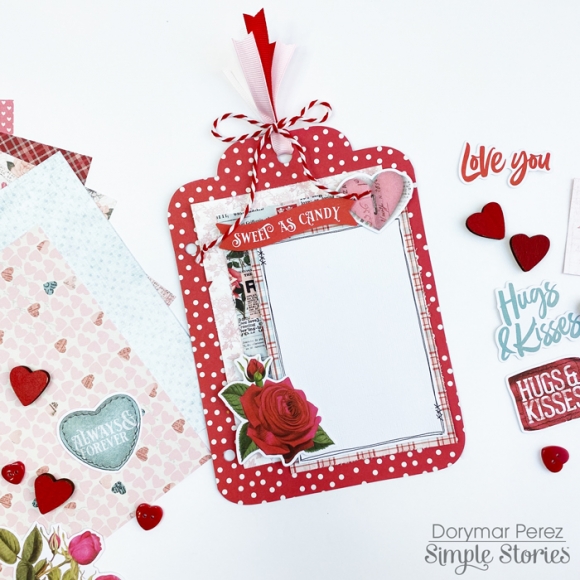
One of the things I love about snap albums is that the page dividers have various patterns and colors and allows me to play with them. In this case I created a giant tag to change the pattern of the album and make it fun.

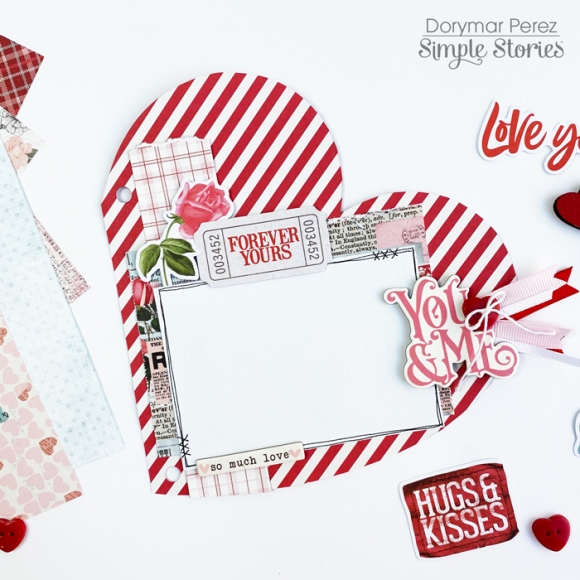
A giant heart couldn’t be missing in this project, I used another page divider and draw a heart to continue incorporating versatility and more space for photos to my project.

I selected one of the 6x8 papers and cut part of a heart to make a pocket, I decorated the front with the love word on chipboard and closer I adhered stickers flowers.

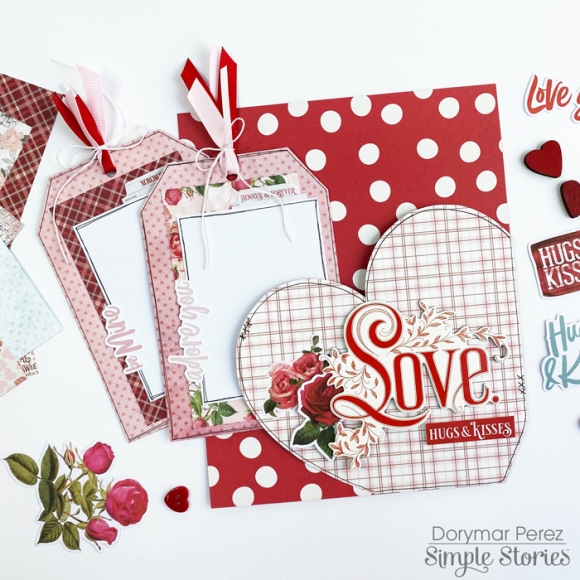
Inside the heart pocket, I included two tags, which I’ve decorated and created areas which will be perfect to add pictures or journal.

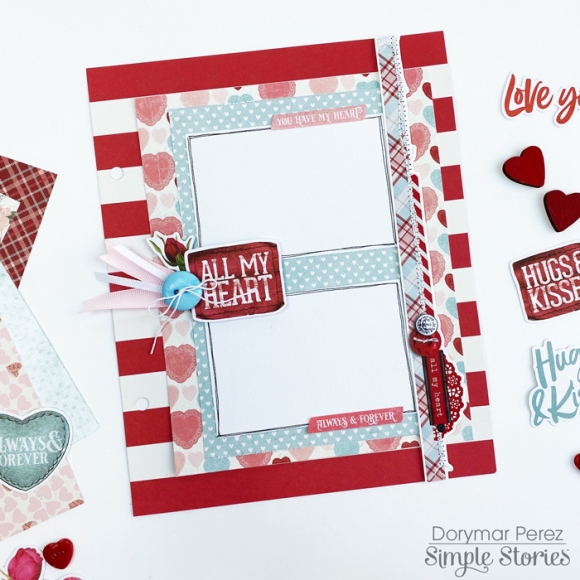
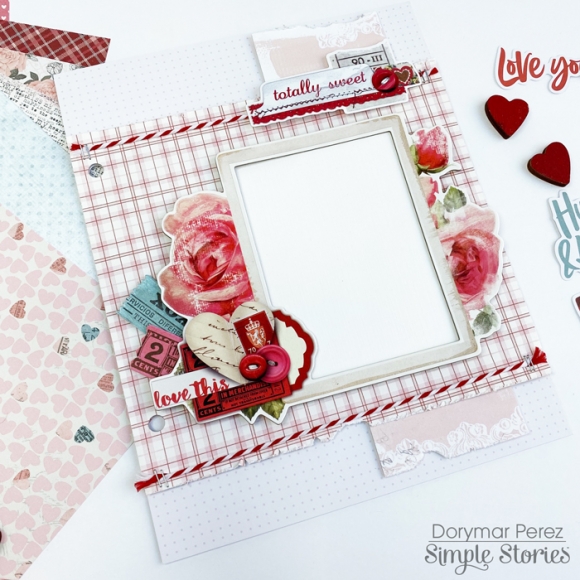
In this page divider, I created a big flap on front with space for a lot of photos, on the side I placed a beautiful border that includes the sticker sheet and on the side where there is space for the photos I incorporated die cuts, tape and a button.

I hope you enjoyed the project and I also hope it inspired you to use this fun collection. Please come join us on Social Media @simplestories_ and myself @dorymar_pl.

Happy scrapping!

Supplies

Hello friends! Its Jennifer here on the blog to share another awesome collection from Simple Stories!  The new Hey Crafty Girl line is perfect for your DIY projects and layouts all about your scrappy girl getaways!  The mint greens with turquoise, pinks, and yellows are beautiful! I  am a big fan of ledger print paper so I  began with Create Beauty as my background. I  then adhered a large piece of the multi-colored Crafty & Happy to the center of my page followed by thin strips of the B side of DIY Queen to each side. 

For my title, I  used the die cut out sentiment "I'm So Crafty"  from the Bits and Pieces and adhered it with pop dots to add dimension. Using my Silhouette, I  cut out floral pieces in white cardstock to layer under my title and embellishments (Bloom by JustNick).  You can see the floral cluster and mint scrapbook also found in the Bits and Pieces. 

Under my title, I  added the fun "eat.sleep.craft.repeat." sentiment as well as a small journaling spot from the Journal Bits and Pieces.  These little accents are a nice way to add more to your title or make notes about your layout. 

This particular journaling spot caught my eye due to the pretty plaid pattern around the edges as well as the delicate floral cluster at the corner. I  added the pink typewriter from the Bits and Pieces  as well as additional floral clusters.  

At the top of my photo I  added additional  ephemera such as this fun sign sentiment "Get Your Craft On".  I  will usually use pop dots/foam tape on at least one piece to add dimension to my page. 

From the Combo Sticker sheet, I  placed  the wood grain scallop border sticker just left of the center patterned paper.  I  felt this was a nice way to add balance to my page as well as fill white space.  You can also see the cute button stickers I  placed as accent (of course adhering one with a pop dot!).

Thank you for stopping by the blog! Please visit the Products page to see Hey Crafty Girl in its entirety!  Have a great day!

Supplies

Hi everyone! It’s Tara with Secretbees Studio.  Christmas is over and now is the time to start thinking about those New Year's resolutions. One that is always good and productive is keeping a journal but wouldn't it be more fun to keep track of your art journey?!

The new 'Hey Crafty Girl' paper collection from Simple Stories is full of vibrant and fabulous patterned papers and the cutest embellishments for any craft you can think of! I took all of these papers, along with the coordinating Simple Basics paper pack, and made this art journal that is perfect for documenting my crafty endeavors throughout the year!

The front and back covers, which are made from heavy weight chipboard and measure 6.24" x 8.75", feature four different patterns of the gorgeous paper. It was so hard to decide which ones to use! I loaded up the front cover with a combination of chipboard, stickers and Bits & Pieces and layered them over a charming 4x6 element card. I even tied on a sweet tag at the top!

Inside are 30 patterned paper and white card stock pages. Four of them are tabbed dividers which have been highlighted with some fun sentiment stickers to help keep me organized. They, along with all of the other pages, have been decorated with the phenomenally cute embellishments, stamps and stencil of the collection. There are pockets galore, journaling pages and plenty of room for photos or mementos! Below are some of my favorites in the journal!

If you are a crafter of any sort, this dazzling collection is for you! The possibilities to create are endless and the papers and every other adorable piece of this collection will definitely put a smile on your face! I'm so excited for the New Year to start documenting my art journey! If you want to make an art journal of your own, please visit my YouTube channel for a tutorial and look through the entire journal!

Supplies

Hello Simple Stories friends!

Nathalie with you today with an new project all about Family Love!  The new  So Happy Together collection from Simple Stories is the perfect combination of design and sentiment.   I couldn't resist using it to document a picture of my family at my husband's birthday.

I started this page by using a cut file from Paige Evans to cut the word Family three times from white cardstock.  These were stacked and glued together to add dimension to the title, then backed each letter with papers from the collection.  The 6x8 paper pad is the right size to back the empty spaces.

The woodgrain paper - Hello Love paper- is the ideal background for the page.  I trimmed the paper to fit 11x12"and then glued it to the Our Story paper.   A bit of handstitching adds dimension and texture to the page

With so many beautiful sticker and sentiment embellishment in this collection, it was so easy to layer them in clusters around the picture and title.  

To finish the page, i added a cluster of embellishments to the bottom of the page.  The scalloped border sticker was a fine detailed that helped soften the edge of the page a bit.   All that was left to do was add my lines of journal.

I hope this has inspired to check the new So Happy Together collection from Simple Stories, you are going to love all the details and sentiments.   

Have a  Merry Christmas and a happy New Year!

XO

Supplies

Hi friends!  I hope you’re having a great day!  Today I’m excited to share eight cards made with the new Simple Stories My Valentine Collection!  This collection is loaded with vintage victorian era images that are absolutely romantic!

You’ll also find lots of beautiful roses and fun prints to mix and match. There’s a fun twist of modern in this collection too – a pop of teal mixed in with the traditional reds and pinks.

This collection is loaded with embellishments!  You have your choice of 12” paper prints for page layouts or 6x8” paper pad sheets with smaller prints for card making.   

The die cut printed images include Bits and Pieces images, Page Ephemera for documenting, and my favorite – chipboard stickers that add dimension and a rich look to your designs.

A mini sticker tablet is packed with sentiments, images, tabs and so much more.  I love to use what’s left after my card making to dress up my calendar or decorate envelopes.

Because the embellishments are made to work together you don’t have to worry about colors matching.  Everything is perfectly coordinated!

This collection also has a fun pack of washi tape with 3 fun prints.  I used the heart print on the above card to add a border along the bottom edge of the card.  A Chipboard Layered Frame is the focal point on my card, but would double as a cute frame for a photograph.

The Card Ephemera die cut pack has lots of images to embellish your card while the Bits and Pieces pack features sentiments so you’ll find one that’s perfect for everyone on your list

Love is in the air with the Simple Stories My Valentine Collection!

Supplies

Hello lovely friends! It’s Kylie back with you today, to share a new layout I have been working on, featuring the gorgeous ‘Holly Jolly’ collection. I had some fun photos of my son wearing his Christmas shirt (*reluctantly….) and wanted to create something with lots of different layers.

To begin, I used some green cardstock from my craft stash as my base and adhered a sheet of WINTER WONDERLAND over the top. I had removed a 1cm edge from each side, creating a neat border effect.

I then trimmed a 2cm edge off the PEACE & JOY paper before measuring a 1 inch border all the way around and carefully cutting this out with a craft knife and ruler. The square piece I had once the border was removed, had a 1cm edge trimmed off each side.

Once I had completed these steps I adhered the frame/border piece and the inner square to my layout. This gave a lovely layered effect showcasing multiple borders.

I printed two square photos and added them positioned diagonally to each other, to some layered blocks of square papers on my background. I did this with foam tape so that they sat up a little for dimension.

For the two remaining squares, I added some layers of die cuts and stickers to create a small ‘picture within a picture’.

To complete my layout I added the ‘village scene’ sticker strip throughout the centre of my layout, followed by the ‘Believe’ chipboard sticker as my main title.

I hope you have enjoyed seeing my layout today and it gives you a little inspiration for your own creating. Until next time,

Supplies

Hi, Odessa here with a couple of fun SN@P! layouts using Simple Stories Holly Jolly. It’s such a great Christmas collection - it’s pretty, full of bold colours and icons and just a little bit sassy. I’ve been using it a ton while catching up on my December 2018 album. Today Im going to share a couple pages.

Here I did a full page layout next to a page with some cute 2x2 square pockets. I had too many great pictures from when we went winter camping and here I am highlighting a few favourites. The Simple Basics coordinating plain and subtly patterned paper made a great background for my 6x8 layout and the colours all go so great together.

I love clusters and layers and a full page layout is the best way to play around with them because there is so much space! I layered various torn cardstock from Holly Jolly under my photo and went from there I picked out a sticker from the Combo Sticker sheet as my title and worked around the photo layering Bits & Pieces, stickers of all kinds and those perfectlyy coordinated enamel dots. I sandwiched a floral Bits & Pieces die cut between some of the cardstock layers to create some balance with the title in the opposite corner.

I filled up the 2x2 pockets on the opposite pages with some of the SN@P! cards and cut outs from the 2x2 Elements cardstock. I kept embellishing on the photo simple with a sticker and enamel dot.

This SN@P! spread is about one of my fav family traditions, putting up our stockings and putting letters to Santa in them. I used a lot of reds around the page and love how they pop!

The corner of this 4x6 photo was totally in need of a little cluster of fun. I mostly used the Holly Jolly Mini Sticker Tablet because the smaller size of the stickers work great in a small area. I added an enamel dot and a border sticker from the Combo Sticker sheet to finish it off.

I added the “believe” chipboard sticker here and it looks so great on this cut out from the 4x6 Elements cardstock. I did some journalling on a SN@P! card and stuck it in a photo flip with a tab from the Combo Sticker sheet. I love using those tabs on a Photo Flip to play up the interactivity.

When the Photo Flip is opened up, my kid’s Christmas lists are revealed! I like to get those in my album every year to capture what’s hot, their handwriting and what they are in to. Using a Photo Flip was a great way to get them into this page without having to add a separate page for them.

I hope you enjoyed and are inspired by this look into my December Album! Christmas scrapbooking is probably my favourite kind of scrapbooking. It’s my second year using just Simple Stories collections to put together my album and I really appreciate the range in the wintery and holiday collections so there is one for any mood of layout.

Supplies

Hello Friends! It's Kristine here today to share a fun layout using the NEW collection called "Hey Crafty Girl!" It is filled with so many great elements such as sewing machines, flowers, paint bottles and so much more! It's super cute in color and you can really create fun pages with this collection. I can't wait to create a little mini album and a few more layouts with my kit. 

My layout is called Artsy Memories Made. My friends and I attend this Crop and Create event every year and we have so much fun together. This is a layout showing us being silly at a photo booth. 

I used a silhouette cameo to cut out a background for my layout, then i added small pieces of patterned papers, elements and cute little pics. To finish off my layout I added Bits & Pieces as well as a few pieces of thread to make it a bit more " crafty " of a page. 

I hope you get a change to play with " Hey, Crafty Girl" You will enjoy it!

Supplies

Pages