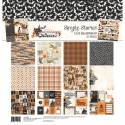
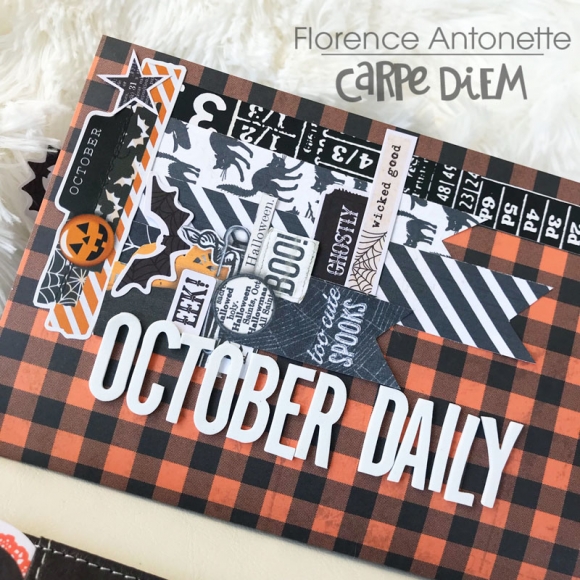
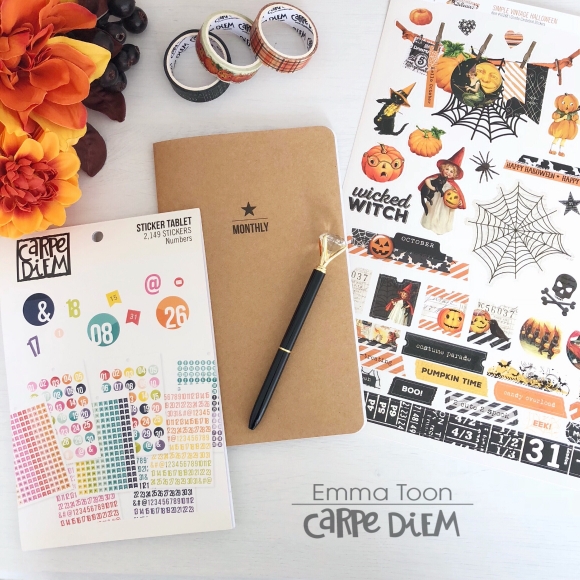
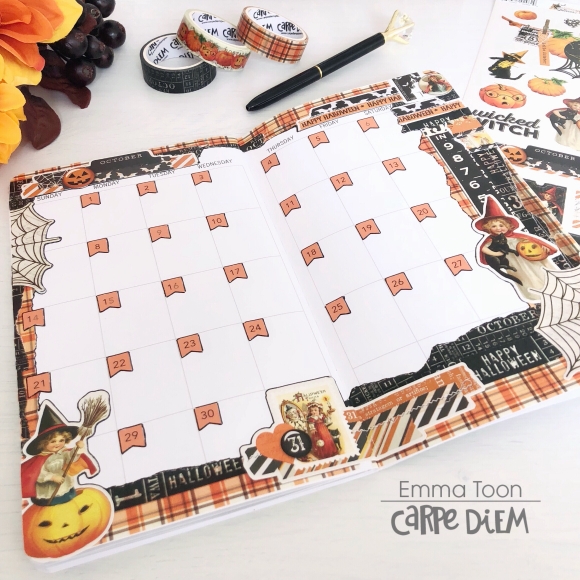
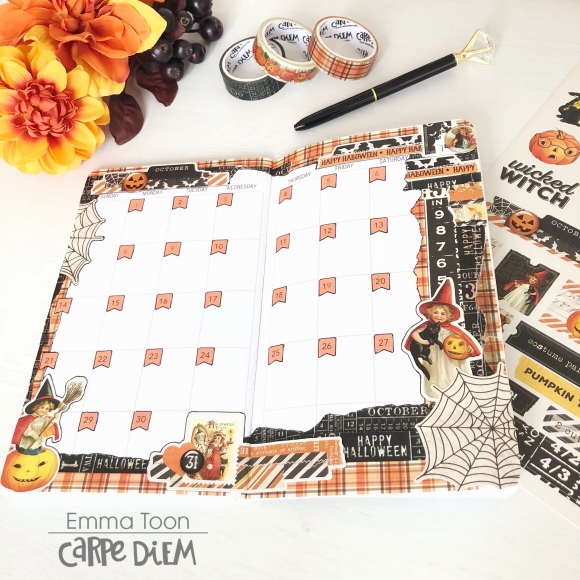
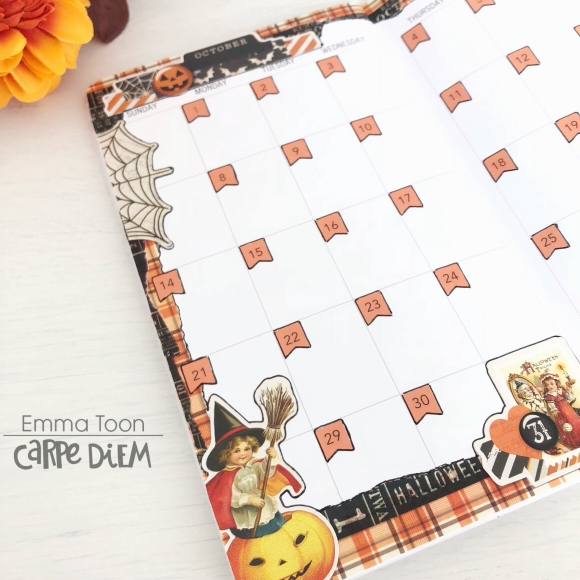
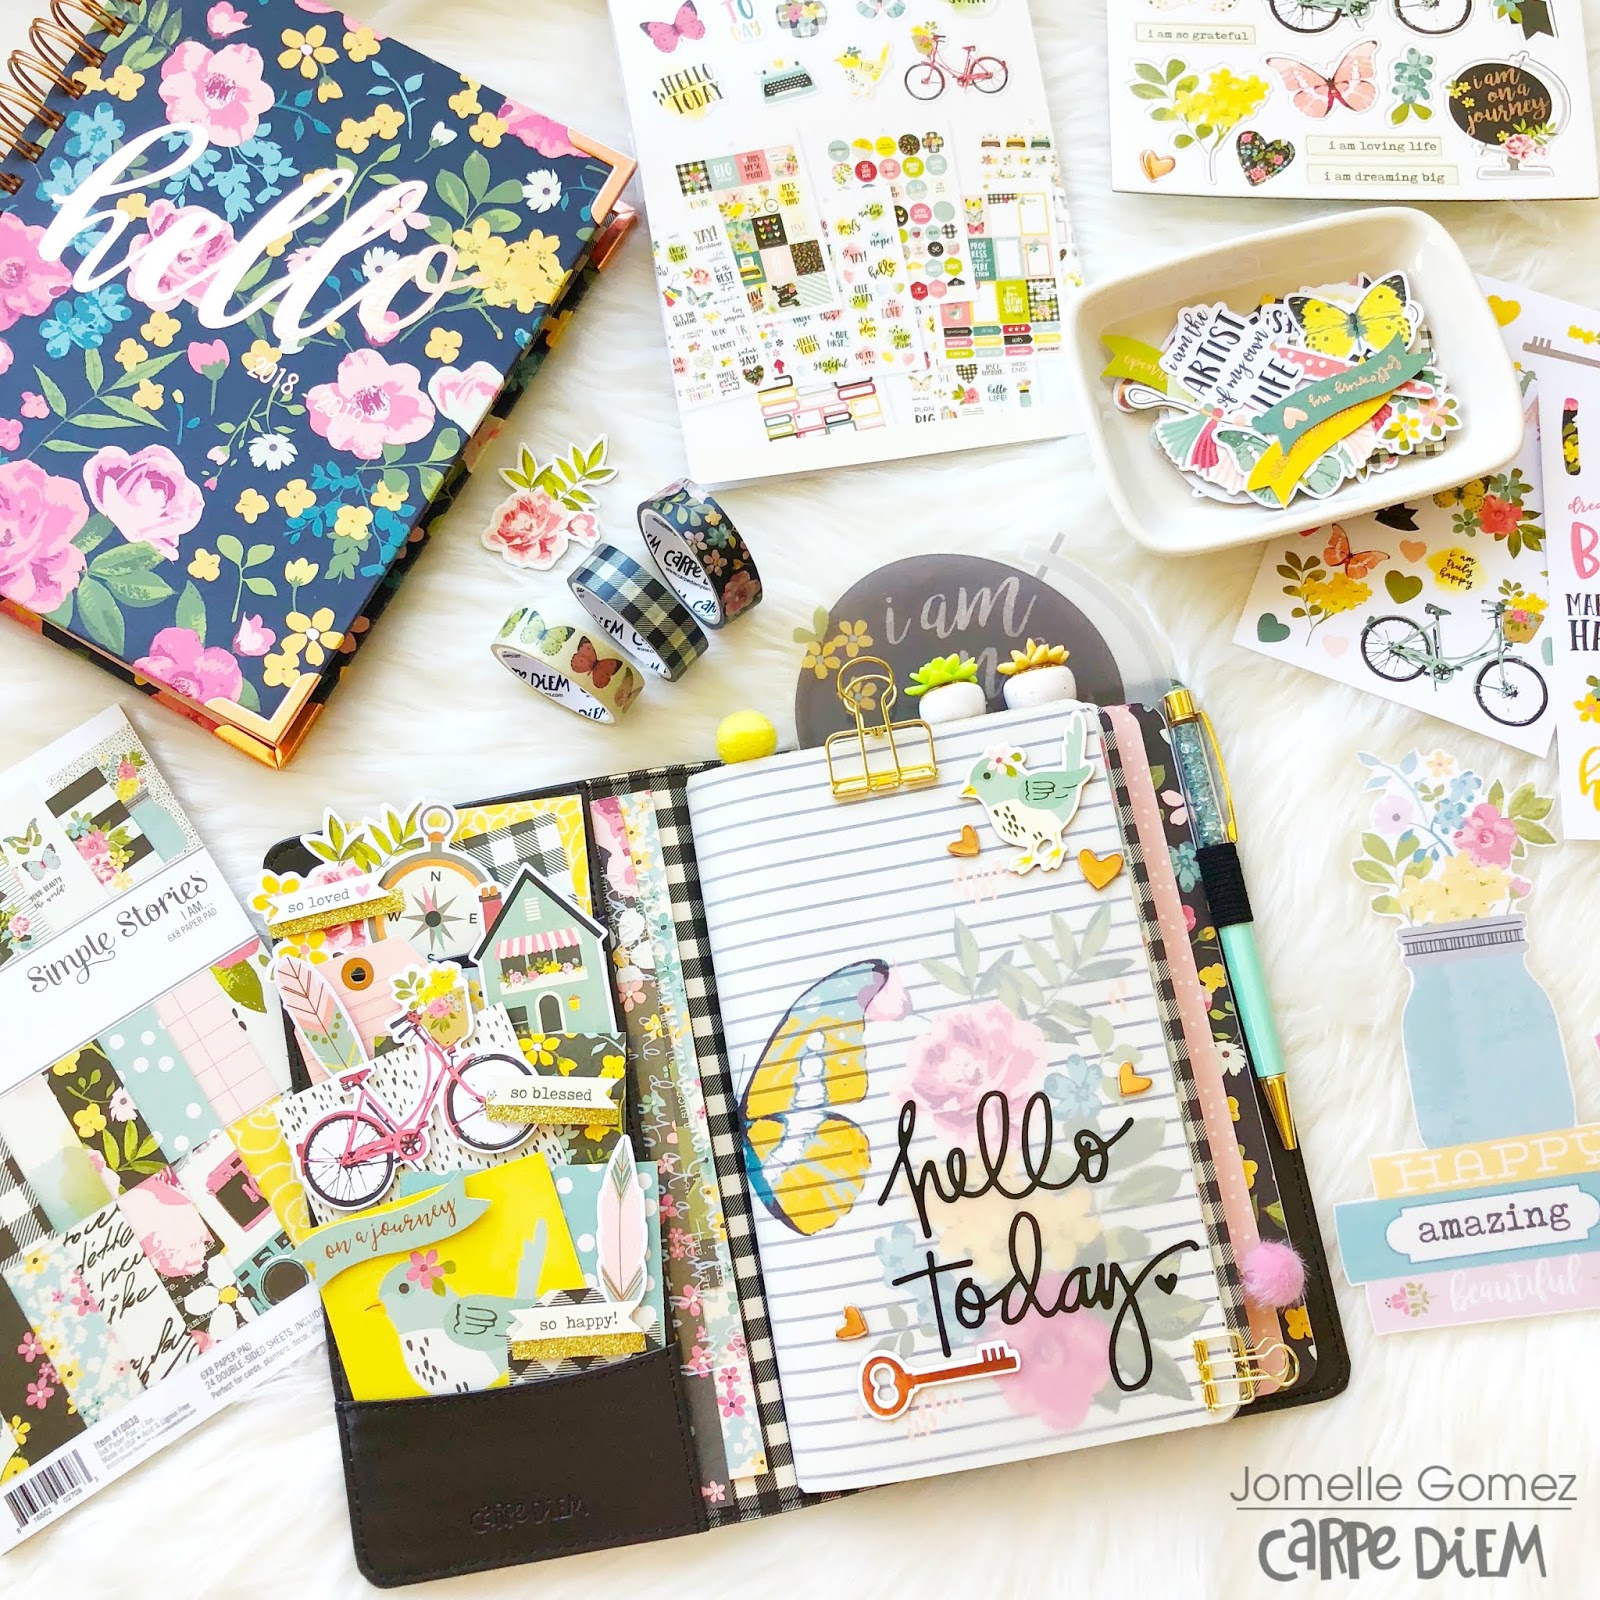
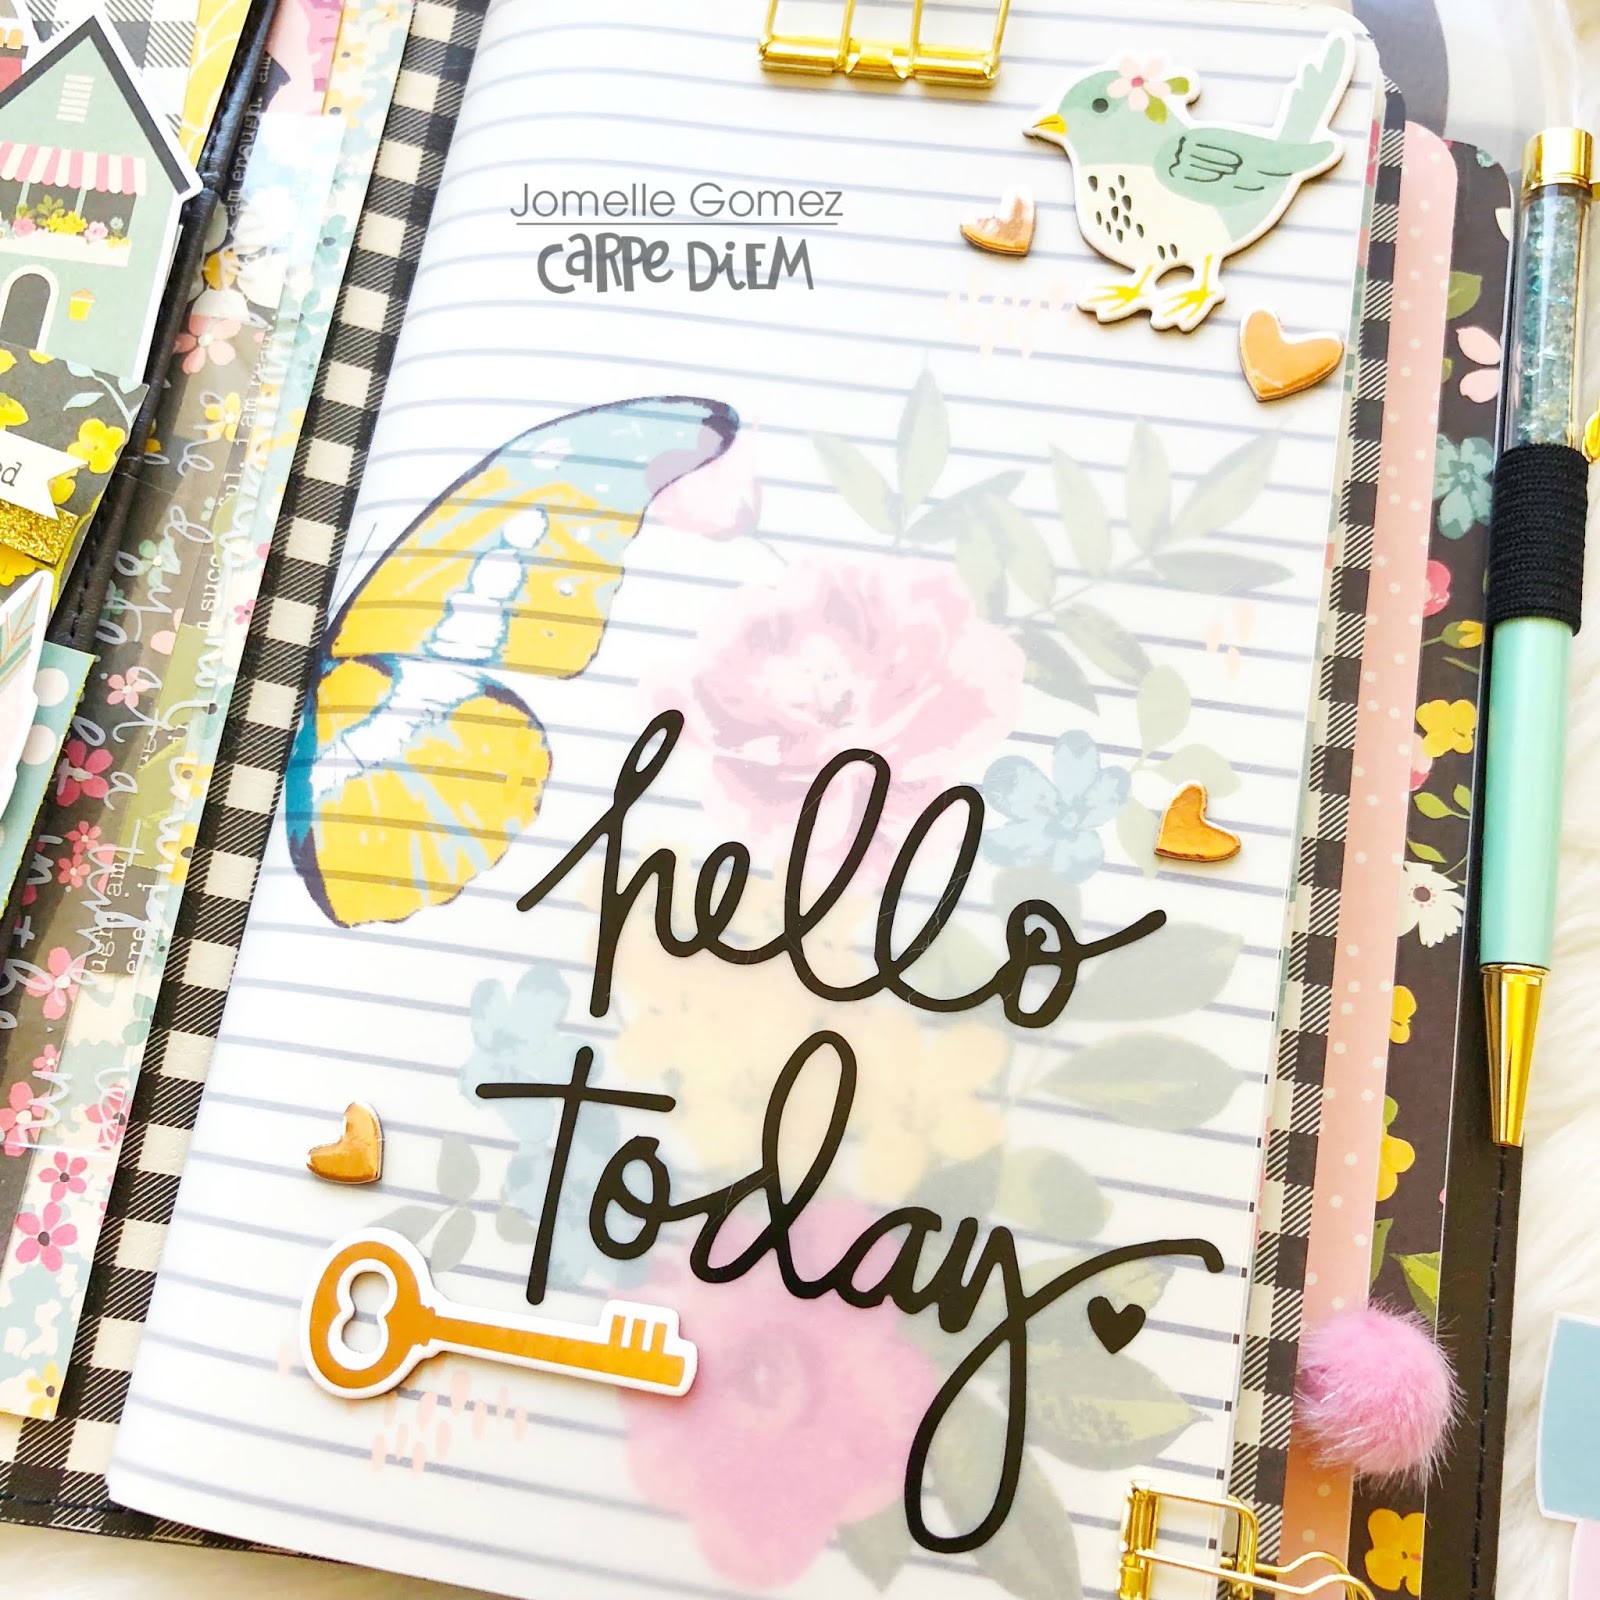
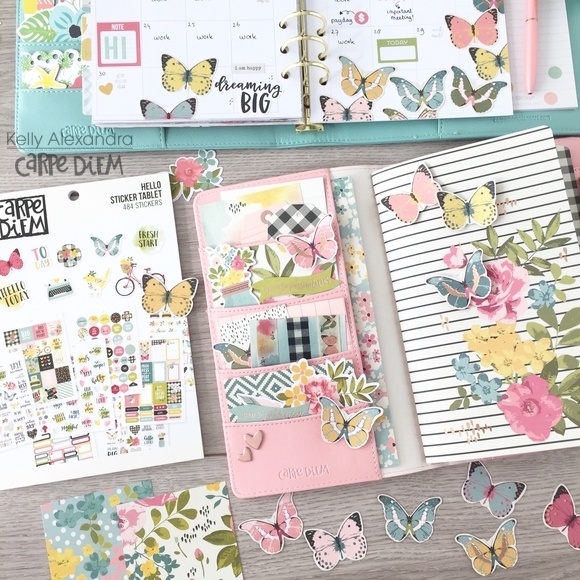
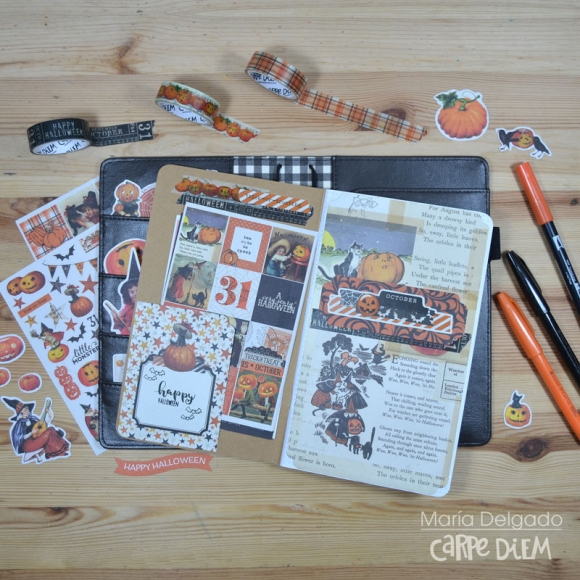
Hello creatives! Leah here with you on the blog today playing dress up with my traveler's notebook to get her ready for spook-tober! I love this time of year and as much as I love my current setup, the Simple Vintage Halloween collection has inspired me to decorate my TN for the season. Switching out the traveler's notebook cover and redecorating the pockets are a couple of easy ways to change a planner's vibe, but another way I really love to change things up is by creating interchangeable covers for my notebook inserts. It's a super easy way to keep using the same inserts but give them a different and temporary look, very similar to changing out your planner dividers.

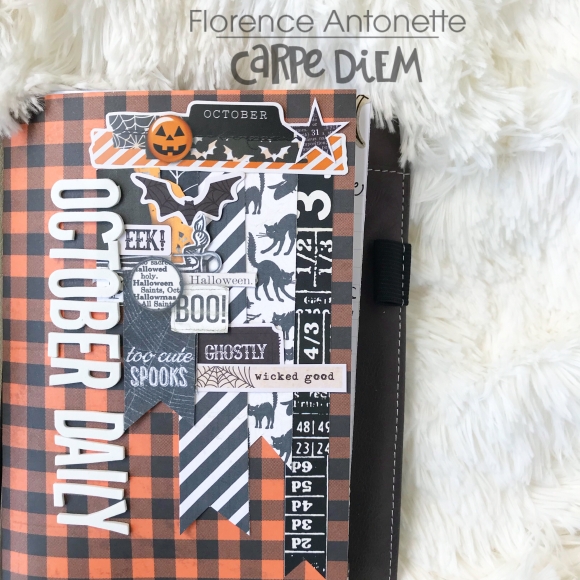
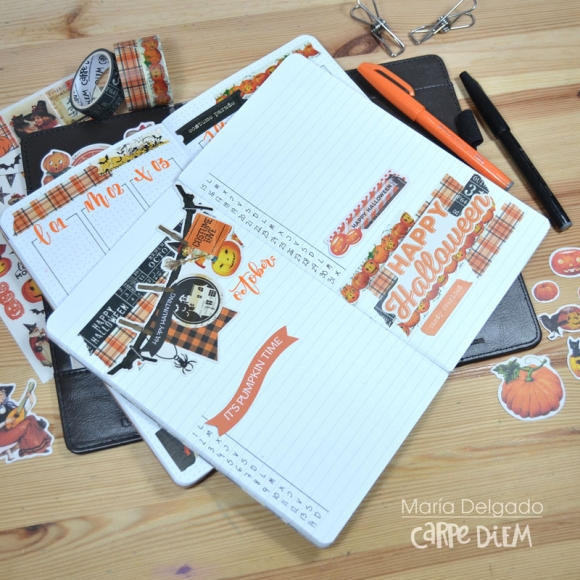
I've had several requests to film the process of creating a custom notebook insert cover and I'm happy to have finally done so.  Check out the video below to see how I made this Halloween-themed cover for my monthly notebook insert.

https://youtu.be/LNgsVKlcY60

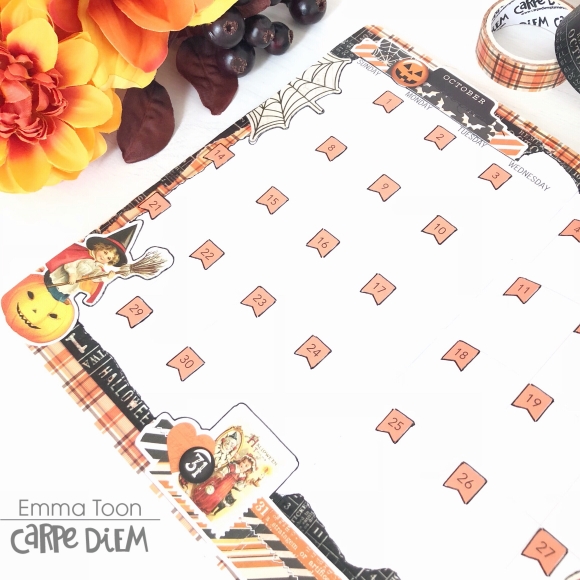
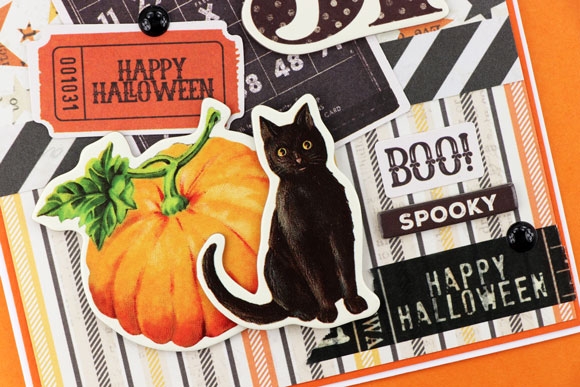
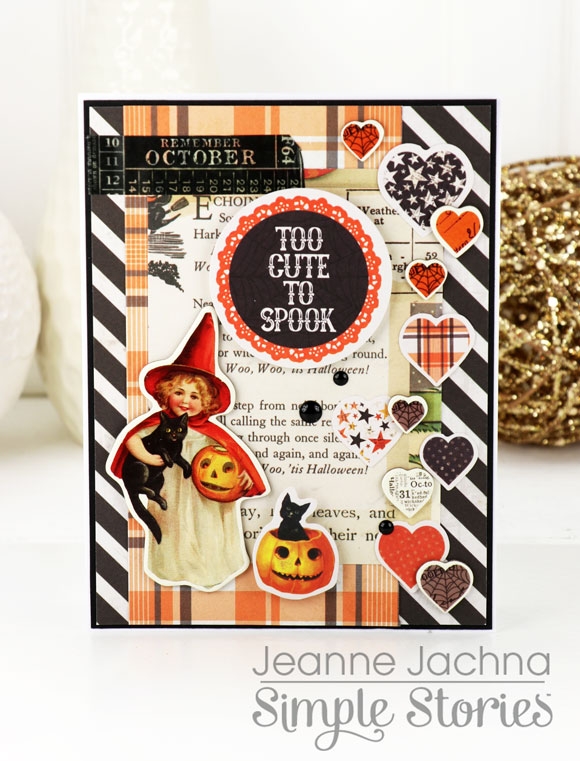
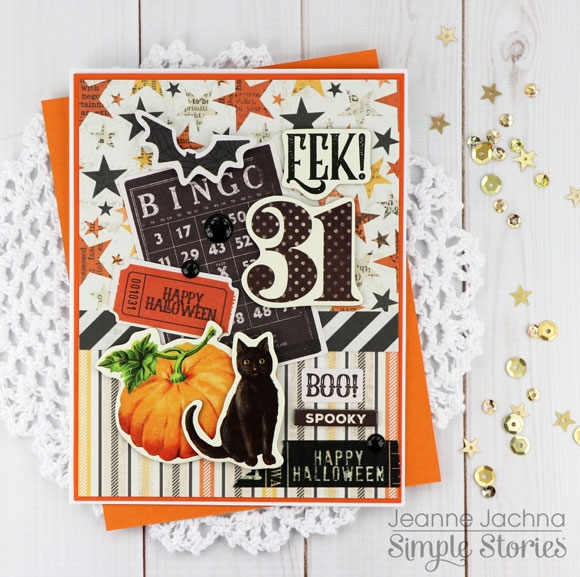
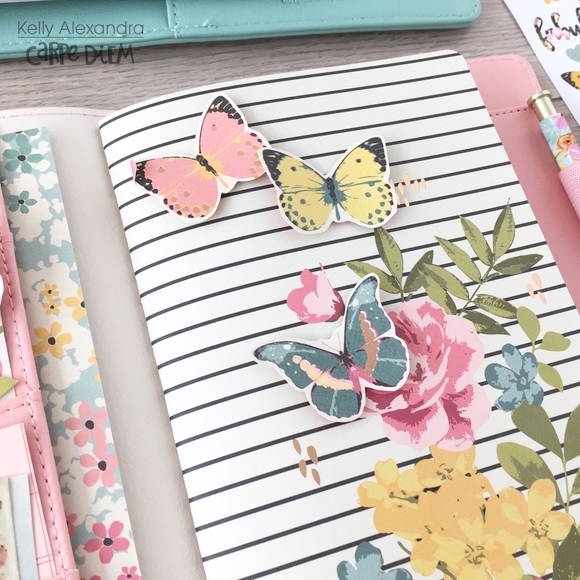
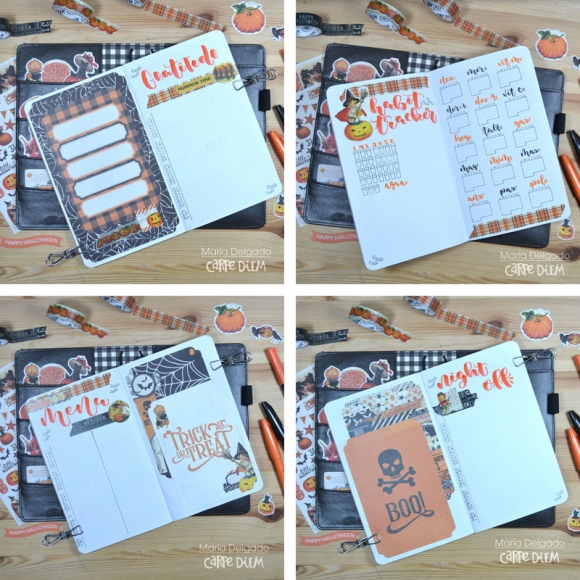
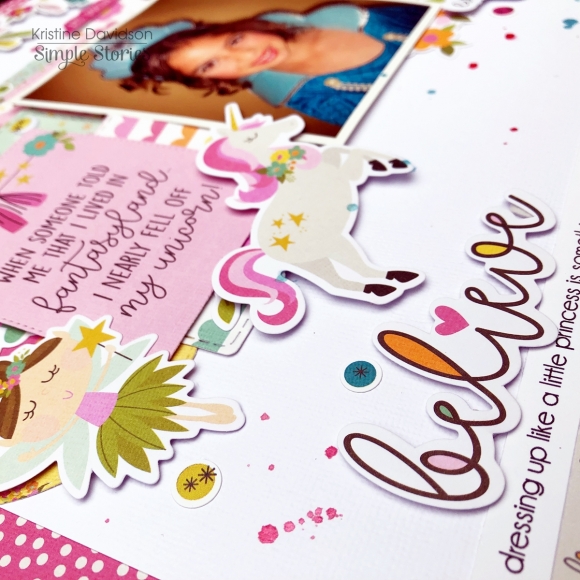
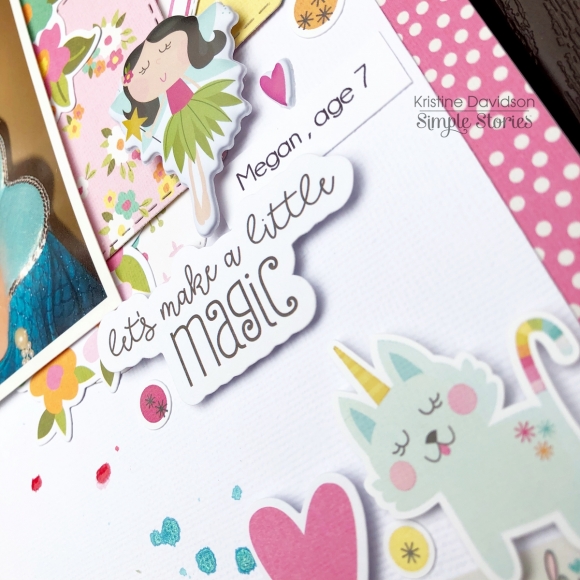
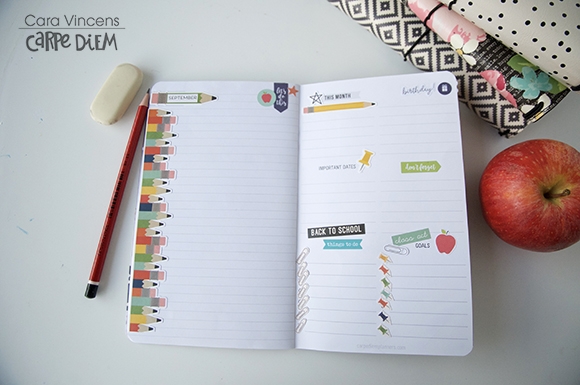
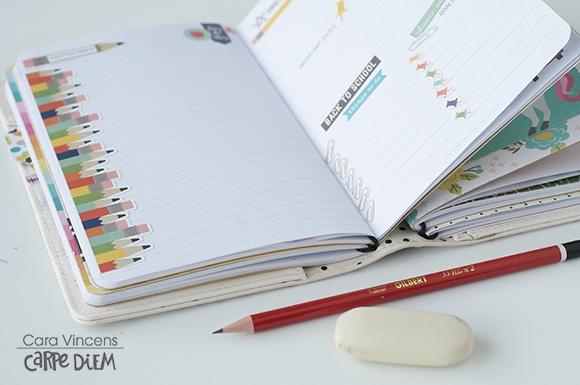
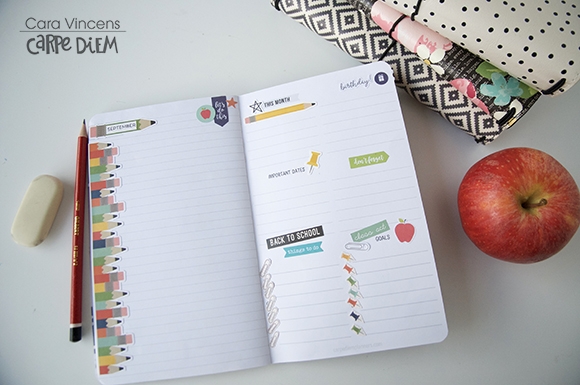
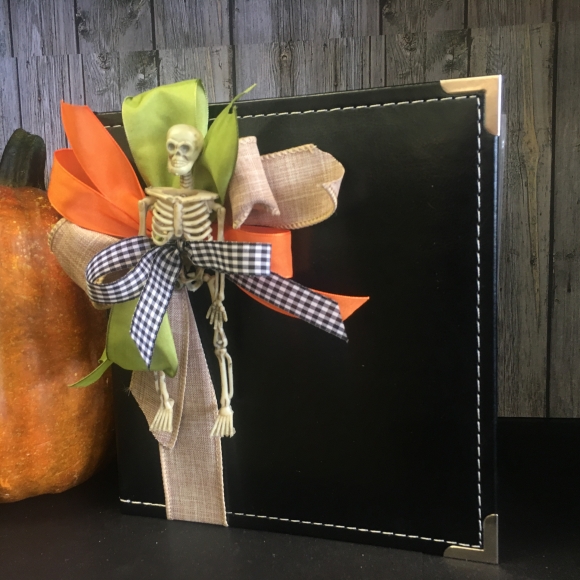
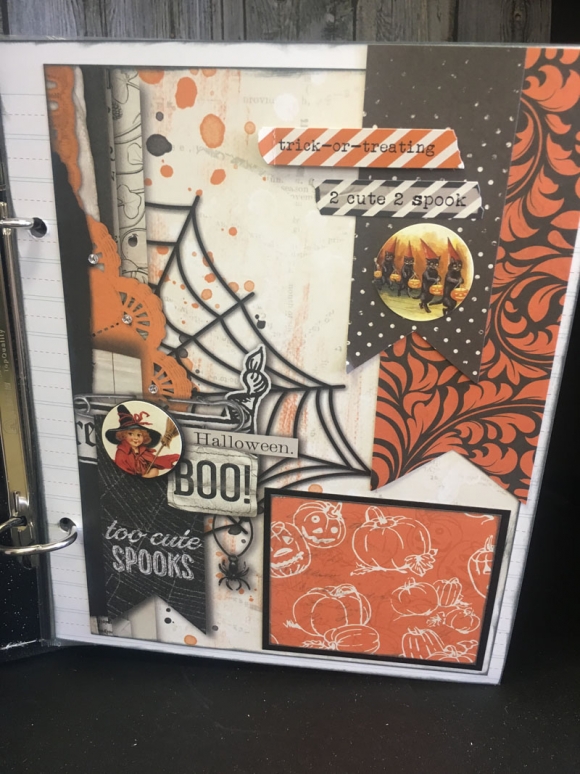
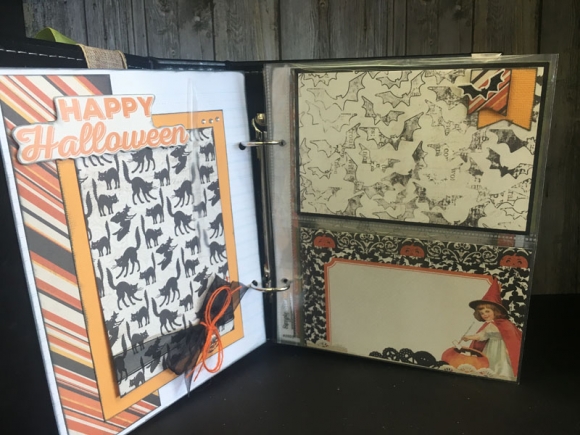
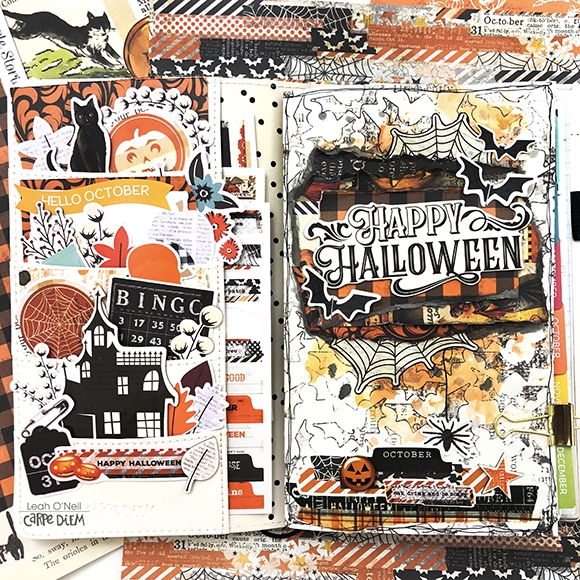
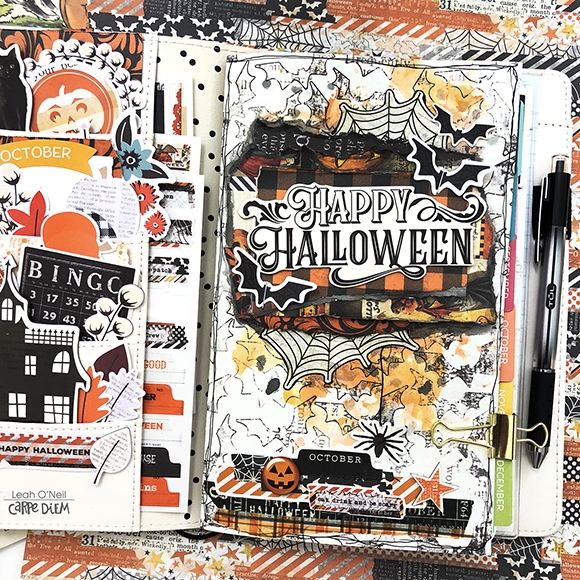
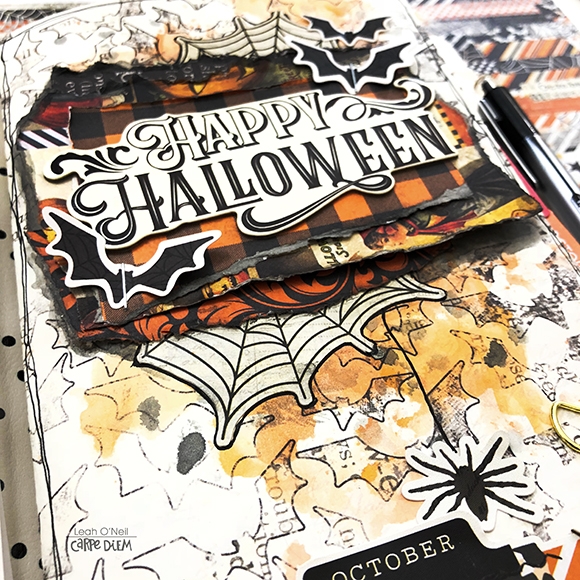
Here are some photos of the finished project. The best part about making covers like this is how you can  switch them out and re-use them later. After Halloween, I can switch to another cover and keep this one around to use next October if I choose to. I keep all the covers I'm not using in a spare TN when I'm not using them.

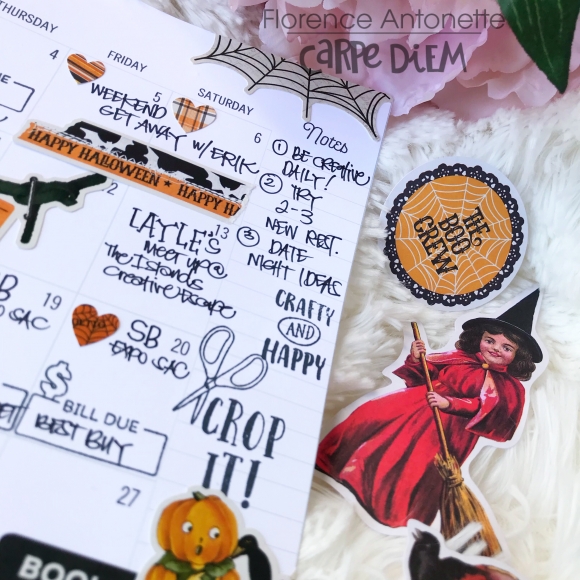
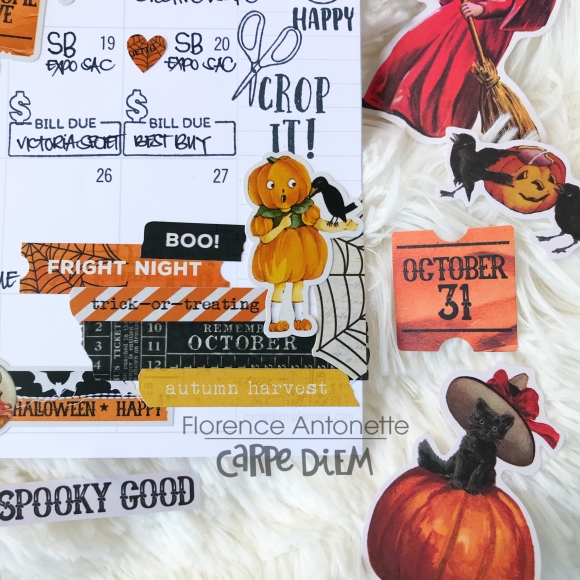
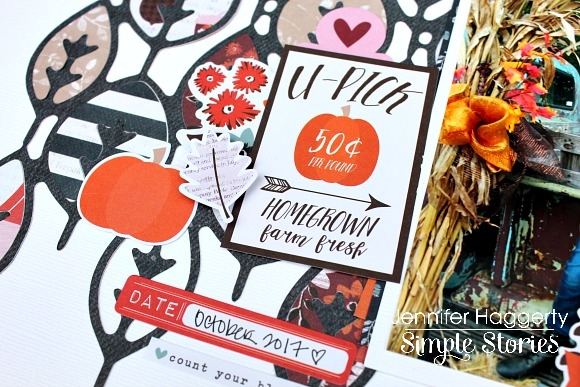
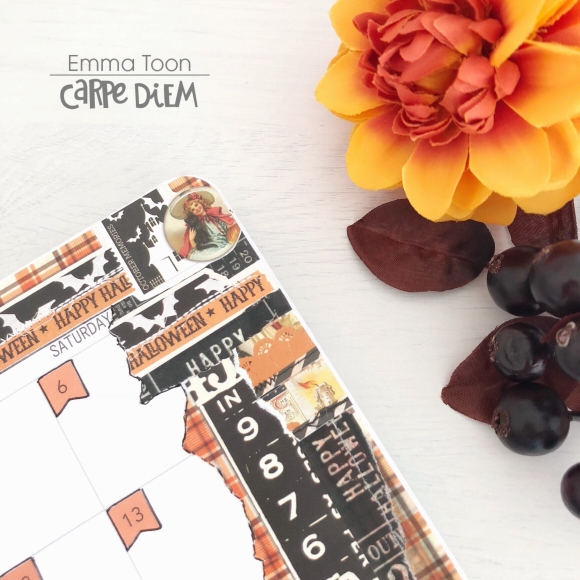
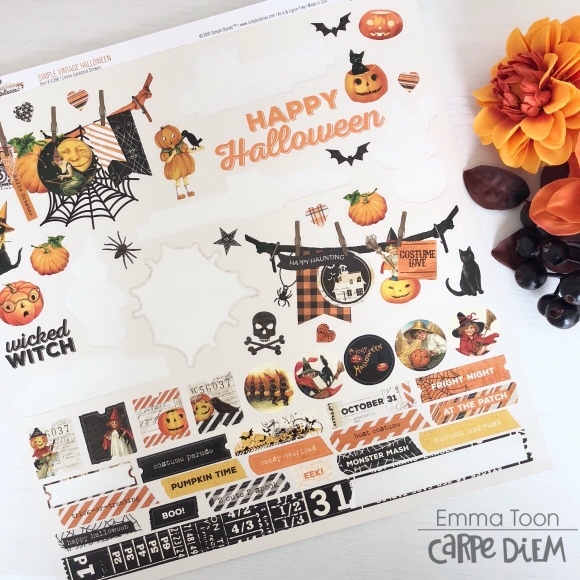
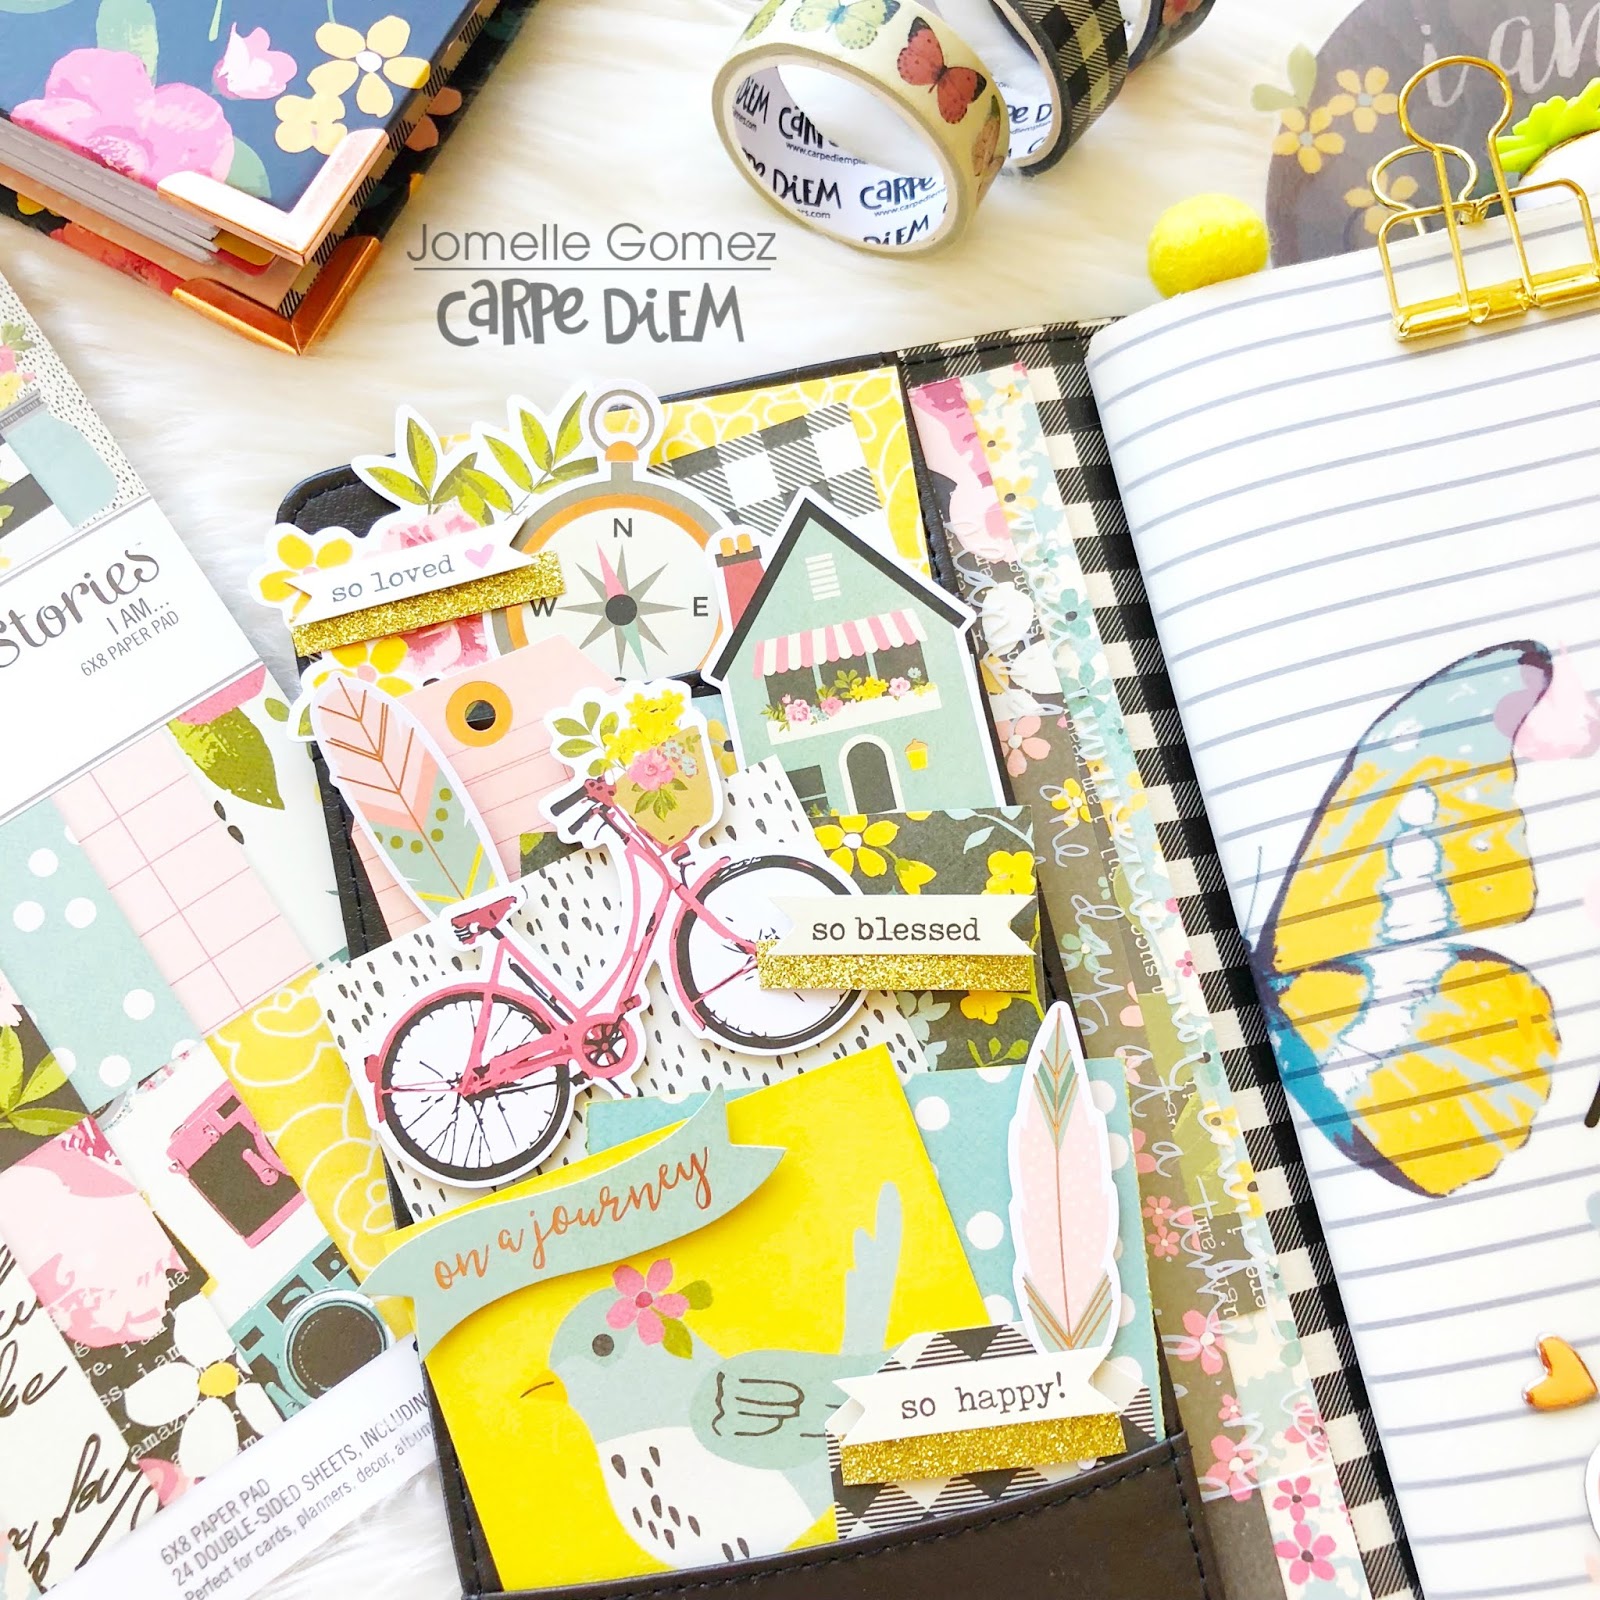
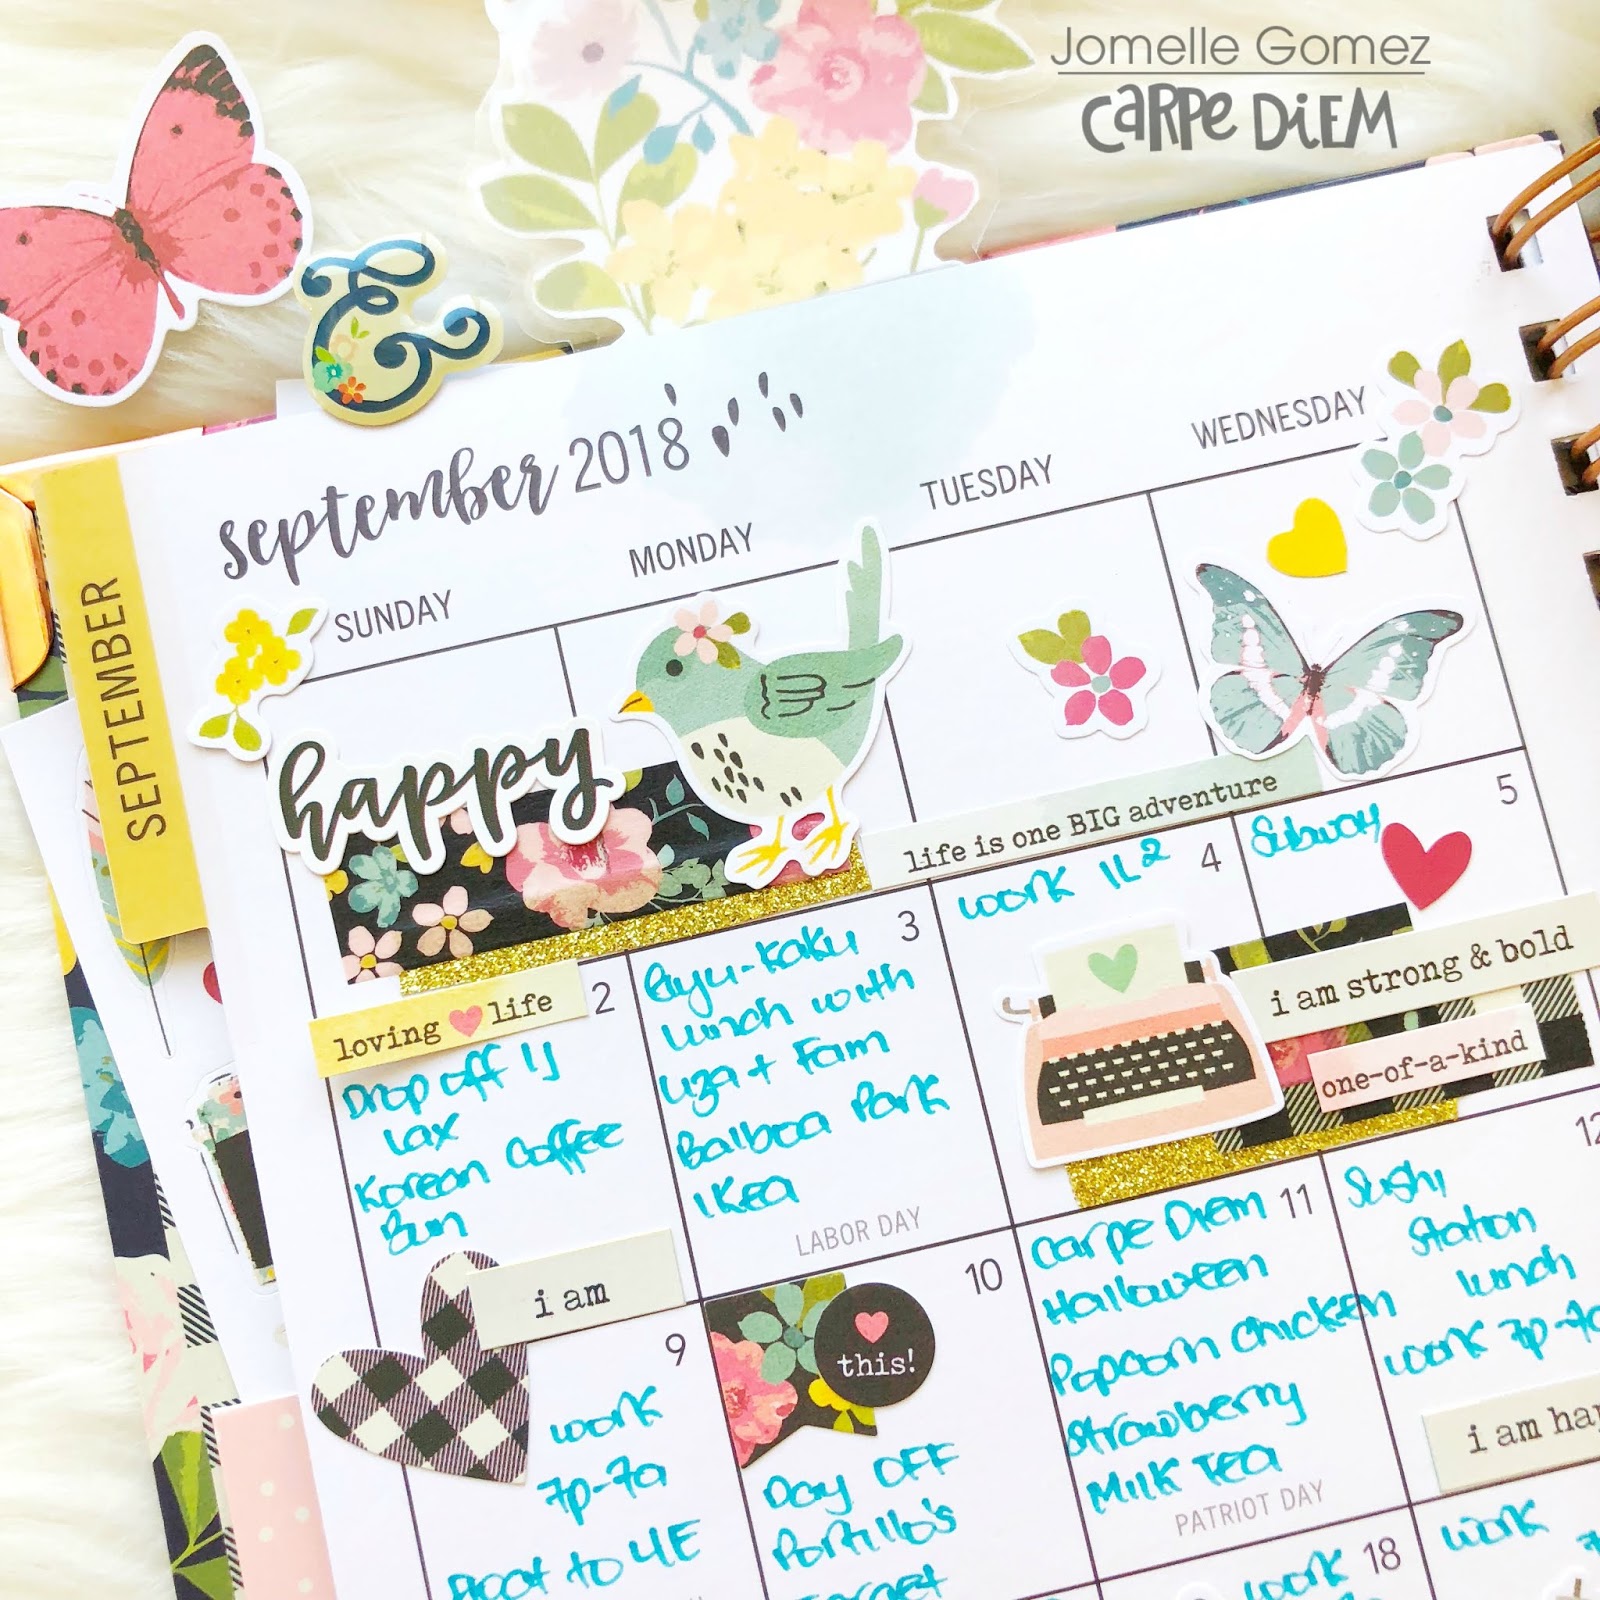
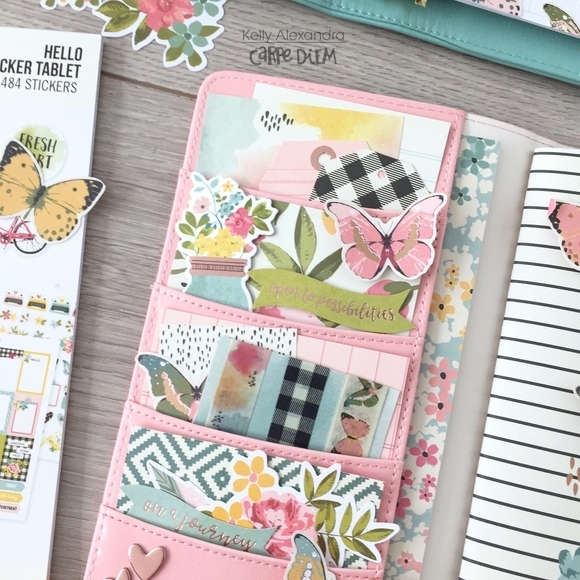
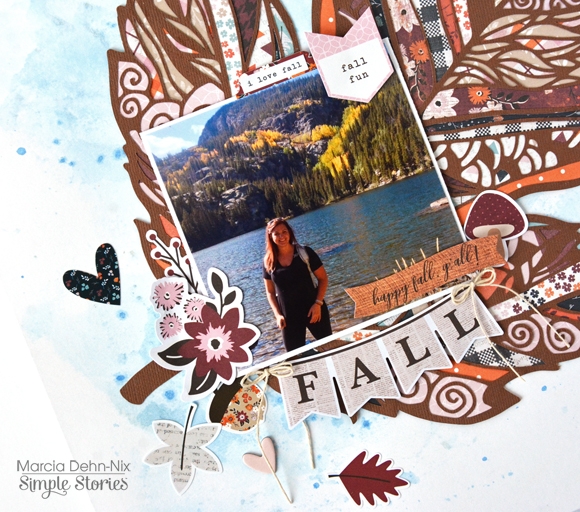
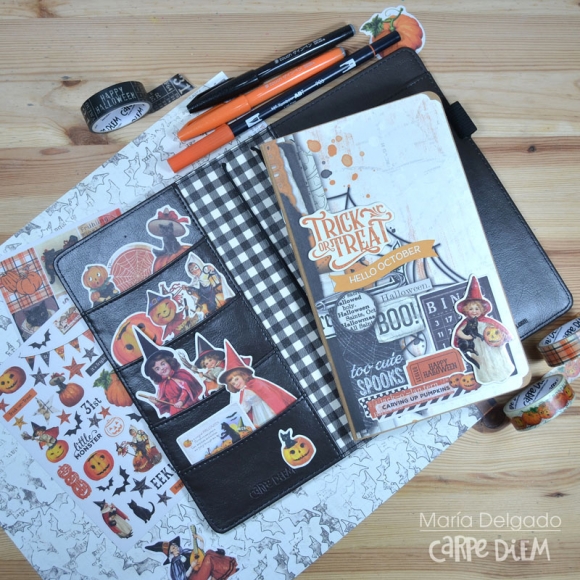
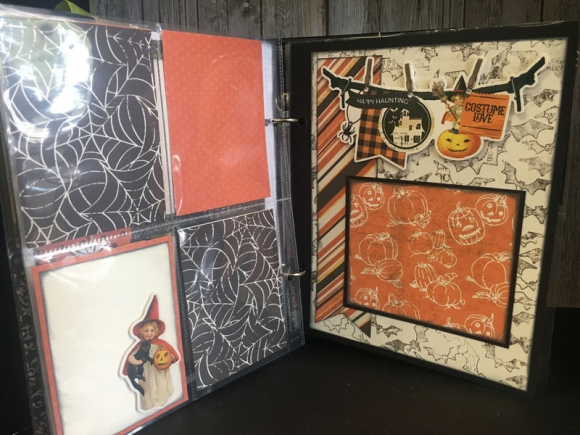
To add to the Halloween vibes in the front of my TN, I tucked a bunch of die cuts into the pockets to match my new cover. Most are from the Simple Vintage Halloween collections, but a few of the florals are from the Forever Fall collection. A little double-sided repositionable tape helps all the little pieces stay in place.

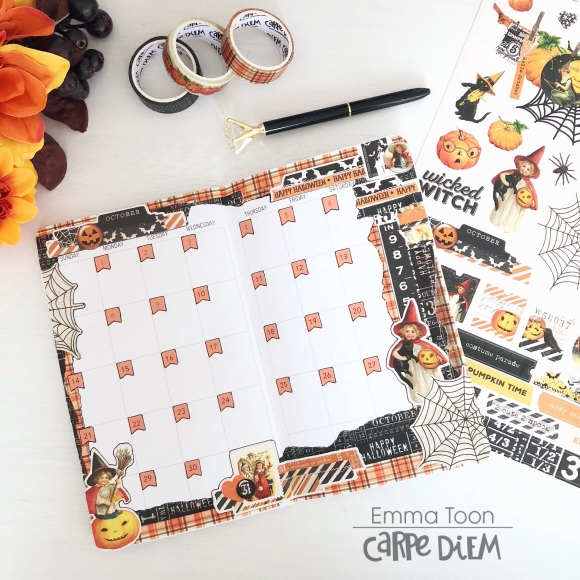
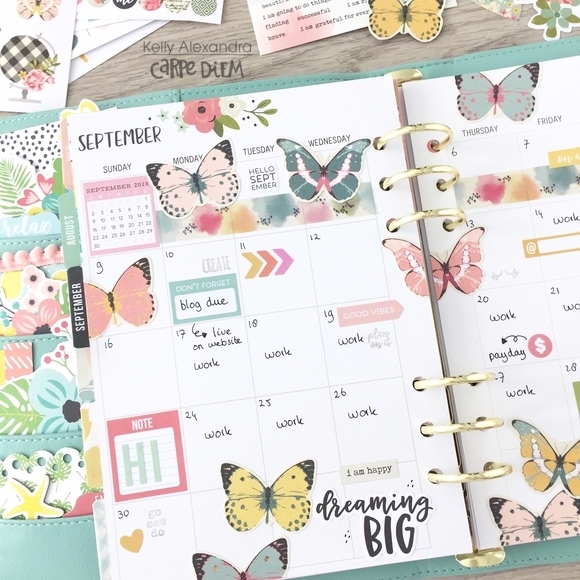
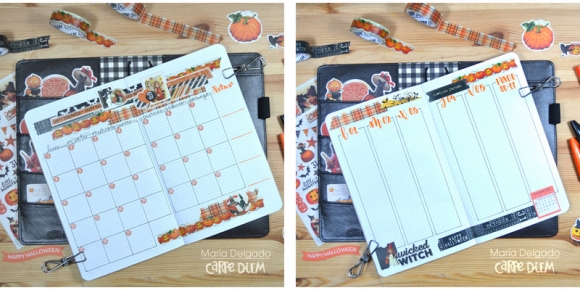
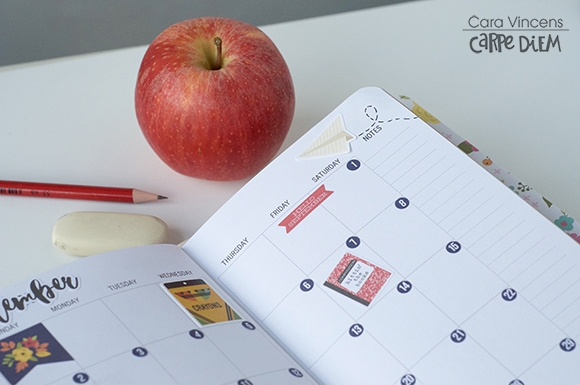
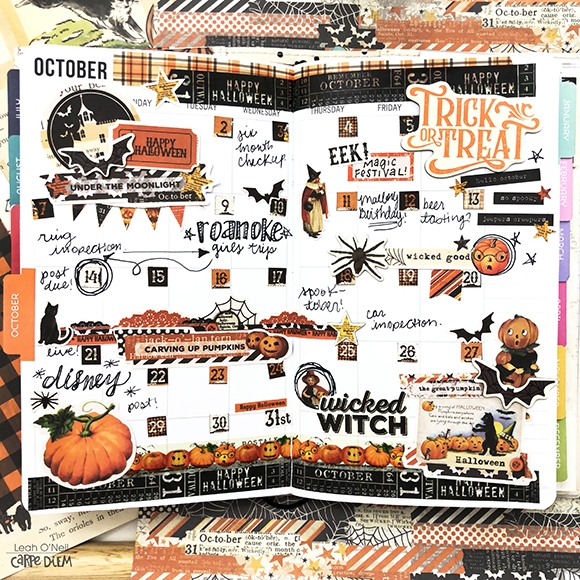
I'm so excited to finish setting up my October monthly setup. This collection has me so inspired and it's my favorite time of the year which has me feeling extra creative. I've done a little pre-decorating for October's monthly spread.

I can't wait to see what other ways everyone will use this collection. Are you working on or planning any Halloween or Fall-themed creative projects? Let me know below or come say hello over on Youtube or Instagram. Head over to the Simple Stories and Carpe Diem Planner Instagram accounts for lots more seasonal inspiration!

The orange glow from pumpkins on porches, stars twinkling in the night sky, and children exclaiming "Trick or Treat!" are just a few of my favorite things about Halloween! Hello, everyone! Jana Eubank here with a scrapbook page featuring the Happy Halloween collection.

I love when the 3x4 & 4x6 Elements papers include large words that I can cut out and use as titles on my scrapbook pages. This word adds so much fun color to the top of my layout!

I took the opportunity to decorate the using the 6x12 Sticker Sheet. For some added texture, I cut a long length of thin, white twine to use as a spiderweb trailing behind the spider sticker, wrapping it around several of the letters.

The banner sticker helps you to know that my girls are headed off to a party and it also anchors the witch sticker at the bottom of the main photo.

Finally, I added some sprinkles of white mist to mimic the look of a night sky.

How about you? Do you plan on attending a Halloween party this year?

Supplies

Halloween?  Already?  How is that possible!  But it will be here before we know it and I had lots of fun getting this fun Snap album ready for our not-so-spooky holiday.
I love the colors and patterns in the Simple Vintage collection.  Fun plaids, stripes, and polka dots paired with lots of cute chipboard pumpkins made this album come together very quickly.
I also love how the papers and element cards have a distressed, vintage feel!
How cute is my little granddaughter?!  These photos are from last year, and now I will just continue the album with photos for each year going forward. 

I also plan to make my album part of my Halloween decor, so that family and friends can flip through the cute pages each October.  I hope you love Simple Vintage Halloween as much as I do!

Supplies

Hey Sweet Creative Friends!

This year is just flying by and October is just around the corner. I printed the digital monthly freebie for the Travelers Notebooks. I’m going to glue this into my insert I’m using for October. I absolutely love Halloween and knew I wanted to use the Simple Vintage Halloween Kit for my Planning!

I also used some of our stamps, I am loving how perfect they are to complete a page. Some people say they aren’t stampers. Honestly neither was I. But I think once you find your groove and favorite products they’re so easy to use! 

I am also going to be doing October Daily. With this, everyday I do a challenge and document it. Whether it’s big or small and I just decorate it Halloween theme. It can be as simple as going to Starbucks to buy a Pumpkin Spice Latte, to taking my niece and nephew to the pumpkin patch. 

I have another blog post early October where I’ll be sharing you some of my inside pages as I will be documenting daily! Feel free to follow me on @livelifeandcreate to see my October Daily journal entries :) 

Winter, Spring, Summer, or Fall- which one is your favorite?! Hands down for me, FALL is my most favorite of all. I challenge you to dust off your paper crafting stash and lets use what we have to document October! 

Till next time!

Supplies

Hello friends! It's Jennifer on the blog today to share a layout I created using the gorgeous Forever Fall collection!  I   don't know about you but autumn is my favorite season! I  just love the colors of the leaves and cooler days!  Even better is creating scrapbook projects about fall!  Forever Fall is full of beautiful autumn hues and adorable embellishments and does not disappoint!

For my background, I  used a fun leaf cut file with the B side of Be Grateful which looks like blue denim! I then went back and inserted different patterns into the negative spaces.   Honestly, it was tough to pick which prints to use since  they are all so cute!

I  am a fan of layering my embellishments so I'm grateful Simple Stories always has many to choose from!  Here, I  used three die cuts from the Bits and Pieces pack followed by the "happy fall" circle from the 6x12 Chipboard.  I  wanted to add dimension to my title so the chipboard is "popped" up with pop dots. 

Showing more of the cute die cuts from the Bits and Pieces that I  layered next to my photo.  I  really love the newsprint leaves as they are a great contrast to the colorful prints!

I  also love to layer under my photos! Here, I  used the fun orange of the B side of Pumpkin Everything and the navy floral of Give Thanks! I also added a cute typed sentiment from the Bits and Pieces as well as a portion of the scallop border sticker from the Combo Sticker sheet! 

Thank you for stopping by the blog today! Check out Forever Fall in its entirety by visiting the Products page! Have a great day!

Hi everyone! Tara with Secretbees Studio  Summer may be drawing to a close (say it isn't so!) but you can preserve all of those wonderful Summer memories in a fun and happy mini scrapbook that is jam-packed with pages, pockets and pull-outs!

For this adorable mini scrapbook, I used the Simple Stories 'Hello Summer' paper collection with it's amazing mix of sunny colors and bold, playful patterns. There are plenty of fruits, florals and flamingos for every page along with lots of charming summer-inspired sentiments! This collection is all about summer vibes and will document your summer story in the brightest way!

The front and back covers were cut from chipboard to 4.5" x 5.5" using a paper trimmer before being covered with the colorful patterned papers. I used an assortment of stickers, chipboard and bits & pieces layered with the cute word stickers to embellish the front and even added a few to the back cover for fun!

For the inside, I had a mixture of Simple Stories pocket pages that I cut to the desired size- some 3x4, some 4x4 and even one with four 2x2 squares! Some had patterned paper added to them along with delightful ephemera and some were just accented with a sticker or two! There are even a couple of interactive pull-out pages as well

Check out my video on youTube to get a great view of the entire mini scrapbook and don't forget to preserve those Summer memories!

Supplies

Hi there, it’s Emma back with you today. I’d like to show you in this months blog how you can decorate your monthly spread without having to spend a fortune on products! Can’t be done?...it sure can!! Take a look! 

Here I’ve laid out the only products you’re going to need,and this can apply to any monthly spread, wether it be your A5, Personal size or TN insert pages, I’ve chosen to use my tn monthly insert by Carpediemplanner to show you. You’ll need a pen, washi tape, 12x12 combo sticker sheet and the Carpe Diem sticker tablet. The sticker tablet is optional, you can always write in your dates without it really affecting the look of this spread. 

Ready?...ok, let’s start! I have used a selection of the Simple Vintage Halloween washi tape to go all around the edges of the pages, you really don’t have to be neat, I like to rip pieces along the sides to add different textures and avoid blunt edges, it softens the look. Layer your washi until you’ve covered all the blank white spaces. 

Now it’s time to start adding some stickers from the 12x12 sticker sheet. Don’t ever be afraid to cut your stickers to make them fit where you want. You can add them to corners and then trim any overhang. I’ve done this with the huge cobweb sticker, and then with the piece I cut off, used it on the other side of the page. 

On the left hand bottom corner I’ve used the sticker of the little girl dressed as a witch and cut the overhang off, I like the finish that this technique gives.

You can also see here in the top corner where I’ve covered over the ‘October’ on the original insert and used one of the stickers that has the word ‘october’ on it. The design of this sticker is where I got the idea for this spread, it’s made to look like lots of different layers, all stitched together. This is another sticker which I cut to make it fit!

On the right side of the page I’ve almost mirrored what I did on the left, adding a witch sticker in the bottom corner, there’s the cobweb sticker that was cut and at the top a layered style sticker, which again, I cut to fit, and then the piece I cut off I used below it. 

I kept the centre of the spread really simple by literally just adding the number stickers, I used orange ones to tie in with the colour scheme and used my black ink pen to draw around each one, I also did this around the whole edge of the pages, it just makes the decoration ‘pop’! 

You can see on the used sticker sheet, just how a very small amount of stickers can go along way!! ...and don’t worry, the remaining stickers can then be used on your daily/weekly pages throughout the month! So, I don’t think that’s bad is it?!, a whole month of decorating your pages, only using one sticker sheet and some washi! 

The main thing to remember is, have fun! Enjoy decorating your pages, they are for you and nobody else, so as long as they make you smile, that’s all that matters!! As I’m always saying, there’s no right or wrong when it comes to planning...it’s what works for you! 

Thank you for joining me again this month, I do hope you’ve enjoyed looking at this spread and will join me again, next month. 

If you would like to see more pictures using Simple Stories products then checkout my IG account  Heartsbyemma (@heartsbyemma) • Instagram photos and videos

Supplies

Hi there, Nathalie with you today bringing you a bit of Fall.   I think that i look forward to the Fall season more than anything else; it's the cozy feeling, the colors, the cooler weather, PSL( Pumpkin Spice Latte!) and of course the crunching leaves.  And this year, Simple Stories new collection, "FOREVER FALL", is the perfect one to document all these treasured moments

To construct this page, a cut file from the Silhouette store was used to cut out letters to form the title from various papers from the collection.

While i hand stitched the title, I used a cut file from The Cut Shoppe to a group of leaves from all the papers in the collection. The color palette of the papers and designs in the collection are just perfect for the season, that i just couldn't chose one!

To have all the details of the page pop, I chose to use the Sn@p Basic Walnut/Cream Dot paper as a mat for this page.  Once the title was set in place, I layered some of the leaves at both corners of the title

A few stickers and die cuts were also nestled around the clusters just to  bring more interest to the page.  I added the small, "Hello", circle die cut behind the top corner of the title so that it can read as "HELLO FALL".

Since Fall is my favorite season, there is always so many memories being made outdoors; the picture was embellished with a few clusters at the top and bottom right corner. Just love all the embellishments included in the FOREVER FALL collection.

I hope this page has inspired you start your Fall documenting. The FOREVER FALL collection by Simple Stories is sure to bring the season to your page! 

Happy Fall you all

Supplies

 Good Morning everyone. Jomelle here today on the blog and I want to share with you my planner set up. I've always loved the "I Am" collection from early this year and to top it off, the new "Hello" Spiral Planner is a perfect match. I also love the new matching washi tapes.
 
I am using the Hello Spiral Planner and the new Typewriter Floral TN. Since the Hello Spiral Planner is dated and it started this August, I wanted to use it for memory keeping. I plan to decorate the whole planner with the "I Am" collection to keep the same theme.
 
 
I printed the butterfly from the digital elements on vellum. I cut it into the size of my insert and I folded it so that half of the butterfly will go on the front and the other half will be on the back. I used the "loving life" 12x12 paper and placed it under the vellum. As you can see it looks really pretty with the flowers underneath the butterfly.
I added the "hello today" small vinyl planner decal on the vellum. The birds, rose gold hearts and the key are chipboard stickers.
 I decorated the pockets with bits & pieces and snap cards pieces. I added the gold washi to highlight the words.
 I completed my memory keeping for August. I wrote down my work schedule and my family's adventures. I plan to write more detail journaling and some pictures on the weekly layout.
 
 My family and I had dinner at The Cheesecake Factory to celebrate my 39th Birthday. 
I finished decorating the Month of September so all I have to do is write down all my memories.
 I love layering the washi tapes and just adding stickers to decorate my layout. It's very easy to do but at the same time the layering makes it look really pretty.

 I cannot wait to document more memories in my Spiral Planner. Did you noticed that the spiral binding is rose gold? 
Thank you for stopping by and taking the time to view my planner set up. Have a nice day.

Do you love Halloween?  If yes then you’re going to LOVE the spooky sweet goodness of the Simple Vintage Halloween Collection.  It captures images from days gone by that  that are still endearing today.

I love the mix of classic images like the little witch and kitties next to elements of the  modern plaid and hearts.

I had so much fun making cards that I got a little carried away making 6!   I like to keep sheets of clear plastic the same size as my card base handy.  I arrange different elements from the Bits and Pieces and Chipboard Stickers on them.  It’s easy to pick up the clear sheet and layer it over the pattern paper to help me decide which ones to use.

After I get a card assembled I add embellishments like washi, stars, dots and sequins.

There’s lots of great stickers on the sheet that comes with the collection kit, like this file tab that says “October”! The journaling cards you’ll find on the reverse of some of the pattern paper sheets make great focal points for your cards too.  The one on my card had a label printed on it ready for the Trick or Treat sentiment from the Chipboard sticker sheet.

I used a circular die cut spider web from the Bits and Pieces pack as a full moon over the chipboard haunted house.

I just know you're going to love making everything from cards and layouts to bags for treats with this collection. It's spooky good!

Supplies

Hello friends, thanks for joining me for my first fall layout.  I noticed a paper folding trend a few months ago that I’ve been wanting to try involving a cascade of folded paper strips.  When thinking of autumn, my first thought is always of falling leaves, so I thought this would be a good technique to pair with a fall photo.  I pulled out my trimmer, score board, and the Forever Fall collection for this layout celebrating things I love about autumn.  Fall tends to come late in California, and at the first signs I can’t get into cozy sweaters and mittens fast enough.

The layouts I’d seen using these folded paper strips were pastel colors and I wanted to put my spin on it with darker colors.  I started off with the denim side of the Be Grateful paper as my background.  It already has stitching and splatter details, so I knew I could concentrate on all the goodies on top.

I cut strips from several of the papers in the collection in varying widths from one to two inches, then cut all of them into three inch lengths.  I scored them in the middle to have crisp folds, then ran the cut ends through my sewing machine to make them into little folded banners.  I placed my photo just off center because I knew I wanted a cascade of the papers coming down from the top in diagonal across the corners of the photo. This is a favorite design layout of mine.  I played with overlapping the folded banners upwards and downwards from the photo, then embellished them with chipboard, die-cuts, and square stickers from the 4x6 Stickers pack.

I clustered pairs of die-cut and chipboard leaves in three spots to reinforce the diagonal. You’ll note that the bottom pile of papers and embellishments doesn’t extend to the bottom diagonal.  I like a bit of asymmetry and often have one side closer to the corners and edges of my page than the other. The large “happy autumn” from the Combo Stickers were the perfect size to lay across the bottom edge of the photo.  They stand out from all the busy layers.  Since the folded papers have stitching that shows through in random areas, I added stitching to the title to tie it in.  Plus who doesn't like a stitched title? :)

For my journaling, I just used word strips. The sheet had all my favorite things and more!  I nestled them in the space under the title and finished off with a date label from the Bits & Pieces pack. 

There was a space to the left of the photo under the top cascade of papers that felt empty, so I filled it with the chipboard mason jar.  This also helps balance out the other end of the stitched title.  Most of the layout is made up of horizontal lines.  To break that up, I filled in spaces next to the leaf clusters with little round stickers.  For added interest,  I stapled a few elements with my tiny attacher.

I struggled a bit because I wanted to add all the cute fall stickers to this layout, but I pared it down since the folded papers provided quite a bit of visual weight.  That just means that I can go crazy with the embellishments in my next Forever Fall layout! :)

Supplies

Hi everyone, it is Kelly here today with a new blog post! For this month I decorated my Robin’s Egg A5 planner and Bloom A5 inserts and Blush Speckle TN with the I Am collection. The I am collection was released a while back, but the new Hello Sticker Tablet and Hello Washi Tape are a perfect match.

I selected two Washi Tapes from the ‘Hello’ Washi Tape set and the ‘Dreaming big’ Washi Tape to create a little Washi Tape sample card for my TN pocket. The rest of the pockets I decorated with a few flowers and butterflies.

For my TN insert I created my own cover from the ‘Loving Live’ paper and fussycut a few butterflies from the ‘Choosing Happiness’ paper. I only glued the middle of the butterflies so the wings can pop up. Love that effect!

The florals in the ‘Staying Positive’ are my favorite from the whole collection, so I had to use it as a dashboard in my planner. I added a 3x4 card, some stickers and four butterflies to finish the page.

I decorated the monthly spread for September with lots of butterflies from the ‘Choosing Happiness’ paper and a few stickers from the basic sticker tablet. To finish of the spread I used a few stamps from the ‘Mug life’ stamp set. This set is full of little quotes and words which are perfect for planner spreads.

You can find more spreads in my Carpe Diem planner on my Instagram account createplannernl.

I hope you have enjoyed reading this blog, have a nice day!

Supplies

Hello Simple Stories friends!

Marcia here today with some Fall layout inspiration using the beautiful new Forever Fall collection. Fall is my favorite time of year. There is nothing better than afternoon hikes to enjoy the colors, sipping pumpkin spice lattes, and trips to the apple orchard for my favorite honeycrisp apples. When my daughter did an internship in Colorado, she spent her free weekends hiking in the Rocky Mountain National Park. In this photo of her by a lake, you can see the pretty yellow leaves on the mountain behind her.

Various pattern papers back this fabulous leaf digital cut file from JustNick Studios. A colorful leaf is probably the first thing you think of for Fall and I wanted to include the many different colors in the Forever Fall collection.

I added embellishments to anchor my photo like this awesome Fall banner I created from stickers in the 4x6 sticker collection and beautiful bits and pieces die cuts.

I created a mixed media background using different blue mists. Forever Fall has some beautiful blue pattern papers and I wanted to play up this color. 

Thanks so much for stopping by today. I hope you have time to enjoy the beautiful Fall season. Don't forget to take photos so you can document the memories with the Forever Fall collection.

Supplies

It’s Pumpkin Spice season and Forever Fall is the perfect collection to document everything pumpkin! We get fall pretty early where I am. It’s like September 1st hits and sweater weather takes over. Our falls are also pretty short so I like to soak up every golden toned cozy moment. And take a million pictures to document it with Forever Fall!

I worked on a little SN@P! story about the beginning of fall and pumpkin everything. I started by decorating a 6x8 SN@P! binder so it’s ready for all my fall stories. I kept it simple, covering it up with the Forever Fall Get Cozy paper and a chipboard piece that says Let’s Get Cozy because this fall is all about everything cozy (after everything pumpkin of course). 

I opened up with a picture of my boys and I with our first Pumpkin Spice drinks of the year! I added in some cards and embellishments. I love that coffee cup journal card so much! And that patterned stripe on the other journal card. It’s swoon-worthy. 

I stuck a chipboard circle in the middle of the page protector to finish off the page. I really like doing that. Just make sure you’ve got all those pockets filled first because those chipboard pieces stick on really good.

I just love the colours of Forever Fall. The oranges, light blues with pops of pale pink and burgundy. It’s pretty great and very fall. This page has some more pictures and that fantastic Pumpkin Spice & Everything Nice 4x6 journal card.

I know shoe-fies are kind of overdone, but I really like them in pocket pages. They are perfect for lots of journalling, it’s like a photo-real journal card but it’s you! On this one I used some of the super cute washi from Forever Fall with one of the Bits & Pieces. It takes it from being just a photo to being a great fall statement.

On the next spread I included a 4x6 insert. The 4x6 vertical pocket pages are a great way to add in some focal 4x6 vertical photos or journal cards. 

On the other side it’s all about fall colours. Fall is when I pull out my favourite nail polish colour so I had to document that. I took one of the stickers from the combo sticker sheet  and cut it in half to create a cute frame for the photo.

For my Fall Favourites list I used a combination of stickers and Bits & Pieces to make my list. As a knitter, number 2 is my absolute favourite!

On the other side of the 4x6 vertical pocket I journaled about my favourite thing and the reason for the right hand page. Pumpkin pie soft serve! It really feels like fall when we go for a walk with pumpkin pie soft serve so that had to make it in. And it was a good reason to use all the cute pumpkins in the kit.

I made this super cute ribbon in the corner of this journal card using a sticker from the Combo sheet. I cut down some washi and a patterned sticker from the 4x6 pages and added a few more stickers around it. Super cute and super easy! I loved working with Forever Fall and can’t wait to get more of my fall stories told with it! I can’t wait for pumpkin patch photos!

Supplies

Hello! Here María again, with a new design for our bullet journal Halloween edition. Are you ready? I used the "Simple Vintage Halloween" collection that was perfect for this occasion, I can not wait until October to decorate my weeks with the stickers, those little witches are so adorable!

The first notebook is my "future log". I do it with a separate notebook to write down all the appointments, birthdays and commitments that I have in the month.
Washi tapes and stickers are perfect for decorating this section.

This is the outside of my second notebook, I have decorated with the papers and "bits & pieces". Also the new TN "Type Writer Floral" is perfect to accompany halloween, I love the interior black and white gingham.

Here the inside cover, I also made a pocket with one of the cards. In my pocket I keep my stickers to decorate the weekly insert.

The sections of my bullet journal: Gratitude, Habit tracker (with new format, I have used "Work It" stamps to make my water tracker, Menu and Night off (to point out the movies I see).

Finally for the monthly insert, I used "Numbers Sticker Tablet" for the days. And weekly with a "Mini Monthly Calendar Stickers" to mark the week.

Please visit me on my instagram account @ungirodetuerca so you can see how it is finished.

Supplies

Hello Friends!

It's Kristine with you today. I am ready to show you the cutest page using the Dream Big collection.

Don't be intimidated by bright colors or designs. You can often create a page using many pieces of pattern papers. Layers are simple to do and make it easy to use so many pieces and not all of them have to be the same size.

Here I cut up a few pieces of papers and stacked them over each other. This gives me the opportunity to add many pieces and creates a uniform background.

I used so many fun bits & Pieces, NEW Puffy Stickers and colors on this layout. I've had this picture for many years but never had the right collection. Dream Big is perfect for those fun dress up photos.


Hope you have yourself a MAGICAL day!

Supplies

Happy September planner girls! It’s Cara here, I’m a planner lover and a school supply addict! September is such a fun time of year. That back to school season is fantastic with it’s fresh starts, sharp pencils and crisp new notebooks. It’s a time to set new goals or learn something new, even if you aren’t going back to school and you don’t have children going back either. 

I’ve used the School Rocks collection to decorate my TN to help me plan my month, week and day and to plan in those goals as well. This collection is perfect for us school or office supply addicts! First off, I decorated my goal page, this page has lots of space for lists (I’m addicted to lists too!) and notes. 

The lists are labelled for you but you can use the stickers from the Planner Basics Sticker Tablet to cover them with list titles that suit you best. I covered up ‘Notes’ with a pencil label sticker and added ‘September’ so that I can use the notes page as a general ideas and brainstorming place as I plan the month. The big pencil looks cute with the stack of pencils running down the side of the page.

I got ambitious and fussy cut 7 paperclips and then 7 pushpins to use as my checklists. I find fussy cutting relaxing but if you don’t like it, you can use some of the small stickers from the Planner Basics tablet instead. 

Onto to the monthly spread. I mixed stickers from the September page of the Seasons Sticker Tablet and the Cardstock Stickers from the School Rocks collection.

I don’t tend to write a lot in the monthly spread so I can afford to put the large, full stickers in my boxes. My six children go back to school on 3 different days (yes, that’s annoying, but it’s also allows me to focus more on each child on their special day) so I marked those with big stickers. I also marked the first day of autumn with a sticker. With the paper airplanes I mimicked the dashed trails from the paper airplane card from the cut apart paper. I used small round navy number stickers from the Number Sticker tablet for the days.

Moving on to the weekly spread, there were lots of ‘First Day of School’ stickers to choose from so I was able to use 2 in this spread.

I combined stickers from the collection, the tablets and fussy cut bits from the papers to complete this page. I cut strips of patterned papers to trim the top and bottom of the pages.

For the daily spread, I simply decorated around the edges of the pages, because I like lots of space to write, I try to keep my to-do list to a minimum each day, but I’ll use the space for notes and brainstorming too. 

The schedule side of the page however will be completely full! Lots to do in a day with 6 children going back to school!

If you’d like to see how I made these pages, you can find a process video on my YouTube channel here: The Hooting Pirate YouTube Channel - Are you addicted to school supplies? Do you love a fresh notebook? Then the School Rocks collection is perfect for you :D

Supplies

I Love this new Simple Vintage Halloween line. The patterns and colors are adorable!!! Halloween is my favorite holiday so when I saw this collection I just knew I had to create with it. I can’t wait to set this cute Halloween Snap book on my coffee table. 

I added some cute ribbons and a skeleton to decorate the cover on the Snap Album. 

I love this page with all the cute elements!!! 

This book came together so easy using the journaling cards and snap sheet protectors. 

I can’t wait to put all my Halloween pictures through out the years in this album. By adding fold out pages to the book it adds dimension and places for more pictures. 

I love these new sticker banner elements they are so easy and so fun!!!! We will be making this adorable album at our Retreat this month!!!! The products used to create this album are the Simple Vintage Halloween Collection kit and black snap album.

Supplies

Pages