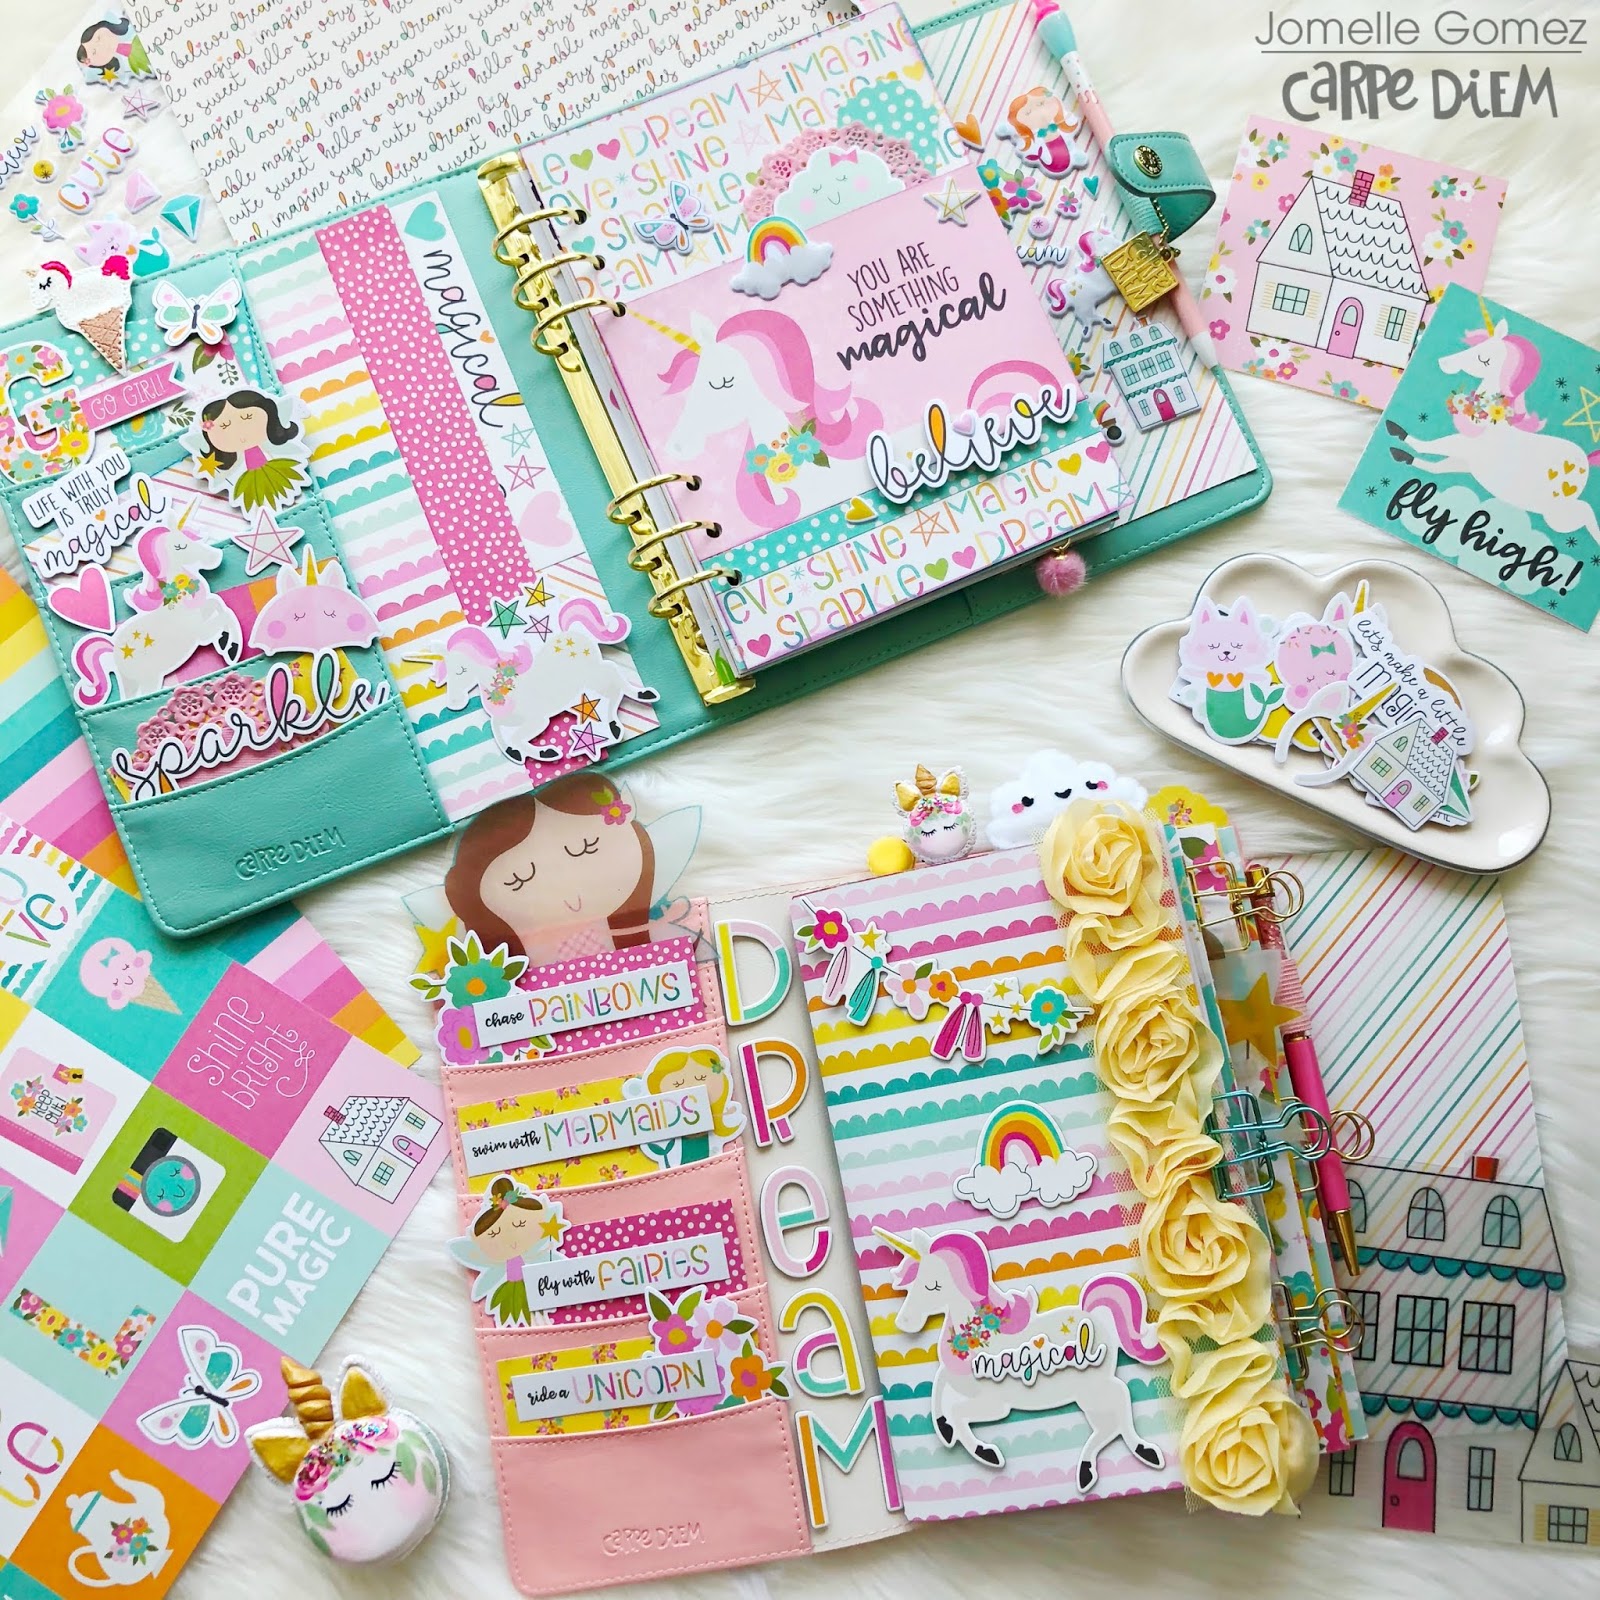
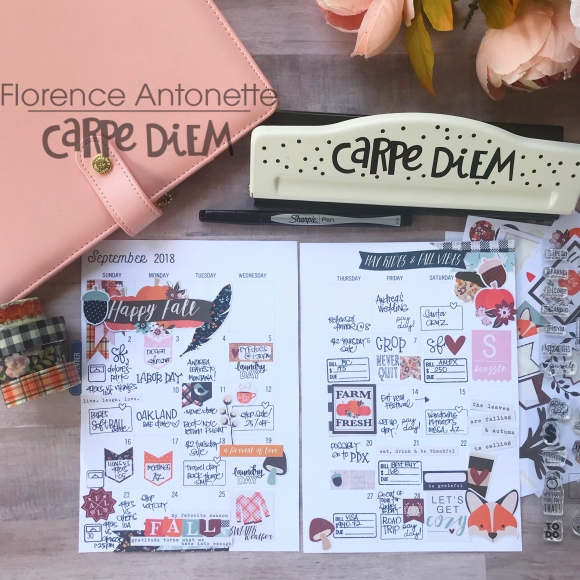
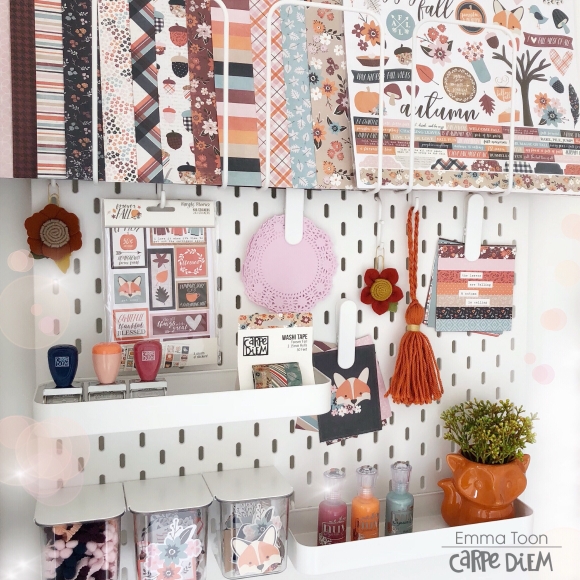
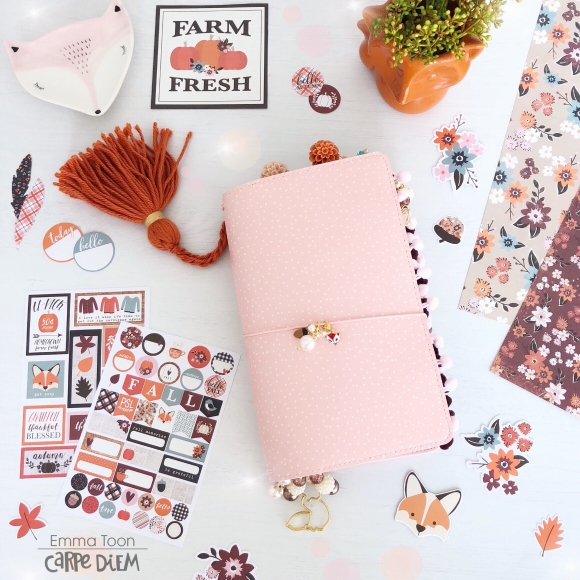
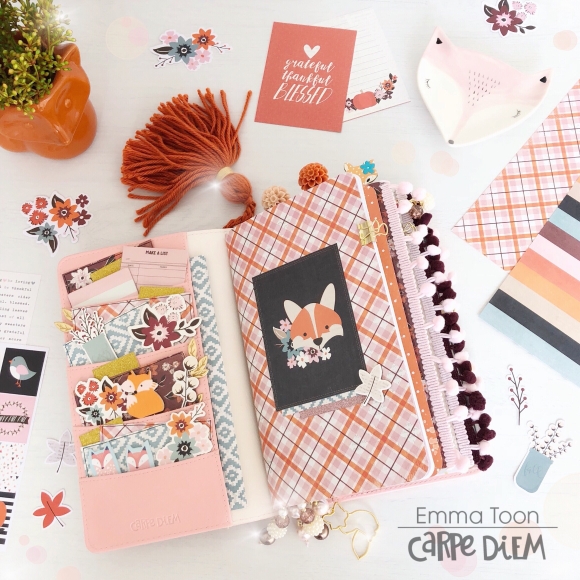
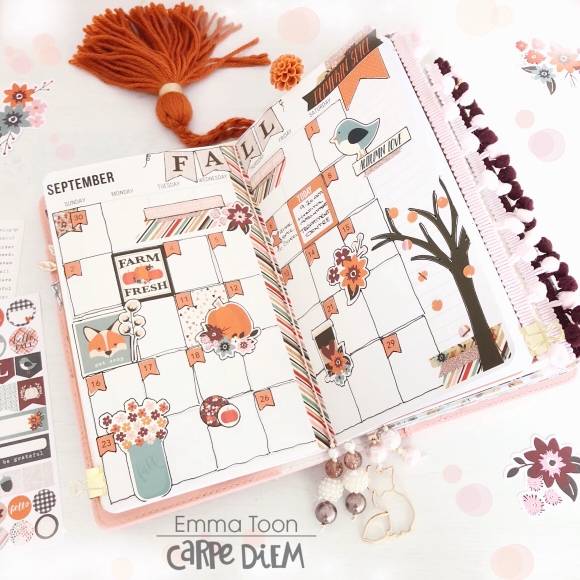
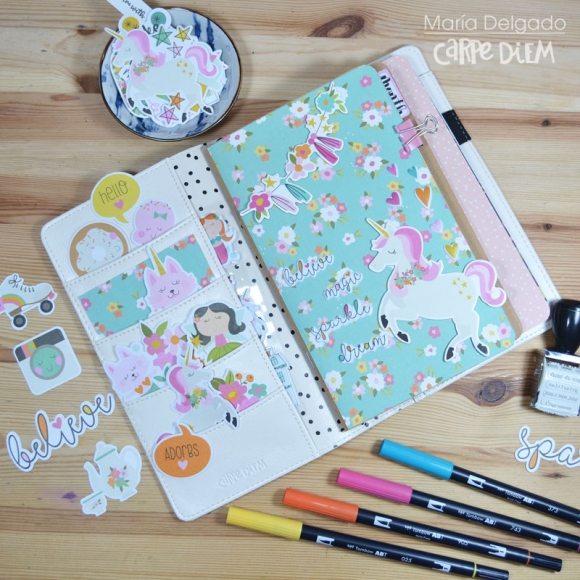
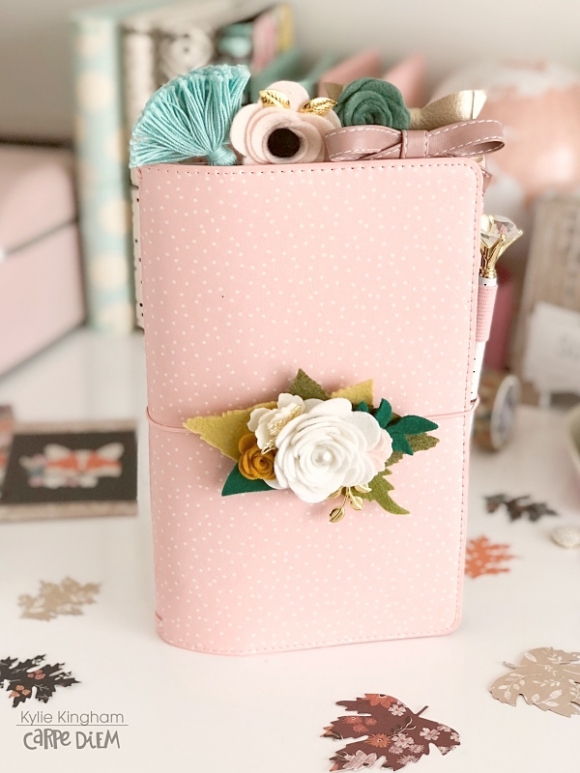
Hello friends it’s Kylie back with you today sharing some September planning inspiration. I moved right into my beautiful Blush Speckle, Travelers Notebook this month. I have to say, I love all the Travelers Notebooks but this one is a stand out favourite because….well ….hello Pink!

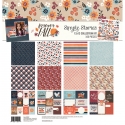
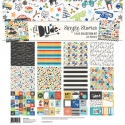
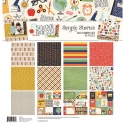
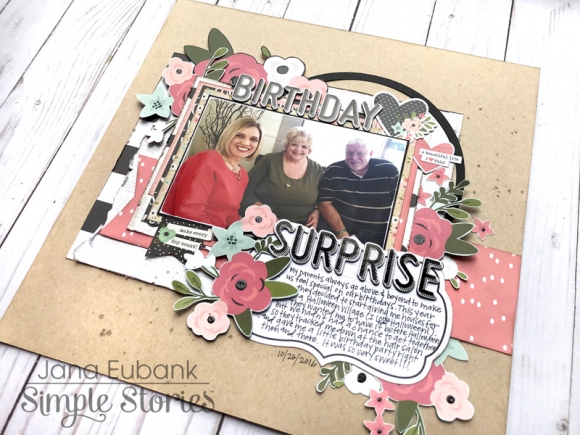
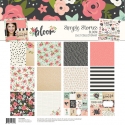
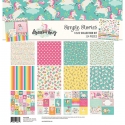
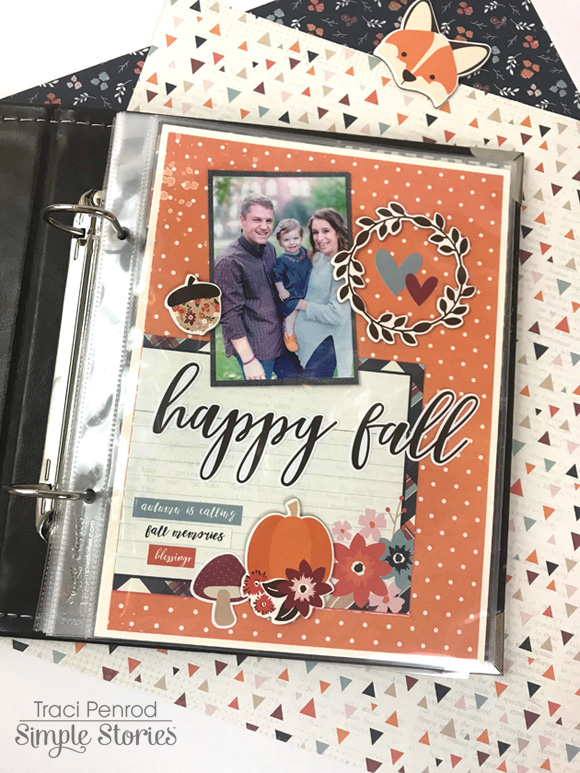
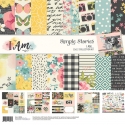
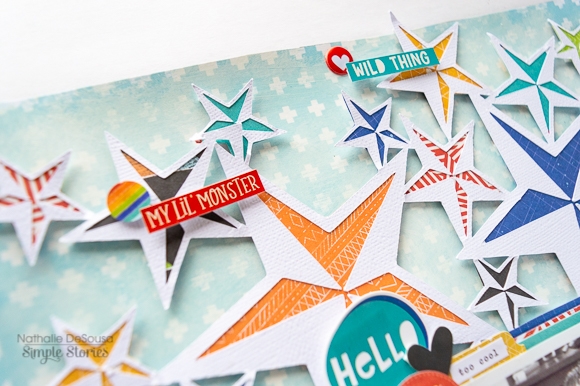
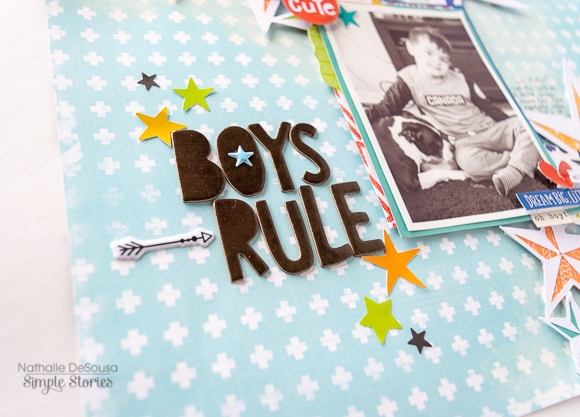
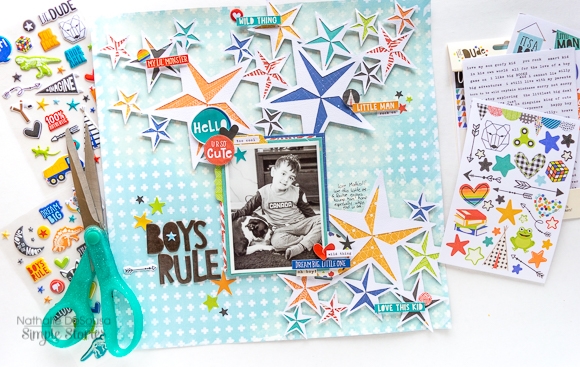
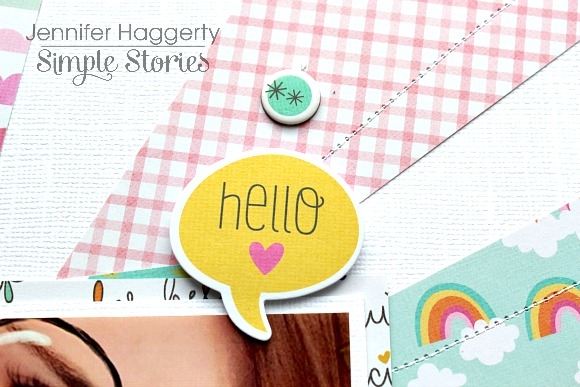
I decided to decorate the month with the ‘Forever Fall’ collection by Simple Stories. The paper prints are so adorable with lots of flowers, pumpkins and Fox’s included with the ‘Bits and Pieces’ too!

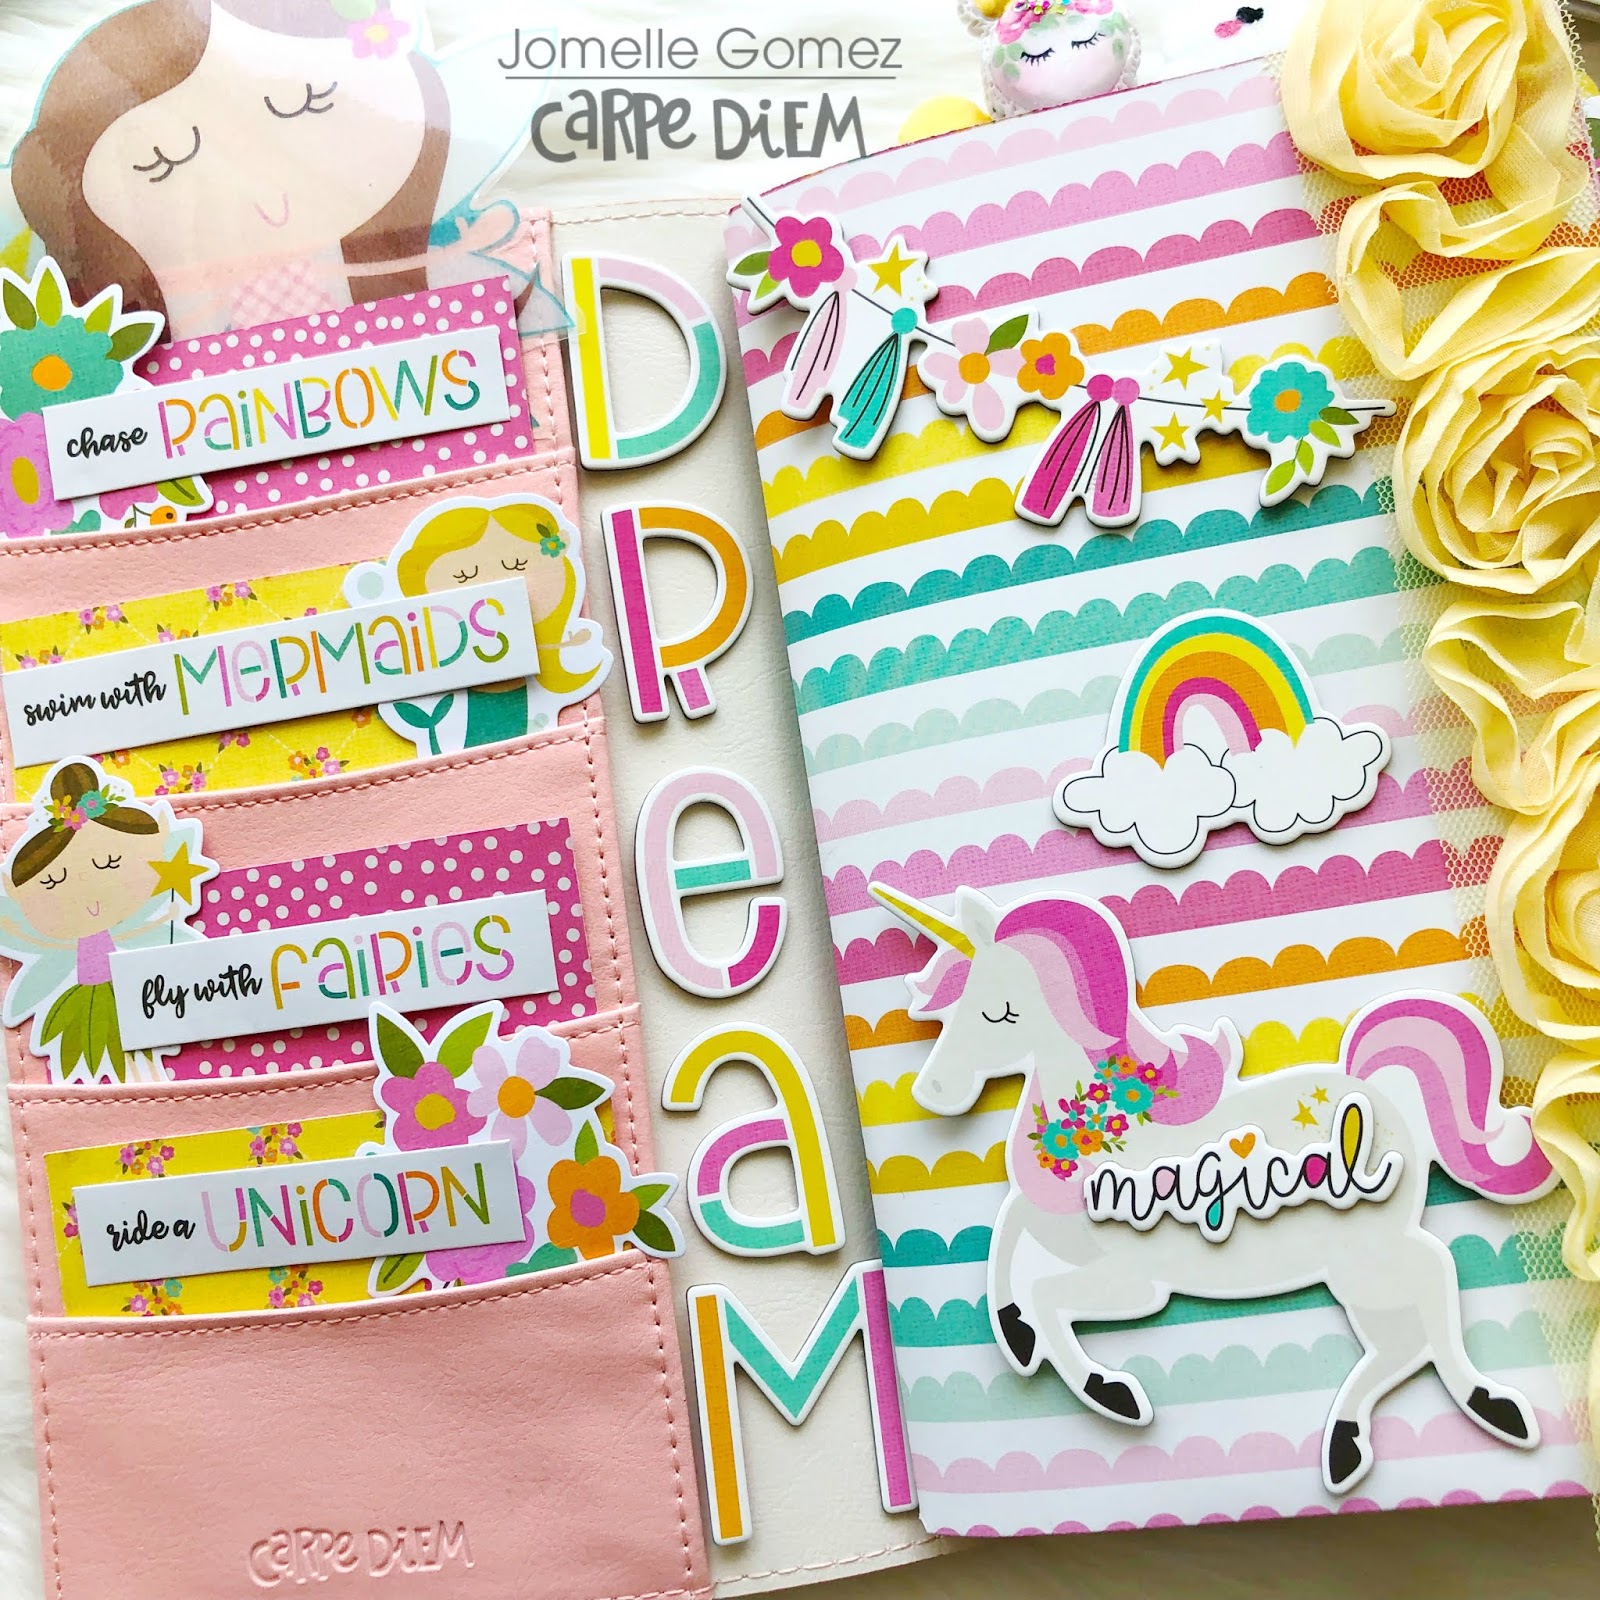
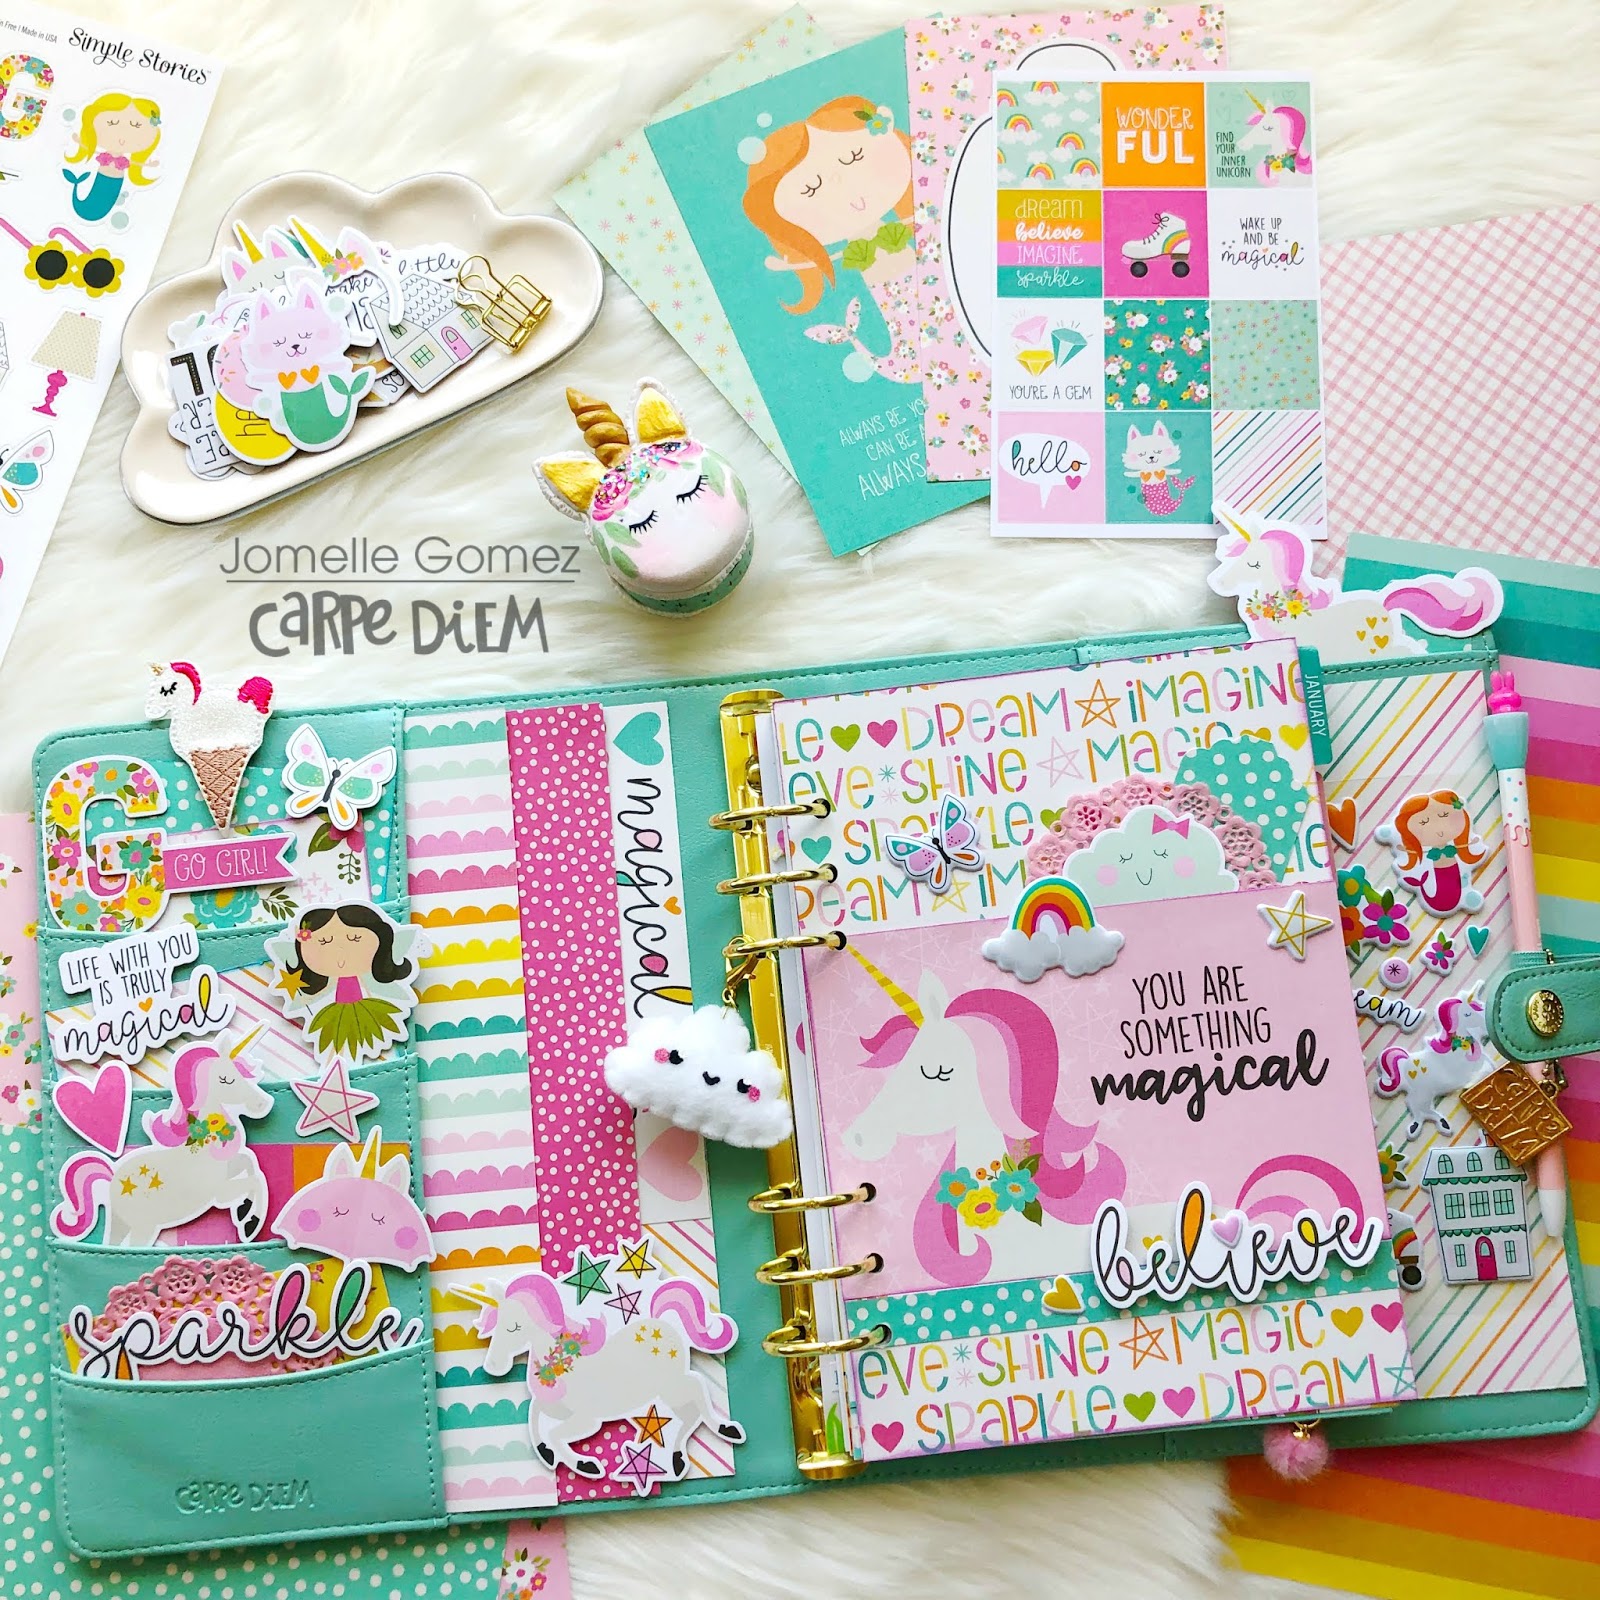
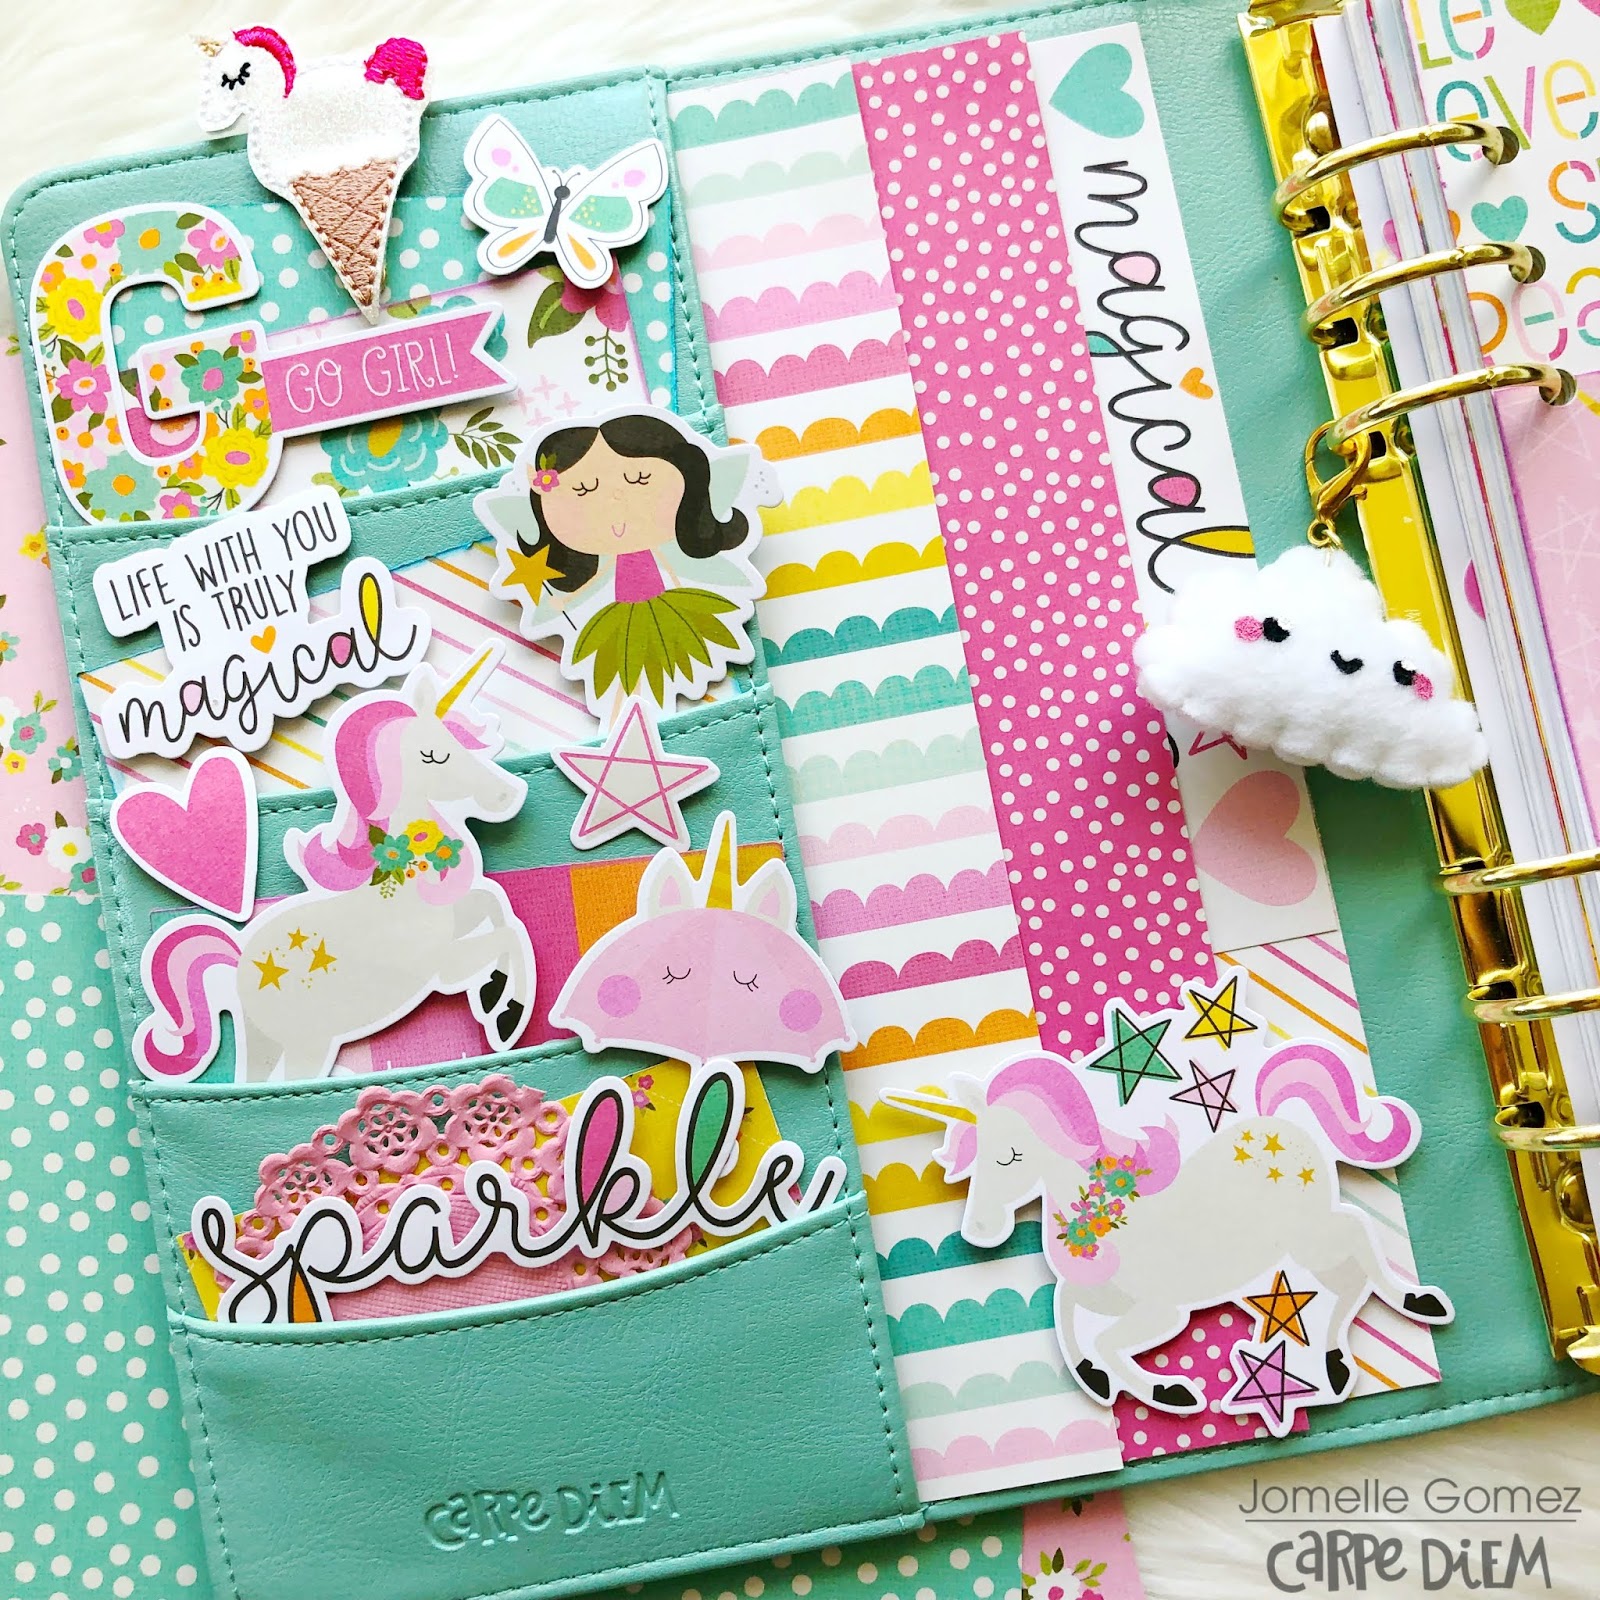
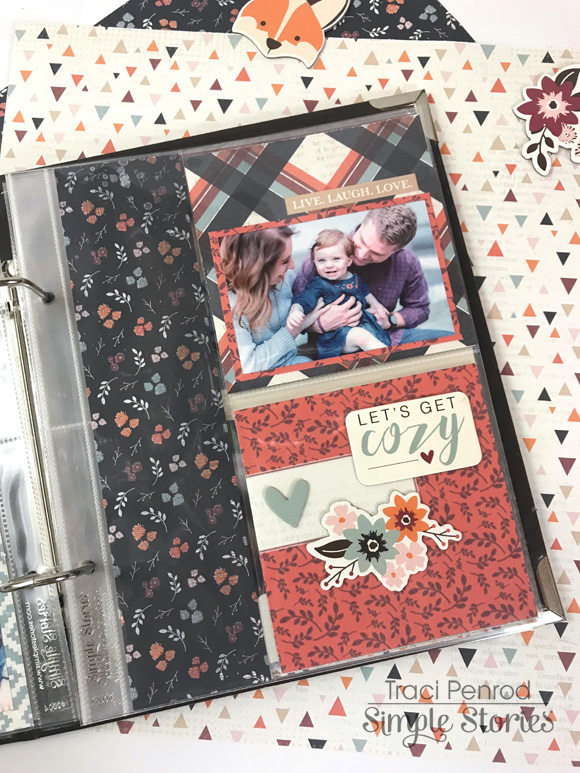
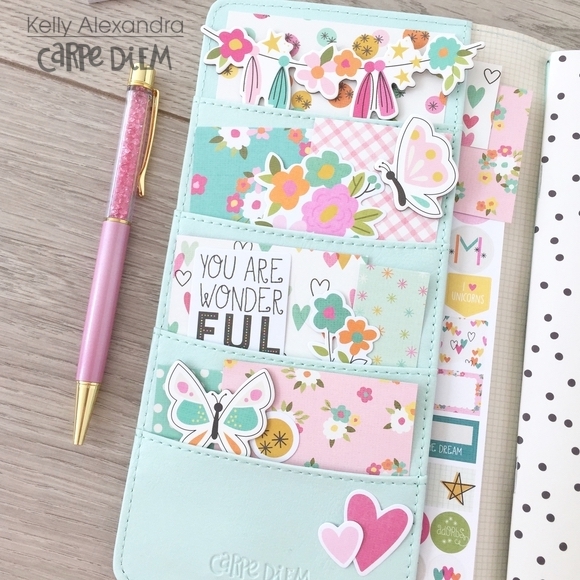
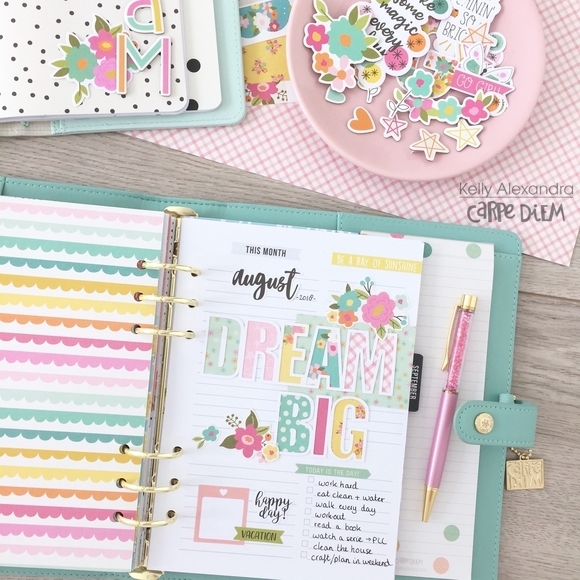
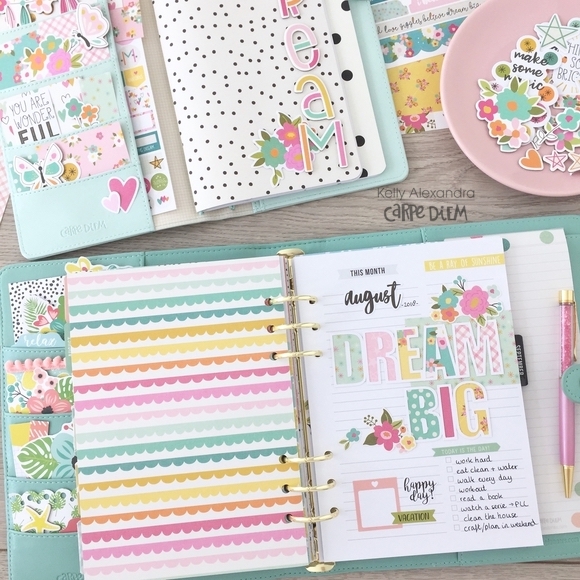
As always I have filled my pockets with some of my favourite pieces.I know this doesn’t have any practical purpose but it sure does make my planner look extra pretty! I also added a card made from the 3 x 4 element sheet.

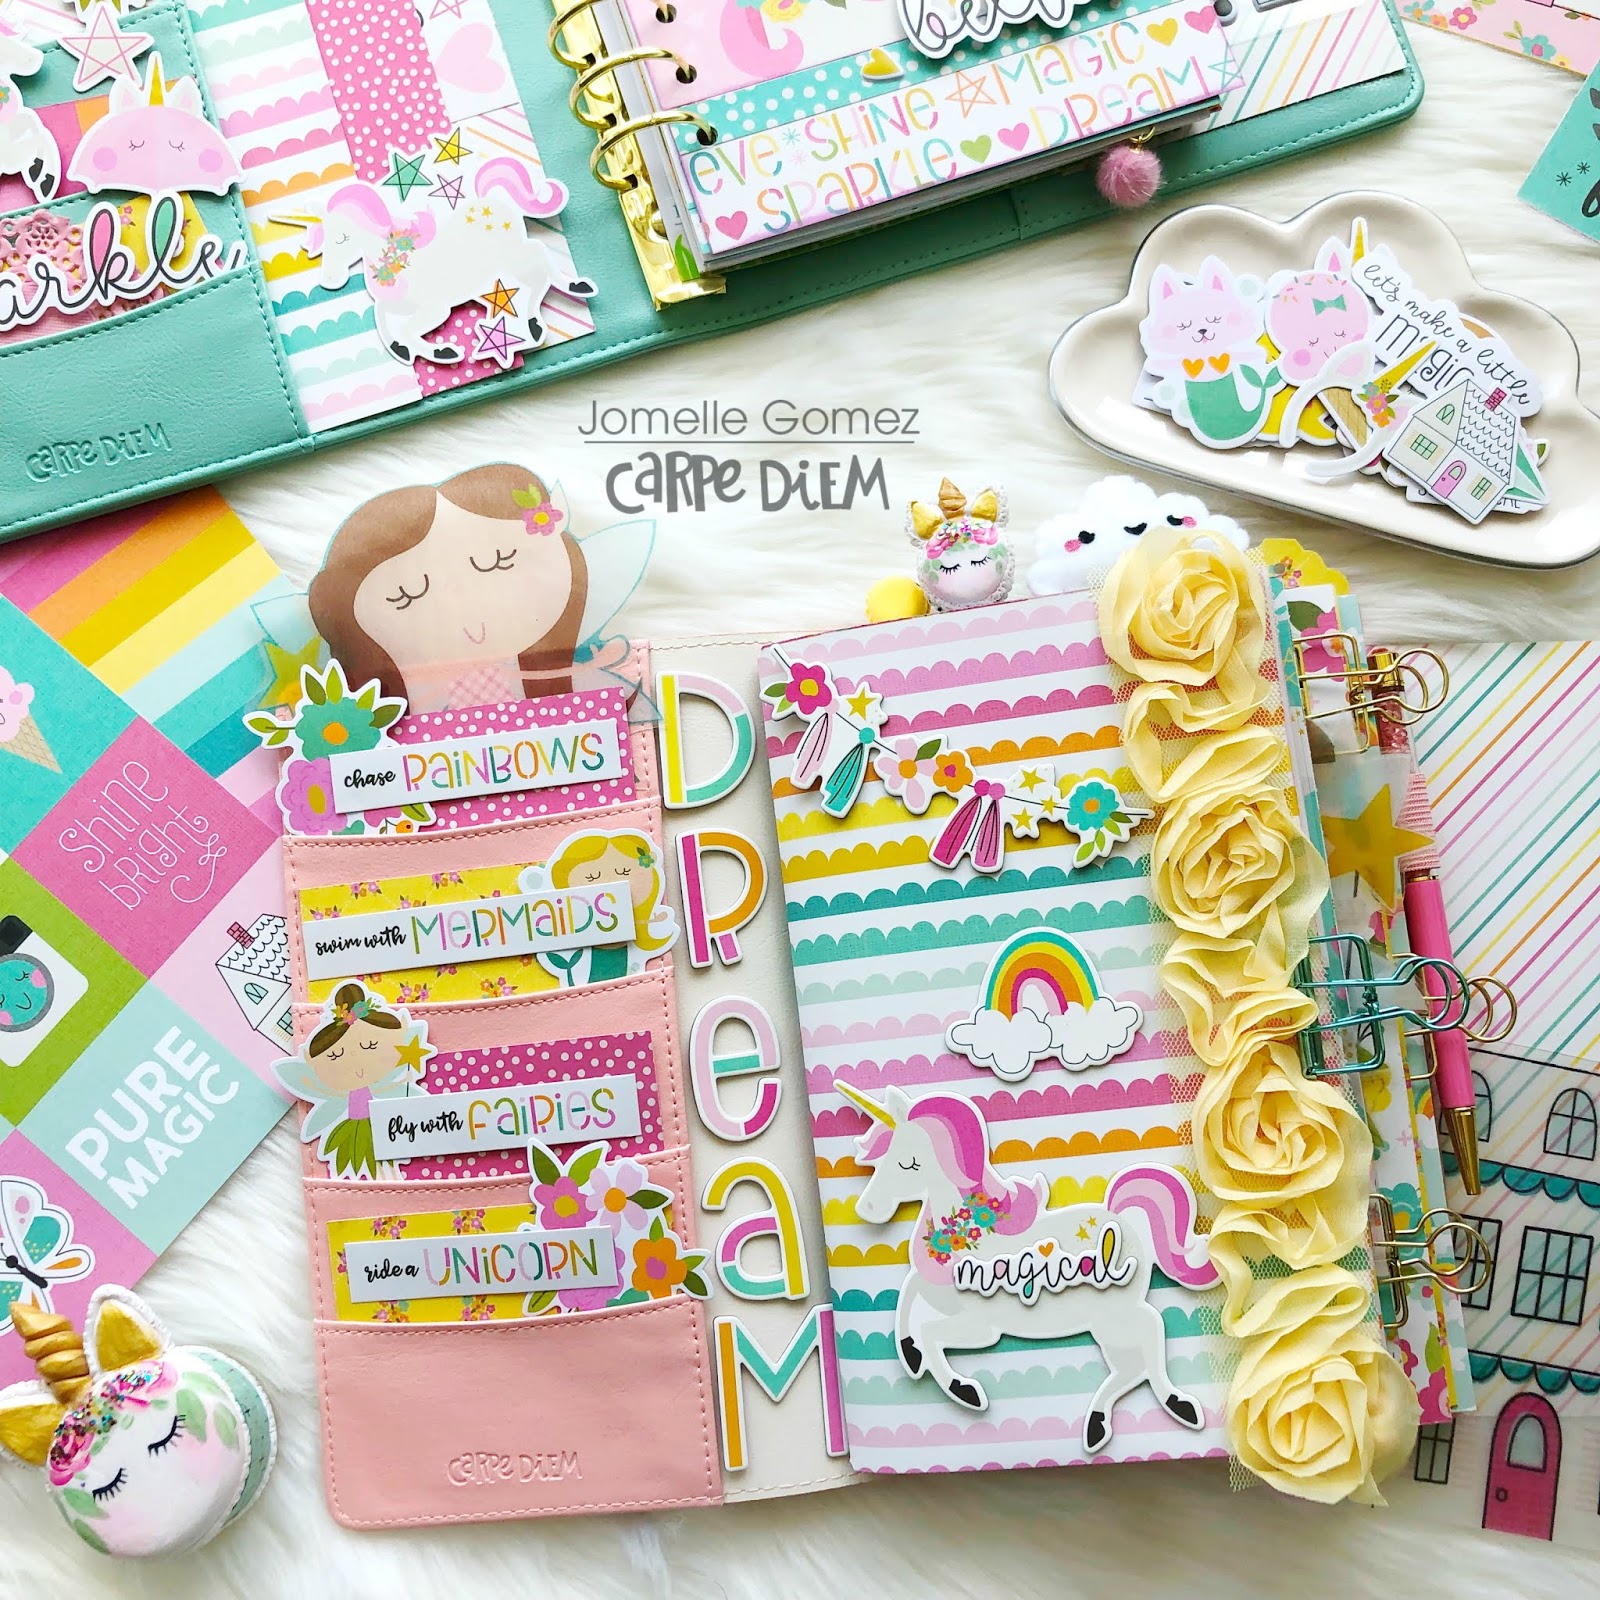
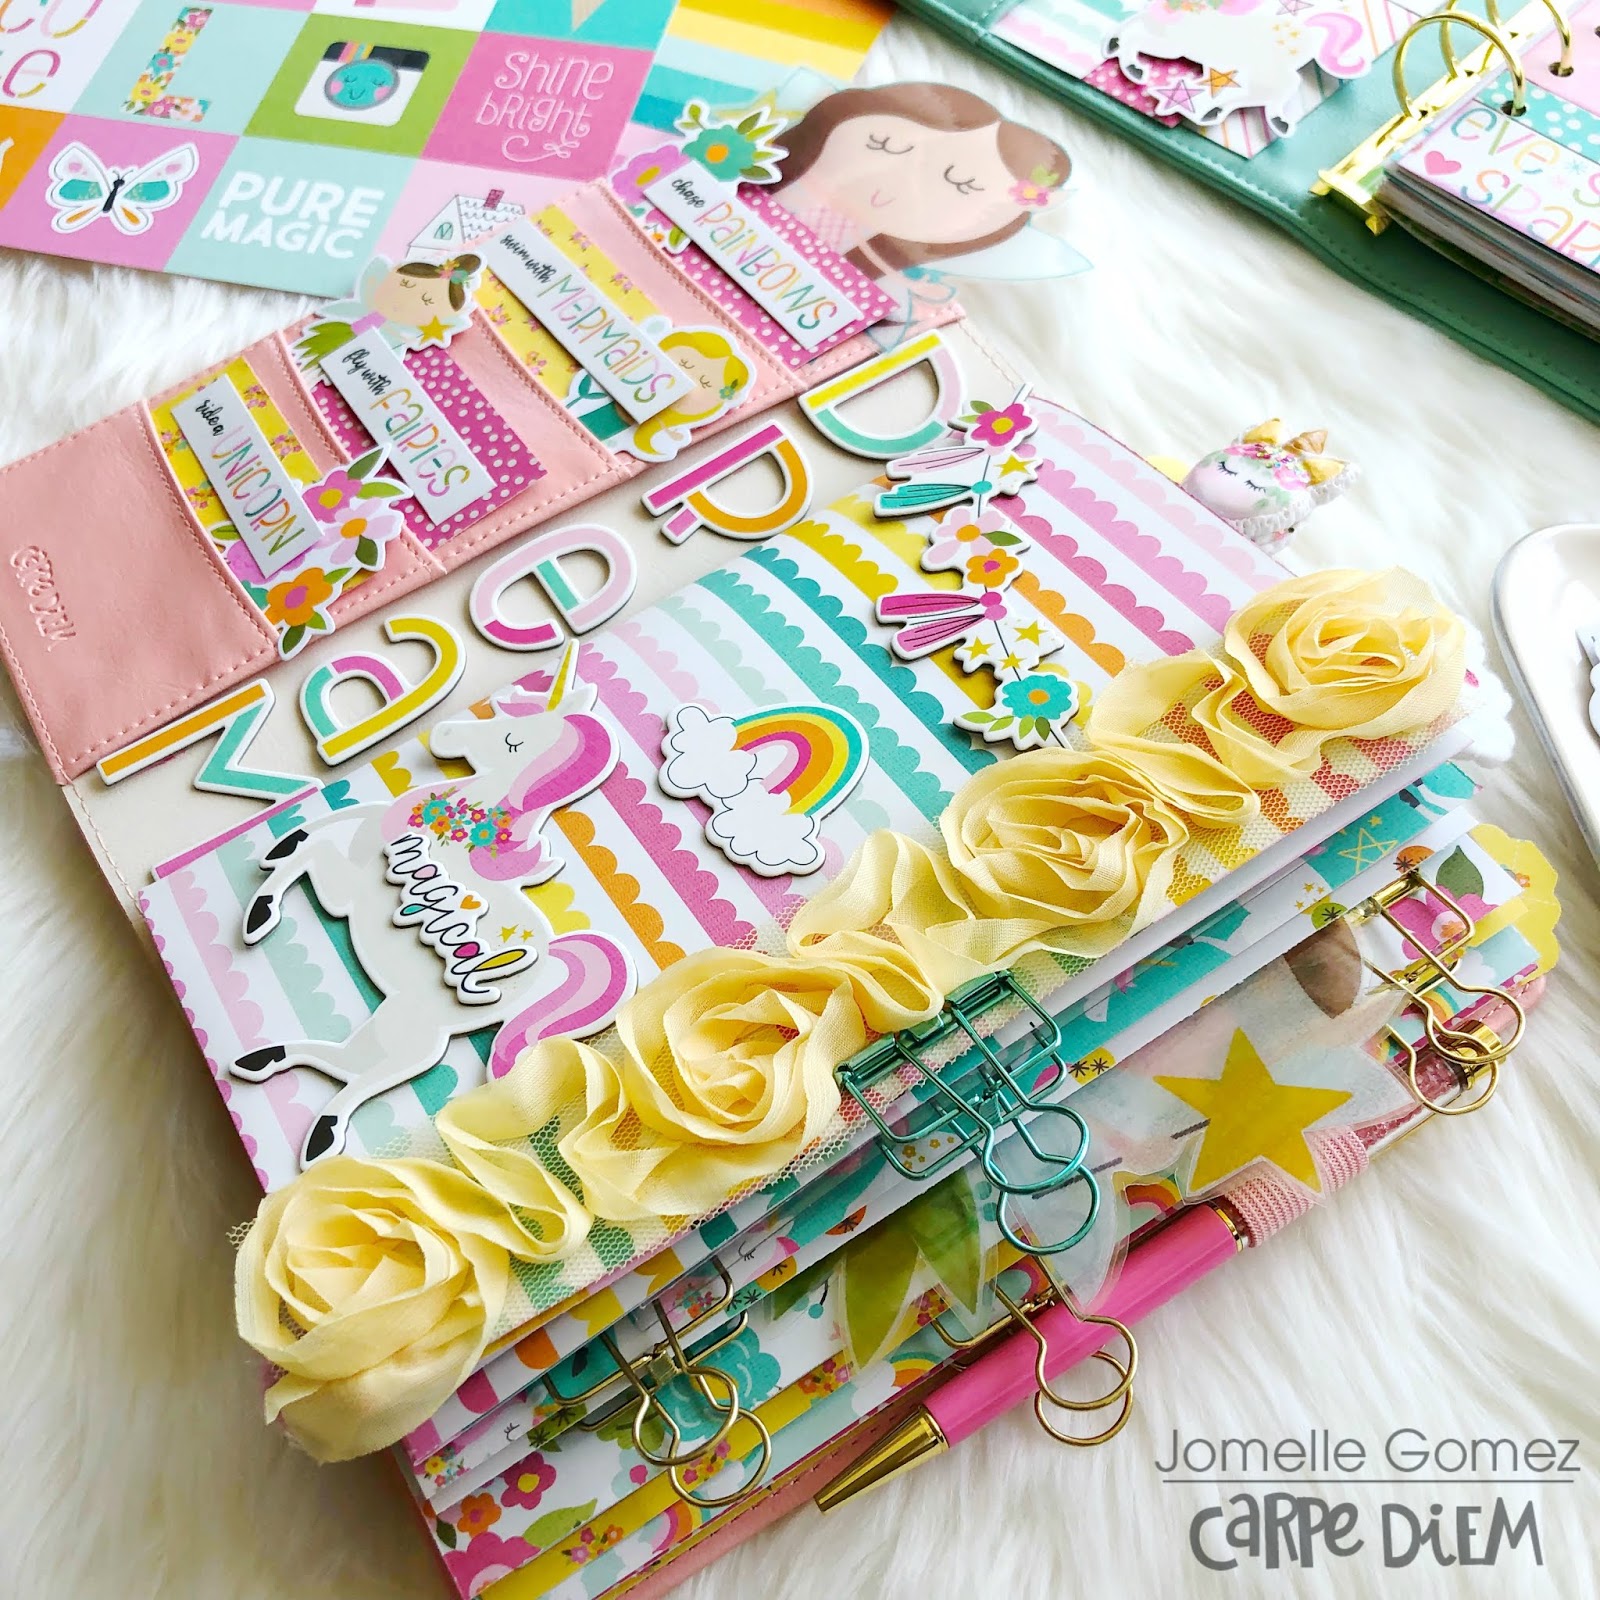
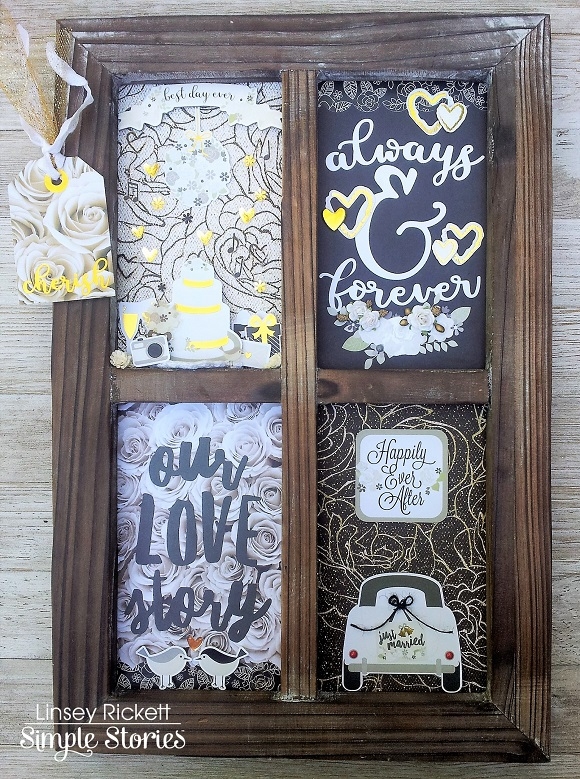
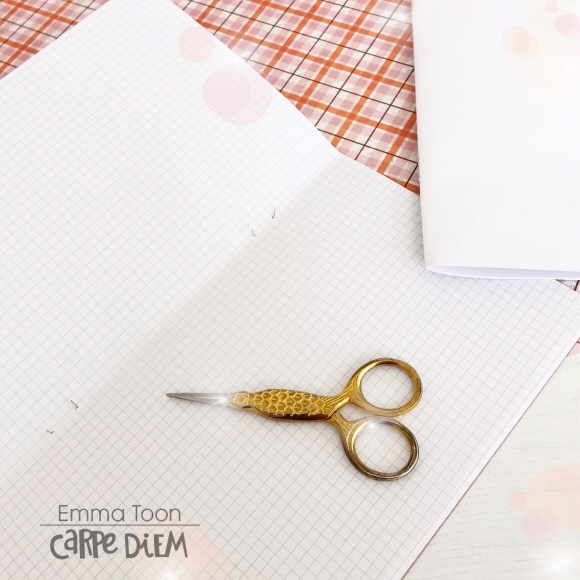
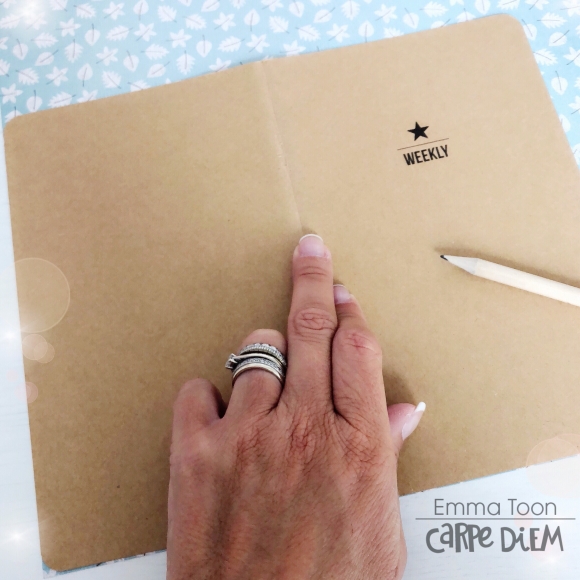
In setting up my Traveller’s Notebook, I created some covers that will slide in over my inserts with the elastic. I used a great mix of papers and embellishments as well as a few cut files I had on hand.

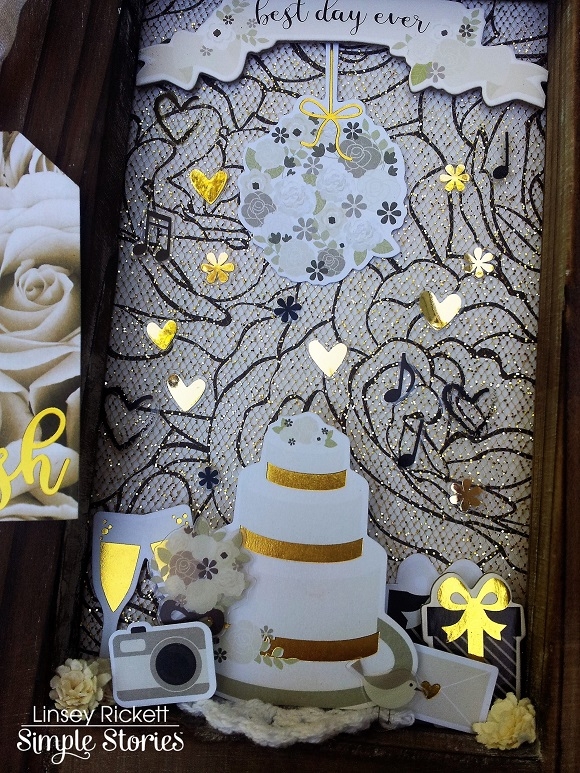
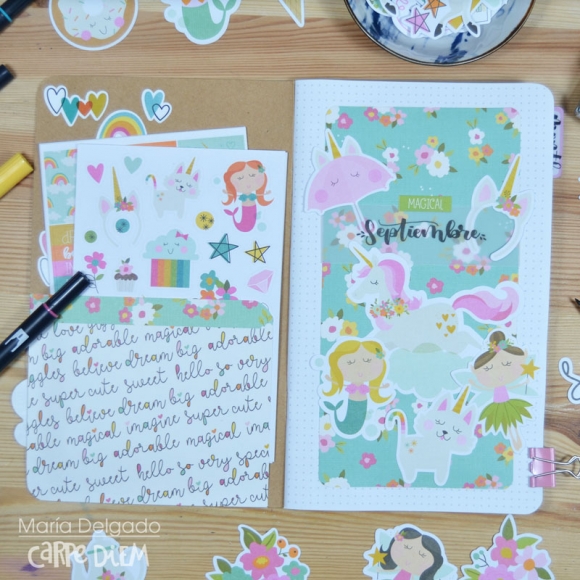
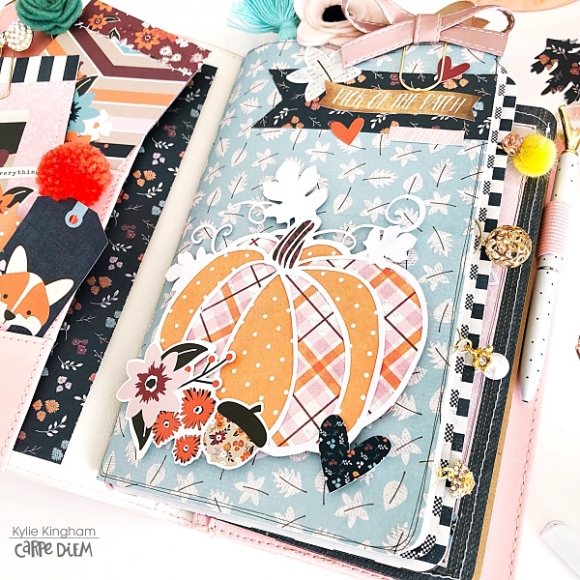
I loved this Pumpkin cut file I found via the Silhouette store.I was able to back it with alternate paper for a colourful effect.It was adhered to my cover with foam tape so it gave a multi-dimensional appearance. All of the corners of my covers have been rounded to match with my inserts as well.

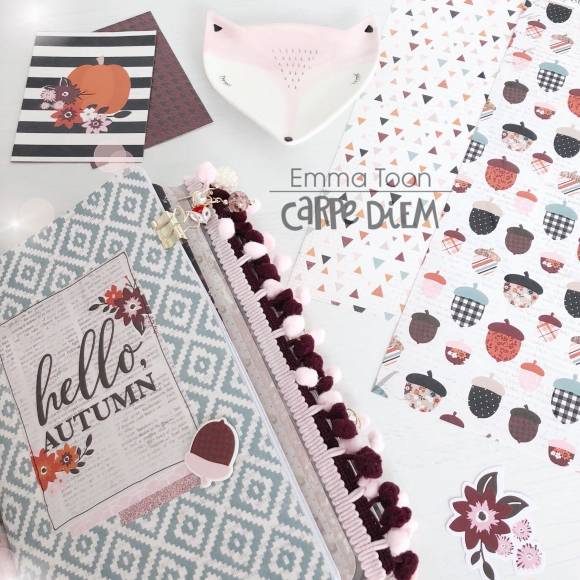
You can’t celebrate all things Fall without a wreath right? Here I have added my own paper wreath with lots of leaves and blooms. Again, I have chosen selected pieces to adhere with foam tape so they sit up from the page.

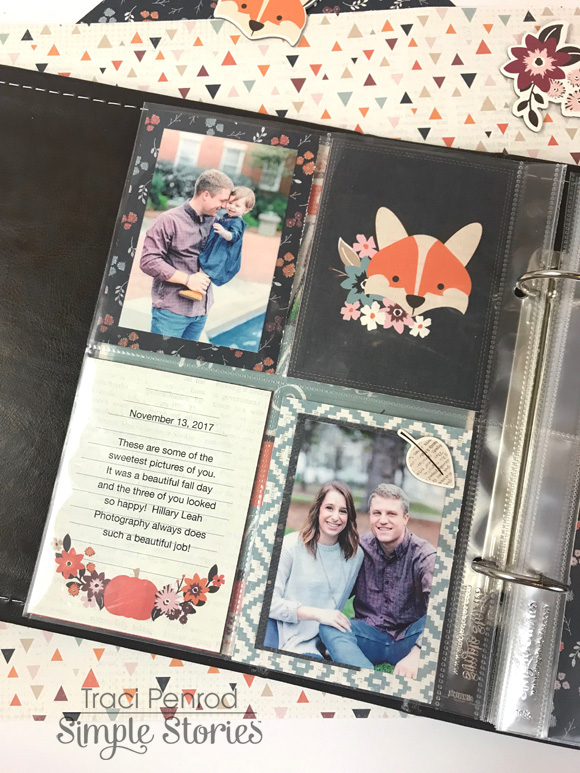
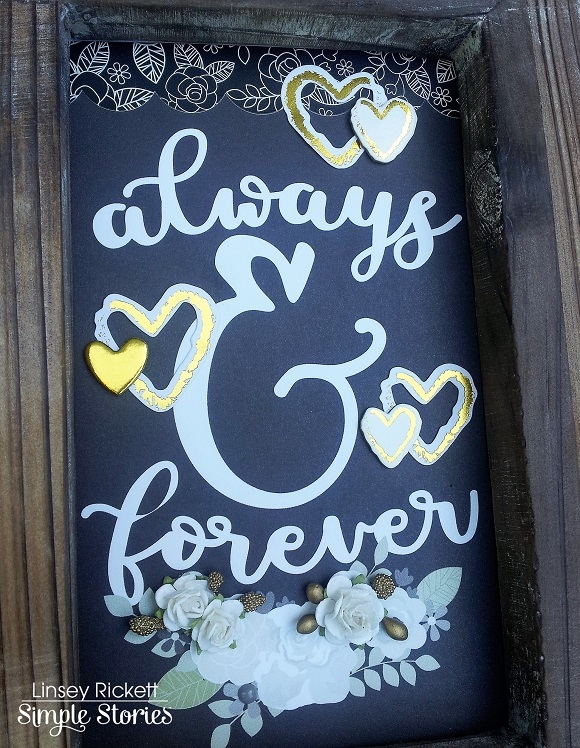
I cut apart the heart 4 x 4 square from the element sheet of paper to add to the back of this cover.It has a denim look background which I love with these colours. How cute is that Foxy??

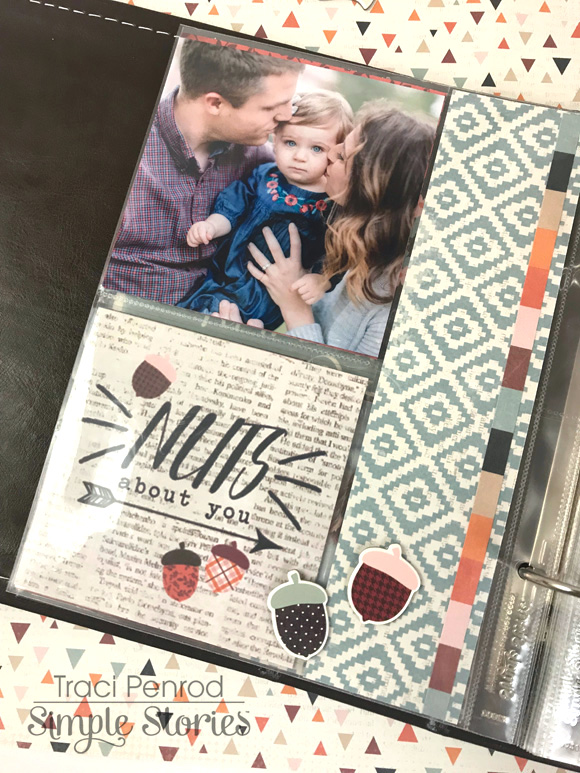
The Fall banner chipboard stickers were added to my next cover. I also had a fun Leaf die in my stash which I used to cut out leaves to add.They were each outlined and given some veins with a very fine black tip pen, helping them to stand out and look authentic.

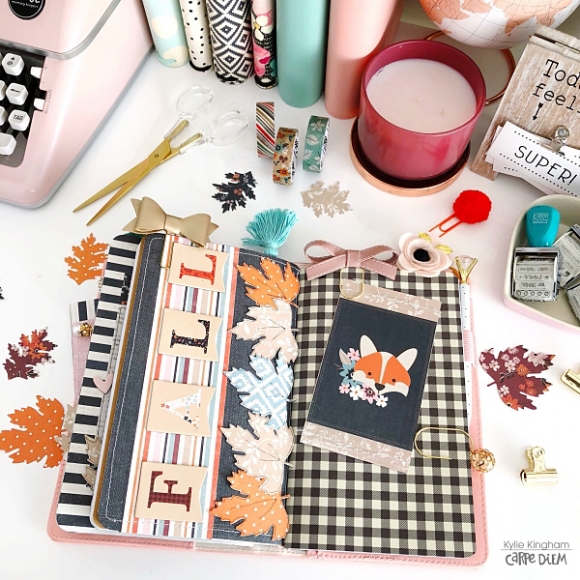
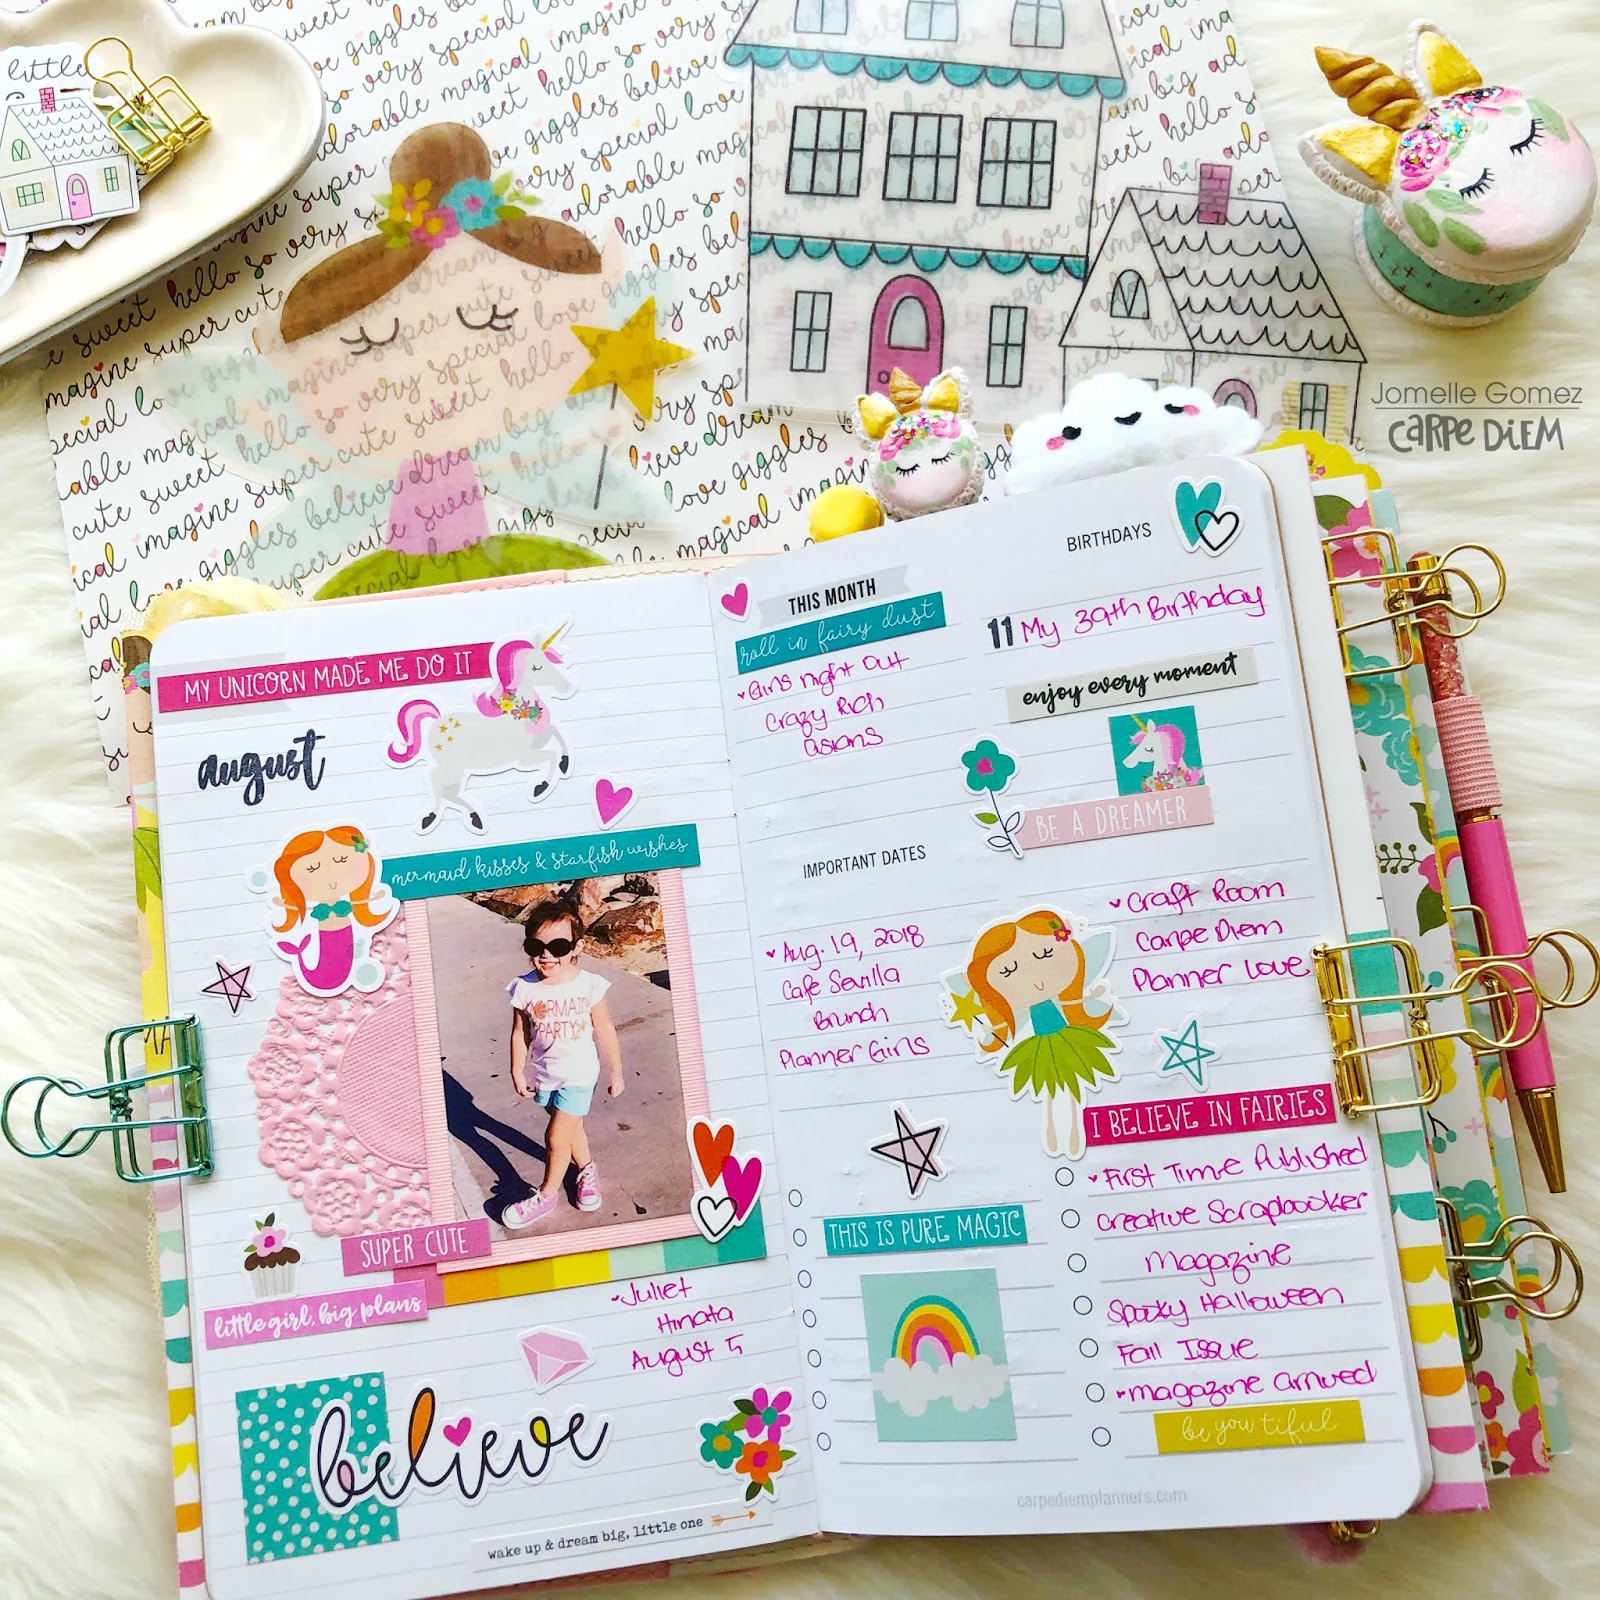
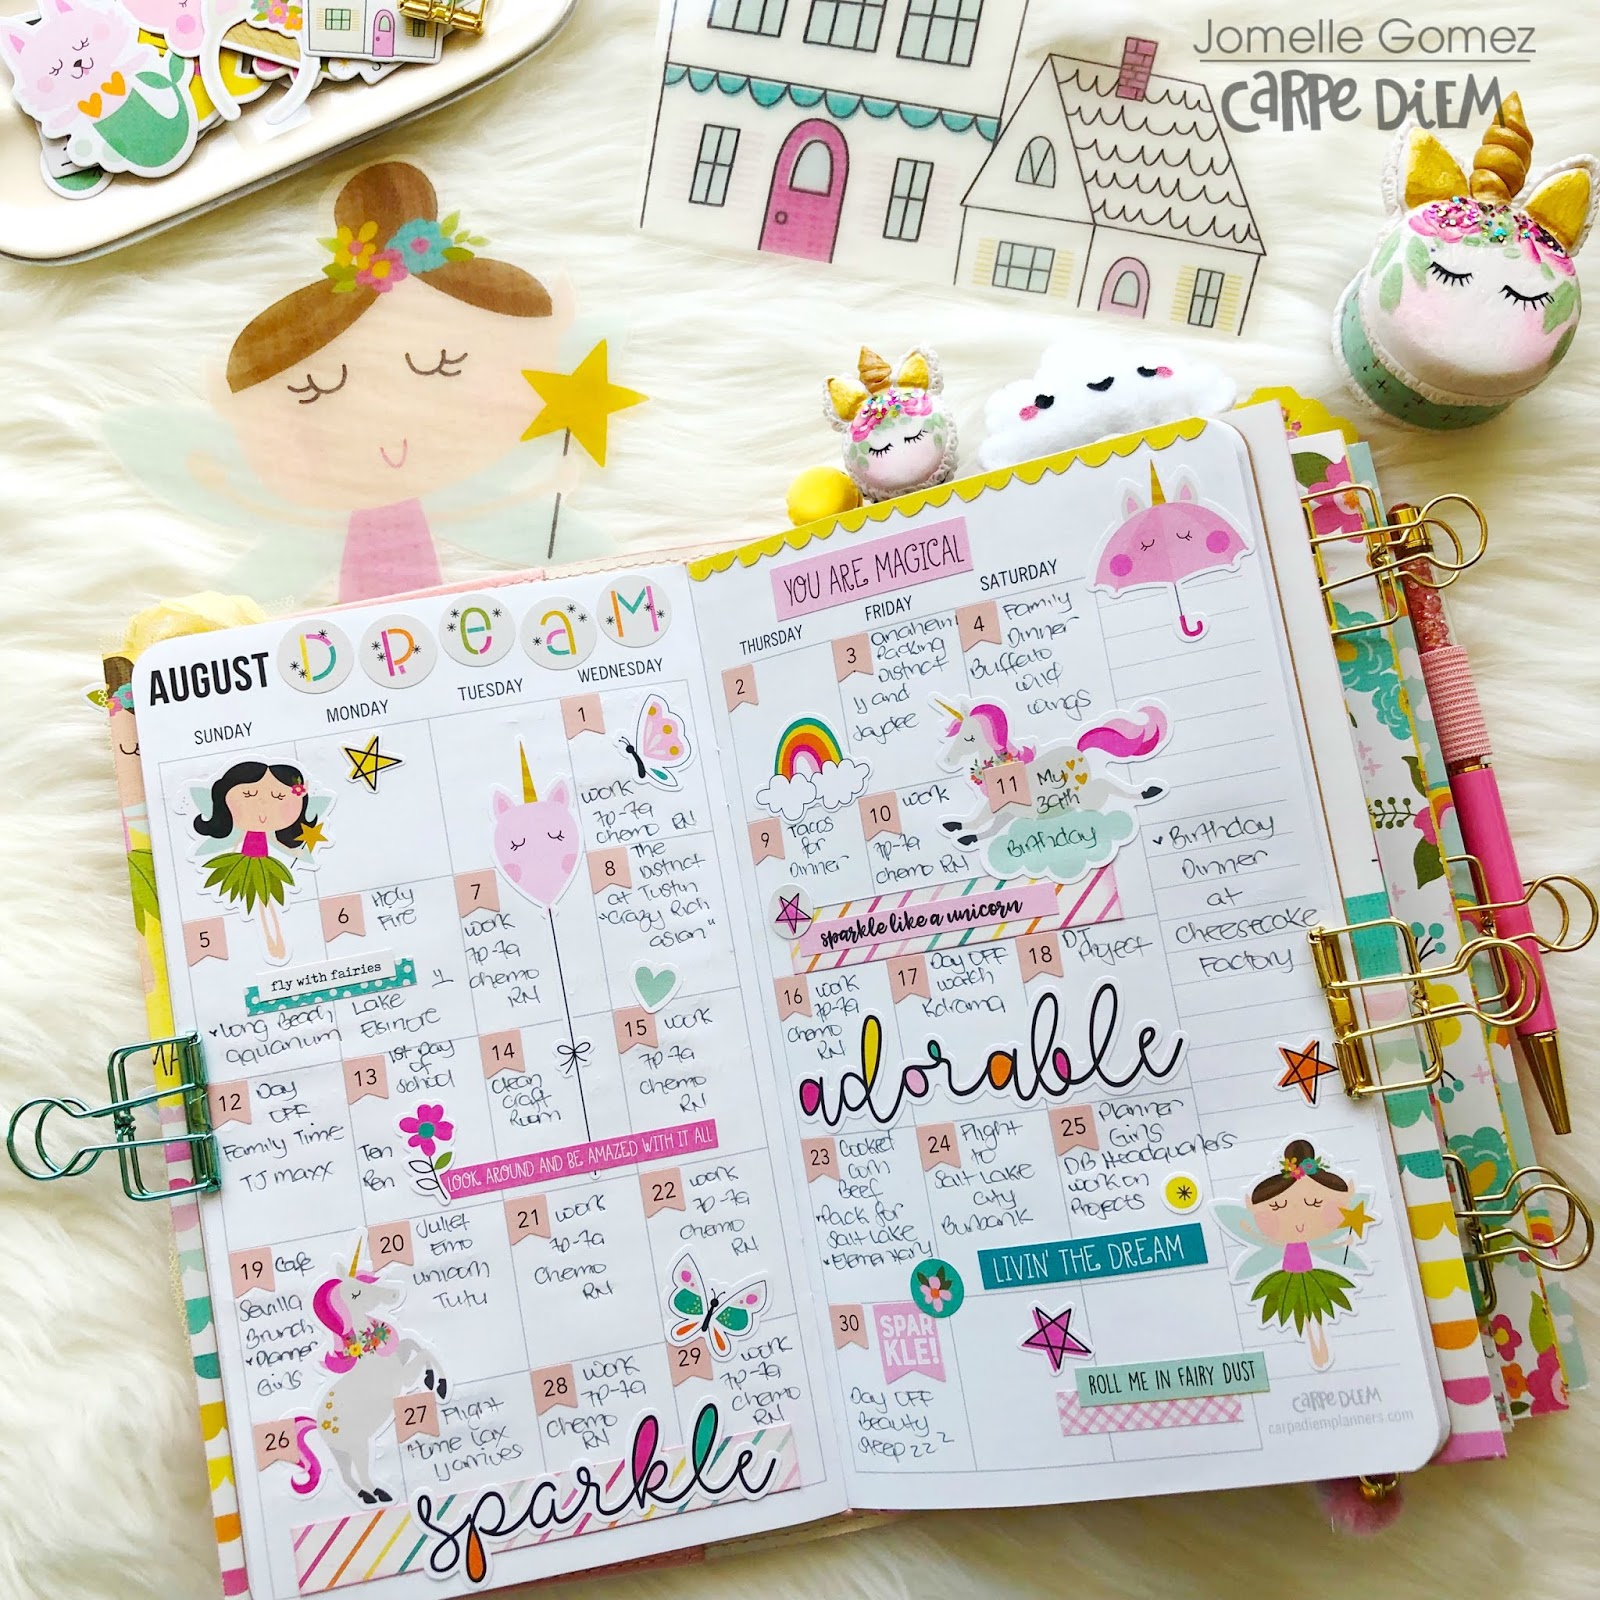
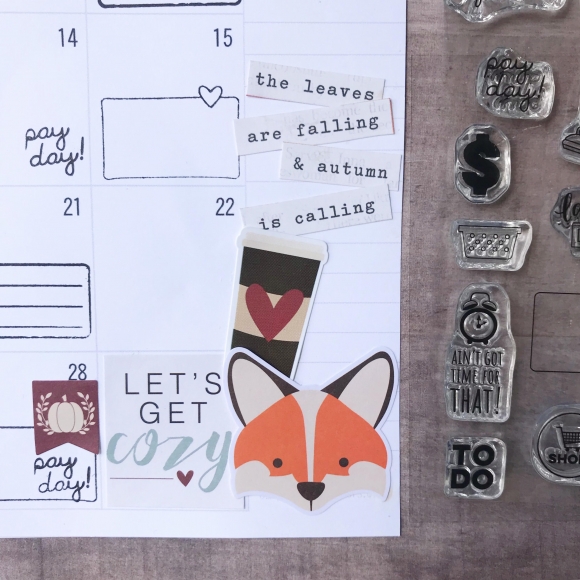
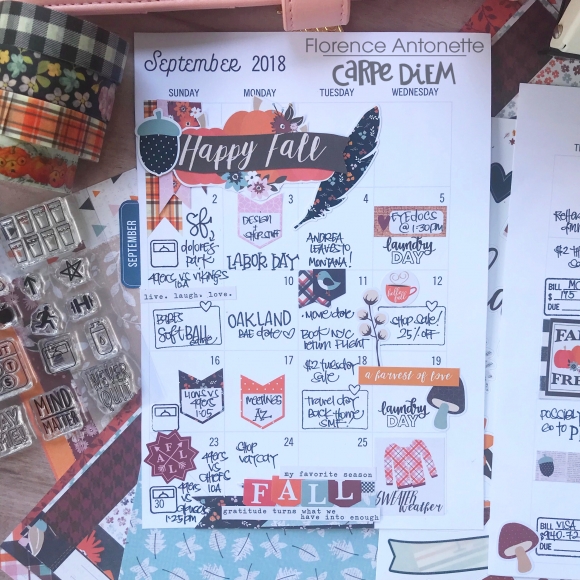
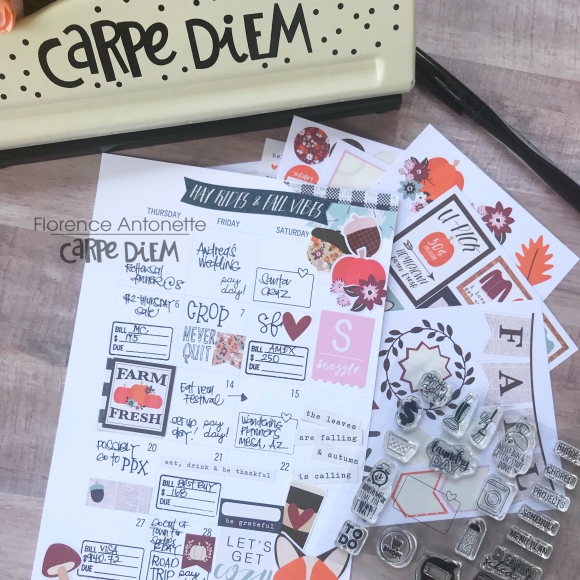
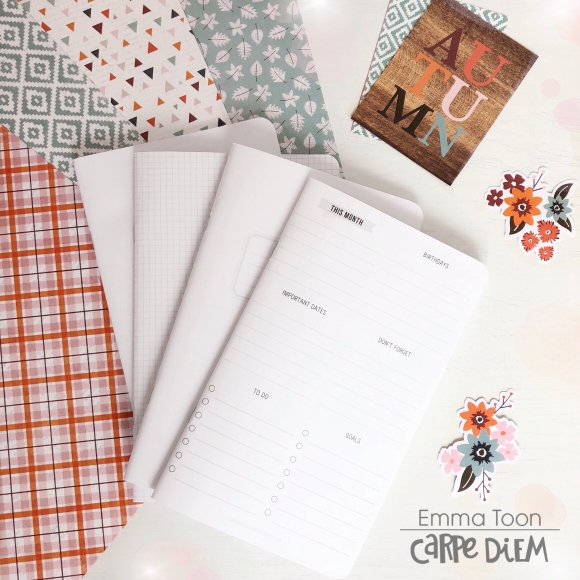
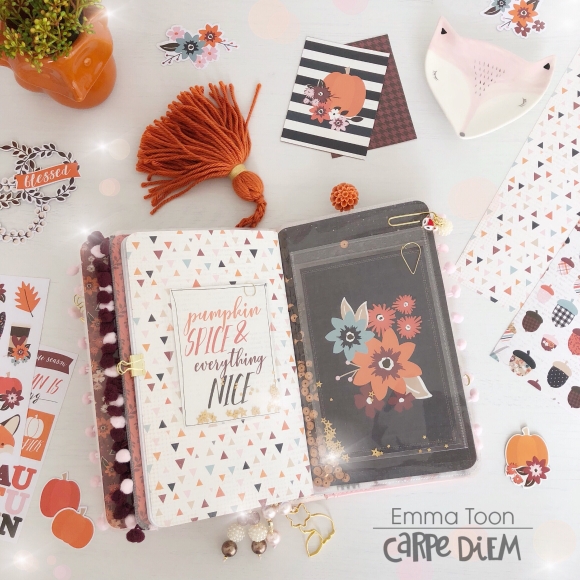
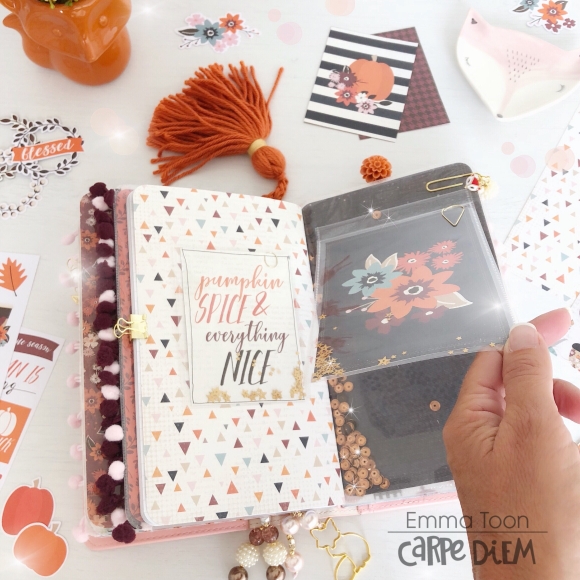
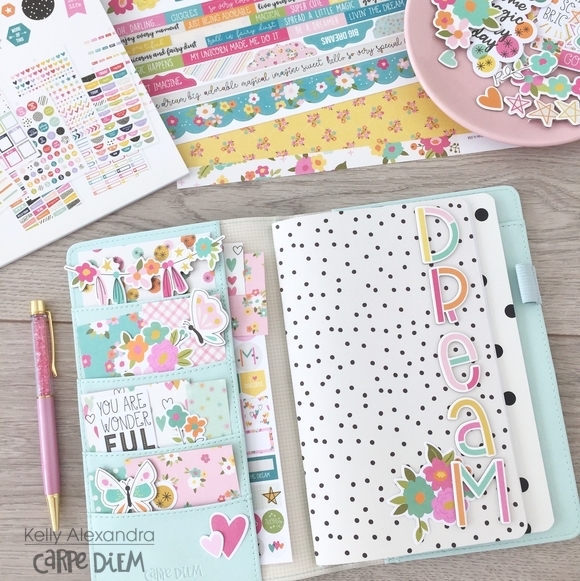
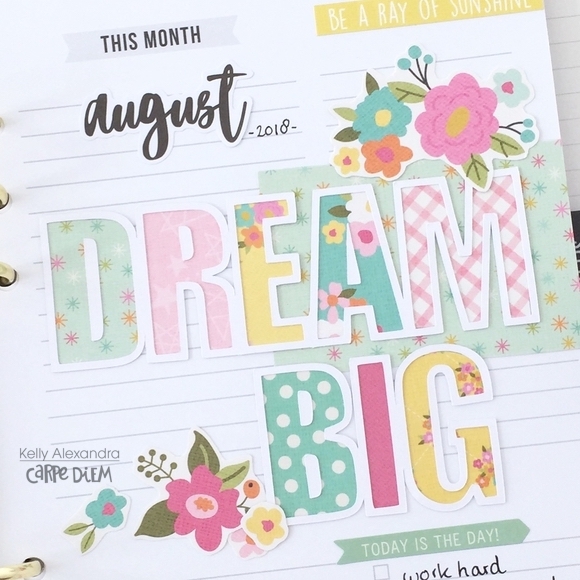
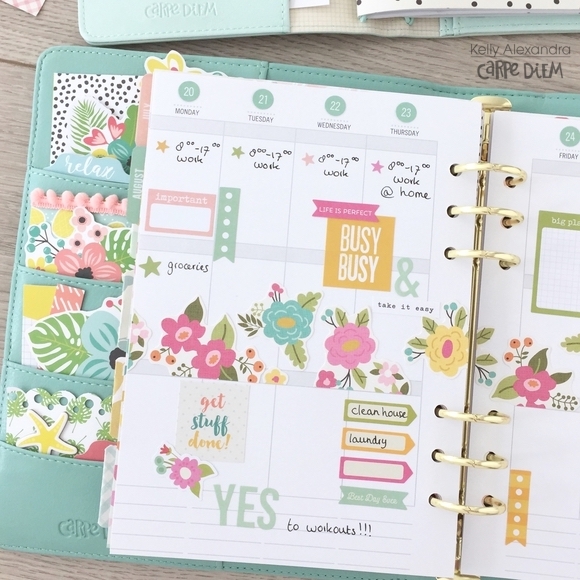
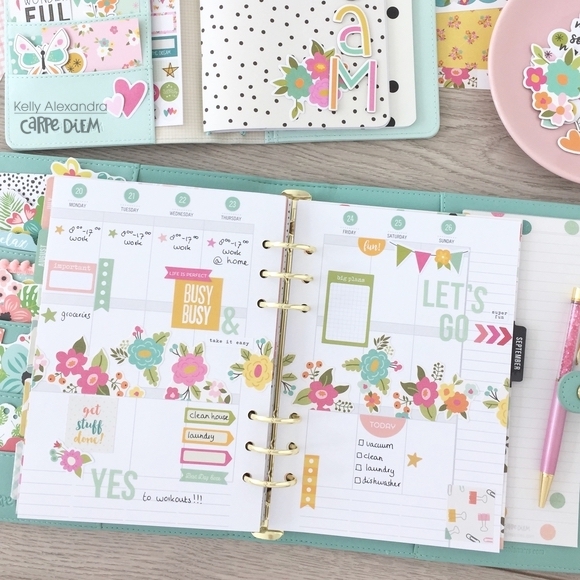
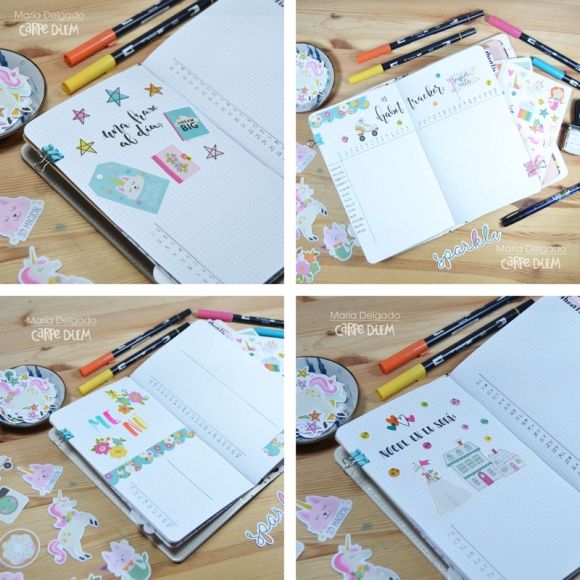
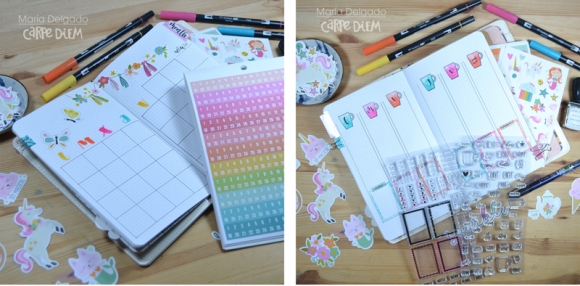
The monthly Travelers Notebook inserts are some of my favourite. I love being able to see my whole month at a quick glance and being able to jot things down with an overview. I used the mini flag date stickers and some of the 4 x 6 stickers. For the fun lettering I added, I worked with some Alpha dies from my stash cutting them from the themed papers.I also used some of the washi tape as well for a border. I love how my pages look before the pen!

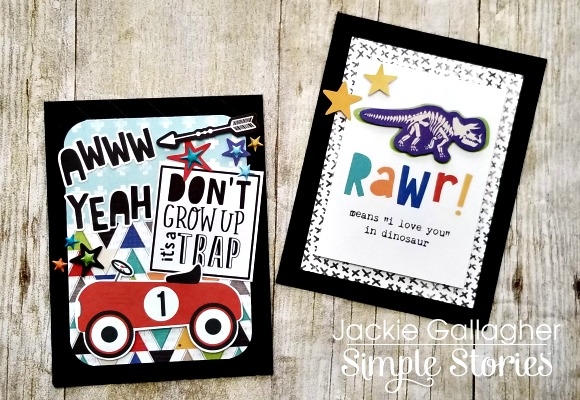
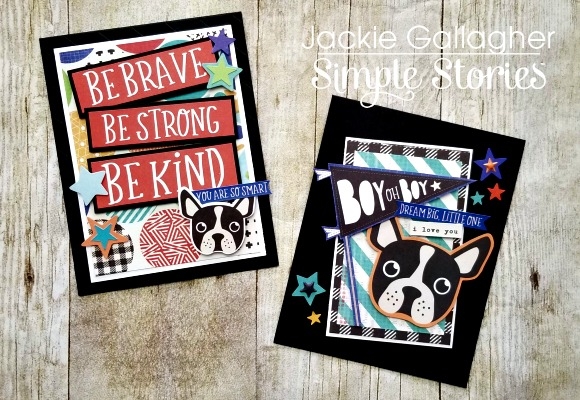
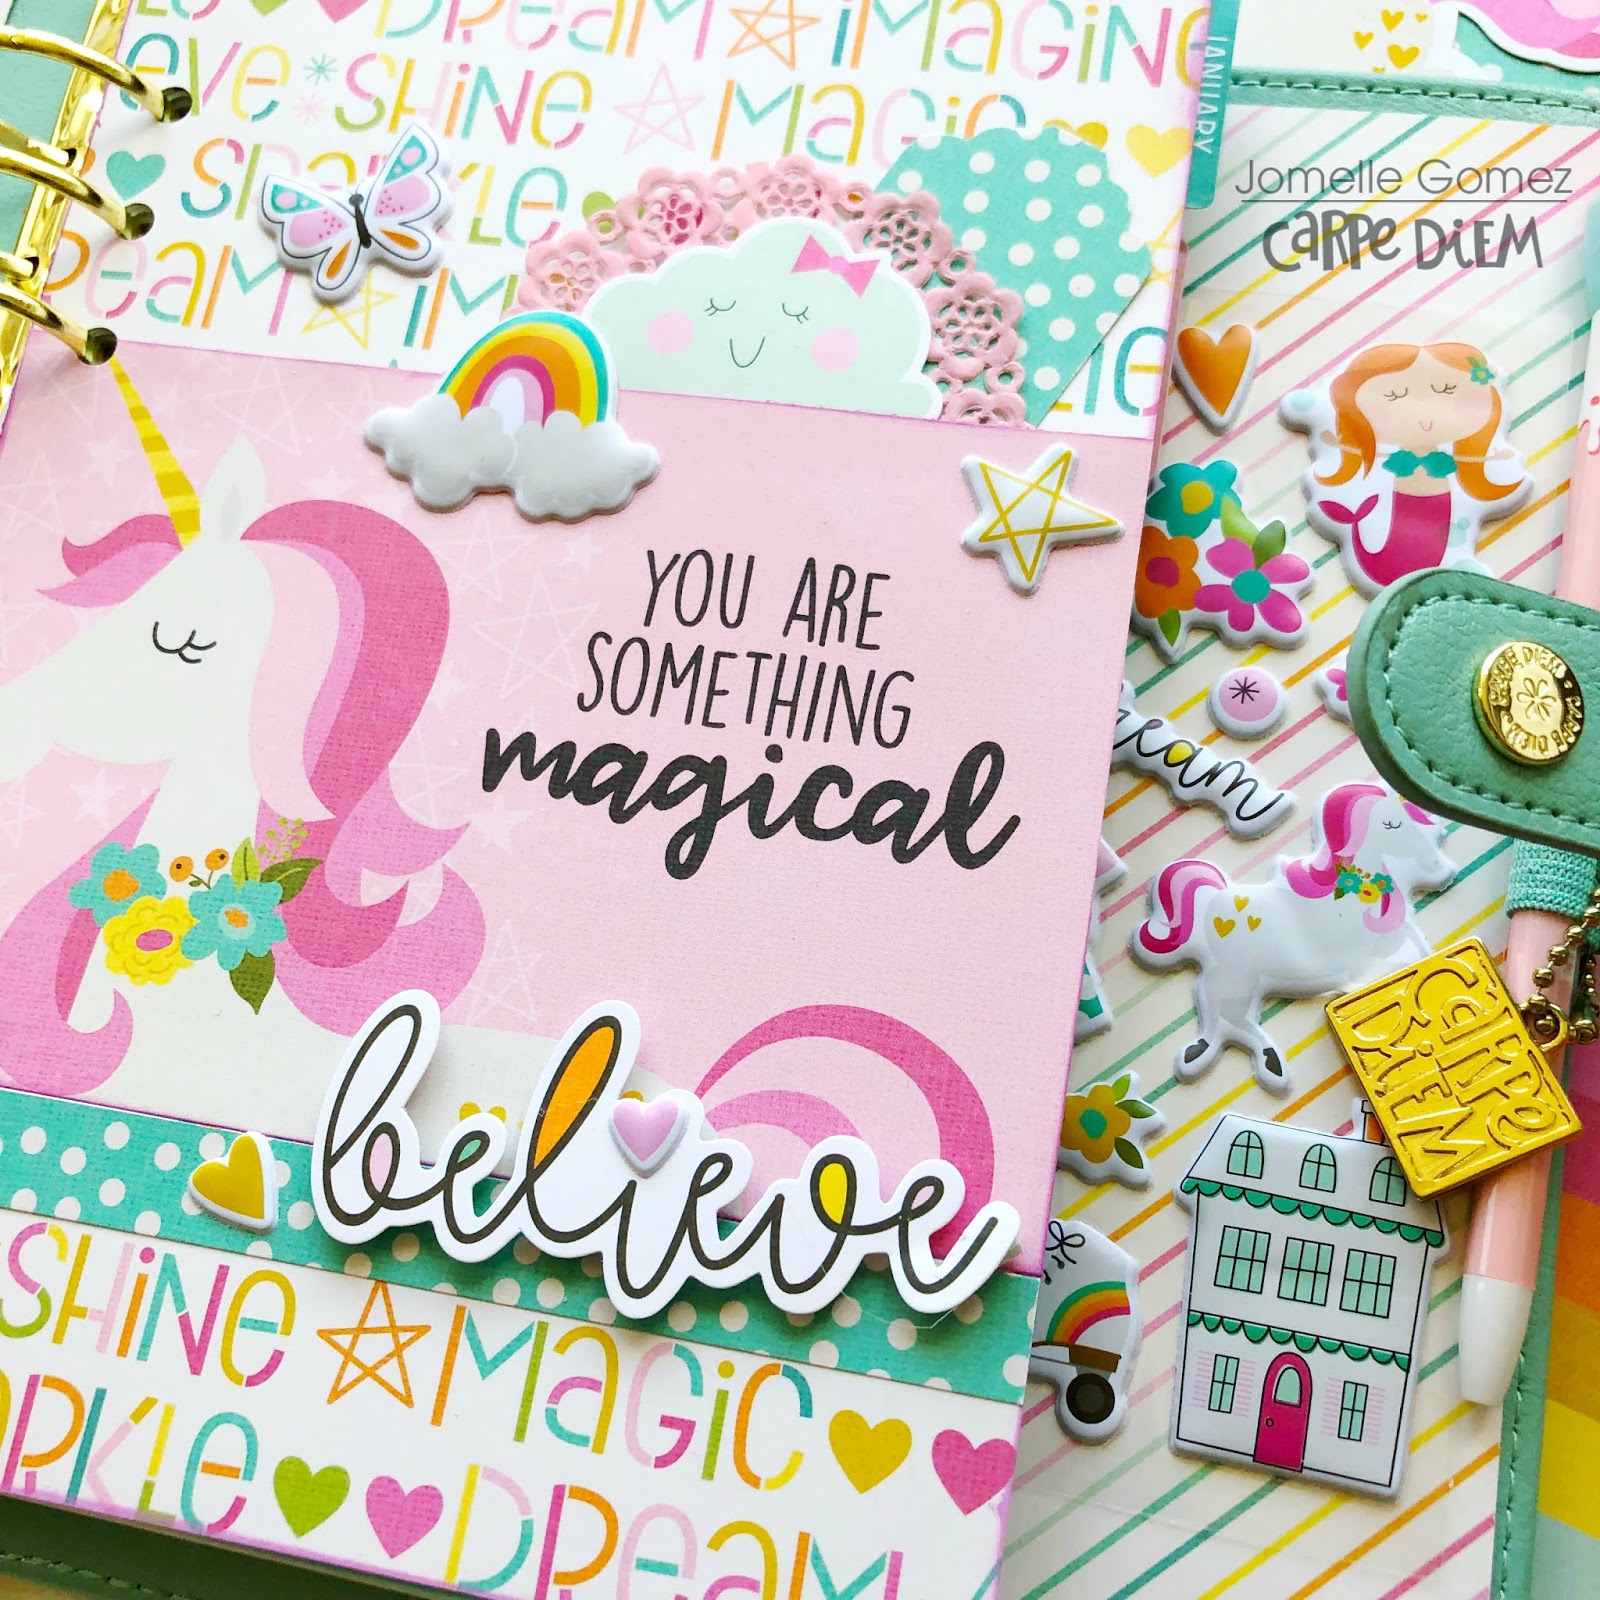
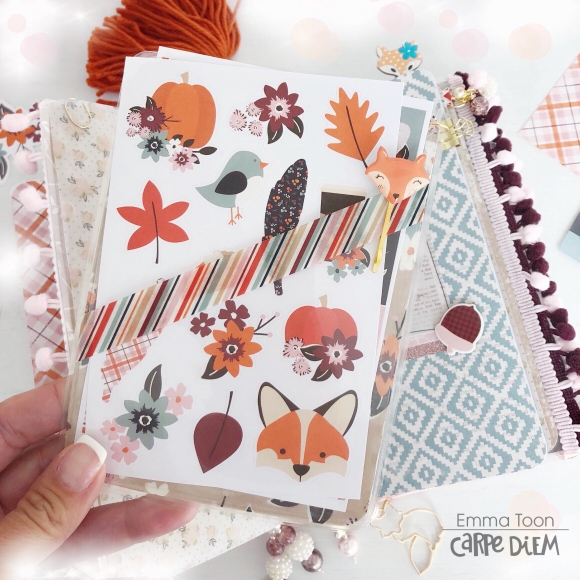
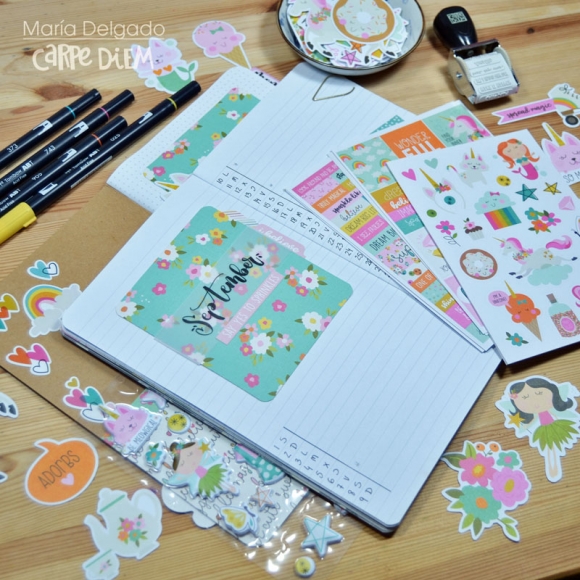
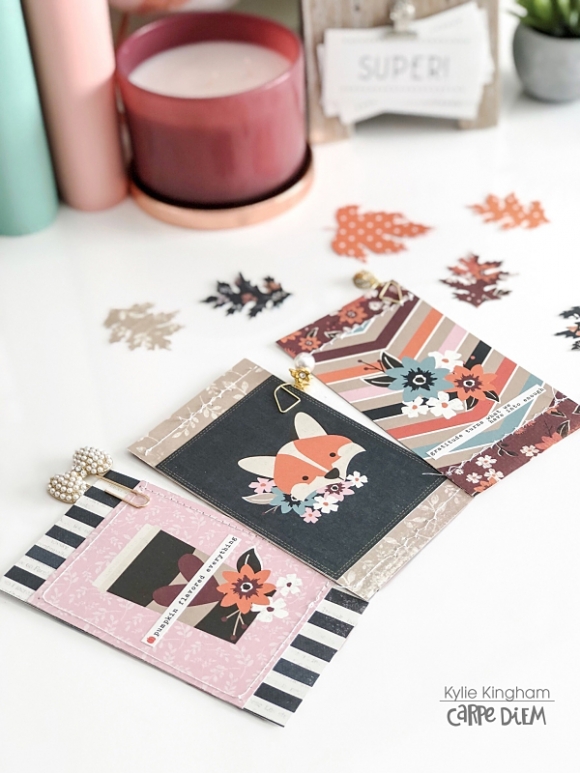
Here’s a little look at some cute themed cards I made for the month. I have added these to my front pockets and throughout my planner as page markers. They were created by cutting apart the 3 x 4 elements paper and backing them with a co-ordinating paper.I have left a border of the paper showing both top and bottom.They look super cute added into my planner with pretty paperclips.

I can’t wait to dive into my planner and fill up those pages for September.Hope you have enjoyed seeing my planner set up today! Until next time,

Supplies

Hello everyone!!  Jackie G here on the blog today!!

I don’t know about you, but I am always in need of some boy cards.  Not sure why, but they are always the hardest to create.  I absolutely LOVE the newest boy collection Lil’ Dude!!  This collection works for all ages and I love that!! 

All four of these cards were created with just scraps I had left over from the mini album I created a couple months ago.  The this first set of cards I wanted to show something more elaborate and something simple.  The card on the left I used a couple different pattern papers, bits and pieces and stickers!!  I used LOTS of dimension for this card!!  For something much simpler I only popped up the dinosaur and stars. 

The next set of cards I focused on the cute little pug dog.  One card is geared more towards a “little one” and other for an older child.  I made sure to put stars on all 4 cards so they would all flow together and work as a set!!

Thanks for stopping by!!!

Supplies

Hey planner friends! It’s Rachel again and I am feeling all the “Back to School” vibes in my Cream Dot Traveler’s Notebook. Even though I am not a student or teacher anymore, I was still really excited to use the School Rocks! Collection in my Traveler’s Notebook for September. I love this collection’s retro school feel and think the colors will be a great transition into fall. The printables for this month pair perfectly with this collection and I will be sharing how I used both in my setup for this month.

As always, let’s start with those scrumptious pockets! I used several of the elements cards and the combo stickers to give these pocket an A+ upgrade. I giggle a little when I see the trimmed down ruler from the Ready-Set-Learn paper and the You Rule! Sticker - I think it is pretty “punny”!

I decided to keep my insert covers pretty simple for this setup - just a few pieces of paper from the collection kit, an element card and a few embellishments. I love the kraft insert covers peaking through! I did go ahead and add some decoration to the back of the inserts, which I don’t often do. I like how it turned out! Isn’t that composition notebook sheet adorable? It is from the printable set from this month!

Speaking of printables, let’s talk about those next! To make page markers for three of my inserts, I used the printable notebook sheets and adhered the printable die cuts to the top. I laminated the page markers to make them sturdy and a little more functional. Now, they act a a great dashboard for sticky notes or a place to write a to-do lists (with a dry erase marker). I love seeing them peak out of the top of my travelers notebook when it is closed!

I also used the calendar printable (already dated!) and adhered it inside my monthly insert. I decorated the monthly spread with stickers from the Combo Sticker Sheet and paper scraps from the decorated notebook covers. A little hack: you know the cover sheet that you get when you buy a collection kit? Don’t be afraid to use that, too! I trimmed a strip off the top of the cover sheet and used it to decorate the beginning and end of my monthly spread.

I had so much fun putting together my monthly dashboard. I decided to focus on my goals for the month and used the combo stickers to highlight them. The notes page is reserved for “bright ideas” or big moments that I will fill in at the end of the month.

Here is next week ready to go using the new weekly inserts! To decorate, I used the Combo stickers, paper strips, and some fussy cut items from the I Love School Paper. This collection doesn’t come with washi, but that didn’t stop me from making washi paper strips instead!

As you may have seen from my last post, I love stamping, so I decided to pull coordinating stamp inks from my stash and some of the new stamps to complete my weekly spread.

I am really loving the box stamps from the Make a List Stamps to highlight important events. For my “Remember” section, I used icons from the Get it Done Stamps as my bullet points instead of my normal checklist. I keep telling myself that if my checklist is cute, maybe I will get all these things done!

For an extra “punch” of color, I love to use punched papers and adding them as decoration to my pages. For this page, I used a small hexagon punch to make a little hexagon cluster to highlight the weekend.

I like keeping the rest of the collection pieces with me, so I made a pocket folder with one of the papers and adhered a 4x4 element card and a trimmed down 4x6 Element cards to the inside of the paper. This folder lives in the center of the my weekly notebook for easy access when I am ready to decorate!

I hope you enjoyed this walk through of my September setup in my travelers notebook using the School Rocks! Collection. As you can see, this collection is not just for students and teachers. There is so much universal cuteness in this collection, that it is perfect for setting up and decorating all planner pages!

Supplies

Hello! It's Jana Eubank. I'm back with another scrapbook page. This time I have a girly, birthday layout featuring the Bloom collection!

If you're having a hard time deciding which patterned paper to cut into first, why not cut a piece from ALL of them and layer them together for a fun, textural photo mat? That's what I did on today's page. Take a closer look below!

After matting my photo, I further framed it by capping it along the top and bottom with my title. I split the phrase, placing one word on top of the picture and the other on the bottom. I then added a black cardstock circle to the right corner along with heart die cuts from the Bits & Pieces pack to frame it even further.

At the bottom of the page, I used the fancy journaling block cut from the 4x6 Elements Paper. Next, I fussy-cut lots and lots of flowers from the Today's the Day paper and the Inspired paper to tuck behind each element of the design. This married everything together and added a fresh, floral feel!

The result is a sweet birthday page perfect for any girl in your life ... maybe even a birthday page about yourself!

Thanks for coming by!

Supplies

 
Rainbows, Mermaids, Fairies and Unicorns Oh My! So many magical things you can create with this collection that I decided to set up my A5 Robin's Egg planner and my Blush Speckle TN.
 
I wanted my set up to highlight the color yellow so I added the flower ribbon on the side of my TN. I used bits & pieces to decorate my pockets. I placed the "Dream" chipboard sticker vertically using washi tape therefore I can easily remove the letters.
 I always love the side view of my TN. It shows the different layers and how chunky it is.
 I printed a large size fairy (as you can see on the top left) on vellum and laminated it. It will be used as my page marker in my TN. 
I have a really old printer and I noticed that the colors are brighter when I print the images on vellums compare to regular paper.
  I decorated the page before the Month and used it as memory keeping. I added my daughter's picture where she was wearing a "Mermaid Party" T-Shirt and her pink Converse shoes when we went to the Aquarium of the Pacific. What's can be more perfect than that?
 Monthly Layout for August. I used the 4x6 stickers to create my layout.
 Let's take a closer look at my A5 Planner Set Up. I created this adorable dashboard and stuffed my planner pockets with all kinds of magical elements.
Now this is what we planner girls call "Pocket Love"
 Believe that you are something magical.
Thanks for stopping by and I hope you have a magical day. For more inspirations check out my Instagram xoxo_jomelle

Supplies

Happy Wednesday everyone!  It's Traci, from Artsy Albums, and I'm excited to share my Sn@p album project using the beautiful Forever Fall collection.

The colors in this line are different than most fall collections.  A hint of pink and blue are combined with traditional fall colors of orange, brown, and cinnamon.  It's just beautiful!
The pictures of my son and his adorable family worked perfectly in this easy, pocket style album.  
One of the 4x6 horizontal cards in the collection has a circle in the center.  I decided to highlight a sweet picture of my granddaughter by using a 3.5"circle punch.  
I used several pieces of Forever Fall chipboard on the page above, and cut down the 4x6 vertical card to fit the 4x4 pocket.
I hope I've inspired you to give pocket style scrapbooking a try for fall using Simple Stories Sn@p albums and the beautiful Forever Fall collection!

Supplies

Hello friends! Linsey here today sharing my latest altered project, a rustic window frame-turned-wedding keepsake using the classy and elegant Always & Forever Collection! I'm a sucker for a good love story and this gorgeous collection has everything you need to tell yours (or somebody else's). It is obviously perfect for designing your wedding album, making custom wedding cards and even creating a keepsake gift like I've done, to commemorate the always joyous occasion of a wedding. 

A project such as this could be done with any number of style frames. I chose a rustic wood window frame, which works nicely to showcase the many beautiful elements included in the Always & Forever collection. Papers from the 6x8 Pad were first chosen and arranged in the 1st and last windows. A piece of gold glittered tulle was layered in front of each, allowing the floral patterns to show through while also creating an additional layer of elegance and sophistication. The first window was decorated to represent various wedding day festivities like cutting the cake, the champagne toasts, music and dancing, tossing the bouquet, taking lots of photos and of course, all the wedding gifts. Elements of 6x12 Chipboard, Combo Sticker, 4x6 Stickers and Clear Stickers were used to build the miniature scene. See those tiny golden hearts floating all around.... Love is actually in the air! 

The 2nd window is designed using 4x6 Vertical Elements, where a few white roses, gold accents and hearts from Bits & Pieces were added to the lovely sentiment. Simple and sweet. 

Similarly, the 3rd window boasts a romantic sentiment from 4x6 Vertical Elements and has lovebirds touching beaks with a gold heart just above to represent a first kiss that seals the sacred wedding vows which bind two soul mates together as one. 

The final window depicts the wedding vehicle that whisks the newlyweds off into the sunset where they begin their new lives together and of course, live happily ever after! And just like any great fairy tale, the Always & Forever collection is a dream come true! 

Thanks so much for visiting today! I hope you've been inspired to use Always & Forever on your next wedding, anniversary or love-themed creation! Until next time, happy crafting!

Hey Sweet Friends!
 
 
I can’t believe that August has flown by in a blink of an eye and September is just around the corner. As some people look at September being the end of Summer, I look at it as the beginning of my favorite season- Fall!! I used the free monthly A5 printables for my month on two pages. 
 
 
Since I absolutely love the new Forever Fall line, I wanted to use some of the new stamps as well as some stickers and ephemera! This is a busy month for me as I’ll be traveling to Arizona and Portland as well as doing little trips within a hour radius of me. Here in California it still is hot- but I’m already California dreaming of the fall. It’s time to get cozy, put on your sweaters and boots, and enjoy some yummy warm drinks. 
 
 
I wanted to share with you the before the pen layout. We in the planner community love to share with you before we decide to lock down our priorities and make permenant plans :)
 

The month on two pages is probably my hands down most favorite thing to decorate. It slowly brings realization on all of the upcoming events and how busy life can get. Don’t forget to schedule some “me time” while Planning. This definitely goes along way especially with a busy schedule. 
 
 
What’s some of your favorite fall things to do? I’m most looking forward to going back to NYC and enjoying fall foliage there AHHH!!! So be prepared for some traveling documentation soon 
Until next time!!
 
 
Xo,

Supplies

Hello friends. Iris here with a back-to-school layout that goes back to some basics: the SN@P! Basics Maple/Cream Notebook paper, an easy cut file, a few embellishment clusters, a little stitching, some ink splatters, and the fabulous School Rocks! collection.

Using a modified cut file from the Silhouette store, I cut four rows of chevrons from the Notebook paper.  Notebook paper always makes a great neutral to pair with colorful papers, and it's especially awesome with a school collection. 

To capture the mixed feelings my daughter had on her first day of 2nd Grade, which is what the journaling is about, I printed a 4x6 photo of my daughter smiling as she waited outside, and also a 3x4 photo showing her sitting at her desk with an uncertain look.  I placed them a little off-center opposite the journaling, and united them with a cluster of circles.  The "FIRST DAY OF SCHOOL" circle - how awesome is the letterboard look! - is meant to be the title, so I popped it up on foam to make it stand out. I also added a staple to the cork circle for interest.

The chevrons give motion to the page and I accented that motion by stitching down the center of each row where the points are.  I wasn't concerned about making the stitching perfectly straight. It adds to the fun if it's a little crooked. ;)  

The bottom right had a natural spot to build up a cluster of icons.  To add depth, I popped up the globe on foam. I also added a stapled the star.

In each row, I placed word strips in random places.  So that they don't look like they are floating, each is anchored by another sticker element. Since the bottom star has a staple, I added staples to the other stars, which also help anchor those strips. The apple and paper airplane are up on foam so that they continue to grab the eye up the page. 

I added my date at the top right of the page, just like they teach us in school. The pencil journaling stickers in the collection fit the roller date stamp perfectly.  For the finishing touch, I picked a yellow mist (SC Mister Huey's in Custard) because it helps fill in the blanks around the three main areas but doesn't compete with the rest of the background.

Back-to-school time for kids means more scrap time for moms, am I right?! What better way to start than with some back-to-school scrapping with the School Rocks! collection. :)

Supplies

Hi everyone! Tara here with Secretbees Studio! Due to popular demand, I have made another Traveler’s Notebook similar to this one that was a huge hit! However, because I used the stunning and gorgeous 'I Am' paper collection by Simple Stories for this notebook, I decided to make it more of a personal journal!

The 'I Am' collection is all about telling your own personal story and is full of beautiful images, patterns and uplifting sentiments. I was super excited about all of the rose gold foil accents in this collection- they are fabulous! This notebook measures 9 1/4 inches x 6 1/4 inches including the laminate borders. I used the pretty patterned papers to make the cover of my journal as well as some folders with pockets and charming inserts!

Included in my journal are some of the new Carpe Diem Traveler’s Notebook inserts so I will have plenty of room to doodle, draw and write. I dressed everything up with all of the exquisite stickers, chipboard and bits & pieces. There are just oodles of pretty things in this collection and they all coordinate beautifully together.

I know this collection has been around for a few months but I wanted to make something really special with it and really personalize it since it would be all about me! I felt so happy and empowered while I was making this lovely notebook since it has the most wonderful affirmations throughout the entire collection!

The most important story you have to tell is the one about you! Believe me, this soft and feminine collection will document your story in the most gorgeous way and will bring out all that is wonderful about you! Since so many people asked for a tutorial on how to make one of these notebooks I could not refuse! There is one over at my YouTube channel that I hope you will check out so that you can make one of these beauties for yourself!

Supplies

Hi there, Nathalie with you today bringing you a new colorful and fun layout using the new Simple Stories "LIL' DUDE" collection.  This collection is filled with fun details for all those little boys and kids at heart, but my favorite thing is that it features a "Boston Terrier" design in it, and as a mom of a "Boston Terrier" baby, i cannot get enough of it (and might have to hoard quite a bit of it, too!)

To create the background of this page, I used a Just Nick cut file  to create all the stars from white cardstock, and backed them all with papers from the Lil' Dude collection.   

Since the Boy Oh Boy paper from the collection is being used as the background,  a little bit of white acrylic paint was used to mute the pattern under the stars.

Once the stars were set with a bit of foam adhesive,  the picture of my nephew with our baby Boston Terrier was backed and layered with papers from the Lil' Dude Collection, and nestled in between the star clusters.     I created clusters of ephemera at the corners of the picture using all the embellishments from the collection.  Love all the small details in each embellishment! 

In addition, small clusters were also created around the background.   Some cardstock stickers and stickers from the 12x12 sticker combo sheet were combined to add more interest to the page>.

The large Chipboard sticker phrase was used to create the title of this page.  Love the addition of black in the Lil' Dude collection!

This page is all about fun and my little nephew, and i love how easy it was to combine all the elements in the Lil' Dude collection in this page!!!  Remember to check it out, I am sure you will love it!!

XO

Supplies

Hello, it’s Emma here, who’s ready for fall? I’d like to show you how I’ve set up my beautiful blush speckled tn. I chose the blush not only because it’s pink, and I love pink! but I thought it would pick out the delicate pinks dotted throughout this collection, and soften some of the darker colours, oh and yes, I should mention, it’s the Forever Fall collection that I’ve used! 

I love to display whatever collection I’m using on my pegboard, it makes my crafty area look pretty, but also, it keeps everything in one place for when I’m doing a new set up. 

Now, I’ve been playing around with different ways to cover my tn inserts, and I’ve found a new way, it’s a little bit fiddly, I’m warning you now, so if you haven’t much patience, this isn’t going to be for you! 

I wanted to be able to have a cover without it being a permanent cover, but I also didn’t want a loose cover where you could still see the ‘original’ cover...if that makes sense? Bare with me, I’m getting to the good bit! 

So! My idea light bulb lit up and I decided that pulling the staples out of the inserts, taking off the ‘original’ cover and then in a very fiddly fashion reinstating the staples back into the insert, minus its cover, was the way forward!! See, I told you’d need patience!! 

This then left me with ‘naked’ inserts! Perfect, It meant then I could make new loose pretty covers but not have to look at undecorated ‘original’ covers, and when I move into a new set up, I just move the ‘naked’ inserts, ready to dress them up with new loose covers! Yay!!

Don’t be tempted to throw away the old ‘original’ covers, keep one back to use as a template for making your new loose covers. 

It’s now time for my favourite bit, setting up my TN, we’re talking pretty pockets, decorated inserts, page markers, all the things that make your TN unique to you, yes, we all have our own ‘style’, you could have a whole room of us, all using the same collection, setting up the exact TN, but each one would be very different, and that’s what I love about creativity!! 

Simple Stories make all these awesome products for us to use, but it’s our own creativity, no matter how basic you might think yours is, that brings the collections to life! 

What I’m trying to say, is don’t feel intimidated when you see some of the incredible set ups that people do, you are just as incredible and totally unique, so, always remember, you rock girl!! 

There’s so many fun ways to jazz up your tn, here’s one of the loose covers I’ve decorated really simply by using a 3x4 card cut from the 12x12 page included in the collection kit, a bit of glittery washi and a cute acorn chipboard sticker! See, easey peasey!! 

Hands up who loves sequins?? Well, here’s another really easey way to add some sparkle, I’ve cut out a 6x4 card, again from one of the 12x12 papers in the collection kit, slid it in a 6x4 photo flip pocket, chucked a few sequins in the pocket, used a dinky little paperclip to clip the card to the front of the photo flip pocket (this stops the sequins falling out) and stuck it on an insert cover!! You don’t even need to have any double sided sticky tape, as the photo flips come with a strip already attached!! 

Carpe Diem planners have recently brought out, monthly, weekly, daily and various other tn inserts. Here’s how I’ve set up September in my Monthly insert. 

The Forever Fall stickers are perfect to fit in the boxes and pretty up the pages, I’ve also used some of the stickers from the 12x12 sheet. 

To number the days I’ve used the Numbers sticker tablet, this is great, full of number stickers in every size & colour you’ll ever need! 

I also made a page marker, it’s quite simple, I cut down 2 12x12 papers, stuck them together for added strength, laminated (but you don’t have to!) and stuck a 6x4 clear pocket on, I cut at an angle across the front of the pocket and stuck some washi on for decoration. It’s a great place to store your stickers and to mark your page. 

I hope you’ve enjoyed having a peek inside my TN and possibly even taken away a few ideas from it. 

If you would like to see more pictures using Simple Stories products then checkout my IG account  https://www.instagram.com/heartsbyemma

Supplies

Oh happy day!  If you have a dreamer in your life (or maybe you are one too?) you are going to love the new Dream Big Collection from Simple Stories.  It’s filled with rainbows unicorns, fairies, mermaids and so much more!

Simple Stories has pulled out all the stops so there’s lots and lots to play with.  Printed and die cut Bits and Pieces, thick Chipboard Stickers, and pattern papers that will make you sigh with contentment! 

The papers are easy to mix and match because they’re perfectly coordinated.  You can find inspirational sentiments on the sticker sheet that’s included in the Collection Kit paper pack. I adore the colorful round sparkles that make great accents for all the images… fairy dust  for the pixies or bubbles for the mermaid.

I think this collection is so much fun ! I know it’s going to delight the young ladies in my life, but I know a few grown ups that would be just as happy to receive one of these cards!  Who doesn’t love to shine?

With this collection anything is possible.. ride a unicorn, fly with faeries, and make some magic with a mermaid.

Supplies

Hello! It's Jennifer up on the blog today to share a layout I created using the adorable Dream Big collection! I adore the bright colors and whimsical prints that are perfect for your girl photos! My little girl isn't so little anymore and the only way I seem to get a good posed photo is by swiping them off of her Instagram! 

I  wanted to incorporate a few of my favorite patterns around my photo. Starting with a white cardstock background, I  adhered strips of patterned paper then stitched through the centers to add extra flair (and I love to stitch on all of my pages). I  accented my page with these "sparkle" circles found in the stickers, chipboard, and Puffy Stickers!  

Dream Big has so many cute shapes and sentiments to chose from! This Insta camera from the Bits and Pieces is the perfect accent to my photo! I  used pop dots to give it some dimension then layered my title sticker underneath.  You can also spy a small section of the floral border sticker underneath my title. Both can be found on the Combo Sticker Sheet which includes so many shapes and sayings to accent your page! 

To the left of my photo, I  utilized the 3x4 Elements by layering a color underneath the ledger print.  I'm totally in love with the chipboard banner found on the 6x12 Chipboard Sheet!  The flowers mixed with the tassels make a beautiful accent! I  also added a floral cluster sticker as well as sentiments from the Combo Sticker Sheet and 4x6 Stickers.  

Showing one of the word bubbles included in the Bits and Pieces! I adhered this "hello" with pop dots and affixed over the top right corner of my photo.  

Thank you for stopping by the blog today!  Check out Dream Big on the Products page as well as what is coming soon from Simple Stories! Have a great day!

Hi everyone, Kelly here today with a new blogpost! For this month I decorated my Robin’s Egg A5 planner inserts and Typewriter circle TN with the same ‘Dream Big’ collection. This collection has lots of fun florals and awesome rainbow colors. I use the planner for planning and the TN for documenting and lists.

I decorated my TN pockets with a few papers, some chipboard stickers and ephemera. For the front dashboard I decided to keep it simple and used the Dream chipboard stickers and one floral ephemera.

I love all the new stamps by Carpe Diem planner, I used a few frame stamps and a to do stamp to create my own custom to do page. I also used a few of the icon stamps to try them out, love them!

I used the back side of the 3x4 Elements paper with the scalloped borders to create a dashboard on the left side. For the ‘This month’ page I made a ‘Dream big’ silhouette file and backed it up with some of the papers. I decorated the page with some florals and wrote my to do list for the month.

I decorated my weekly spread with some florals from the ‘So adorable’ paper from the collection. For the rest of the spread I mainly used some functional stickers from the ‘planner stickers basics’ tablet.

I hope you have enjoyed reading this blog! You can find more fun spreads in my Carpe Diem planner on my Instagram account createplannernl https://www.instagram.com/createplannernl/

Have a very nice day!

Hello Friends!

It's Kristine here today to share a layout with you! I used this super cute Lil' Dude Collection. It just screams fun and adventure for those little boy pages. I love the colors and the die cuts that include robots, cards, and dinosaurs are perfect!

This is a layout I created with a picture of my nephew. It was a photo shoot last year and this crow is painted on a large cement wall in the city. This photo was perfect for this collection.

Something I want to share with you on this layout is my title. I like simple titles and don't over think it. To create my title I used a 4x6 card from the Lil' Dude 4x6 Elements sheet. I cut it to fit my page as a banner. I thought it was perfect and so easy to do. Perhaps on your next layout you could try and use a journal card or element card to create your title!

Thanks for visiting today and please visit us on Social Media for more Simple Stories projects.

Kristine

Supplies

Hi! Odessa here with some more SN@P! layouts! Lately I’ve been using them to document our summer adventures and I am just loving these 6x8 binders for telling my favourite stories.

Dream Big is such a me collection. I’m pretty girly. I like glitter and unicorns and everything cute. I also have 2 boys and the majority of my scrapbooking involves them. But I don’t let that stop me! While Dream Big might not go with some of our bigger adventures, it’s perfect for a nature hike and a day at the beach with a giant inflatable unicorn. I made a cute title page for this story with a 3x4 journal card (with an added cat unicorn embellishment because why not?!?) and a 3x4 cut from one of the gorgeous papers from the collection. I used some of the Basics alpha stickers to make a fun title. I added in a picture of all my fav guys and some more embellishments from the collection and my title page is done.

For this spread I used a bunch of the journal elements I loved from the cut apart sheets with some of my fav photos from our walk. It was a pretty magical place so this kit works well.  And those new puffy stickers give me major heart eyes! They are great for adding a bit of dimension.

Sometimes a plain journal card is just to plain to me and I have to jazz it up. Here I added this adorable banner chipboard and a phrase sticker to personalize it.

Next up was the part of this story that really went with the collection. Blue skies, floating away on a unicorn and white sand. I went for a brighter look with this page, all of the cut apart journal cards are really bright since my photos are pretty cohesive colour and composition-wise. I added in a card with a spot to write so I could get some words in and added a few stickers here and there to the other cards. I accented my photos with some puffy stickers, words and phrases.

I was really excited to have a legitimate reason to use a sticker that says “ride a unicorn.” One of my favourite things to add to a photograph is a few loosely related phrase stickers to create a little story on the photo.

Ok, so maybe every single beach trip I document says “Beach Please” on it, but I don’t know if any of them look as good as this one. Those alphabet stickers are perfect!

I finished off bold with lots of rich colour. I love the pinks and oranges in Dream Big so I let them shine here. On the left are a few pics from our drive home embellished with various stickers. On the right I used a page full of 2x2 squares. The Dream Big collection includes a paper full of 2x2 elements perfect for sliding into these proctectors. I cut down a 4x6 photo to fit in the middle and worked my favourite 2x2 squares from the paper around it. Then I added a mermaid cat sticker because it seemed like a good place to use it.

I hope you enjoyed this look inside my album and how I used Dream Big! It’s a great collection to embrace colour and all things cute!

Supplies

Hello friends! María here with another edition of my bullet journa, this time for September with the Dream Big collection. If you like unicorns, cats, fairies and mermaids, be careful! this collection will bewitch you.

This is the decoration of my "future log" I used one paper of the collection kit that I have decorated with vellum paper and lettering. I also used the stickers from same kit.

This is the outside decoration of my notebook, I have lined it with one of the papers of the collection, then I have adorned with "chipboard stickers" and "puffy stickers". I love the new TN  because it has the interior decorated with dots.

As I have done in previous months I have made a pocket on the inside of the notebook, it is perfect for storing the "4x6 stickers". To decorate the cover I used the "Bits & Pieces".

Here the collections of this month: "gratitude", "habit tracker", "menu" and "night on the sofa" where I point out the series and movies we see.

In the monthly insert I will use the number stickers to mark the days. In the weekly insert I used the stamps "mug life and "make a list". The ink I used for stamping was my tombow markers.

Supplies

Pages