Hello Simple Stories friends!

Marcia here today with a Lil' Dude layout to share with you. This is such an awesome boy collection. I love the bright primary colors and the typical boy images of dinosaurs, cars, dogs, and frogs. I knew it would be the perfect collection to scrap this photo of my nephew playing at a park. Big adventures are dreams here where there are dinosaurs and dinosaur eggs that the kids can crawl in and around. Lil' Dude helped me capture his adventure to remember for years later...

I used a font called Adrian Stars to create my title;You Rock. I arranged the title around a circle with some of the chipboard dinosaurs as embellishment and well as some dinosaur footprints.

The Be Wild, Be Free, Be You bits and pieces die cut went with the dinosaur theme. I added a puffy arrow sticker on top to add some dimension. 

Under the photo is a fun chipboard banner and I could not resist adding the Rawr puffy sticker over the photo. I can just hear my nephew Rawring as he peaks his head out of that dinosaur egg as if he were a dinosaur that had just hatched.

Thanks so much for stopping by today. I hope you check out the Simple Stories Lil' Dude collection for capturing all your boy's favorite adventures too.

Supplies

Hello again creatives! Leah here with you on the blog today. I finally got a chance to dig into the adorable Dream Big collection that I have been hoarding. My husband and I just moved into a new, bigger and brighter rental space and as I'm settling into my new craft room, I just want to scatter the Dream Big collection everywhere! I probably will make some fun room decor with it soon, but for now I decided to start a little smaller scale by using it to set up August in my traveler's notebook.

I dressed up the front cover of my monthly insert with lots of colorful layers. I love all of the texture! When making insert covers, I always cut a 12x12 paper down to the height of the notebook and then use the extra width to wrap around the edges of the front and back cover. This way the cover stays in place but can be transferred to another insert later. I added even more color to my insert by adding monthly tabs from the Tabs A5 Sticker Tablet.

In the Carpe Diem traveler's notebook monthly inserts, there is a notes page and monthly intro page in between each month's calendar pages. You can use the headers as is, but these pages are so easy to customize with a little washi tape or stickers to cover up/re-label the headers. This month, I am using the notes page on the left to document a couple of notes about my life currently. On the right, I have separated the page into sections and labeled them by each room in my new home. I then wrote out wish lists for each space. I have associated Pinterest boards for each space as well. I'm excited to budget for and check off the items on these lists eventually!

My monthly calendar is a lot less packed than it was last month thankfully. This month is all about taking some time to recover from the move, and then focusing my energy on unpacking and organizing. The Dream Big collection is just what I need to inspire me as I'm setting up my new craft space this month. I definitely want to sprinkle lots of color and crafty magic everywhere!

This is the first time I've had my own designated creative space and I cannot be more excited to transform it! You better believe my Simple Stories supplies will be pulling double duty – they'll be on display to beautify my space which will also keep me inspired and motivated to use them. 

Stay tuned to my Instagram for updates about how my craft room is coming along. Please tag me if you've posted photos of your creative space on IG. I'd love to see how you've decorated and organized it. Until next time, happy creating friends!

Supplies

It’s my favorite time of year.... it’s never to early to start getting ready for Halloween!!! I love this new Simple Vintage Halloween line!!!  I used the darling journaling cards and bits and pieces to make up this adorable banner! 

I used pop dots to add more dimension. 

This banner will be adorable over any hutch, window or entry way. They also make darling big gifts!!!! 

I also made a few cute cards 


Projects on this post are made from the Simple Vintage Halloween collection kit and Bits and Pieces. 

Supplies

Hey friends! It’s Kylie back today, sharing some inspiration from my August planning. This month I am using the divine A5 Colour Wash Planner. When I first saw this, I loved how the design also looked like little colourful macaroons!

I decided the ‘Good Vibes’ collection from Simple Stories would be the perfect match in this planner for my August pages. So much variety from the cute icons and patterned papers.

My planner has lots of storage room inside with 4 smaller pockets as well as two large on the front and back.Perfect for storing lots of goodies and extra papers. I adore the polka dot print of this planner on the inside also.

As with every month my favourite thing to do is make dashboards using the Divider Templates.They really make it so easy, just trace and cut to have the perfect size!

My opening dashboard I made using a heart cut file from Simple Stories, available from the Silhouette Store. I layered different papers behind it and adhered it to my dashboard with some foam tape so it had some dimension. I finished it with some fussy cut flowers as well as some blooms I punched.

Using the tab sticker book I easily added my various tabs for the month and covered them with the clear tab stickers so they were extra sturdy.

I always enjoy filling in my Monthly overview page. It’s a great way to quickly check month to month important dates as well as note your goals and any birthdays.I worked with some of the new stamp sets on this page and especially loved the Good Vibes set.

I’ve always been a fan of the 6 x 8 paper pads and this month I added some of my favourite papers next to each divider I made for extra colour.They are already a pretty good size to fit in my planner and I just used the Carpe Diem A5 punch to add my binder holes.

To the back of this divider I added a small pocket I made as I found it handy for storing my sticker sheets for when I am planning on the go.

Here’s a peep at one of my weekly spreads.I am using the vertical inserts this month and had heaps of fun adding the borders from the Make A List stamp set.They are the perfect fit! I also added some coloured paper strips to the base and side of my pages which again added some more colour!

I used some of the chipboard stickers for this divider.They add some nice dimension to the overall effect.

I round off the month with a page marker.I usually add an extra ½ to 1 inch to the height of my planner when cutting these so the tab sits to the top above my pages.

Thanks for stopping by today.I hope you feel inspired by my August planning!

Kylie.

Supplies

Hello everyone!!  Jackie G here on the blog today to share a fun little card and mini album using the Dream Big collection.  I created this little gift for my son to give to his girlfriend.  They are 5 and 6 years old and are inseparable!!  They share a love for unicorns so this paper collection is perfect!!  Young love and unicorns!!

Since this album is going to a 5-year-old I wanted the front to have a fun interactive feature so opted for a shaker element.  Lots of glitter, hearts and sequins to create some “unicorn sparkles”.  Paired up with the Be Younique rainbow paper it makes for a fun scene.

This mini album may be fairly small but can hold lots of photos…and let’s just say we are going to need the space!!  These two love to take photos together!!  The 4x6 and 4x4 papers make perfect photomats!!  If you would like to see a full walk through of this album you can head on over to my YouTube channel HERE.

I only created two pages for this mini album but they are pocket pages so both have inserts for extra photos!!

The last page I used the space to create a big waterfall full of photomats, twelve to be exact!!  I ran out of magnets so a paperclip and ribbon closure.

Lastly, a gift isn’t complete without a card!!  Using some left over stickers and bits and pieces I had from the album. 

I hope you enjoyed my projects today!!  Don’t forget to head on over to my channel for a walkthrough of this mini album!!

Supplies

Hey, Planner Babes! It’s Rachel, and I’m up on the blog today gushing about the new Carpe Diem Planner Stamps. If you follow me on Instagram, then you know that stamps are one of my favorite planner supplies. Now, I know some planner babes are a little hesitant when it comes to stamping, so I thought I would share today three reasons I love planner stamps and three tips for getting started. 

Three things I love about Planner Stamps 

  1. They are reusable and customizable – you’ll never run out! 

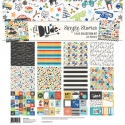
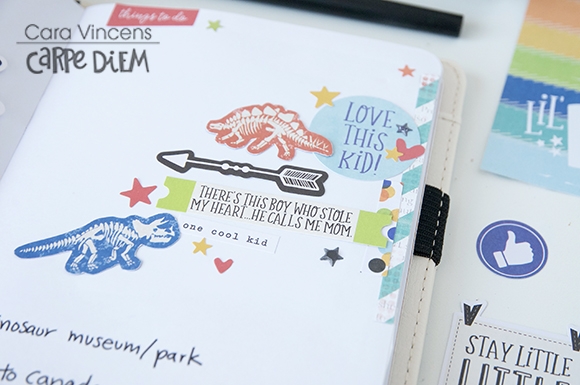
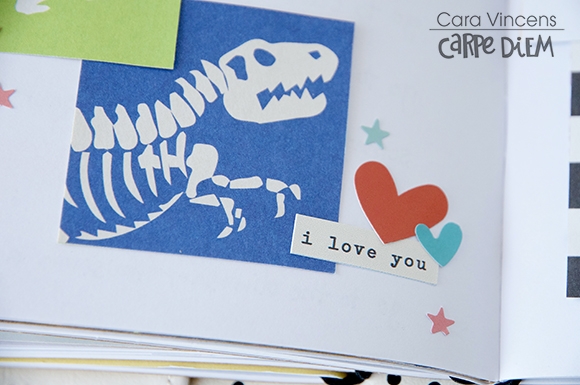
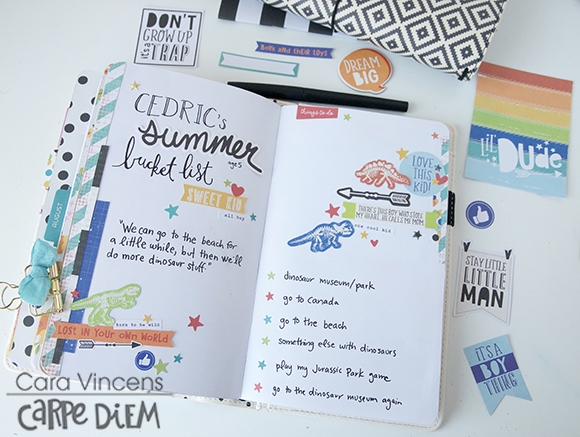
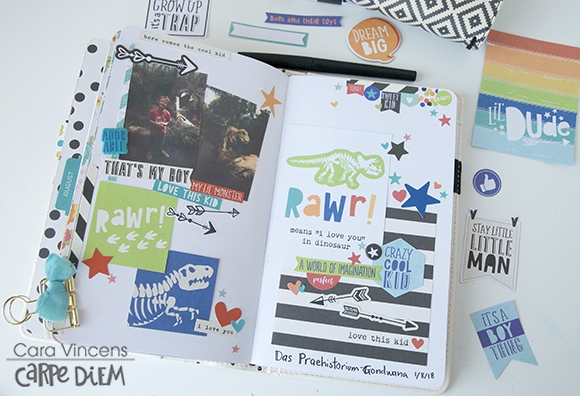
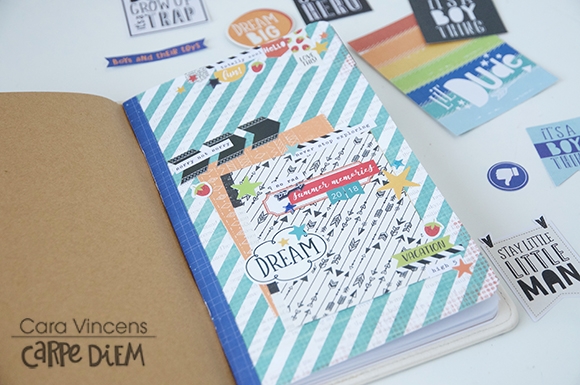
Have you ever had a planner sticker you love, but there is only one or two on the sheet? What do you do? You save it, because you want to save it for that perfect planner layout.  I do it, too! Enter planner stamps – you can use the image, icon, phrase or pattern you love a hundred times and it will never run out! The new Carpe Diem Planner stamps have all the adorable icons and patterns from past collections like Good Vibes, Domestic Bliss and Crafty Girl (you know, the ones you have been saving because there are only a few) and the small functional icons us creative planners use all the time, and you can use them forever!

You can also mix and match stamps to fit your needs and whims. With the Mug Life Stamps, I was able to stamp the same messy bun image with different sentiments underneath. How fun, right?! 

  1. They are great for dating (or re-dating!) your planner pages. 

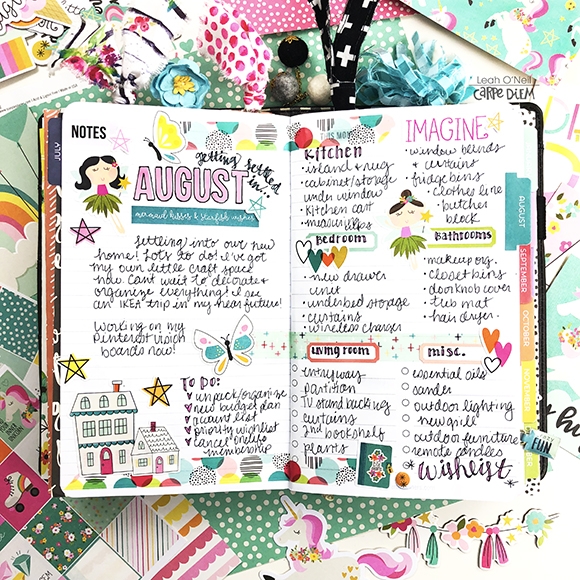
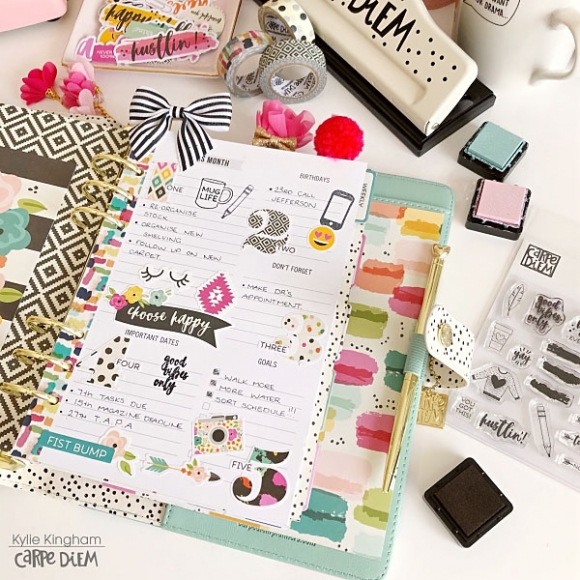
One of the things I love most about Carpe Diem Inserts is that they are undated. Having the freedom to use different insert styles makes planning more fun. With the new It’s a Date Stamps, dating planner pages has never been easier. Here, I have used It’s a Date Stamps to date my August monthly spread. Some stamps need to be “primed” before use, so when using new stamps, I always stamp a few times on something that is not your planner page. For me, that usually means stamping onto labels or sticker sheets. With these stamps, however, I was happy to discover that they stamped perfectly right out of the package! Now that’s a good stamp set! 

As it turns out, the extra stamping came in handy. I dated one week wrong, so I used the stamped date stickers to correct my mistake! 

Stamps like this set are also great for altering the dates of old planner pages or changing the headings altogether. I love the Carpe Diem Daily Inserts, but I don't always use them on the days of the week printed on the insert. To fix this, I simply stamped the month on sticker paper and covered the part of the page where the days of the week were printed. Now I can use these pages any time in August! You could also change the heading to “Today” if you wanted to use the insert anytime of the year.

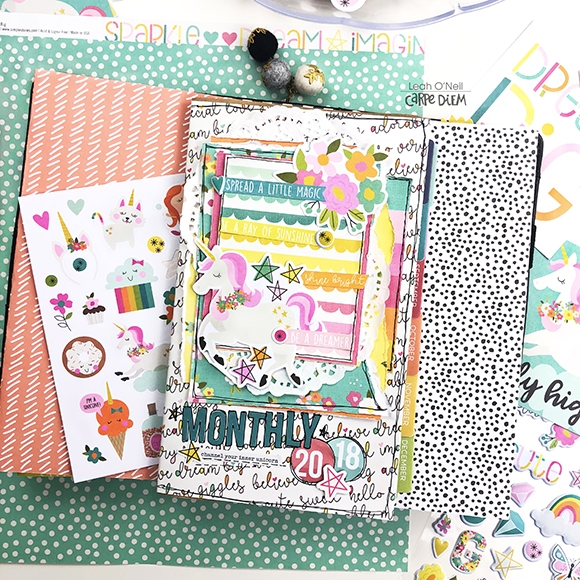
  1. They are versatile – stickers, washi, backgrounds, oh my!

With a few helpful supplies, stamps are one of the most versatile planner supplies around! They can easily be made into stickers, washi, and used for backgrounds with the color palette of your choosing!  

Here are some examples of how I used a masking technique with washi to make fun backgrounds for the vertical boxes on my weekly insert. Added bonus? You can write directly over the stamped image so you aren’t losing real estate on your planner page. I also created a mini habit tracker by stamping a grid with the lines from the List It Stamps and added icons from the Get it Done Stamps.  

For this weekly spread, I experimented with stamping faux washi across the top, middle, and bottom columns. I love how this turned out! Being able to use my favorite color combination made this page feel very "me"!


This daily planner page was also created with only stamps! Again, I stamped some faux washi directly onto the bottom of the page. The faux washi on the top of the page was stamped onto sticker paper and trimmed to look like a strip of washi. I highlighted my work schedule with a box stamp from the Make a List Stamp set and a pin icon from the Plan it Stamp Set. I have a feeling those boxes are going to get a lot of use!


Three Tips for Getting Started 

  1. Set yourself up for success with quality stamping supplies.  

High Quality stamps and inks along with the right size stamp block can take a lot of the frustration out of stamping by reducing “user error”. Start with high-quality stamps (like these!) and archival pigment ink in a neutral color like black or gray. You can always color in stamps with colored pencils or markers, so there is no need to run out and buy stamps in every color. Having one good ink pad is better than 10 not so great inks.  I do like to have multiple clear acrylic stamp block sizes because there can be quite a bit of variation in the size of stamps. When the acrylic block is roughly the stamp size as your stamp, you tend to get a better impression on the page. Luckily, stamp blocks are often sold in sets so you can purchase one set and that will be all you need!

  1. Be efficient with your stamping.

One of the complaints I sometimes here about stamping is the time and effort it takes to get all the supplies out. To avoid this, I like to be efficient with my stamping. What does this look like? It looks like stamping “all the things” at one time, rather than stamping as I go throughout the week. If you are dating planner pages, date several months at a time. If you to track a particular habit, go ahead and stamp out several weeks for that habit. 

As I mentioned above, when I stamp on my planner pages, I also stamp a few onto sticker paper, too. That way, I always have a few stamped icons that I can tuck into my planer for later use. On the sticker paper, I can stamp images in a variety of colors, too. I just love the customization of stamps!

  1. Practice, Practice, Practice! 

Stamping can be a little bit of a learning curve. Don’t give up! I have been stamping for a while now and I still make mistakes all the time! Remember earlier about me stamping the dates wrong? Progess - never perfection - Planner Babes! To take the pressure off, I practice! This coincides with the previous tip. If I have an itch to get “stampy”, I set aside some time to practice before I ink up my planner pages. Again, with new stamps especially, I like to stamp an image several times on a blank sticker sheet before I stamp in my planner. Added bonus – an extra “sticker” sheet for on the go planning! You can always cover up a mistake, so don’t worry about getting it right every time.

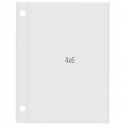
For storage in my planner, I either punch the stamped sticker page directly into my planner with the planner punch, or I use a 4x6 pocket page to hold smaller stamped stickers. I always have a small set of scissors with me so I can easily trim and use these sheets when I’m planning on the go.  

I hope you enjoyed reading about my love for the new Carpe Diem Planner Stamps. Maybe, I convinced you to give them a try as well!

Follow me on Instagram to see how I continue to put these stamps to use! 

Supplies

It's rare that you find a collection for boys that can span all the way from when they are toddlers to teens and the Lil' Dude collection does just that! Hello! Jana Eubank here with a birthday layout featuring my son, Owen.

The 4x4 Elements paper played a big role in this design. I not only used one of the squares for my title ...

... but also as page elements scattered below the title. Here you can see where I fussy-cut the speech bubbles from another one of the 4x4 Elements, as well as how I punched out the circle journaling block.

I also punched the "It's a Boys World" from the 3x4 Elements to use as a page accent.

At the top of the page, I used a smaller circle punch to punch the "So Rad" circle from the 2x2 Elements.

After I placed the larger pieces, I came back in with the die cuts from the Bits & PIeces pack and the puffy stickers to fill in the spaces.

I love how this design grabs your attention at the top of the page with the title and the photos and then leads your eye down the "waterfall" of page elements through the journaling and then finally ending on the photo at the bottom of the layout.

Thanks for joining me today! I hope you felt inspired to create a scrapbook page of your own. 

See you next time!

Supplies

Hi it’s Cara today, along with my son Cedric, my ‘Lil’ Dude’. We’ve been planning and recording some summer memories.

What I love best about traveler’s notebooks is that they can be anything you want them to be. A notebook, a planner, a sketchbook or journal. You could use yours as a memory planner or a bullet journal or simple just to decorate. Or, my favourite, a mix of any of these!

For this project I wanted to mix a bit of planning with a bit of memory keeping and I want to do this project with my children. I used a blank insert and we will have some bucket list type pages and some more scrapbooking/memory planner pages and anything else the children would like to add. At the end of the summer I hope to have a nice document of what we did during our school holidays.

Today, I was creating with my youngest, Cedric. He’s 5 and is obsessed with dinosaurs, I knew I would have to share my dinos from the Lil’ Dude collection, but that’s ok, there was lots to go around and I’m a nice mom :D

I asked him what he wanted to do during his holidays and wrote down his answers. basically, all dinosaurs all day! 

While all his brothers and sister were away at camp I took him to a dinosaur museum in Germany. He was in heaven! I used a few photos on this spread and of course some dinos! 

The big kids were still away so the two of us sat down to craft together. I created this page and let him have at it with my left over dino stickers. I did hide them from him for awhile so I could make my last project, which you can see here.

This is what he came up with, he even drew his own T-Rex and added a couple of dogs and a robot for good measure. I think he’s caught the TN bug now :D

I have loved saving my family memories over the years, and as some of you know, I have two sons, 24 and 28 years old.  As you can imagine, there are a lot of blue pages, sports layouts, and masculine themes in my albums .... until my sweet granddaughter joined the family 22 months ago.  I will continue to document the men in my life, but I'm having so much fun scrapbooking my life with this little princess. 

The Dream Big collection was perfect for saving some of my favorite 2018 memories.  I love the colors!
The 2x2 pockets make such a fun page.  I added just one tiny photo on this page, to highlight a special moment between my granddaughter and her uncle.
I used the 12x12 collection pack, including the sticker sheet.  I also used the chipboard stickers, puffy stickers, and Bits & Pieces die cuts.  
 
If you have a little girl in your life, the Dream Big collection is a must have.   Thanks for letting me share with you today!

Blog * Facebook * Instagram * Pinterest

Supplies

Hello friends! I hope you're enjoying your summer! Linsey here today sharing my latest altered project, a shadowbox using the super sweet and adorable Oh, Baby! Collection. A new baby is always a joy and creating a handmade keepsake is such a special way to celebrate the occasion. Come along and see how I transformed this ordinary wood shadowbox into a one-of-a-kind keepsake gift for baby! 

First, the outside of the box was covered with 12x12 Precious and Little One paper. Next, all of the edges were covered with So Sweet Washi Tape, which is a nice alternative to painting. Each of the inner boxes were covered using papers from the 6x8 Pad. The smaller designs in the pad are perfectly proportionate to individual boxes. Delicate white lace trim was added around the inside of the frame for a touch of softness. Finally, the fun part--decorating each of the tiny boxes with an array of darling detail using stickers, chipboard and die cuts. 

I love that the colors, patterns and designs in this collection are just right for either baby boy or baby girl so you can create effortlessly without worrying about your project being too boyish or girly.

Since my niece is expecting a baby girl this December, this will be for her. A name has yet to be chosen, so I kept it basic, but how cute would it be to personalize it with the name, date and details of birth using letter/number stickers too? I had the most delightful time decorating all of the tiny inner boxes. There are so many precious pieces in this collection, the details possibilities are endless! 

And that's a wrap! I hope you enjoyed seeing my altered shadowbox and if you are so blessed to be expecting a precious new little one in your life or family, the Oh, Baby! collection is a no brainer. Thanks so much for visiting today and until next time, happy crafting! 

Supplies

Florence here! I wanted to share with you one of my passions that I hold near and dear. It’s my bible journal. I wanted to share an entry that was dedicated to my nieces Baptism and I thought the Dream Big line was perfect for it. 

Kairie (my niece) is extremely girly. So I wanted to create this page with bursts of colors that represented her personality! I am extremely blessed to have her in my life and to have been able to be one of her God Parents. 

I know many of us come from different religious backgrounds but I wanted to share another way to utilize this kit. With bible journaling, I love working with bright colors especially yellow, pinks, and mints. Even though this line isn’t only for faith documentation, we can get our creative juices flowing and make it into anything we desire :) 

I hope you got some inspiration on using Dream Big for your next project!! Until next time!

XO,

Florence

Hello friends!  Jennifer on the blog today to share a layout I created with the new Lil Dude collection! Who doesn't appreciate a good boy line? Lil Dude knocks it out of the park with its bold, bright colors and prints! The coordinating embellishments have enough mix of "boy" to range from toddler to teen!  Photos of my son when he was 6 years old  playing with Hot Wheels were perfect to use with Lil Dude!

I  used my Silhouette to cut different sizes of circles from my favorite patterns to layer across my white cardstock background. I  then clustered my photos in the center of my page matting with cardstock to help them "pop" against the colors. 

I  used a circle frame, again cut from my Silhouette, to position my title.  Using foam dots, I adhered the bright letter stickers from the Combo Sticker Sheet. I  then accented with additional stickers found on the same 12x12 Sheet.  I  am loving the new addition of the Puffy Stickers!  You can see the miniature stars as well as small arrow; you receive two sheets in each package!

I  love using the 3x4 Elements for my journaling especially since there is almost always a ledger/notebook print included!  I  accented with a cute star cardstock sticker as well as more Puffy Stickers!

The Bits and Pieces pack is always full of a large variety of shapes as well as journaling spots such as the one seen here. I  used a date stamp in my stash and added a bright blue chipboard star. You can also spy a mini circle sticker found on one of the 4x6 Sticker Sheets...and yes, more Puffy Stickers! 

The B side of "Hear Me Roar" is probably one of my favorite prints of the collection!  I  am a huge fan of plaid and am loving the black and white. You can even note the hint of type as well!  For this circle, I  added a cute pennant from the Bits and Pieces as well as additional stars.  

Thank you for stopping by the blog today!  Check out the collection in its entirety by going to the Products page. You can also see all of the new, exciting Simple Stories collections coming soon!  Have a great day!

Hi everyone! It’s Tara from Secretbees Studio  One of my favorite things of summer are all of the beautiful flowers! I really enjoy creating my own pots of flowers and watching them bloom and blossom over the season. A little part of me is always sad to see them go so I created a bouquet of paper flowers that will last forever!

For this adorable paper cone bouquet I used the lovely Simple Stories 'Bloom' paper collection along with lots of the coordinating embellishments for a lush and full arrangement. The large flowers were cut with Silhouette cut files and large flower dies. I also stuffed in a few sweet rolled flowers made with some smaller dies. I attached my flowers to wooden sticks and then used hot glue to make sure they all stood up in the bouquet.

To go along with the blooms, I added in a few of the lovely stickers of the collection and highlighted them with other goodies like the 'Bits and Pieces' die cuts and small word sentiments. For even more charm, I added in beautiful paper curls made from the patterned papers!

The tag on the outside of the paper cone was made with a couple of the die cut pieces and I simply added a word sticker, a rolled rose and a bit of twine. I used a bit of thicker adhesive to add dimension to the tag before attaching it to the cone.  I attached a handle to the back of the cone to make this into a lovely door hanger I can enjoy long after my summer pots of flowers are gone!

Supplies

As much as I love the "Dream Big" Collection, I wanted to give some love and special attention to the "Lil' Dude" Collection
 
While everyone is going gaga over unicorns, fairies, rainbows and mermaids, I wanted to use something out of the norm. 
The "Lil' Dude" Collection is perfect since most planner girls don't use boys products in their TN's and planners.
 I decided to use my Typewriter Circles Traveler's Notebook. As always, I created covers for my inserts. I love the robots, video games, trucks, fidget spinners, rubik's cube and so much more.
 
I finally put my Stitch Happy Sewing machine to use. I wanted to add black stitching all around the border of each of my covers. I love how it adds a little bit more detail.
The inside of my covers all have pockets. I cut the length of the papers into the size of my notebook insert but I left the height alone, which is 12 inches.
Then I just folded the bottom part of paper over to create the same height of my notebook insert and voila you now have pockets. 
 
I don't plan to permanently glue my inserts so I can change the covers whenever I want to match the theme I'm going for in the future. 
I am planning to use this Monthly insert all year long. Without gluing the notebook insert to the cover, I will be able to take it out and use it in another TN with a different set up.
Having to use it this way, I can use the pockets in the front and in the back to hold stickers, bits & pieces and other elements I want to use later on.
 Carpe Diem now offer Monthly, Weekly, Daily, Dot Grid and Blank inserts. I can use these covers for each of the inserts, or I can just leave it as it is and use it as pockets when I add them inside my TN.
The front cover is so mesmerizing that all I want to do is stare at this whenever I open my TN. 
 I also wanted to add fun elements in my pockets, but at the same time I didn't want it to be too bulky. I decided to sew more black stitching on some of the elements I chose to add in my pockets.
My "Before the Pen" layout for the month of September. 

 I will be adding some journaling and photos to these pages. 
This was my first time sewing on papers. I still need to work on my stitching so it will be straight, clean and precise. 
Although the "Dream Big" Collection would've been perfect to use to create a set up for August since it's my Birthday month, the "Lil' Dude" Collection is just as sweet, if not sweeter in my TN.
Thank you for stopping by and I hope I was able to inspire you to use more boys products in your planners and TN's in the future.

Supplies

Hi there!  Nathalie with you today, and I am so excited to share with you a new layout that celebrates all those girly dreams of fairies and rainbows.   The new Dream Big  collection is filled with all rainbows, butterflies, fairies, mermaids, and unicorns just every little girl  and woman's dream.

For this page, I wanted to play with colors in the collection, so i used a Paige Evans cut file to recreate a rainbow for the background.   

A paper from the High Style pad was used for the background,  a bit of white acrylic paint was added as to form a cloudy sky

A few layers of papers from the Dream Big collection were used to back the picture.  Just love all the patterns and colors in the collection!!!

To embellish the page, I placed a few of the fairy stickers, from the Dream Big collection, so that they formed a visual triangle on the page.   Stickers, die cuts and the new puffy stickers were added around each of the fairies so that they pop from the page.

Just love all the puffy stickers in the Dream Big collection, all the stars work so nicely around the clouds and rainbow in this page.

This layout was a joy to put together, all the icons and papers in the DREAM BIG collection are sure to bring a smile to your face.   I cannot wait to see what you all create with this new Simple Stories collection.

XO

Supplies

Hello, this month I’d like to show you how I’ve been using one of my many Carpediemplanner TN Inserts with the beautiful Simple Stories Bloom collection.

I really enjoy gardening and watching how it evolves over time, I decided that the bloom collection would perfect to document all about my garden this year.

I’m going to show you some of the pages I’ve done so far that are about my favourite plants this summer.

I used a small photo printer that prints your pictures onto little stickers, so perfect for popping on my pages. You can find several similar types on the market. One thing I have found with mine is the colour of the prints are far less vibrant than the original photo.

I used the letter stickers by Simple Stories, I have a large selection of these in different colours from a lights & a brights pack, you’ll find these in the product list below, they worked perfectly to highlight each particular plant I wanted to journal about, this made the word really stand out nicely, I then went round each letter with a black ink gel pen to outline, this is something I like to do, along with any journaling cards, each page and stickers I might add, this is ‘my style’, some might think it’s a little ‘scruffy’ but I like the informal look...and it works well with my dreadful handwriting!! ;)

I’ve cut up scraps of paper to layer my pictures and also filled some ‘white spaces’ with black ink spots, another thing I like to do too! I’ve also used lots of the stickers and bits & pieces to add more interest to my pages. 

I’m really looking forward to filling this notebook out with pictures from my garden and journaling about what has and hasn’t worked for me this summer.

So there we have it, my little book of plants! I hope you’ve enjoyed having a browse at some of my pages and maybe taken some inspiration of the different ways that the Carpediemplanner TNs can be used. 

If you would like to see more pictures using Simple Stories products then checkout my IG account  https://www.instagram.com/heartsbyemma

Supplies

Is there a rough and tumble Lil’ Dude in your life?  Then you need to check out the newest collection from Simple Stories called Lil’Dude!   It’s got all things boy.. think dinosaurs, robots, puppy dogs, and race cars!

The collection includes everything you need for cards, layouts and so much more including pattern paper, stickers, cardstock stickers, journaling card “elements” and die cut “bits and pieces”.

I love the bright bold rainbow colors with contrasting accents of black and pastel sky blue.   The reverse side of some of the card stock sheets have journaling cards too.  I used this one with the “Lil’Dude” sentiment as the focal point on my card.

What a fun way to tell you’re little guy that you think he’s awesome!   The chipboard sticker robot is totally rad!  No adhesive foam tape for this guy – the chipboard is thick enough to add dimension without it. 

The kiddos grow up fast so you better gobble up this collection while you can!

Supplies

Hi everyone, Iris here with a layout using the new Lil' Dude collection. Sure, the primary colors, animals, toys, and playful fonts are great for scrapping all the lil' dudes out there, but I'm here to show you that it's perfect for all the strong, adventurous girls too. 

As soon as I saw the Never Grow Up teepee paper, I knew I'd scrap these photos of my daughter pretending to be a wild tribeswoman with paint markings. I started off fussy-cutting the teepees in tiers, and backed them with triangles cut from the corners of No Limits. It's nice to see such a vibrant true blue in a collection, and what's really awesome are the light blue splatters.  Mixed media without having to do the work!

I lined up four pictures just under the mountain scene. She had so many great poses that I wanted to include. I printed my favorite as a 4x6 and placed the bold title banner next to it, so that although this layout is chock full of colors and little bits sprinkled all around, the eye is drawn back to the center banner and my daughter's cute face next to it.

The supporting photos are printed as 3x4's and matted in alternating orange and yellow patterns from Never Grow Up and 2x2 Elements.  They fit perfectly across the page, staggered so I could nestle clusters of flat and puffy stickers where the photos overlap.  And of course she's a Fox girl, so that puffy fox had to make it on the page.

Who can resist buffalo plaid? Not me!  I love the addition of the text mixed into the plaid of the Hear Me Roar paper, and the black and white help ground all the bright colors. For my journaling I found a free font called "Blackout Two AM" that is very similar to the font with the filled-in letters.  And because it's a white on black, it blends in with the plaid, so that it doesn't distract from the rest of the layout.

Can't have mountains without a sky, and how pretty are those distressed plus signs on the blue of the "Boy Oh Boy" paper? The puffy moon and the black stars are some of my favorite elements in the whole collection, and add the perfect touch rising above the mountain to balance out all the black from the bottom of the page.

I finished it off sprinkling more puffy stickers and hearts all around to fill in little gaps.  I'm really loving that Simple Stories collections now include puffy stickers!

 Lil' Dude is perfect to document all our playful kids, boys and girls alike.

Supplies

Pages