SOLD OUT!   Sorry if you missed out this year, the boxes sold out incredibly fast.  Mark your calendar for early June 2019 for our annual warehouse sale!

Hello friends!  We're super excited to announce our 3rd annual Warehouse Box Sale!

Each Warehouse Sale box contains $200 retail value of Simple Stories products including 12x12 papers, 6x6 & 6x8 pads, stickers, SN@P! Cards, brads, clips, washi, chipboard and more from collections including Posh, Romance, Sub Zero, Beautiful, Vintage Blessings, Very Merry, Oh What Fun, Summer Days, Cabin Fever, Emoji Love, Domestic Bliss & MORE!

To purchase a Warehouse Sale box, simply select a shipping/location option below and click BUY NOW!

Click HERE for a list of Frequently Asked Questions.

SOLD OUT- SORRY!

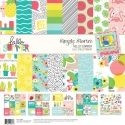
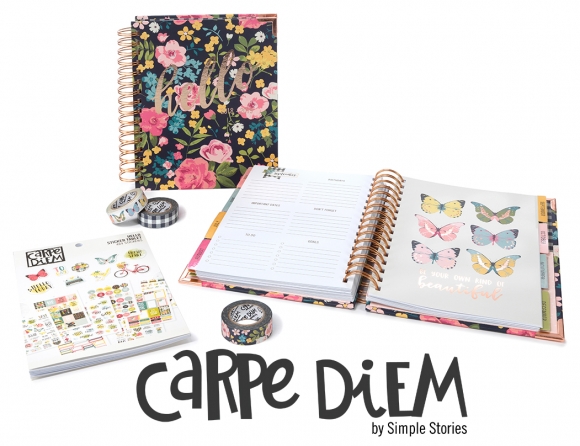
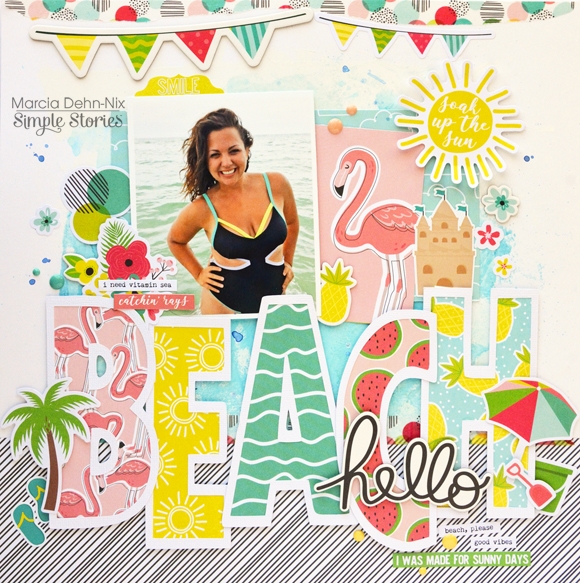
Hello Again! Rachel here, and I’m am so excited to share my setup for my work planner in my Black Speckle A5 planner using the Good Vibes Collection. If you follow me on Instagram, then you know I cannot get enough of this collection. I am in love with the pink, aqua and bold black and white accents of this collection. I feel like it was MADE for me! What better way to spice up my work planner than with some good vibes from this fun collection!

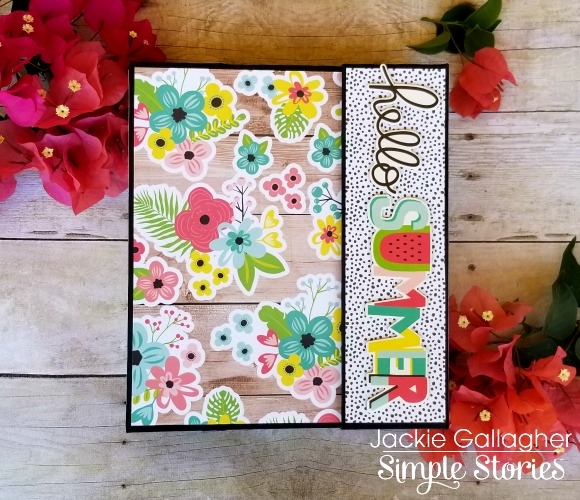
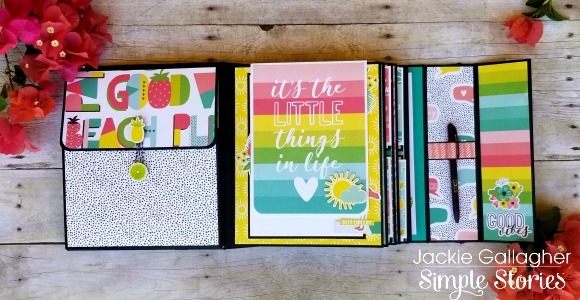
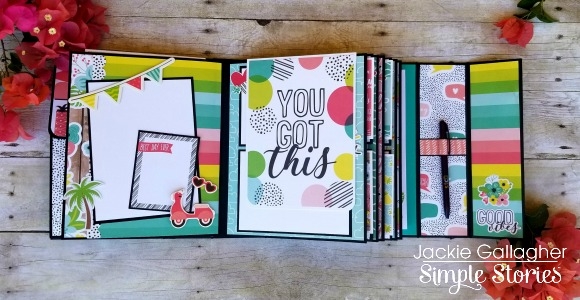
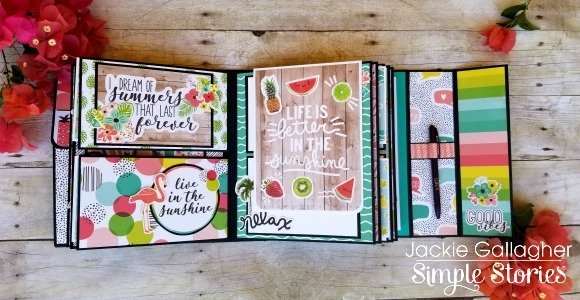
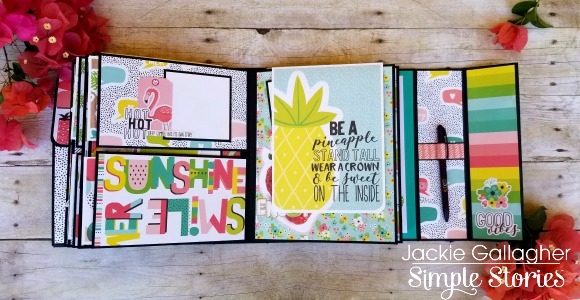
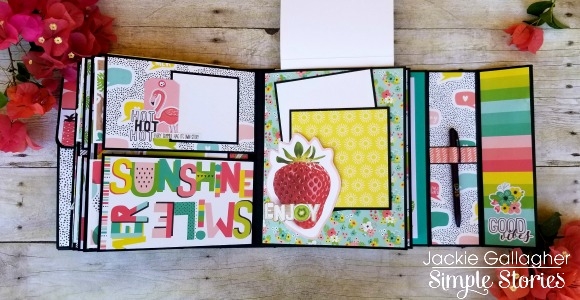
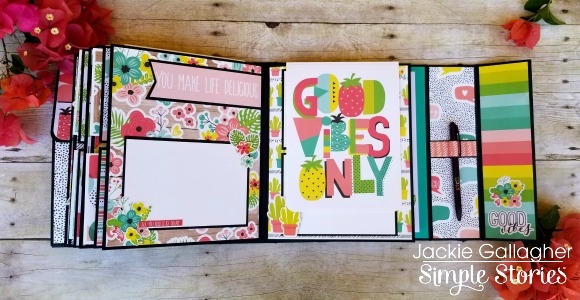
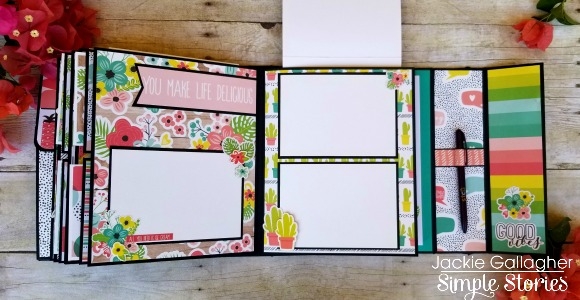
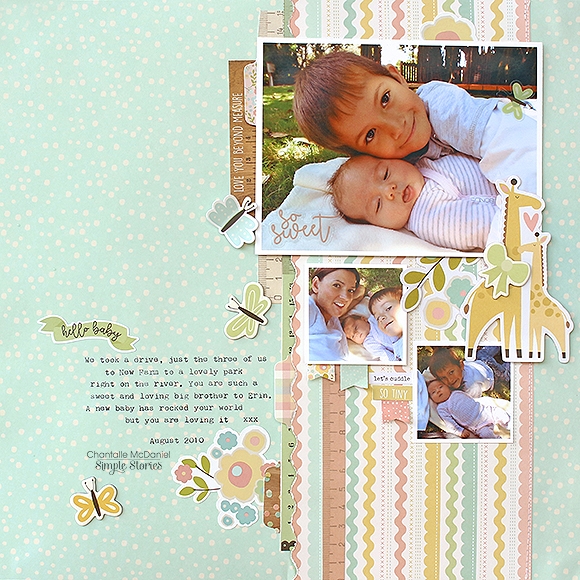
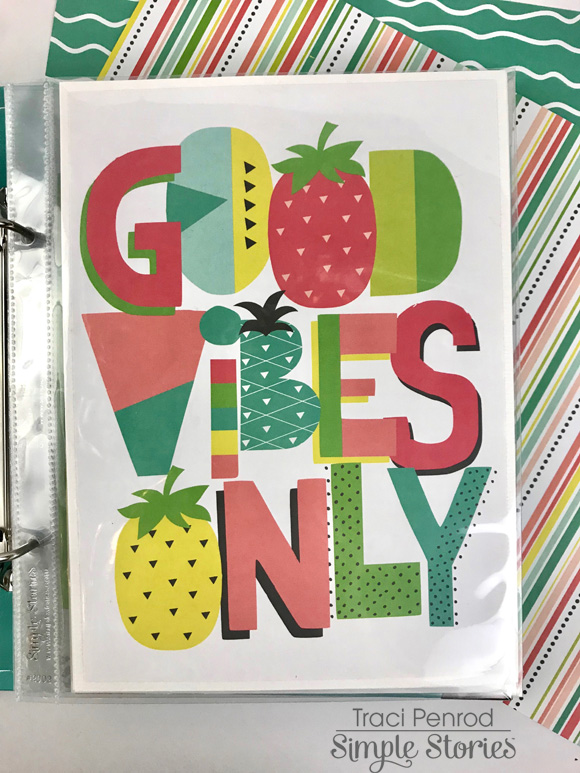
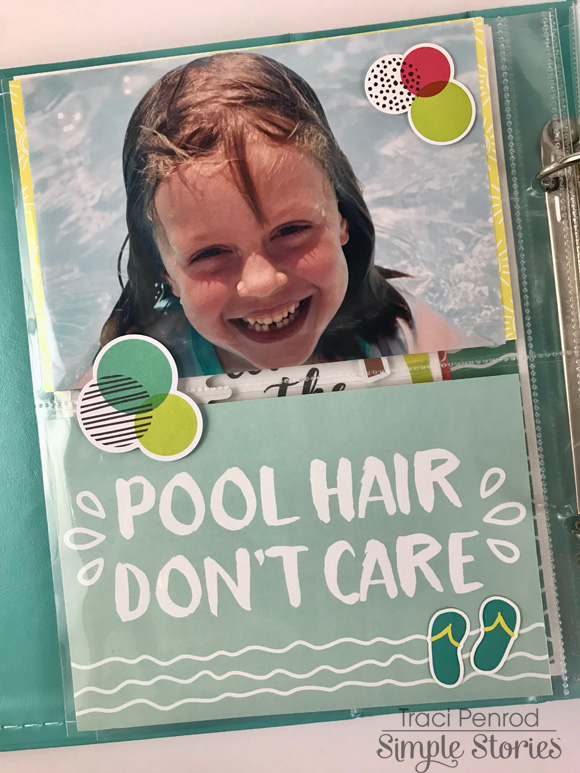
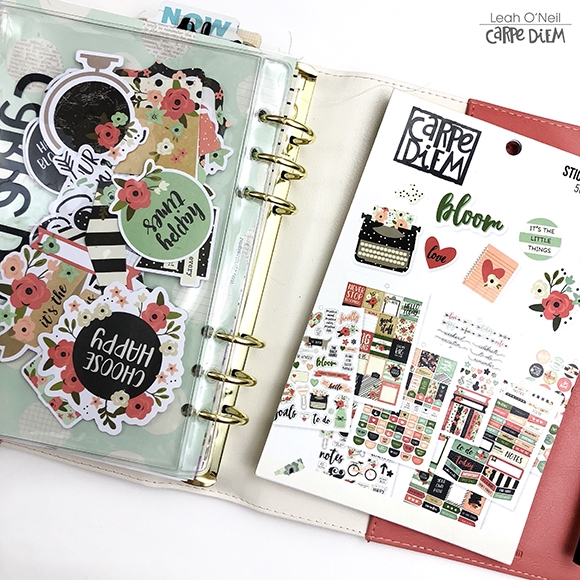
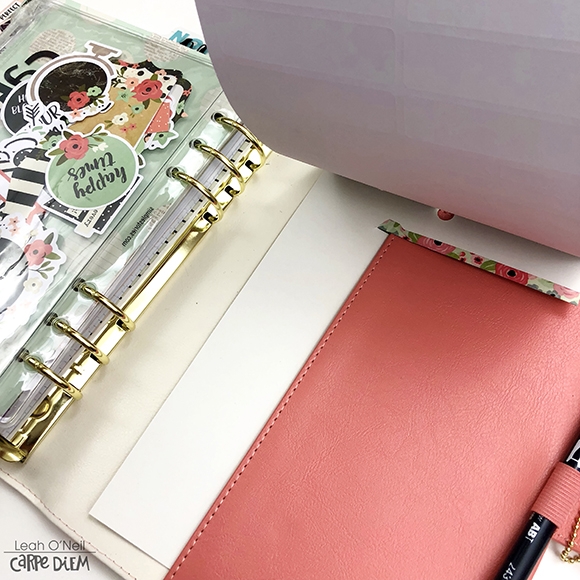
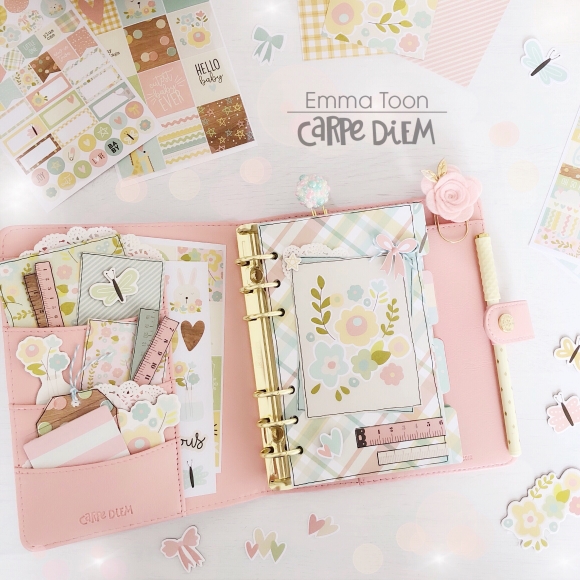
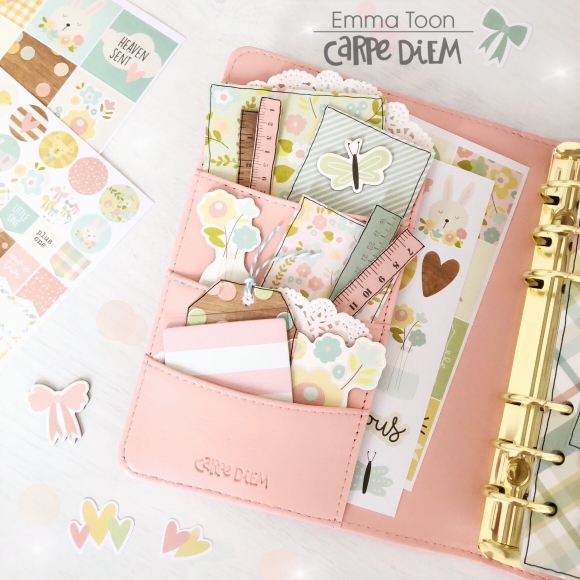
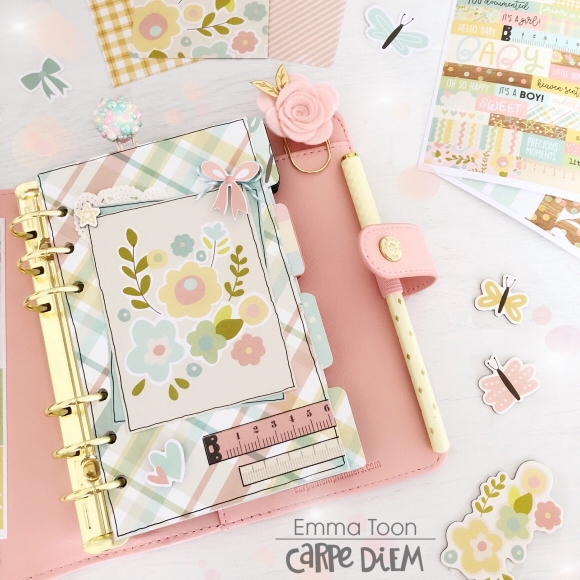
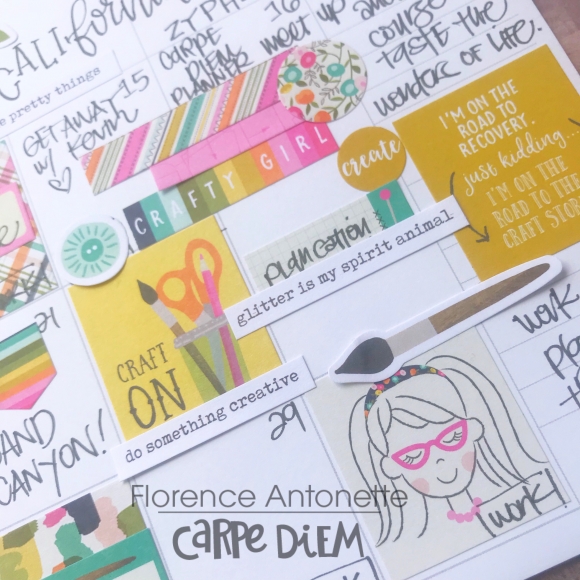
Let’s start with the pockets! As a planner girl, I love my planner pockets! Sometimes, it can be hard to keep all the cuteness contained in the pockets, so for this pocket setup, I adhered the chipboard stickers with removable tape to trimmed-down pocket cards for the 4X4 Elements paper. I like to mix up the background shapes in my pockets. For the circle, I used one on my favorite tools, the circle photo crop, to trim the circle out of paper from the element paper. I loved opening my planner this month and seeing these beautiful pockets! For the front divider, I used one of the 12X12 papers and the divider template to trim down the paper, and hole punch the paper to make a perfect divider (no measurments needed!). I decorated the front divider with 3X4 element cards and the combo stickers. The sentiment on this card is a good reminder at work to do my thing (which is, be friendly and help students!).

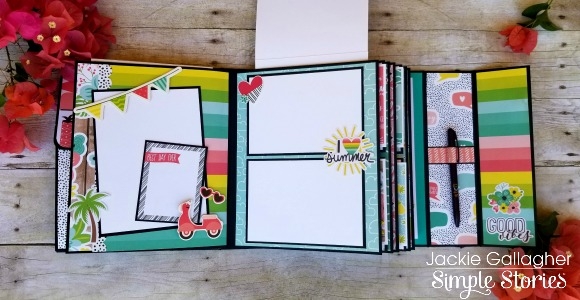
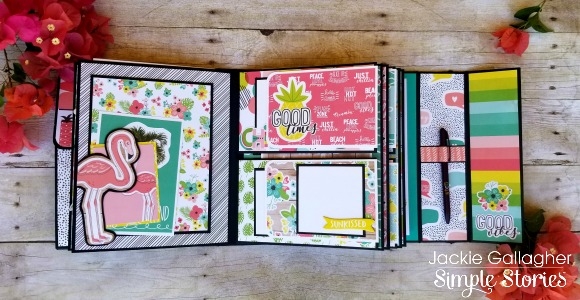
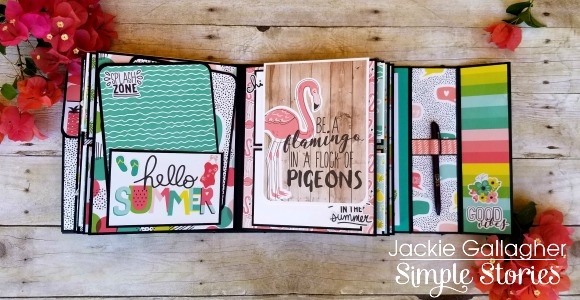
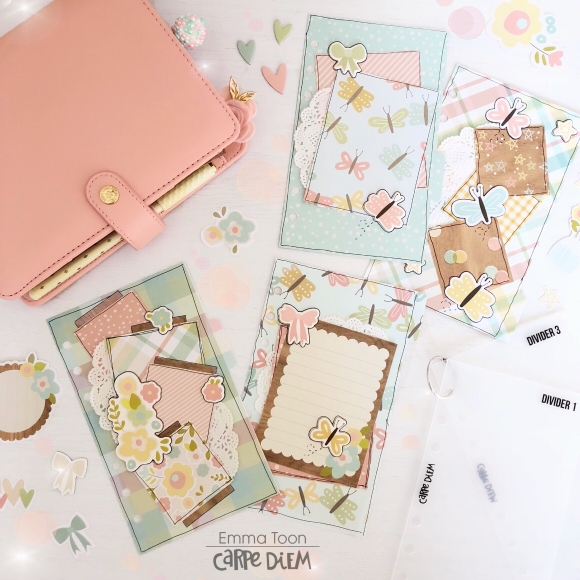
I used the same steps to make two more dividers for notes and important documents. Since this planner is for work, I need it to be very functional. But that doesn’t mean the dividers for each section can’t be fun!

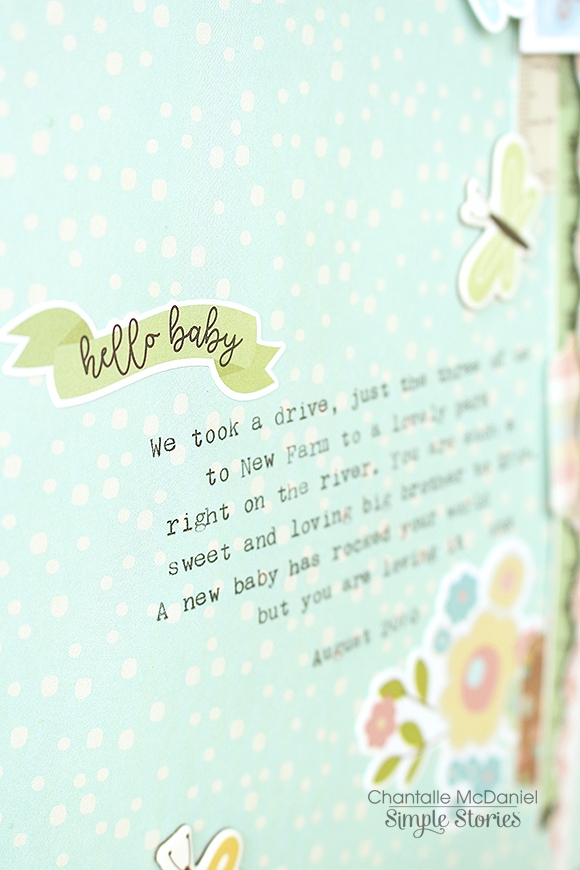
  For this divider, I added some of the bits and pieces and the word strip stickers from the 4x6 sticker sheets. Again, some good reminders on these word strips stickers - “Work hard. Be Humble. No bad days. Let your life shine!” I work with college students every day and these sentiments remind me that I do my best work when I put the students first, and try to make everyday a good one.

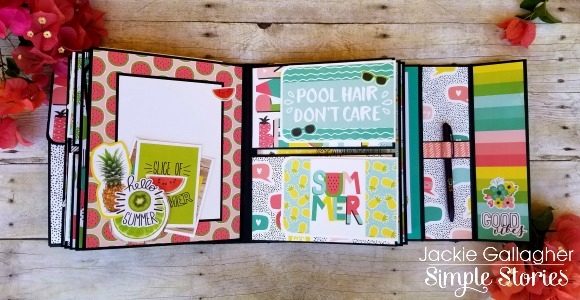
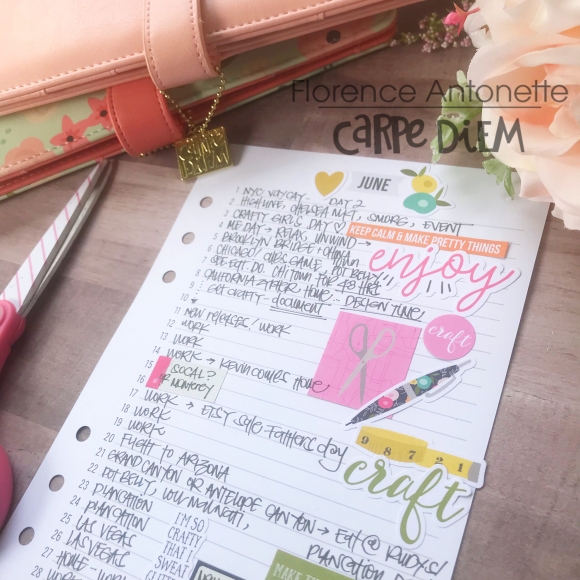
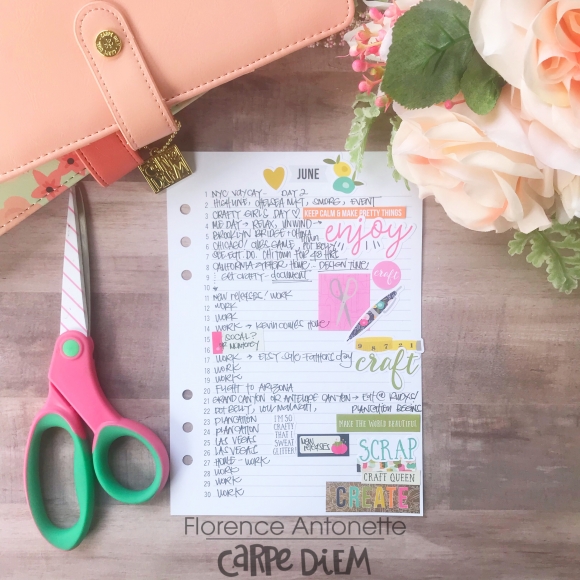
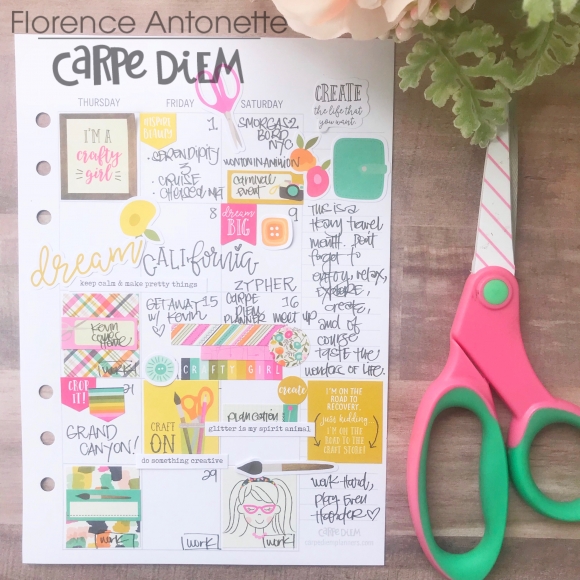
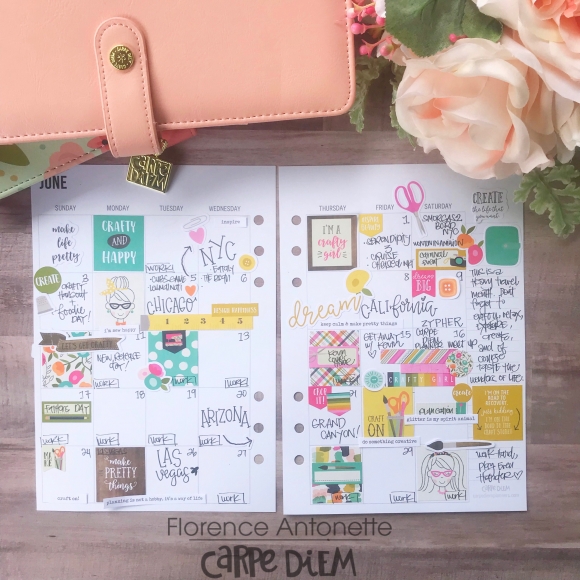
I rarely decorate my monthly spread in my work planner but with this collection, I just couldn’t help myself! I started with that fantastic washi on the top and bottom and then filled in the days with stickers from the 4x6 sheets. I love how the box stickers fit perfectly in the daily squares.

My favorite decoration for the month was on the 30th. That’s right! In July, my husband and I are headed to Spain and I can’t wait!

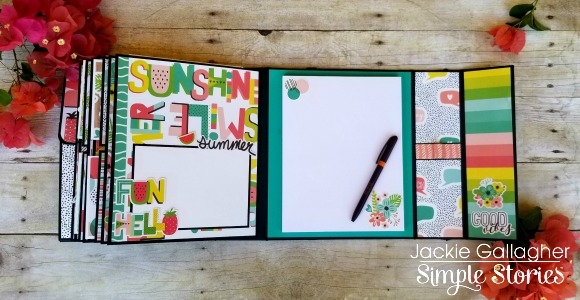
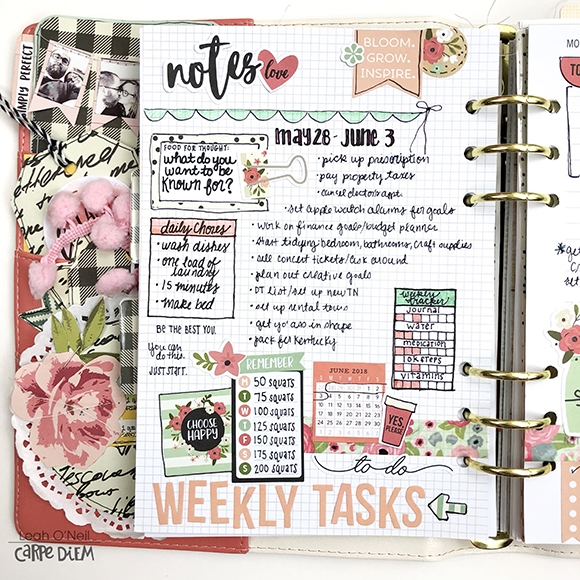
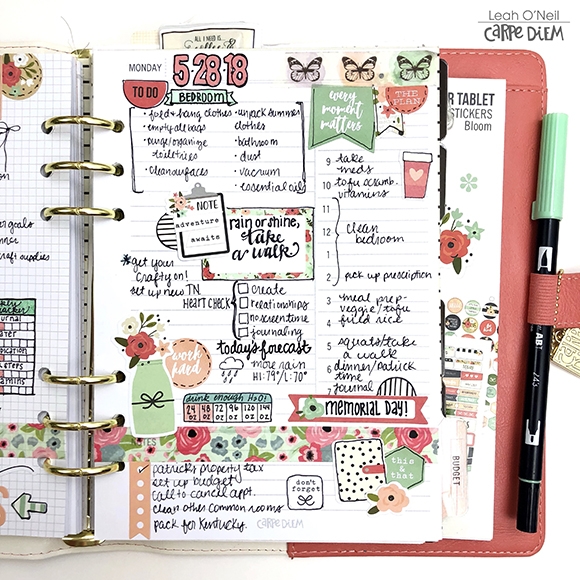
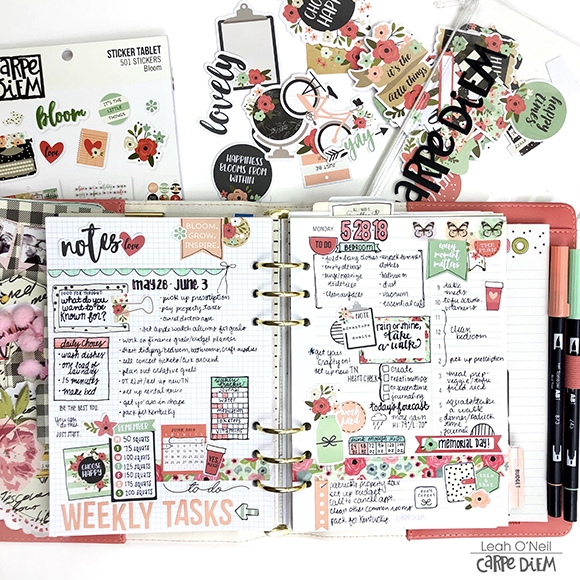
While I do use weekly inserts in my work planner, my daily inserts are the real work-horse. Here is where I write down “all the things”. Sometimes I decorate them, other times I don’t. Either way, the daily sheets give me plenty of space to jot down notes, to-do’s and document the people I have spoken with throughout the day. This is super helpful for the reporting I have to do for my job. When I have time to work on my monthly report, I simply look back through my daily pages to update the report.

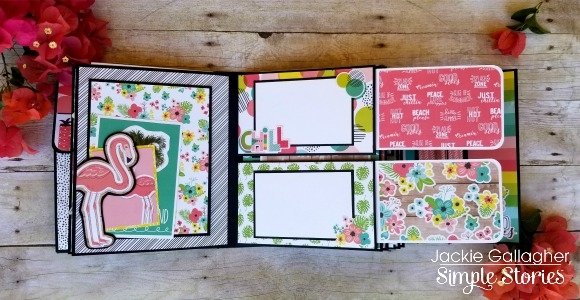
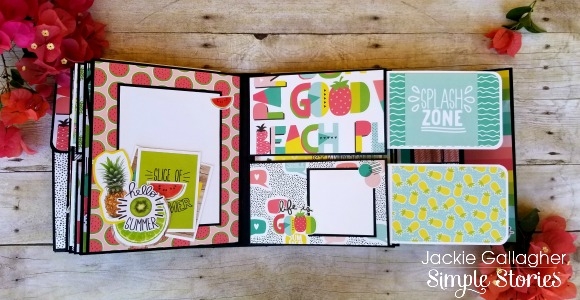
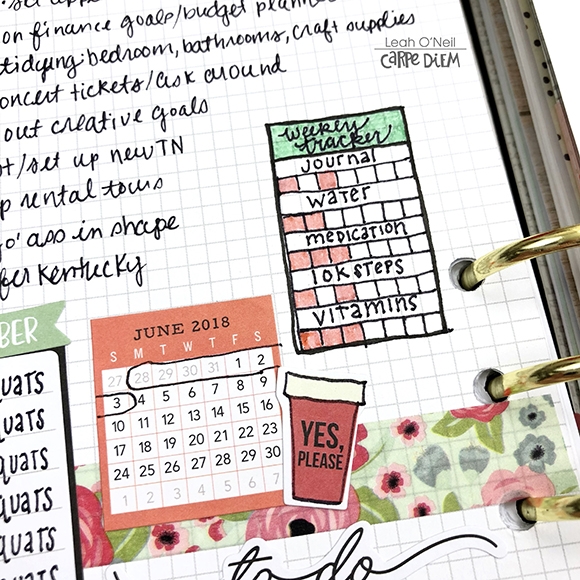
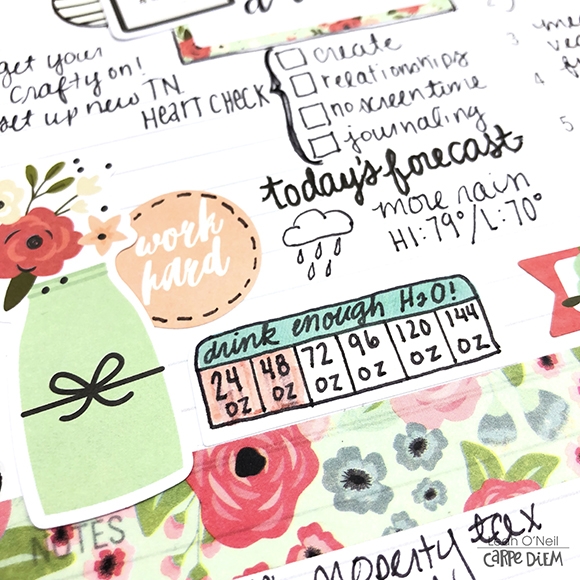
These pages are functional first, but I also love getting to decorate them, too! For this day I cropped a scrap of paper using the circle crop so that the “yes, please” was still included. I added stickers for 4x6 sticker sheets and even added a journaling 3x4 element card for decoration and function.


I hope you enjoyed getting to see a peak into my work planner. I have really liked this setup for the month of May. Tell me, do you use separate planners for specific areas of your life? Comment below and let me know!

Supplies

Hello everyone!!  Jackie G here to share a super fun summer project with you!! I’m super excited about this mini album…well, more like “not-so” mini album!!  Measuring in at 9” x 10” with a 3” spine…it’s a big one!!

I used the “Hello Summer” collection to make this beauty!!  Since it was so big I ended up using two of the collection kits, 6x8 paper pad, bits and pieces, and the chipboard stickers. 

So lets get started!!  I kept the front cover pretty simple.  Using just two of the chipboard elements to create my title “hello summer”.  I decided to keep it simple because this album will be traveling with us throughout the summer and I didn’t want anything to get snagged or torn off during transport. 

When you open the album I’ve got a HUGE accordian pocket on the left hand side of the album.  Inside I’ve placed a notepad for my children to jot down notes or drawings while we are out and about.  There is also a TON of room for extra photos or memorabilia to be stored.  On the right hand side I’ve created a fun little pen holder.  Each of the pages are pocket pages with top inserts.  So again, LOTS of room for photos!!

This page is super fun with a cute little scooter to hold a journaling card. 

Can’t go wrong with summer and flamingos!!  This guy holds a couple different size photomat and journaling cards.  I was very cautious about keeping all the mats an easy size so all I have to do is print photos and stick them on with little or no cutting involved.  This spread has two smaller pocket pages with side inserts.  The pull out for lots of extra photo or journaling storage.

I love this spread!!  “I dream of summers that last forever”!!!  LOVE it!!  I’m a summer girl so this collection really has my heart!!

These two inserts I made specifically for using a white gel pen on the back of the black cardstock for some journaling!!  I know my boys will enjoy helping as this house is in full blown “splash zone” here!!! haha

Here’s another spread with the side pockets.  Pool hair, don’t care, and the last of the pages. 

And lastly, we’ve got a big notepad on the back cover for lots more journaling, drawings or whatever else we need!!! I’m so incredibly excited to fill this album up!! 

You can also watch a full walk-thru of this mini album HERE

Thanks for stopping by!!  Hope you have a wonderful day!!!

Supplies

HELLO BABY

Hello again Simple Stories fans! Thank you so much for joining me today as I share this page which captures my babes when they were much younger. The soft pastel notes of the beautiful new ‘Oh Baby!’ collection were perfect for getting this little park outing documented!


I’ve used the simple spotty print of a sheet of ‘Sweet Dreams’ for the background and popped the paper into my typewriter, to get the journalling sorted. I’ve opted for a small title on this page, choosing a banner sticker from my pack of Oh Baby! 4x6 Stickers.


Next, I went about layering up some sweet prints, in the form of this cute ‘squiggle’ print on a sheet of ‘Little One’. I’ve echoed this shape by tearing my paper in a wavy pattern.

The little rulers were hand cut from a sheet of ‘Sweet dreams’. I’ve added them at different levels for interest. These rulers also echo the die cut shape from my pack of Buits & Pieces with the sentiment "Love you beyond measure” which I’ve tucked behind the main photo.


How adorable are these giraffes! Big brother and little sister….

This collection is perfect for documenting a new baby, a baby shower or even a new fur baby!

I hope you enjoy creating with it as much as I have!

Until next time,

Chantalle

Have you ever been bitten by the travel bug? Well, our family has been itching to travel the world and we cannot wait to see where our next adventures will take us next. We recently just came back from Tokyo Japan during Spring Break and we're already talking about our next travel plans.
 
Setting up my planner with the Travel Notes Collection definitely got me even more excited planning our next family trip.
I had so many ideas running in my head for my travel dashboard. This collection has so many fun elements that I couldn't decide what to use first. I finally decided to fussy cut the plane and the clouds from the 3x4 journaling cards. I used foam adhesive for the plane to give it that 3d effect. I then layered the word "explore" on the bottom of the page.
 Decorating and stuffing my planner pockets is a must even though it's mostly for decorative purpose. It's more fun and it always makes me super happy when I first open my planner. Do you decorate your planner pockets or is it more for functional use? 
I cannot tell you how excited I was while creating my monthly layout. I was literally jumping up and down with a huge smile on my face. All I can think about is planning our Summer Vacation and our Bahamas trip for December. 

I work 3 12 hours night shifts. My schedule allows me to have 5 days off in a row. So, when I have those 5 days off and the boys have no school, we love to go on a mini vacay. Mini vacays are the best, since you can have many of those during the course of a year.
 Life is too short. Live your life to the fullest and travel to explore what else is out there.
So what are you waiting for? Plan your next trip and document your travel and adventures using the Travel Notes Collection. Summer Vacation here we come!

Supplies

Hello Summer!  Well, almost.  This fun Sn@p album makes me so happy ... not just because of the family memories, but because the Hello Summer collection is so much fun!

This is my sister and her adorable family on one of our summer beach trips.  As you know, my boys and my nieces are all grown up now.  I am WAY behind on saving these memories but pocket page scrapbooking and Sn@p albums make it so easy!
 
 
I'm an embellishment junkie so I always buy chipboard, stickers, die cuts, everything!  For the page above, I used foam adhesive to adhere the die cuts, and added a sticker behind my photo mat.
Even though most of these pages are pocket pages, I also like to do more traditional scrapbooking so I use the 6x8 sleeves for this.  It's like having little mini scrapbook pages throughout my album!
 
Visit me over at Artsy Albums and on Instagram to learn more about my love for mini albums :) 

Supplies

Hello Friends! 

It's Kristine Davidson here today with a layout using GOOD VIBES!  I created a layout using a picture of my niece being cool with my sunglasses on when we had a little dinner date 2 summers ago. I honestly just loved the brick wall and had to take a few pics and well she's cute too! 

This collection is full of colorful patterns and I do love a little black on my pages so this collection made me happy! 

I used the 6x8" paper pad to create and used a few bits & pieces for embellishments. The chipboard stickers are super cute and have so many great designs. Aren't those little yellow sunglasses the cutest?! 

Adding layers to a page is simple and a great way to use those left over pieces or add tons of color on a page. I added my pop dots as usual and layered the 10x10 layout on a piece of 12x12 cardstock. 

I hope you have a chance to play with this bright and fun collection! Visit us on Social Media for more great designs and projects from the team.

Hello everyone! Welcome back to the Simple Stories blog. Leah here with you today to show you a new planning setup I’m trying out in my A5 Mint Blossom Carpe Diem planner. I’ve been playing around with different planner inserts lately, and am giving daily inserts a try this week. The beauty of the Carpe Diem planner inserts being undated is that you can switch up your inserts any time.

I love using daily inserts, but I still like being able to see a weekly view. I used the grid paper from the Basics Inserts pack and stuck one sheet in at the start of the week to write out my weekly tasks and goals. I love planning on grid paper because it's so easy to draw lines and shapes on a layout. The grid lines really help with spacing and writing neatly as well.

 I love how this little weekly habit tracker turned out. I wrote in reminders for daily habits I'm trying to improve upon. I will color in a square for each day of the week I remember to do these things.

Several of the stickers from the Carpe Diem sticker tablets fit perfectly within the grid paper lines. Using stickers on this paper is a fun way to emphasize messages or reminders, or to separate your layout into sections.

For the first daily page of my week, I used a few stickers from the Planner Basics sticker tablet, such as this tab sticker that works really well as a tracker. In this case, I drew lines to represent 24 oz. of water since that’s the size of the tumbler I carry around with me everywhere. These tab stickers would be so fun to draw or stamp shapes onto to make a variety of trackers. For example, you could draw little hearts or boxes to color in.

 I primarily used the Bloom sticker tablet to decorate both of these layouts. The Carpe Diem sticker tablets are loaded with SO many stickers. Carrying just one around with you gives you ample possibilities for decorating several layouts on-the-go. I cut the back cover of the Bloom tablet so that I could tuck it into the back pocket of my planner. I’m also carrying the Bloom Bits and Pieces pack in a Carpe Diem Plastic Storage Pouch. I love finding easy ways like this to carry supplies with me to use while I'm away from home.

Simple Stories has been releasing more and more sticker tablets lately. There’s one to coordinate with nearly every collection, but there are also several basic sticker tablets that have come out recently. One of my favorites is the one full of nothing but number stickers to date your undated inserts. Do you have a favorite Carpe Diem sticker tablet right now? They are so versatile and give you so much value for your money.

Thank you all for sharing your time with me here on the blog today. Until next time friends, happy planning!

Supplies


____________________________

Howdy!!  Layle with you today for the final day of our Spring/Summer Reveal week!  We kinda like to think we saved the best for last - are you ready to see some awesome new Carpe Diem products?!  Kicking off the new release are three brand new 17 month Spiral Planners!  Dated August 2018 through December 2019, gold or ROSE gold metal accents and gorgeous designs, you're going to want to pick oneof these beauties up soon!

Of course, we just had to introduce new coordinating A5 Sticker Tablets to go with them!

Who doesn't love washi?!  We're introducing three new washi designs to coordinate with the three new spiral planners AND, to top it off, each 'design' includes not one but THREE coordinating rolls!

Last, but certainly not least, we're thrilled to introduce stamps!!  These clear, photo polymer stamps are made in the good ole USA and are sure to dazzle planners and non planners alike ;)


So there you have it, our brand new Carpe Diem products, shipping to retailers in late June!

Now for some fun!  How about a chance to win a Spiral Planner and an assortment of stamps before you can buy them?  You have 3 chances to win - 

First, simply enter via the Rafflecopter widget below -

a Rafflecopter giveaway

Second - PIN TO WIN!  Just pin your favorite(s) of the Carpe Diem images in this post, tag your pin with #carpediem, then leave us a comment on this blog post telling us that we've been pinned and include your Pinterest user name.

Third - follow us on Instagram at simplestories_  and carpediemplanners for additional chances to win all of our new releases! 

I'll announce all of the winners throughout the week in one giant celebratory post here on Thursday the 7th, so make sure to check back then to see if you're one of the lucky winners!

Good luck - we can't wait to hear what you think about the new Carpe Diem!

Hello Simple Stories Friends and Fans!

Nathalie with you today with a new project that is all about color and GOOD VIBES.  I love taking pictures of my kids and their little cousins together, especially since they get along very well despite the large age gap between them.   Sometimes it is hard to document these pictures, but  the new Simple Stories' GOOD VIBES collection was perfect to convey the feel of this memory.

I wanted to use as many of the papers and colors of this collection, so my choice was to create a large title using a JustNick Studio cut file, and then used papers from the Good Vibes collection to back the letters.

To have all the details pop on the page, a bit of mixed media -Vicki Boutin's Art Crayon- was added to the b-side of a Sn@p! Birch/white grid paper.   

Once the title was added to the page, it was time to start embellishing!  Since there are so many fun and colorful icons, I chose to color block the clusters so that they match the colors in the background.

The picture was then backed with one of the papers from the collection, and placed next to the title.   Once again color block clusters were created around the picture.   Just love all the icons and how perfect they work in these color clusters.

Totally loving the GOOD VIBES on this page.  I hope this serves as inspiration to check this new Simple Stories collection.   You are going to love how fun and versatile the new Simple Stories' GOOD VIBES collection can be! Til next time!

Supplies

I started with an antique-style metal clock frame and covered the inside and back walls with See The World. The inside and front were decorated using a variety of stickers, chipboard pieces and die cuts, all from the Travel Notes collection. I wanted to capture the essence of life in motion within this timepiece. The car and scooter buzzing by, the plane flying above head and all the little travel accents make me want to pack a bag and take off to anywhere! 

Does a hot air balloon ride suit your fancy? Are you a road trip lover? How about globetrotting aboard a jet plane to see all the wonders of the world? Whatever your pleasure, you'll find your ticket to paradise right here! 

And the buck stops here! Thanks so much for stopping by today and allowing me to share my altered clock with you. I hope you've been inspired to create something marvelous with the Travel Notes collection today! Until next time, happy trails!

Supplies

Hi there it’s Emma back with you, this month I wanted to share how I’ve used the ‘Oh Baby!’ collection by Simple Stories in my personal sized Blush Carpe Diem planner. 

My aim was to show how the whole collection could be used without even the slightest nod to ‘baby’! You will find beautiful butterflies, fabulous florals, bewitching bows and heavenly hearts, and see how the colours are perfectly soft & delicate! 

You’ll see how I have been able to fill my planner pockets with so many of the pretty elements and does it look like a ‘baby’ theme???...no, it sure doesn’t! 


I have carried the soft, feminine feel onto the dashboard and through onto the divider set. 


The divider set was so easy to make, I used papers from the 6x8 paper pad and the personal size divider templates, then dug in to the stash of gorgeousness to decorate. 

On each of the dividers I have included a touch of the wood grain, this was to tie it all in and I think it helps give depth to the varying items I’ve used. 

When a collection has so many wonderful products, it’s an absolute breeze to find all the details you want. There’s the snap pack, chipboard stickers, bits & pieces, washi, stickers, all perfect for adding decoration to your dividers!

So, I do hope I’ve been able to inspire you a little to perhaps look at collections differently, don’t just read the title, look closer and you’ll be amazed what you find! If you would like to see more pictures using Simple Stories products then checkout my IG account  https://www.instagram.com/heartsbyemma

Supplies

Hello! Jennifer on the blog today to share a page I created using the fun Good Vibes collection!  This line has something for just about everyone with its bold colors and patterns mixed in with muted grays and pastels! You could scrap an "every day" kind of event, spring, or summer vacations!  For me, I wanted to document a favorite photo of my teen daughter. I sometimes "steal" pictures off her Instagram since she's not too keen on having her photo taken LOL

One of my favorite prints of Good Vibes is the grey/woodgrain and white chevron print of "Be Amazing" so I knew I wanted to incorporate that into my page! I  adhered strips to each side  along with both prints of "You Got This"! Using my sewing machine, I added stitching through the strips. 

The 6x12 Chipboard Sheet has many fun pieces to choose from to accent your page! I used the hot pink "good vibes" script along with the multi-colored heart for my title.  The bright colors are eye-catching as well as bring the prints together! You can also spy the coordinating Aztec Washi Tape that ties in with the paper as well as border strip on the Combo Sticker Sheet!


​​

The Bits and Pieces pack has many different sized accents for your page such as this circle journaling spot and fun sentiment!  I   added a small flag from one of the 4x6 Sticker Sheets as well.  Anyone else out there starting to hoard the Carpe Diem Roller Stamps? They are so fun to use on scrapbook pages or in mini albums! I  used the I  Am Roller Stamp to accent my journaling as well as on other spots on my page. 

​To the left of my photo, I layered different embellishments to create a semi-border and used pop dots where needed. I  did not have any certain rules on whether the embellishments had to touch; just whatever looked right. Sometimes a finished page is by a bit of trial and error! I  am known to rip items off my page until it looks "just right" LOL

​Showing more of the layers including this floral cluster and cute nail polish bottle! Adding in smaller stickers such as hearts or the circle sentiments from the 4x6 Sticker Sheets is a nice accent.  

Thank you for stopping by the blog today!  You can visit the Products page to see the entire Good Vibes collection, as well as what Simple Stories has coming up!  Have a great day!

Hello friends, Iris here with the super, cutest baby layout I've ever made, thanks to the Oh, Baby! Collection.  All the papers are so adorable, it was difficult at first to pick which one to use for my background.  But I finally decided to go with one of the woodgrain patterns (Cuddly).  Those swirly frames are just so cute, and echo the theme of framing my photo.  

Speaking of the framing, when I picked a photo of my baby sleeping (she's 12 now by the way!), I was inspired to use the moon and star clear stickers directly on the photo, like a mobile hanging above her.  That lead to the idea of a circular cut-out over an enlarged photo, as if we are peeking into the crib through the cute mobile stars and critters swirling around her.

Framing the cut-out is a wreath I grabbed from the Simple Stories selection at the Silhouette online store.  (Design ID #214849) Originally released for an autumn line, I cut it out of the aqua dotty paper (Sweet Dreams), and it really is a sweet addition to my page.  One of my favorite techniques when I have circles and wreaths is to stitch multiple times around them to add texture. I did most of the stitching before adding the wreath, then took a pass over the it.

My daughter's lovey since she was a baby is an elephant and she still collects them, so naturally I gravitated to the adorable mama and baby elephant from the Bits & Pieces pack.  I tucked them under the cut-out.  Then I surrounded the photo with more die-cuts, chipboard, and stickers, and I used more stars, both die-cut and clear, scattered like I would normally use enamel dots. 

To fill in the blank spaces on the photo next to the top and bottom clusters, I picked a couple of sentiments and hearts from the Clear Stickers.  They, along with the little word strips from the regular 4x6 Stickers , serve in lieu of journaling.  Sometimes just those little sentiments are enough. And the chipboard banner serves as my title. 

The Oh, Baby! Collection is just so delightful!  My older daughter is now requesting some pages about her as a baby with this collection! I didn't get much scrapbooking done during those early baby years, so this collection will be perfect to document all those baby moments. Hope everyone enjoys scrapping their baby pictures with this collection too.

Supplies

Hi everyone! Tara here with Secretbees Studio  Babies are definitely the perfect tiny blessing and it is always such a joy picking out the perfect gift to celebrate them. Although there are so many adorable baby gifts available, I want to give you some inspiration to create a sweet handmade present that anyone would love!

The 'Oh Baby' paper collection from Simple Stories is full of soft colors and sweet sentiments perfect for a boy or girl. This mini dresser, cut from an SVGcuts file, is charmingly decorated with the lovely patterned papers of the collection and then further embellished with the sweet stickers, chipboard and Bits & Pieces! 

Both drawers pull out and are large enough for small gifts. I stuffed the top drawer with an adorable teddy bear chipboard sticker and made a gift card holder from more of the beautiful paper, adding a couple of the charming stickers as well. The onesie, part of the Bits & Pieces, has it's own little hanger and hangs perfectly from a knob- too cute!

The top of the dresser is loaded with more of the adorable accessories from the collection. I almost couldn't stop my self from adding more they are so sweet! I dressed it up with a small doily and some miniature diapers embellished with more of the patterned paper.  The framed picture is one of the 4x6 stickers and I mixed chipboard, stickers and Bits & Pieces for a wonderfully jumbled look! The coordinating card was simply created with a couple of the adorable 4x4 element cards and embellished with sweet stickers.

Even though there is plenty of pink and blue mixed in with the other pastel colors, this collection is beautifully gender neutral. There are the most darling animal images in this collection as well a delightful mix of butterflies, hearts, flowers and bows. Everything you need to make a beautiful gift for a beautiful baby!

Supplies

Hello Simple Stories friends! Marcia here today with another Simple Stories layout using the awesome new Hello Summer collection. Last Summer my daughter took a trip with girlfriends to Sunset Beach in Florida. She had just graduated from Veterinary Collage and wanted a little vacation before diving into her internship. This collection was perfect for scrapping those beach photos.

I went with a big title that I could back with different pattern papers. This is a great way to include lots of patterns and colors on your layout. I wanted that title to make a big statement. After a long winter there is nothing better than soaking up some glorious sunshine at the beach. The chipboard Hello layered on top makes for the perfect title "Hello Beach".

To create the illusion of water on my layout, I added some watered down blue spray mist to my background using some plastic packaging. Next to my photo, I added this fun flamingo from the 3x4 Elements paper and layered lots of fun chipboard stickers,Bits & Pieces die cuts, and phrase stickers.

I added a strip of washi tape to the top of my layout then layered the pennant banners over the top. The colorful banners at the top of my layout add balance to the colorful title at the bottom.

The Hello Summer collection is perfect for documenting more than just your beach photos. With the watermelons, pineapples, suns, clouds, and flamingos, this fun collection could be used for picnics, playground outings, or any outdoor summer fun activity. What fun memories will you be making this summer?

Supplies

Hello beautiful creative friends!

Florence here back with another blog post :) I thought I would share a simple and easy way to plan your month out! Many people feel the pressure to need to buy all the things to make a layout beautiful. But honestly Simple Stories does an amazing job with adding variety to their products. Whether it’s their ephemera packs, scrapbook sets, or stickers they give us more than enough!

I wanted to show you what a black pen and their stickers can do. One of my favorite products that I always buy is their 4x6 stickers. They’re prefect because you can use them for multiple uses!!

It’s been a while since I did a decorative month on two pages layout spread. I have tons of traveling to do in June and two of the events I’m attending are  planner related!! I love how the planner inserts have a daily page where it’s numbered. This is great for planning ahead and a quick overview of what you need to write in your boxes! 

Since Summer is near I enjoyed how the bright all the colors are. Especially since I’m going to be in hot places! NYC will be humid (California Girl here- and we aren’t use to that lol) and Arizona and Las Vegas will be high heat! Not ready for that at all. But I am ready to play and get crafty with my girlfriends!!!!

Speaking of getting crafty with girlfriends do you know that Layle will be in Northern California?! She has a meet up on the 16th at the Islands Creative Escape!! They’re so much fun and if you’re in the area you totally should calll and see if you can purchase a ticket. Layle is soooo much fun and definitely throws great events. There’s nothing like a fun time and getting crafty with like minded women who enjoys planning! 

I can’t wait for my crafty adventures next month! Until next time :) Take care!

XO,

Florence

Memorial Day is just around the corner and for me that signals the beginning of Summer.  The kids are almost out of school, people are opening their pools, and the smell of BBQ is in the air!   

Today I’m sharing some patriotic cards made with the Simple Stories Hometown USA Collection Kit.   These will make great invites for the big celebration!  We usually have a house full over for a BBQ and to watch the fireworks after it gets dark.

The paper packs are a great value because they include everything you need to make several layouts and greeting cards.  On the reverse side of the paper prints you’ll find journaling cards that make a great focal point for a greeting card.  

A sheet of stickers make easy embellishments.  I use baby powder to dull the sticky adhesive back and add adhesive foam tape to pop up the stickers to add dimension to projects.   The sticker sheet also includes several sentiments.

The best part of all is that the papers are meant to work together.  The colors match perfectly and there’s no guessing what paper matches another paper.

So go ahead!  Celebrate the Red White and Blue in style with the Simple Stories Hometown USA Collection Kit!

Supplies

Pages