I am so enamored by the Simple Stories I Am collection. It is so beautiful. I love that it reminds us that we need to document our own lives, not just the lives of those we love around us. For my layout today, I am scrapping some photos of myself with my old dog Satchel. This dog adores me, I mean really adores me. He follows me everywhere and stares adoringly at me all the time! He insists on giving me puppy kisses too. Here is my layout ...

I arranged my photos in a strip and framed them with this heart digital cut file. Then I added more rose gold hearts from the chipboard stickers and the cardstock sticker sheets. 

One of my favorite things about this collection is all those butterflies. I decided to create a bunch of layered butterflies in different shapes and sizes. I cut the same butterfly shapes out 3 times each time getting smaller and smaller. Then I machine stitched all those layers together. I really looks like these butterflies might just fly off my page.

I used a combination of chipboard stickers and die cut ephemera pieces to create my title "I Am Loved".

I hope I inspired you to scrap some photos of yourself. Make sure to pass your camera around so you get in some shots too. Have a great week!

Supplies

Hello there! Linsey here today sharing my altered tree mini album featuring one of my very favorite Simple Stories collections, I Am. This collection calls to my soul. I'm so inspired by the beautiful message it carries and felt it was a perfect fit for the tree shaped chipboard album. I really like how it came out and I hope you like it too!

Each piece was decorated with the 6x8 paper pad on both sides and no matter which papers I chose, one coordinates with the other every time. From each darling die cut to every sweet sticker, it all matches beautifully together. No stress scrapbooking, thank you!

I love the colorful patterns and lively sentiments in this collection. The gold accents throughout add a touch of sophistication and elegance. I Am is brimming with beauty and purpose. It really is a celebration of life.

Thanks so much for visiting today! I hope you've been creatively inspired by my project and by the wonderful I Am collection. Until next time, happy crafting! 

Hi there, it’s Emma back with a look at the Simple Stories Crafty Girl collection. There’s nothing I enjoy more than having a crafty afternoon, filling my desk with lots of goodies to play with, and when you have a stash of goodies called ‘Crafty Girl’  there’s no better excuse than that!

Just take a look at the bright cheerful colours that the Crafty Girl collection has to offer!! I dived straight in to make the dashboard by cutting out lots of the coloured pencils which were on one of the cut a parts on a 12x12 sheet from the collection kit. I had the idea of putting them in a jar which I drew and cut out, using foam back sticky pads it gave it a 3D effect.

I used some of the chipboard pieces and the large chipboard banner to also add some dimension.

I couldn’t stop there though, I’d got my crafty head on and decided to decorate the reverse side of the dashboard too! Here I cut out some of the colourful strips with words on and used them like bunting, I love how colourful it all is, it really makes me smile!

What a fun, cheerful front page it makes in my A5 Coral Carpediem planner!

You know how I love to fill my planner pockets, well, I didn’t hold back! I knew I just had to use the fabulous crafty girl faces in my pockets and I’m a sucker for flowers so they went in there too!!

Wow! The Crafty Girl collection is everything and more that a Crafty Girl could possibly ask for! Crafty Girls are happy girls, and this collection sure makes me happy!! I hope you’ve enjoyed a peek inside my planner using the Crafty Girl collection, you can find more detailed pictures on my IG account  https://www.instagram.com/heartsbyemma

Supplies

Hello Simple Stories fans! Thank you so much for visiting the blog today. While I am currently enjoying a reprieve from what feels like a very looooong Summer, lots of you are full of the joys of Spring! That palpable excitement is completely infectious and I can’t wait to see all the gorgeous Summer projects coming out of different parts of the world as the weather warms up!

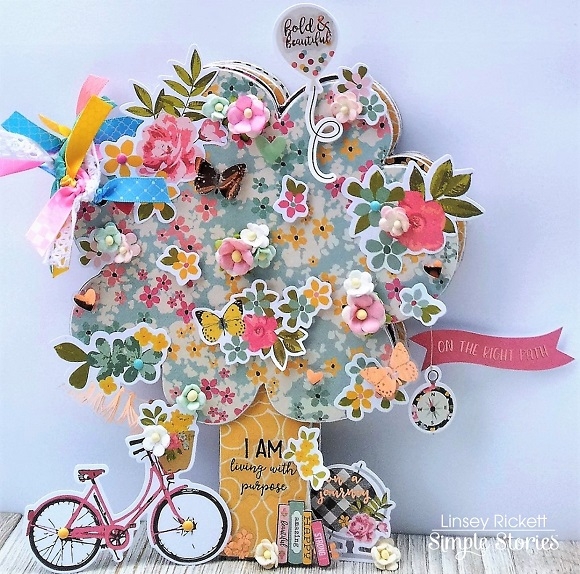
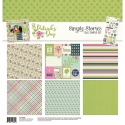
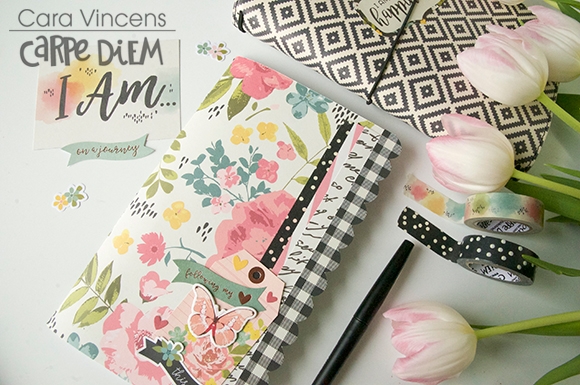
I’ve created two projects with the new 'Hello Summer’ collection. You are going to fall head over heels for this bright and playful line - juicy pops of lime and flamingos are a must!
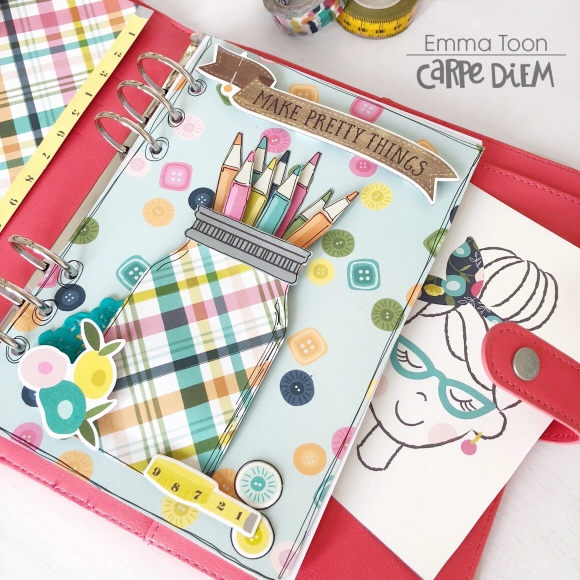
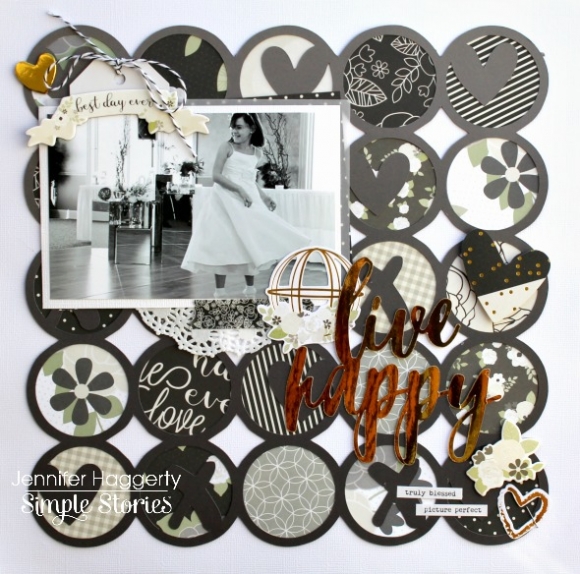
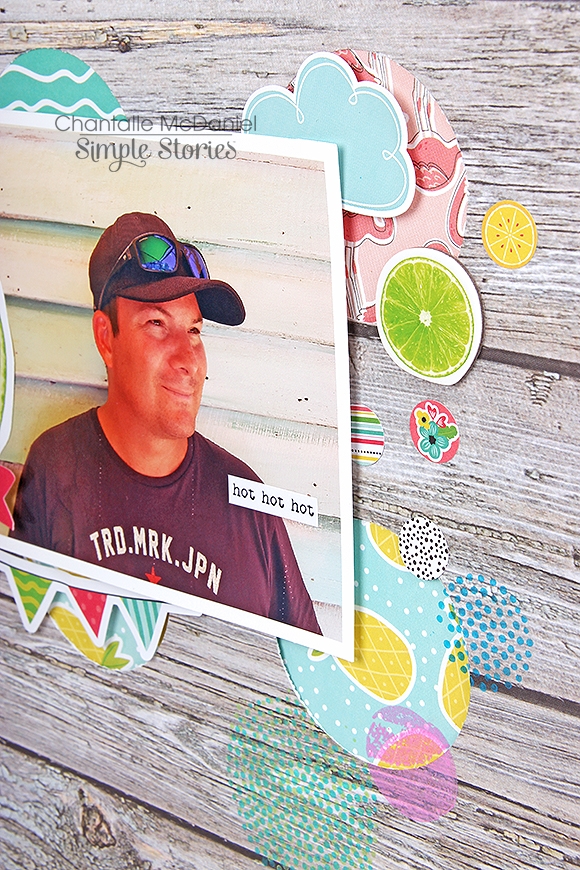
MY MAIN SQUEEZE

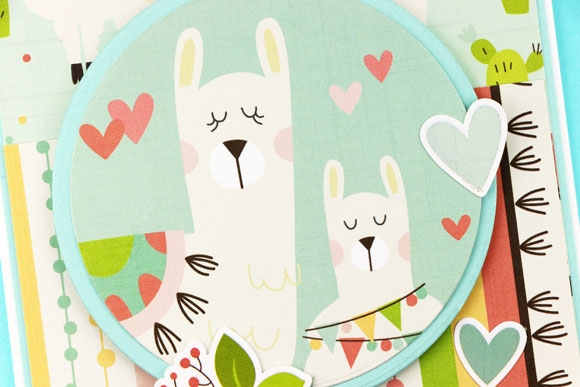
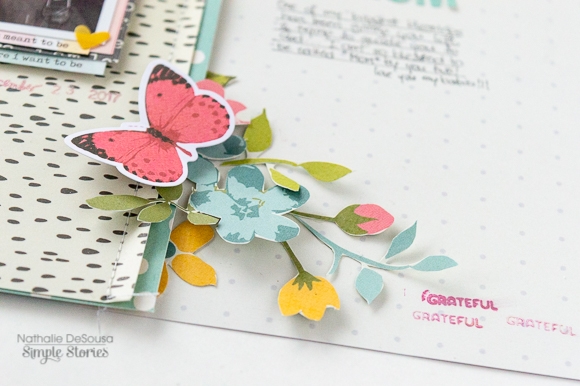
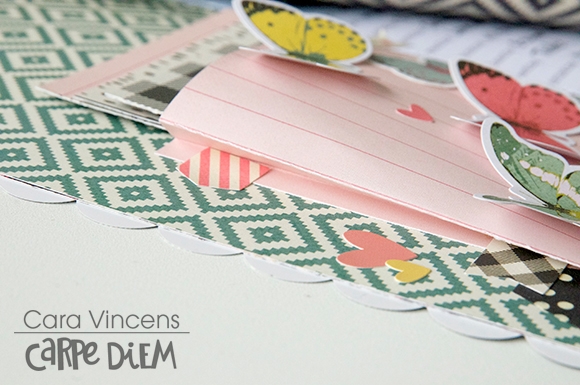
This page uses a simple circle shape, repeated. I’ve created this type of design before and I just love it. 

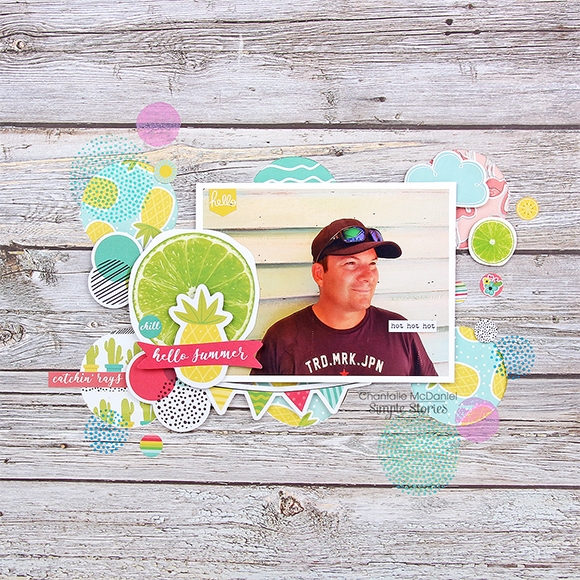
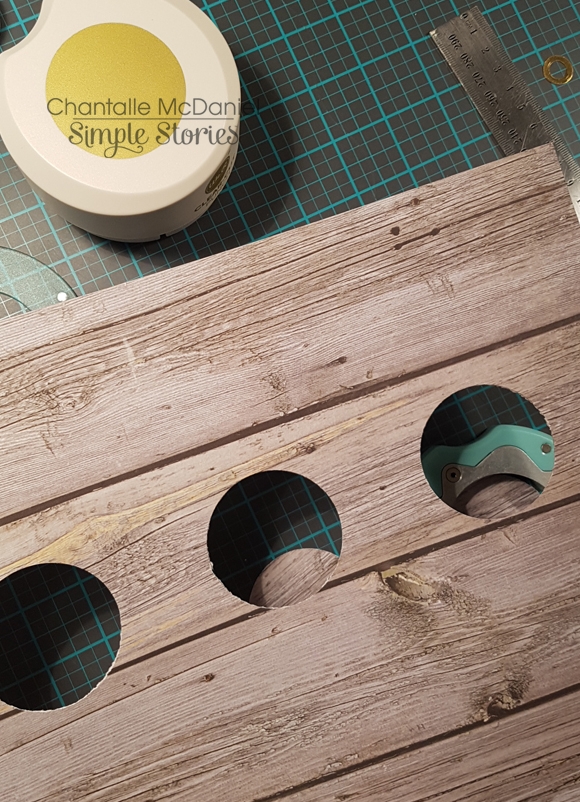
I’ve used a sheet of Birch/White Grid 12x12 from my pack of Sn@p Basics and punched repeatedly widthways across the paper.

I’ve matted these circles with slightly larger circles (just cut freehand) in various prints from the Hello Summer 6x8 paper Pad.

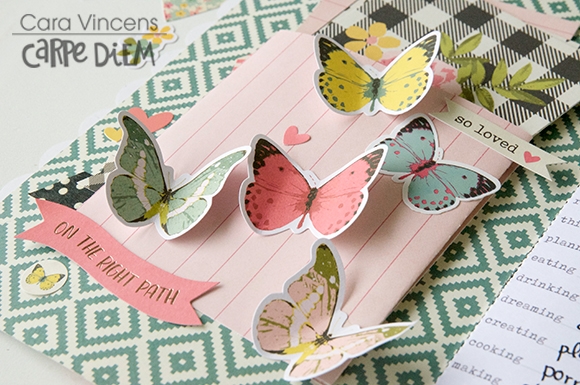
The circular shape is strengthened by using lots of the same shape, pulled from Hello Summer sticker sheets and my Bits & Pieces pack.

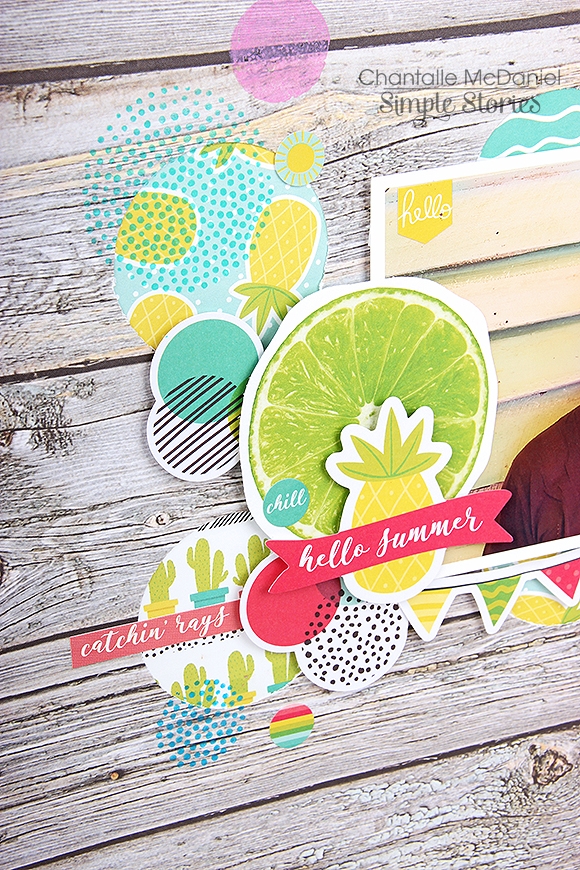
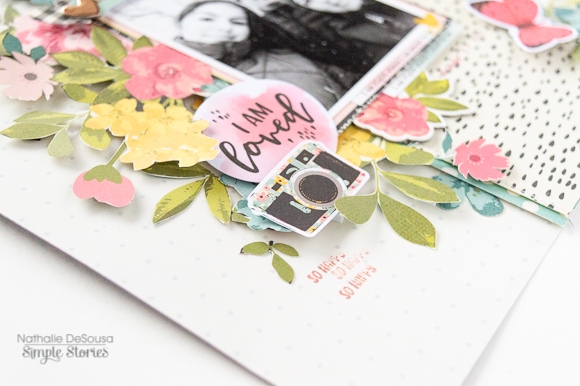
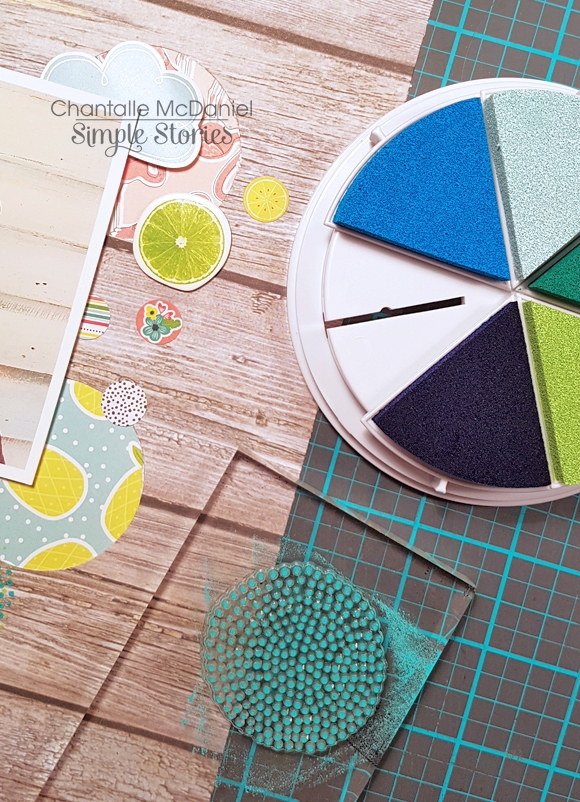
A touch more detail has also been added in the form of a spot of stamping in similar shades. This spotty stamp pulls the dotted print out of the collection perfectly!

Teensy details can be found in the mini circle stickers from the 4x6 Sticker pack.
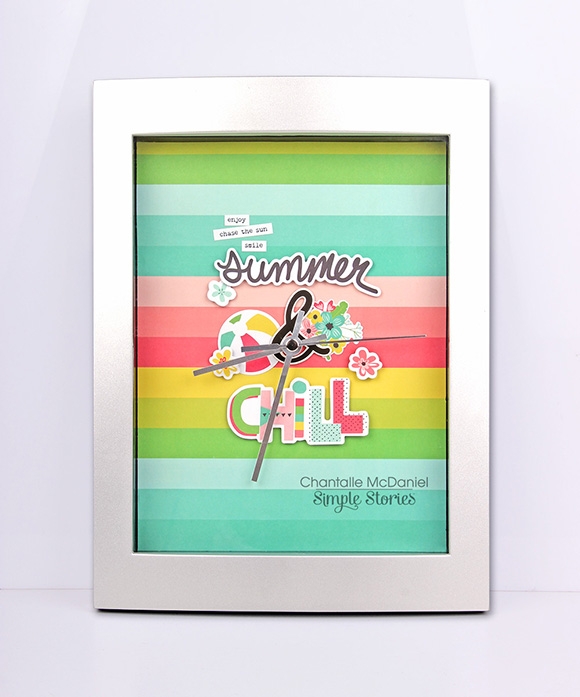
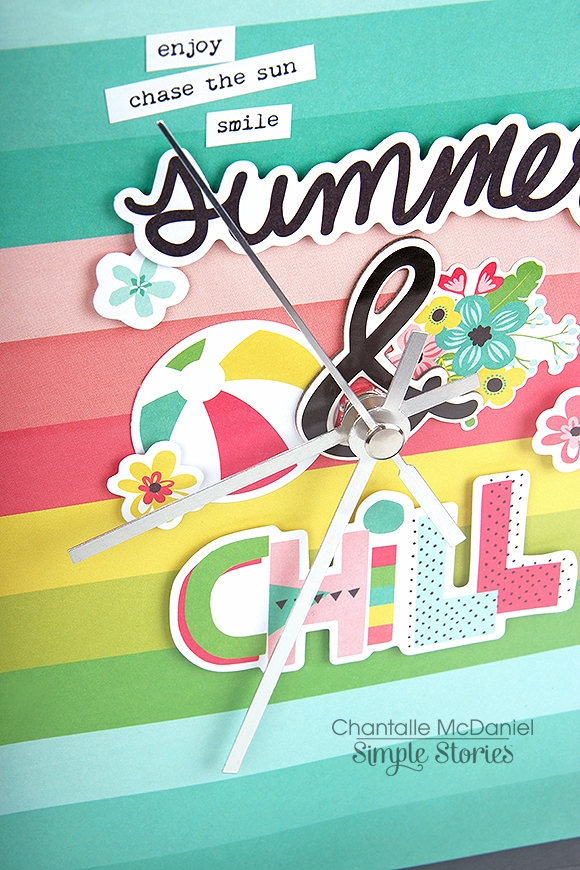
 

SUMMER TIME

This cheeky little timepiece started life a little uglier lol. My hubby (knowing I like to take in ‘orphan’ items) brought this clock home from work with the thought that I could make it a bit prettier. Hello….Challenge accepted!

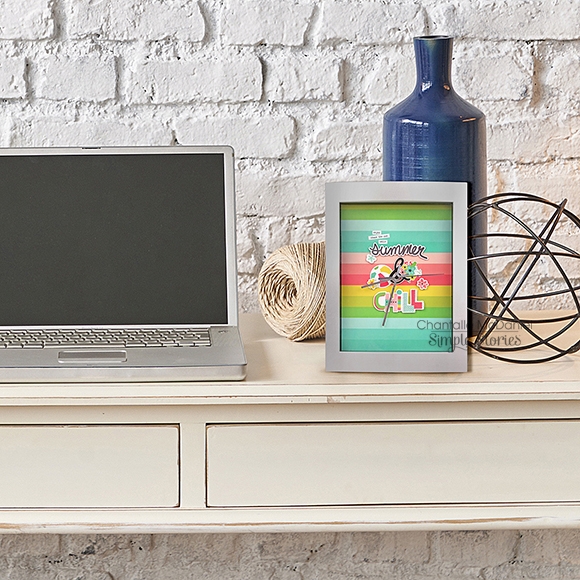
It now lives in my DD’s room but would look cool in a craft space too!

This is the very corporate ‘before’ pic. The rectangle shape was a little chunky, but I thought the silver lifted it and would work ok with some cooler summery tones.

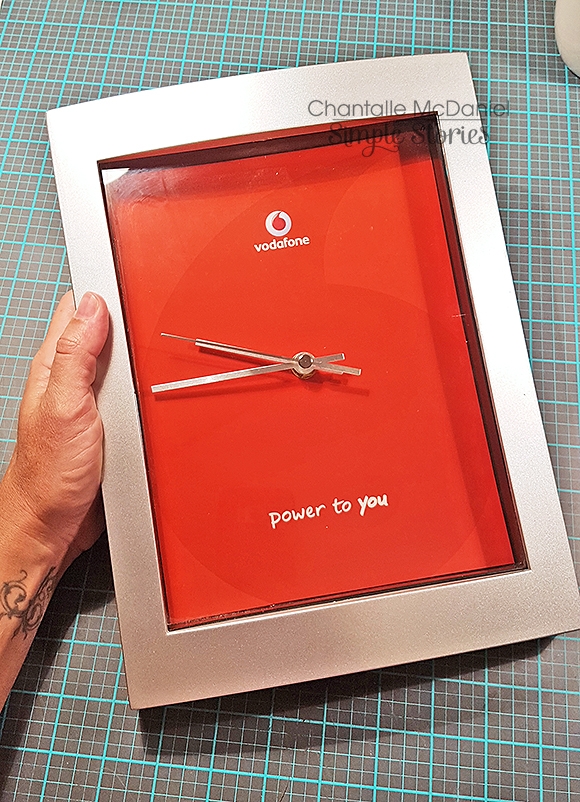
I pulled the clock apart and began by replacing the solid red with a trimmed sheet of ‘Life is Good’ 12x12. The simple rainbow print was perfect as it gives a pop of colour but doesn’t distract the eye too much.

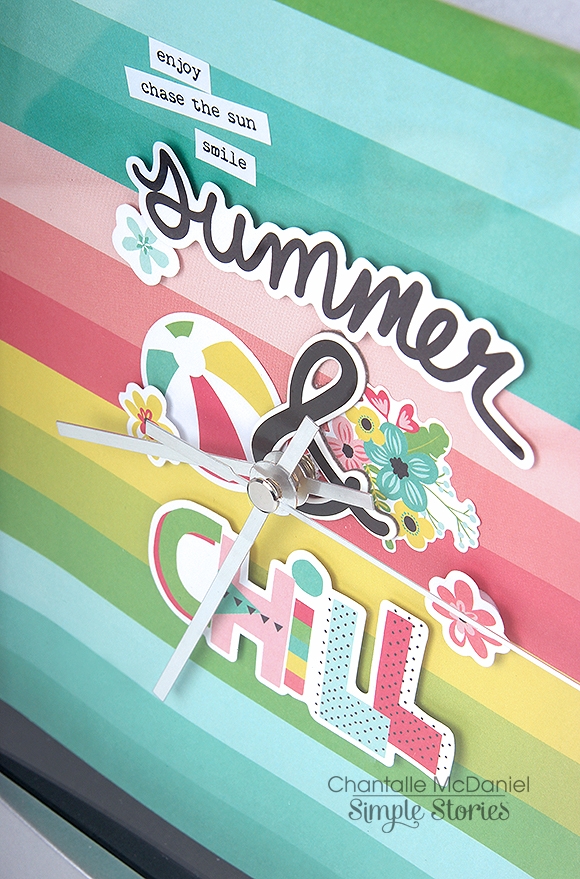
Next, I went about adding the titles ‘Summer & Chill’ to the face as well as a few little summery bits. I don’t know why I haven’t done a seasonal clock before!! I love this and I’m totally going to be making more as the season’s change.

Thanks so much for stopping by! Wishing you lots of fun with the gorgeous new Simple Stories Collections and don’t forget, if you are a digital or hybrid scrapper, you can grab all of your favourite collections online in the Simple Stories Digital Store.

Happy creating!


Hi everyone! I love to travel! There is nothing better than seeing another part of this fabulous world and the people in it!  The jolly 'Travel Notes' collection captures the beautiful essence of roaming the globe and is perfect for documenting all the fun a trip can have!

On our vacations, we take a TON of pictures and to document them all would fill a giant scrapbook. I think there is nothing better than to take a small segment or subject of your trip and capture those memories in an adorable mini! I took this colorful, fun collection and created a travel notebook documenting our days spent in Cinque Terre on a trip to Italy last year!

I cut one of the lovely patterned papers to 8x11 inches to use for my cover and embellished it with lots of the playful stickers and Bits & Pieces. I then laminated my cover for extra durability. Holes were punched at the top and bottom for the elastic holders on the inside and on the back page for the closure. There is room for photo pages and a journal that holds notes of our entire trip! I just love the luggage tag charm on the elastic closure- it is part of the Bits & Pieces!

Inside, the book is filled with four folded pages, each one a different pattern of paper. All in all, I have sixteen pages to document my favorite memories. Plus, I made pockets for seven of the pages that are holding flip books or tags for even more photos and mementos! Each of these wonderful pages and pockets have all been delightfully decorated with the bright and playful stickers, chipboard, Bits & Pieces and washi tape of the collection! You will have so much fun with this collection it will be like taking your trip all over again! Please visit my YouTube channel to see a full video of this super cute album!


Supplies

Hello Everyone! Jana Eubank here! It's taken me a long time to become comfortable scrapbooking pictures and stories about myself, but the I Am collection makes it easy ... and FUN!

I used several papers from the 6x8 pad to mat my photos and also to create lots of fun layers behind them!

I fussy-cut these butterflies out of one of the 6x8 sheets. I love how they reinforce the idea behind my page title with a nod to "evolving."

I used the darling chipboard tassel banner in the lower left corner of my photo and then layered my title to the left and underneath. Several chipboard hearts accent the spaces in between the butterflies.

The foil-bordered journaling block was hand-cut from the 4x6 Horizontal Elements paper. I chose to have it bleed off the bottom edge of the page.

When was the last time YOU created a page about yourself?

Supplies

Hello Friends! 

It's Kristine with you today and I'll be sharing a layout and a card I created with the St. Patrick's Day Simple Set. 

You are probably thinking why would she show us St Patricks Day at the end of April! Well this is why ... it's not a St. Patty's day layout and I want to show you how you can use a THEMED kit into something more " generic ". 

I created a layout using the kit but I used mostly the flowers, hears, and tried to avoid the shamrocks and more greenish colored paper. I apsolutly LOVE the pink in this kit and I really wanted to focus on that color and the flowers. 

I cut up some shapes using a few metal dies I have - such as tags, banners, and circle shapes. This allowed me to use some sections of the 3x4 cards that come in the kit. I cut up a few pieces to create my own diecuts such as the "Charmed Life". This allows you to stretch those kits and use them even if it's not a St. Patricks Day or any themed layout!

Here is another close up of the layout - of course I added pop dots and journal strips. My layouts would not be complete if I didn't add those! 

I also created a card - using the sticker sheet I used the Happy & the Day sticker. I left out the St. Patricks. See what I did there!? Yes.. I made something different from a themed sticker. 

I hope you give this kit a try because it is really beautiful. You can see that you do not need themed photos to use a themed kit! 

Please come follow us on Instagram @SimpleStories_ & @KristineDavidson. 

Chow for now!

Supplies

Hello everyone! Florence here! From my previous blog post you might have seen me write about how I want to do 32 new adventures and 52 new memories. I’m kicking off my 4th adventure by going to Japan!!! I am obsessed with this country and went for the first time at the end November. 

I feel like sometimes life just passes us by. Some of us just settle- even when we’re unhappy. And I was truly unhappy. I was miserable actually. So I decided to book my dream vacation and it was the best decision of my life. While I was still in Japan I decided to check tickets in April for Sakura Season (Cherry Blossom Season) and low and behold I scored a ticket for $430! Round trip!!! I couldn’t believe it. 

Unfortunate news- sometimes things don’t go as planned and Sakura Season was no longer here since the cherry blossoms bloomed early. Womp womp womp. But I decided that this trip was going to be more relaxing for me. 

I’ve been on the go lately with no rest. Especially the month leading into this trip. I wanted to create a Simple Bucket List with items I may or may not achieve (which I was content with). The number one on my bucket list was Tokyo Disneyland Resort. So just as long as I achieved that, I was golden!

I couldn’t wait to use the travel notes line. I’m absolutely obsessed with it. I was excited to use this finally!! I created two spreads- my bucket list layout and a journaling page! I pre-made these pages before I left so it was easy for me to travel on the go without bringing too many things. 

Surprisingly I only brought a small bag of stationery/ craft items with me. My favorite things on this trip was definitely visiting the Mt. Fuji Area and Tokyo  Disneyland. 

What do you have planned for your next adventure?

Supplies

There are so many beautiful new collections available at Simple Stories that the hardest part is deciding which one to work with. With Mother's Day just around the corner I couldn't resist reaching for the Mama Llama Collection!

This collection is a mix of pastels - think blue, green, pink and yellow with accents in chocolate thrown in for drama! The images include llamas (of course) with flowers and hearts for Mom, streamers and banners to celebrate her, and some Southwestern accents to set the scene. 

The 12" collection pack has everything you need to make lots of pretty cards! There are a few sheets of journaling cards to cut out and use as the focal point of your design as well as a sticker sheet for embellishments.  

I cut some of the images with a circle die cut, but a punch would work just as well. I powder the back of the stickers to release the adhesive, and then attach them with foam tape to add dimension. 

The sticker sheet has lots of cute sentiments like "I love my mama" and "save the drama for your mama". These cute llamas and whimsical sentiments are sure to make you smile.

What a fun way to thank Mom for all she does and let her know you appreciate all the good things about yourself that you got it from her!   


Supplies

I Am a Mom!

Hello Simple Stories friends and fans!  Nathalie with you today with a new layout that speaks to my soul using the beautiful I AM collection.   

I don't know about you, but i can not get enough of all the florals in the I Am collection ( plus if you have seen my work before, then you know i am a sucker for florals!).  So what better way to showcase them than to fussy cut them and use them  as the focal point of a layout.

For this page, my idea was to have all the flowers as if they were wrapped around the picture.  So i cut a large strip of the 4x6 horizontal and 4x6 vertical elements and stitched them together, and then used a bit of cardstock to propped this on the center of the b side of the Walnut/Cream Dot paper from the Sn@p basics.

Then used some quality time with my detailing scissors just fussy cutting floral designs from a few of the papers from the collection and the 6x8 paper pad

Once i set the picture on the vertical strip of paper, a bit of foam adhesive was used to layer the florals and embellishments.  I tried my best to create the illusion of the flowers wrapping around the paper strip.

The butterflies help guide the eye across the layout which helped to add lots of small word stickers and ephemera that tell the story of the picture, "motherhood"

Finally the title was created using some of the Chipboard stickers, and the Sn@p Color Vibes Light letter stickers ( which match the tones in the florals).   A few stamped sentiments using the rotaty stamp complete this page.

I love this page, it tells the story of the past 18 years of my life.  Trust me, the I AM collection is perfect to create those unique stories about you, just the way you want to tell them.  So don't forget to check it at your scrapbooking store.


XOXO

Supplies

Hi everyone, Kelly here with a new blog all about my Crafty Girl Travelers Notebook (TN). For a while I wanted to dedicate a TN for all my craft projects. I wanted a place to write down ideas for special projects, spreads and layouts. But also a place to write down measurements, techniques and swatches of all my inks and pens. When I saw the ‘Crafty Girl’ collection I immediately thought about this project and started decorating my Aztec TN.

For decoration purposes only, I filled the front pockets with papers and bits and pieces from the collection. I covered one of my notebooks with a scrapbook paper and added a 3x4 card.

For the opening page in the notebook I made a special spread using the word Create and the ‘Hand made’ paper. I punched different sizes butterflies from the different colors of the paper and placed them in the same rainbow order as the paper. Love the end result!

I used some tab stickers from the combo sticker sheet for the different sections of my notebook. In the first section I will write down all the measurements I need while planning. For example, I made templates and noted the measurements of the monthly and vertical weekly boxes for A5 planner inserts. I attached the templates with washitape on the page. This way I can easily grab them when I need them for a spread.

Lastly, I made an opening page for the swatches of all my color pens, brushpens, inks, etc. The collection has some awesome stickers and ephemera to match this theme, such as pencils and inkpads. In the pages behind this opening page I will swatch all my colors as a reference for use in my planner and projects.

For now, the setup of my Crafty TN is done and I can easily add more measurements, techniques, ideas etc!

Have a lovely day!

Supplies

Wedding photos are one of my favorite memories to scrapbook because they are a reminder of the love and joy of that day!   Always & Forever is a timeless collection full of class and beauty without being over the top!  The bonus is that it can be used for other similar events such as proms, dances, or anniversaries!  I  chose this favorite photo of my daughter when she was a flower girl for our niece's wedding. The photographer caught her spinning in her pretty dress before the ceremony like many little girls love to do!

​I  began with a grey/black ombre sheet of cardstock from Bazzill for my background cut file (Circle Heart Mask from Paper Issues). I  wanted to incorporate as many of the beautiful patterns as I  could so I  used my circle hand punch to place papers behind each circle on the die cut.  For my title, I  used the "Live Happy" cut file (#227456) from Simple Stories found in the Silhouette Shop and cut from gold foil cardstock.  I  thought it would go perfect with the gold foil accents found on the embellishments! 

I  added small embellishments from the Bits and Pieces pack as well as the 6x12 Chipboard on a few of my circles to accent. I    also love these sentiment stickers found in the 4x6 Sticker Sheets!  I  use them on all of my projects! 

​I  also love to tuck items like this cute tag under my photos! The Bits and Pieces packs always have a few coordinating tags just for accent or to journal!  You can also see the gorgeous "best day ever" chipboard "banner as well as gold foil chipboard heart! 

Thank you for stopping by today! Check out this collection by going to the products page! And don't forget to look at all of the fun new releases! Have a great day!

It’s Odessa with a cute 4x6 album I’ve put together with some photos from a recent weekend road trip with my family using the Simple Stories Bliss Collection! Even thought it’s still pretty snowy, I picked Bliss because of it’s light spring-y feel for our spring break road trip to Minneapolis. I kept things simple with lots of all sorts of stickers - words, phrases, chipboard and more! Bliss has lots of super usable phrases and icons that were easy to match up with pictures.

I love the plain chipboard cover of the 4x6 SN@P! binders! I went with a teal spine and decorated it with some cut down cardstock in a nice wood grain and added some of the Bits & Pieces and stickers to personalize it.

The first page of the album is my favourite! The left pocket is more cut down cardstock. I love the handy photo crops so I can see exactly what I am cutting and get it the right size. I used some of the Basics alpha stickers and embellished with some stickers from the Bliss 4x6 sticker pack to make a title. On the right I used an iced coffee cup with an illustration of Minnesota, again cut with the photo crops with a cute heart from the chipboard stickers. See through elements are so fun to add to mini albums!

Throughout the album I used coffee sleeves or cups cut down as dividers for each day. For the sleeves, I cut down cardstock to the same size and glued it to the back so I could add some journalling.

The cardstock in the Bliss collection is really really pretty so I let it shine on this spread, cut down to 4x4 with a simple chipboard sticker on it. I added some more stickers to the photos on the spread for an easy but cute layout.

Throughout the mini album I used lots of the Basics alpha stickers as a focal point and word strips to capture how I felt about this pictures. Here I also used one of the 3x4 elements to fill up my pockets and quiet down a busy spread.

This is my second favourite spread in the album. A cute picture from our trip that goes really well with Bliss on one side and one of my favourite quotes of the trip from my younger son using the Basics alpha stickers again.

Here I used one of the photo flips. When we go on trips I collect bits and pieces of ephemera to go with my pictures and this cut out from a fast food tray liner was perfect in the photo flip above our lunch picture. I just folded down the sticky edge of the photo flip and attached it  to the back of the page protector.

When we go on trips, I always pick up some film for my instant camera for my older son. He loves taking pictures with it and I love seeing things from his point of view! I added his favourite ones to a 3x4 photo booklet and slid the back of it into one of the page protector pockets for a quick flip book. It was the perfect way to add in his pictures.

I had so much fun making this mini album. There are so many fun sizes of page protectors and accessories that it’s easy to add all of my pictures and things into an album.

Supplies

Hello friends. María here showing a new month to edit bullet journal.  I know, it's still early to think in May, but I could not wait to use the I Am ... collection.  Also, May is my birthday month. I hope to inspire you and if you wish you can visit my instagram to see my weekly.
 
 
This is the insert I use to edit my future log. The 6 x 8 paper pad helped me decorate, I ripped the paper and combined with the clear stickers. I love how it looks!
 
 
For the interior cover I made a pocket, the designs of this collection are so beautiful that I found it difficult to decide which one to use. I cut out some rectangles of decorated paper to write the month.
 
 
I have decorated the collections of this month with strips of decorated paper, ripped paper, washi tape and clear stickers, which I love. I also used some 4 x 6 stickers to complete my gratitude log, I think they are perfect for this.
 
 
I have decorated my monthly in the same way, but I added some motivating phrases for the clear stickers. I'm sure it helps me meet my goals.
 
 
Finally my weekly. I use two, the first is to organize my work beforehand. The second is to take notes and to do lists.

Hello friends.  Iris here with a layout using the I Am collection. Have you ever fallen head over heels in love with a piece of patterned paper?  When I first got the this collection in my hands, I squealed in delight with each piece I took out of the box.  But when I saw the typewriter text print with rose gold foiling of the Focusing on the Good paper, I gasped! I knew immediately I couldn't cut it up.  I had to use it as a complete background.

To help all the elements stand out against the dark background, I started with off-white acrylic paint that I dabbed on lightly with a makeup sponge so that it remained translucent enough for the background words to show through.  I thinned some of the paint down with water and used a round paint brush to splatter big droplets. Inspired by the water color circle sentiments in the Clear Sticker pack, I also watered down acrylic paint in aqua, pink, green, and yellow shades, and used the packaging technique to create some splotches. Then I stitched a few lines radiating out from the center.  

Now my base was ready to add all the elements to. I cut the yellow flower and black and cream papers from the 6x8 pad to layer behind my photo.  I'm really loving the scale of the patterns in those pads!  I was going for a mostly symmetric design radiating from the center, so I divided my title above and below the photo.  I used the lovely rose gold foiled "I Am" from the Bits & Pieces pack. The "Me" was cut with my Cameo from the b-side of the 4x6 cut-apart sheet using one of my favorite fonts called Miss Elizabeth. (downloaded from the Silhouette store)  I hand stitched around it to make it pop and to personalize it even more because stitching is one of my things. 

I had so much fun picking the icons and words that really resonate with me and arranging them in a swirling cloud around the photo.  My brain is always swirling with stuff, so I feel this design captures my personality really well.  I used something from every pack in this collection. The "making it happen" was a square from the 4x6 Stickers, but I punched it out with a 1" circle punch so that it could match the others.  

To fill in some of the gaps and create a bit of clustering, I sprinkled lots of hearts around.  I can't decide if the rose gold are my favorite, or the buffalo plaid and striped ones.  I love them all!  One final bit of whimsical touch is a string of pom-poms from my stash I've had at least 8 years.  Great to finally use it and I like how it underscores "I Am".

The I Am collection is so beautiful and inspiring, I'm absolutely smitten with it!  It's full of soft colors, accents of black and glorious rose gold, and tons of affirming sentiments, making it the perfect collection for documenting ourselves.

Supplies

It’s Cara today from the Carpe Diem team and I love making my own traveller’s notebook inserts! Usually I use plain, lined or dotted paper for my pages. This time, I was inspired by the free ‘I Am’ printables to use those as the pages. 

Using Photoshop, I trimmed each page, made them into a PDF and then printed them as a booklet in Adobe Reader. This worked for the most part, only there’s a white border around the edges of the pages. My printer won’t let me print the pages of a booklet all the way to the edges of the paper. I’ll have to try a different technique next time.

I used the I Am… collection to match the printables and I started with the ‘Staying Positive’ paper as the cover and stitched down the middle of the whole lot before folding it all in half and trimming the pages to size. 

Since spring is still too shy to poke her nose out here in Luxembourg, I thought I’d try and coax her out with some flowers and butterflies. So after layering washi, paper and a sticker for a border, I added a floral tag and stickers and topped it all off with a chipboard butterfly.

I love to add pockets to the inside of my inserts. These are great for tucking away spare Project Life cards, stickers, receipts and memorabilia. I added some cards cut from one of the cut apart sheets. 

Pockets are easy to make, just take a strip of paper the height of your pocket and about 2 inches wider than the size needed and accordion fold each side down to size. Stick down the two sides and the bottom, being careful not to glue the folded bits together, and voila!

More butterflies are added here to further invite spring! One sticker and 4 die cuts. The die cuts are only adhered down the middle and I bent the wings up to make it look like they’ll take flight at any minute. A few more stickers and die cuts and the pocket is complete.

The ‘I Am…’ page is my favourite from the printables. I love capturing the everyday moments of life. They are what make life rich and wonderful and I love looking back over pages like this to see what I had been up to at that time in my life. Life seems to move slowly, but really it does change quite quickly, so these little records become priceless peeks into our own story.

I added a layered washi border to cover up the white border left by my printer and then layered some stickers to finish it off. What are you loving? liking? doing? etc…

I absolutely love this travel line Travel Notes by Simple Stories. The colors are so cute and go with everything!!! 

I created this cute page layout and left the pictures off so you could imagine your own cute photos on this page..... it could go with a cruise, road trip, hiking just about anything!!! 

 I also made these cute wood blocks to put on one of my shelfs to decorate for the summer next to a fun vacation picture. 

Supplies

Hello friends.It’s Kylie with you all today sharing how I have set up my Grape, Carpe Diem Planner for April. I have the boxed A5 Grape planner and I have teamed it with the new ‘Bliss’ collection by Simple Stories. Being boxed, my planner already had a gorgeous selection of dividers and stickers come with it in the Bliss theme. So to combine all of this, really creates some lovely additions to my planner.

The delicate pastels of the Bliss collection really stand out in my Grape planner. I had a lovely time creating extra dashboards, using the A5 divider templates. I love having my planner pockets full and store a lot of my stickers and die cuts in them.

I created an extra pocket at the back of my first divider. Perfect for storing more stickers and receipts etc, in. Here you can also see one of the dividers my planner came with, complete with gold foil acetate overlay. Love it!

Here is a look at my monthly view pages. I love adding extra details and have made some flowers from a punch as well as some leaves. I’ve layered different papers for the extra colour.

I have used the banner date stickers from the Date Stickers Tablet. I love all the different colour selections to choose from. These fitted nicely as did the printed box stickers, from the Bliss Sticker Tablet.

I loved the banner stickers from the Bliss Sticker Tablet and have used them in my weekly pages. I love how orderly it makes my planning appear, being in point form.

With all these gorgeous die cuts and papers in the collection, I just can’t resist adding lots of tags and tip ins to my pages also.

I have also been using some Alpha dies to punch my own lettering from the patterned paper. I love the contrast it gives my pages.

Another dashboard I have created. It sits in between some of my weekly pages for colour.

I have also created a page mark using some of the 3 x 4 elements paper as a background. I’ve also fussy cut some of the beautiful blooms from the ‘Be the Good’ paper and centred them with some pearls I had in my stash.

Another element I loved adding were some Butterfly paperclips. I fussy cut some of the Butterfly’s from the ‘Enjoy the Ride’ paper, and sandwiched a paperclip in between. These were actually quite addictive to make!

I hope you have enjoyed seeing my April planning today and it inspires you a little with your own.

Until next time,

Supplies

Pages