Hello Simple Stories friends and fans!

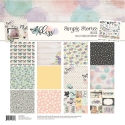
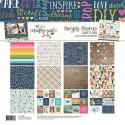
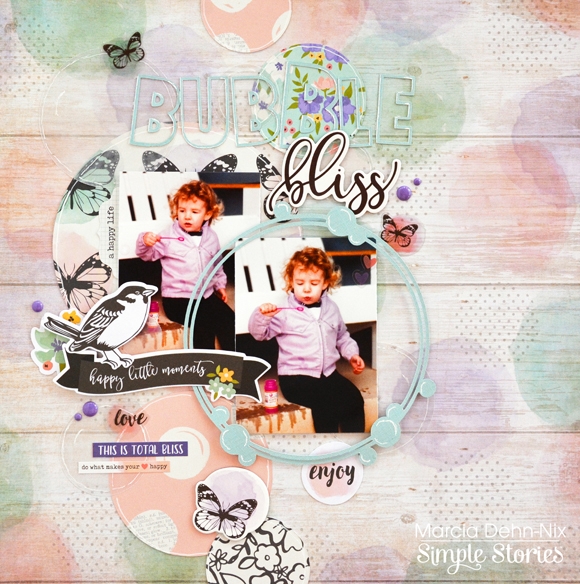
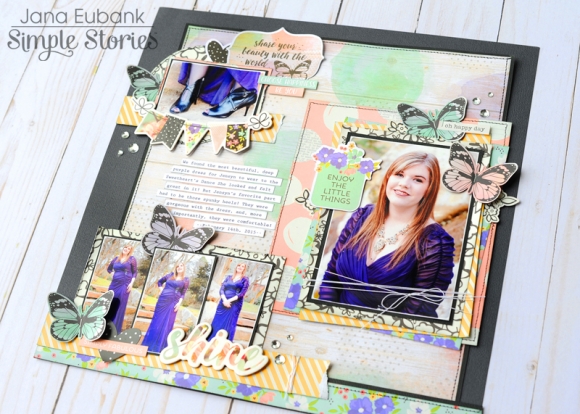
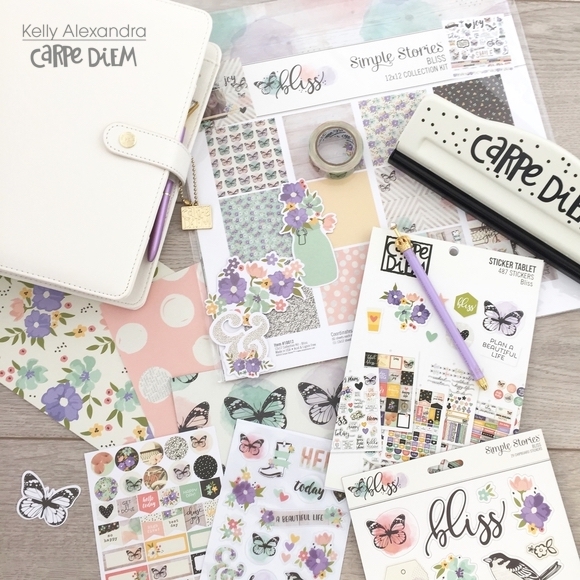
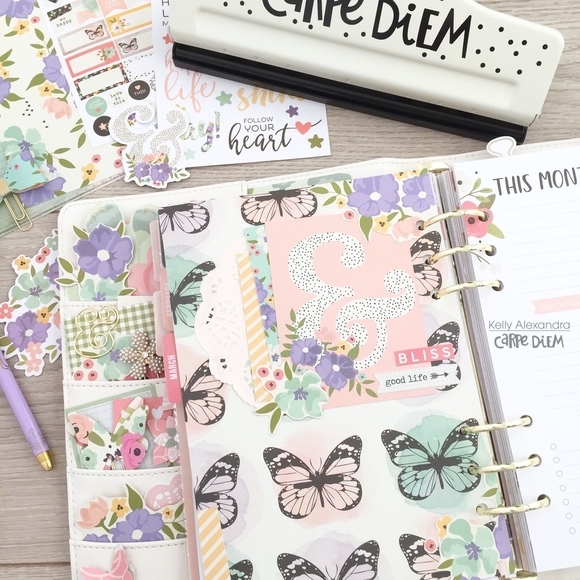
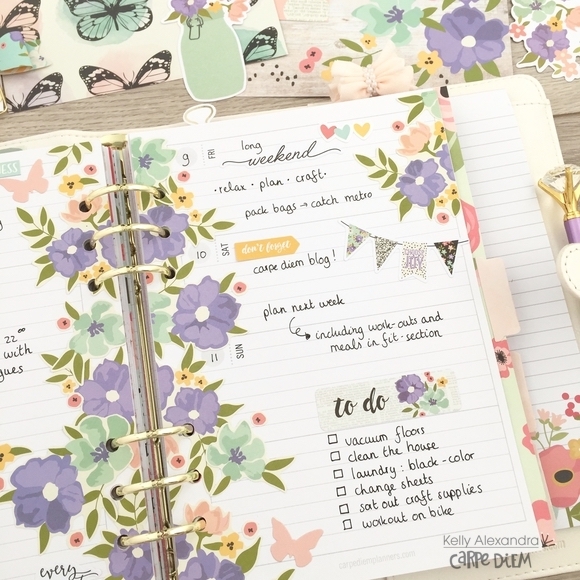
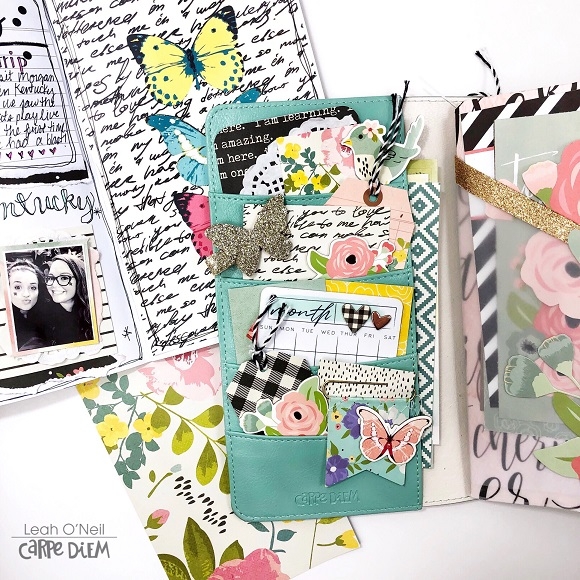
Nathalie with you today with a new project that is Spring on a page. I was so excited to be able to create some samples for Creativation this year, and this is one of them (that is why there is no journal lines on it yet!!!).  That means I was one of the lucky ones who got to play with some of the new collections before they were released, and the new Bliss collection is one of the most beautiful ones I have seen.  Just look at all that purple!!

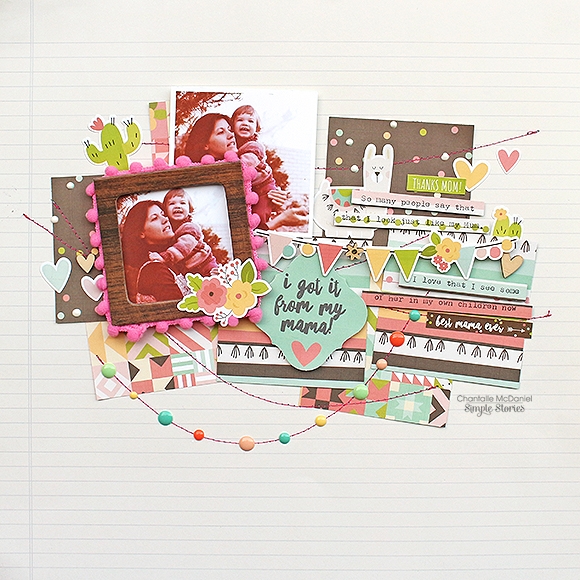
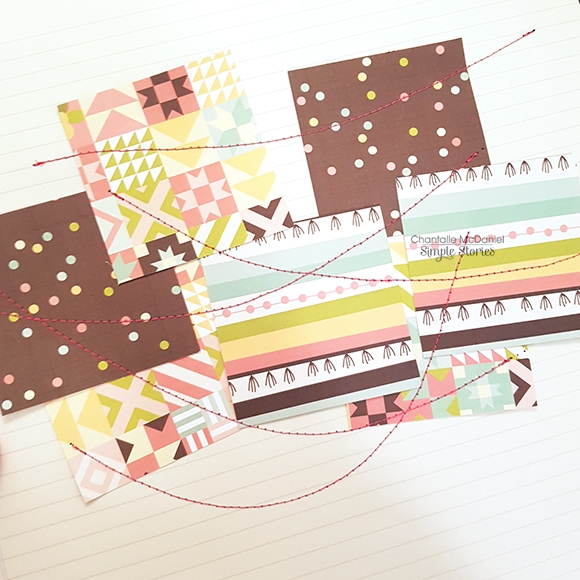
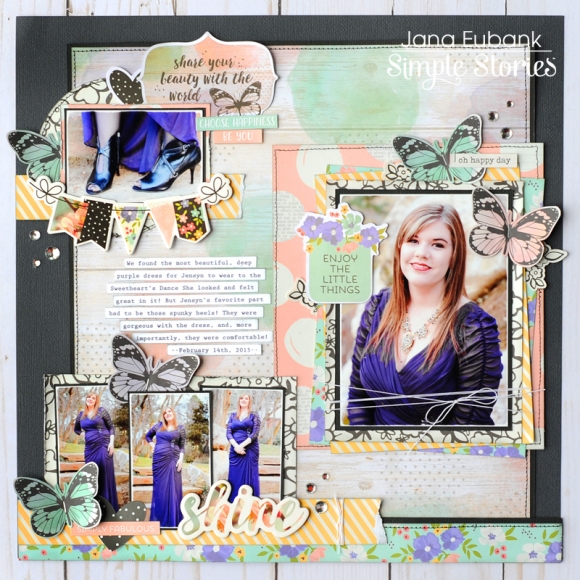
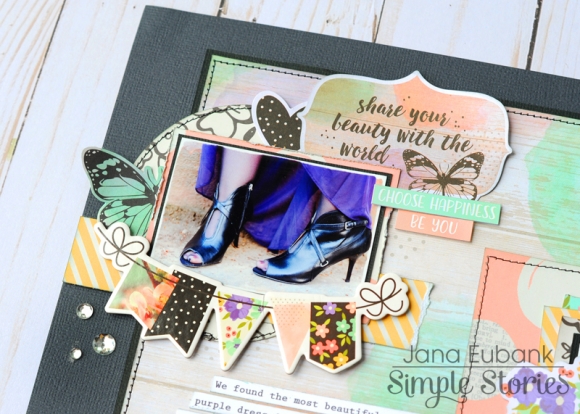
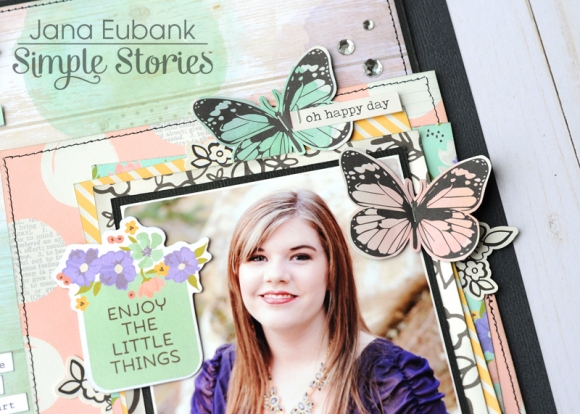
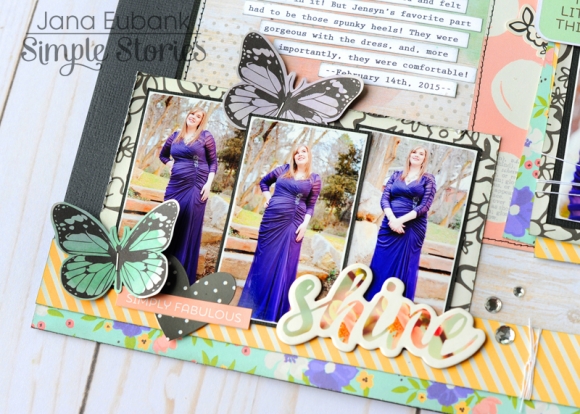
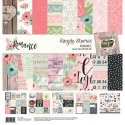
It all started when i cut the triangles from the Live in the Moment paper from the collection. I wanted to take advantage of the angles to anchor my picture between them. So once i cut them,  I carefully also cut some of the butterfly wings -using an exacto knife- so that they could be lifted of the page.

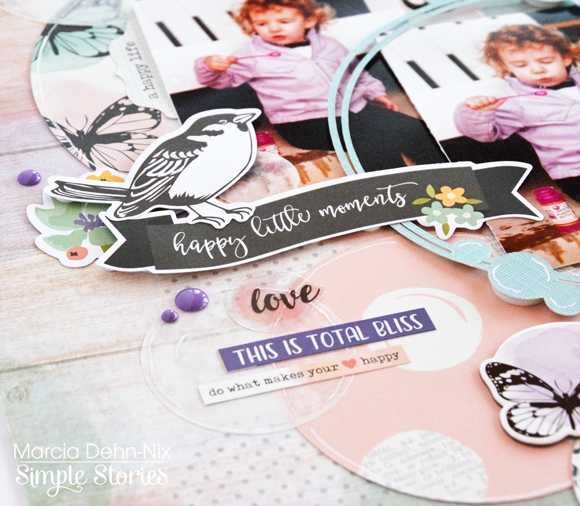
Then i hand stitched the triangles to white cardstock, making sure to follow the lines of the wood grain of the paper design.  To add more interest to the triangles, a few fussy cut butterflies were also stitched, through the center line, so that they form a flying path on the page.

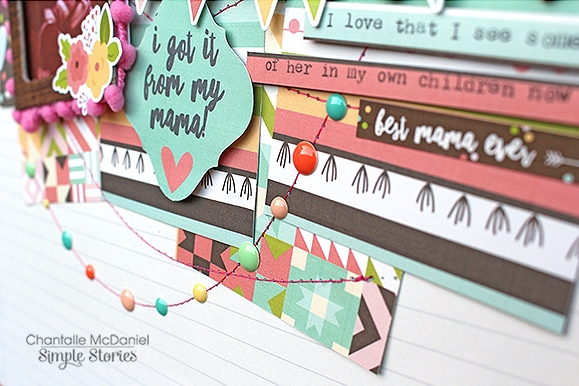
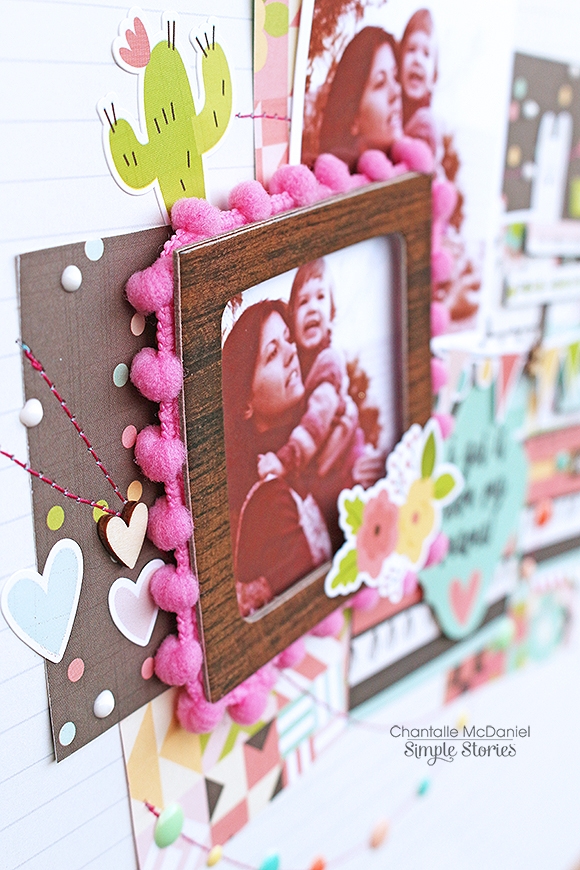
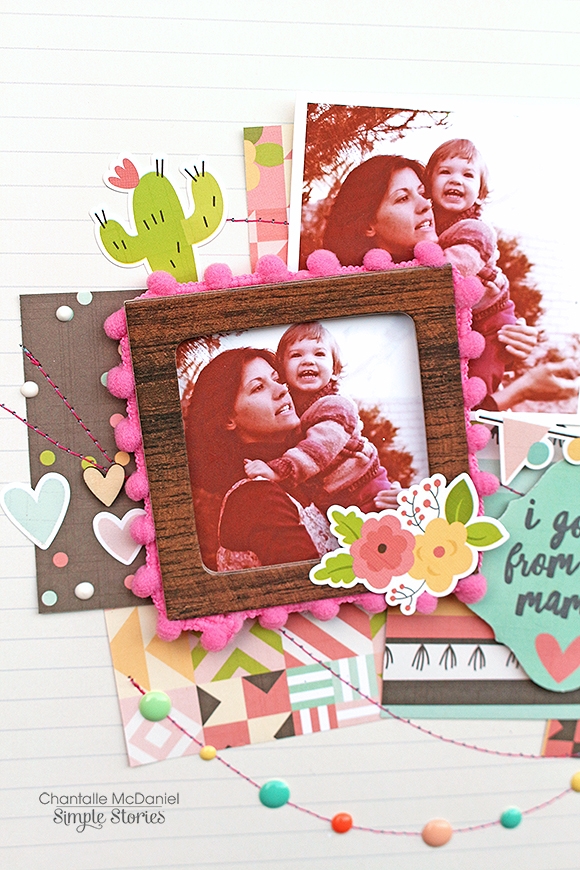
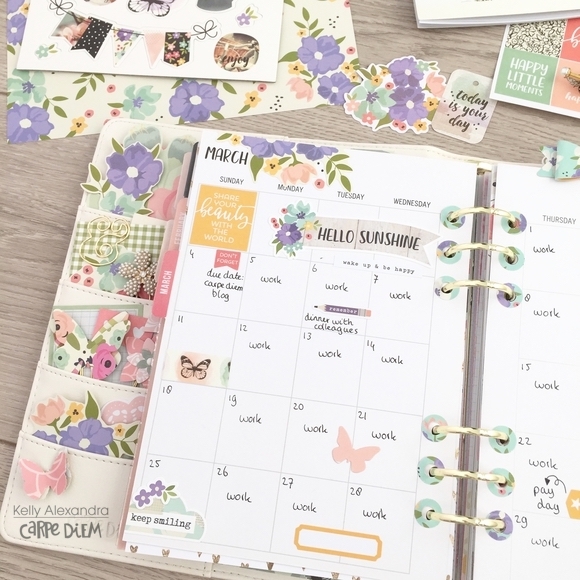
I fell in love with the florals in this collection, so I fussy cut quite a bit of them from the Be Good, and Remember to Shine papers to create the clusters around the picture.  All the fun embellishments (and the ones included in this collection are gorgeous) just help bring more sentiment to the page.

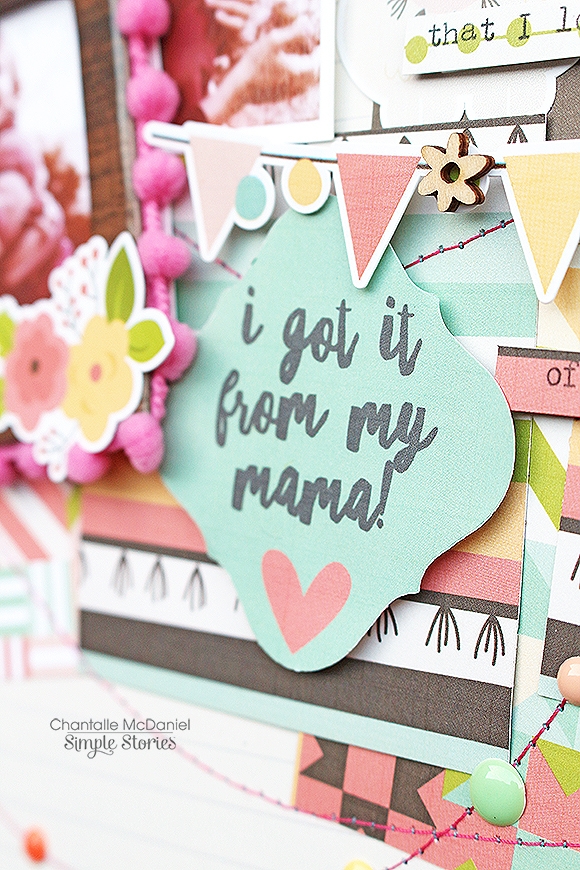
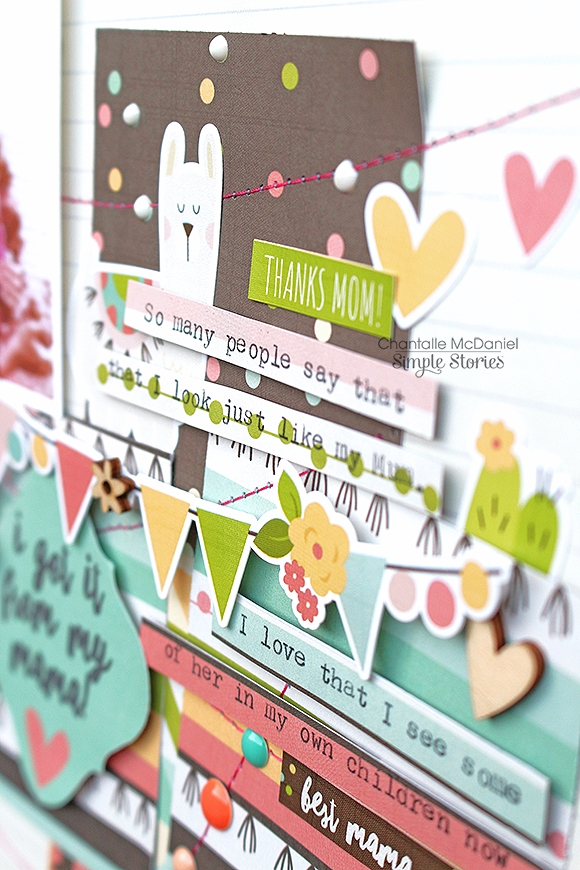
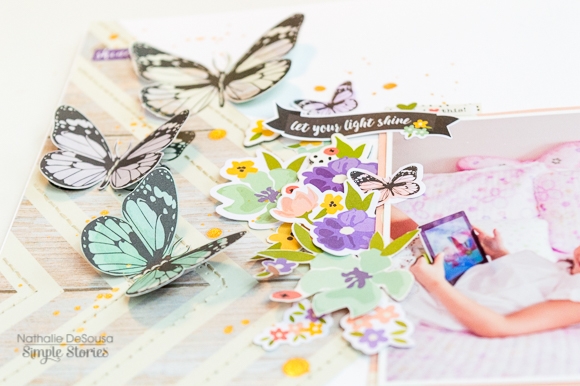
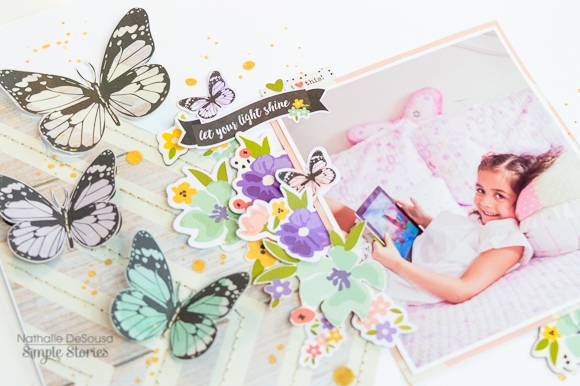
The title for this page (all about my niece's sweet smile, and love for the ipad) comes from the chipboard sticker set from the collection.   Once I set the "Hello Sunshine" banner for the title, i quickly add another one at the top of the picture.  The movement they create along with the butterflies is just what this layout needed.

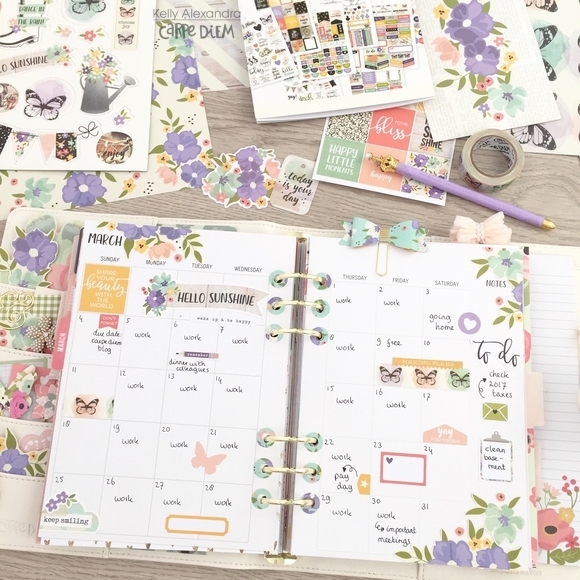
I hope this has inspired you to pick the beautiful Bliss collection. It is the perfect Spring collection, and you will be wanting to use it all to document the upcoming season.  Remember to check all the new Simple Stories collections, they are so so beautiful

See you all soon!

Supplies

Hi everyone! Odessa here with some pages I’ve been working on in my SNAP album. When I saw the Crafty Girl collection I knew I had found the perfect collection to work on some pages all about me. Crafting is my life and I just love the bright colors, cute icons and smart phrases in the collection! And what better to put them in than the chic Black Stripe Designer Album?

I started with a cute drawing of myself and some craft goals I have this year and then got busy embellishing! I had a sideways 3x4 picture that I stuck down to a pink patterned paper cut down from the 6x8 pad with some of the adorable painterly washi tape. The washi paired perfectly with the all the stripe colors in the Live. Love. Create. 3x4 card so I had all the colors to pick from for my embellishments. The colors in Crafty Girl all go so well together which makes putting together pages so easy - you can just use anything together! I added some of the SNAP Basics letter stickers along with some words and phrases from the Crafty Girl sticker sets. Then I stuck down some Bits and Pieces and this page was done!+

For the next set of pages I just had to pull out one of the totally frameable pages from the 6x8 pad! Eat. Sleep. Craft. Repeat is pretty much my motto. I added a few stickers from the combo sticker sheet because glitter just had to be mentioned and it was perfect. 

On the left side I have a couple of pictures and a 4x6 card. I used some of the chipboard stickers - those buttons are adorable - and stickers from the 4x6 sticker set to really personalize this page. The phrase stickers from that set feel like they are made for me! On the selfie I used the stickers to frame the picture and get a little bit of journalling in and on the coffee picture I used a centred phrase sticker and that cute button to accent the picture. Finally I added a few little things to the 4x6 card to personalize it. I find it so hard not to personalize elements like that, if I don’t they feel naked next to everything else.

For my last spread I used the back of the 6x8 paper from the previous page to do a little layout and then a collection of 3x4 pictures and cards on the other side.  I couldn’t help but sing a little while I was putting down the “makers gonna make!” 4x4 card which I lined up with a horizontal 4x3 photo for a simple centred layout. I added both a chipboard sticker and a word from the 4x6 sticker set in between the pictures as a border. Then I stared laying down some more stickers around it, some washi and a journalling spot from the bits and pieces. 

On the right side I have all the colors going on in my pictures so I went with a nice pencil crayon 3x4 card. I embellished it with some more alpha stickers and stickers from the sticker pack to title the page, since color is probably my favorite part of getting crafty! One of my favorite design elements is placing a heart or other simple icon in the centre of something so when I saw the wheel of yarn picture a heart just had to go on there. I added a simple phrase and the bun of one of the crafty girls to finish up that pocket. I knew I had to use the crafty tote bag chipboard sticker and it was perfect in the middle of the picture with all the yarn. The picture has a lot going on and didn’t need much so a nice central embellishment was spot on. 

I just love the phrase stickers in the 4x6 sticker pack. They were just what I needed to add a little DIY poem in the negative space in the bottom of the page. A little button and one of the arrow stickers and this set of layouts was all done!

I hope you enjoyed hearing about how I document my crafty fun and are inspired to pick up the Crafty Girl collection to document your own craftiness!

Supplies

Hi planner girls! It's Cara here with you today for my very first post on the Simple Stories blog! I'm so excited to be part of this year's Carpe Diem team, I'm dancing in my chair. I have only just recently stopped pinching myself, but the happy dancing goes on! 

I'm sharing how I set up my new Aztec Black & White TN. I'm going to use it to plan out my crafty projects, so I chose the 'Crafty Girl' line, nothing could be a more perfect fit. 

The first thing I decorate when I set up a new planner is usually the pockets, this one is no exception. Once the pockets are decorated, the whole planner feels ready to be filled with plans and dreams. My pockets are about 75% show and 25% function, so I added a few of the Bits and Pieces from the line. I made a few clips from some of the chipboard pieces, aren't the crafty girls adorable?

I wrapped some washi on a piece of card, I cut a strip of stickers that could come in handy from the Planner Basics Sticker Tablet and tucked a piece of patterned paper from the 6x8 pad in the large pocket behind after adding that adorable measuring tape sticker from the Cardstock Stickers along the edge.

To decorate the cover of that darling polka dotted insert, I layered cards cut from the 3x4 Elements cut apart sheet with a fab pink glue gun die cut and some Crafty Girl stickers. A couple of strips of washi finish it off nicely.

I snagged the March printables and used the calendar for the first spread of my insert. I used strips of paper from the 6x8 pad, and some washi, then layered lots of the Bits & Pieces and stickers from the line. 

I added a tab, with 'March' added to both sides and covered it with one of the clear tab stickers to keep everything snug and the tab protected. My favourite bit of this spread is those fantastic flag numbers from the Numbers Sticker Tablet, they are so cheerful and really brighten up the page, don't you think?

No wait! I change my answer! That teeny tea mug clip is my favourite. So stinkin' cute.

Happy Planning!

Supplies

Adventure

Hello everyone!  Iris here with my very first layout for Simple Stories.  I am beyond excited (and a little bit nervous) but ready to play and tell stories using the latest fabulous collections!  

Last month my husband and I made the trek to visit Point Reyes Lighthouse on the Northern California coast. We took a selfie in the same spot we'd taken one 20 years before. Yes, we were taking selfies before they were cool! When I saw the Travel Notes collection, I knew it was perfect to document this story.

Taking my cue from the ocean, I went for the navy background paper that is the B-side from the 4x4 elements sheet.  The “Travelogue” sheet, reminiscent of the lightkeepers' logs, was a perfect addition to house my journaling.

You're going to love the scale of the patterns on the 6x8 paper pad! I chose a bunch layer a-symmetrically around the photos and in little strips above and below.  How awesome is that blue diagonal stripe for framing photos? The orange polkadot, which I cut in scallops for variety, adds a bright pop to the otherwise slightly muted colors. To bring in some of the white that the title has, I stitched across the strips and scallops. It’s subtle, but reminds me of the white capped waves and adds a bit of texture.

I made clusters in four spots with icons and word stickers - one of my favorite Simple Stories products - and made sure each spot had a red heart to draw the eye up and down the page in a zig zag across the photos.  If there were such a thing as a spirit icon, clouds would be it for me. So imagine how thrilled I was that Travel Notes has a couple in the Bits and Pieces pack. I hand stitched them with blue thread to make them extra special.  I fishtailed some of the word strips, and added pop dots to a few so they would layer smoothly on the clouds and the camera from the Chipboard set.

It can be hard to use washi on a dark background, but I've got a tip for that. Cut two strips and line up the patterns to double it up. Now it stands out, but you can still tell it's washi.

The navy and bluff colors and marine type icons were perfect for this story at the sea, but Travel Notes includes great patterns, icons, and phrases for all sorts of travel.  Happy travels and happy scrapping!

​Hello everyone! My name is Florence and this is my first blog post for Simple Stories. I was torn between two lines that I wanted to work with- travel notes or I AM. I am travel lol! Many people see anything travel and they're like "that's totally you." It plays a HUGE part of my life. On the 24th I turn the big ol thirty two and wanted this next year of my life to be documented. I think we as creatives tend to document others. Our children, family, friends, fur babies, but we forget to sometimes add ourselves to that. I am going to solely use this TN for the purpose of myself, my next year journey and the I AM Simple Stories line was a perfect fit!

The I AM line was perfect for this year project of mine. I want to document at least once a week- so 52 memories with at least 32 adventures (doesn't only have to be traveling) big or small. I will be using the travelers notebook for this. I absolutely LOVE a blank notebook. It allows us to have have this open canvas to create something beautiful. And guess what- if you don't like it, there's always a fresh page to turn to that you can start over (I personally glue the pages together if it's that bad then start over!)

It wasn't until the year that I hit 30 when I started truly living life. That's when the travel bug hit me. That year my one little word was adventure, and let me tell you- that set a pavement for me. I wanted to travel and my year of 31 I lived out of my suitcase. I know this year I won't be able to do much traveling BUT- I still wanted to share with you a few of my main goals for this new year of mine. 

I live off of bucket lists. Before it was just something I created for fun. You know a wish list of what I want to see, what I want to do, where I want to go next- but never did I put true effort on crossing it off until 2 years ago. Unfortunately something tragic has to happen before that light bulb in our heads turns on to push ourselves. It wasn't until my Grandma passed away that I decided to be a little jet setter. As you can see above, my list if heavily geared towards traveling. YOURS doesn't have to be!

I would suggest creating a bucket list of things you love doing. If you love Disneyland- maybe going to another Disneyland in a new country could be on that list (PS Disney Sea in Tokyo IS THE BOMB!!!) or if you love running, maybe participating in the Nike Womens Marathon can be on there. The list can be endless- I suggest adding things that you love to the list. Because that will definitely motivate you to make it happen! Until next time sweet friends!

Feel free to find me on instagram for more creative tips and stories instagram.com/livelifeandcreate 

Supplies

 I’m so excited to be on the Simple Stories design team. I absolutely love this adorable I AM line

The colors are amazing and so easy so design with!!! These cute cards are made using the 3x4 journaling cards and I Am collection kit. Adding a few ribbons and buttons and flowers. 

This I Am line is also perfect for making darling layouts!!! This double page spread is all ready for your darling pictures!

This project uses papers from the I AM collection kit and the darling I AM sticker sheet. Use some pop dots for added dimension and a few buttons. 

Supplies

Hey Planner Friends! It’s Rachel Newman and I am thrilled to be on the 2018 Carpe Diem Creative Team. I am a planner girl through and through, and I can’t wait to share with you all the ways I use and decorate my (many) planners! For my first blog post, I want to share how I used the Simple Stories I AM collection to decorate my monthly and weekly pages in my Blush planner for March. But before we get into the planner pages, let’s talk dashboards and planner pockets!

I am more likely to actually use my planner when it is just the right mix of pretty and functional. When it comes to my planner pockets, I try to decorate them enough so that they are pretty to look at, without over stuffing them. For the opening dashboard, I kept it pretty simple with a trimmed down paper from the I AM paper pad and a planner decal. So pretty and still so functional!

I decided to spruce up my March divider with another trimmed down sheet from the paper pad, which I punched and adhered straight to the divider. I love that I can still see a little of the original dashboard peeking out and bordering the floral paper. If you look closely, you can see that the paper has a typewriter print on it! How cool! Lastly, I added a  Sn@P card from the Sn@P Card pack and some washi to complete this dashboard. Simple, but beautiful!

Now, for the monthly spread! First, I created a faux washi down the middle of the two pages with paper from the collection kit.

Then, I filled in my major events using icons from the sticker tablet. I finished up my decorating with stickers and ephemera from the bits and pieces pack.

The weekly spread is next - which is my favorite part to decorate! I consider myself an equal opportunity planner girl. I love trying out a variety of insert formats, so the fact that Carpe Diem inserts are undated means I don’t have to commit to one kind of weekly planning. This week, I wanted to try out the appointment inserts.

I love that these inserts are lined can be used as hourly inserts or can be easily modified to be a completely blank slate! And I cannot get over how adorable the I AM collections looks with all the great little icons and boxes from the new sticker tablets!  

I love adding little pocket cards into my weekly spread for a little inspiration. To make this pocket card dashboard, I placed two butterfly stickers together to create a tab, and punched the card using the planner punch.

Since I like to plan just about anywhere, I always have a storage pouch in the back of my planner filled with stickers, pocket cards and bits and pieces that I can use throughout the month to decorate my pages. The 4x6 I AM sticker pack will easily last me the entire month, with stickers to spare!

I hope you enjoyed getting a peek into my planner setup and process. I look forward to sharing more planner posts with you this year!

Supplies

Hello friends, it’s Kylie with you all today and I am very excited to share my very first blog post as a part of the Carpe Diem Creative Team. I have always loved the Carpe Diem range and today I will be sharing how I have set up my A5 planner for March.

I am using the beautiful, new A5 Mint Blossom planner teamed with the ‘I Am…’ collection from Simple Stories. I instantly fell in love with this planner when I saw it thanks to the gorgeous floral design and pastel colour hues.

I really love creating my own dashboards for my planner and now with the new A5 divider templates, it is such an easy task to do so! Simply trace around your template and cut them out. There are three in a pack and by using each of them as well as flipping on the reverse, it will give you the option of 6 tabbed dividers!

This is the tabbed divider I created for March. The lettering I created using some Alpha dies and I also enjoyed layering many elements to bring colour to my planner.

I’m never shy in embellishing my planner.I love to create pretty dividers and tags like this little one I have sitting over my ‘currently’ page.I also used some of the chipboard stickers to add some dimension to the overall appearance.

The opening page from the monthly inserts is great for adding current important tasks to. I also enjoy adding things I am currently enjoying such as a favourite movie I have seen, a new restaurant we may of found, events we have been doing , etc. This adds a fun memory keeping element to your planner to look back on.

Here are some of my planning pages for the month. I swap and change at times but currently I am using the horizontal weekly inserts.

I adore the Calender Sticker tablet and find myself using this booklet all the time. There is always a cute icon sticker you can find relevant to use in your planning.

They really add such a fun element to your pages!

I also enjoyed using the tabs sticker tablet as well. The clear sticker tabs fit neatly over them making them extra sturdy and less likely to crease.

Here is another example of some inserts I have created this month from the beautiful papers. Whilst they may not have a practical purpose to my planning, I love adding that ‘element’ of pretty to my planner. One divider I created, I have fussy cut some butterflies from the ‘Choosing Happiness’ paper to layer over some printed butterflies in the same colour. The Butterflies have a Rose Gold accent and were SO beautiful!

I also added a ‘mood board’ for the month which I created using some of the pocket pages.

I hope you have enjoyed seeing my planner spread this month and it inspires you in your own planning!

Until next time,

Happy Planning!

Supplies

Hello all of my fellow crafty girls and guys!! I’m Jackie G www.instagram.com/jackiegdesigns !! Today I have a really fun set of cards to share with you. I don’t know about you, but I LOVE crafting with my fellow crafters!! There is something just so special about the fellowship when we are all together!! That’s why I love the collection Crafty Girl, it has so many fun elements. Planner girls, sewing gals, washi tape lovers and more!! So with that said, I thought it would be fun to make two sets of cards with a matching giftboxes to give out to some of my crafting friends!!

For this first set, I used one of the 4x6 journaling cards to be the focal point on my giftbox. This girl is just too cute with those fabulous cat-eye glasses!!! I definitely need to get me a pair of those!!

I used a ton of chipboard elements along with the bits and pieces and combo sticker sheet from this collection to create all of the cards. They all pair up so beautifully and are perfect to make a matching set of cards!!

For the second set, I decided to keep the front of the box plain so my little tag could be the main focus. Again, using the chipboard elements, bits and pieces and combo stickers I popped them all up with some dimensional foam tape for a super quick tag.
This collection is one of my absolute favorites, and like I mentioned before…so much fun to create a gift for your fellow crafty friend!!
 

Supplies

Hello Simple Stories fans!

Marcia here today with a Spring layout I created with the gorgeous Simple Stories Bliss collection. I just love the soft purples, pinks, and greens in this collection with the pops of black. It is so perfect for Spring photos. I dug out some older photos of my daughter where she was wearing a purple jacket and blowing bubbles from the front steps. 

I wanted to use lots of circles on my layout to reinforce the bubble theme. I used a variety of pattern papers and cut my circles in different sizes, arranging them on my layout so the larger circles were in the middle and the smaller ones are at the top and bottom. I mixed in a few circles cut from vellum as well. I even framed one of my photos using a circular cut file.

I like mixing fonts for my title. I used an Outline Alpha here for 'Bubble' as I wanted the letters to resemble bubbles and combined it with the scripty 'Bliss' chipboard text.

The Clear Stickers were perfect for adding even more dimensional bubbles with adorable butterflies or fun text. Then I embellished with more chipboard, adorable bits and pieces, and phrase stickers.

I love how this turned out! I know the Bliss collection would be perfect for your Spring scrapping too.

Thanks so much for stopping by today!

Supplies

Hi Simple Stories fans and thanks so much for coming over to the blog today! Chantalle with you, to share my first layout on the 2018 DT. As you are well aware by now, I adore Simple Stories and am so thankful to be returning to create with the goregous new collections, like the super sweet ‘Mama Llama’ Simple Set.

I lost my Mum when I was a teenager and each photo of her is precious to me. There is definately a strong resemblance between us and it warms my heart every day, to see her face in my own children.

I’ve cut the title for the page from the 3x4/4x6 Elements sheet from the Mama Llama Set. 

Initially I wanted to do a grid design, so I cut a bunch of 3x3 squares. I found it a bit too constricting, so instead I took inspiration from the fun bunting and confetti in this set and machine stitched some bunting lines over the squares, which were adhered in a more loose arrangement on the notebook print background paper which comes from a Sn@p! Basics pack.

Over the stitching, I’ve popped some enamel dots to echo the dotted pink lines in the paper.

This frame is a little DIY number which I created using an older chipboard frame from the retired 'We are Family’ collection. The dark woodgrain looked great with the muted hippy pastels. 

I saw some frames like this on the market recently and I’ve been dying to try making some myself, so I bought some mini pom pom trim from a LSS. It was so easy, I really encourage you to give this adorable embellishment a try! You could use a glue gun to adhere the trim, but mine worked great with the red super strong double sided tape.

Tadaaah!

Some typewritten journalling onto co-ordinating paper and stickers, finished this page off.

This adorable set is perfect for the Mama in your life!

Happy crafting!

Chantalle

Hello Everyone! I am very thrilled to be back on the Carpe Diem Creative Team 2018. I am starting off with my first blog this year with the "I am" collection. The colors in this collection is giving me the Spring Fever. It's been really cold lately here in Southern California. I cannot wait for Spring to come.
 
 
I am loving the butterflies and the yellows. For my dashboard, I fussy cut the butterflies and added them on top to give it that 3D effect. I ink the edges to emphasize the yellow. 
 
 
 I decorated my planner pockets using the chipboard pieces. I also fussy cut the mason jar from the 6x8 pad. I always love a very decorated planner pockets.
 
 
 Here is my Monthly Layout for March. As you know I love using the Number Stickers for the dates.
 
 
Close Ups
 
 
 I used mostly the combo stickers to create my layout.
 
 
 The plastic storage pouch is such an eye candy. I just like to stare at it whenever I open my planner especially if its filled with all the bits & pieces and chipboard pieces
 
 
Thank you so much for stopping by and I hope you enjoyed my Spring Planner Set Up.
 

Supplies

Hi crafty friends!  It's Traci, from Artsy Albums, and I'm so happy to be back as part of the 2018 creative team!  The pocket album I want to share with you today is all about my crafty adventures ...  creative retreats, scrapbook time with friends, and CHA visits.  The new Crafty Girl collection was perfect for documenting these fun memories!

I used a 6x8 pocket for the first page and added a 4x6 element card to the front of a fold out.  Inside the card, is a photo from my first trip to the summer Craft & Hobby Association convention.  

 
I love that Simple Stories makes the 6x8 paper pad for most of their collections.  I used one of the pages from the pad for the title page below.  I like how it breaks up the smaller spaces throughout the album.


There are so many cute embellishments with Crafty Girl!  I like layering them right over the pocket edges.  The cute camera above is a chipboard sticker and the adorable little journaling spot is from the bits and pieces.
 
 
Have you noticed that the tab stickers fit right on the chipboard tabs in your snap albums?  How fun is that? 


I know all of you crafty girls are loving this colorful new collection!  Have fun...and be sure to document your crafty adventures.
 

Supplies

Hello, friends! Jana Eubank here. I have been holding out for the perfect collection to scrapbook these photos of my daughter all dressed up for a dance in her beautiful, deep purple dress ... And then the Bliss collection came along with it's gorgeous purple flower accents. It was PERFECT!

Of course I had lots of fun photos for this page, but managed to narrow it down to the five you see here. I chose to create three clusters of photos in this page design, to highlight the three different types of shots I took. 

In the top left, is a close-up of her FAVORITE part of the outfit that day ... her shoes! I treated this photo extra special by underscoring it with the chipboard banner piece.

I fussy cut several butterflies from the Enjoy the Ride paper to use as accents around the page. I love the slight wash of watercolor they have and the movement they add to this layout.

Three smaller photos clustered together with the chipboard title anchor the bottom of this page design. More butterflies accent this part of this page, as well as a sticker phrase that fits my daughter AND the Bliss collection perfectly ... they are both "Simply Fabulous!"

Even though there are a lot of photos on this page, I still managed to make the main photo the focal point by matting it with several layers of patterned paper. I love the way the patterns of the Bliss collection play off one another!

Supplies

Hi everyone! Tara here with Secretbees Studio.  If you're reading this blog, chances are you are a crafty person and Simple Stories has come up with the most adorable paper collection to celebrate this way of life! It is full of ridiculously cute icons and embellishments not to mention the super punny ( and funny) sentiments! It is also the perfect paper collection for hosting your very own crafty party! What could be better than getting together with your friends and making pretty things? Adding in the cutest invitations and decorations, I say!

The invitations were printed on heavy card stock in colors that would complement the collection.  I then layered those over two different pieces of the lovely patterned papers. I added in a couple of the stickers from the 4x6 pad on each of the invites and then topped the whole thing off with a decorative band that is embellished with images from the Bits & Pieces along with chipboard stickers and the collection stickers. So stinking' cute!

To top off the darling invitations, I used a Spellbinders basket die to make these delightful sewing baskets as party favors! Each was cut from more of the adorable patterned paper and then trimmed and adorned with more of the charming icon stickers. Each basket holds a bit of twine, buttons, a glue stick and some washi tape- everything your guests need to get their craft on! I even tucked in some chocolate of course.

Run, don't walk, to your nearest craft store to pick up this collection! You will literally swoon over its cuteness!

Supplies

Hi everyone, it is Kelly here again with a new blog! This month I am using my favorite A5 Ivory Carpe Diem planner with a new Simple Stories collection I received - Bliss. It is a gorgeous floral collection perfect for decorating these months in your planner.

I used the ‘Enjoy the ride’ paper with butterflies as a background for this decorative dashboard for March. I decorated the page with a few pieces of paper and stickers.

When I start decorating my monthly spread I always first add the numbers (written or stickers), then I write down when I have to work and use a list or sticky notes to write down important appointments that month. When I have that list I start decorating the days with appointments with functional stickers, this time from the Bliss stickertablet. Lastly, I decorate the empty spots on the page with decorative stickers and flowers.

The gorgeous paper ‘Be the good’ from this collection is filled with flowers that need to be fussycut out. I cut about half of the flowers from the paper and layered them in the middle of my weekly spread. After I glued them on the page with a glue stick, I repunched the holes and added a few other stickers on my spread.

I love to use floral pattern papers in my planners and I hope you can find some inspiration in these spreads! Have a lovely day,

Who doesn't love a great travel collection? Simple Stories' has another hit with Travel Notes and today I'm sharing a layout I created documenting a fun trip to Seattle!  This line has bold colors and prints with a multitude of embellishments to choose from! Plus, many of the B side patterns can be used for just about any theme!    

The ledger print of Travelogue makes a perfect background for my page!  I  then layered contrasting prints like the navy blue/white cabana stripe of See the World behind my photos.  For my title, I  was instantly drawn to this stacked "adventure" phrase from the Bits and Pieces pack! Using a few small pop dots, I  gave my title some lift to add dimension to my layout!

​I  incorporated many of the fun patterns into my page by using a few different sizes of my circle hand punches! The small circles  found on the 4x6 Stickers were perfect to add in as accents; I  even used a pop dot on a few for added dimension! Layering some of the smaller sentiments such as the "explore" from the Bits and Pieces are a great way to add contrasting colors! And of course, the sentiment stickers are one of my favorites!

You can see more of the layered circles; a few I  added stitching around the edges with my sewing machine. The 6x12 Chipboard Sheet includes a few fun, colorful circles that were perfect to layer with my larger circles! I  also included a small journaling strip from the Bits and Pieces to stamp my date! 

Thank you so much for stopping by the blog today!  You can see the Travel Notes collection in its entirety by going to the Products page! While you are there, check out the rest of the new collections as well as what is coming soon!  Have a great day!

Supplies

Hello creatives! Welcome back to the Simple Stories blog. Leah here to show you a peek into my traveler’s notebook. Right now, I have a pretty good planning system going that involves one A5 ring bound planner and one traveler’s notebook. I hope to share the details of that system later, once I work out a few details. My traveler’s notebook has several inserts, two of which I want to show you how I use today – one for making lists and the other for documenting memories. The other inserts in my TN are for brainstorming ideas and journaling.

I use one insert in my traveler’s notebook for making lists - to do lists, to buy lists, to read lists, to watch lists, etc...any type of list. I sometimes like to decorate these list pages, just for fun. I am still using remnants left over from the Romance collection, which I used to decorate these pages.

I’m using this insert for some random on-the-go memory keeping. Whenever I have random day-to-day memories I want to document, I put them in this TN insert. This layout was all about a fun road trip to Kentucky with my niece to visit my sister and dad to see our favorite basketball team play. We had a blast! I didn’t have a ton of photos to document from this short trip, but I still wanted to get these memories down on paper. I created this layout using a couple of pieces from the I AM collection on the left page, and this beautiful I AM free printable (available here) on the right side.

I mixed a few bits and pieces from the I AM collection and a couple of practical items like paper clips and sticky notes in the front pockets of my traveler’s notebook. I always have the goal of on-the-go planning and memory keeping in mind and this traveler’s notebook is serving that purpose very well.

Do you use more than one planner/notebook to plan? I always feel like I need at least two to serve my needs. I’m curious to hear more about your planning/memory keeping systems in the comments below or over on my instagram. Come say hello and check out some beautiful  planner inspiration on the Carpe Diem Planners Instagram while you’re at it. See you again soon!

Supplies

Pages