Hi friends! Linsey here today sharing these festive miniature egg cartons all dressed up for Easter! With the holiday right around the corner, I wanted to make a decorated carton filled with sweets and give to each family member. What a fun and easy way to say Happy Easter to the ones we love! 

Each carton is decorated with a variety of stickers and paper from the new Happy Easter Simple Set. The mixture of black/white and colored images make for a simple, yet sophisticated and elegant look. From gingham bunnies to floral spring wreaths, everything coordinates perfectly together. 

A pretty ribbon bow was attached to each side of the cartons with a pearl flower button to accent the centers and closure. Finish with a small greeting tag tied by string to the front and fill with choice of treats and goodies! 

Thanks so much for stopping by today! I hope you enjoyed my project and feel inspired to make something beautiful with the Happy Easter Simple Set! Until next time, happy crafting!

Supplies

Hello Friends! It’s Kristine Davidson here today and I’m sharing 2 layouts I created using the NEW and SUPER Fabulous I AM Collection. This collection is beautiful … soft, colorful, floral and perfect! I created 2 layouts using pictures of my nieces from a few years ago. They are growing up and being teenagers and It’s hard to get nice photos of them so I have to go back a few years and find some that not the Snapchat faces I often get via text!

The first layout is called I AM. It’s a straight forward title and I used some bits and pieces, the roller stamp, some chipboard pieces and added a few descriptions that go well with the I AM Title.


I used a strip of the washi tape for my first stripe at the top – it’s colorful and fits perfectly. I then cut up a few other pieces all different width but same length to go across my page. The size of the photo is 4” by 5” . I added so many great embellishments on this page to create a focus on the left side of the photo. A few heart stickers and some chipboard really did the trick for this page.


The diecuts are amazing in this collection and I’m not just saying that. They really are! You might want 2 packages of those Bits & Pieces!

The Second Layout is called I AM FABULOUS.

My niece just turned 11 and I told her she needed to STOP growing up! I created this layout using a piece of white cardstock but then adding some black cardstock behind my papers. I created one of my favorite go to formats – a GRID layout.

I was able to add so many colors and again tons of those Bits and Pieces to this page. Adding some pop dots under the butterflies made them dimensional and really pop off the page. I hope you enjoyed my layouts today I will definitely be using more of this beautiful collection. Come follow us on Instagram! @SimpleStories_ and myself @KristineDavidson.

Supplies

Hi there! I am so thrilled to be back on the Carpe Diem creative team for 2018, and what better way to start than with the beautiful ‘I Am’ collection!

This collection brought to you by Simple Stories is full to bursting with positivity!...oh and lots of butterflies, as you’ll see in my photos! Talking of which there’s a whole 12x12 scrapbooking paper with foiled butterflies, I choose to fussy cut them all out to use for decoration.

I used several of the butterflies on a dashboard I made, layering them up and adding little gems to complement the rose gold foiling.

I think you know by now how I like to make the pockets of my planners leaning more towards decorative than functional. I’ve used the A5 Carpediem Blush planner this month and I think it works so well with the I Am collections colours.

In this collection there is the Sn@p cards which I love to use for journaling, filling pockets and decorating my dividers. Here you can see how I’ve used one ready to fill in with lots of different details, I am loving, liking, doing etc, isn’t this a great way to be able to document how you were feeling on that particular month!

I’ve used another one of the Sn@p cards here on this divider and layered it up with some rose gold chipboard hearts and you can also see a couple of different ways I’ve used the butterflies on paperclips.

I hope you’ve enjoyed a little peak inside my planner if you would like to see more ways I’ve used the I Am collection please pop over to my Instagram account https://www.instagram.com/heartsbyemma

Supplies

Hi!  Jeanne here today and I’m excited to share some projects made with the Simple Stories I AM COLLECTION.  This heartening collection is filled with positive messages sure to lift your spirits and inspire.

The images are feminine and romantic – think  hand painted florals and  butterflies! 

The collection includes die cuts (Bits & Pieces), chipboard, stickers and even washi to make each project a coordinated work of art.

This is a GORGEOUS collection of pink, teal, yellow and some midnight black thrown in for drama – the contrast between patterns is simply stunning!

You’ll love mixing and matching the patterns that are designed to coordinate perfectly with all the other elements in the collection.

We all need a little pick me up every once in a while – what a beauful way to encourage and to let someone know they’re on your mind, and that you believe in them!

Supplies

Hello Simple Stories friends and fans!

Nathalie with you today.  I am so excited to be returning for a new term as a member of the Creative Team.  I love Simple Stories and the people behind it all.  Thank you Simple Stories for inviting me back!!!

Every time, I think i have finally picked my favorite Simple Stories collection; they top it with another more beautiful collection.  This is the case of  the new I AM collection.  When it arrived at my doorstep, I fell in love with all the papers and embellishments, and quickly pull a picture that mostly represent me to create a layout with it!   

We always document all those special moments in our lives, but some times forget to tell our story.  So what better way to keep a memory of you than to create a self affirmation page.   For this, I pulled a cut file from the Silhouette store, and cut the title for this page from the B side of the 3x4 journaling cards.   A bit of coordinating hand stitching just adds texture, and brings all the colors of the flowers forward.

A bit of white acrylic paint on the B side of the Bold and Beautiful paper make sure all the details in the title pop.   To emphasize the "ME" in the title, the word was cut form another paper from the collection and attach with foam adhesive to the title.

The icons and stickers from the collection are perfect to create clusters and embellish the page. The florals of this collection are so beautiful you will want to get a few of the sheets to fussy cut them, and add them to your projects.  But let's not  forget the beautiful roller stamp; the sentiments are just perfect to create a self-empowering page;  a must have!!!

You will fall in love with all the patterns and colors from the Simple Stories  I AM collection, and  it will help you to document your own story.

XO

Supplies

Hello!!  It's Lisa and a cute sloth here today. I have the cutest photo to scrapbook. The colours just went so well with the 'Romance' collection, so I decided it was the perfect time to document our Sloth encounter from last year.
 

I love this photo so much and wanted all the focus to be right there in the centre on that adorable sloth. So I created various different frames to do this.

I started off by adding a thick white border to my photo before printing. This really helps the photo stand out from the page. Otherwise the colours would just blend in to the back ground.
 
Then I cut one the the 4X6 elements out, cutting it in to a rectangle to border the photo. I made sure there was a good space to add my title 'Kisses' here which came from the coordinating 12x12 sticker sheet.
 
I then took my circle cutter and a couple of pieces of patterned paper and cut out 3 large circles to go around my photo. I love how this creates such a pretty frame and then by adding some of the 'Bits and Pieces', more stickers from the 12x12 sheet, a couple of pieces of the Chipboard Stickers and some stickers from the 6x4 pack. It just works so well.
I wouldn't usually use black on my pages, except when journaling, but I have to say, I love this contrast. It just works and compliments the page and really helps the title stand out too.
 
 
I'm so happy with my cute page. I think this collection was the perfect choice. Thank you for joining me today. If you would like to watch me create this layout, please see my video here.  I had so much fun!!
    

Supplies

Happy Ever After

Hello friends, Dorymar here! I’m so happy to share a fabulous SNAP Album I designed with the Romance Collection. This collection is gorgeous! When I think of a Snap Album, I think of some wonderful dividers, full of details and elements that make my photos look great. That's what I share with you today on the blog! Check it out!

All the elements are so beautiful that they are very easy to place, they look fantastic! I colored the dividers in white and distress borders with the coral color to continue giving that subtle touch that the collection has. I accented the cards and photo frames with a black pen.

I love to use the paper to the maximum, that is why I always use the Sn@p pages to do space for the journal and makes some dividers and inserts. In this case I used my scraps fill up my 2 x 2 insta-pocket pages and I added phrases and stickers from the Romance 4x6 stickers.

I punched some hearts from different papers and stapled them to give a little dimension.

I cut out some strips from the border of the paper for the background and washi tape for finishing touches.

I hope you enjoyed the project and inspired you to use this gorgeous collection.

Happy scrapping!

Supplies

Happy Monday! It's Lisa Dickinson with you today and I wanted to combat the Monday Blues with a fun layout!

LiveLaughLove1_W


I've arranged my photos in a stair-like pattern that helps naturally direct the eye through the layout. The white borders help them stand out from the patterned striped background (one of my favorite ways to gets lots of pattern on a page!)


LiveLaughLove2_W


The tabs cut from white cardstock under each photo also offer a nice bit of white space where the eye can rest and help break up all the patterns.


LiveLaughLove3_W

A bit of twine tied across the top edge of the page is a nice dividing line between my papers and journaling block.


LiveLaughLove4_W

I've mixed stickers, clips and enamel dots and buttons from various collections to embellish - if the colors work with my design, I'll use it!


LiveLaughLove5_W

Hope your Monday is wonderful!


SaveSave

Supplies

We recently completed the intense process of reviewing hundreds of beautiful submissions for our creative team.  For those of you that submitted, thank you so very much for taking the time to share your beautiful work; we truly wish we could invite each and every one of you to join us.   

We're thrilled to introduce you to the 2018 Creative Team!  Look forward to seeing work from these talented ladies beginning next month in March!

Hi there, this month I’d like to show you how I set up my A5 Cream Blossom Carpe Diem planner using the Romance collection. This collection has a Valentines feel to it but you really can use it all year long, it’s full of beautiful florals and the colours are so delicate!

Yes, you guessed it...filling the planner pockets was what I started with first. I used several doilies along with ‘bits & pieces’, chipboard pieces and also sticky notes from the Bloom range. 

For the dashboard I cut a piece of 12x12 paper to fit and used the Carpediem A5 hole punch. I decorated the dashboard with a few of the cut a parts from the 12x12 paper pack, a doily that I cut in half and some of the die cuts.

Here’s how I used lots of the stickers from the Romance collection to decorate my monthly spread. I adore the die cut butterflies, I just used a black fine liner to add a little butterfly trail!

I hope you’ve enjoyed a peek inside my planner using the Romance collection, you can find more detailed pictures on my IG account  https://www.instagram.com/heartsbyemma

Supplies

Hello Simple Stories fans! 

Nathalie with you today bringing you a new project about my baby's love for crafting, and what better way to document this memory than to use the super fun and beautiful (and a new  personal favorite) CRAFTY GIRL collection!   

What better way to document a love for crafting than to add a bit of mixed media to the background (the soft watercolor was created using Vicki Boutin's markers).    But what better way to combine all the beautiful patterns and colors from the Crafty Girl collection than to create a large title using one of the Cut Shoppe's cut files.

There are so many fun icons and stickers in the Crafty Girl collection that i had to use them all to create clusters at the corners of the title, and the picture of my daughter.

A few more small details like one of those awesome Crafty Girl icons (just  love the girl with her top hair knot), and an extra pop of color from the Hand Made paper from the collection.

You will fall in love with all the patterns and colors from the Crafty Girl collection, and it will quickly become one of your Simple Stories favorites.


XO

Supplies

Hello, everyone!  I have a busy March, so I had to get a jump on my planning.  I used the St Patrick’s Day Collection Simple Set, the Seasons Sticker Tablet and Sn@p Alphas to pretty up my planner.

I used the decorative papers from the Simple Set as washi down the center edges, alphas to highlight the big events and used stickers from the Seasons Sticker Tablets

After I had a sense of my commitments next month, I filled out my Monthly overview.  I used this page to remind me of all the great things happening in my life and to set my goals for the month.

This is my last blog post being a creative team member—I had had a wonderful year making projects on the Carpe Diem Team.  Thank you all for joining me on this journey and for all your comments and support along the way.  Last, thank you to Simple Stories for this wonderful opportunity.  I was proud to show off all the great products you released over the last year, keep up the great work!

Supplies

Hello friends! Jennifer here on the blog today! I  hope you are enjoying all of the fabulous new collections debuted at Creativation last month! I'm sharing a layout I created with the lovely Bliss!  I'm so in love with the soft colors and prints of this line!  I  had to use woodgrain print with little burst of color of Live in the Moment as my background! 

​This collection has so much beautiful goodness in the embellishments!  The black and white chipboard pieces such as the "bliss" script and butterfly are a perfect contrast to the colors! Bliss has not one, but TWO washi tapes included in the collection!  You can spy both the Butterflies and Black Speckle Dot Washi Tapes layered among the stickers and Bits and Pieces die cuts!

I  am a fan of layering my embellishments and was happy to see lots of floral clusters included in the Bits and Pieces pack! The 4x6 Stickers also have many small embellishments to accent such as the small circle stickers and the gorgeous sentiments (which have always been a long time favorite!)

Thank you for stopping by! Do you have an all time favorite Simple Stories embellishment?  Check out the entire Bliss collection by going to the Products page! Have a great day!

Supplies

Hi everybody. It’s Mindi here with you to share some pocket pages. Valentines Day was last week and I’ve created some Valentines Day/love themed pages to give you some inspiration. It’s been a long tradition for me to take some fun Valentines Day photos of the kids. I had a bunch of photos my middle child and made this 6x8 full page to get a few more pictures in.  

I really loved the journaling cards in this collection. They are beautifully done and you don’t really need to embellish them to much. 

This spread includes more photo shoot photos of my kids. I added a strip of pattern paper on the top of the 4x6 card and added the chipboard word Love. I thought it was the perfect embellishment for these photos. 

My last spread is all about Valentines Day itself. I needed to brighten up the spread so I made a journaling card with white card stock and the chipboard XO pieces

Supplies

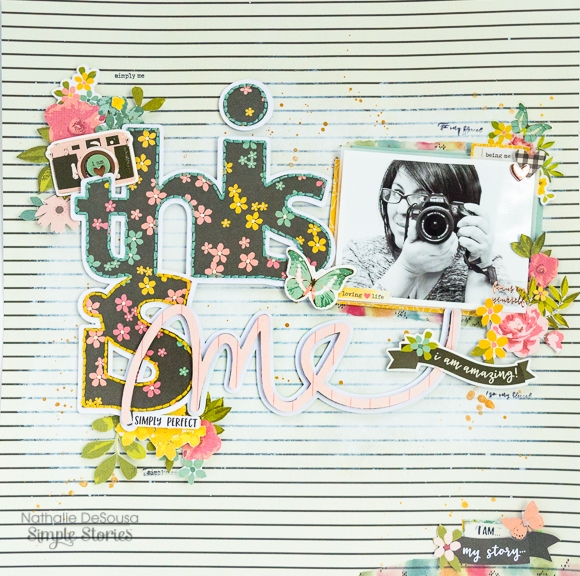
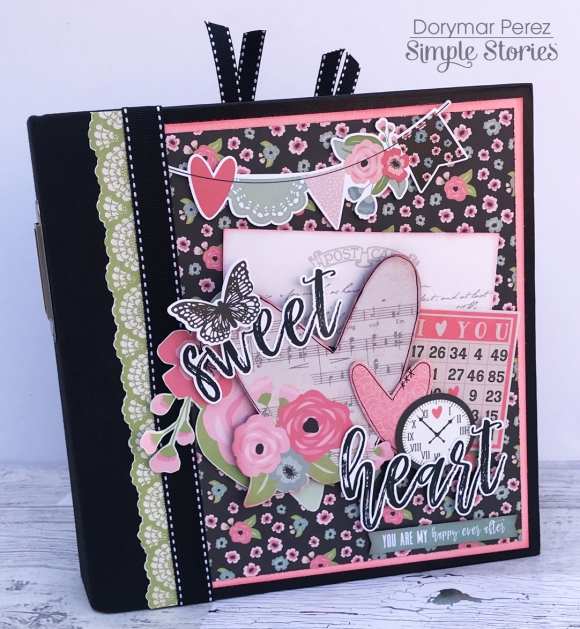
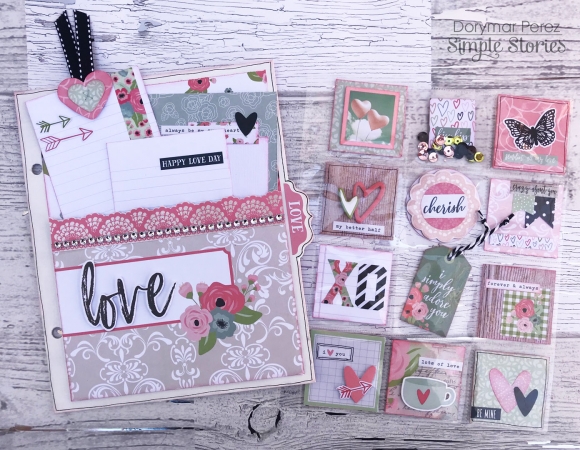
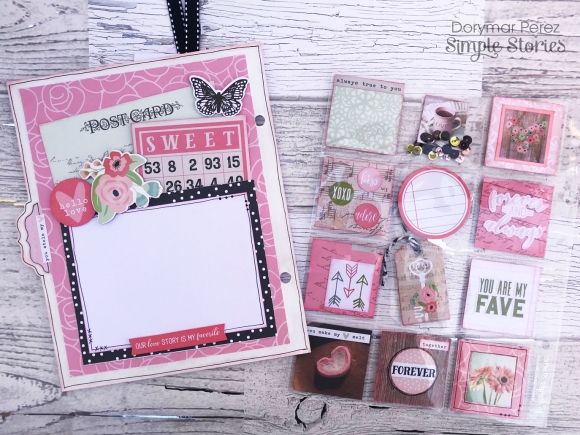
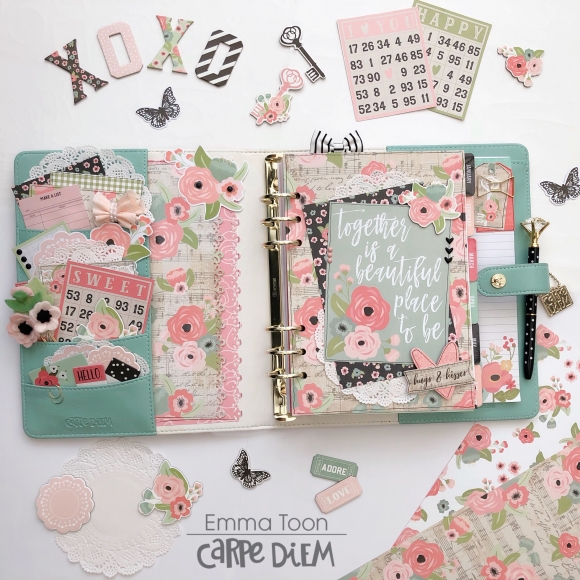
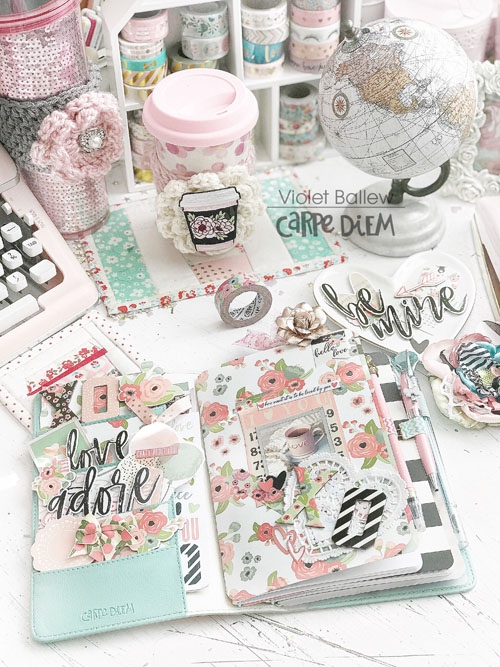
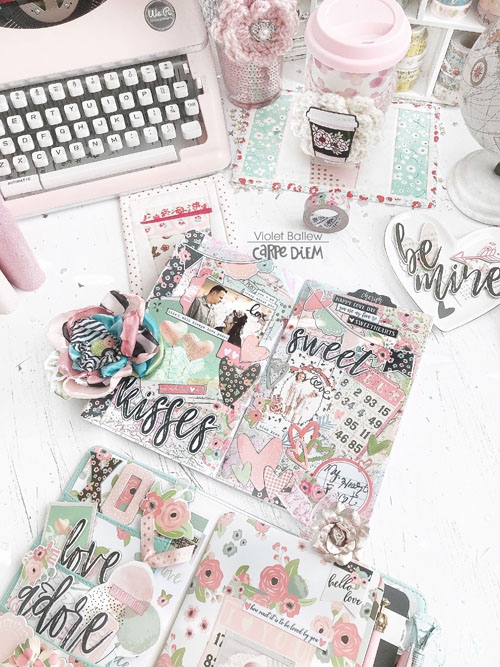
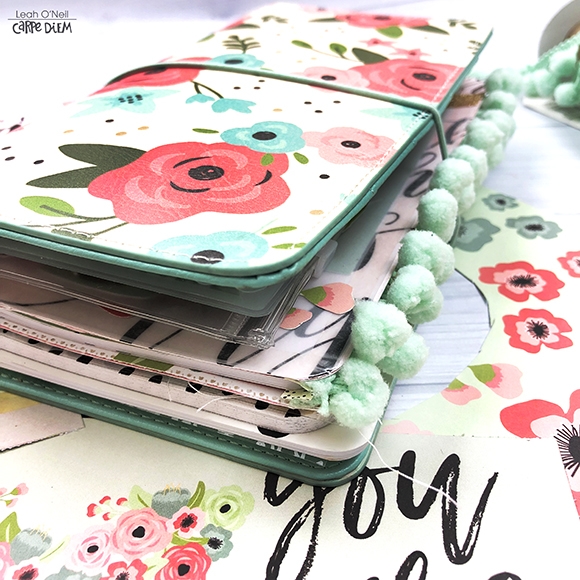
Hello again creatives! Leah here today showing you how to make your own pocket folder insert for your traveler's notebook. If you are anything like me, you can't have enough pockets in your planner. Not only can you decorate the pockets of your planners and traveler's notebooks to make them pretty, but they can be very functional by holding some of your favorite supplies. I've filled up the pockets of my Cream Blossom TN, so I decided to make a pocket insert that will allow me to carry more journaling cards and stickers for on-the-go planning and creating.

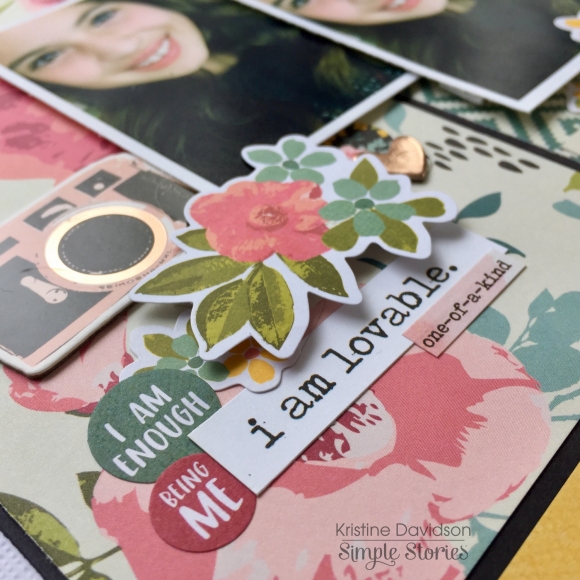
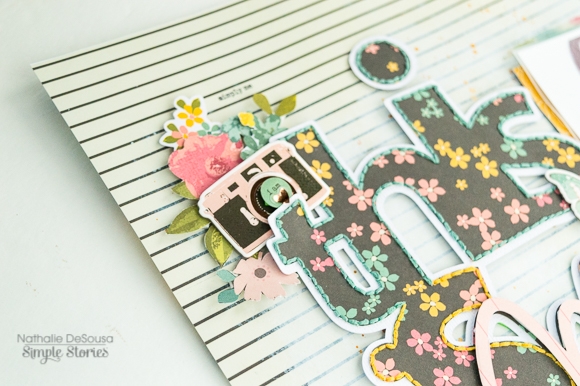
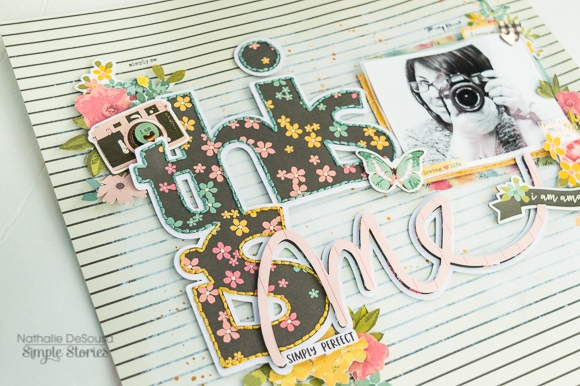
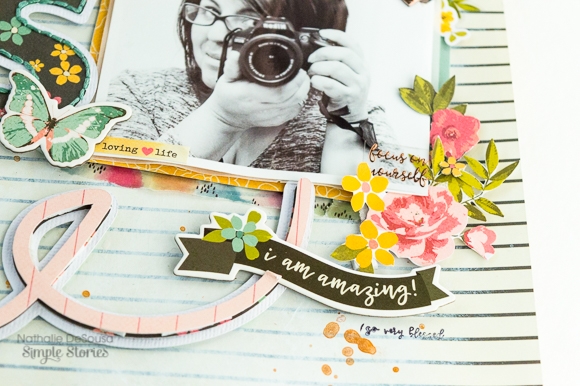
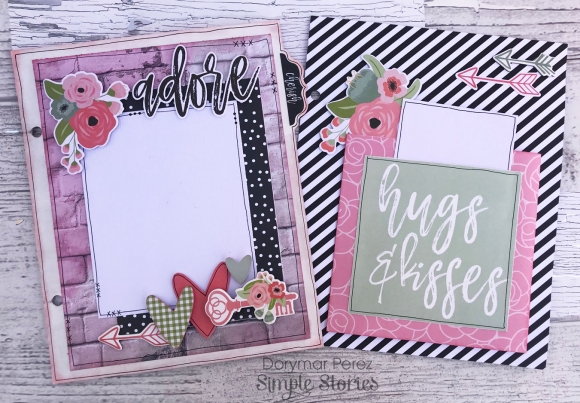
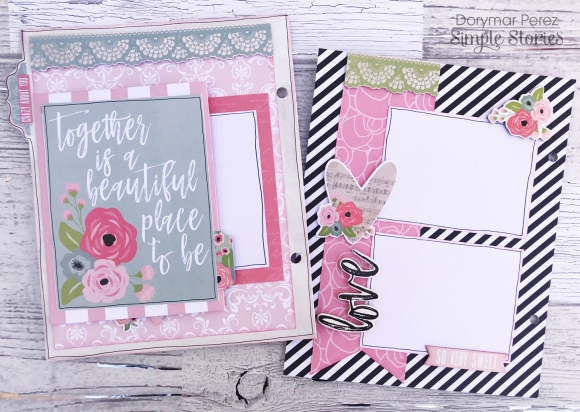
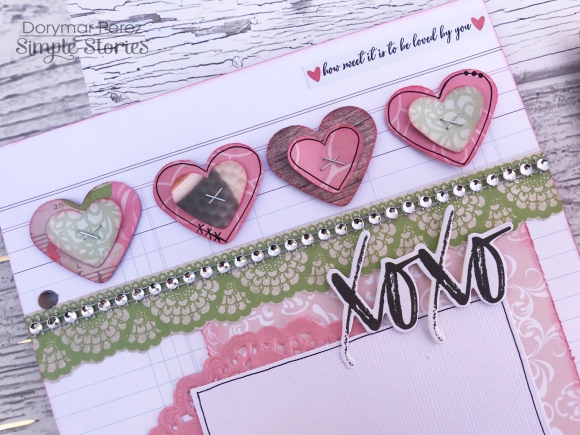
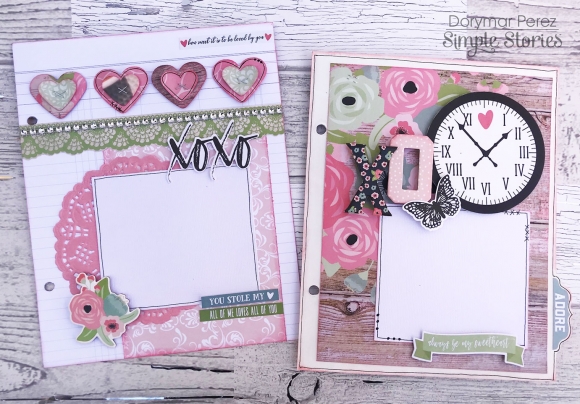
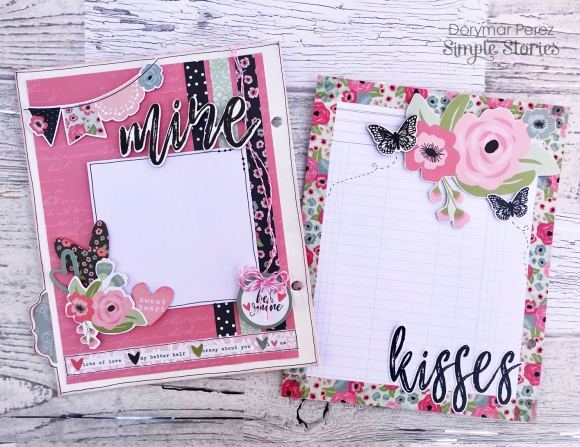
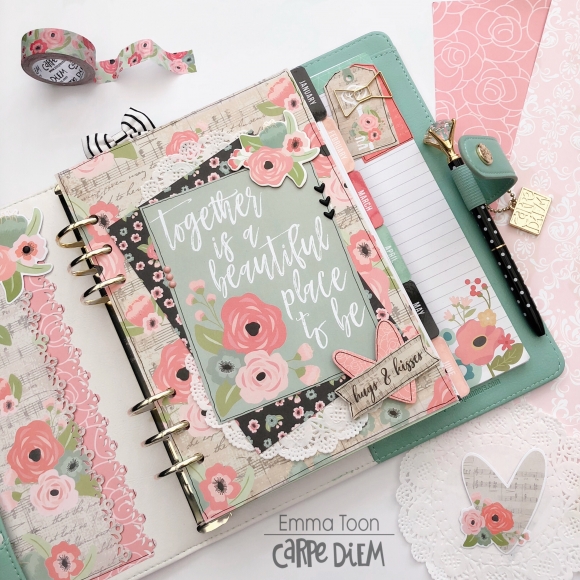
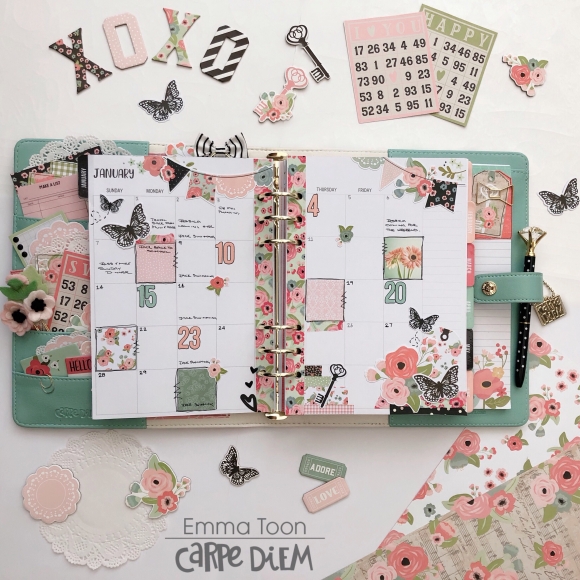
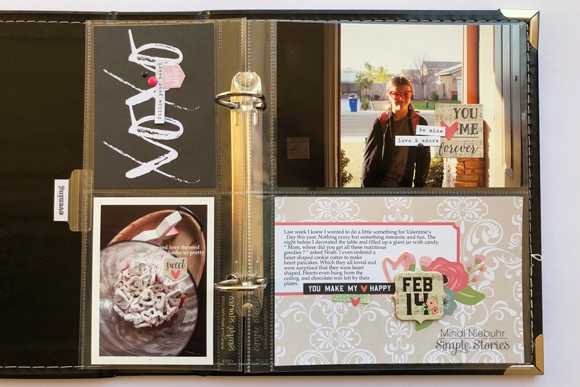
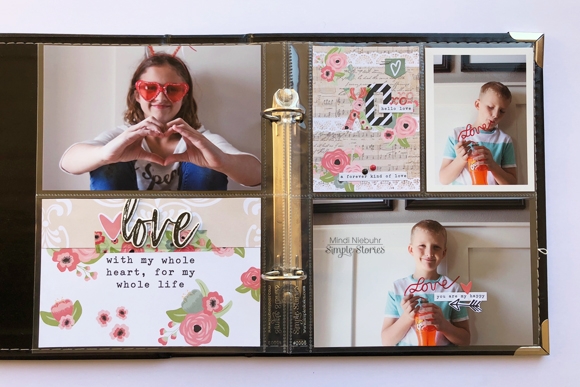
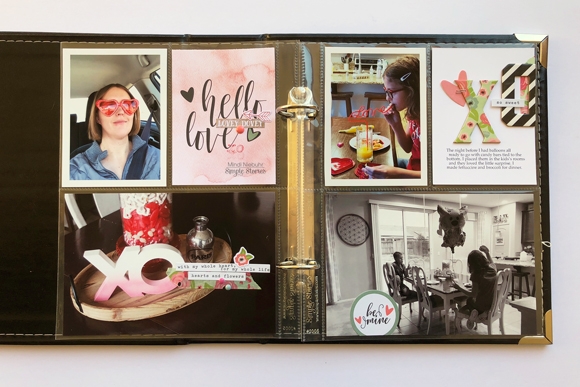
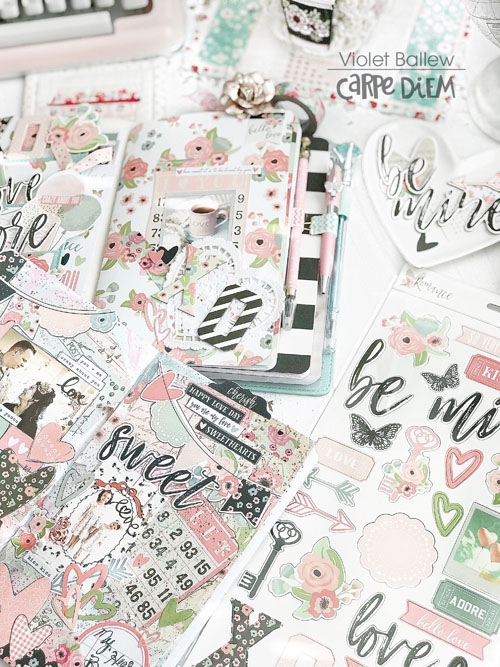
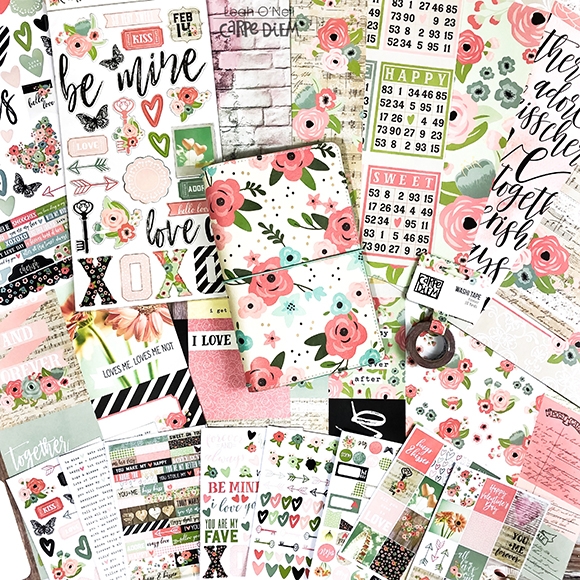
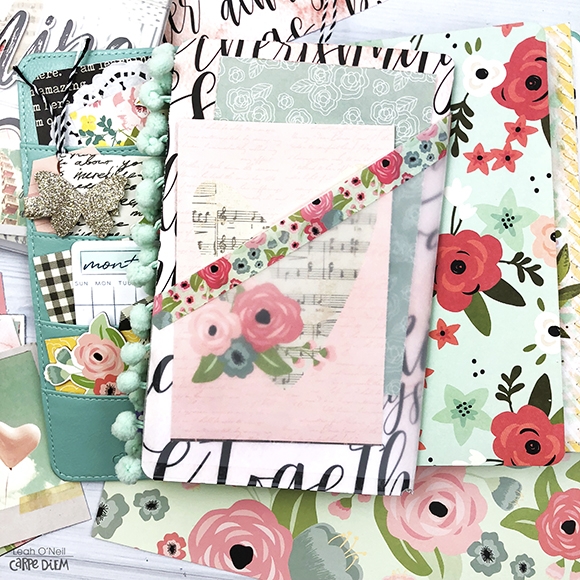
I created this pocket insert using the Romance collection. I love the beautiful, romantic elements of this collection and I always intended to use it long after Valentine's Day. The soft colors and florals provide  the perfect transition from winter to spring in your planner decor.

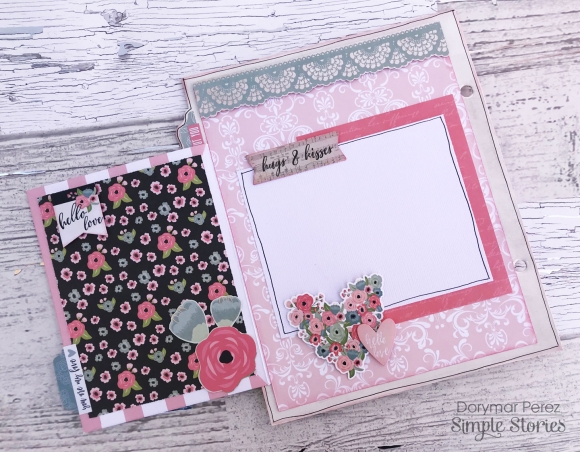
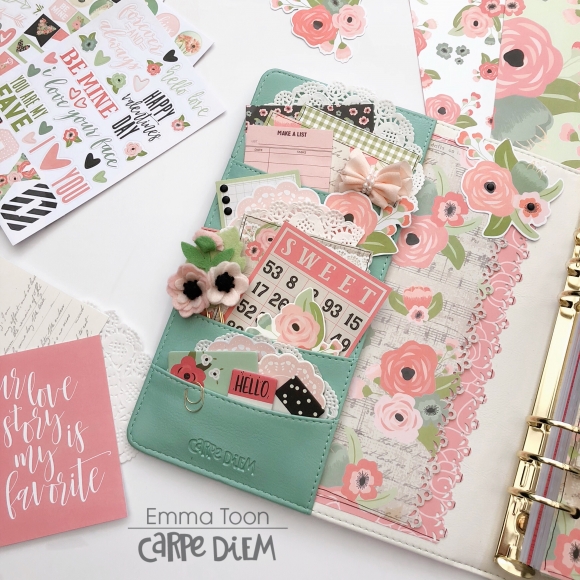
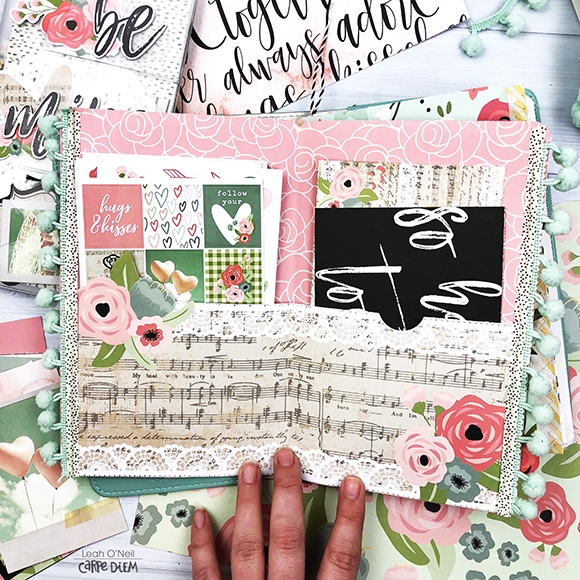
I used another notebook insert from my TN as a template to cut my pocket folder insert to the right size. No matter what size TN you use, you can always use one of your other inserts as a guide to cut to the appropriate size. I used a sheet of vellum to add pockets to the outside of the insert. I kept it simple with the décor, simply adding a little washi tape and a floral that I fussy cut from the 12x12 patterned paper titled “My Whole Heart.”

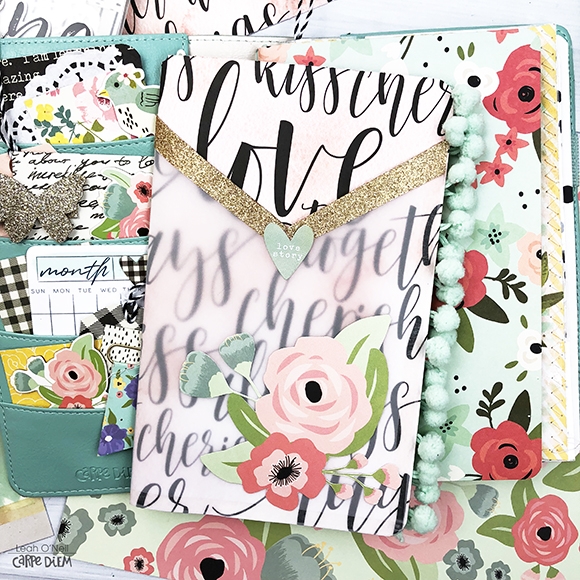
The back of the folder insert just has a little washi tape to dress it up. The washi tape also reinforces the top of the vellum pockets so that they are less likely to tear when you take supplies in and out of the pockets.

I love the idea of adding pockets to the front, back, and inside of the insert. I can fit so much in here!

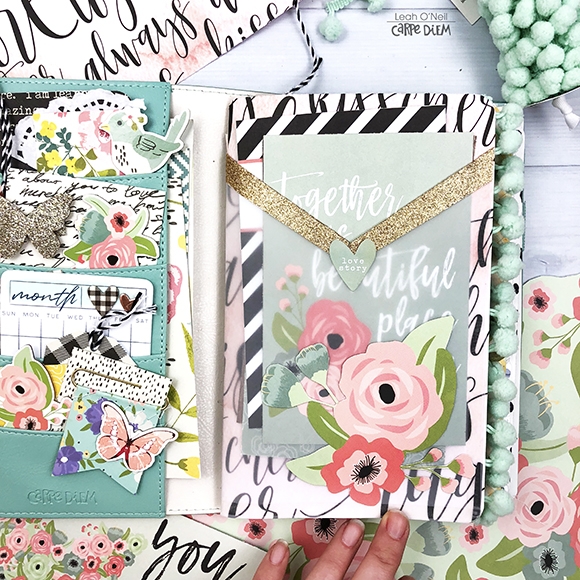
I also added a little pom pom ribbon to the edges of the insert for a fun little detail to peek out of the sides of my traveler's notebook.

Check out the full tutorial below. The written instructions will be in the description box of the video over on my YouTube channel.

https://youtu.be/kSWCijkqq88

If you have any questions, please ask below or on any of my social media channels. For more creative inspiration for your planners and traveler's notebooks, head over to the Carpe Diem Planners Instagram account. Happy crafting friends!

Do you love to craft?!  Of course you do!  Have you checked out the Simple Stories Crafty Girl Collection?  It’s the perfect way to meld your love of crafting – and I mean ALL your crafting (think sewing, painting, drawing, and journaling) with your love of paper crafting!  The colors are fun and feminine and you’ll find some pretty florals too!

I got to mixing all the elements of the collection together – colorful pattern paper,  chipboard, die cut bits and pieces and stickers to create these fun cards to share with my crafty friends! 


I had so much fun mixing and matching the elements that I think these cards made themselves!  Get your crafty on – or better yet have your crafty crew over and explore this new collection together!  I just know you’re going to LOVE it! 

Supplies

Hello it’s Kristine Davidson with you today! I am sharing a layout I created using the NEW Travel Notes collection. I love this collection because it can also be used for awesome boy pages! I created this with something different in mind. I wanted to use all those gorgeous colors in this collection but I didn’t have a “travel” picture. I used this photo of my nephew and started adding chipboard as well as Bits and Pieces. It Worked!

I used a piece of black cardstock as my base because I wanted the layout to be framed. That enhances the colors for me and since the title in the word Explore was black – it would be perfect.

I cut up pieces of pattern paper different widths and the same length (9”).  I added the embellishments in random areas and my title in the centre. I didn’t add much for journaling except the date and our location.

I did add texture to my layout by sewing the edges of all those paper strips. This also helps unify all those patterns. I added popdots under my photo, some stickers and also chipboard pieces to give my layout some dimension.  

As you can see – this collection can be used for something other than “Travel “ related pages!
I hope you enjoyed this little lesson today and please come find us on Instagram @SimpleStories_ and @KristineDavidson

Supplies

This month is such a Very Beautiful month. What a wonderful way to celebrate it with the Romance Collection

I used it in my Creme Blossom Travlers Notebook. The perfect pairing. All the florals and Pinks with a hint of blue is A Valentine planner dream. 

I use my Travlers Notebook for memory keeping. This Month was my 22 year anniversary and my Granddaughters 2nd Birthday. Incorporated the collection paper and journaling cards along with the ephemera and stickers to create a scrapbook collage.


Pages