Hello Simple Stories fans!

Marcia here today with a fun layout created with the awesome Travel Notes collection. This collection is perfect for documenting your wanderlust adventures. A couple years ago, my daughter was fortunate enough to spend a summer backpacking across Europe with a friend. They started their adventure in Dublin Ireland. These photos were some of the first ones she sent to me.

I created a cluster of embellishments in the lower right corner of my layout with the Itinerary tag to document the location. You can see stickers, chipboard elements, and some of the Bits & Pieces die cuts all deliciously layered on top of each other.

I used a digital cut file for my title cutting Adventure twice, the second time from the map pattern paper. I popped it up with some foam tape and added some fun clear stickers, phrase stickers, and more chipboard.

The compass point was fussy cut from pattern paper. I love how it looks with my title layered over the top.

A smaller cluster of embellishments is located in the lower left. I used phrase stickers on top of my photos and added the wanderlust and car from the clear stickers pack.

I love how this turned out. I know that the Travel Notes collection will be perfect for documenting your adventures too. Thanks so much for stopping by today!

Supplies

Hello Planner Friends! This is Rachel and I am so happy to share another planner blog post with you. Today, I am going to show you my personal-size planner that I use to document daily happy moments.

Can I just take a moment and say how perfect this little planner is? First, the color - if I could only have one color of planner (gasp!), it would definitely be this Robin’s Egg Blue! It goes with everything and makes me so happy every time I look at it! And while some personal-size planners can feel too small, this planner is perfect, with its slightly wider size and inserts. I keep this planner on my bedside table so I can easily work in it at the end of each day.

When I saw the Crafty Girl line, I knew I wanted to give this little planner a facelift using this colorful and cheerful collection. Those pockets were begging for some decoration. I used a few scraps from the 6x8 papers to back up a few of the bits and pieces die cuts.


I decided to make some monthly dividers using the 6x8 paper pad, the new personal planner dividers templates, and the tabs sticker tablet with decorations from the Crafty Girl Collection Kit.

I love this quote from Alice Morse Earle: “Every day may not be good...but there's something good in every day”. This pint-size planner helps me document those good little moments so I don’t forget them. Maybe it was a good workout, time with friends, a good moment at work or even just quality time with the husband. Documenting these moments helps me thank my lucky stars and focus on the good, rather than dwelling on the bad.

Something I love about the Craft Girl Collection is its versatility. The colors, patterns, and stickers can be used for more than just documenting your crafty life. But the crafty sayings also inspire me to get my crafty on! I know that spending time crafting helps me relax. Plus, the more I do it, the more I want to keep doing it!

Since I’m usually working in this planner at night, I have a little planner “kit” for myself to limit my supplies. That way, I spend less time choosing decorations and more time documenting.

Along with Crafty Girl Items, I also keep the new Sticker Tablets close at hand for dating the pages and adding little icons here and there.

Thank you for stopping by and I hope you enjoyed getting to peek into my personal “good in every day” planner. How do you document the goods things in your life? Comment below, I would love to hear from you!

Supplies

Hello my fellow crafters!! Jackie G here again with a super fun project to share with you today!!  I don’t know about you, but mini albums are so fun to make!!  The album I am sharing with you today was inspired using the tutorial by Frances of Your Book of Memories.  You can find a link to her tutorial HERE. This album holds so many photos, it’s unbelievable!!! Check it out!!

I plan to give this mini album to a friend so wanted to create a matching card to go with the gift.  I used the gorgeous I Am collection to create both the album and card. 

Okay, lets get started!! First, I created a thick belly band to keep my album closed.  I didn’t have any magnet closures so had to get super creative!!  I opted to specifically use some of the chipboard elements to decorate my belly band as they are very sturdy.  I wanted to make sure nothing could bend as this piece will get a lot of traffic.  I made sure to keep the entire cover, spine and back flat so nothing would catch on the band.

This album has so many fun features including and big accordion pocket, hidden pockets, and two waterfall features that can hold both 3x4 and 4x6 photos!!  Like I said before, you get a lot of real estate in this mini!!

The accordion pocket has a ½” gusset which allows for lots of storage!!  The storage possibilities for this giant pocket are endless!! You can put photos, memorabilia, notepads, pretty much anything!! Again, I didn’t have any magnets so created a paperclip closure with some of the butterfly chipboard elements and some ribbon.

I also created paperclip closures to keep my waterfall features closed.  Didn’t want them flopping around!! 

Thank you so much for stopping by!!  I hope you enjoyed these projects!! Have a wonderful crafty day!!

Supplies

Hello Simple Stories fans and welcome back to the blog today! When the first release of I AM was released it was an instant hit. One of my all-time favourites! The 2018 version is equally divine and I was so inspired, I’ve created two pages for you today… one traditional and one digital.

The beautiful butterflies in this collection have really caught my eye as you can see! Die cut shapes combined with some butterfly-shaped brushes form part of a bold title as well as build up interest with embellishments. I’ve given a white background a bit of texture and paired it with some pretty pink lined paper with a torn effect. I really like this self reflective page and don’t really know why I don’t do more digital scrapping! New digital collections are released very soon after paper ones so keep an eye on the Simple Stories Digital Store!

The Digital Supplies I used are

D10024-1 I Am Digital Designer Cardstock

D10024-2 I AM Digital Elements

D10025 I Am Digital Stickers


THIS IS ME (traditional page):

The I AM collection is not just for scrapping ourselves but the cuties in our lives like my little Miss E, looking adorable on holiday in 2013.

For the base, I’ve used a floral cut file from the Simple Stories collection available in the Silhouette store. I’ve used a sheet of ‘Living Vibrantly’ for the floral shape as the gentle watercolour wash pattern was beautifully subtle underneath the image and embellishments.

I pulled out lots of the butterfly shapes, be it as cardstock stickers, chipboard stickers and ephemera from the Bits & Pieces pack.

For the rounded photo, I used my clever Circle Photo Crops to bring attention to the most important element in this photo, lol.  I’m sure you will agree with me that the white space around her head was unecessary.) The circular shape also softens the page and echoes the mild circular shapes in the die cut shape.

The devil is in the details! Little sticker hearts, some machine stitching and the stamping peeking out from underneath the cut file = heart eyes!

Wishing you lots of fun with your I AM collection!

Supplies


 When I first glance at the new Color Wash A5 planner, it makes me think of macarons. I love all the fun colors. I think the Crafty Girl collection matches this planner perfectly.

 As soon as I saw the crafty girl with a bun and glasses, I knew I wanted to use her for my dashboard since she kinda looks like me. I have the same color glasses.

  I added a strip of pink ribbon at the bottom to dress it up a little bit more.

I always like to decorate my planner pockets. I start by picking some bits & pieces and chipboard pieces and arrange them how I like it. It's all about balance and appeal.

I truly enjoy creating my monthly layout. Having so many beautiful pieces makes it easier and more fun.

The new Number sticker tablet has so many different designs that it can go with many different collections.

 I decided to use the pink color number stickers for my monthly layout.

 There are so many more pieces and elements that I can use to create more layouts in the future.


Thank you for stopping by and I hope you enjoy viewing my planner set up. Hope to see you next time.


Supplies

It's been a few years since my son and daughter-in-law got married, but a small gift album had been on my to do list for a while.  I wanted a 4x6 album with some of our favorite photos from the big day, and I knew the Always and Forever collection would be perfect for this project.


I kept the album simple and used clear stickers on photos and pocket cards.


The die cuts, chipboard stickers, and element cards helped make the album fun, and added space for journaling that I wanted to record.


I especially love the page above.  Although you can't tell in the photo, I wish you could see the pretty gold foil on the die cuts!
 

Thanks for stopping by the blog today and taking a peak into my mini album!  The products I used for this project are:

Supplies

Hi, Scrappers! Jana Eubank here today with a new page using the Welcome Spring collection.

One of my favorite things about Simple Stories is the beautiful floral papers in each of their collections. I LOVE fussy-cutting out the flowers and using them to decorate my page.

On this page, the flowers are the most colorful thing on the page. I placed them at the top of the page to accent my journaling ...

... and at the bottom of the page to call attention to my photo.

A strip of black and white striped paper (Hello Spring paper) anchors the photo and title.

Brighten up your Spring on your next project with beautiful florals and Simple Stories!

Supplies

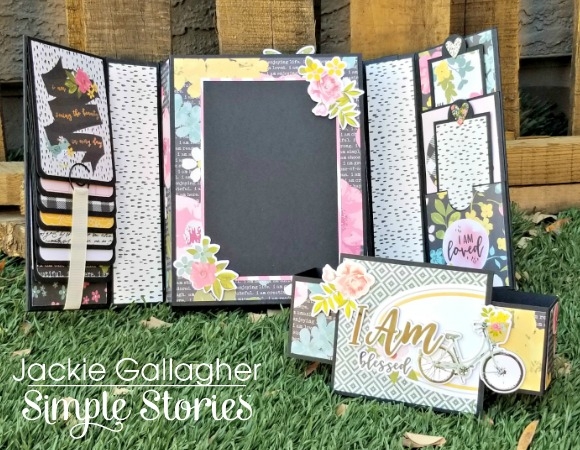
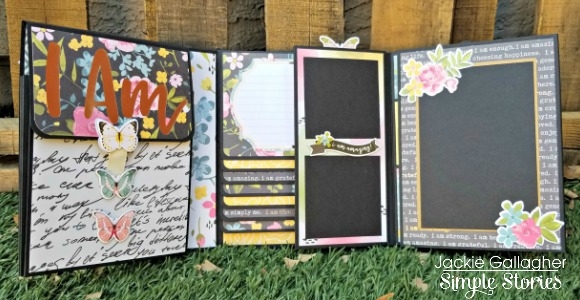
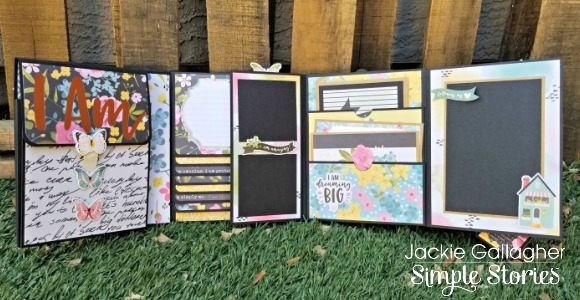
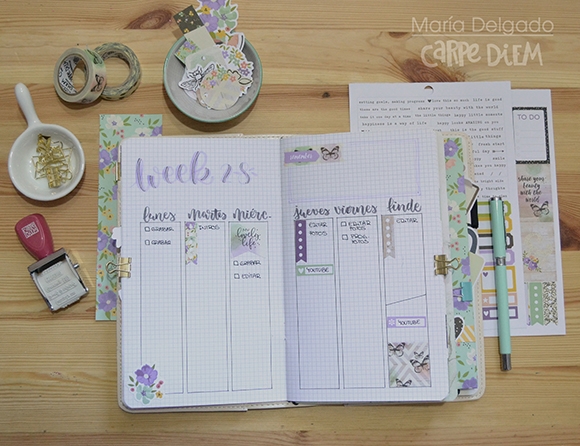
Hello creatives! Welcome back to the Simple Stories blog. Leah here with you today and I'm so excited to share a new project with you using the Crafty Girl collection. The second I saw this collection, I was instantly inspired to create pretty things. The artsy and crafty sentiments and bright colors truly speak to my creative heart. One of my big goals this year is to find more balance in my life that includes more time to feed and nurture my creativity. So I embraced the creativity this collection was inspiring in me, and channeled it into setting up my new A5 Color Wash planner.

The intention of this planner is to serve as a creative journal of sorts. I have a TN insert that I love to art journal in as well, but it is my hope that this planner will be a more casual project to help me work  towards my goal to do something creative every day. I don't have any set focus or theme in this journal, other than to just be creative. I may doodle, I may color, I may scrapbook, I might write...maybe I'll do something simple, like color swatching new markers or paints. Whatever it is on any given day, there will be no rules. I just want to spend a few minutes doing SOMETHING that stretches my creative muscles. The Crafty Girl collection was the perfect collection to set this planner up with because that's what it's all about – creating.

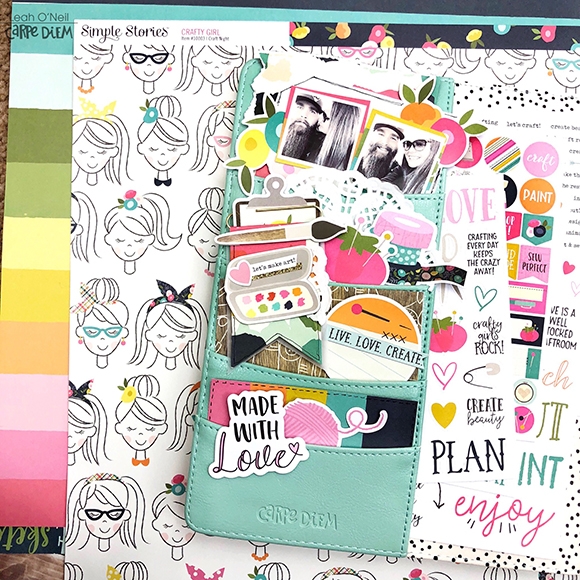
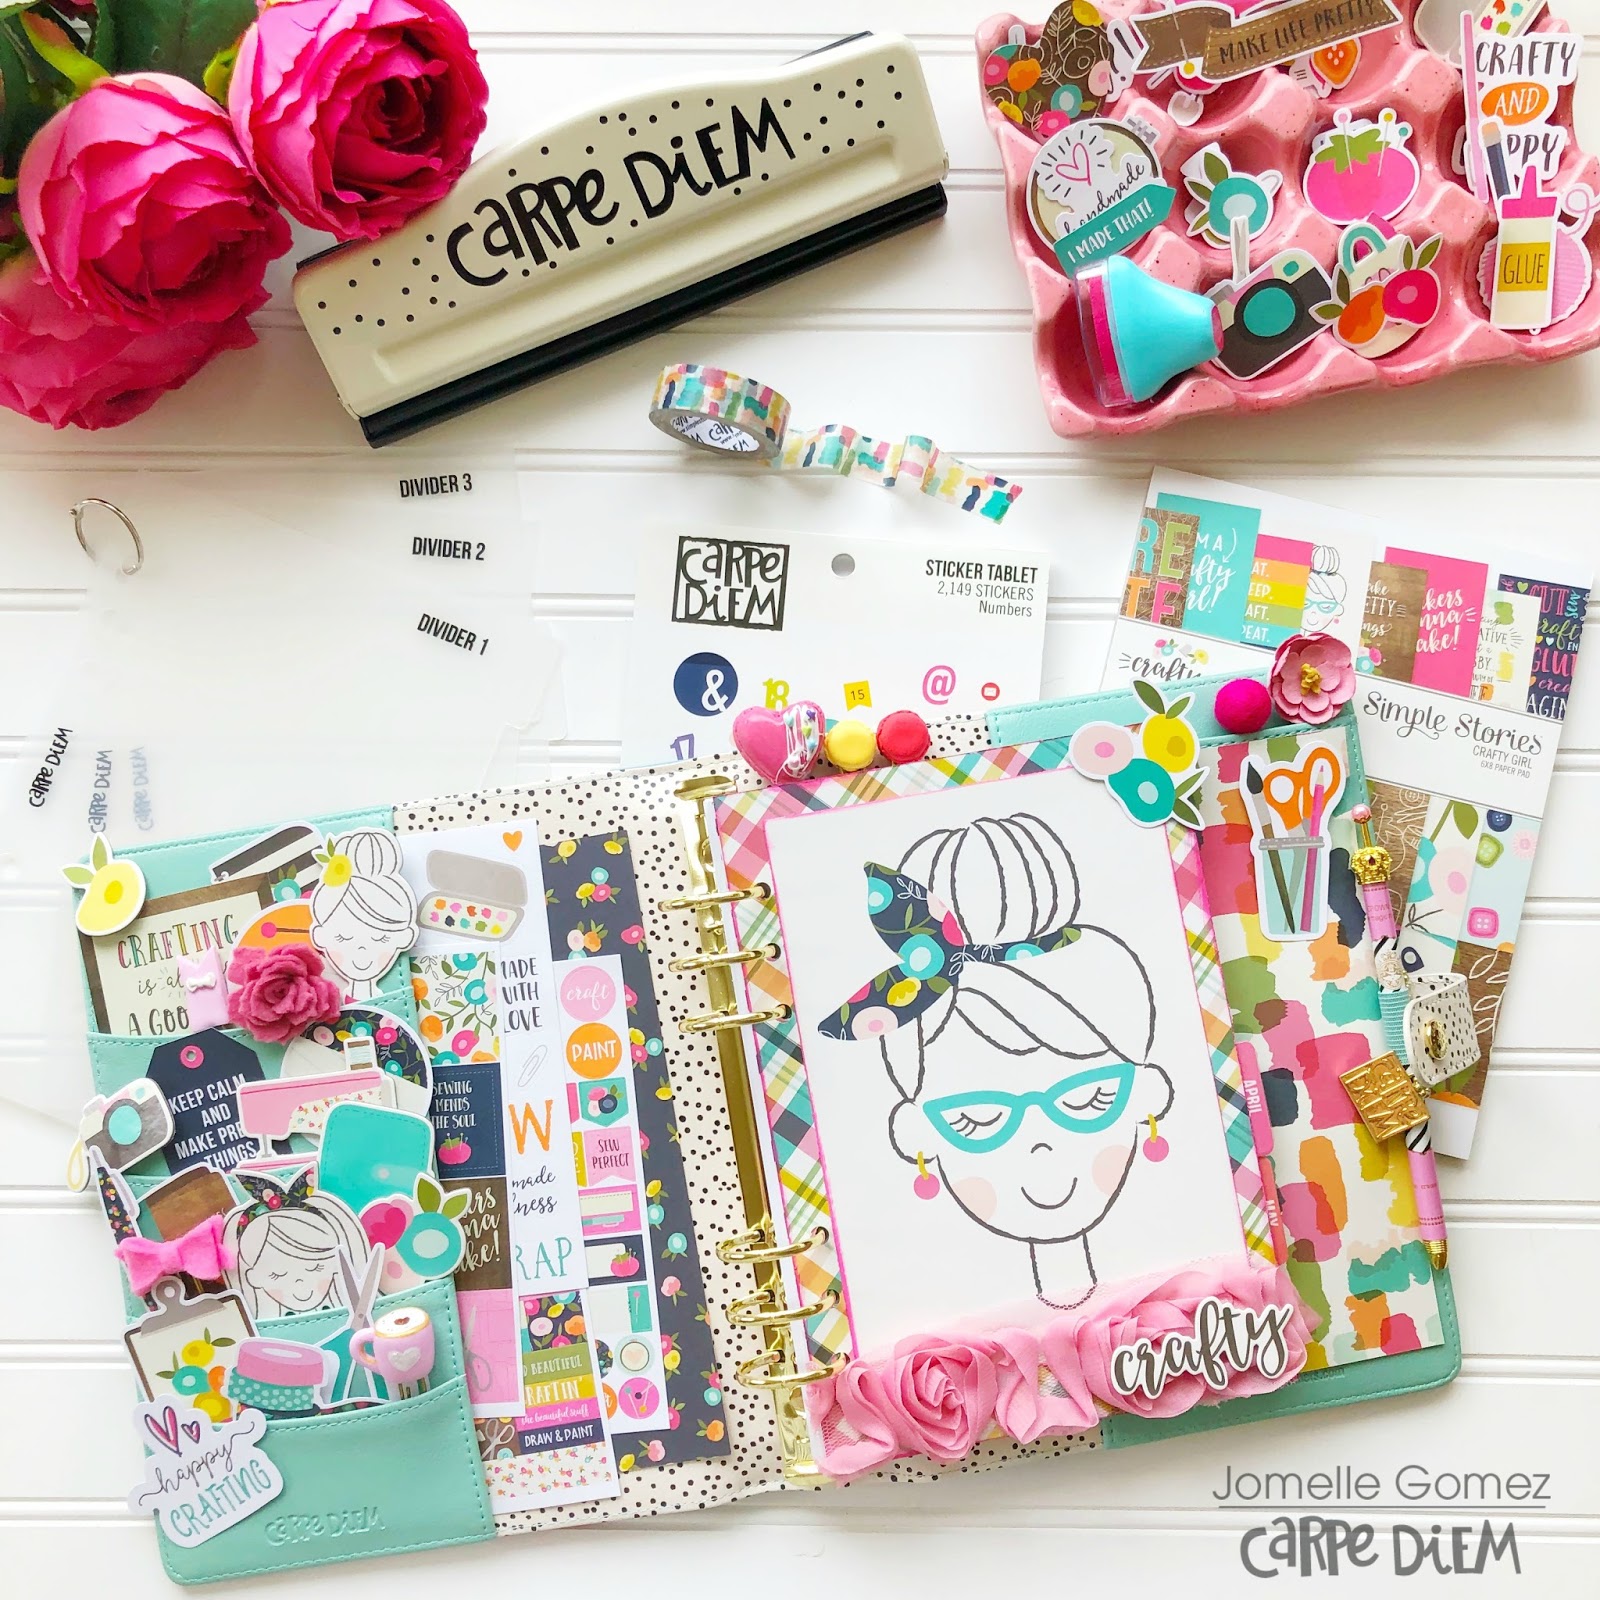
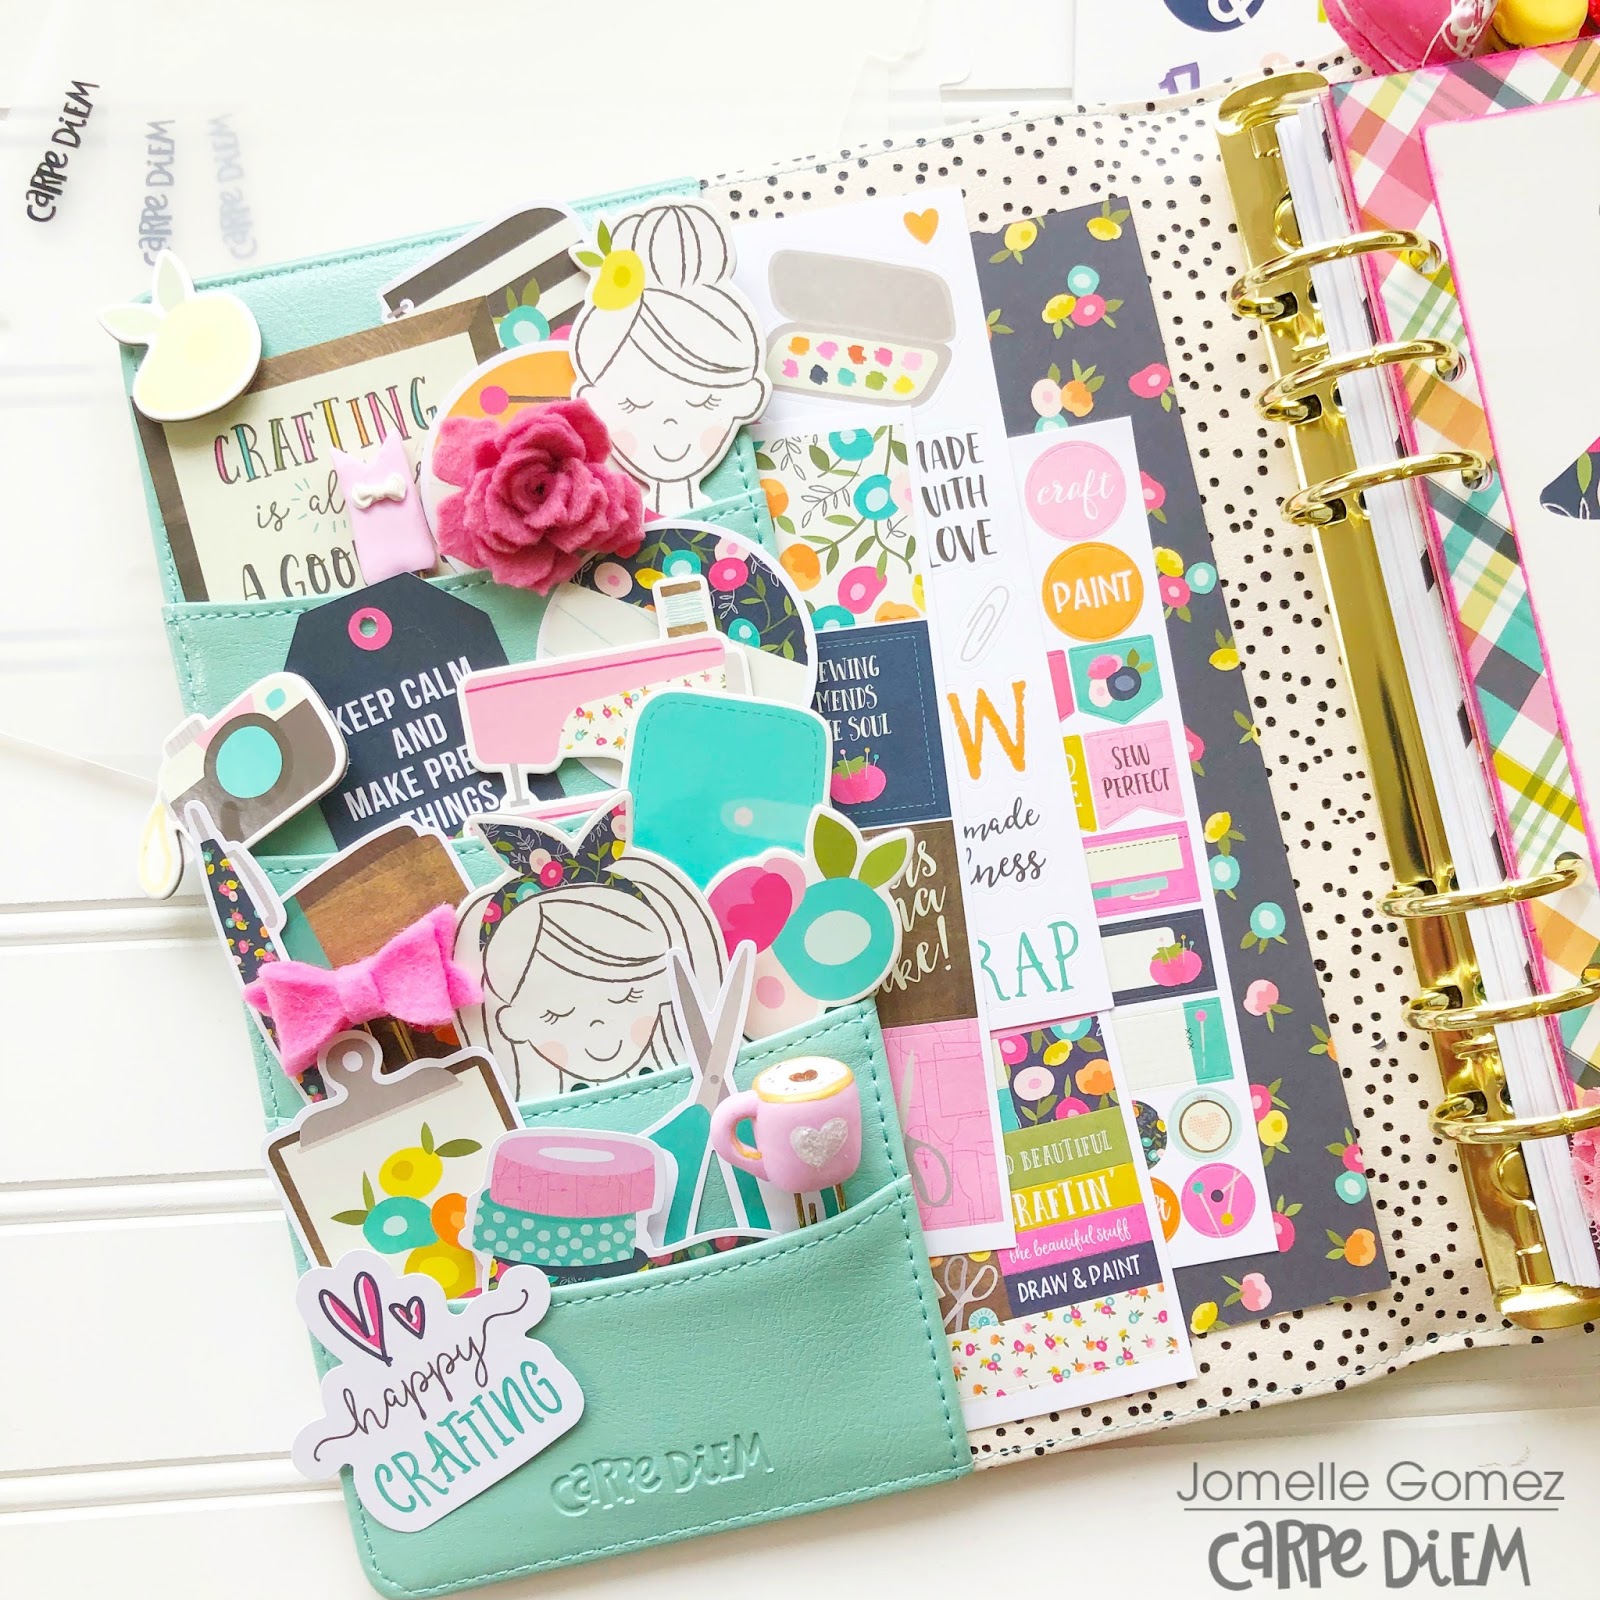
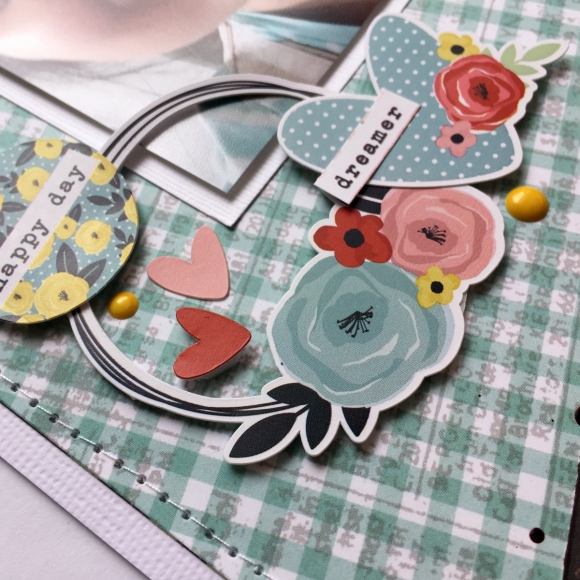
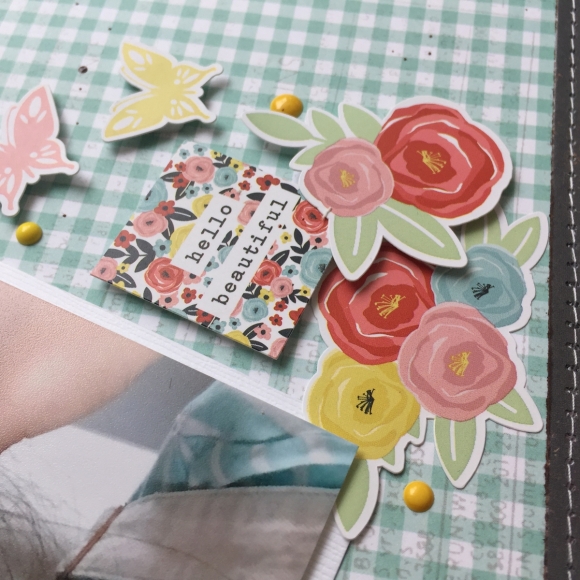
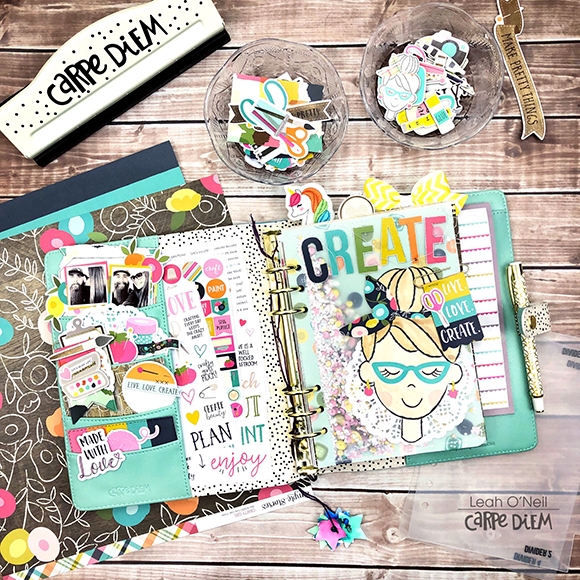
I decorated the pockets with several die cuts from the Crafty Girl Bits and Pieces pack. I also layered some paper scraps behind a couple of photos. If you have been following me for awhile, you may already know how much I love incorporating photos into my planner pockets. It makes them feel so much more special and personalized. My favorite element in this pocket setup is the paper clip I made by wrapping some paper around the edge of a gold paperclip so that it hangs like a little flag. I added a few of my favorite stickers to it to dress it up and love how it turned out!

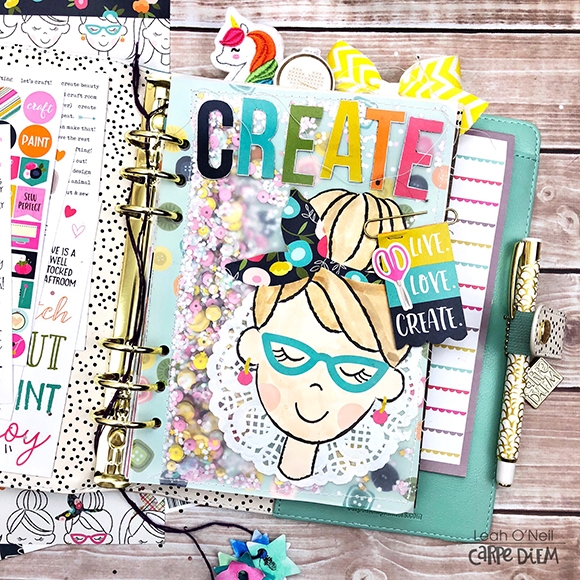
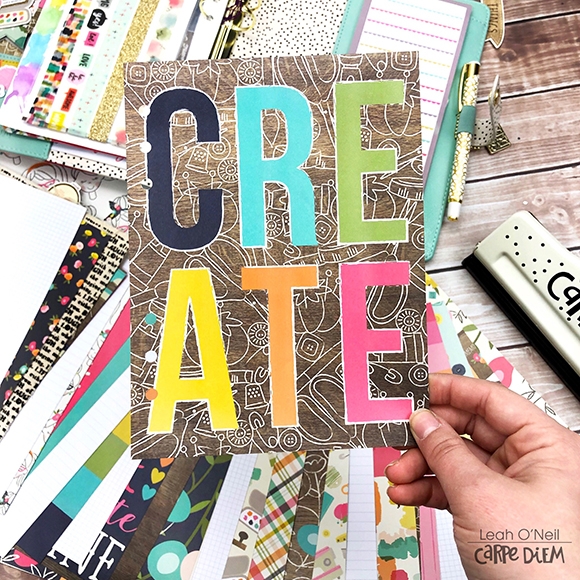
The dashboard of this planner was also super fun to make. I used the new A5 divider templates to cut down a 12x12 paper and a sheet of vellum down to the same size, and then sewed the vellum on top of the paper, sewing the sides and bottom edges but leaving the top open. I added a bunch of glitter and sequins into the pocket and then sewed the top closed to create a shaker dashboard. If you don't have a sewing machine, don't worry! I have made many, many shaker dashboards using thin double sided tape (my favorite is the super thin 0.125 Super Sticky Red Tape from American Crafts because you can't see it through vellum and it doesn't budge). To decorate the dashboard, I cut the cute girl out of a paper from the 6x8 paper pad. I added a little watercolor to her skin and hair to customize her. I also fussy cut out the letters to spell “create” from a card on the 4x4 Elements sheet.

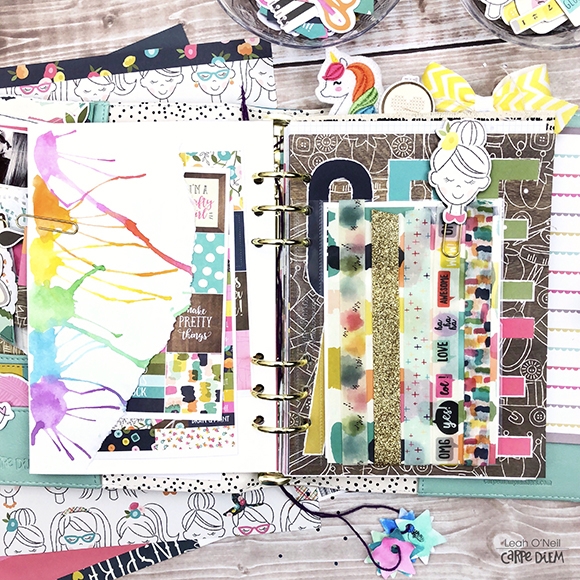
I used a 4x6 pocket insert to add a few strips of washi tape for creating on-the-go. I made the pocket on the left using white cardstock and it has a fun story to go along with it. While babysitting my 5-year-old niece, we had an arts and crafts night and had a blast with some straws, water and watercolor paint (got that idea from the lovely and talented Amy Tangerine). My niece also painted the stars that are hanging off the purple yarn on my planner rings here – an adorable planner accessory with an even more adorable memory.

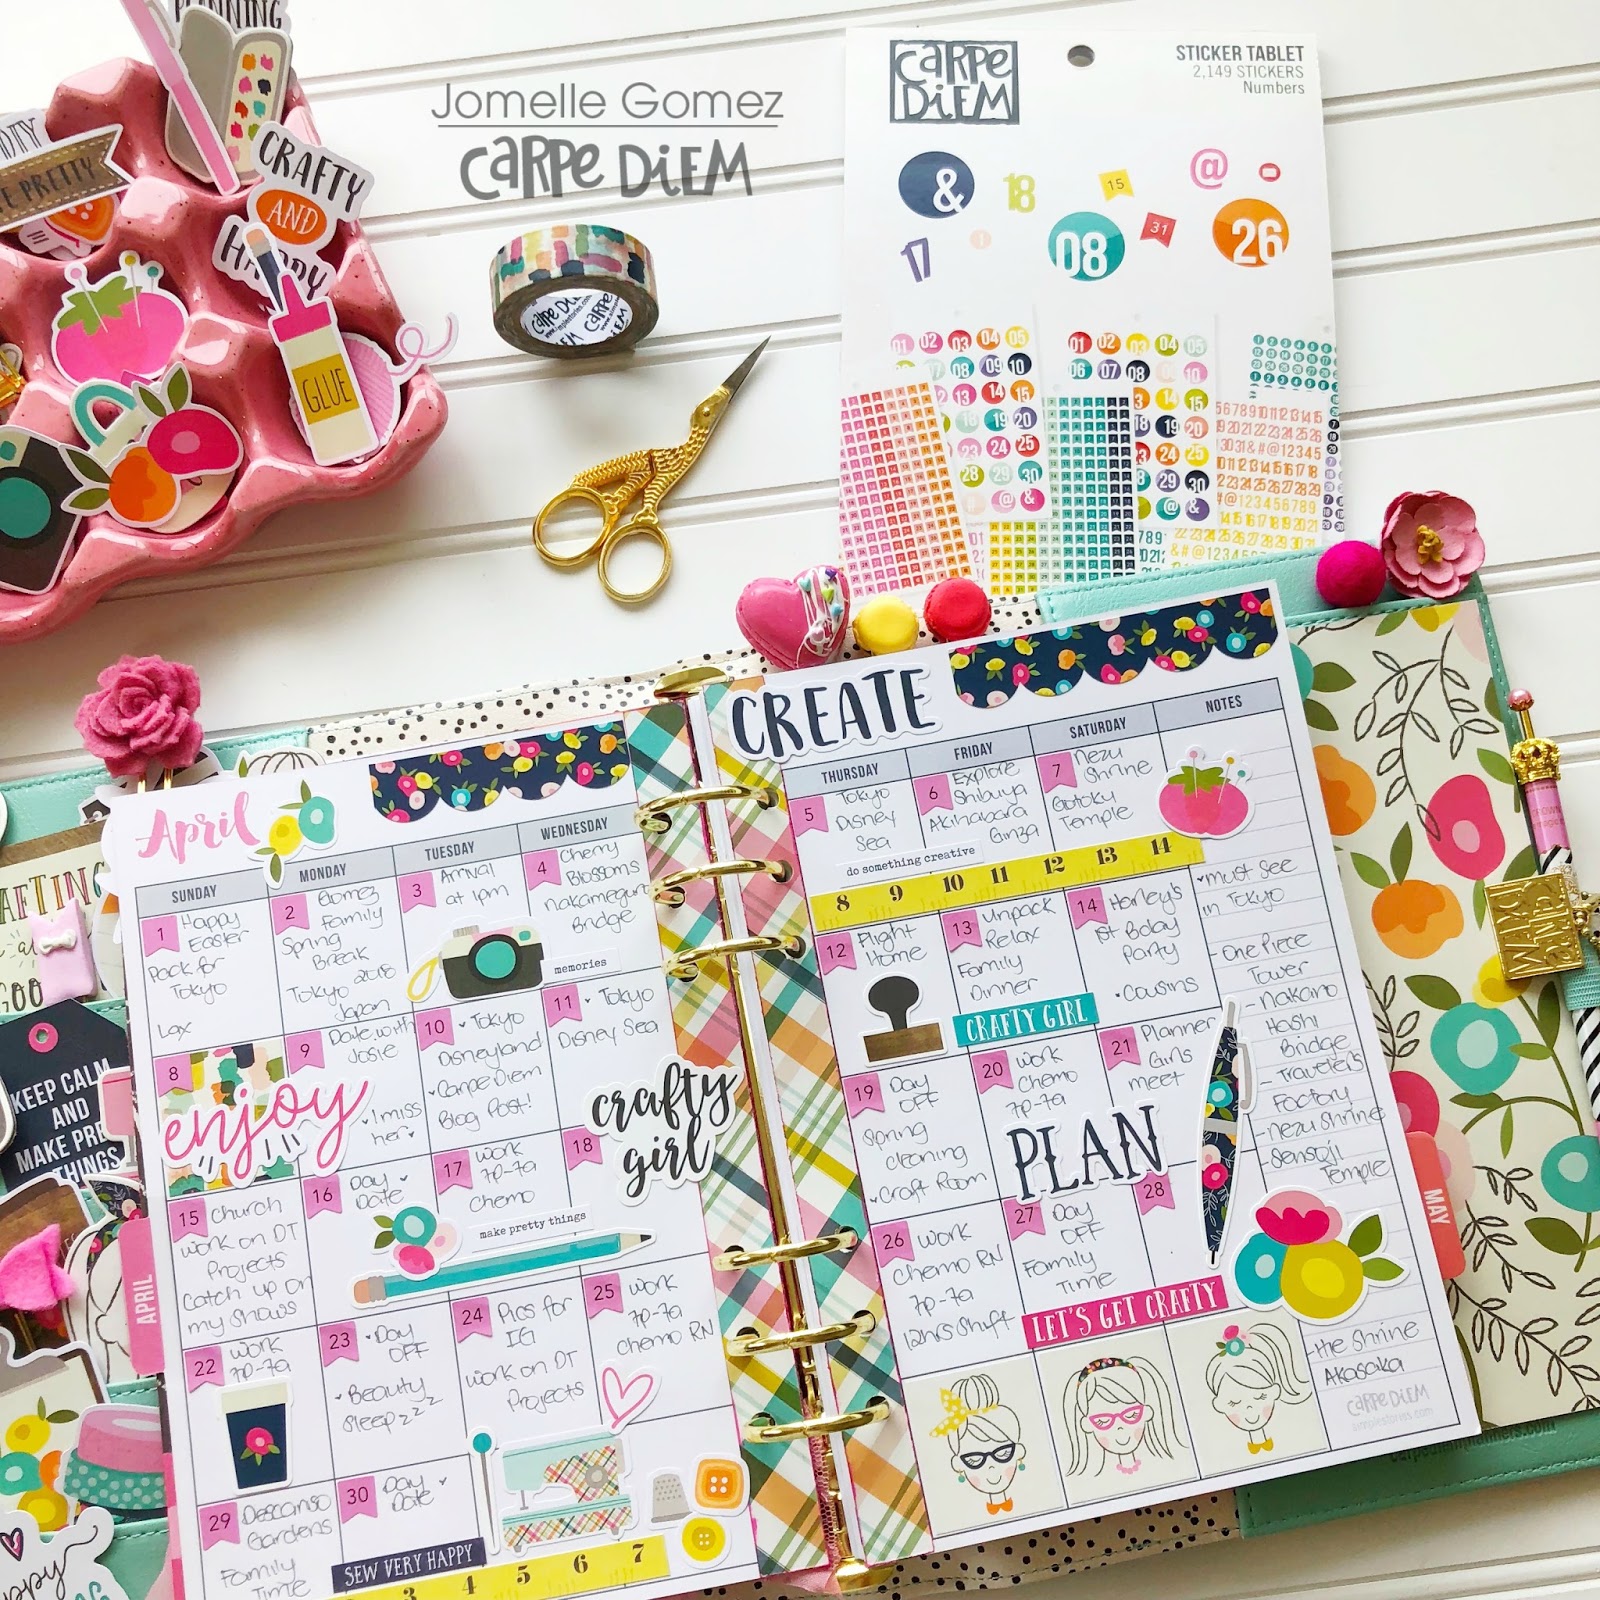
To finish my creative journal setup and prep it for later crafty endeavors, I hole punched all the rest of the papers in the 6x8 paper pad to use as inserts. This was super quick and easy to do using the Six Ring A5 punch. Then, I mixed in papers from the A5 Basics Inserts pack. I am sure that I will mix these inserts around and alter them later, but pre-punching them into my planner gives me a template to start with each day, which helps me find a little inspiration on the days I may be feeling less creative.

I hope this planner is going to help me stick to my creative goals in 2018. Do you have creative goals for the year? I have learned that keeping your creativity and inspiration alive and thriving takes practice. It really is like exercising a muscle – the more you do it, the more you want to do it! How are you exercising those creative muscles? Comment below or over on my Instagram post – I'd love to hear from you!

Supplies

Hello  Friends! It’s Kristine Davidson with you today. I am so excited to share my projects with you today. I was so inspired by the latest Simple Set called Mama Llama! Have you seen this yet? It is soooo cute! The diecut stickers of little llamas, hearts and cacti? Ya it’s
a cute one.

So my first project is a layout – called Mama Llama. I didn’t want to use a white piece of cardstock for my background so I used a piece of ledge paper from the SN@P! Basics Collection.

I am one who loves layers and colors. This layout is no exception. I used as many pieces of paper as I could for layout. I spread it across the middle of the page and used lots of circles and 3x4 pieces of paper. I have nothing larger than 3x4 on this page.

You can see in this picture below that I created some circle shapes from the 3x4 journal cards and that just allows me to create my own larger diecuts. I love doing this on my pages. I added pop dots under my stickers for dimension.


​​

I hope you like my page. If you are looking for a new collection pack to play with – You NEED to add this one to the list. It is filled with color, patterns, and adorable stickers!

With this Mama Llama Kit I also created 2 cards. My first card is Happy Mama’s Day.


I wanted color on my card and decided to use 4 pieces of paper for my background. I did add some sewing and cut my pieces at an angle to create visual interest.

I wanted to add a diecut sticker to my card by the background was a bit busy. I created a small circle tag to place on top of my card base and was able to then add popdots to my sticker to create dimention. I didn’t have any flower stickers left so instead I cut up a piece of 3x4 journal card that had flowers. I placed them underneat my title. I love this card!


My second card is Happy Mother’s Day. I did not use any pattern paper for this card. I used 4 diecut stickers and some distress ink. I created a background scene with some distress ink, I added a little flag banner at the top. The Llama was for sure going to stand on a mound of sand and my little Happy Mother’s Day title is to the left of the cute little Llama! I hope you enjoyed my layouts today and please visit @SimpleStories_ on instagram and come find me as well @KristineDavidson .

Have a great day!
 

Supplies

Hi friends! Linsey here today sharing my latest altered project, this fun shadowbox bicycle decorated with the gorgeous and very inspiring Bliss Collection! Enjoy! 

I started by spray painted the metal bike frame a bright yellow. After dry, I used patterned papers to line the inside of the wheel and background, then went to town embellishing the dimensional shadowbox with an array of lovely Bliss die cuts, stickers and chipboard elements. 

The back wheel wasn't ignored. As well as all the Bliss elements, I also added a variety of paper flowers in and around the bike for even more interest and dimension. 

I love how every aspect of the Simple Stories collections coordinate so beautifully together. From paper to stickers, chipboard to die cuts, is always seems to flow together flawlessly. It really is pure bliss! 

And that's all for me! Thanks so much for stopping by! I hope you've found some inspiration in my project and don't forget to check out the entire Simple Stories Bliss Collection today!

SaveSave

Supplies

Happy Easter, I’m back this month to show you how I set my planner up for Easter using the Easter Simple Set. 

I spent quite some time fussy cutting out the flowers and leaves from the ‘Happy Easter’ 12x12 paper, I don’t know about you but I find fussy cutting really therapeutic! 

I layered up the flowers and leaves, glueing some directly to the dash and then raising some on foam sticky pads, to add more texture I’ve used little black & cream pearls and cut some gold leaves from some trim I had in my craft box.

I then used a few of the stickers from this collection and a couple of butterflies from the Romance collection also from Simple Stories to add even more detail...I know, I got a bit carried away! 

For the pockets I’ve used scraps of paper from the Collection, some sticky notes and a couple of paperclips which I thought went well. I’ve kept the pockets a little less busy than usual because I thought it might look too much with the dashboard being quite full on!

For my Easter weekly layout I’ve gone for full on florals! I used the beautiful floral stickers which come with the collection kit. 

I hope it shows how you can use this set for any spring layouts, just leave out the large Easter sticker and away you go!

I hope you’ve been able to take some ideas from my blog for this month, you can find more detailed pictures on my IG account  https://www.instagram.com/heartsbyemma

Supplies

Hi there!

Nathalie with you today to bring you a bit of Springtime inspiration to your corner of the world, and what better collection to document the season than the new Simple Stories "WELCOME SPRING".

This simple set collection is packed with soft but vibrant colors and some of the most beautiful floral designs.  It is no secret I love florals, and as soon as I saw the ones in the Hello Spring paper, I knew i had to fussy cut them to scattered them on the layout.

I wanted to bring all the designs of the papers into one page, so I chose to create a large title using one of JustNick Studio's cut file.  Each letter was backed with papers from the collection, and a bit of foam adhesive which adds dimension to the title.  

The stickers that come included in the collection are just the perfect complement to the title work of this page.  Gotta love all the phrases and cute designs!

To bring all the colors of the florals and papers, a bit of black art crayon -from Vicki Boutin- was added to the background.   Once the title was in place, the picture of my daughter and nephew on one of our Spring walks was tucked under the title, and all the fussy cut designs were used to frame the picture and title.

All the colors and designs of the Welcome Spring collection just shine in this page, but still don't overtake the picture of my family.   I just love how this layout turned out.

Well it is time to enjoy the season (at least here in the Northern Hemisphere), and the new Simple Stories' "Welcome Spring" is ideal to document the arrival of all things new!  

Have a great Spring !

XO

Supplies

Hi everyone! Hopefully in your neck of the woods, Spring has sprung! Here in Colorado we have lots of sun but we are still getting snow and Spring always brings us some huge storms. In anticipation of a few gray days, I decided to make some pretty Spring decor.

The 'Welcome Spring' simple set from Simple Stories is full of bright and happy patterns and beautiful blooms in the most gorgeous colors! These patterns look so awesome together that I decided to pile them all together in one lovely basket full of Spring! 

I created geometric shapes in varying sizes of all the paper patterns and then gave each  even more decoration with the charming stickers and sentiments in the collection! I stacked them all in a bright berry basket that is also happily embellished with more of the pretty paper and stickers! 

This sweet little basket is sitting on a shelf in my studio and adds so much cheer and color! You must check out this paper collection with its bright rainbow of colors and perfect Spring sentiments!

Supplies

Hello, Simple Stories Fans! Jana Eubank here with a layout using the Crafty Girl collection.

I love the rainbow striped "Handmade" paper from this collection and decided to use a large vertical strip to anchor my photos as part of my page design. To accent the edges of the strip, I ran it through my sewing machine on a zig-zag stitch setting without any thread loaded into the machine. The pierced pattern left behind is subtle, but interesting!

Next, I played off the rainbow scheme to create a colorful title for my page using a block font and my Silhouette Cameo electronic die cutting machine. I used scraps of paper from my stash to back each of the letters. I fussy-cut the cluster of flowers from one of the 4X6 Horizontal Elements cards.

My photos are matted on silver foil cardstock, with a larger bottom margin to look like polaroid frames. I used the scallop border sticker from the Combo Sticker sheet to anchor the photos and embellishments at the bottom of the page.

I love stacking the Bits & Pieces die cuts together with the Chipboard stickers to create dimensional clusters. 

Have you tried a rainbow color scheme on a layout recently?!

Thanks for stopping by today. Happy Scrapping!

Jana

Supplies

Hello! Jennifer on the blog today to share a layout I created using the new I  Am collection!  Many of us, including myself, are guilty of not documenting enough about ourselves. So, I  was excited to see another I  Am line!  The colors and prints are beautiful and I definitely have some favorites!  

For my background, I  layered the beautiful black floral print of Bold & Beautiful with the pink ledger of Living Vibrantly. I  wanted to make a list of sorts of "I  Ams" using the smaller coordinating embellishments! Here, I used the pretty black floral die cut "I    AM" from the Bits and Pieces pack for my title. I  placed pieces of foam tape underneath to add some dimension. 

How adorable are these black/white plaid and pink ledger tags? I  love that coordinating print tags are always included in the Bits and Pieces!  Here, I  layered them under my photo as well as adding bakers twine from my stash.  I  also used some of the  pieces from the 6x12 Chipboard including one of the typed "I  Am" sentiments.  

I  utilized many of the small embellishments to create my list including stickers from the 4x6 Stickers and Clear Stickers.  A few I    placed over strips of the Dreaming Big Washi Tape as well as the Butterfly Washi from the Bliss Collection. You can even spy some stamping I  did with the I  Am Roller Stamp!  

Thank you for stopping by the blog today! I  hope this inspires you to do a page or two about yourself! I  know for me, it serves as a good reminder of the many blessings in life!  Have a great day!

Are you ready for an adventure?  Who doesn’t love a get away?  Whether you’ve caught the travel bug and want to document your escape, or you want to encourage someone who’s taking that first bold step in a new direction, you’re going to love the new Simple Stories Travel Notes Collection!

My son recently graduated college and I keep reminding him that this is the best time in his life to travel.  He’s young and curious, and more importantly – he can travel light.  There’s no children or pets, mortgages or car payments!

My daughter just found her “career” job and moved 6 hours from home.  She’s traveling at least three weekends a month for work and right now she loves it.  She’s excited to meet new people and see different places.

My husband and I are in the road trip stage of life.  We’re ok jumping in the car and stopping wherever an interesting bill board takes us and getting to know each other all over again.

The Travel Notes Collection is ready for you wherever life is taking you!

All cards finished Size 4.25 x 5.5”

Supplies

Hello Friends!

It's Kristine Davidson here today. I am sharing 2 layouts I created using the gorgeous collection called WELCOME SPRING! It's perfect for this time of year and the colors of yellow, pink and light blue can really be used for Spring and Summer.  

The first layout I created is called -  Hello Springtime! It's a photo of my cousin's girls enjoying a day outside in the melting snow. I changed the color of the photo to black and white so it would be a good match for this collection. 

I first created a circle and cut it by hand. I didn't have a circle cutter and decided to just GO WITH IT! I did some sewing around the edges and I like how it turned out. Sometimes it's just about letting go and creating! 

I cut up pieces of patterned paper in 3x4" and used those pieces to create layers. I love this effect. I have tons of color and I really didn't use that much paper. 
I always use pop dots on my pages to create more dimension and of course adding clusters of embellishments. The sticker sheet that comes with this collection has tons of cute designs. 

I added extra stitching, enamel dots, a bit of mist and was very happy with the outcome. 

My next layout is called -- So Lovely. As you can see I used 2 pieces of paper and cut them at an angle to create this background. I really loved that blue since it goes well with the shirt my niece is wearing and the flowers on a dark background is just something I enjoy working with. 

I did some sewing along the edge and on a small strip in the center of the layout. I used a 3x4" journaling card to add a few sentences about this sweet lovely girl.  

As you can see from the previous photos I added more clusters of stickers, enamel dots and some mist again. I just feel like this finishes my layouts. 

If you are anxious to start scrapbooking with nice bright colors and get away from the white and blue of the winter season this Welcome Spring Collection is a MUST!

I hope you enjoyed my layouts today and please visit @SimpleStories_ on instagram and come find me as well @KristineDavidson . 

Have a great day!

Supplies

Hi! It's María and I will be part of the Carpe Diem team 2018. I will be using Traveler's Notebooks for my Bullet Journaling, I have been using this method of organization for more than 2 years and I am looking forward to sharing with you.

For this month I wanted to use the Bliss Collection, maybe because my favorite color is purple or because it has so many flowers, which I also like a lot.

First I prepared the future log in a separate notebook, so I can move freely from one TN to another.

For the month cover I made a small card with lettering and I used the bits & pieces to decorate, I love that the sheets of the notebooks have a 120 gsm, so I can play with small watercolor splashes.

The habit tracker is a very regular resource for those who make bullet journals. It helps us to keep track of daily goals and work toward them, in order to achieve them.

I love decorating with lettering titles, I usually use the Tombow Dual Brush markers, I really like their range of colors. The pages of the notebook are very soft, so working with brush markers is very nice.

I usually plan my YouTube updates in "this month", I find it very comfortable to visualize the full month and organize my content. I know that the Bliss stickers tablet will help to organize this page during the month.

In the weekly view I plan my work, when I edit, record, shoot photos and more. It helps me to be more efficient and not get lost in the clouds, I usually prepare them the weekend before and as you can see the Bliss stickers help me decorate again.

Finally I wanted to see if this notebook passed the "pen test" where I will make samples of all my markers to have a reference of the colors. I used one of the inserts that come with TNs that are blank paper. To decorate I used the Crafty Girl collection, it's perfect for it!

Supplies

Pages