School Rocks! In My Traveler's Notebook

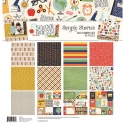
Hey planner friends! It’s Rachel again and I am feeling all the “Back to School” vibes in my Cream Dot Traveler’s Notebook. Even though I am not a student or teacher anymore, I was still really excited to use the School Rocks! Collection in my Traveler’s Notebook for September. I love this collection’s retro school feel and think the colors will be a great transition into fall. The printables for this month pair perfectly with this collection and I will be sharing how I used both in my setup for this month.

As always, let’s start with those scrumptious pockets! I used several of the elements cards and the combo stickers to give these pocket an A+ upgrade. I giggle a little when I see the trimmed down ruler from the Ready-Set-Learn paper and the You Rule! Sticker - I think it is pretty “punny”!

I decided to keep my insert covers pretty simple for this setup - just a few pieces of paper from the collection kit, an element card and a few embellishments. I love the kraft insert covers peaking through! I did go ahead and add some decoration to the back of the inserts, which I don’t often do. I like how it turned out! Isn’t that composition notebook sheet adorable? It is from the printable set from this month!

Speaking of printables, let’s talk about those next! To make page markers for three of my inserts, I used the printable notebook sheets and adhered the printable die cuts to the top. I laminated the page markers to make them sturdy and a little more functional. Now, they act a a great dashboard for sticky notes or a place to write a to-do lists (with a dry erase marker). I love seeing them peak out of the top of my travelers notebook when it is closed!

I also used the calendar printable (already dated!) and adhered it inside my monthly insert. I decorated the monthly spread with stickers from the Combo Sticker Sheet and paper scraps from the decorated notebook covers. A little hack: you know the cover sheet that you get when you buy a collection kit? Don’t be afraid to use that, too! I trimmed a strip off the top of the cover sheet and used it to decorate the beginning and end of my monthly spread.

I had so much fun putting together my monthly dashboard. I decided to focus on my goals for the month and used the combo stickers to highlight them. The notes page is reserved for “bright ideas” or big moments that I will fill in at the end of the month.

Here is next week ready to go using the new weekly inserts! To decorate, I used the Combo stickers, paper strips, and some fussy cut items from the I Love School Paper. This collection doesn’t come with washi, but that didn’t stop me from making washi paper strips instead!
As you may have seen from my last post, I love stamping, so I decided to pull coordinating stamp inks from my stash and some of the new stamps to complete my weekly spread.

I am really loving the box stamps from the Make a List Stamps to highlight important events. For my “Remember” section, I used icons from the Get it Done Stamps as my bullet points instead of my normal checklist. I keep telling myself that if my checklist is cute, maybe I will get all these things done!

For an extra “punch” of color, I love to use punched papers and adding them as decoration to my pages. For this page, I used a small hexagon punch to make a little hexagon cluster to highlight the weekend.

I like keeping the rest of the collection pieces with me, so I made a pocket folder with one of the papers and adhered a 4x4 element card and a trimmed down 4x6 Element cards to the inside of the paper. This folder lives in the center of the my weekly notebook for easy access when I am ready to decorate!

I hope you enjoyed this walk through of my September setup in my travelers notebook using the School Rocks! Collection. As you can see, this collection is not just for students and teachers. There is so much universal cuteness in this collection, that it is perfect for setting up and decorating all planner pages!

Supplies