06.09.17
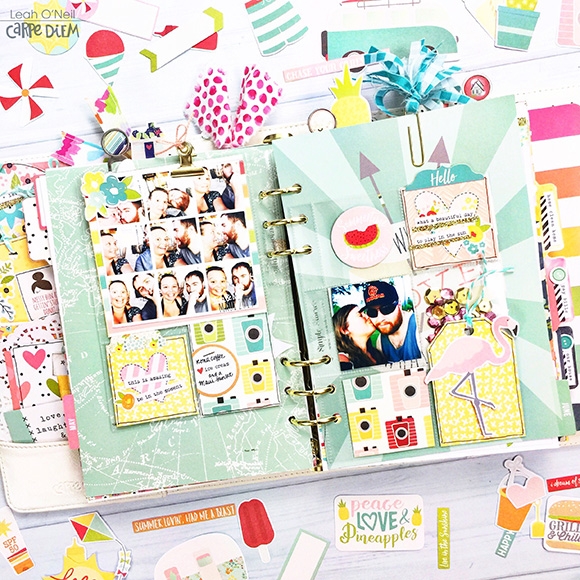
Hello creative planners! It’s Leah, back on the blog today showing you a few ways to use 4x6 pocket pages to personalize your Carpe Diem planners! When I saw the Summer Days collection, I was immediately inspired to create some new decorative elements for my planner to dress it up for summer time. The tropical designs in the collection reminded me of my honeymoon to Hawaii that I have yet to scrapbook, so I had the idea to print out a few photos from the trip and incorporate them into my planner pages using a few 4x6 pocket pages.
I always keep photos in my planner that remind me of happy times or loved ones. My photos from Hawaii are a couple of years old now but they immediately make me feel happy when I look at them. Since I open my planner every day, I get to be reminded every day of those special memories.
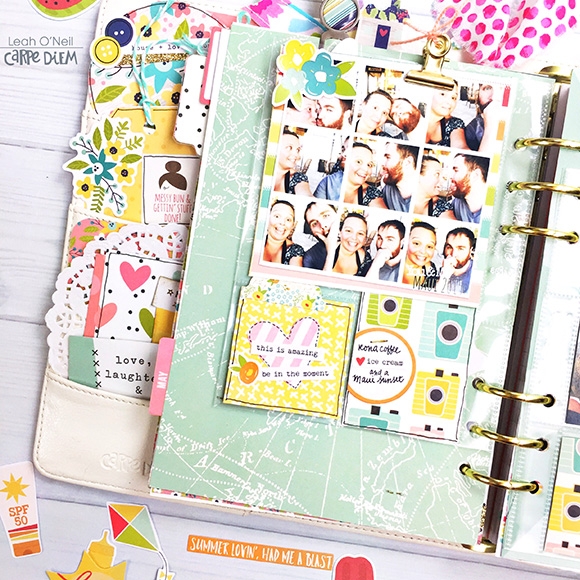
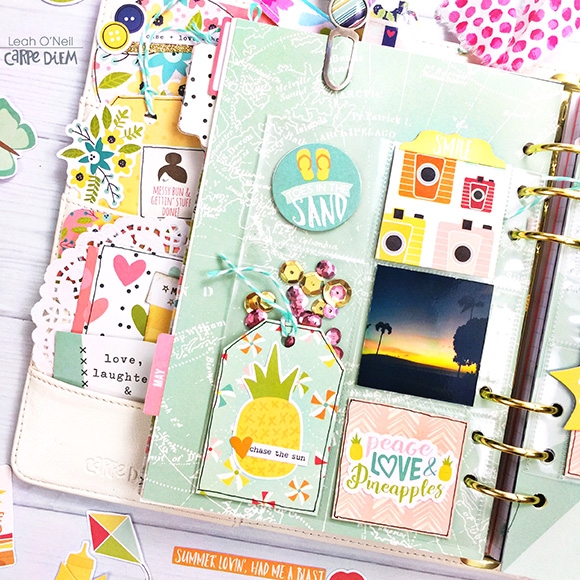
The 4x6 pocket pages fit well into your Carpe Diem planner, you just have to add a few extra holes for the rings. The first pocket page I decorated has one 4x4in pocket and two 2x2in pockets. The 4x4 card inside is cut from this Summer Days 4x4 Elements Paper. I added a butterfly die cut to the outside of the pocket to add some dimension. I made a small tag to fit in the bottom left pocket and added a sun die cut to the outside of the pocket so I didn’t have to trim it down. In the bottom right pocket, I measured and cut a 2x2 square from some patterned paper and added the rainbow tab. I printed a 2x2 photo of my husband and I, and then trimmed it down a bit so that you could still see the patterned paper behind.
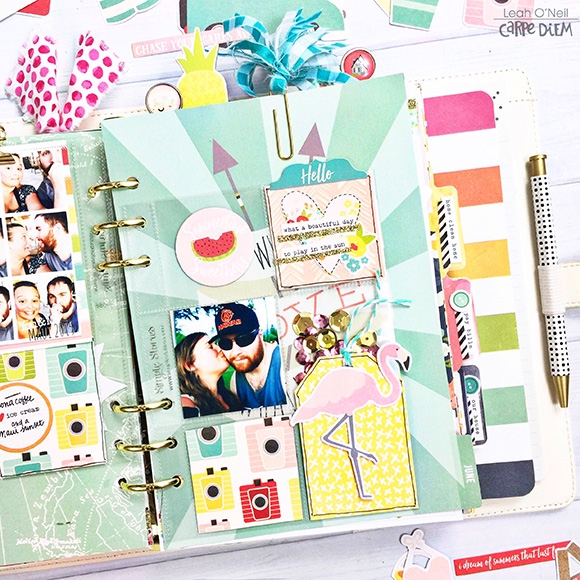
On the back side of this pocket page, I printed a collage photo that I made using a mobile app called Pic Stitch. I printed the photo 3.8x3.8” in size. This allowed me to trim the photo down to fit in the top pocket but also let the paper underneath show which added a colorful frame. Instead of gluing the photo down, I used a gold clip to hold it in place. In the bottom pockets, I added a couple more die cuts from the Bits and Pieces pack and a few word label stickers.
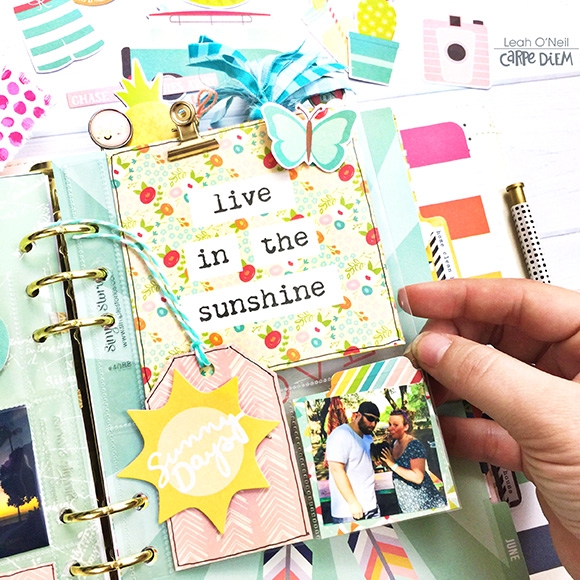
For my next pocket page, I used a page with six 2x2in pockets. Using the same process as before, I cut a few patterned papers down to fit in the pockets and made another little tag. I added some sequins to one pocket and taped it shut with clear Scotch tape. I printed the photo in a 2x2in size.
On the back side of this page, I just printed another 2x2 photo and embellished the other sides of the patterned papers that were in the pockets.
Here are a couple of other fun ideas for how you can use 4x6 pocket pages in your planner:
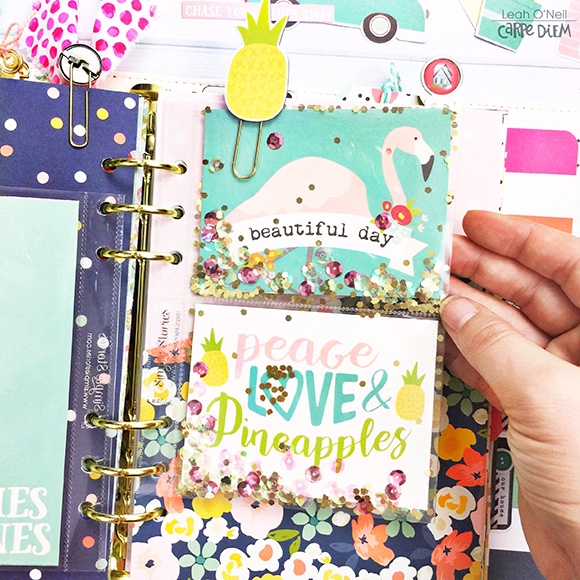
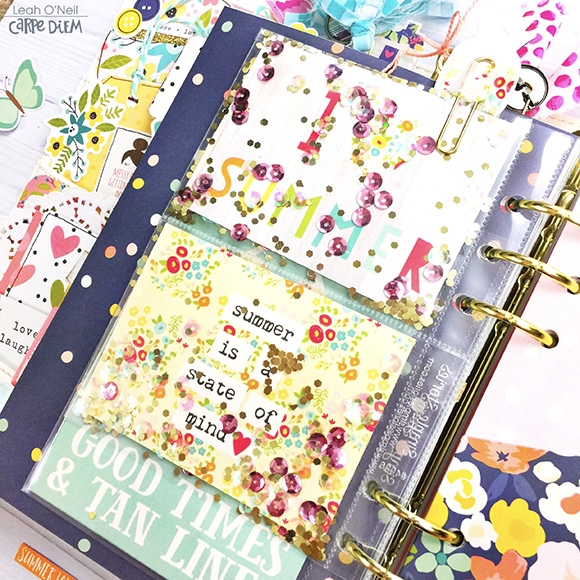
· The pockets on the page below are 3x4 in size. I cut out some of my favorite 3x4 journal cards from this 12x12 paper, then added some sequins and taped the pockets closed to create a super cute and super easy double-sided shaker pocket!
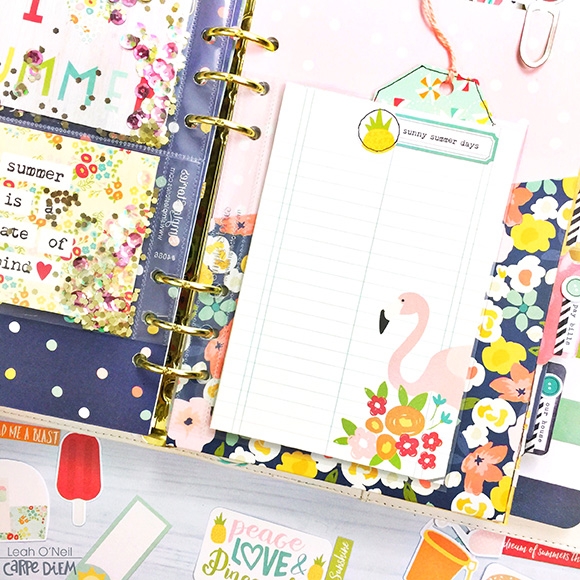
· The pocket page below has one large 4x6 pocket, so I used the flamingo notecard from this 12x12 paper. Putting a journal card into a plastic pocket page is a quick way to create a dashboard that you can write on with a wet erase marker. You could create the same effect by laminating the card, but this process is way quicker and allows you to change out the journal card later if you want.
Now for a little bonus content on this blog post…
Check out my June monthly layout! The Summer Days collection is PERFECT to kick off my summer planner layouts! Hop on over to my Instagram to see the layout all filled in.
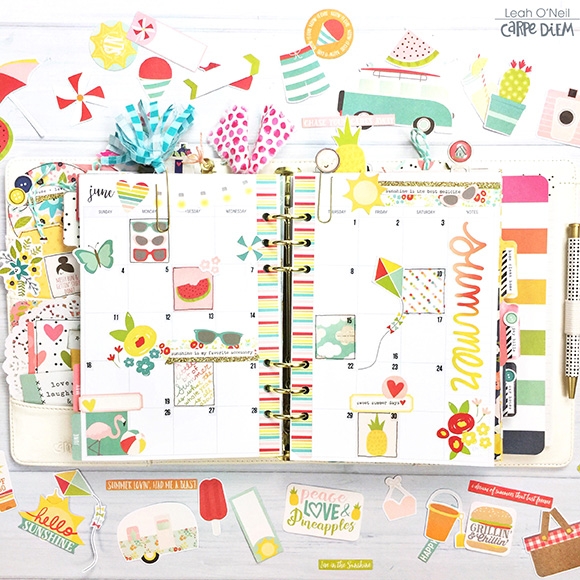
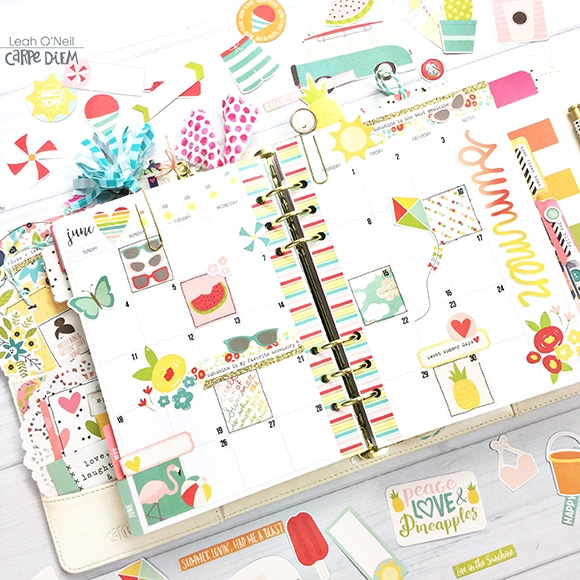
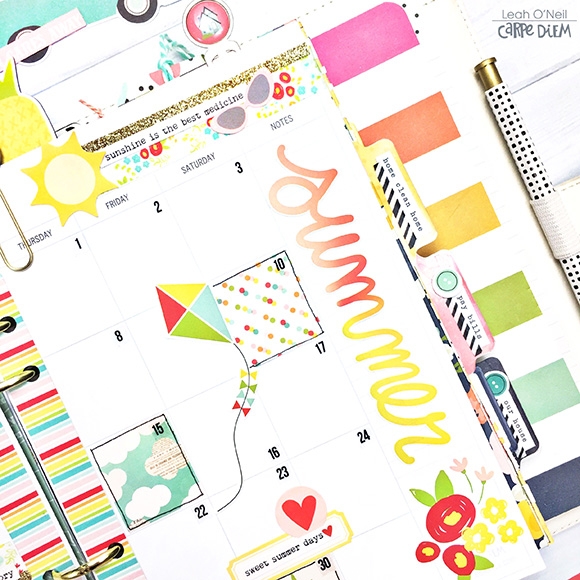
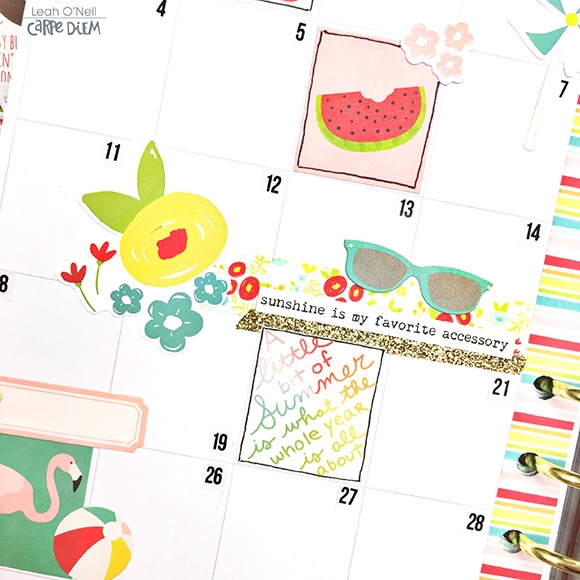
Here are a couple of close up photos!
I hope this post has given you all some inspiring ideas for how to use pocket pages in your Carpe Diem planner. For lots more beeeeautiful planner inspiration and peeks at all the new planner products rolling out this summer, check out the Carpe Diem Planners Instagram! I AM SO EXCITED! What products are you the most excited for?

06.08.17
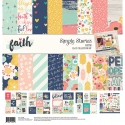
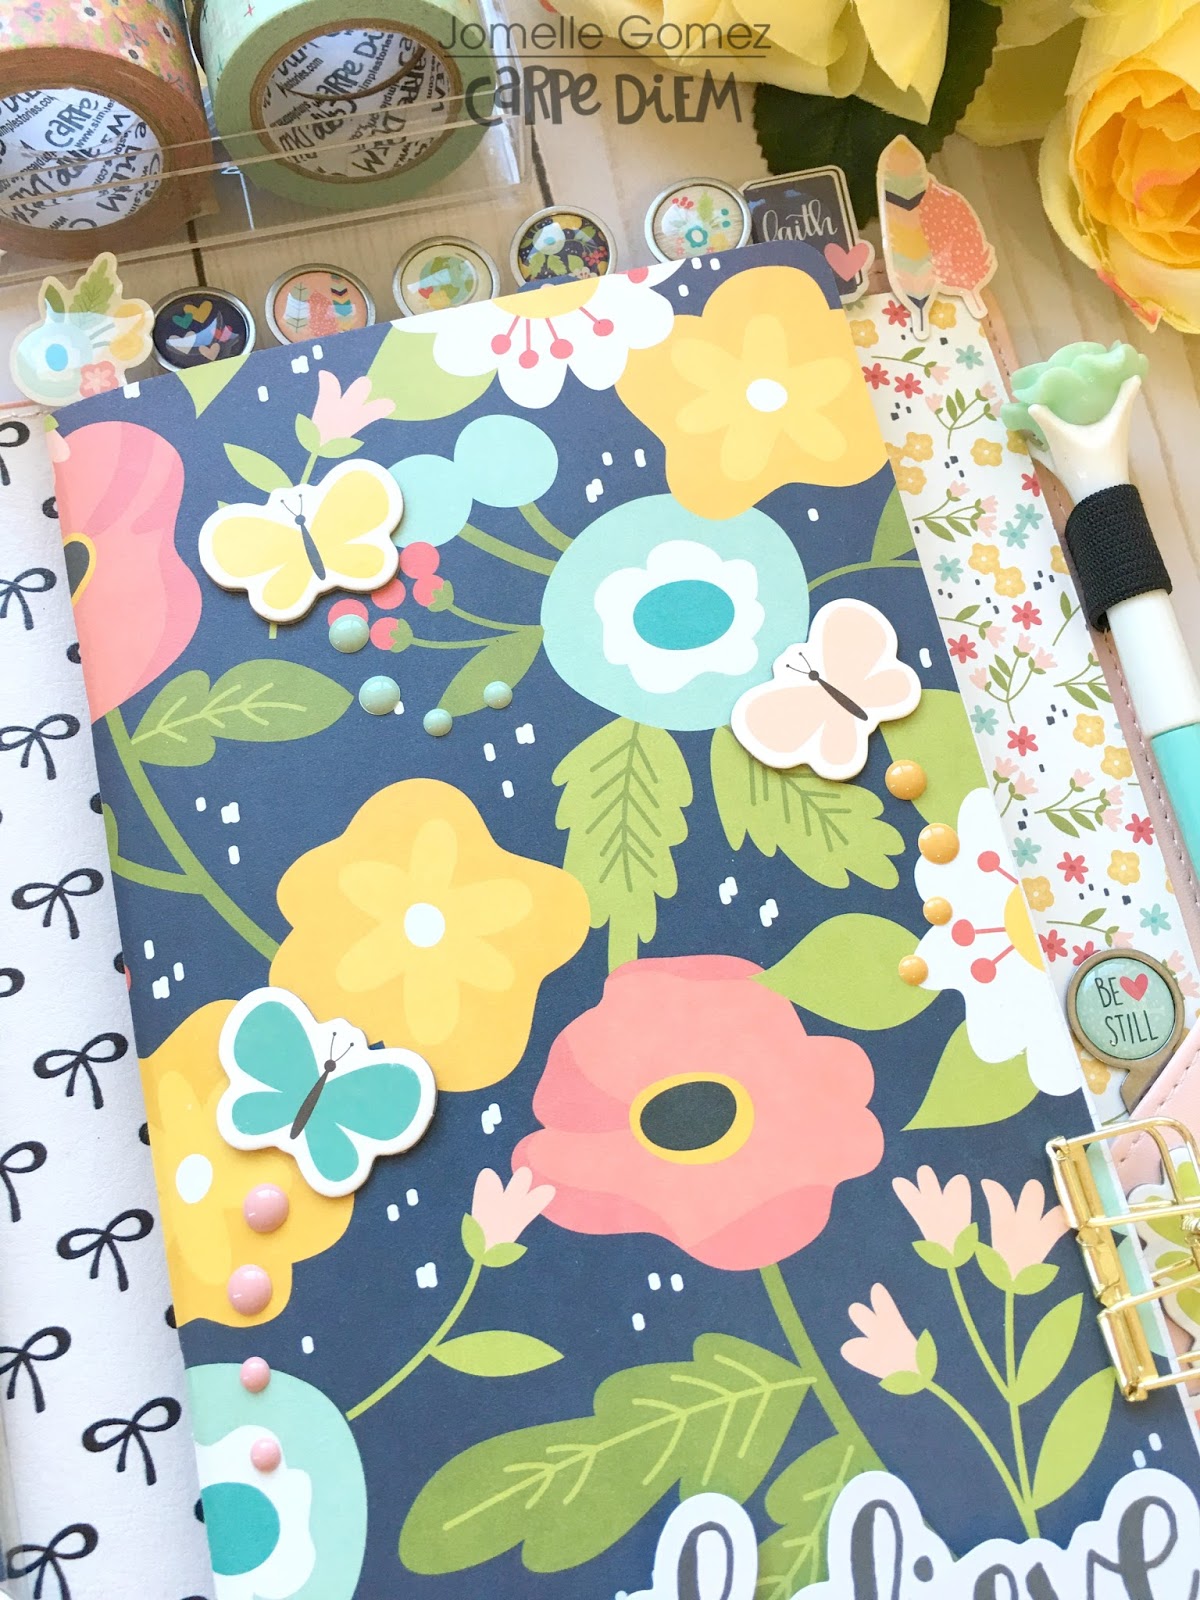
Jeanne here today with some inspirational cards featuring the Simple Stories Faith Collection. This collection is a beautiful mix of florals and prints in bright colors with navy accents for lots of contrast.

The collection is appropriately named “Faith” because religious sentiments are mixed throughout the different elements available in the collection like this bible verse that you can find in the Bits and Pieces die cut pack. What a great way to encourage and inspire, or maybe just remind someone of how blessed they really are.

I thought these die cut plants were perfect with the sentiment – a reminder to have faith and trust in God.

The butterfly to me represents “letting go” and letting Christ lead the way. I added a strip of navy pattern paper under the pots to keep them grounded and added some yellow enamel dots for a sprinkle of extra color.

Sometimes we’re looking for answers, things happen in life that we don’t understand. It’s important to have faith.
This card started with pretty papers from the Faith Collection. For my focal point I added a 3x4” SN@P! Journaling card and topped it with some circles I cut from the 6x8 Paper Pad.
I added lots of embellishments like a pretty chipboard flower.
An epoxy metal clip and some enamel dots shine like candy!
This little butterfly is from the Combo Sticker that is in the 12” Collection or sold separately. I dusted it with baby powder to remove some of the tackiness before adhering it with adhesive foam tape for dimension.
All the different elements in this collection are beautifully coordinated to complement each other, making your projects a pleasure to create.
___________________________________
Sometimes we’re looking for answers, things happen in life that we don’t understand. It’s important to have faith.

This card started with pretty papers from the Faith Collection. For my focal point I added a 3x4” SN@P! Journaling card and topped it with some circles I cut from the 6x8 Paper Pad.

I added lots of embellishments like a pretty chipboard flower.

An epoxy metal clip and some enamel dots shine like candy!

This little butterfly is from the Combo Sticker that is in the 12” Collection or sold separately. I dusted it with baby powder to remove some of the tackiness before adhering it with adhesive foam tape for dimension.

All the different elements in this collection are beautifully coordinated to complement each other, making your projects a pleasure to create. The Faith Collection is a beautiful way celebrate and inspire the people who are blessings in your life!
Supplies
06.07.17
Hello friends! Jennifer here on the blog today to share some pages I created using the new Cabin Fever collection! The weather is getting warmer here in the US so that means getting outdoors! Where I live many people love to camp and I was excited to see this fabulous line! Truth be told, I don't love to get out there and "rough it" but definitely enjoy being among nature! Both of my kids have attended church camp during the summers just north of our city and Cabin Fever is perfect for their photos!
I used the new Geo Background (#19848) Simple Stories Silhouette Cut File as the base of my first layout "Explore". I wanted to show off the many rich patterns and colors of Cabin Fever so using a background cut file is a perfect way to do so! I honestly can't tell you which pattern is my favorite because I love them all!

The 3x4 Journaling Card Elements are perfect to add journaling or layer small embellishments around your title! I did both using pieces from the Combo Sticker Sheet as well as one of the Decorative Brads! Using pop dots or foam tape with embellishments can add some depth to your page just as I did with the fire die cut. I usually find this helps fill in space between photos and/or journaling spots.

If you don't do much pocket page scrapbooking and aren't sure what to do with the 4x6 Horizontal and Vertical Elements, they do make great layers under your photos! I like to add at least two contrasting colors to help my photo "pop"! I also have a habit of matting my picture onto white cardstock as well! What can I say? I love layers! To break up the page, I used the tartan plaid border sticker from the Combo Sticker Sheet and the "Wild and Free" Die Cut from the Bits and Pieces pack.

I love that the Decorative Brads have a multitude of sizes and shapes to choose from! Here, I paired one of the smaller brads with a larger plaid. Brads are a nice accent to bring you pages together!

__________________________________
For my second layout, "Camp 45", I started with kraft cardstock as my backround. Again, using my Silhouette, I cut different size circles from a few select patterns (using both sides of the page). I then layered my circles across the center of my layout and stitched through with my sewing machine. I also added strips of favorite accent prints at the top and bottom of the page (and again stitching through...I sew on everything!).

Camp 45 is the name of the camp my daughter attended that summer...it was for fourth and fifth graders and her first time being away from home for more than a night. It's only 20 min away but I may have cried when I dropped her off! Again, there is that 3x4 Journaling card! They are so nice to tuck next to your photo and add a title and a few embellishments! I used the "CAMP" from the Camping on the 6x12 Chipboard along with cutting my "45" with my Silhouette and backing with yes another 3x4 Journaling Card! :)

I punched two smaller holes at the top of my Journaling card to add brown baker's twine to the top! I thought it gave the card a little bit of dimension!

Using hand punches, I added smaller circles to the fringes of my photo as well as added die cuts and smaller Decorative Brads. Also, you can spy at the top of my photo some of the lovely Nature Hike Washi Tape!

Here, I used the remainder of my tartan plaid scallop border sticker to break up the page...you can also spy a small section on the other side of my journaling card! I love using repeating shapes on a page when you want to include lots of color and prints!

Thank you for stopping by today! I hope this inspires you to do some creating with Cabin Fever! You can check out the collection in its entirety by going to the Products Page! Have a wonderful day!

06.06.17
Hello friends! Brenda Smith here with you today and I've got a Summer mini album in a 4x6 SN@P! binder to share with you today.

I used the 4x6 Sn@p album in teal and papers and embellishments from the new Summer Days collection. The chipboard "Summer" just begs to be used on mini album covers and I couldn't resist. I paired it with a label, stamps, and some additional sticker embellishments.


I covered the insides of my album with the Lazy Days patterned paper. I usually like to choose a smaller pattern without too many colors for the covers and this worked perfectly. I trimmed down a 4x6 "bucket list" journal card and matted it on the Gotta Wear Shades patterned paper. I created a sequin pocket and sealed it shut with the Good Vibes washi. I used a 4x6 card as a title cards of sorts, typing out the months documented and our names.


I knew I wanted to use the box stickers from the 4x6 stickers so I measured them and created a photo collage in Photoshop with photos the same size. I filled the blank spots of the collage with box stickers and embellished accordingly. I matted the collage with the Soak up the Sun paper. For the "bright" journal card, I used some more of the Gotta Wear Shades paper and glued a bit of it on the top of a 3x4 journal card. I then used some alpha stamps from my stash atop a label and added a few brads from the Decorative Brads. The "Hello Sunshine" is a stitched on die cut from the Bits and Pieces pack.


I outlined the letters and the heart on the "I <3 Summer" card and added a few extra embellishments. "The Good Life," the green patterned stickers underneath, and the label are all from the 4x6 stickers. I used a 4x4 insert pocket in between this spread and stamped some sentiments from the Emoji Love roller stamp. I put an extra wide border on my "Swim" photo and added some stickers from the 4x6 stickers set as well as the cloud decorative brad.


I printed a 1.5" circular photo as well as 2x2 photo to fill the smaller pockets. I created a 4x4 journal card using a card from the cut-apart sheet and some paper from the Sn@p Basics 6x6. On the other side, I trimmed a corner from the Summer Snapshots paper and added a few embellishments including enamel dots from the Home collection. One of my favorite things about Simple Stories lines is that you can often easily combine collections.


One of my favorite tricks is to print a photo at 3x3 and leave the blank white space at the bottom so the photo is a 3x4 but looks somewhat like a polaroid. Then I'll add a little patterned paper and embellishments to finish it off. This Ninja card was just the right amount of color paired with the black and white photo. The 4x6 journal card is pretty simple with just the "chill" added from the 12x12 sticker sheet. I outlined it with a black pen to make it stand out more.

For this page, I again made a very wide border on a 4x6 photo and embellished. The "happy" is from the 12x12 sticker sheet and the stickers along the bottom are all from the 4x6 sticker set. I obviously still have a bunch more to go to adequately document our summer, but I'm happy with this as a stopping point.
Have you begun to document your summer with Simple Stories? Be sure and tag us @simplestories_ when sharing on Instagram so we can come and take a look!

Supplies
06.05.17

Thanks sooooo much for joining us for our 2017 Carpe Diem Spring Release Reveal, we hope you enjoyed seeing all of our new products! If you missed them last week, you can catch them below or view the full catalog here -
Bloom & Beautiful
Bliss & Good Vibes
NEW Carpe Diem & Planner Essentials
These new products will be shipping June-September, depending on the products; watch the blog & social media for updates as we start shipping!
Now on to the fun stuff - congrats to our 15 random lucky winners! Here goes -
Day 1 – Bloom or Beautiful A5 or Personal Boxed Set
Blog – Peg Graham
Instagram Simple Stories – planningwithsophie
Instagram Carpe Diem - emilyac84
Pinterest – Peggy Clees
Facebook – Lori Singleton Cash
Day 2 – Bliss A5 Boxed Set or Aztec Traveler’s Notebook
Blog – Rachel V
Instagram Simple Stories – kristenjo76
Instagram Carpe Diem - elliervine
Pinterest – Terri Mas Stolzenberg
Facebook – Gingera Lincoln Earley
Day 3 – Floral Dot or Black Speckle A5 Planner
Blog – Deborah Routledge
Instagram Simple Stories – midnight.wink
Instagram Carpe Diem – unicornglitter75
Pinterest – Jenn E
Facebook – Susanne Staal
06.05.17
Hello planner girls! I finally set up a Home Planner that I am absolutely in love with! Carpe Diem had everything I needed to get the perfect set up done. From the planner to the amazing detailed inserts to the décor to personalize it.

For my home planner I am using the Marigold A5 Planner with the Domestic Bliss collection. One of my most favorite thing to do is set up a planner! I love decorating the pockets, making new dividers, selecting where I want things to go and personalizing it to my taste.

I used some of the paper pad paper scraps, stickers, journaling cards, brads and paperclips to decorate my pockets.


One of the most amazing things Simple Stories offers is the ready to use dividers for their planners which you can just personalize with stickers or you can use their paper to chose the order and customize your dividers even more!


I used the Domestic Bliss paper pad and cut my dividers with my Silhouette Cameo however if you do not have a cutting machine you can hand cut your paper down to 5.8 in wide by 8.3 in height for a A5 planner.


With the paper pad I was also able to make a dashboard and a page marker. I cut the dashboard down to 5.8 in wide by 8.3 in height and the page marker is 3.0 in wide by 8.681 in height with the top tab. I was able to use the different journaling cards, die cuts, stickers and brads from the Domestic Bliss collection to make it to my liking and I absolute love how it all turned out.


Carpe Diem Home insert collection is astonishing! Everything you can think of needing for a home planner they have included. From Personal information, emergency information trackers, Password logs, contacts and budget. If your like me I forget these things often so being able to have it all in one place has been a life saver. They also have inserts to keep you well organized by having a daily schedule, menu planning, to do list and much more!

Along with all the amazing things you can create or get from the Domestic Bliss collection as a Planner Addict and user the variety and amount of stickers available is breath taking they truly suit every theme so well and are so versatile.

Supplies

06.03.17
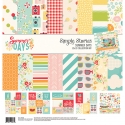
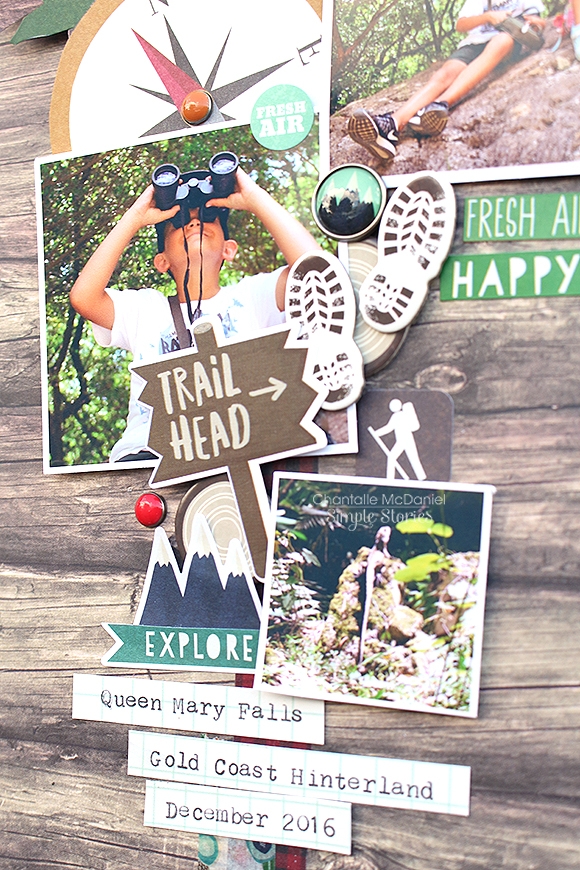
Hello everyone. Chantalle here, and I would love to share some recent projects with you, capturing some sweet outdoor moments. I have used new releases Cabin Fever and Summer Days which are both perfect for your summer adventures!
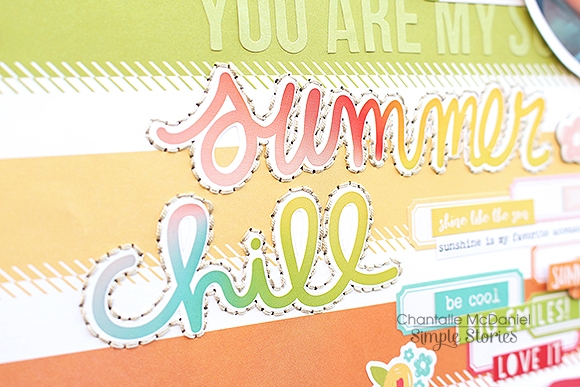
You Are My Sunshine
This page uses the bright and breezy Summer Days. I love this new collection with its infectious brights and fun elements. The watermelon is a fave for sure!
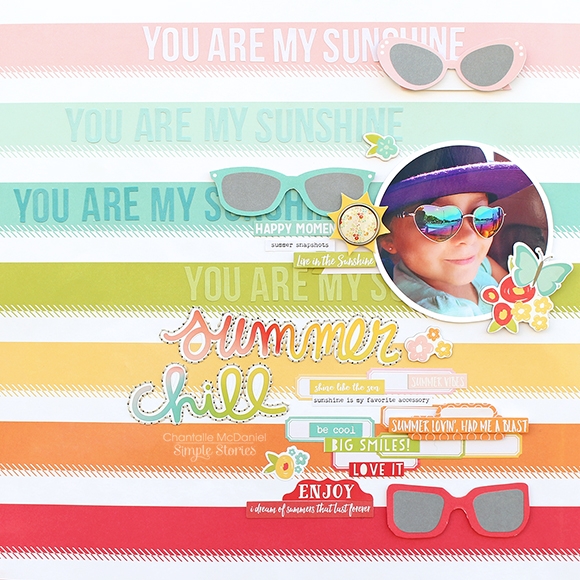
For a bit of fun, I have created some subtitles on the ‘So much Fun’ background paper using some co-ordinating alpha stickers from a pack of Sn@p Color Vibe Lights.
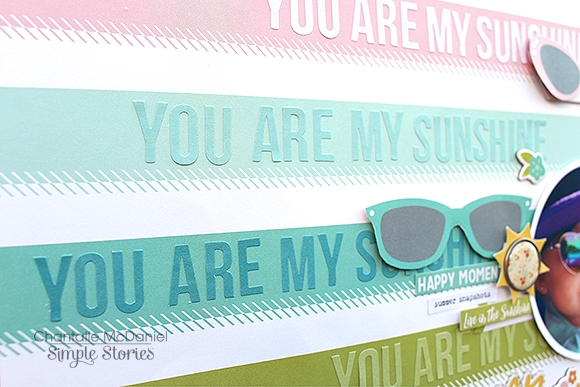
I love the way these stickers add a bit more detail to the page without being too distracting. I lined them up with the help of a light ruler but you could also line them up on the very edge of a plastic ruler and then place the ruler down carefully in your desired area, to transfer them.
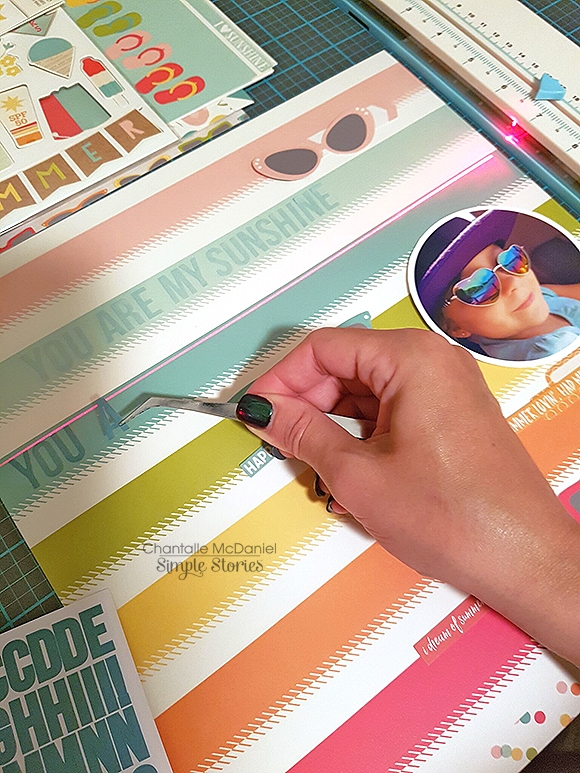
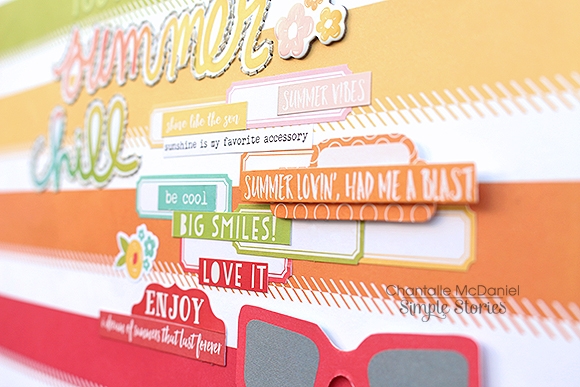
The striped pattern also helped make lining things up a breeze. In between the colour bars, I have added some more details in the form of ephemera and phrase stickers. The super cute sunglasses shapes matched my photo perfectly, so I cut some larger sized ones from a sheet of the 4x4 Elements in three different styles and colours.
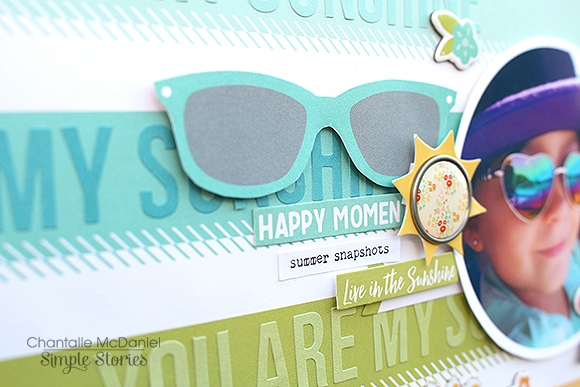
I quite like to group matching colours on my projects. Creating with Simple Stories is such a joy as everything co-ordinates so perfectly!
I’ve cropped my photo in a circular shape for something different. Using Circle Photo Crops makes cutting your photos to size a cinch!

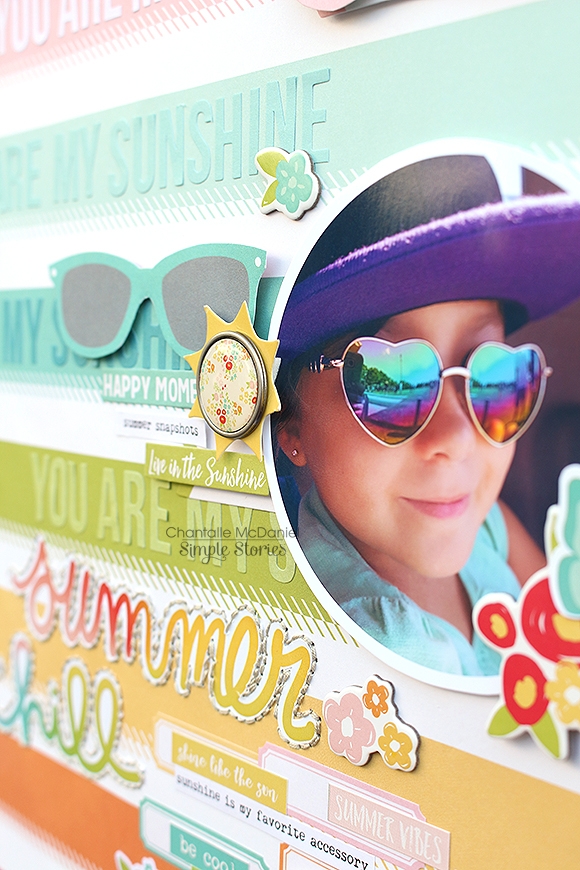
For a final flourish, I have added some embroidery style stitching around my title stickers. I think it helped it stand out a bit more against the colourful elements.
This next page, 'Call of the Wild’ also celebrates fun moments outside.
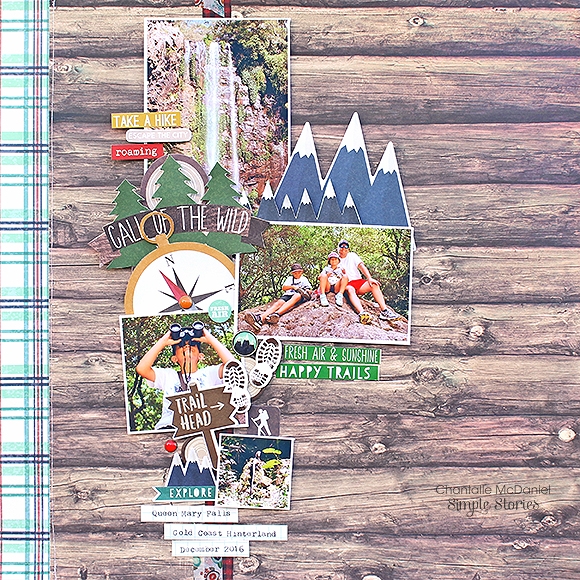
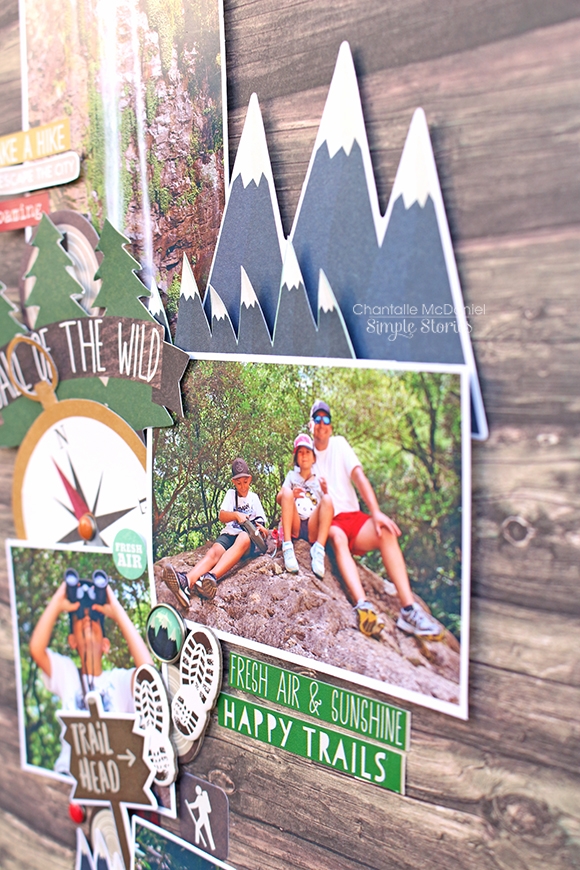
Cabin Fever is amazing for those camping times, getting out and about times or just nature times! Living in Queensland where we have pretty much gorgeous weather for most of the year, I can see myself using every last bit of this collection! I’ve used a vertical design and grouped lots of fun elements together to show off the photos of a wonderful day we spent enjoying the Gold Coast Hinterland this Summer.
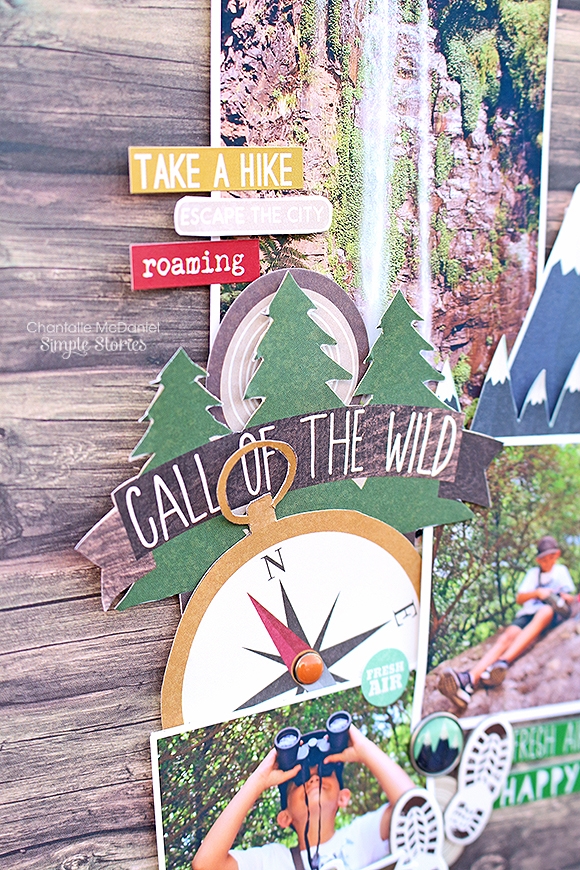
The tree and mountain elements called out to me for this project so I nabbed a few larger size ones from the Cabin Fever 4x4, 3x4 and 4x6 Elements pages. I always look forward to seeing these papers in Simple Stories collections as they are full of extra bits and pieces to cut out if you need some more of a certain shape or for a journalling spot etc. Value and versatility in one! The compass was also cut from the 4x6 Elements page. I added a little brad in the centre for a bit of extra detail.
I also loved the muddy boot track and tree stump chipboard stickers!
Thanks for joining me today!

Supplies
06.01.17
Hello there! Linsey here today sharing my latest altered project, made with the beautiful and timeless Simple Stories Faith collection. A 3D wooden wishing well was the perfect piece for my plan. I designed it with a certain scripture in mind: John 4. This is when Jesus comes to rest at Jacob's well and the Samaritan woman arrives to get water. Jesus explains to the woman that all who drink the well water will be thirsty again; but whomever drinks the water that He gives them will never thirst again. For Jesus is the true, living water and indeed, the water He gives us will become in us a spring of water welling up to eternal life. And this is how my well of faith came to be.

As you can see, this is no usual well. This is a very special well indeed! It's brimming with all good things so that anyone who comes to it, thirsty, might bear witness to the true, living water of Christ. There are countless elements in the Faith collection to embellish with. So much so, I found it difficult to stop adding darling goodies to my project. Come and be inspired by the joy and love within!

The well is covered with some of the patterned papers from the Faith collection, giving it a nice feel of floral mixed with woodgrain and lots of colorful pretties. Grace washi tape was perfect to use for covering all the edges, so painting them white first wasn't even necessary. I love all the cute accents of this collection. From the balloons, potted plants and world globe chipboard to the faith bible and Winston wearing his I heart Jesus sweater decorative clips....there is so much to adore!

The "shine" decorative brad is a perfect accent for the theme. As God's children, we have a certain light in us and He wants us to shine brightly. He is the light of the world and we are His city on a hill--so let your light shine!

I love the quality of Simple Stories products. The heavy duty cardstock stickers stood up to all my abuse when manipulating them into the scene. Like the lights and lantern hung from the inside ceiling.

Enamel dots are so cool. Here, they were transformed into a colorful string of fun also hung from the inside of the well.

And a few more enamel dots on the tiny blooms of the chipboard add just the right amount of dimension.

The roof's trim was designed using the 12 inch heart border sticker cut down to fit the length of each side. A bit of delicate white crochet lace underneath the border and along the top of the roof border adds a sweet touch.

And that's my well of faith altered project. I hope you enjoyed it. I certainly took great pleasure in creating it! And I hope you've been inspired by the Faith collection today. Thank you so much for visiting! Happy crafting!

05.31.17
Hi everyone, Kelly here today with a new blog post. I am going to show you a fun and easy way to create your own pretty sticker storage binder to store all your planner stickers in one place.
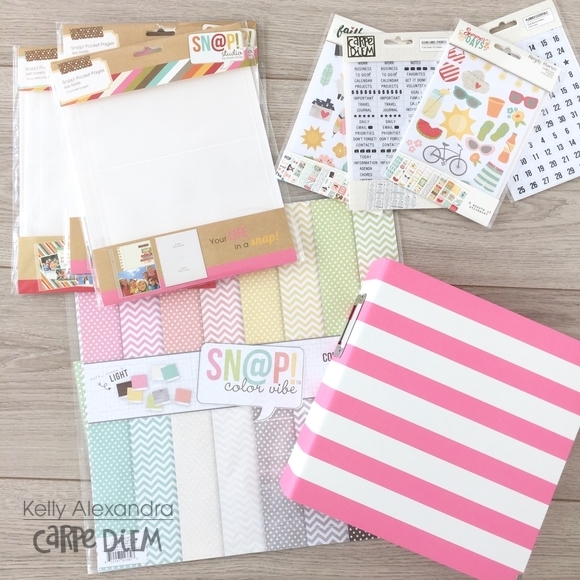
As a base I used a pink SN@P binder, 4x6 clear Pocket Pages, some scrapbook papers and of course stickers to put in the inserts. Now I am going to show you how I created the dividers!
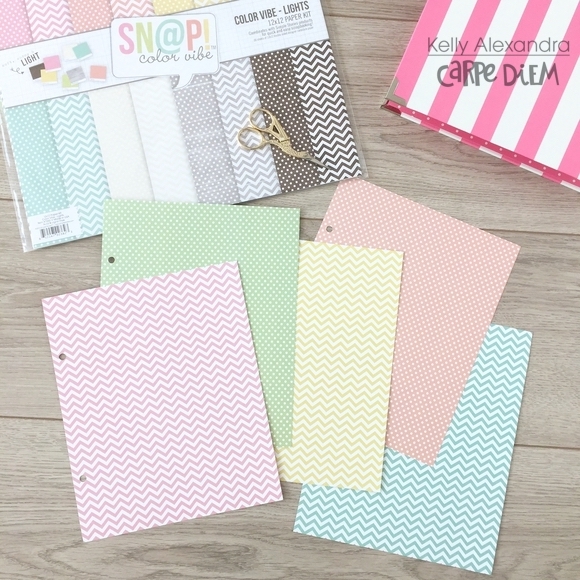
Because of my love for pastel colors I decided to use the SN@P! Lights Color Vibe papers as my dashboard and dividers. First, I cut the scrapbook papers down to size (7x8.5 inch) using a cutting board, but you can also use a ruler and scissors. Next, I punched 2 holes using a Pocket Page sheet as a template to know exactly where I needed to punch.
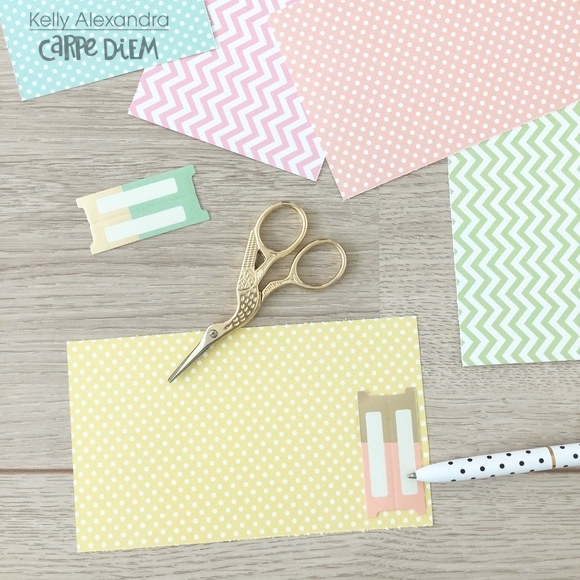
Now that the dividers are the right size it is time to make our own tabs. I found some tabs in an old pack of diecuts to use as a template. I traced them on leftover scrapbook paper pieces and then cut them out.
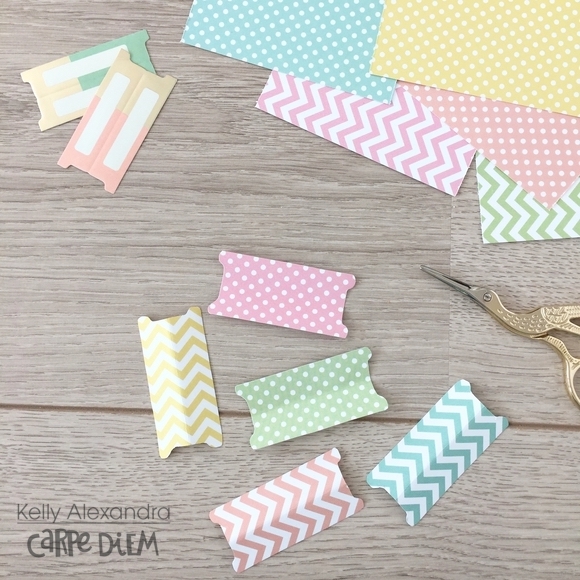
As an end result, you have your own DIY tabs in matching colors to glue on the dividers.
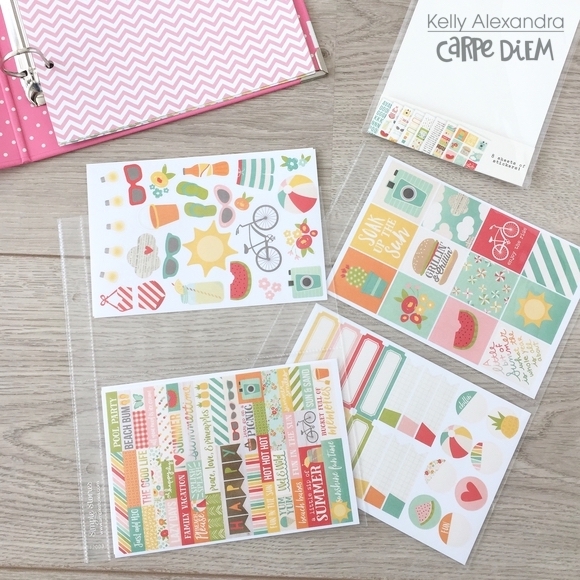
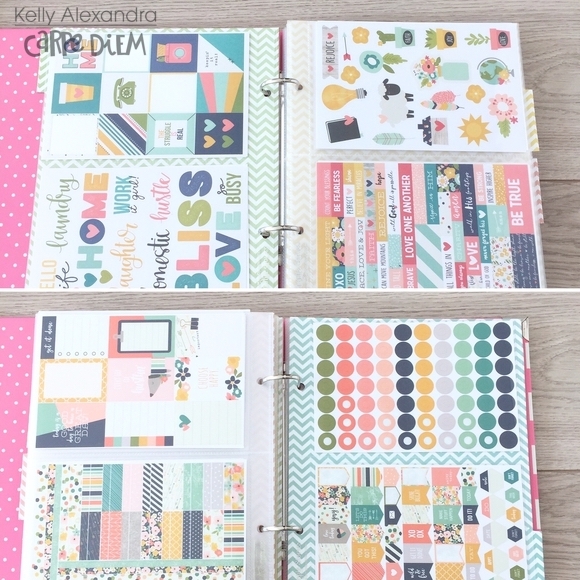
The next step is to grab all your stickers and put them in the clear Pocket Pages. I decided to divide my stickers into 4 categories: Collections, Summer, Functional and Alpha’s. Because the alpha sheets are a little bit bigger than 4x6inch, I trimmed the borders of each sticker sheet a little bit to make them fit in the pocket pages easily.
Now that my stickers are all in the Pocket Pages it is time to put them in the binder.
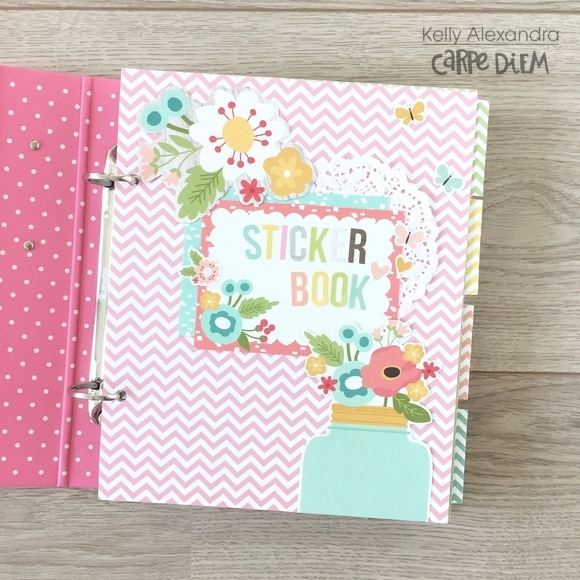
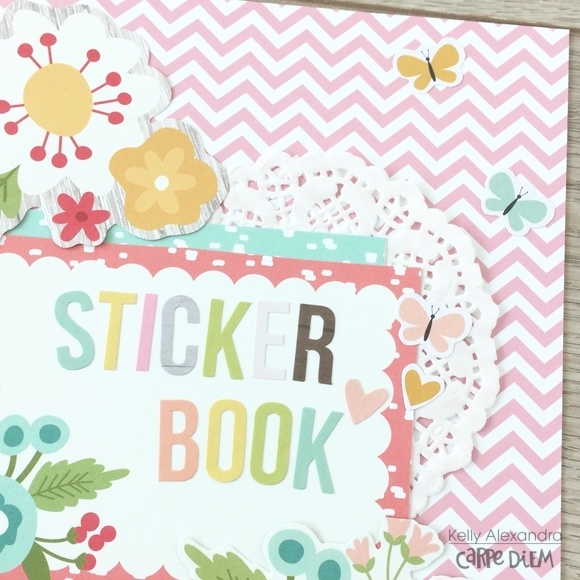
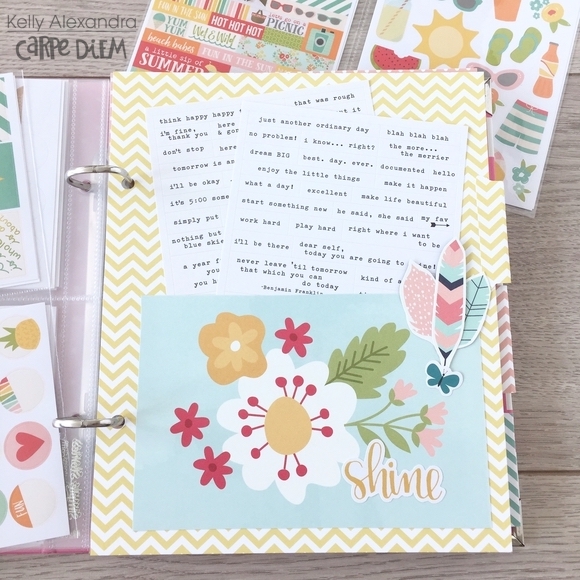
I love decorating and decided to use some journaling cards and stickers from the Faith collection to decorate the pink dashboard and 4 dividers. With the alpha stickers I wrote ‘ Sticker book’ and I used some flower pieces and little butterfly stickers to decorate the page.
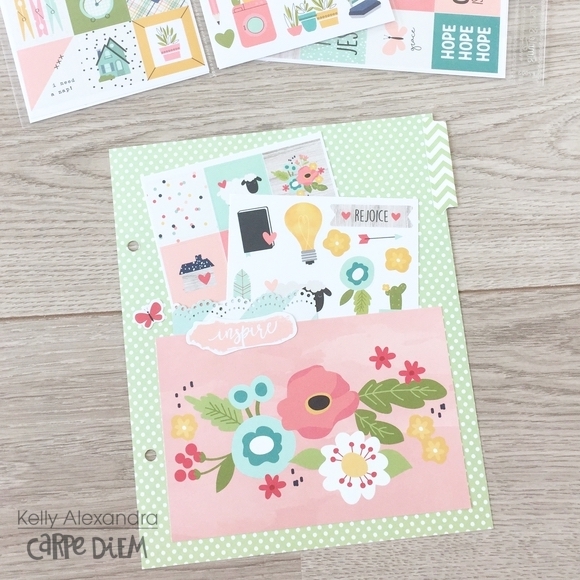
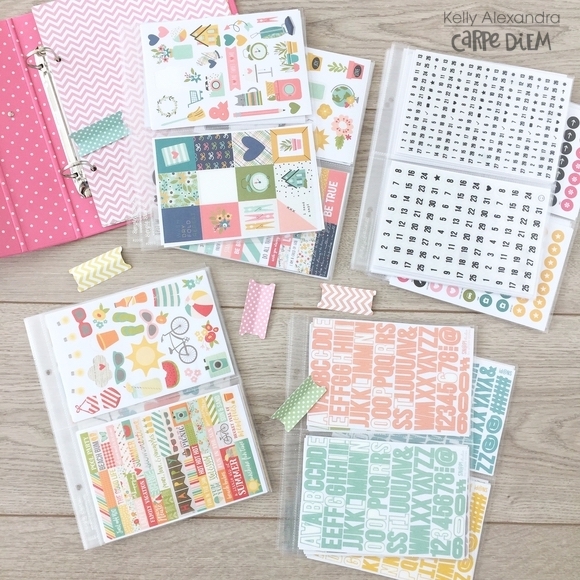
To decorate the dividers I created pockets on all of them to put even more sticker sheets in there! I used a 4x6 journaling card and only glued the bottom and sides of the card so that you can slide 2-4 sticker sheets in there.
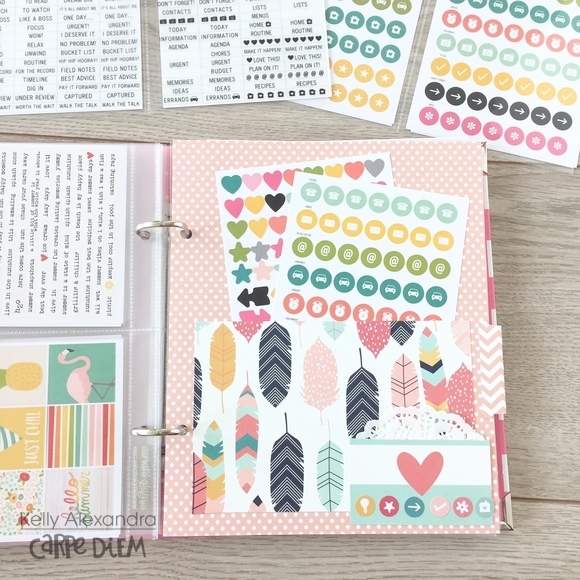
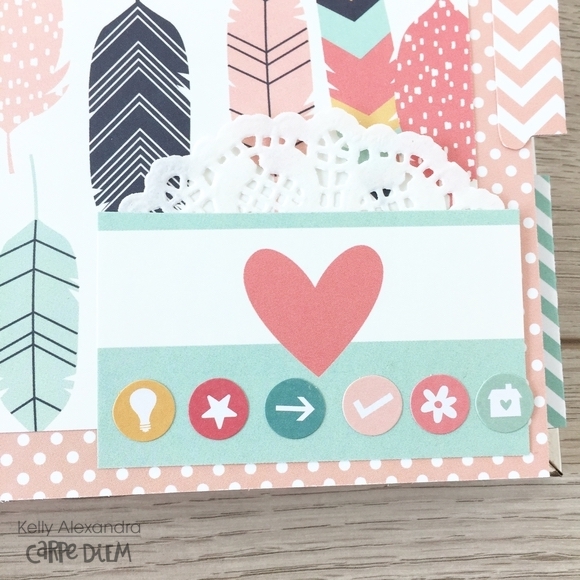
The third divider is for functional stickers such as date numbers, icons and label stickers. I have so many functional stickers for my planner, I think I can fill a full binder with those alone!
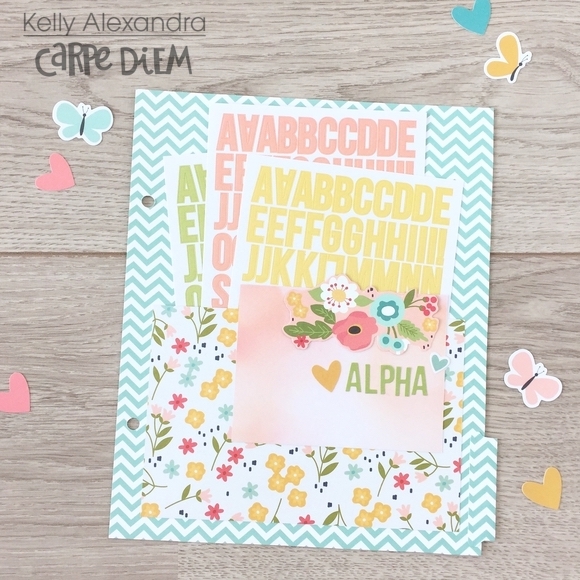

The last divider is for my alpha stickers, so ofcourse I slided some alpha sheets in the pocket as well.
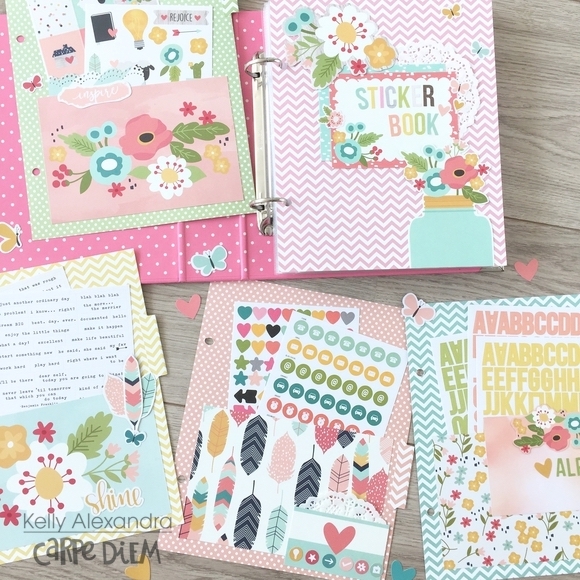
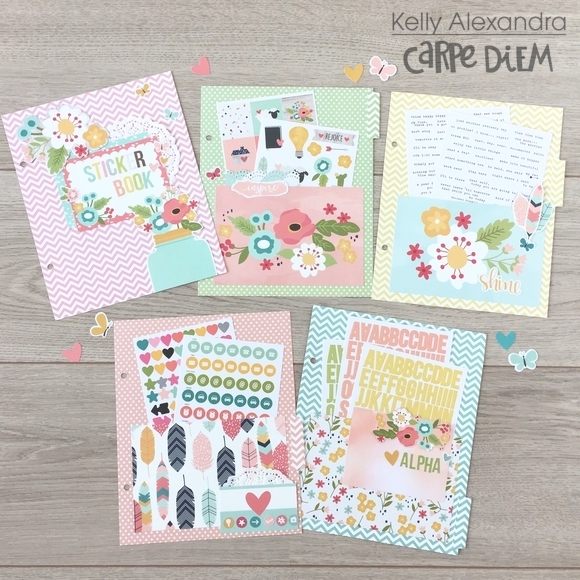
The end result is 1 front dashboard and 4 decorated dividers with little pockets to put even more sticker sheets in there.
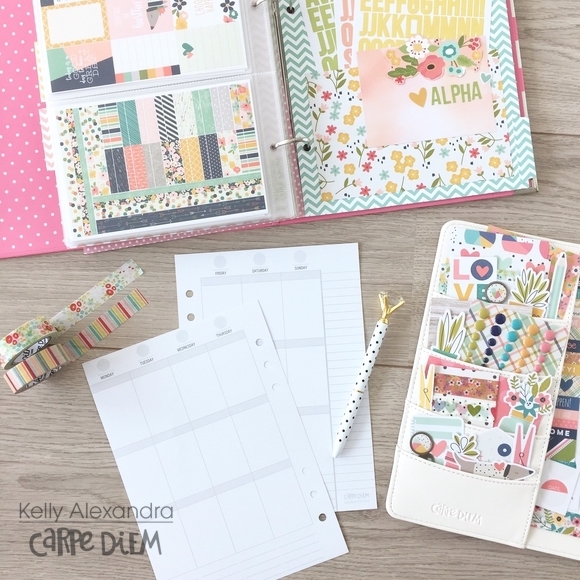
I love this binder because now I can flip through the binder and see all the stickers I have. I can grab my planner, some washi tapes, and my sticker binder and plan everywhere I want and have all my supplies with me!
I hope you liked this blogpost and got inspired to create your own sticker storage binder! For more inspiring planner posts go to my instagram account: createplannernl. Have a great day!

Supplies

05.30.17
Hello everyone! It's Lisa Dickinson here today and I'm excited to be sharing my recent obsession with double pagers! I love the larger canvas for creating and the fact that they hold lots and lots of photos. My only issue with the double-page spread is that I use 3-ring albums, which creates a significant gap in the middle of my two page spreads. My solution? Create a two-pager that also works as two stand-alone pages!
On both of these pages, I'm working with the new Summer Days collection, which is ideal for documenting these last days of school as well as the warm weather events happening all summer! For the left half of the page, I chose to use one photo enlarged to 11x7 and layered a bold die-cut title over it. Below the photo, I punched out ten 2-inch squares from the Summer Days patterned papers and layered them with chipboard, die cuts, brads, stickers & journaling strips.
On the right half of the page, I continued the grid design but used slightly larger (2.25") squares. In addition to eight photos from my daughter's last day of school, I alternated the 16-square grid with eight more patterned paper squares.
Once again, I layered the patterned squares with coordinating Summer Days pieces and also used one as a journaling block. I tried to select a variety of accents that reinforced the page theme and brought lots of color and texture to the design.
To keep the two-pager from being awkwardly divided by the 3-ring album gap, I kept all the page elements with the 12x12 margins and didn't allow anything to cross over the center line. But the common design element of squares, as well as the coordinating papers, keep this spread looking harmonious. And while each page certainly can stand alone, the double-pager helps tell the story of the day with more detail (even with the dilemma of the gap!)
Thanks so much for stopping by and have a wonderful day!

05.29.17
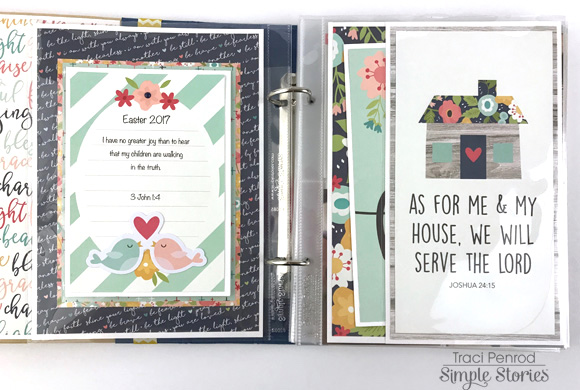
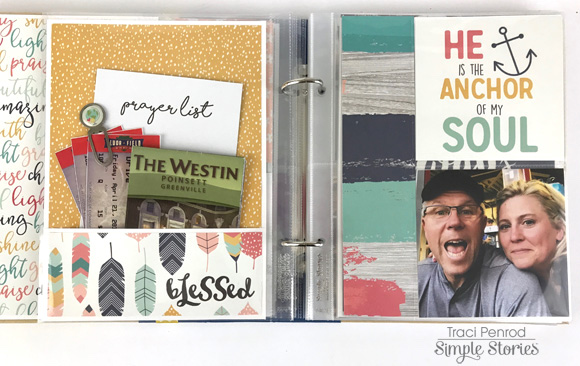
Happy Memorial Day everyone! It's Traci, from Artsy Albums, back to share my latest Sn@p album with you. I decided to make an album that highlights my life in 2017. Everything from time spent with family and friends, to trips and celebrations. I also wanted to incorporate my spiritual side ... prayers, bible study notes, etc. The Faith collection was perfect for all of this.
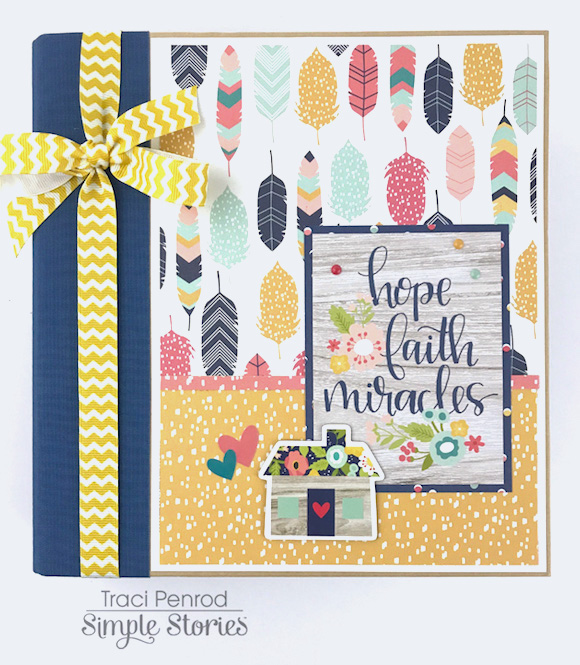
I used white card stock, and covered it with papers from the Faith 12x12 collection, as well as the 6x8 paper pad. The title on one of the 3x4 elements cards, "Hope, Faith, and Miracles" was perfect for my cover, especially since we welcomed a new little miracle to our family last year.

I really like incorporating the 4x6 vertical page protectors into my Sn@p albums ... it allows me to include extra journaling spots, photos, and the collection's awesome 4x6 element cards.


Our little miracle doesn't look too happy in this photo (smile).
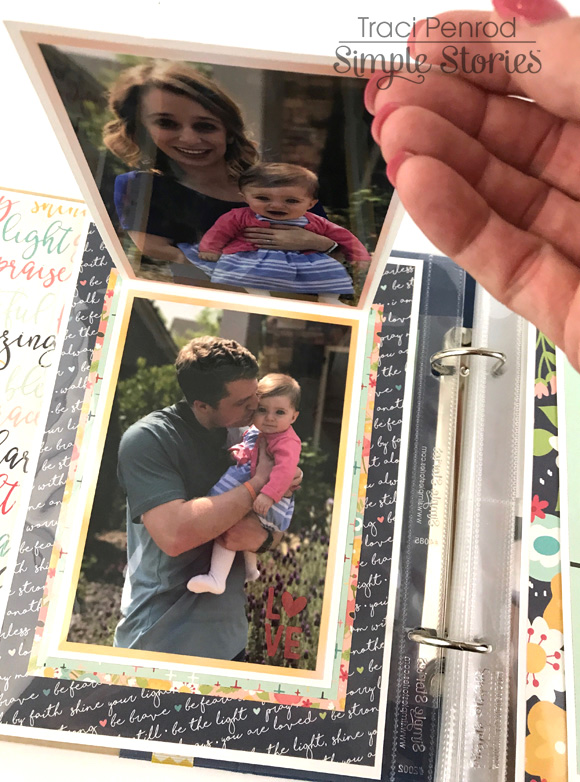
I make a lot of flip cards and pockets in my albums. I think it makes the album more interesting, and it help me to get more photos and journaling on my pages.

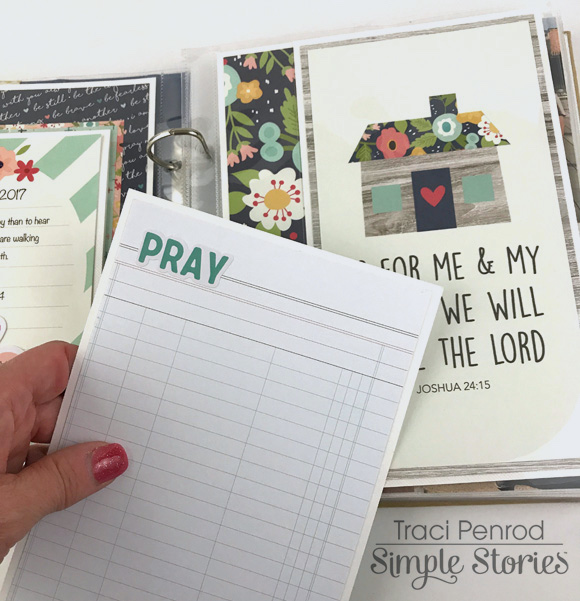
This "Pray" sticker is from the 4x6 Faith sticker package. These packs are great because they have alpha/number stickers, tabs, icons and small captions that are perfect for smaller spaces like mini albums and planners.

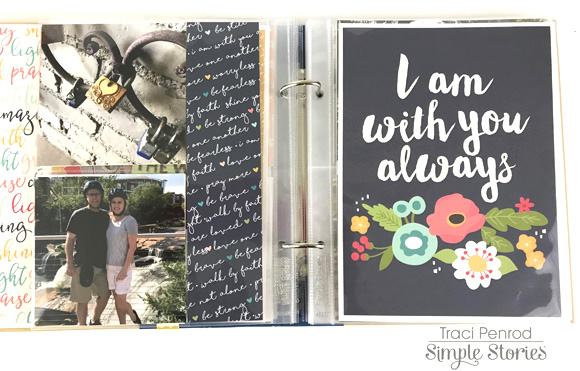
These photos are from a recent trip my husband and I took to Greenville, SC with some friends. We went on a Segway tour of the city. If you've never done this, do it! It's a lot of fun, and pretty easy after 10 minutes of practice.

For Mother's Day we visited my in laws in Chattanooga. I usually don't take tons of photos on weekend trips, so my Sn@p album pockets are perfect for documenting the highlights. The chipboard globe in the Faith collection reminds me of travel .... so cute!
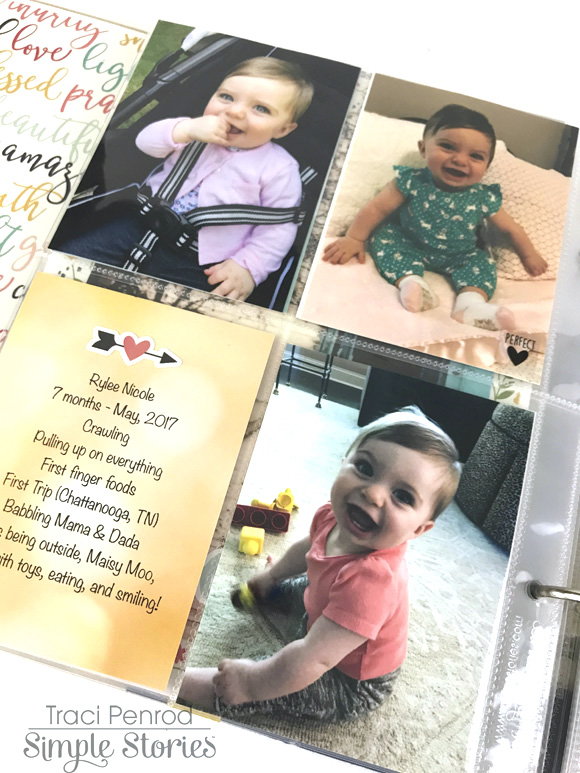

What can I say ... this little sweetness has my heart! Having a granddaughter has been one of the biggest joys in my life. I'm sure when I look back on my 2017 album in the future, most of the photos will be of her, ha ha!
Well thanks for letting me share a few pages of my 2017 album with you! I hope you'll stop by my Artsy Albums blog and say hello sometime!

Supplies
05.28.17
Hi there, Nathalie here with some new projects using some of the fun and beautiful collections from Simple Stories.
This time i chose to document two different snapshots of my fun loving family!, and the new collections Cabin Fever and Emoji love were perfect to bring this pictures to live. Let me show you:
TAKE A HIKE

My husband is passionate about camping and the great outdoors, something he has passed on to our kids. For this picture of our family hiking around Lake Simcoe, I used the colors and patterns in the new Cabin Fever collection to complete this page.

To create the background, two cut files from the Cut Shoppe were fused together to create a compass. The star in the middle of the compass was backed with vellum, while the two outer rings of the compass were back with the 'Roughing It', and 'Under The Stars' papers from the collection. The compass was then glued to the right of the b side of the " Nature Hike" paper, and trimmed to fit within the edge of the page.

There are so many coordinating embellishments in this collection, that i just had to use as many as i could to frame the picture. I layered some of the 4x6 element cut-out cards from the collection behind the picture, and glued it between the N and W corner of the compass. I created the first cluster at the center of the compass by using some sentiments from the Combo Sticker sheet, Bits and Pieces, and 4x6 sticker sheets.

A second cluster was created around the top corner of the picture, here i used pulled some of the beautiful flower chipboard stickers, the boot print brad, and some stickers and die cuts from the collection. I love the brads from this collection!, in fact I am hoarding a few of them in my stash!!

Can you tell I love cut files? I used another design from the Cut Shoppe to create the title of this piece, I used the remaining piece of the "Under the Stars" paper to back the cut-out, and glued it below the picture. I had to repeat the foot print design -as in the brad-, and chose the Chipboard stickers; this time, a small cluster was created with some of the Bits and pieces, Combo sticker sheet and another brad ( i love the brads!!!).

To finish the page, I trimmed a bit of the left and bottom edges of the page, and glued the entire mat to the "Summer Camp" paper from the collection. I added a few lines of journal around the perimeter of the compass to complete this page. I love how i was able to combine the picture with the earthy tones of this collection. Trust me, you need a bit of Cabin Fever to document your outdoorsy adventures!
__________________________________________
LOL
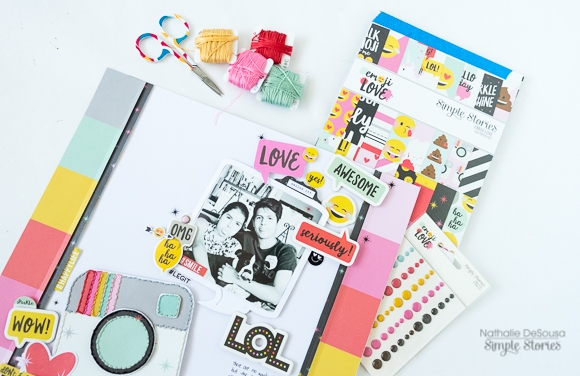
This project is all about the super fun Emoji Love collection, and one of the funniest pictures of my 3 kids. Sometimes the stars align, and you get that lucky shot, this is exactly how this picture came to be, and the best way to document it was using all the icons in the collection.
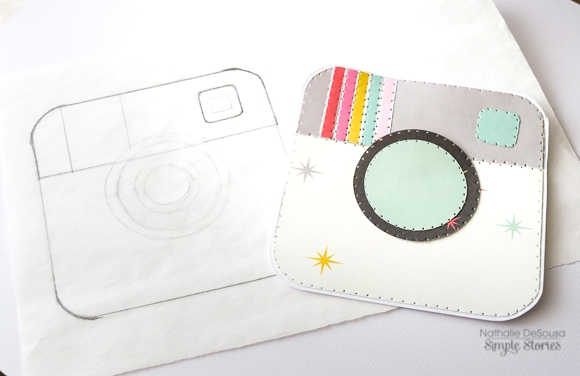
The idea for this layout came after sharing this picture with my family overseas. It all started from a camera snapshot, followed by the picture going to our family group, and then the reactions are still coming in. So, I started by recreating the camera icon in this collection. I drew the image on trace paper, and used it to build the icon from papers from the 6x8 paper pad and some hand stitching. This took a bit of time, as I wanted to add details, and texture to this element.
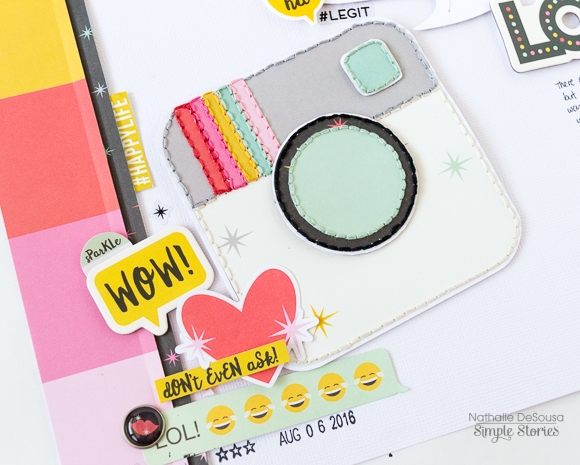
To make the colors of this layout shine, I opted to use white cardstock as the base. I cut two wide strips of "YAY" paper, and glued it to the sides of the cardstock; next two strips of the "Too Cool" paper were cut ( narrower than the previous strips), and glued on top of the previous strips. The finished camera element was then glued to the bottom of the page, and I used Chipboard stickers, die cut pieces, the combo sticker sheet , and brads to add the cluster on the camera.

To recreate the posting, I cut a speech bubble out of cardstock, and used it to frame the picture of my kids. It was then glued above the camera element, and lots of icons were then glued around it. Since there is so many icons, speech bubbles and emojis in the collection, I pulled pieces from all the embellishments in the collection to create the clusters around the picture. I even used the LOL chipboard sticker as the title for this piece. Here is final layout:
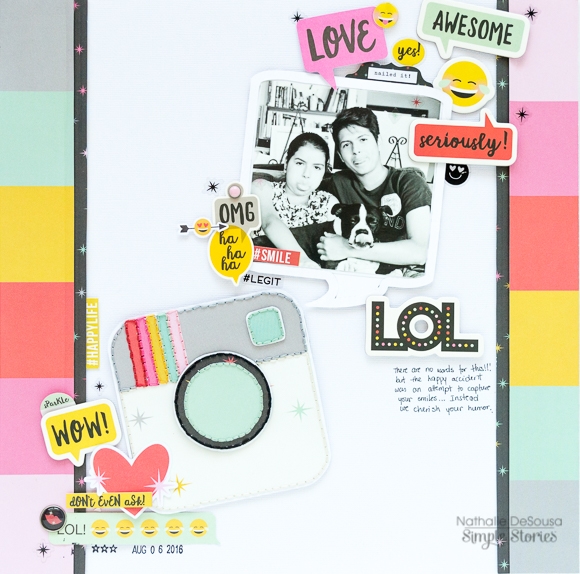
OMG, this layout is just the perfect representation of this social media post. I love it!. The emoji collection is by far one of the funnest collections to date.
I hope the two projects here inspire you to document those fun family moments. The new Simple Stories collection are so diverse, fun, innovative that you can easily scrap from outdoor hikes to the common social media post. The possibilities are infinite with the new Simple Stories collections. I cannot wait to see what you create with them.
Thanks for stopping by today!
Supplies
05.27.17
Hello Everyone! It's Jomelle here today sharing my project using the Faith collection. I was raised in a religious family. Growing up, I remember that we always go to church for mass every Sunday. I even went to Catholic School during my Elementary Days. Having my own family, I truly try my best to keep the Christian Catholic Faith. Part of that is to have my children attend Faith Formation Education Classes and to make sure that they receive the Sacraments of Initiation.
The Faith Collection is perfect for my memory keeping of the Holy Sacraments that my family celebrate and will celebrate in the future.


This is what I call "Pocket Love" I used mostly bits and pieces to decorate my pockets. I love the hint of yellow everywhere.

The cover of this Doc it Journal is already beautiful. I just added some butterfly chipboard stickers and some enamel dots to add a little 3D effect.
I used lots of layering to decorate the cover page of my journal. I love using doilies and have them peeking out from behind.


Here is the first Sacrament of Initiation-Baptism. I wanted to document my daughter's baptism to remember the day she was welcomed into the Christian world and became the child of God. This is a very special occasion for her and for our family.


I was lucky enough that one of our family member was able to photograph my daughter being baptized.

Close up of the picture where my daughter is being baptized with the Holy water.

I made a peek-a-boo page. The scallops edges also adds a nice touch to this page.


Next Sacrament of Initiation is the First Holy Communion.


My son Jaden's First Holy Communion. This was a big deal for my son. He was actually excited and I was excited for him because he now knows the meaning behind taking the "bread" during Sunday mass. I wanted him to know that is he receiving Jesus into our body and soul.


I actually ran out of some letters of the alpha stickers in the same color to spell the words I wanted on this page, so ended up using both colors. I didn't think I was going to like it but it actually turned out pretty good.

I had to take a picture of this eye candy bits and pieces and washi tapes. I always use these with all my planner projects. They are super fun and I just love the vivid colors.

Thank you for stopping by. I hope to add more in my Faith Memory keeping Journal in the future when my oldest son receives his Confirmation. Have a nice day!
Supplies
05.23.17
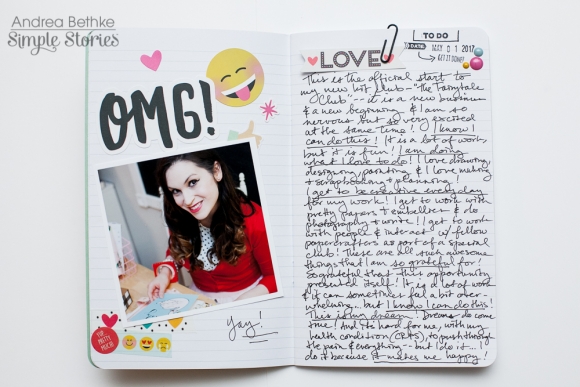
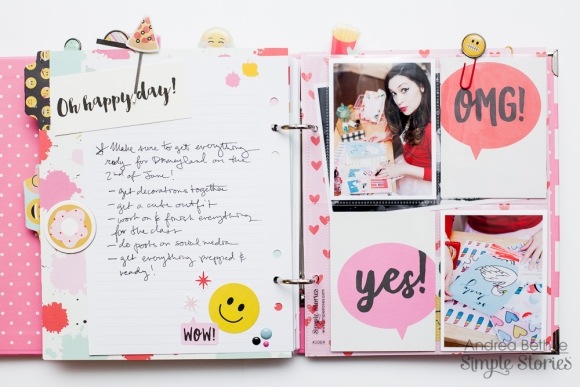
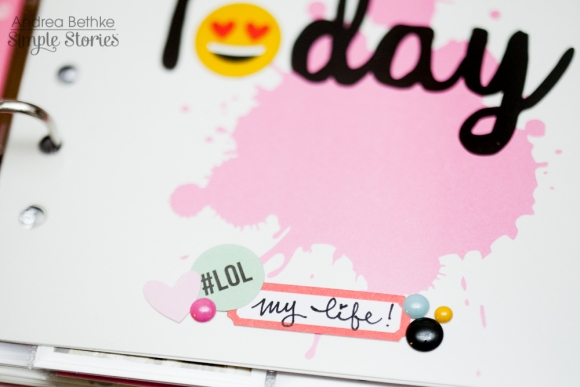
Hello Everyone! It's Andrea here and today I want to share with you a fun project I did using the Emoji Love collection from Simple Stories! I love this collection! It is so bright and bold and it feels so “of the moment”. It is the perfect collection to use to plan and document your life right now in a cool mini album project. So this month I made a mini album for May called "Love today: my life now" which combines lots of planning goodness with traditional scrapbooking and pocket pages...yay!
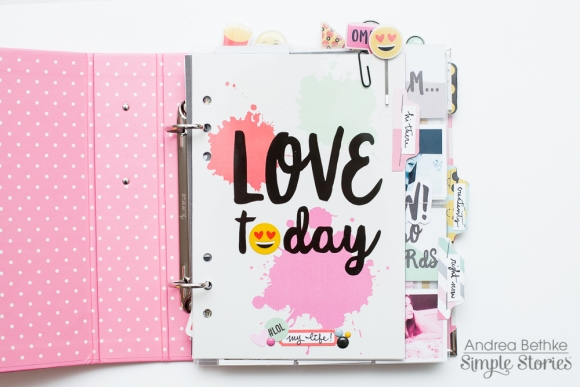
I don't know about you, but I am always using emojis in my everyday life now. And so, it felt appropriate to use a scrapbooking collection that has tons of emojis to document my everyday life too! I decided to document my everyday life right now with a combo of memory-planning and memory-keeping, using the planner goodies, Doc-It journal, and a 6x8 mini album with SN@P! Pocket Pages and Emoji Love SN@P! Pack.
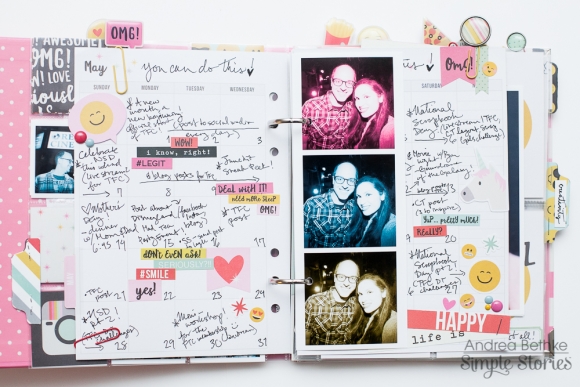
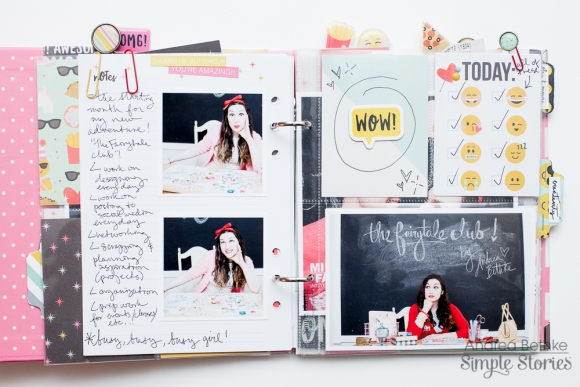
Similar to what I did last month (with my Faith planner to Faith mini album project), I documented my month, May, in my planner and then I moved those calendar pages into a mini album. This time I also decided to do some journaling, list making and note taking in my Doc-It journal too...and then use some info from that to inform my 6x8 mini album. This album is all about documenting my life right now...what is going on, how I am feeling, my plans and activities, etc.
This month was filled with ups and downs. The downs haven't been that bad though, its just that I have mostly just been really, really busy. Which, many of you know, when you are really busy, sometimes things can feel a bit overwhelming. But, when you are busy with something you love doing, then it also feels really good to be constantly working on something that makes you happy! That is how my May has gone! I have been so busy, but I have been so happy too, working on lots of creative projects!
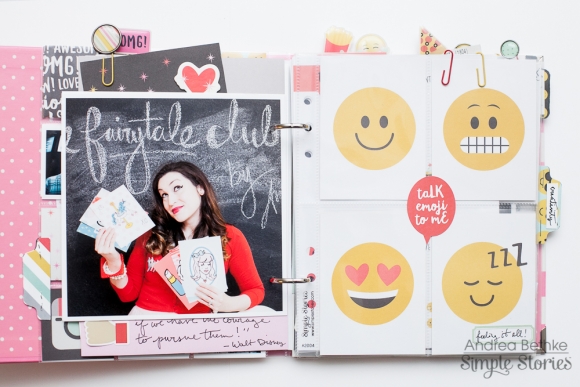
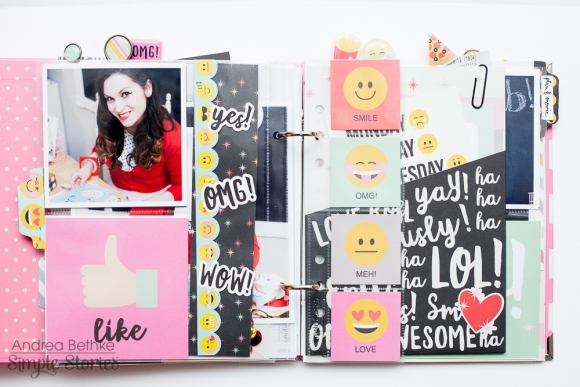
This month marks a new, big creative and business adventure for me, so I am really excited...and also a little bit nervous...like all the time! I think my emotions have been running the gamut this month and so it made perfect sense to use the Emoji Love collection to document all the different feelings that I am feeling right now!!! The different emoji faces are perfect for this!
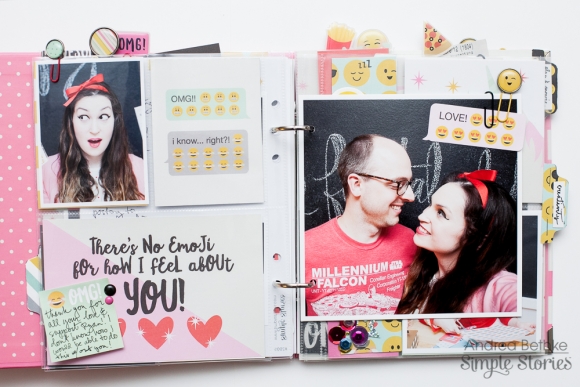
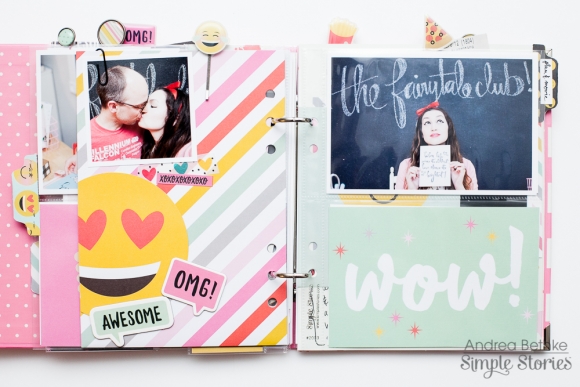
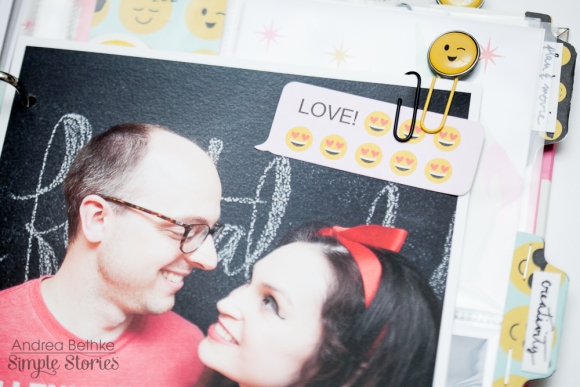
One big feeling I have definitely been having this month, is a whole lot of love and heart eyes for my hubby, Ryan, for being so very supportive of me right now! He has really helped me a lot this month to get so much accomplished and it is so nice to know that he believes in me!
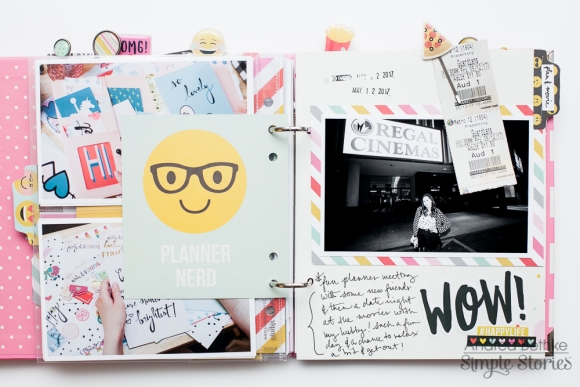
I am definitely feeling very creative this month too...with my creative mojo flowing! I have definitely been scrapbooking and planning a lot this month and that is always great!

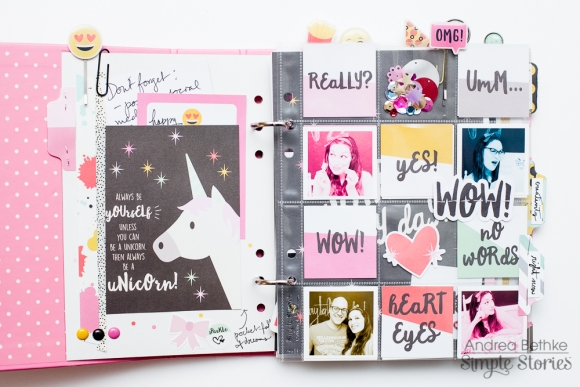
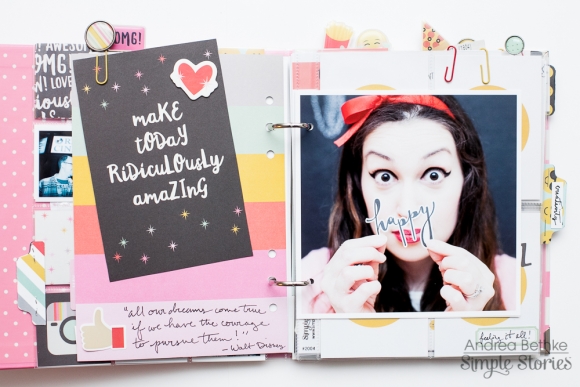
I love that in addition to all the cute face emojis that are included in the collection, there are also a lot of very explanatory words and phrases that helped me to document all that has been happening this month. The busy-ness is described well I think with phrases like “omg” and “wow” and “deal with it” and “need more sleep”!
In addition to all the busy stuff and creative stuff that I documented this month with Emoji Love, it was fun to document the more relaxed, “playful”, of this month as well with the collection. For example, I thought the collection worked really well with our pics from our trip to go see “Gaurdians of the Galaxy” at the movie theater too!
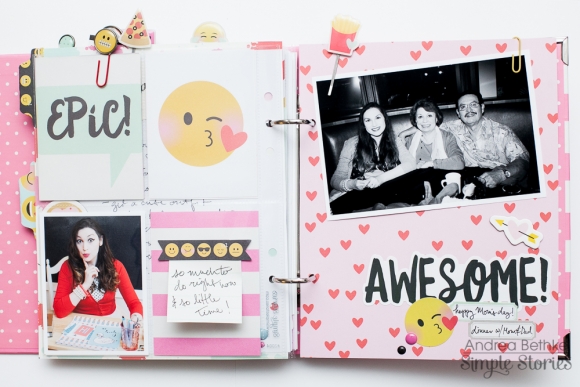
And since Mother's Day was also this month, of course I included that in my album documenting May too!
Alright, well, I hope you enjoyed this combo of memory-keeping and memory-planning that I did this month with my documentation of the “Now” using the awesome collection, Emoji Love by Simple Stories!

I hope I have inspired you to make a fun mini album of your own, documenting your various emotions and activities and plans for your life at the moment!
Happy Scrapping everyone! Xoxoxoxoxoxoxoxoo

Supplies
05.23.17
Hello Everyone! It's Andrea here and today I want to share with you a fun project I did using the Emoji Love collection from Simple Stories! I love this collection! It is so bright and bold and it feels so “of the moment”. It is the perfect collection to use to plan and document your life right now in a cool mini album project. So this month I made a mini album for May called "Love today: my life now" which combines lots of planning goodness with traditional scrapbooking and pocket pages...yay!
{pic 02}
{pic 03}
I don't know about you, but I am always using emojis in my everyday life now. And so, it felt appropriate to use a scrapbooking collection that has tons of emojis to document my everyday life too! I decided to document my everyday life right now with a combo of memory-planning and memory-keeping, using the planner goodies, Doc-It journal, and a 6x8 mini album with Sn@p pocket pages and Sn@ppack from Simple Stories Emoji Love!
{pic 05}
{pic 39}
Similar to what I did last month (with my Faith planner to Faith mini album project), I documented my month, May, in my planner and then I moved those calendar pages into a mini album. This time I also decided to do some journaling, list making and note taking in my Doc-It journal too...and then use some info from that to inform my 6x8 mini album. This album is all about documenting my life right now...what is going on, how I am feeling, my plans and activities, etc.
{pic 06}
This month was filled with ups and downs. The downs haven't been that bad though, its just that I have mostly just been really, really busy. Which, many of you know, when you are really busy, sometimes things can feel a bit overwhelming. But, when you are busy with something you love doing, then it also feels really good to be constantly working on something that makes you happy! That is how my May has gone! I have been so busy, but I have been so happy too, working on lots of creative projects!
{pic 07}
This month marks a new, big creative and business adventure for me, so I am really excited...and also a little bit nervous...like all the time! I think my emotions have been running the gamut this month and so it made perfect sense to use the Emoji Love collection to document all the different feelings that I am feeling right now!!! The different emoji faces are perfect for this!
{pic 08}
One big feeling I have definitely been having this month, is a whole lot of love and heart eyes for my hubby, Ryan, for being so very supportive of me right now! He has really helped me a lot this month to get so much accomplished and it is so nice to know that he believes in me!
{pic 09}
I am definitely feeling very creative this month too...with my creative mojo flowing! I have definitely been scrapbooking and planning a lot this month and that is always great!
{pic 10}
I love that in addition to all the cute face emojis that are included in the collection, there are also a lot of very explanatory words and phrases that helped me to document all that has been happening this month. The busy-ness is described well I think with phrases like “omg” and “wow” and “deal with it” and “need more sleep”!
{pic 11}
{pic 13}
In addition to all the busy stuff and creative stuff that I documented this month with Emoji Love, it was fun to document the more relaxed, “playful”, of this month as well with the collection. For example, I thought the collection worked really well with our pics from our trip to go see “Gaurdians of the Galaxy” at the movie theater too!
{pic 15}
{pic 16}
And since Mother's Day was also this month, of course I included that in my album documenting May too!
{pic 17}
Alright, well, I hope you enjoyed this combo of memory-keeping and memory-planning that I did this month with my documentation of the “Now” using the awesome collection, Emoji Love by Simple Stories!
{pic 18}
{pic 24}
I hope I have inspired you to make a fun mini album of your own, documenting your various emotions and activities and plans for your life at the moment!
{pic 29}
Happy Scrapping everyone! Xoxoxoxoxoxoxoxoo
05.22.17
Be still, and know that I am God. (Psalms 46:10) This month I wanted to share with you how I used my Floral Dot Carpe Diem Planner and the Faith collection as my War Binder. This scripture has so much meaning to me that I cried when I first saw the 6X8 pad. I knew right away what I was going to use as my Dashboard.


Throughout my life I've had some very difficult moments. Some that people will never have to go through in their lifetime. From having my first born son prematurely and needed to stay in the hospital for 30 days and just days before he was released was told, to prepare my self for the worst, he most likely is not going to make it! I couldn't understand, and I wasn't going to accept that. Our church prayed at the next service while we were there and by the end of the week he was able to go home.
When our daughter turned four we went in for a routine checkup and found out she had a heart murmur, but the doc wasn't too concerned, but was concerned enough to have a child cardiologist take a look at her heart. Before I knew it there are 4-5 doctors in the room with us all whispering among themselves. I felt my heartbeat in my ears. I was like, what is going on! My eyes were darting back and forth. It was then that her cardiologist informed us that she needed to have open heart surgery. I felt like I was punched in the gut.
From surgeries, marriage, and all the other things life throws at me. Sometimes I try to take matters in my own hands and sometimes I did and messed up everything, but God was always there and still is, reminding me to be Still! Through a song playing on the radio, from a friend, from a greeting card to my daily devotion, a sermon on a Sunday morning, on a journal sent to me, and now with a Simple Stories Faith Collection Line. I'm humbled that he would take the time to constantly bring me reminders of who really is in control.


The Faith A5 planner inserts are perfect for my war binder. I used the Inspired journal inserts, to keep track of what I was reading, inspiration and prayers. I also made a little flag paperclip bookmark. This has to be one of my favorite color schemes of all time. The florals, mason jars, mint, aqua, pinks and yellow are so beautiful. All of the journal cards and stickers are just what I need to add some inspiration and encouragement to my day.


As part of my war binder, I keep my month scripture writing in it. I use the weekly inserts to write down each scripture for the day.


Jesus is the reason I live and breath, he is my hope and my salvation. I serve him because I need him! My life and everything about me is far from perfect, but I'm thankful to know who is! I am also very thankful that I now have a gorgeous way of documenting all my prayers, daily scriptures and more, using the Faith Collection.

Supplies
05.20.17
Hi everyone! Tara, from Secretbees Studio here today with a super cute home project that is not only functional but looks awesome too! Sometimes we (our family) need a little reminder of the things that have to be done around the house. Using a regular picture frame and the adorable Simple Stories 'Domestic Bliss' paper collection, you can create a charming way to help them remember!

I picked up a simple 8x10 frame at my local craft store for this project. You can use any size, but this one is great for showing off the beautiful 'Domestic Bliss' papers and embellishments! You will also need dry erase markers for this - any color will do. Gather all of your supplies and get ready to make something awesome!

I started by using some of the letters from the 4x6 stickers to create a title for my chart. It's always a good idea to use a ruler, or another piece of paper to align your letters evenly! Once positioned where you want them, press firmly so they stay in place.

I also layed out how I wanted my chart to look with the patterned papers, stickers and embellishments before I put it in the frame. The colorful weekly list is one of the 4x6 vertical element cards in the paper pack and worked perfectly! Keep in mind that if you are layering lots of paper together with thick embellishments, it may be harder to fit behind the glass.

The finished product is sweet and charming and so much better than the actual housework! My favorite part is the kitty sitting in the laundry basket with the sentiment 'Every Day I'm Launderin'. Too funny! I added some special touches to the outside of the frame using more of the chipboard, stickers and washi tape from the collection to make it even cuter!

Writing with dry erase markers is smooth and easy and will not leave any residue behind when you need to change things up!

There are so many adorable sentiment stickers in this collection that I couldn't resist using one layered over a label sticker to make a tag for the metal slot at the bottom of the frame.

A close up of the tag I made using one from the Bits & Pieces layered with stickers and chipboard! I just love the laundry basket brad in the center of the twine bow!

This home project was so easy and fun to create that I made another one for the weekly dinner menu! The 'Domestic Bliss' collection even has cute embellishments for that!

Once the week is over and you need to write something new in, just take a tissue or paper towel and wipe off the old. Easy peasy!

Thanks for taking the time to check out my project! I hope this inspires you to create something cute and functional for your home!

Supplies