Hello, it's Lisa here today with a rather magical post.
Let's face it, anything Disney related is magical, right?! And that's how this Say Cheese III collection makes me feel. Magical!

I have two projects to share with you today using this collection. I have a layout and a minibook where I will share my secrets with you....the success of making mini books.


I'm going to start with the ' Meeting the Mouse' layout.


I cut down some white card stock so that it could be framed on the cute spotted paper from the collection. I like to frame my scrapbook pages. I just think it's a good finish.
 
I edited my 'meeting the mouse' photo to turn it in to a vintage polaroid print. I love this look and although it does take the quality out of the photo, it keeps it looking vintage, which I quite like.


 I used one of the 'Snap' cards with half a Mickey head on it and by using a craft knife around the outline of the ear, I've turned it in to a little pocket.


I cut some of the tickets out from the 12x12 Die Cut papers to pop inside the pocket. I also used some to journal on.


I took another of the patterned papers and cut out the large spots to stick on my page. I also used some of the 'Bits and Pieces' then to embellish. I like the colour contrasts here. The arrows were made by also cutting out from one of the patterned papers.

I'm really happy with how this has turned out. I love all the pops of colour and yet there's still a little 'white space'.

Now on to my next project, my Mini Book.


This Mini Book was so much fun to make.   I got myself a little stuck with mini books a while back. I used to start them, spend weeks working on them very slowly, step by step, so much procrastinating and they would never get finished.  Then one weekend I made a mega mini book over a weekend.   It then dawned on me the secret to making mini books.


1. Print all your photos and have them ready.
2. Gather all your craft materials and supplies so they are ready in front of you. No more thinking about what paper to use next what embellishments go with what. By using a matching collection like this, all that thought has been done for you and everything coordinates. Make sure you have all your tools there too.
3. Try and create it in one sitting if you can. If this isn't possible then stick with it and make sure you finish it the following day. Chances are (if you are like me) and you walk away, if it's left longer than a few days, it will not get finished.
 
 
 4. Keep a design running throughout the book. This way you don't have to spend too much time thinking how you are going to decorate the pages and when you do decorate each page, it's quick and easy and really makes the mini book flow as you look through. It's very pleasing to the eye seeing this repetitive continuation of the design. Keep it simple. I cut the scalloped patterned paper in to strips and added a strip to the bottom of most of the pages as you can see here above and below. 
 
  
You could also add a heart from the same paper on each page, or use a circle punch ....just something to keep a design flowing.
 
I then work page by page. I choose the order of the pages selecting the papers. Here I used the 12x12 Element papers. They are perfect for Mini Books.
 
 
Then I go through, keeping them in order, adding my photos. Then I go on to add embellishments/stickers. Then any journaling and finally I often like to doodle.


This whole mini book was made in under 2 hours as I stuck to my Mini Book rules. It makes it so easy.
 
Here you can see the pages in order.


I am so happy with how this has turned out. There is a real sense of achievement when you create a project like this.
 
I do have a YouTube Channel here where you can see me creating both of these projects.
 
Thank you for joining me here. Have a magical day!
 

Supplies

Hi again, it's Emma here, I'm back this time to show you what I've been up to with the Domestic Bliss collection, it's a fabulous new line which I'm using in my Carpe Diem A5 planner.  There are so many different items to choose from. 

First things first, which planner to choose? I picked out some of the 12x12 papers from the collection kit and put them against my Ivory, Robins Egg and Ballerina planners to see what looked best, to be honest I liked them all but in the end went for my ever faithful Robins Egg. 

The humour in this line is brilliant, I love all the quotes used, like 'housework can't kill you but why take the chance'!!, it's so important for me to have elements throughout my planners that make me smile, and with this collection they even make me chuckle which can't be a bad thing!

The pockets and dashboard are the first impression you get when you open your planner and for me it's all about stuffing the pockets full of pretty things, I certainly didn't struggle to do this when I had all the bits & pieces and cards from the snap pack at hand! I also used some of the decorative brads and enamel dots for more texture. 

As I said this collection is perfect for the Carpe Diem planner as it has specific items like the 54 piece Home Planner Insert Set which includes home planning inserts, menu & financial pages, dashboard, die cuts, storage pocket, stickers and 6 tabbed dividers. The dividers can be labelled with the stickers included.

The domestic bliss line is full of images of fun household items like the retro vacuum cleaner which you'll find throughout the collection, even on the epoxy metal clips. The doc it journal cover has all these on it, it's so handy to keep in the back pocket of my planner, I also have the shopping list bookmark tablet tucked in the back ready to scribble down what's needed! 

I have filled my weekly pages with washi and stickers and tried to put together a basic routine for housework. I'm using the planner for a multitude of things to try and make the home run more smoothly. Decorating the pages is a pleasure with the 725 stickers you get in the sticker tablet!!

One of the ways I'm using the planner is to keep all the notes that my little boy brings home from school, although you get a pocket divider included with the insert set I wanted to make a few more as they are so handy, it's really easy with the 12x 12 papers to make a simple pocket divider, and then using all the other elements to decorate. You can then store your receipts, stickers, coupons etc in each one. 


I hope you've enjoyed looking at a few of the ways I've used the Domestic Bliss collection, I'm certainly enjoying using it all!

If you would like to see more pictures of how I use all the simple stories Carpe Diem products you can find me at Instagram https://www.instagram.com/heartsbyemma

See you next time.

SaveSave

Supplies

Hey Carpe Diem planner fans! If you've been looking for a place to chat all things Carpe Diem & share your love for our planners & accessories with people just like you, look no further! There are 2 independent groups on Facebook just for that - we encourage you to check them out & join!

http://bit.ly/CarpeDiemPlannerLovers

http://bit.ly/CarpeDiemPlannerFans

Hello Friends! It's Kristine Davidson here today and I'm sharing 2 layouts with you using the new collection called CABIN FEVER.  When you look at this collection you might think -" wow, i haven't been camping in years!" but you shouldn't skip this collection all together! I created a layout that wasn't even close to camping - just read my post and you'll see! 

My first layout is called Cabin Fever. I had to borrow a friend's photo to complete a layout using this collection because honestly I haven't been camping in years! I really liked the colors and also that little red truck was just calling my name! So I created a layout based on a gorgeous cabin in the woods. A place where people come to relax, enjoy some quiet time and make some lasting memories. 

I created some layers with several papers from this collection and used a minimal amount of die cuts on this one. I found with the picture of the cabin, i didn't much to enhance it or I didn't want my page to be too busy. 

I cut out the compass from a 4x6 journal card in the kit and then of course that little red truck is sooo cute isn't it !? This collection could be used for a fall layout or spring / summer layout at the cabin or camping as well. 

It's an easy page that you can replicate with no issues, just find that perfect picture!

________________________________________
 

My second layout is a fun one - still using the same Cabin Fever collection but I created a page that wasn't about camping or the cabin at all. 

This layout is called " You Make Me Happy".  I apologize that the lighting isn't great on my layout - we haven't seen sun in ages here on the east coast. 

 I started this page by using a cut file in the Silhouette store from the Simple Stories - the GEO Background #194848. I love die cut backgrounds and of course this one was perfect for me. I created my background and then added pieces of papers - to give it more detail I did some sewing all along those lines - it looks good and I don't need to fuss over glue dots or make sure it stays put ;) 

Once I finished with the piecing of the background I started decorating. I wanted to have something that wasn't camping related so I simply used the flowers from the sticker sheet, Bits & Pieces and also chipboard.  I clustered on the left hand side of the photo since my papers on the right were a bit busy as is - I didn't want to overwhelm the page too much. 

I kept some simple colors such as the beige and also the mint green. I also kept a corner with the wood grain paper so I could decorate a bit more on the right bottom corner. 

My title was created using some alpha stickers from the SN@P! basics collection.  I also had a cut file for happy from Kerri Bradford. I added some pop dots behind the word happy to give it some height and then added some enamel dots ;)

As you can see this collection isn't just for those who love camping ;) 

I hope you enjoyed my reveal today and of course we can't wait to see what you create with this collection! Don't forget to tag us on instagram using #SimpleStories and you can come follow me as well at instagram.com/KristineDavidson

Thanks for visiting and talk to you again soon!

Supplies

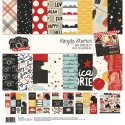
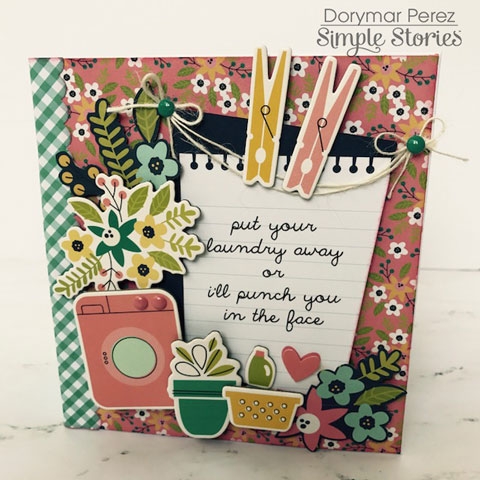
Hello everyone!  It’s Dorymar Perez here!  I hope you had an amazing National Scrapbook Day and a spectacular Mother’s Day weekend!  I want to share with you a beautiful mini album I created using the gorgeous DOMESTIC BLISS collection.  When I saw this collection, I fell in love instantly with the colors, designs, but most of all, the theme: Home!  I wanted to design an album to document the everyday chores to do at home.  In my case, a from everything I do daily – I take care of my brother, my mom, two beautiful daughters, a loving husband, pets and a big house - LAUNDRY is a HUGE task!  OMG, it never ends!

¡Saludos chicas! ¡Por aquí Dorymar Perez! ¡Espero que hayan disfrutado al máximo el Día Nacional del Scrapbook y un fin de semana de madres espectacular!  Quiero compartir con ustedes un hermoso mini álbum con la colección DOMESTIC BLISS.  Cuando vi la colección quedé enamorada al instante con los colores, los diseños y más aún con el tema: CASA.  Quería diseñar un álbum que documente las tareas del día a día en la casa.  En mi caso algo que hago todos los días – es cuidar a mi hermano, mi mamá, mis dos hermosas chicas, mi amado esposo, mis mascotas y mi casa, pero entre las muchas tareas que realizo en el hogar la que para mí es una tarea enorme es el LAUNDRY. ¡OMG nunca termina!

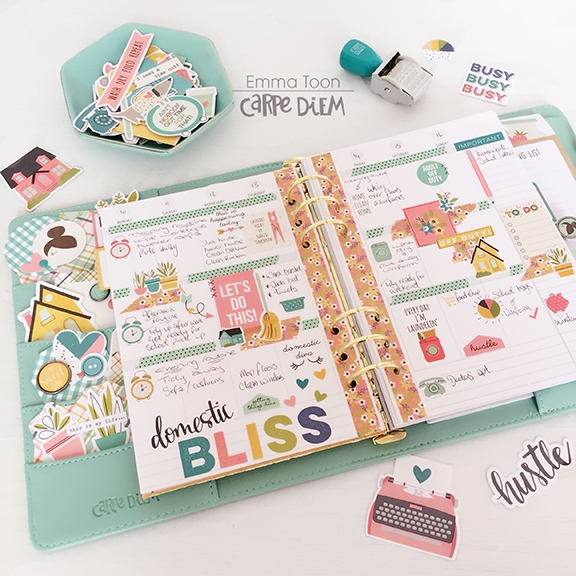
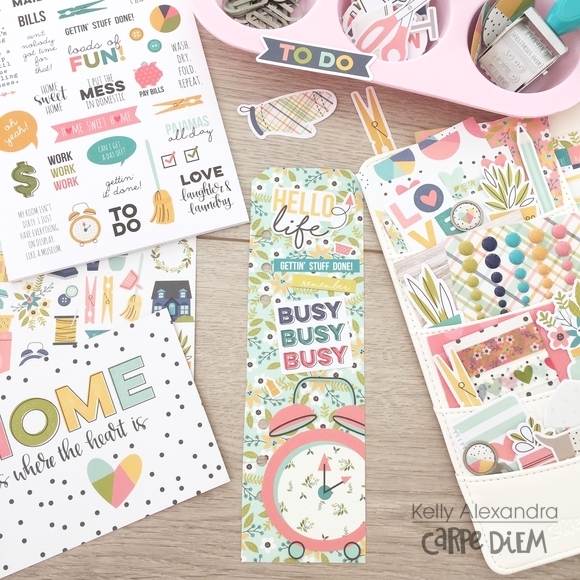
I decided to use the collection to create a box that simulates a washing machine and inside it housed a beautiful mini album with lots of space for photos!  We typically take pictures of special moments, but not photos of the tasks we do as part of daily routine.  My album does not have the photos yet, but each page is designed with a specific photo in mind.

Decidí utilizar la colección para crear una caja que simule una lavadora y en su interior albergue un hermoso mini álbum con mucho espacio para fotos. Por lo general, uno acostumbra tomar fotos de esos momentos especiales, pero no de los momentos arduo trabajo o de la rutina diaria. Mi álbum aún no tiene las fotos, pero cada página está diseñada para la foto que voy a colocar. 

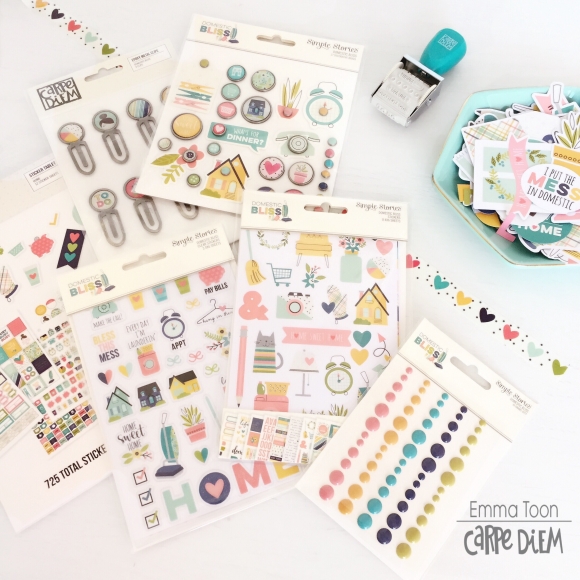
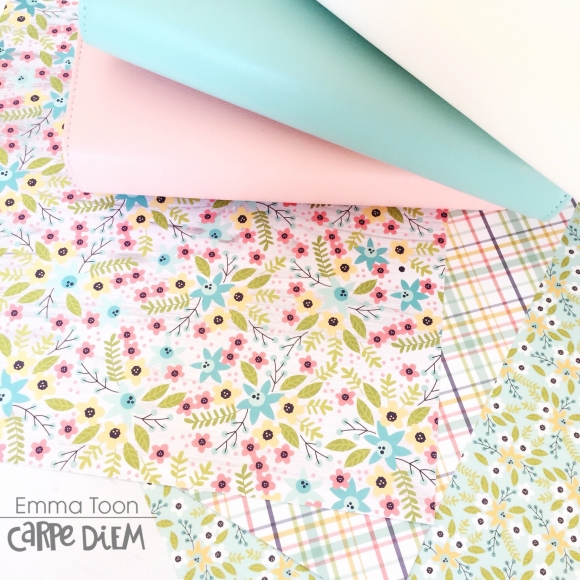
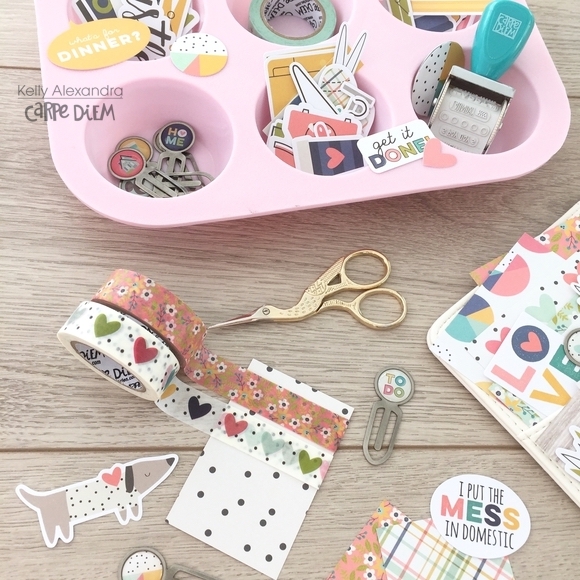
The box measures 6.6” high x 6” long x 5” wide.  I bought some magnetic cans in a dollar store and used its lid and a bubble ornament to form what simulates the door of the washing machine. After cutting the chipboards to the measures indicated above, in one of them, I drew the ornament and made a hole to cover one of its sides later with a transparency.   Then, when placing the ornament, it can be filled with sequins in combination with the bright colors of the collection. I decorated its exterior with flowers hand-cut from the paper, die cuts from Bits and Pieces, Domestic Bliss Decorative Brads, and Enamel Dots from the collection.

La medida de la caja es 6.6 alto x 6 de largo x 5 ancho. Compré en una tienda de dólar unas latas magnéticas y utilicé su tapa y un ornamento de burbuja para formar lo que simula la puerta de la lavadora.  Luego de cortar los “chipboards” a las medidas ofrecidas anteriormente, en uno de ellos tracé el ornamento e hice un agujero para luego con una transparencia cubrir uno de sus lados para que al momento de colocar el ornamento pueda rellenarlo con lentejuelas en combinación con los brillantes colores de la colección.   Decoré su exterior con flores cortadas del papel, “die cuts” de los BITS AND PIECES, Domestic Bliss Decorative Brads y “Enamel Dots de la colección”. 

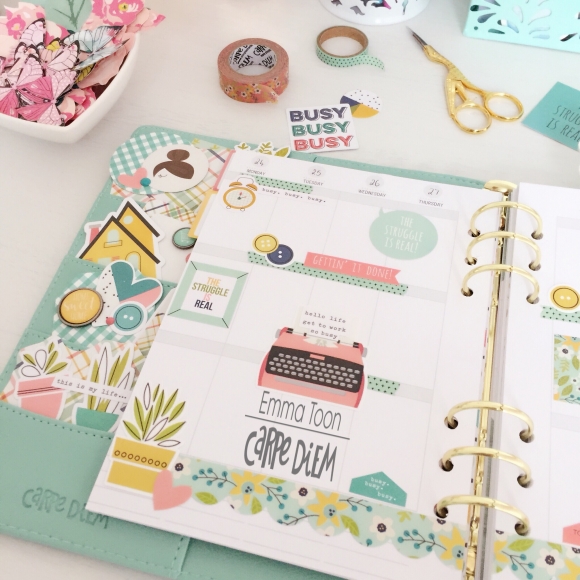
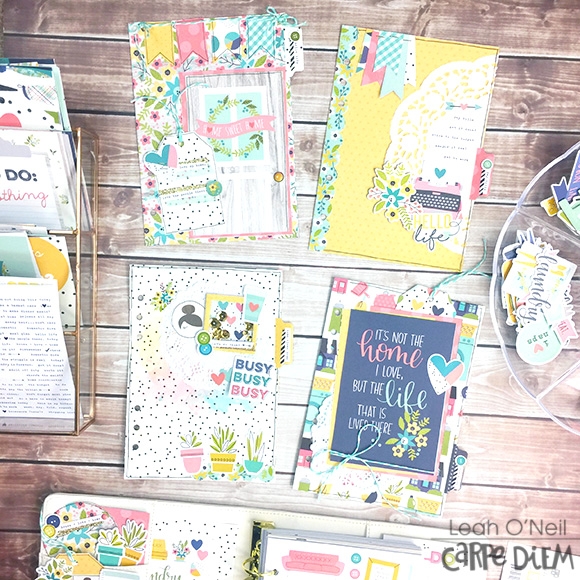
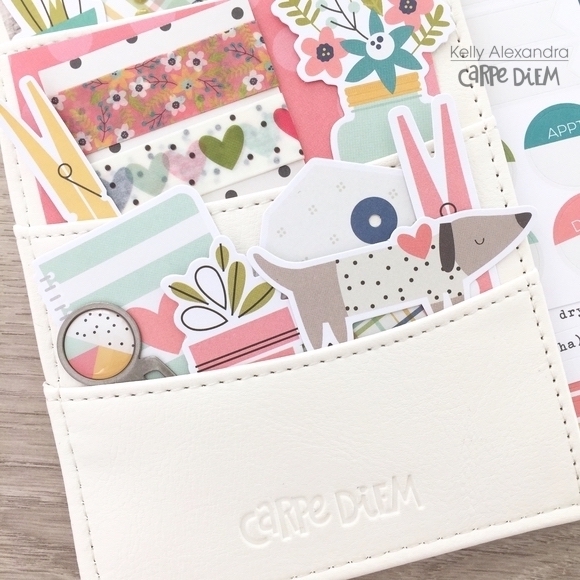
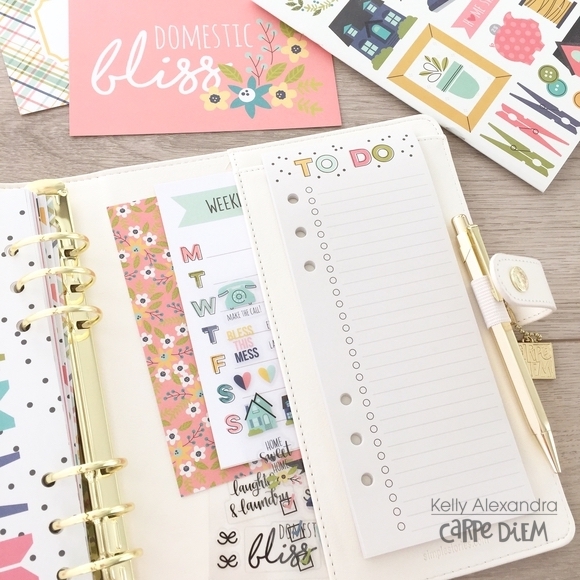
The mini album measures 6” high, 5” long and 2.5” wide.  It has five pages with pockets and flaps. For the cover, I used a 3 x 4 card, chipboard stickers and enamel dots.  I selected all the elements following the theme of my project.

El mini álbum tiene una medida de 6 alto, 5 de largo y 2.5 de ancho.  El mismo cuenta con cinco páginas con bolsillos y “flaps”. Para su portada utilicé una tarjeta 3 x 4, chipboard stickers y enamel dots.  Fui seleccionando todos los elementos acordes con el tema del proyecto.

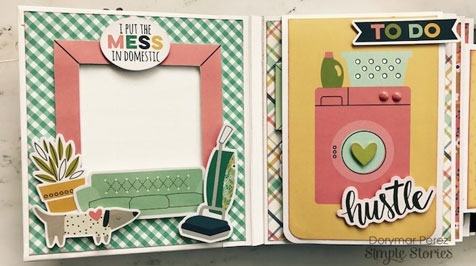
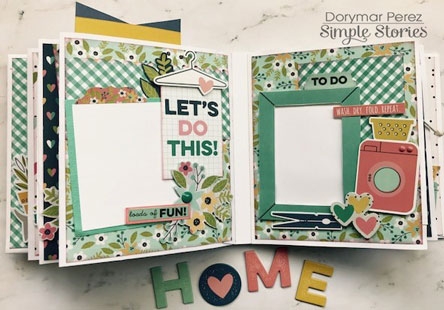
You can see that the interior of the cover simulated a room with die cuts and the frame of a 4x4 card. On the first page, I did a flap that opens and used a 4x6 card that is accentuated with die cuts and enamel dots.

En estas páginas quise enfocar lo que es el tema de la colección y el tema que seleccioné, puedes observar que el interior de la portada simulé una sala con piezas de “die cuts” y el marco de una tarjeta 4 x 4. En la primera página hice un “flap” que abre hacia arriba y utilicé una tarjeta 4 x 6 la cual acentúe con “die cuts y enamel dots”.

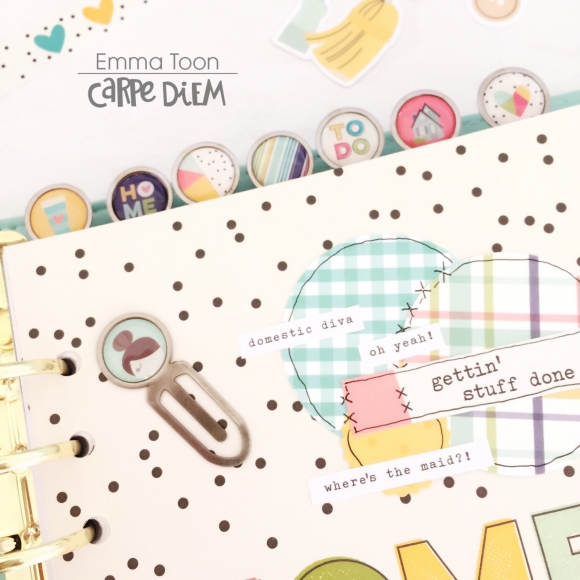
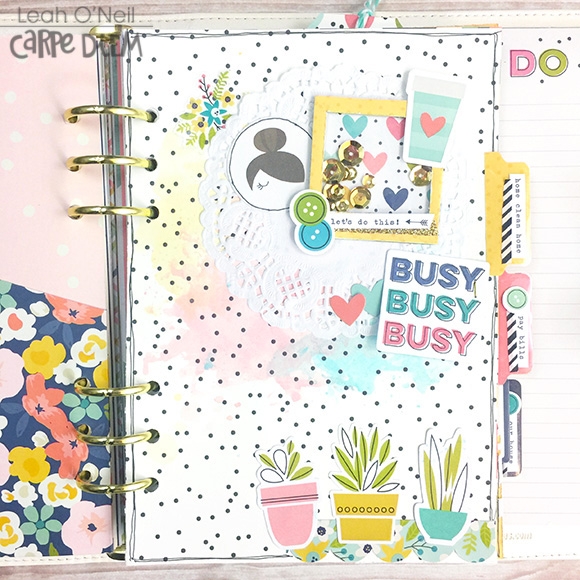
Here you can see in detail the inside of the flap of the first page. In it, I used brads, chipboard stickers, die cut and stickers to decorate everything that surrounds the frame of the photo.

Aquí puedes observar en detalle el interior del flap de la primera página. En ella utilicé “brads, chipboard stickers, die cut y stickers” para decorar todo lo que rodea el marco de la foto. 

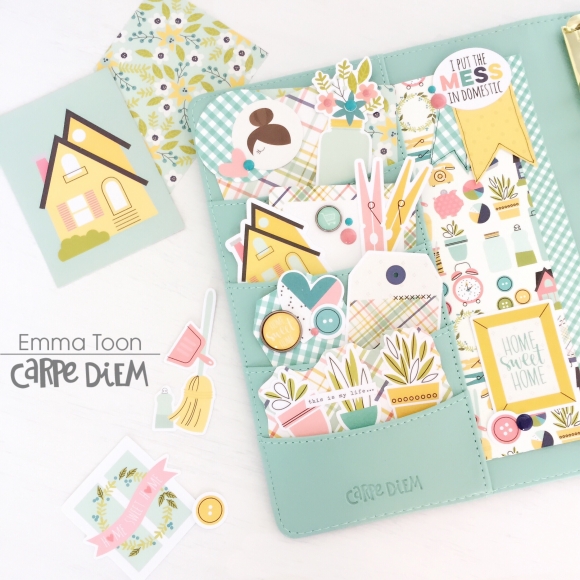
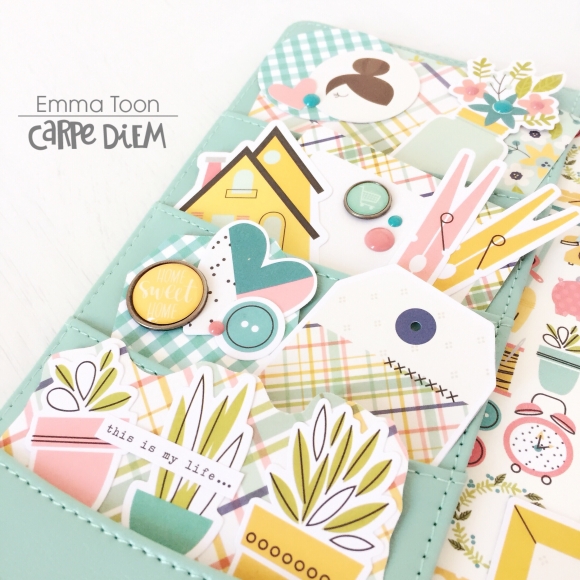
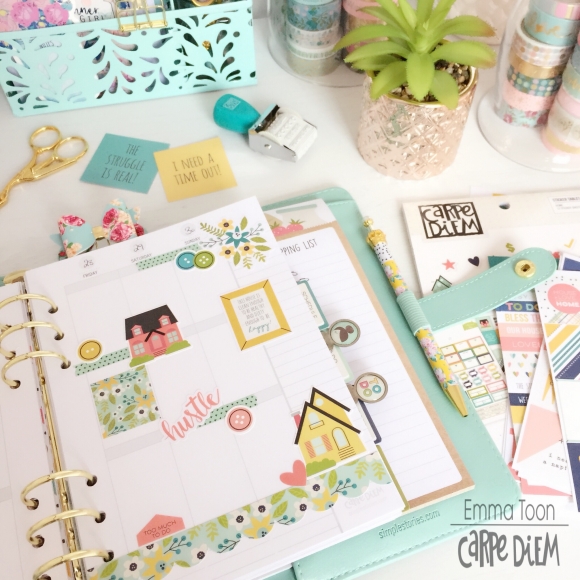
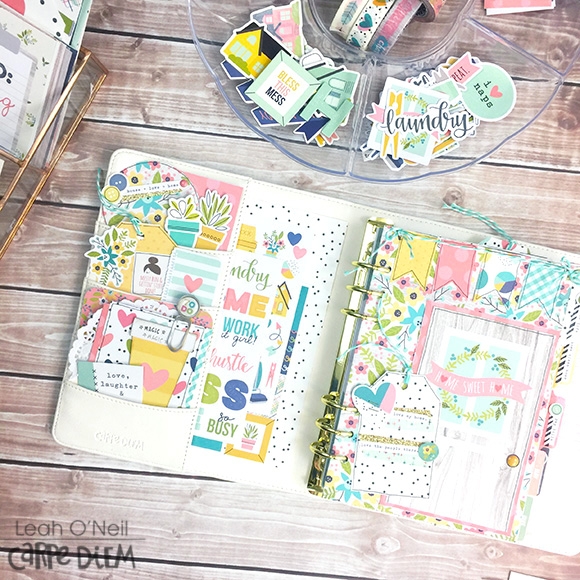
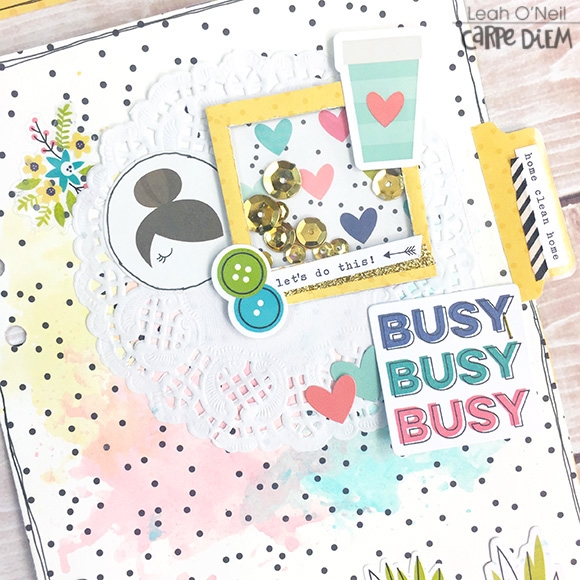
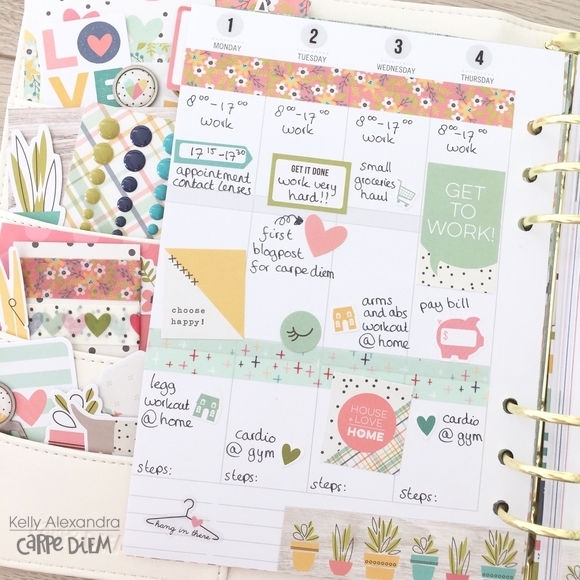
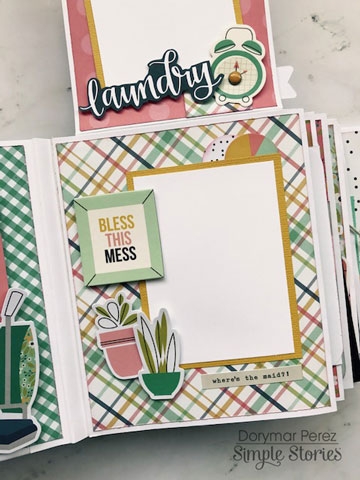
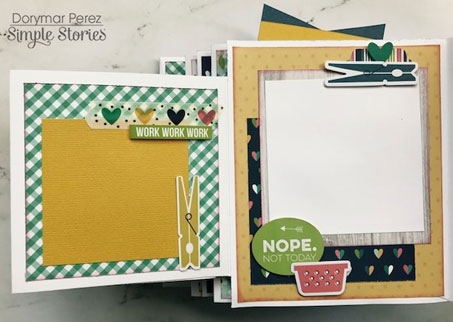
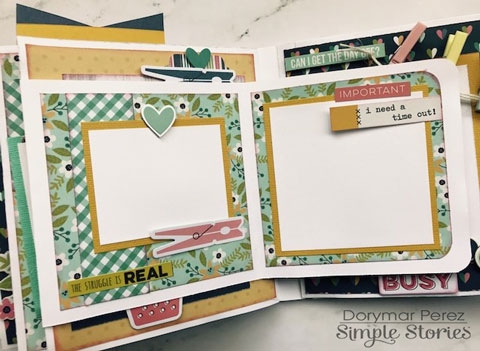
The second and third pages have two flaps that open to the sides.  There is plenty of space for photos and journaling, I continued to embellish all around with die cuts, stickers and washi tape, always focusing on the theme of the project.

La segunda y tercera página tienen dos “flaps” que abren hacia los lados, puedes observar que tienes mucho espacio para fotos y escribir el “journal”.  Sigo acentuando todo su alrededor con “die cuts, stickers y washi tape” enfocándome siempre en el tema del proyecto.

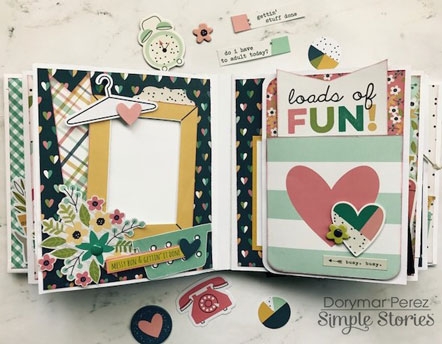
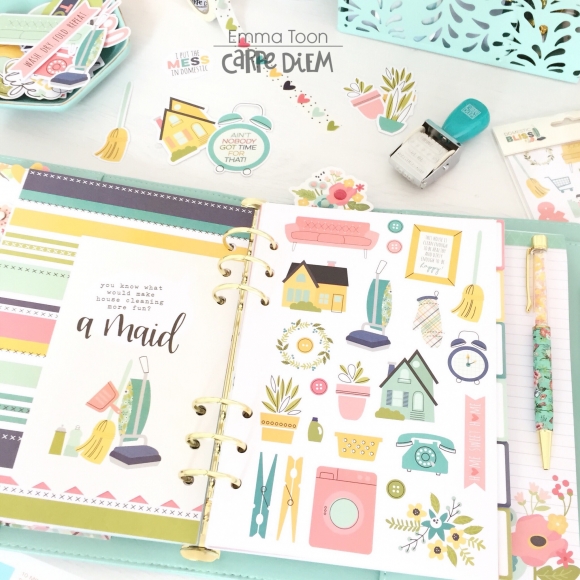
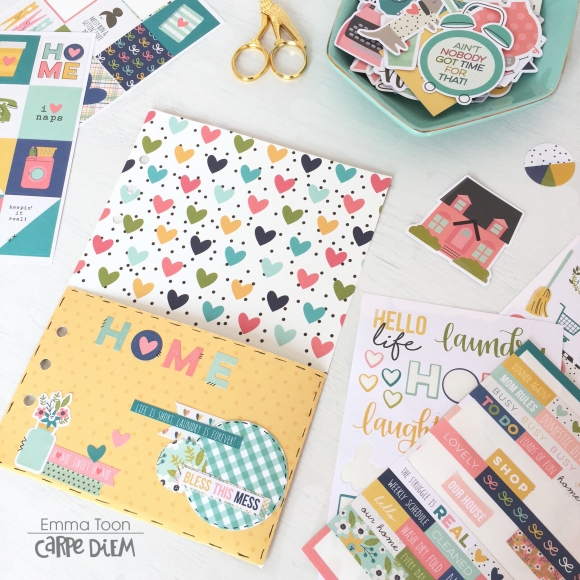
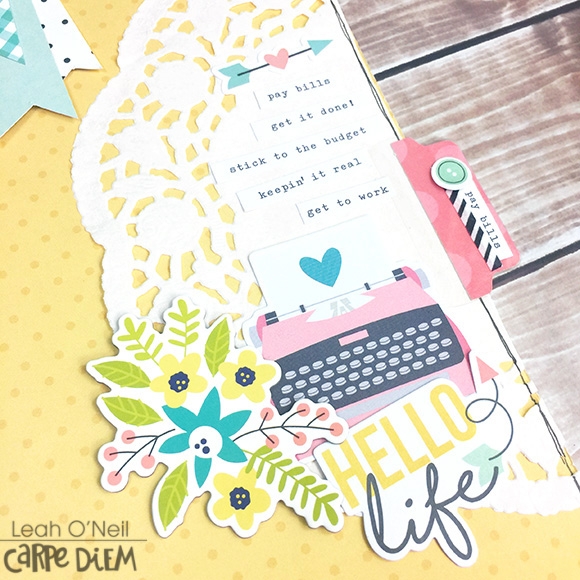
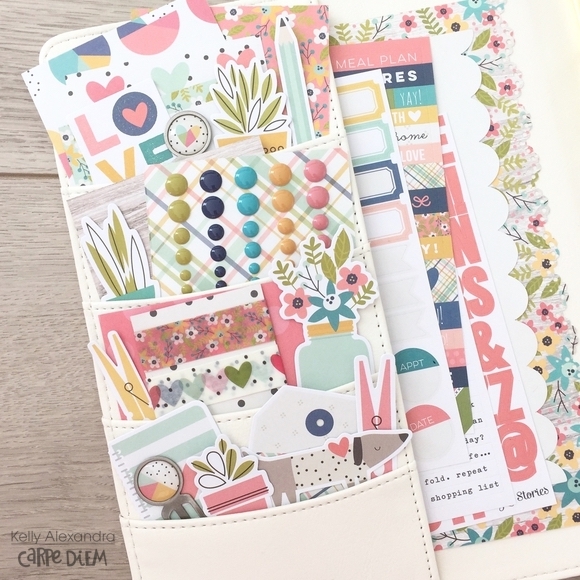
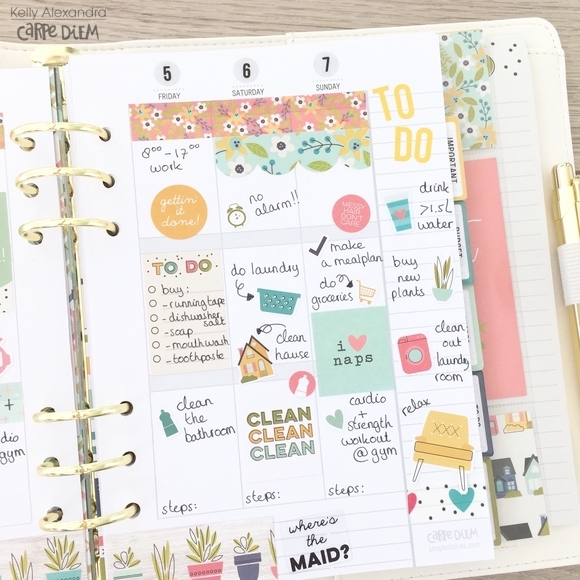
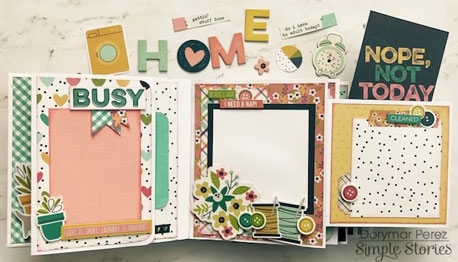
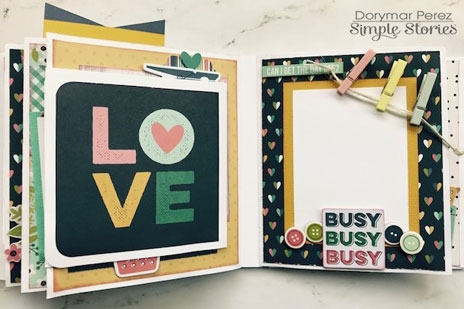
Next, look at pages 4 and 5. Both are filled with super fun elements from the collection. Page 5 has a flap with pocket that has space for journaling and inside it, you can place more photos.

A continuación, observas las páginas 4 y 5.  Ambas páginas están llenas de elementos super divertidos de la colección. La página 5 tiene un flap con bolsillo, en el bolsillo tiene espacio para colocar el “journal” y en el interior del mismo puedes seguir colocando fotos.

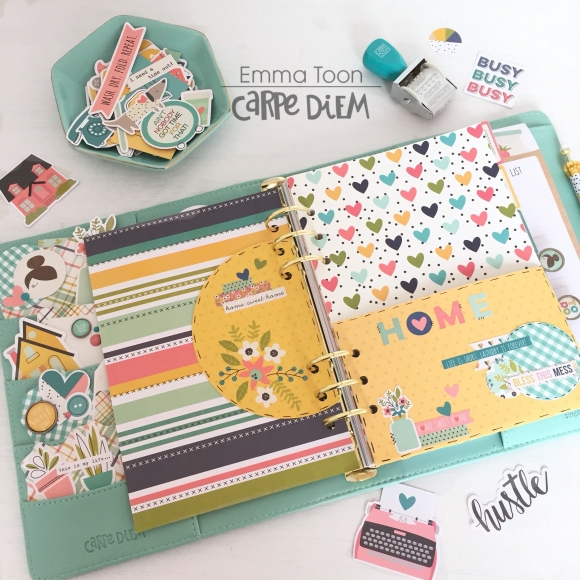
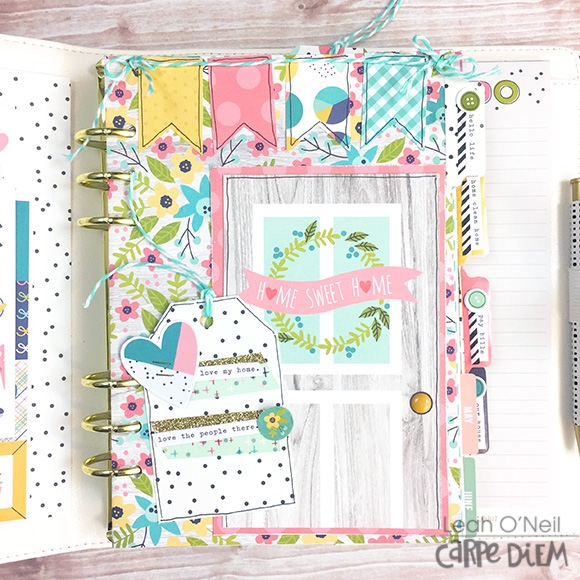
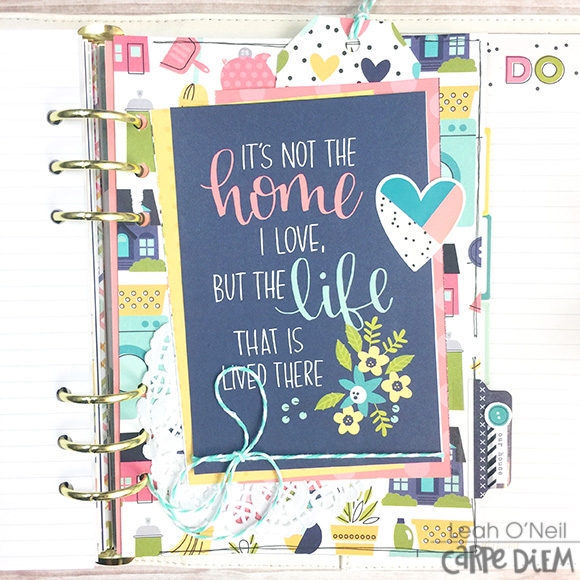
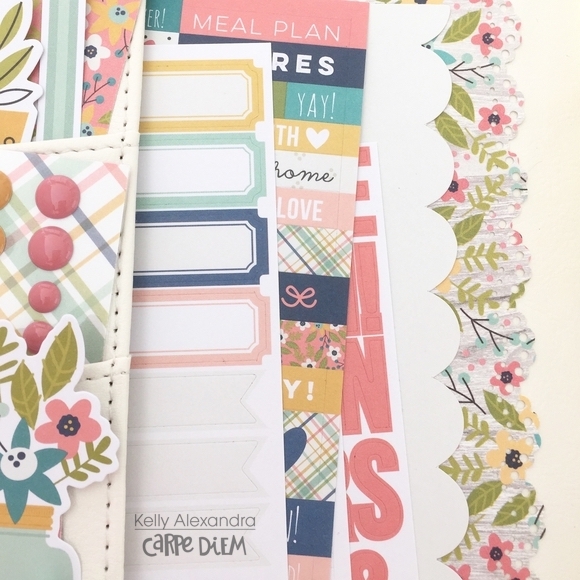
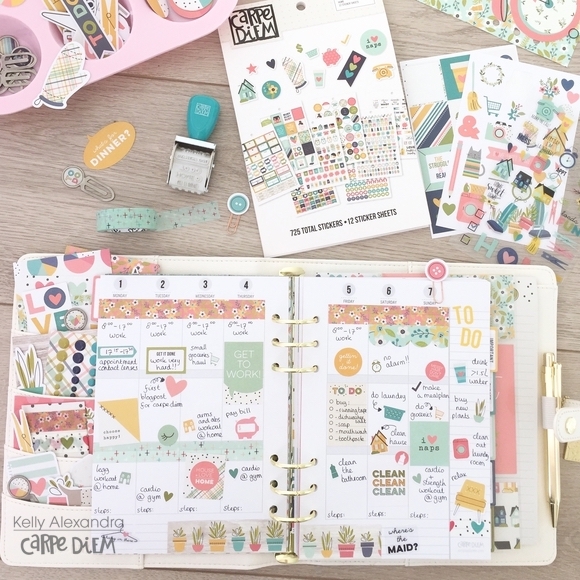
The next pages work the same way: flaps that open sideways and are embellished around them with the magnificent elements of the collection – Domestic Bliss Bits and Pieces, Enamel Dots, Chipboards, Combo Stickers and Bless This Mess and Home Sweet Home Washi Tape. All are beautiful!!!

Las páginas siguientes las trabaje de igual forma, “flaps” que abren hacia los lados y acentuado su alrededor con los magníficos elementos de la colección – Domestic Bliss Bits and Pieces, Enamel Dots, Chipboards, Combo Stickers and Bless This Mess and Home Sweet Home Washi Tape. ¡Todos son hermosos!

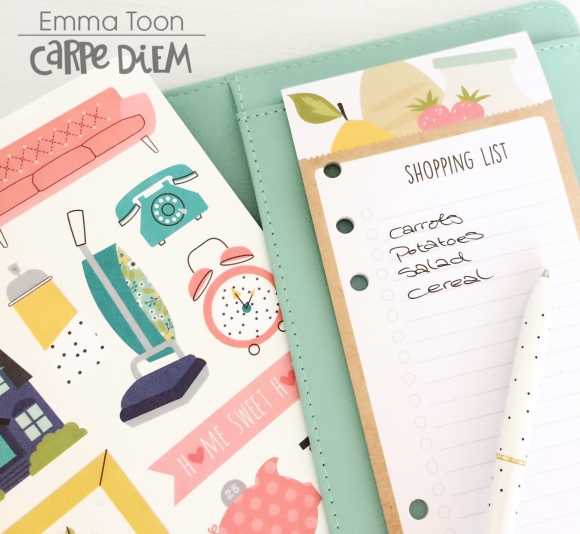
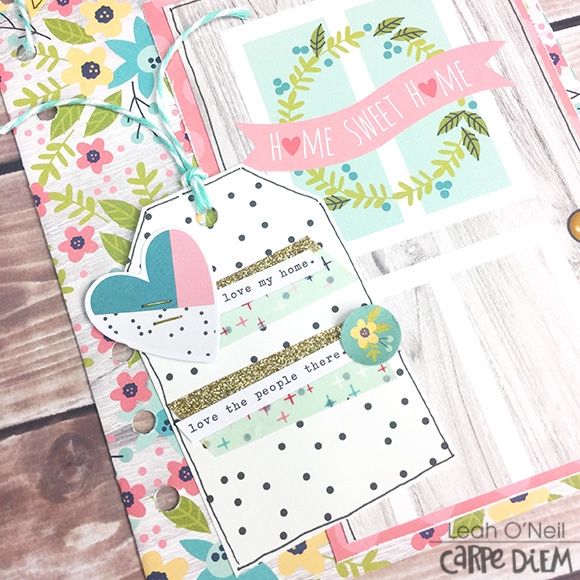
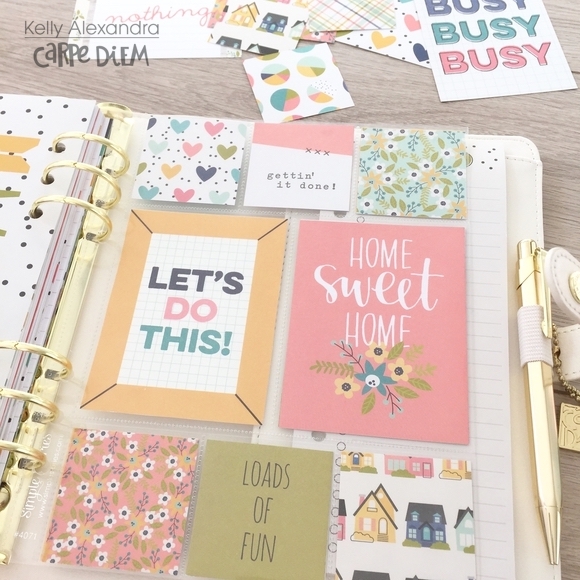
In all the pages of the mini album, you will find how the elements of the collection are located with the purpose of assigning a specific photo according to the phrases and the theme of the mini album.

En todas las páginas del mini álbum vas a encontrar como los elementos de la colección están ubicados con el propósito asignar una foto específica acorde con las frases y el tema del mini álbum.

I hope you enjoyed the project and that it inspires you.  Happy crafting friends!  Have a great week! Blessings! 

Espero que hayan disfrutado el proyecto y que les sirva de inspiración.    ¡Que pasen una feliz semana! ¡Bendiciones!

SaveSave

SaveSave

Supplies

Hello again, Nicole here today to share a few projects on the blog.  I have been sitting on some photos of our family trip to Disney for a few years and thought this was a good opportunity to use some of the fun Say Cheese III collection to document some of those memories!

I chose a mixture of patterned papers and punched a simple row of circles on the bottom of the page. This is a great way to add in some little bullet journaling or sentiment stickers as I chose. An easy way to embellish a project for sure.

I chose to use a mixture of stickers and die cuts from the Bits & Pieces package to embellish the top row of my page, to balance out the bottom grid of circles. It’s also a fun way to add a quick border of paper and smaller embellishments.

_____________________________________

Last month I talked about getting out from behind the camera and scrapping some photos of myself for a change. I have decided to make a greater effort on this over this year and so I have a fun & crazy page to share with you using the Emoji Love collection!

I started this page with a simple white background and trimmed the rainbow effect like paper from the Emoji Love collection and added it to both sides. I really wanted lots of color but needed a way to draw it all together. A great striped paper like this helps do just that, bring all the colors together and is a great starting point for your page.  I decided to hand cut some letters from various patterned papers in the Emoji Love 6x8 paper pad and added that to my page, filling my patterned paper component on the project!

The hand cut letters are a great way to customize the size of your title and add a certain whimsy to your page too! A great way to add in a burst of color. Of course, I needed to add some fun emojis and word bubbles to my project, and used several stickers with some foam adhesive to the back to add a little pop!

Thanks so much for stopping by the blog with me today!

Hello everyone ! It's Mindi here with you today. I am so excited to be sharing some pages that I have created for my Disney album. We recently had annual passes to the park and although I have already scrapped some photos from our trips I wanted to create an entire album. The thought was to have a place that I could document our fun and magical year. The new Say Cheese 3 collection was the perfect solution. Simple Stories has a darling 6x8 album that has a Mickey Ear shape on the cover with lots of red and white polka dots. I typically don't embellish the fronts of my albums so that I can store them easily. But I do love this album and it's darling Disney theme. 
 
 
Before sitting down to start putting this album together I had a few thoughts. I knew I wanted it to go in chronological order. From our first trip to our last. Then to break it down further I wanted to it to have themes or events. I started with this entry page. I used one of the fun pages that comes with the album and added a few embellishments to it. The large castle on the bottom was the perfect place to add the year and some other embellishments.
 
 
On the next page I added a photo of all 5 of us together. This was our first family photo of the year and I think it was a nice beginning to the album. 
 
 
Opposite the big family photo I have a pocket page protector with a 4x6 journaling card. I wanted to give a brief summary of what this album is about. I also have a photo of Noah's old Mickey hat that I took on Main Street when we first arrived at the park. 
 
 
These photo flip ups are great for adding in extra photos. I added one here and was able to add in another photo and a filler card. To help aid the flip up page I added one the adorable clips. 
 
 
I am going to set up my album with a few things in mind. As I mentioned earlier I am going chronological. These next set of photos are all from one place at the park, Cars Land. There are so many ways that you can organize your album. By day, by theme park, by events, ect. Whatever works for you.
 
 
When you order the Disney SN@P Decorative Binder inside are some great decorative pages. I used this red and white polka dot page to add in some journaling and extra photos. It was really fun to create this page and have it outside of the page protector. I also love the interactive aspect of the page. 
 
 
These types of pages are perfect and fun to add into your mini albums. They break up the pockets and the possibilities are endless. You can use it to add your stories or fill it with photos. Here is a look at the whole inside of this page. I added a strip of photos and then added some journaling on the right side. I used my typewriter for this page but you can also hand write as well. You can kind of tell that I am still getting used to using a typewriter with some errors but I am ok with that. I embellished it a bit here and there. I used some washi tape on the left side of the photo strip along with some clear stickers on the photo strip.
 
 
I had so many fun photos from Cars Land and I made another photo strip and added it on the backside of this page. I used some more washi tape on the top and added in another clip for a cute look. 
 
 
This is what the backside of the polka dot page looks like paired with the other side. I love that it is a smaller size and that you can see multiple pages around it. 
 
 
Before I had put this journaling page together I had put together the next set of pages. You'll see them in a minute. I had this 6x8 big pocket page to work with. So I cut down this 6x8 page that has the lines in it like regular paper does. It originally had holes in to put right into your album. I trimmed them off so that I could add it into my page protector. I had one more favorite photo that I wanted to include and so I added it onto the bottom part of my page. My typewriter came in handy again to get my journaling onto the page easily.  I added some simple embellishments to the top portion of the page and also to the photo. The scalloped edge there under the photo is from a journaling card that I cut up. Thought it could use a little something underneath the photo.
 
 
One last set of pages that I want to share with you here. I have always been a fan of big photos. And I had this great photo of the castle. So I made it stretch over both sides of the album. 
 
 
This photo of the castle has lots of great spaces for embellishing. I cut down one of the 3x4 cards and added it to the left side of the photo. On the other side I added some journaling and then finished it off with some embellishments. These chipboard pieces that have a watercolor look are my favorite. I added one of them to the top of my journaling.
 
 
I can't tell you how much fun I had putting some of my pages together in my Disney album. I didn't want to stop. Ha Ha. I hope that you have gotten some inspiration for an up coming Disney album or another theme. Have a great day everyone and thanks for coming. 

SaveSave

Supplies

Hi everyone, its Meredy and I don’t know about you, but I have been LOVING the Simple Sets that Simple Stories has released.  If you aren’t familiar with these sets they are a small, mini collection that includes (2) sheets each of three double sided cardstock paper, including one sheet of 3x4/4x6 element pieces and (1) 6 x 12 sheet of cardstock stickers.  I wanted to make up a new planner for May and I loved colors and florals in the Mom Simple Set so I thought I would see how I could pretty up my Ivory Carpe Diem planner with this Simple Set.

The first thing I always do is make a Dashboard and fill up the pockets of my planner. I cut apart the page of 3x4/4x6 elements and filled up the pockets!

I used “I Love You Mom” floral paper for the dashboard with a 4x6 card cut out from the “Journaling Card Elements” paper.  I added the LIFE using Black alpha stickers from the Simple Stories Sn@p Line and a Coffee Cup Sticker from the 6 x 12 Cardstock Sticker Sheet included in the set.

The Journaling Cards really brightened up my planner pockets quite easily.  I don’t always like my pockets super stuffed and these cards did the trick.

There are enough papers in the pack to create dividers.  I usually feel overwhelmed by cutting all the papers and gluing them together and adding the tabs. But I used a quick way to make dividers and I am so happy with the end result!

To make quick dividers take a 12 x 12 paper and fold it in half.  Trim down the side opposite the fold and the bottom to the correct size for your planner.  Use a tab punch to punch a tab from the cut away paper.  Use a glue stick on the inside of the paper, stick on the tab at the correct location and fold the paper closed.  Press down until the glue keeps the paper together, punch the holes and you are ready to make the next divider.

The double layer of cardstock makes a perfect divider.  Folding the paper and using the same pattern on the front and back of the divider really cut down on the time it took to make the dividers.  This will probably be my go-to way to make these from now on.  I added 3x4 journaling cards to the front of the dividers for a finishing touch.

Now on to my favorite part, my weekly layout using the 6x12 sheet of Cardstock Stickers! One of my favorite aspects of the pages are the center washi strips I made from the papers in the collection.  I started with the banner sticker on Thursday for my Birthday and I built the pages from there.  I used practically all of the stickers on the sheet to layer up the page.  I also used the Sn@p Line Alphas and some of the 4x6 Black stickers from a few Carpe Diem collections.

Another way to use the 3x4 journaling cards is to cut them down to fit into your layout.  I loved this yellow floral pattern with a small white space—it was perfect for this very important reminder.

Last, I just wanted to show how I used some of the remaining elements to do a bible journaling entry.  Since I have an interleaved bible, the oversized MOM sticker was perfect place to start for this entry.  I cut out the banner from a 3x4 Journaling card, drew in a little extra string and added some heart stickers.

I used a tab punch to make a tab from the “Best Mom Ever” Paper and used a phrase sticker from the Sticker Sheet.

Last I added in a photo of my mother and me (41+  years ago!) wrote the verse and a short journaling entry.  Last I layered up the floral stickers to create a bouquet in the corner and finished it up with a Happy Mother’s Day sticker.

I hope you all enjoyed seeing how many things you can make with these 12x12 Simple Sets—I am in love!  Also, wishing you all out there a happy May and Happy Mother’s Day!

SaveSave

Supplies

Hi, Everyone! Jana Eubank here! 
 
My daughter just moved back home from her first year at college and I wanted to document her first "Home Away from Home" ... her dorm room that she has been living in for the past year. The Domestic Bliss collection was the perfect answer!
 
HOME AWAY FROM HOME
 
I had taken several photos of her room the day we moved her in last Fall, along with a shot of the outside of her dorm building. I included them all together on this page.
 
 
I cut the "HOME" letters out from one of the cards from the 4x6 Horizontal Elements Paper to use as my title. Behind the letter "O" I included one of the pie chart circle die cuts from the Bits & Pieces pack.
 
 
The smaller "HOME" letters are from the 4x6 Sticker pack. I adhered the letters to white cardstock and trimmed them out using scissors to give them a white outline. I used the Snap Color Vibe Bolds Letter Stickers for the other words in the title.
 
I book-ended my title with the Decorative Brads to give it even more personality! I love them here!
 
 
For some reason, that cute couch icon included in this collection just said "dorm" to me! I cut this one out of the same sheet of 4x6 Horizontal Elements Paper that I used for the "HOME" letters. Doesn't that couch look inviting?! ... Like it's just waiting for 6 college girls to pile on it and start gossiping about their dating and class experiences!
 
 
At the bottom of the page, I added a couple more decorative icon brads, as well as the date, stamped on one of the label stickers from teh 4x6 Stickers pack.
 
 
_____________________________________
 
I love when I find my kids asleep on the couch or in various other places around our house. To me, it means they feel safe, they feel cozy ... they feel at home. And that is what this next page is about.
 
HOME
 
I used a sheet of the Aspen/White Basics Notebook paper as the base to my layout, matting it with a sheet of the Bless This Mess paper.
 
 
Next, I used various papers from the 6x8 paper pad to build up some delicious patterned paper layers behind my two photos. The smaller scaled patterns are perfect for layering together in a situation like this!
 
 
I cut the letters "HOME" from one of the 4x6 cards of the Snap Pack and then added a house and heart die cuts from the Bits & Pieces die cuts. Everything is stitched and anchored to a strip of striped paper from the same 6x8 paper pad.
 
 
I hand cut the large hearts from the 6x8 paper pad and drew an outline around each one of them with a black journaling pen to match the outlining preprinted on the title letters. I then used my sewing machine to stitch them to the left side of the page, sprinkling them in a waterfall fashion and bending up each side of the heart for dimension.
 
 
I added my journaling with a black journaling pen, using the lines of the background notebook paper as a guide. A few enamel dots sprinkled here-and-there adds even more color and dimension.


Do you have sweet pictures like this of your children or loved ones asleep? Don't they look angelic in those photos? Why not use those photos to document what makes them feel safe and secure or what brings them comfort in your home?
 
Have a great week!

Hello again friends! Happy May! Leah here today to show you the new dividers I’ve made to revamp my planner with the Domestic Bliss collection. It’s been a long while since I’ve made a complete set of custom dividers. If you can believe it, I think it’s been since my very first post with Simple Stories last year. Wow, how the time has flown! I have been feeling the need to change up my planner for a while now because the current organization just has not been working for me. I’ve been in such a planner funk lately and haven’t wanted to open up my planner. With a new setup, comes a new chance to get crafty and give my planner a makeover!

I used word label stickers to label my divider tabs for now. I chose ones from the Home sticker tablet. I have separated my planner into 4 categories. The first section is where I have my actual planner pages. For this planner, I’ve decided to use only monthly inserts and blank lined pages for my planning.

This divider turned out so cute! I love having it up in the front of my planner because it’s like the “front door” of my planner. The door is from the 4x6 Vertical Elements 12x12 paper in the Domestic Bliss collection. I used a banner paper punch to create a banner along the top of the divider using patterned papers from the 6x8 paper pad and some baker’s twine. I used another patterned paper to create the tag where I layered some washi tapes, word label stickers and a cute heart die cut from the Bits and Pieces pack.

The second section is for tracking chores and household to-dos. I’ve mentioned my struggle with anxiety in some of my previous blog posts. Well, I am also a pretty naturally disorganized person. I WANT to be organized, and I can achieve it, but I have to work extra hard to maintain an organized home. Writing down household tasks and chores and attempting to establish a schedule that I can learn to manage a little at a time, helps me avoid getting too overwhelmed.

This divider is so fun because I created a little shaker using a 2x2 card from the SN@P! pack and layered on some stickers from the 12x12 combo sticker sheet. Aren’t the little succulent plants that pop up a lot in the Domestic Bliss collection so sweet? I love all of the multi-colored pots! I created a little watercolor background on this divider and chose colors to match the pots.

The third section is for bill pay and debt repayment info that I’ve moved over from my budget planner (check that planner out here). My financial planner has been working out super well for me. However, now that I feel like I have a handle on our budget and spending, I have found I’m not using the first half of the planner as much and mostly just need the bill pay info from the back. So I’m going to see how it works out as just one section of my main planner.

I love how this divider turned out with the simplest of details! I used half of a doily and layered on the typewriter and “hello life” die cuts with the chipboard flowers and word label stickers. At the top of the divider, I hand cut a few different sized banners out of leftover paper scraps, grouped them together and then stapled them onto the page.

The last section of my planner is for information pertaining to our home and family, such as insurance and medical info and important contacts. This divider was super easy to make! I made it out of this 12x12 paper, and then used one of the 4x6 elements from this sheet as the main focal point. Then I layered some paper scraps and a doily behind it, and wrapped some baker’s twine around the card with a little bow for some texture.

I don’t know why I don’t make custom dividers more often! I always love how they turn out and they are so fun to make. They make my planner feel so much more personalized! I love working within one collection when I make dividers because of how beautifully everything coordinates. Look how pretty all of the dividers look together!

Do you like personalizing your planner dividers? If you’d like to see some more pretty planner dividers for inspiration, run on over to the Carpe Diem Planners Instagram! Also, I hope you will come say hello over on my Instagram as well @sunny.leah, and be sure to check out the Carpe Diem planner giveaway I’ve got going on right now!

Thanks sooooo much for joining us for our 2017 Spring Release Reveal, we hope you enjoyed seeing all of our new products!  

The Summer Days and Cabin Fever collections as well as all 4 new Simple Sets have shipped to retailers and are in stores now!   

Now on to the fun stuff - congrats to our 14 random lucky winners!  Here goes - 

Summer Days –
Blog – Amy Cooley 
Instagram – mommavince
Pinterest – Karen Kirkman
Facebook – Sharon Frewen 

Cabin Fever –
Blog – Rebecca Rewer    
Instagram – Tonya Morgan
Pinterest – Wendy Baker
Facebook – Janet Dorkin

Simple Sets –
Blog – Tiffany Medina  
Instagram – Cindy Fast
Pinterest – Steffanie Seiler  
Facebook – Kristi Beisel


12x12 Pads –
Facebook – Jody Grimm
Instagram - Janet MacKay  

Thanks everyone!!  If you are one of the random lucky winners listed and did not receive a message or email from me, please send me an email at layle@simplestories.com with your full name and mailing address so we can ship your package!

Hi I’m Jeanne!  Back again this week to share some more cards with you, this time with the Domestic Bliss collection. I love to send cards to family and friends to let them know I’m thinking of them.  It never has to be for an occasion – just a note to say hi is always welcome! 

My kiddos are growing up fast.. off to college and finding their own places.  Lately my daughter has become a domestic diva!  Going to work, cooking dinner, and keeping the house tidy are part of the daily grind.  I have to smile to myself and think “Welcome to my world!”  LOL!! 

Today I’m playing with the Domestic Bliss Collection!   I started with a background of pretty papers from the 6x8 paper pad.   I topped the background paper with a 3x4 Journaling card from the SN@P! Packet!  The pack has 118 pieces to choose from.  The “messy hair…”   2 x 2” card is from the same pack.

I love how all the elements are coordinated to work together so all you have to do is mix and match to your hearts content!  I added Chipboard sticker flowers to frame the sentiment.  

I love piling on the embellishments like color coordinated enamel dots, Bless This Mess Washi Tape, and stickers!!

The hello life yellow tab is a sticker that you’ll find on the Combo Sticker that’s included in the 12” paper pack or sold separately.  

_________________________________

My second card features lots of Bits and Pieces.  If you haven’t seen these before you need to check them out!  The pack includes 53 printed die cut pieces like the washing machine, cute pooch, laundry basket and more! 

If you look close under the word sticker sentiments you’ll see some pretty floral washi “Home Sweet Home” tape.  I love the fun sentiments in this collection!   Sometimes you just have to laugh at a situation.  Laundry happens.

I think this would be a fun card to send to a friend who might have her hands full with life.  Maybe include a gift card for a night out, or volunteer to watch the kids.

I mixed some Chipboard stickers in with the Bits and pieces like the detergent bottle and the smaller laundry basket.

Yep.. life is going to bring you housework.. but in the end there’s still no place like home.   And for me there’s no better place to be! 

Wishing you a great day with some time to do all the things you love best.. dinner with dh, hug your fur baby, spend some time with the kiddos, and maybe find a little crafty time to play!

Happy (inter)National Scrapbook Day!   We’re thrilled to participate in the worldwide celebration, focusing on all things scrapooking & paper crafting!  In honor of this super fun day, we have not one but TWO awesome surprises for you! 

Today only, your entire purchase from our Digital Store is 50% off!  With ALL of your favorite Simple Stories collections in digital format, you’re sure to find just what you need for all of your digital crafting needs.  Visit our Digital Store and enter code NSD2017 during checkout!

_____________________________________

Today’s celebration also brings 4 different sets of die cuts & 3x4 FREE printables!  Designed for use in your Carpe Diem planner pockets, your SN@P! Pocket Pages and your other scrapbooking & paper crafting projects – you’re going to love these Faith, Fitness, Domestic Bliss and Recipe designs! 

Domestic Bliss - http://bit.ly/DomesticBlissPrintables

Faith – http://bit.ly/FaithPrintables

Fitness – http://bit.ly/FitnessPrintables

Recipe - http://bit.ly/RecipePrintables

We'd love to see how you're using these free printables in your planners & pages, so be sure to snap a pic and tag your Instagram or Facebook posts with the hashtag #SSfreeprintables!

Thanks for celebrating (inter)National Scrapbook Day with Simple Stories!

SaveSave

SaveSave

Hello friends!  It's Jennifer on the blog and I'm very excited to be a part of the Simple Stories team for another year!  I will be creating layouts but you may see a mini book from me from time to time!  Today I'm sharing pages I created using the new Domestic Bliss collection!  This lovely line is full of beautiful colors and prints that are perfect for just about any theme!  
 
For my first layout, "Home", I started with the gorgeous blue/grey wood plank print of the B side of Bless This Mess! (This sheet is probably my favorite out of the collection as it has a beautiful plaid print on the opposite side).  Going through an old photo album, I found this black and white picture of the first house I remember living in.  The address and a date were written on the back; I assume it was taken by the realtor.  I have lots of memories of this house: some good, some bad, but definitely part of my story.  
 
 
Using white cardstock, I cut a circular cut file on my Silhouette (Geo Globe from The Cut Shoppe) then added in different patterns from the collection. I finished by stitching the edges with my sewing machine (honestly I sew on everything!).  You can also spy one of the cute tags under my photo from the Bit and Pieces pack! I added some navy and white bakers twine from my stash to accent. 
 
 
​The colorful "HOME" chipboard letters found on the 6x12 Chipboard Sheet make the perfect title for my page!  I love the bright colors! I added in a sticker from the 
Combo Sticker Sheet as well as coordinating Enamel Dots to accent my title. 
 
 
I thought the chipboard and die cut houses would look cute next to my photo! I placed them across my page almost like a street adding in die cuts and one of the cute
 
 
I'm not a fan of my handwriting so if I have a choice, I will use my electric typewriter.  I used the B side of Domestic Diva because I love the bright yellow! And it was different than my usual white card stock. I think I could've written a book about this one photo; its funny how a picture can bring up so many memories!  
 
 
________________________________
 
For my next layout "Love Was Here", it is ALL about memories.  When I first saw Domestic Bliss, I knew I wanted to scrap about my mom in her kitchen. The minute you walked in the door she had a smile and a hug for you.  Next, she was offering to cook you something or get you a drink; that's how my mom showed her love to others. 
 
I used the colorful florals of "Work It Girl" (don't you love the titles?!) and used the Simple Stories Crosses Background Silhouette cut file for my background.  I backed the crosses with different patterns then stitched around the edge of the cardstock.  
 
 
Using one of the ledger prints from the SN@P! Basics Paper Pack I cut a tag from my Silhouette to hold my title. I used the letter stickers from the Combo Sticker Sheet as well as black alphas found in the Say Cheese III collection.  I "popped up" my tag using some foam tape to give it some dimension above the surrounding embellishments.  I love how  Simple Stories gives you so many little pieces to decorate and accent your pages!  
 
 
Another fun Simple Stories cut file, Heart Polaroid, I used with the B side of Mom Rules.  I then added a cute chipboard plant as well as smaller stickers and die cuts! And don't you love the hanger with the heart?  I thought it would look cute "hanging on the line" across my page.  
 
 
Showing more of the coordinating die cuts and stickers that are part of the collection! I used brown bakers twine to hold my pieces and added in mini wood clothes pins. 
 
 
​I also used one of the chipboard clothespins to "hold" my photo as well as used the adorable "mom" Epoxy Metal Clip.  
 
 
​I probably will go back later and add journaling to my page. Honestly, I had so much emotion even putting this page together and there is so much I wanted to say.  For now, I think just scrapping the photo was enough since its still difficult to create pages about my mom. I miss her so much...what I wouldn't do for one more day to sit at her kitchen table with her! 
 
Thank you for stopping by today! I hope you will check out all that is included in Domestic Bliss as well as the new releases!  You can check out everything by visiting the Products page! Have a wonderful day!  

SaveSaveSaveSaveSaveSave

Good morning friends! Brenda Smith here with you today to show you how versatile the Faith collection is. I wanted to document my daughter's seventh birthday party but really liked the colors and patterns in the Faith collection but knew the sentiments weren't exactly what I needed for these kind of layouts. So I set out to make this kit work for what I needed. 
 
 
One of the things I liked about this collection so much is the perfect balance of girly-ness with more colors than just the traditional pink and purple and red. The blues, yellow, pinks, and greens meshed amazingly with colors of my photos. 
 
 
The cloud and stars die cut had a non-applicable bible verse on the cloud so I covered it with some labels from the Emoji Love 4x6 stickers. The phrase stickers atop the labels are from the Emoji Love Sticker Tablet. I trimmed a 3x4 journal card so I could use it as journaling space on this 4x6 card. I hand-stitched a little to accent. I interviewed my daughter to fill out the "I Am..." card and love how I'll have this little time capsule of what she was doing when she turned seven. 
 
 
I added a strip of patterned paper to the bottom of the "Never Forget" journal card before hand-stitching the "love." Because the patterned papers in this collection worked so well with my photos, I printed out most of my photos just slightly smaller than the cards so I could get additional pops of color in the pockets with photos. The "His Love" heart worked so well with this photo of my kids and gave me a great opportunity to talk about how enamored my son is with my daughter. 
 
 
The varying sizes of the page protectors encouraged me to print up my photos at varying sizes and use some of the large pocket cards I don't usually use (like the 4x4 and the 4x6 cards). 
 
 
I trimmed two 3x4 cards on the diagonal and glued them together to form the background of this "believe" photo pocket. The chipboard balloons from Faith 6x12 chipboard gave me a little dimension on an otherwise flat spread. I hand-stitched some arrows to make sure the rare family photo was appropriately highlighted. 
 
 
The 4x6 pocket on the top is a little heavier visually with all of the patterned papers and embellishments I combined so I attempted to keep the pocket on the bottom a bit lighter with the white background and lightly patterned blue paper with the journaling. It was a little too plain for my liking at first so I added more hand-stitching and a little washi and a sticker at the bottom. 
 
 
I knew I wanted to use this cute globe card but I couldn't figure out what to add to it. It's great on its own but putting this "love" chipboard piece on the diagonal added the accent I desired. I used a paper punch to add the chevron detail to the picture of my son.
 
 
I had fun altering journal cards on this side. I trimmed the aqua diagonal 3x4 card and placed it atop a yellow journal card. For the picture of myself, I trimmed several cards to make the layered effect you see. I used dimensional foam adhesive to pop up "inspired." The "Be Still" sentiment I thought worked well for the picture of all the kids together because we all know that familiar struggle of getting this many kids to be still at the same time. 
 
I hope I've encouraged you to think outside of the box when it comes to your themed Simple Stories collections!

Jeanne here today with some colorful cards for the emoji lover in your life!  Let’s face it.. who doesn’t love emoji’s?  I don’t care if you're 15 or 50 they’re a fun way to spice up your text messages and social media!  The Emoji Love collection from Simple Stories is total eye candy.. bright colors, net lingo, and super fun emoji icons will have you smiling from ear to ear.

Need a special card for a tween or teen in your life?  You can’t go wrong with the unicorn emoji.  This one says “Be a Unicorn”!  Unicorns are unique and rare.. this sends a positive message that you don’t have to be the same as everyone else.  Be different.  Just be you! 

I started out with a background of papers from the Emoji Love 6x8” pad.  Rainbow stripes on one side, and stars on the other.

For my focal point I selected two 3x4 cards from the Emoji Love SN@P! Pack.    The pack contains 112 double sided cards to choose from.  I cut the a rainbow stripe card with a circle die (you can also use a punch) to create a semi circle, and layered it over another card with a star print on black. 

I topped that with a unicorn and “be a unicorn speech bubble” sticker from the Combo Sticker.  This sticker sheet can be purchased individually and is also included in the 12” paper pack.   The sparkle heart is a die cut from the Bits and Pieces pack.  I added a word sticker over the heart that says u rock, and another sticker from the Combo Sheet along the bottom.  The finishing touches for me are always a bit of bling.. a decorative brad bow and some shiny color matched enamel dots.

_________________________________

One of the girls in a mood over a guy?  Maybe a bad break up?  I’ve seen them come and go.. and the one thing that sets things right is a girls night out!  This would be a great card for my teenager.  I’d tuck in some movie tickets and a little extra cash for some junk food.   How about a birthday card for a best friend? 

I mixed more Emoji Love papers for the background before adding a 3x4 SN@P! card.  I added a bit of Expressions Washi Tape along the edge to look like it’s holding the card in place.

All the cool food shapes are from the Bits and Pieces pack.  There are 47 die cut ready to work with pieces you have lots to choose from. 

Even the “Yes! word bubble and heart eyed emoji are from the Bits and Pieces!  

I love the round tab stickers in the 4x6 sticker pack.  They make great accents.  Can you spy the little “OMG” one on my card? 

SaveSave

Do you ever just find yourself looking at a page or project you have created and wonder ‘Where did that come from?!’   More often than not, something totally awesome will come of something that’s driving you nuts! I had ideas about how the two pages I am going to share with you today were going to turn out, and let me tell you, they were nothing like this! Not that I’m complaining, lol. I love them both now, but they didn’t start out that way ;)
 
 
Nope #whatever! is a fun page about my sometimes crazy kids, who are getting to an age where they just won’t ‘smile nicely’ for the camera anymore! I pleaded with them to stand at the edge of beautiful Lake Somerset, but they just mucked around. The photos that came of it were so funny though and the #Whatever simple set was the perfect match for them.
 
 
Now this next part might sound a bit nuts, but ever since I first saw the front ‘info’ page of the Reset Girl Simple Basics Kit, I just wanted to use it on a project. I LOVE how all the papers displayed next to each other… it’s such an awesome mix of prints and colours! I trimmed the individual prints down in to strips and attached them to my Instax photos - a perfect fit!
 
 
I put the photos aside and started combining papers and embellishments to create my page. I put everything together and…. hated the outcome. #ohdear! So I pulled it apart, keeping the major elements to re-use and chose a new sheet of paper - yummy Mint Hashgrid by the Reset Girl. I added elements on top and still thought it was all a bit too busy, so I decided to give it all a good wash with some white acrylic paint. Instantly, it looked way better! I continued to place the rest of the elements on the page and I was so happy with the outcome.
 
 
For my title, I have combined a hand-cut word ’NOPE' from the 4x6 #Whatever elements and some stickers from the Cardstock sticker sheet.
 
 
Those little snippets of paper from the info page peek out on either side of my central band. As you can see in the image above, I cut them in half (or thereabouts) so they would ‘stretch’ further. This is a great technique if you want to make stickers go further too
 
 
It was all quite spontaneous once I got fully going, so I wasn’t too fussed if things weren’t perfect. There are no rules in this glorious creative pastime of ours, so go with what makes your heart happy!
 
 
A bit of journalling and (all-time faves) enamel dots, finish off the page.
 
 
Don’t be afraid to make a change if something isn’t working for you or if you just feel like having a go. It can be so rewarding!
 
________________________________
 
L❤︎VE
 
In stark contrast, this next page is super ‘clean’. I do feel myself wondering on a small level if it maybe needs a few more ‘things’, but you know what? It’s OK if it’s not the ‘normal’!
 
 
I had plans for a big photo and it just didn’t do it for me, so I went about trimming my photo down and cutting out some areas of a sheet of Love & Adore ‘With all my Heart’. I removed a teensy bit extra from the grid, so our faces could show through a bit better. It’s one of only a handful of really lovely photos of my DH and I, and I like the way it sits up in that left hand corner, sending the flow of the page down diagonally.
 
 
What followed was a hearty explosion! I’ve grabbed all the hearts I could find, in the stickers and ephemera in this collection and placed them in the matching area on the paper. I use this technique often and have kept the same colours together because I think this is a great way to add interest while keeping it less ‘busy’.
 
 
Here you can see how the heart cardstock stickers look different to the more matte finish of the heart stickers from the 4x6 Sticker Sheets and how both of those look different again to the heart chipboard and die cut shapes.
 
 
Another little detail on this page is the semi-circular shapes I have added at various intervals along the black grid line. I simply snipped the coloured part off from the little circle stickers in the 4x6 Sticker Sheets and used them in the co-ordinating coloured areas.
 
 
The last little touch was this ‘xoxo’ ticket shape from the Bits & Pieces pack. I’ve adhered it to the page with a wave-like shape, so it looks like a little fabric tag. I think it adds a bit of a 'stitched' feel to it. As if it could be something you would pick up at a market or something. Am I sounding crazy? Lol, maybe.
 
 
The point to both of these pages is just go where the moment is taking you. Have fun, enjoy the process and get those fingers busy!
 
Til next time!


Supplies

Hello everyone, my name is Kelly and I am one of the new Carpe Diem creative team members! I live in the Netherlands and I am totally addicted to decorating my planners, you can find me on Instagram as createplannernl.  For this first blog post I decided to show you how I setup my Ivory Carpe Diem planner using the Domestic Bliss collection.

The first thing I do when I am setting up a new planner is place all the supplies I want to use (such as clips, washi, bits and pieces, stickers, paper, etc) around me so I can see everything. I have a little cupcakeholder which is perfect to put in all the smaller items so you can easily look through them and see them. Now the fun can begin!

I always start by filling the front pockets, this is one of the things I love about these planners. I try to use all the different patterns of the collection by adding journaling cards, clips and bits and pieces. The enamel dots fit perfectly in one of the pockets, so I decided to put them in there.

I added a little sample of the washitapes in one of the pockets. I cut down a little card and wrapped the washitape a few times arround it. It’s very easy to create and this way you always have your washi on hand when you take your planner with you.

In the large side pocket I like to store a few stickersheets which I want to use in my planner. For decoration I used a borderpunch to create the doily lace effect on the scrapbook paper in the back.

Now that the front pockets are done, it’s time to start on a front dashboard! Since this is the first thing you will see when you open the planner, this is very important. I selected a scrapbook paper, cut it down to size and punched some holes. Because in my opinion the front pockets are very busy, I decided to keep the front dashboard a little bit more calm this time. I used the letters ‘Hello’ and three 4x4 cards from the SN@P pack.

With the Domestic Bliss A5 planner insert set you get six dividers, which you can customize to your own needs by choosing your own tab headers. I chose these sections: Planning, Important, Budget, Chores, To do and Menus.

After the first divider I put some undated monthly and weekly plannerpages. I decorated the ‘This month’ page with some washi and stickers and wrote down a few important appointments and goals.

In the ‘Bits and pieces’ pack I found four little button pieces and I immediately figured they would look amazing as DIY paperclips. I just glued them on rosegold paperclips and let them dry overnight. This is a fun and easy way to make you own paperclips!

On this blog I wanted to show you how I decorated the first week of May. I always begin with placement of washitape strips, thereafter I write down important appointments and then I decorate blank spaces with stickers or little cards.

I love using pocket pages in my planners and because I don’t have a tool to make them myself, I decided to use a pocket page that are originally designed for the SN@P albums. I punched four extra holes so it fits the planner perfectly! I selected some 2x2 and 3x4 cards with quotes and patterns to give it a pop of color.

When I setup a planner, I always create a DIY bookmark. I selected one of the scrapbook papers (‘Loads of fun’), cut it down to size and punched six holes. To decorate it I used some pieces and stickers.

I love these ‘to do’ pages and the ‘to do’ bookmark! In the back pocket I put some extra 4x6 cards and clear stickersheets.

Now the setup of this planner is complete, I can start using it every day. I hope I have inspired you today on this blog and see you next month. Have a great day!

Pages