05.02.17
The Rules Are, There Are No Rules
Do you ever just find yourself looking at a page or project you have created and wonder ‘Where did that come from?!’ More often than not, something totally awesome will come of something that’s driving you nuts! I had ideas about how the two pages I am going to share with you today were going to turn out, and let me tell you, they were nothing like this! Not that I’m complaining, lol. I love them both now, but they didn’t start out that way ;)

Nope #whatever! is a fun page about my sometimes crazy kids, who are getting to an age where they just won’t ‘smile nicely’ for the camera anymore! I pleaded with them to stand at the edge of beautiful Lake Somerset, but they just mucked around. The photos that came of it were so funny though and the #Whatever simple set was the perfect match for them.

Now this next part might sound a bit nuts, but ever since I first saw the front ‘info’ page of the Reset Girl Simple Basics Kit, I just wanted to use it on a project. I LOVE how all the papers displayed next to each other… it’s such an awesome mix of prints and colours! I trimmed the individual prints down in to strips and attached them to my Instax photos - a perfect fit!

I put the photos aside and started combining papers and embellishments to create my page. I put everything together and…. hated the outcome. #ohdear! So I pulled it apart, keeping the major elements to re-use and chose a new sheet of paper - yummy Mint Hashgrid by the Reset Girl. I added elements on top and still thought it was all a bit too busy, so I decided to give it all a good wash with some white acrylic paint. Instantly, it looked way better! I continued to place the rest of the elements on the page and I was so happy with the outcome.

For my title, I have combined a hand-cut word ’NOPE' from the 4x6 #Whatever elements and some stickers from the Cardstock sticker sheet.

Those little snippets of paper from the info page peek out on either side of my central band. As you can see in the image above, I cut them in half (or thereabouts) so they would ‘stretch’ further. This is a great technique if you want to make stickers go further too

It was all quite spontaneous once I got fully going, so I wasn’t too fussed if things weren’t perfect. There are no rules in this glorious creative pastime of ours, so go with what makes your heart happy!

A bit of journalling and (all-time faves) enamel dots, finish off the page.

Don’t be afraid to make a change if something isn’t working for you or if you just feel like having a go. It can be so rewarding!
________________________________
L❤︎VE
In stark contrast, this next page is super ‘clean’. I do feel myself wondering on a small level if it maybe needs a few more ‘things’, but you know what? It’s OK if it’s not the ‘normal’!

I had plans for a big photo and it just didn’t do it for me, so I went about trimming my photo down and cutting out some areas of a sheet of Love & Adore ‘With all my Heart’. I removed a teensy bit extra from the grid, so our faces could show through a bit better. It’s one of only a handful of really lovely photos of my DH and I, and I like the way it sits up in that left hand corner, sending the flow of the page down diagonally.
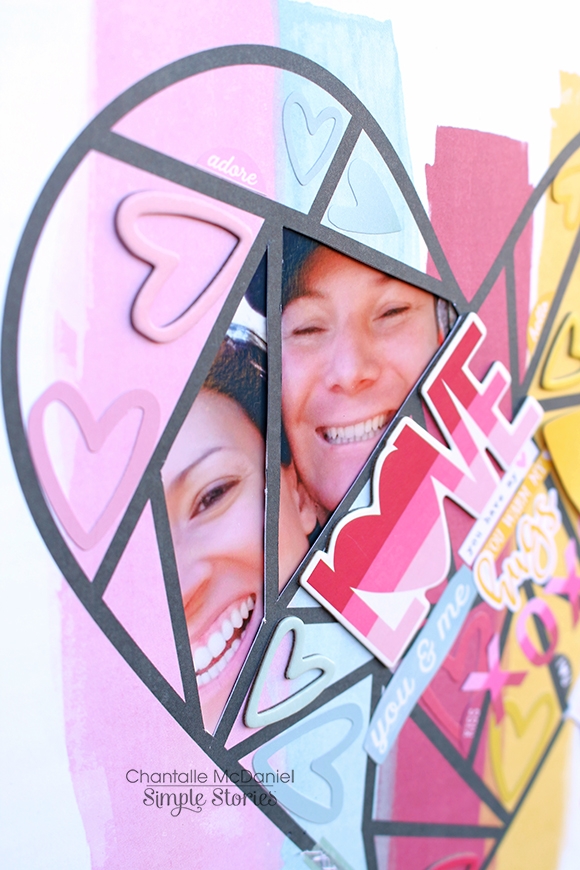
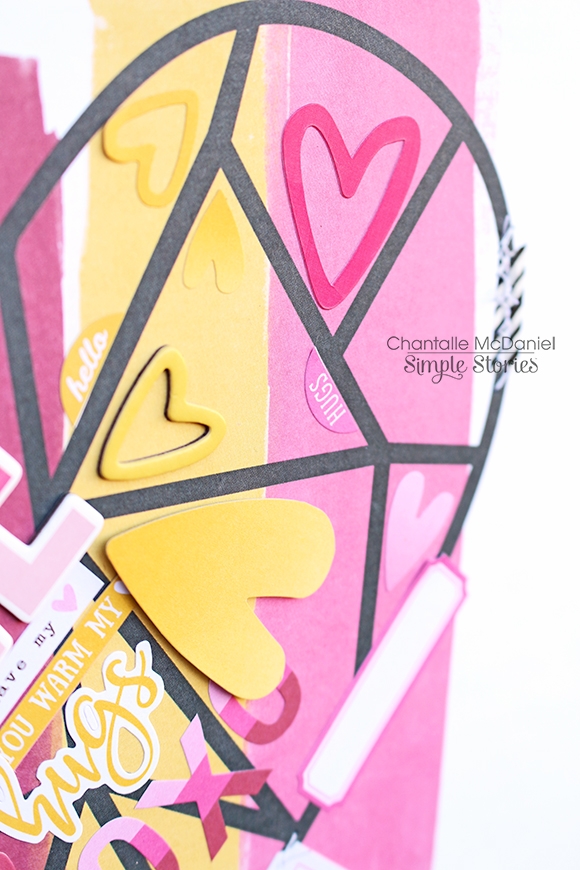
What followed was a hearty explosion! I’ve grabbed all the hearts I could find, in the stickers and ephemera in this collection and placed them in the matching area on the paper. I use this technique often and have kept the same colours together because I think this is a great way to add interest while keeping it less ‘busy’.
Here you can see how the heart cardstock stickers look different to the more matte finish of the heart stickers from the 4x6 Sticker Sheets and how both of those look different again to the heart chipboard and die cut shapes.
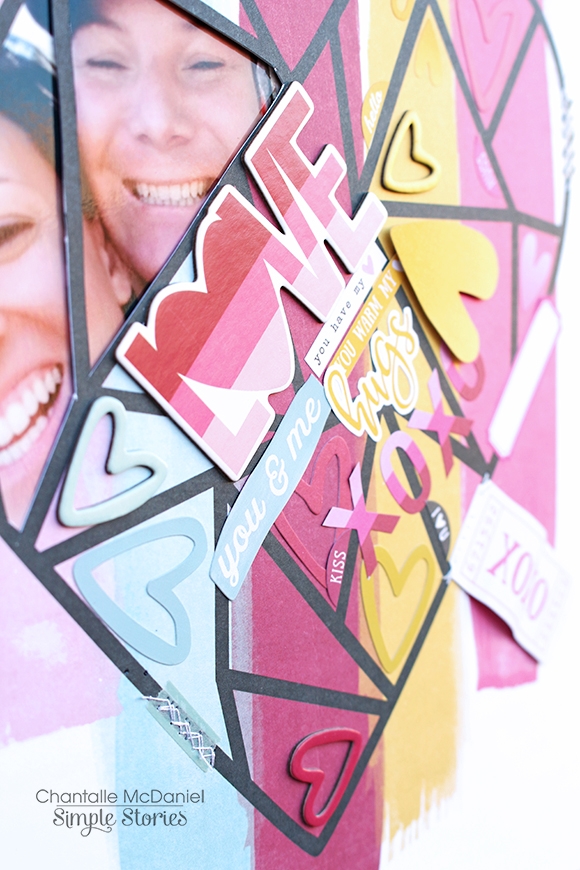
Another little detail on this page is the semi-circular shapes I have added at various intervals along the black grid line. I simply snipped the coloured part off from the little circle stickers in the 4x6 Sticker Sheets and used them in the co-ordinating coloured areas.

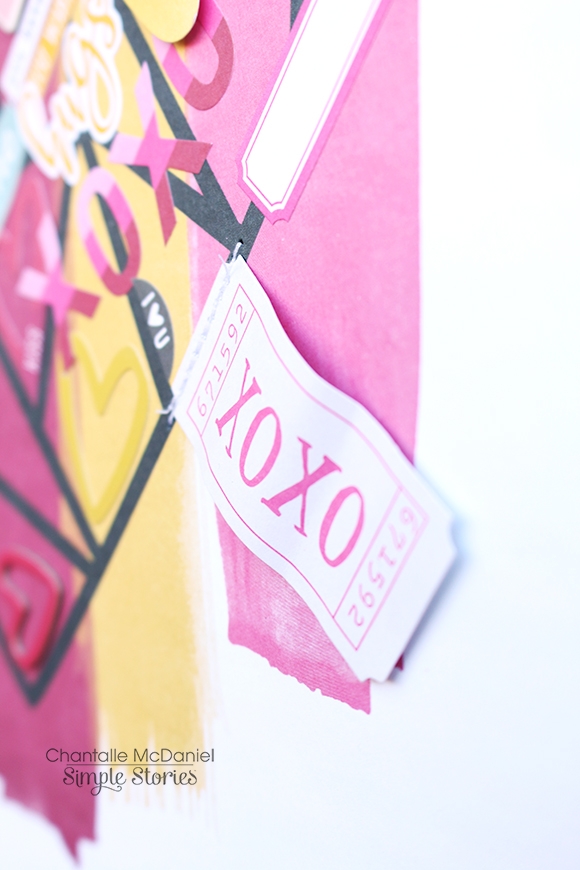
The last little touch was this ‘xoxo’ ticket shape from the Bits & Pieces pack. I’ve adhered it to the page with a wave-like shape, so it looks like a little fabric tag. I think it adds a bit of a 'stitched' feel to it. As if it could be something you would pick up at a market or something. Am I sounding crazy? Lol, maybe.
The point to both of these pages is just go where the moment is taking you. Have fun, enjoy the process and get those fingers busy!
Til next time!

Supplies