Howdy friends!  We're gathering a bit of information about our Simple Stories & Carpe Diem fans & we'd love to know about you.  The survey consists of 4 super short multiple choice questions, is completely anonymous & should only take a minute or two.  

CLICK HERE

Thanks for taking the time to participate!

Hello everyone! It's Lisa Dickinson here today to share a few tips on using pattern on your pages! Patterned paper is the most abundant product in my scrap stash, and I love to incorporate lots of it into my pages. But sometimes pattern can be intimidating. Does plaid go with floral? Can you mix stripes and dots? The answer is YES when you use one of my favorite tricks to combine patterns...just follow the rainbow!

When you want to use lots of patterns in one design, using a ROYGIBIV order is a fail proof method. Mother Nature knows what she's doing, and the same color combo will look great on your page. On this layout, I'm using the Cabin Fever collection and have featured seven different patterns from the line.

OntheRoad_W

While there are no orange, green or purple papers in this line, it was easy to sub in some of the patterns (a tan dot for orange and a multi colored plaid for green) and still get the rainbow effect. Even though the patterns are completely different, they read as harmonious because of the order in which I adhered them.

OntheRoad4_W

OntheRoad2_W


OntheRoad3_W

So what if you don't want the whole spectrum of color on your page? It's easy to select just a portion of the rainbow - say red, yellow and orange - to use in your design. On this page about my son's swim team, I used green, teal, aqua and navy to help reinforce the water-theme of the layout.

FTT_W

I used a wave-like cut file with holes to fill a large portion of the page. I filled the holes with a variety of Simple Stories papers in the selected colors of green, aqua and navy. The patterns range from dots to gingham, and text to geometrics, but they all work together because of the arrangement of colors. 

FTT4_W


FTT3_W


FTT2_W

So the next time you want to punch up the pattern on your page, try this rainbow order technique. You're sure to end up with a colorful, happy page you'll love (and isn't that even better than a pot of gold??)

Happy Scrapping!

SaveSave

Supplies

Hi everyone!  It's Traci from Artsy Albums, back to share a mini album using the Old School Simple Set.

I wanted a small album that I could have for my son's school pictures K-8.  The Old School Simple Set worked perfectly since the album is small and I only needed a few sheets of paper and stickers.  The album is a 4x6 Sn@p binder in black.
The 3x4 pocket pages are perfect for wallet size school photos!
The collection comes with some great 3x4 and 4x6 cards too!
 
 
 A book like this will be fun to add to year after year. Thanks so much for letting me share it with all of you today!  Happy crafting!
 

SaveSave

Supplies

Hello Everyone! It's Jomelle here today and I want to share my August Carpe Diem planner spread. My birthday is in August and I just love the Cabin Fever collection, so I figure I'd use it for my birthday month. Our family loves to hike and visit National Parks, but it's been super hot lately that we can't really plan any outdoors activities especially since my baby girl is only 18 months old.

As soon as I saw the "Happy Camper" 12x12 cardstock, I wanted to make a dashboard out of it. I also love the map legends on the bottom. I just added some bits and pieces to add dimensions.


I just added the word "Camping" on the side as embellishment.
 

Close up of the dashboard. This is one of my favorite dashboards I've made. It's perfect for all hiking adventures our family plans to go to in the future.
 

Of course we can't forget the "pocket love" all planner girls must have.
 

Here I used the "Adventures Awaits" 12x12 cardstock and turned it into a pocket dashboard to hold some of my stickers and embellishments.
 

I also just love staging my pictures and adding elements that goes with my layout. Don't you think the mama bear and baby bear add finishing touch to my photos?! :)


I truly enjoyed creating my August monthly Layout. The Bits and Pieces have so many cute pieces that it was so hard for me to chose which ones I wanted to use in my layout.
I didn't think I had enough numbers but I was able to find these number sticker sets from the Posh Collection. The color goes well with this collection.


Here is my layout for the first week of August. Since the boys are off from school and I have days off during the weekend, we are planning on taking a road trip to San Francisco and visit my cousins. We plan to take my daughter to the Jelly Belly Factory. 
 

I just love this sticker of the truck pulling the cute trailer. Our plan is to have an Airstream travel trailer to use for our future road trips.
 

Some of the embellishments in the Cabin Fever Collection.


Thank you for stopping by! I hope you enjoy viewing my layouts as much as I had creating them. Hope to see you next month.


Nature Hike Washi tape 3033 Adventure Awaits 3039 Happy Camper 12x12 paper 3040 Journaling Cards Elements 12x12 paper 3041 Elements 12x12 paper 3046 Decorative Brads

Supplies

Hi everyone, Nicole here to share with you what I have been working with the newest Simple Stories collections.  I have a lot of masculine photos floating in my photo drawer and was drawn to the great colors and patterns in the Cabin Fever collection for my first page. I really love the camping theme, but thought I would just use those patterns to create a great masculine page.

I chose to punch out a lot of the fun circles on the Off the Grid paper as a starting point for my page. I lined the mixed patterned circles together in simple rows on one side of my page and secured in place with simple machine stitching. I added a fun Cabin Fever journaling card as well as a diecut title combined with some Simple Stories letter stickers.

I just love how easy it was to pull this page together with basics like patterned paper and a few stickers! I also love it when B-sides of paper are great for projects of all kinds!

_________________________________

My next page is a little more summery, using the Summer Days collection! I couldn't help but cut the vibrant yellow patterned paper into a sun ray pattern on my digital die cut machine for one side of my page.

I used the Simple Stories fringed heart Silouette cut file with various patterned papers in the collection and layered them together to help create a big and fun title to go along with that bold sunray shape!

A few yellow sequins from my stash help add a little sparkle to the big sunray on the page, and a few brads and enamel dots help finish off my title too!

Supplies

Howdy friends!  Layle here - hooray for the weekend!  It's Saturday, the last day of our week long Simple Stories & Maya Road Product Swap! 

Both design teams have swapped products & teamed up for some great inspiration all week long!

Today creative team member Violet Ballew joins us with a patriotic Carpe Diem planner set up with the All American Simple Set - 

__________________________________

Hello everyone, it's Violet and today I will be sharing how I used the All American Simple Set for my July monthly view planning and some journaling in my Doc-it-Journal.

I absolutely love everything about this collection. The stars and stripes, red, white and blue. The paisley print on the flag is so gorgeous. I squealed with delight as I was decorating my pockets and making my dashboard.

How fun is this metal clip & tassel from Maya Road?!  The perfect additions to my planner this month!

I decided to plan ahead for July, due to the fact that its like Christmas in July for our family. Most of my family’s birthday are in July. My son and my granddaughter have the same birthday. My nephew and my brother share the same birthday, as well. Once I get all the names on the calendar, I am pretty sure I can fill up most calendar boxes. Lol. We can’t forget 4th of July and all the other fun stuff that happens in the July.

I also wanted to do some journaling in my Doc-It Journal. I don’t like to waste any of my scraps and a good way to use them is in my junk journaling. It’s a fun creative way to use up those extras. I just rip up pieces of left over paper, or use the bits and pieces from my trimmings. I glue them to the pages. I then add some acrylic paint on a gift card and swipe a thin amount all over the page. I used a shimmering white.   I also used the Say cheese Roller Stamp, because it had stars and embossed them onto the journaling cards. The stickers were the perfect embellishment to my journaling.

Thank you everyone who took the time to stop by the blog today and for all those that are currently or have served in the military.  May you all have a wonderful 4th of July, and God Bless America!

__________________________________

Now for even more fun!!  Enter via the Rafflecopter widget below and we'll draw one lucky winner next Monday to win both a Summer Days & Cabin Fever collection kit!   

a Rafflecopter giveaway

After you enter, head on over to the Maya Road blog to see what their team has created.  

Want to follow Maya Road and keep up with all of their great projects & products?  Here you go!

Thanks so much for joining us this week for the swap with Maya Road, we hope you've been inspired!!


SaveSave

Supplies

Howdy friends!  Layle here - happy Friday and happy day 5 of our week long Simple Stories & Maya Road Product Swap! 

Both design teams have swapped products & teamed up for some great inspiration all week long!

Today creative team member Traci Chaussee joins us with a super summery mini book with products from our Summer Days collection -

__________________________________

What an exciting month to get not only adorable products from Simple Stories but to ALSO get amazing products from Maya Road which I adore!  Of course I received a sweet Maya Road mini chipboard album so I knew it was the perfect time to combine it with the Summer Days collection for an amazing mini scrapbook!

The Maya Road Recollection Chipboard Binder is a chunky little book with 4 tabbed chipboard pages. I decided to not add any additional pages to the album but made each of the chipboard pages interactive with the adorable 'Summer Days' paper, chipboard, stickers and Bits & Pieces! Wait until you see all the fun inside!

The cover of this fun and colorful Summer album is pretty much dedicated to the Maya Road products I received! I used a large Ken Oliver metal button to create a charming 'knob' for the front complete with some hanging charms! I also made the long charm on the spine of the album using the sweet metal embellishments along with another tassel and a paper rose. These were attached to some jewelry chain with jump rings and then secured to the album from the inside with a twine knot.

I used the adorable mason jar stamp and die from Maya Road to create a mini mason jar shaker that I filled with small stickers from the 'Summer Days' collections as shaker elements! For extra shine, I added small glittery hearts and stars! Too cute! The die cuts a whole mason jar but I used an exacto knife to cut the center out and then covered it with acetate.

Of course, no mini album of mine would be complete without a pocket! I created this large one on the inside front cover by using two of the 4x6 vertical elements cut to size and angled for easier use! Even though these elements are already super cute,  I added on more with a sticker, chipboard flowers and enamel dots!

When I saw this Summer Bucket List on one of the 4x6 cards, I just knew it would be on the first page of this album! Who doesn't make a bucket list for the season?! For a colorful and interesting background, I cut out mini frames from the fun patterned papers and added stickers from the 4x6 sticker pack to the inside of each. Super cute!

For the second page, I used some of the journaling card elements to create a small flip book. The journaling cards were mounted on solid color card stock and embellished with stickers, chipboard pieces and ephemera! Adorable both closed and open!

I cut a section of the 4x6 vertical elements and scored them before folding them back and forth to create this fun pull-out section that is all ready for Summer photos. I took two decorative brads, snipped off the prongs and adhered  them together for a small tab and embellished the pages with cute pieces from the collection!

A large fishtail flag from the horizontal elements for this page! There is room for small photos on the front and then it lifts up to reveal more photo spots and charming embellishments! You can see some of the 'Summer Days' washi tape on the side of this page. Such a colorful addition!

For this page I made a large pocket from a square of the 4x4 elements that was cut to fit. I used two more of the 4x4 elements to make a double sided slide out tab that can hold pictures or mementos!

Another pull-out on this page, made with the cute 4x4 element cards. I used the smaller stickers to create the tab for this one and also to decorate these smaller pages! There is a rectangular pocket at the top of the page that is perfect for holding smaller journaling cards or photos!

Since there are so many super cute 3x4 journaling cards, I couldn't resist making a double flip book! Each section has a fun front and then space on the back for photos! I added in lots of the adorable chipboard and stickers to embellish this page!

More cuteness on the last page with a large frame ready for that perfect Summer photo! I cut 1.25" x 1.5" chipboard rectangles for the frame and covered them with the patterned paper before adding stickers, metal embellishments and enamel dots! A great way to end this super cute Summer mini album!

__________________________________

Now for even more fun!!  Enter via the Rafflecopter widget below and we'll draw one lucky winner next Monday to win both a Summer Days & Cabin Fever collection kit!   

a Rafflecopter giveaway

After you enter, head on over to the Maya Road blog to see what their team has created.  

Want to follow Maya Road and keep up with all of their great projects & products?  Here you go!

Join us again here tomorrow for more inspiring projects!


Supplies

Howdy friends!  Layle here - it's Thursday & that means day 4 of our week long Simple Stories & Maya Road Product Swap! 

Both design teams have swapped products & teamed up for some great inspiration all week long!

Today creative team member Andrea Bethke joins us with a beautiful 6x8 pocket page SN@P! album with our  Summer Days collection -

__________________________________

Hey everyone! It's Andrea here today and I want to share with you all a really fun mini album that I made using the new Summer Days collection and also a few goodies from Maya Road!  I had a great time using the collection to document an older summer story that I had been meaning to put into an album for a while now. You see, every summertime, I try to go at least once to the beach at Coronado Island in San Diego... My husband and I love it there! However, we don't always get to go. With my health issues, its hard to go. But whenever we do go, we always have a really amazing time! The mini album I made using “Summer Days” and the red SN@P! album, is all about a day on Coronado Island, on the beach, swimming, eating ice-cream, reading, and relaxing in the sunshine on July 8th 2013.  It was a perfect summer day!

I started out my album with a large 6x8 photo page. I love intermixing large photo pages like this in my mini albums – with the pocket pages and the mini-layouts! I think it just makes the album more interesting to look at, with the variety of pages. And some pics I think just need to be showcased in such a way! I chose a pic of me on the beach that day that I thought was cool and I added the sticker word “summer” along the side (from the 12x12 sticker sheet that comes in the collection). This serves as a kind of title and title page for my album. I also added a few other little things to my title page – like a chipboard flower sticker, a few enamel dots, and a couple of decorative paperclips to the top of the page...which I made using regular paperclips, a glue gun, and some of the super cute brads that come in the collection.

Like I said, the album consists of a mix of pocket pages, large photo pages and mini-layouts. For my mini-layouts, I used the pretty 12x12 patterned paper that comes in “Summer Days” and cut it down to 6x8 to fit in my mini. These served as my backgrounds for my layouts. I simply used a small 3x4 photo, and added it to the page with some cute stickers (chipboard and cardstock), and some other embellishments like washi-tape and ephemera pieces, in order to create simple and cute little layouts for my mini album.

Many of the pages in the album are pocket pages. I love the SN@P! pocket pages, they are so great for so many things, but especially for mini albums like this!

It is easy to use the cool cut-apart Element sheets that come in the collection and just cut the pocket page cards out (in 3x4 and 4x6 and 4x4) and then simply slip them into the pockets of the pocket pages. You can just add writing and photos and you are done...or you can add a few other little embellishments and such like I did!

In one of my pocket pages, I made a little shaker pocket where I used sequins along with small ephemera pieces and even a chipboard sunglasses sticker (with the backing still on). All these together make for a fun, interactive pocket page! On other pocket pages, I used other embellishments to add pop to the page, embellies like ephemera pieces, the little word stickers, labels and the cardstock and chipboard icon stickers...which I clustered together to create interest on my pocket pages...specifically for the pockets with pics that I wanted to draw a little more attention to.

In my album, in addition to using the Simple Stories “Summer Days” collection, I also used a few things from Maya Road (as I had mentioned). I had fun using the Maya Road Mason Jar stamp set and dies to create a few little jars for my mini album. I used one of them for one of my pocket pages. I stamped the jar on some white cardstock and then cut it out using my Big-Shot die cutting machine and the little jar dies. I added a strip of patterned paper (cut out with another one of the dies) to make it look like the jar label, and then stapled on a round circle with “Authentic” stamped on it (also cut with one of the dies). This I put on a pocket page with some rainbow patterned paper behind it and a butterfly ephemera piece just floating on top of it (attached only in the middle, with wings sticking up to create an awesome, dimensional look to the page).

Another item I used from Maya Road, that you can see here and there throughout that album is the number paperclips. I used the “Summer Bucket List” 4x6 pocket card and I listed out 5 things that were on my bucket-list that summer – the 5 things that we did on that special summer day that I documented in my mini album.

Here is my list: 1) Go to the Beach, 2) Go Swimming , 3) Hang out with Ryan, 4)Relax, Rest, Chill out, 5) Ice-Cream!!!

And for each item on the list, I used the correlating number from the number paperclips and attached them to a photo that I thought perfectly represented that summer item on the list!

I really hope you enjoyed my Summer mini album and that I have inspired you to make a fun summer mini of your own!!! Summer is a great time to Scrapbook! And I also want to point out, that a lot of the fun techniques and things I showed in this album can be used for your project-life pocket page making, and for your planning as well! Happy Summer everyone!!!

__________________________________

Now for even more fun!!  Enter via the Rafflecopter widget below and we'll draw one lucky winner next Monday to win both a Summer Days & Cabin Fever collection kit!   

a Rafflecopter giveaway

After you enter, head on over to the Maya Road blog to see what their team has created.  

Want to follow Maya Road and keep up with all of their great projects & products?  Here you go!

Join us again here tomorrow for more inspiring projects!

SaveSave

SaveSave

Supplies

Howdy friends!  Layle back again with you for day 3 of our week long Simple Stories & Maya Road Product Swap! 

Both design teams have swapped products & teamed up for some great inspiration all week long!

Today creative team member Nathalie DeSousa joins us amazing layouts from our Hello Lovely Simple Set and the Summer Days collection -

__________________________________

Hello there!  Nathalie back with you today, and I am so happy to share what i have created for the Simple Stories & Maya Road product swap.

My first layout is all about summer,  my daughter's fascination with ice cream floats, some of the Maya Road goodies, and the super fun Summer Days collection.

The staring point for this layout was the "Lazy Days" paper in the collection.   The spin wheels in the paper was the inspiration for this layout.  So i set out to create a few spin wheel cut-outs using the Cut Shoppe's Spinwheels cut file.

The cut outs were backed using the Lazy Days, So Much Fun, Hello Sunshine, Gotta Wear Shades papers from the Summer Days collection.   The lovely  decorative brads were then used in the centers of each of the spinwheels.

To bring in the colors of the collection to the page, a few splatters of watercolor were used to create a mixed media background on the page.  Once this dried,  the page was trimmed on two of edges, as to continue the movement of the spinwheels, and then attached to the B side of the Lazy Days paper.  All the spinwheels were also glued to the page as if cascading from the top of the page.

And now to embellish the page.  First, I created clusters around the picture using some of the combo stickers, bits and pieces and 4x6 stickers from the collection.  The little mason jar sticker full of lemonade gave me the idea to create a mason jar of my own for this page.

Some white acrylic paint was used to add some color to one of the Maya Road Vintage Wood Mason Jar.  To pull more of the colors from the Summer Days collection, some water crayons were used to color the Medium Vintage Paper Flowers , and Ken Oliver's Small Vintage Paper flowers.  Once the wood jar was dried, a piece of Lime Green Jute Twine cording was wrapped around its neck, and all the flowers were then glued to the page.   I just love how the Maya Road products add that charming accent to the page!

To finish the page, the Alphas in the 4x6 stickers were used to create the title.  Oh! I really like the overall look of this page.  It is bright, happy and full of texture, in total a great fusion of both Simple Stories and Maya Road Products.

__________________________

The Hello Lovely Simple Set has quickly become one of my favorite Simple Stories collections (this far!).  This time, I set to use it to document a picture of my nephew and my daughter -yeah!, I used pink for a boy layout, and the results are lovely-.  

For this layout, I wanted to use as many of the patterns of the collection in one single page, so I pulled the Free Love cut file from Just Nick Studio to create the large title.   

Each letter in the cut out was then backed with the So Very Lovely, Fab-YOU-lous, and the journaling cards from the collection.   Once all the cut outs were backed,  i chose the So Much Happiness paper from the Life in Color collection to serve as the layout's mat.

This picture of my daughter and nephew is one of my favorites, and so fitting for the title and feeling of the page.  The 4x6 cards from the cut-apart paper were used as layers behind the picture.   The floral designs of the collection are so beautiful, so I used some fussy cut flowers and stickers from the 6x12 sheet to create a large cluster around the picture.  The little key charm from Ken Oliver Vintage Heart and Key charm from Maya Road fits perfect in this little cluster.

The beautiful Maya Road Pink and Red Vintage Paper flowers  were used to create clusters at the corners of the title.  The colors in the flowers matched perfectly those of this collection. 

In addition, the Ken Oliver Heart and Key charm from Maya Road add hints of gold, and complement the look of the title and the page.  

Finally, some pieces from the Faith collection Sticker combo were added around the page.  And as a final touch a few splatters of gold ink were added to the page, and to the Maya Road flowers.    

I love the simplicity of this page, and  how the Hello Lovely can easily be used to create a boy layout.  I am sure you all will also love this collection.

Thanks for stopping by!

__________________________________

Now for even more fun!!  Enter via the Rafflecopter widget below and we'll draw one lucky winner next Monday to win both a Summer Days & Cabin Fever collection kit!   

a Rafflecopter giveaway

After you enter, head on over to the Maya Road blog to see what their team has created.  

Want to follow Maya Road and keep up with all of their great projects & products?  Here you go!

Join us again here tomorrow for more inspiring projects!


SaveSave

SaveSave

Supplies

Howdy friends!  Layle here with you today for day 2 of our week long Simple Stories & Maya Road Product Swap! 

Both design teams have swapped products & teamed up for some great inspiration all week long!

Today creative team member Meredy Vranich joins us with her Carpe Diem planner & our Cabin Fever collection -

__________________________________

Hi Everyone, Its Meredy (aka @myplanningadventure) and I am here to show you my June set up for my Carpe Diem Planner using the Cabin Fever collection.  I know the theme of this is for outside adventures, but I actually found it perfect to keep me motivated on my current adventure, a home renovation!  We are managing the project ourselves and I have loved the elements and inspirational sayings as they have really helped me stay energized over the last few weeks.

One of my favorite things to do in my planner is make dashboards.  It is a quick and easy way to give your planner a fresh new look.  I also love patterned paper but I don’t scrapbook so this is a perfect way for me to utilize those papers I collect!  

Next, I move on to the pockets.  I like using journaling cards and Bits & Pieces in the pockets and I always tuck in some of my favorite larger size journaling cards into the back pocket.  I also like to put in clips that I can use throughout the month.  I love these number paper clips from Maya Road.

Here is a close up of my dashboard.  It’s fun to layer a bunch of different elements.  For the dashboard I used Under the Stars paper, then added items from the Bits & Pieces pack and a journaling card from 4x4 elements paper.  Alpha stickers are my new obsession and I used some to spell out June!

The back of this paper was too pretty to leave blank, so I added another journaling card from the 3x4 Journaling Card elements paper.

I also made some charms to remind me that the key to the success of this project is to keep moving forward.  The Maya Road pieces were perfect for making the charms!

Another way to use pretty paper is to make a pocket insert--It is really easy to do!  Find a 12 x 12 paper you love (this one is Nature Hike) and fold up the bottom portion of the pocket until the paper is the same height as an A5, then fold in half with the contrasting bottom portion facing out, glue the inside together, trim a bit, punch and you have a pocket!  Put on some stickers, ephemera and embellishments, like the Maya Road metal arrow that I used, and you have the perfect companion to a new dashboard.  I have been loving the 4x6 sticker packs Carpe Diem releases for each collection--they easily make your planner look gorgeous!  I put them right into my pocket pages and I am ready to decorate on the go.

The back of the pocket page is stuffed with Alphas from Simple Stories SN@P! line (did I mention I was obsessed with alphas!?)  I also decorated the pocket with stickers from the 12 x 12 Combo sheet.

Next up is my monthly layout.  This month is all about the work happening at my house and home life.  I used washi folded in half to mark out my construction schedule and brightened up the rest with decorative elements.

Last up is my daily planning—one of my favorite things to do!  I break up my To Dos into three categories using Alpha letters and then just have fun with the rest.

I used this Maya Road number paperclip for the date, so fun!

Thanks for stopping by and viewing my project.  I hope you are inspired to use this collection to motivate you on your own adventure whether it is outdoors or just on a project you have going on at work or at home!

__________________________________

Now for even more fun!!  Enter via the Rafflecopter widget below and we'll draw one lucky winner next Monday to win both a Summer Days & Cabin Fever collection kit!   

a Rafflecopter giveaway

After you enter, head on over to the Maya Road blog to see what their team has created.  

Want to follow Maya Road and keep up with all of their great projects & products?  Here you go!

Join us again here tomorrow for more inspiring projects!

Supplies

Howdy friends!  Layle here with you today.  We've got a fun week planned for you - a Simple Stories & Maya Road product Swap! 

Both design teams have swapped products and will be sharing on our blogs all week long.  Join us for some great inspiration all week long!

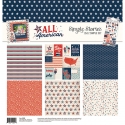
Today creative team member Lisa Abbott-Saunders  joins us with layouts from our Cabin Fever & Summer Days collections -

__________________________________

Hello, it's Lisa with you today.  I would love to chat about multi photo layouts with you.  I know some people are put off by these. I used to be on the 'One Photo Per Page Team', but have more recently switched sides and find myself scrapbooking more and more with smaller but multiple photographs. There's always the worry that by adding lots of photos it can feel too busy and the photos can dominate the page so you have less space for fun designs. A one photo layout just seems cleaner and neater, so today I want to share some tips with you. How to create multi photo layouts and still have space on your page to breath and have fun.

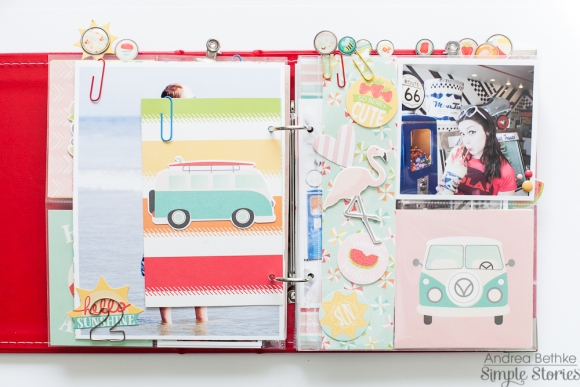
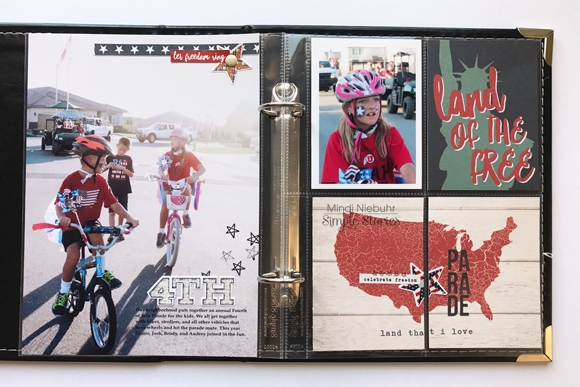
I'm going to start with my Explore layout that I've made with the Cabin Fever collection.


I have used a free editing website called PicMonkey to create a photo mosaic. It's really easy to do and a great way to add a few photos to your page without the page looking cluttered as you can see here.
 
 
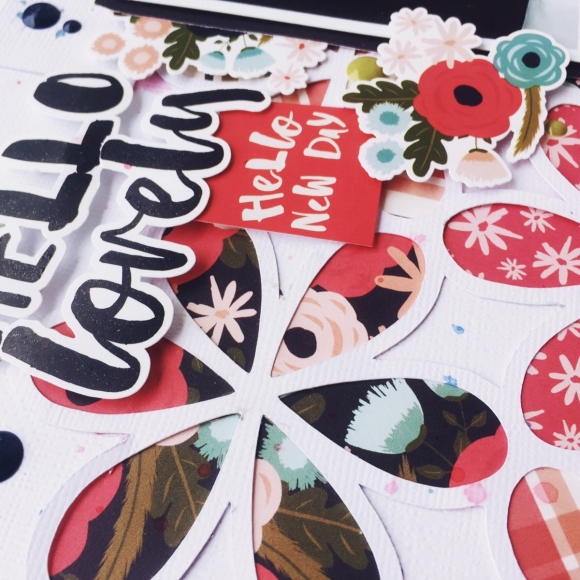
I like the white border giving the photos a clean look. It's then really fun to embellish around your photo grid. I've used stickers and the 'Bits and Pieces' here.
 
 
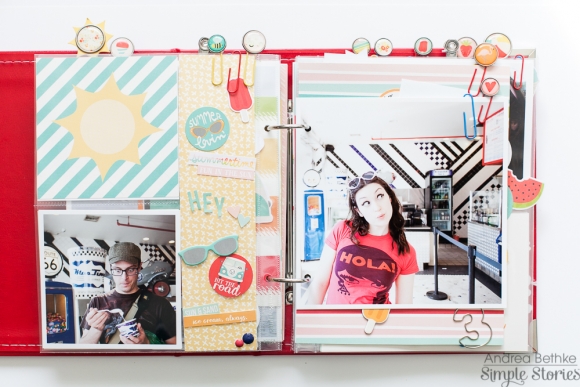
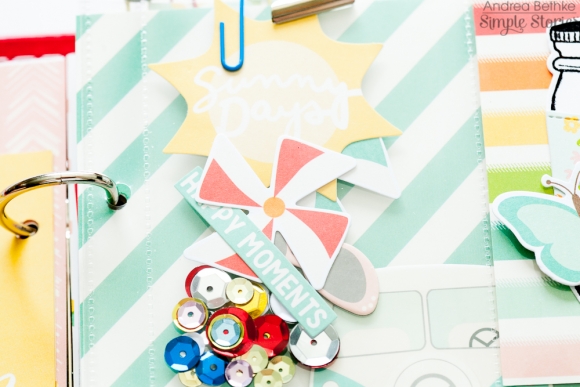
I wanted to create a fun title. I have layered up one of the Die Cut cards that I cut from one of the coordinating 12x12 sheets and added a couple of the 'Bits and Pieces' and the 'Explore' is from the 12x12 Sticker Sheet stuck across the center.
 
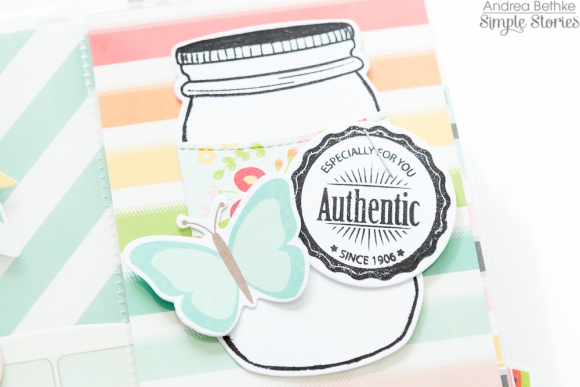
I continued with the embellishing around this area. I also added a few Maya Road stamps which I thought were a really fun addition.
 
 
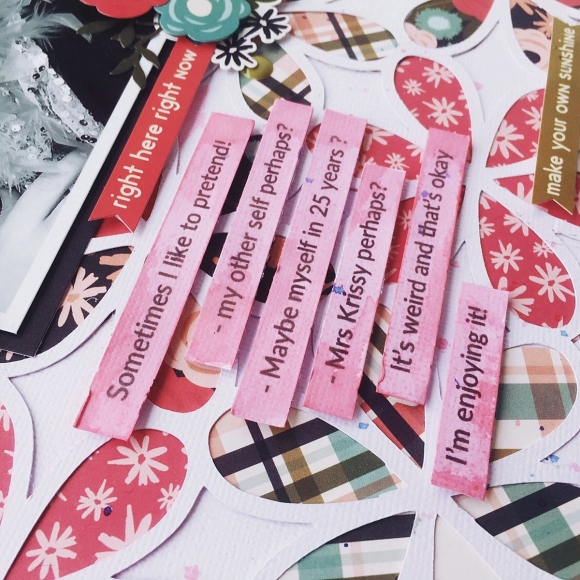
I think it's important to allow some white space on a page to give it a less cluttered feel. To break this white space up a little I used this Die Cut tag from the 'Bits and Pieces' pack and added some word stickers. I love how this kind of acts as a sub title to my page.
 
I also added some of the washi tape from this collection around the whole edge of my layout. It's a great way to add further decoration without over doing it.
 
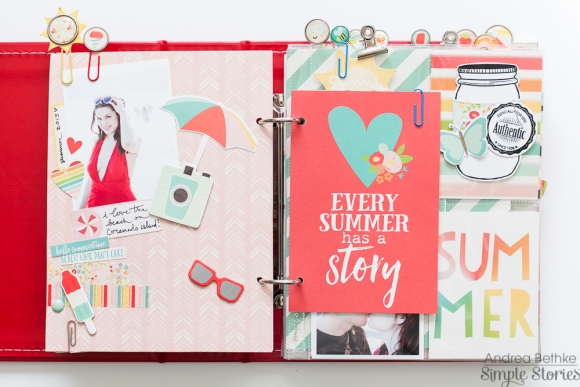
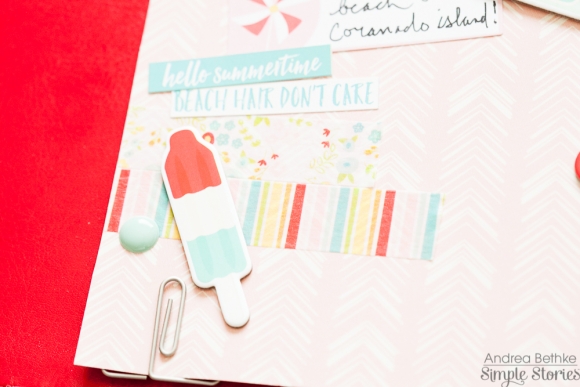
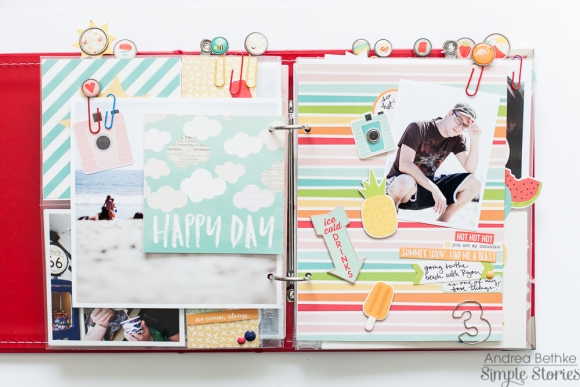
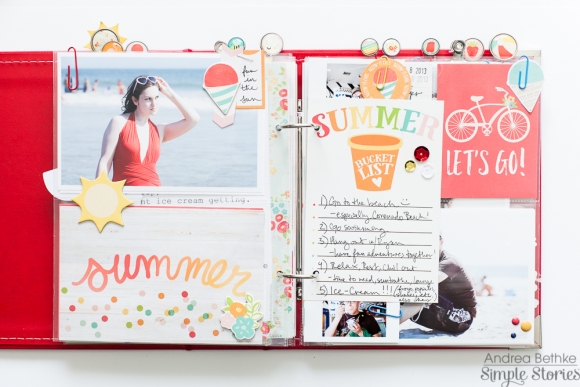
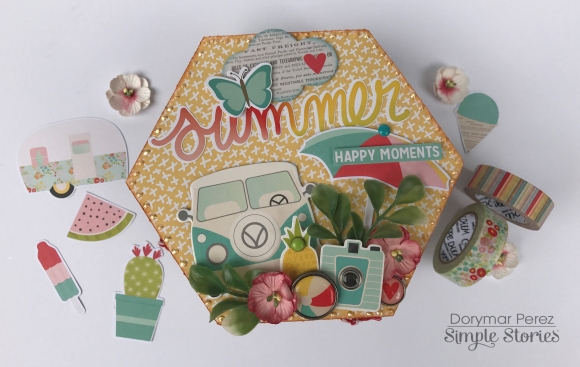
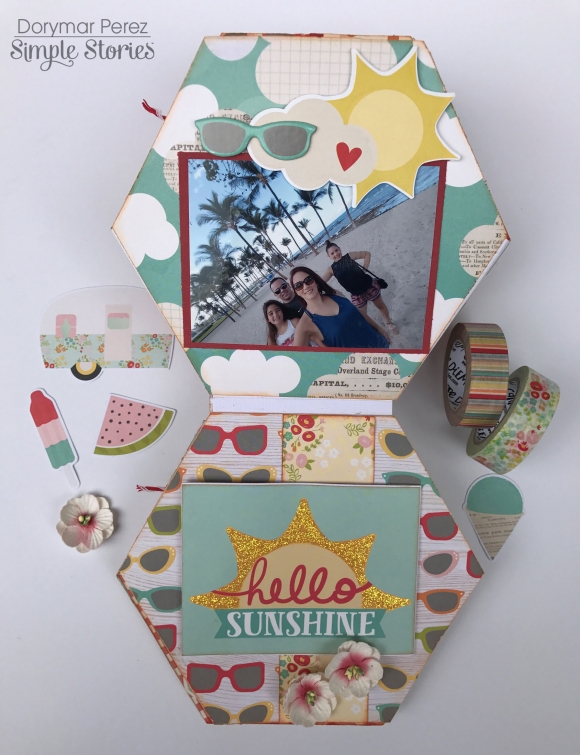
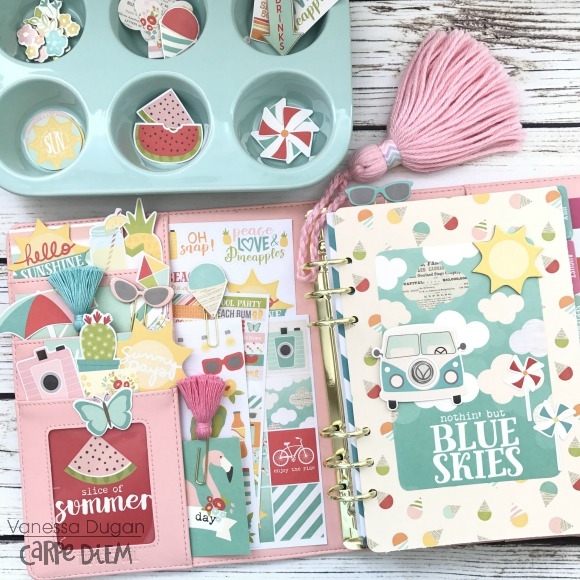
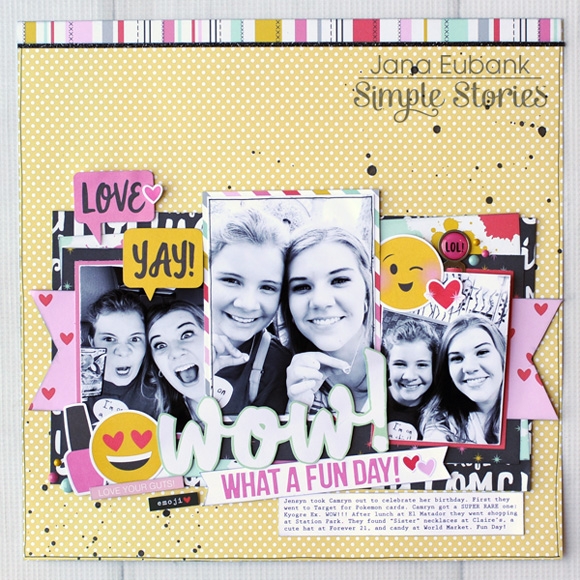
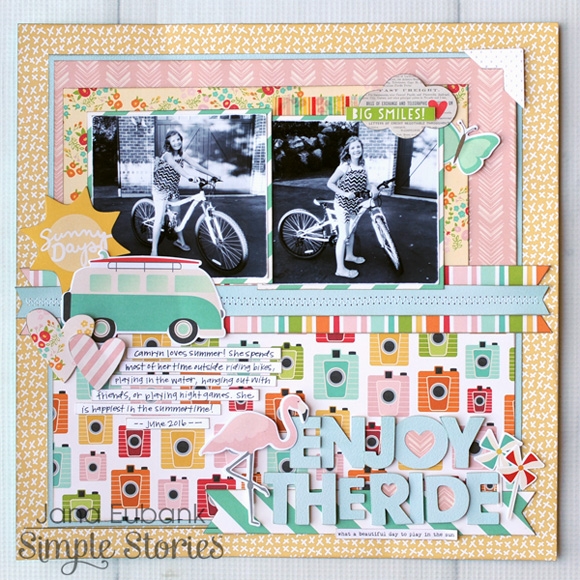
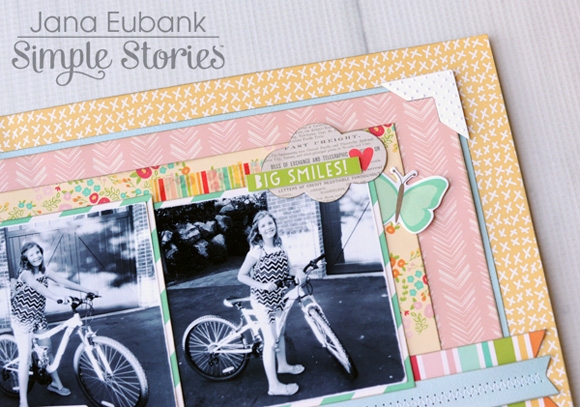
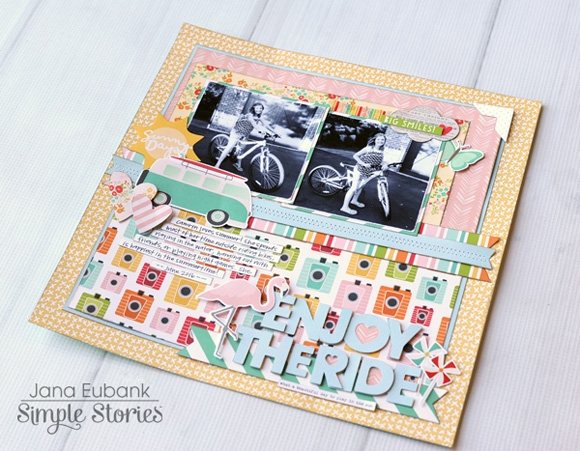
My next layout for you is called 'Our Summer'.  I've used the 'Summer Days' collection here.
 
      
I've created a grid design in the center using 12x12 patterned paper cut down and also using some of the Die Cut Cards cut down to fit within that space . The idea was to contain the photos and design within this area.  I've gone for white space surrounding my center art work here, so again having some clean space on my page, tricking your eyes in to thinking that it's not 'too' busy. 
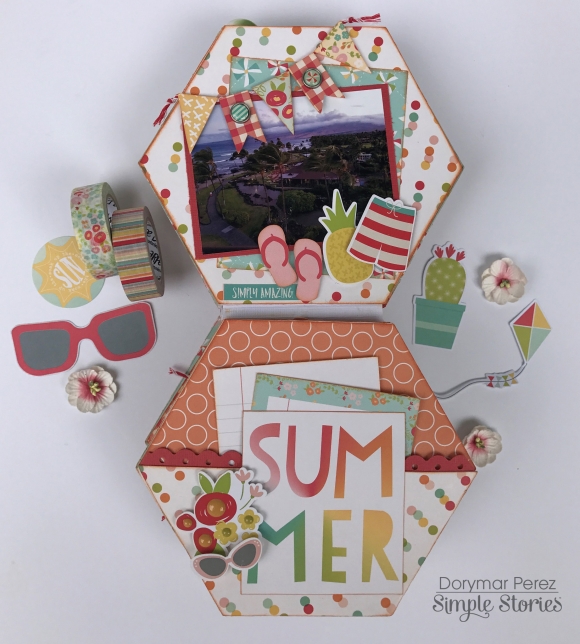
I have printed off my 2 inch photos individually this time and once again with a white border. This really helps to stand the photos away from the patterned paper backgrounds. Sometimes they can disappear in to the background if you aren't careful. The white background really helps the photos to POP!


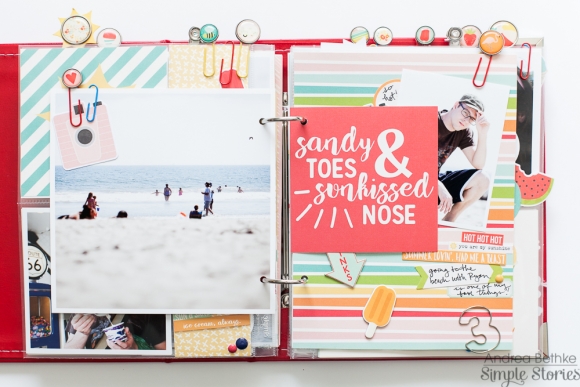
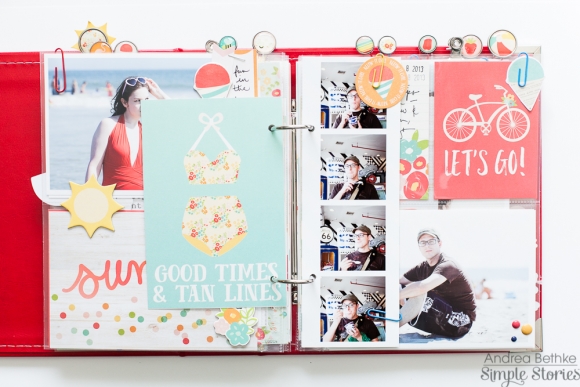
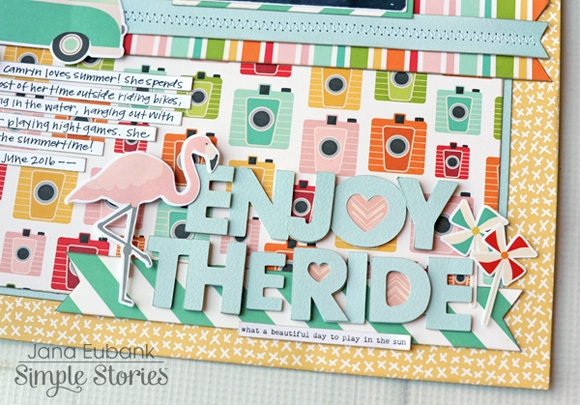
I've cut one of the die cut cards from the 12x12 sheet to use as my title. The design was looking a little busy, so I've gone around everything with a black pen and this includes the wording on this Die Cut card. Once again it's just something that really helps things to stand out. I added a little heart sticker to the 'R'. So Cute!!
 
 
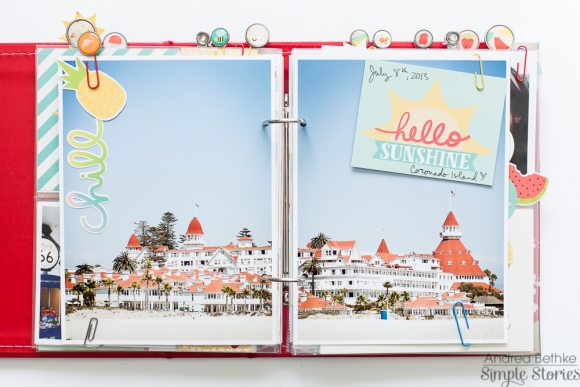
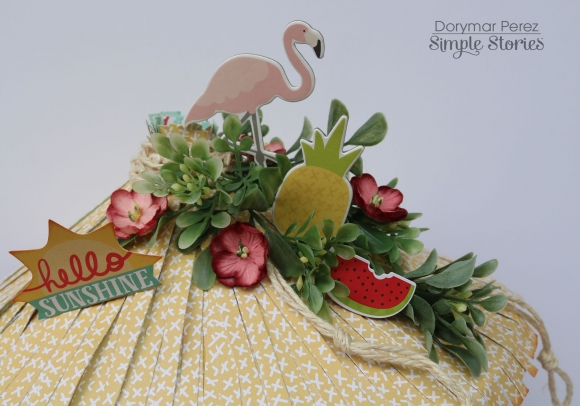
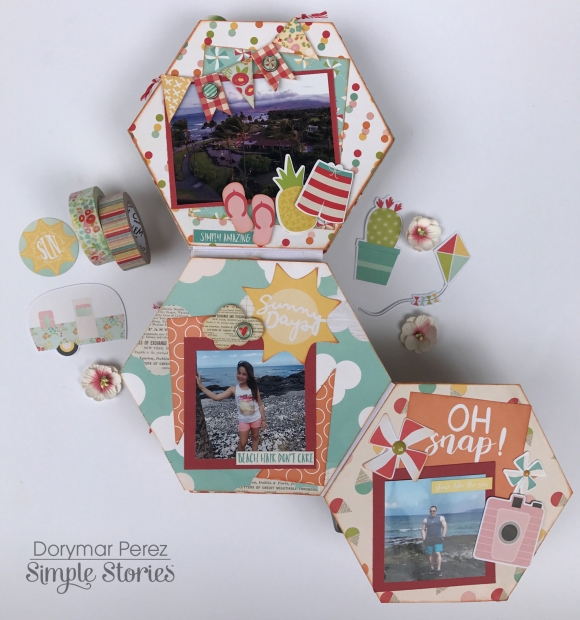
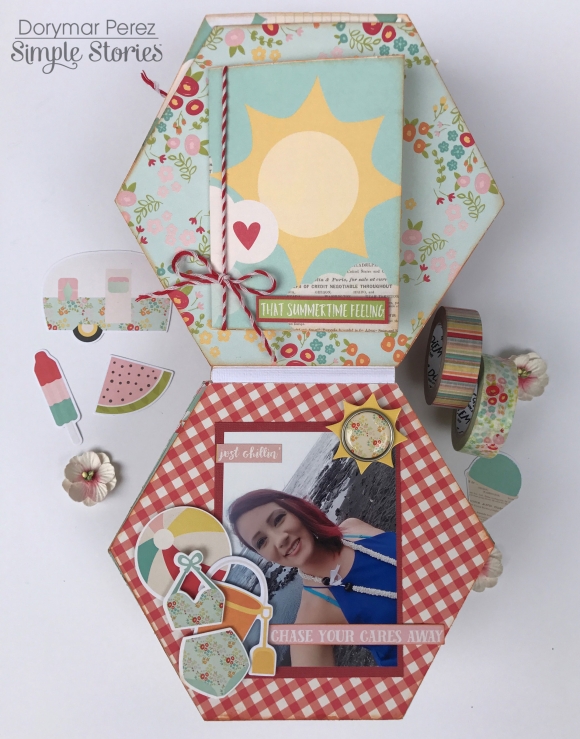
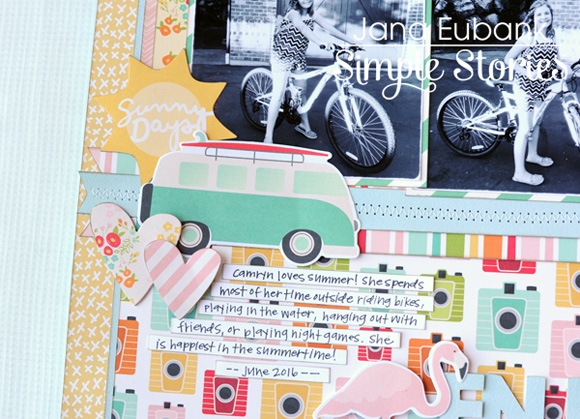
I loved the 'hello sunshine' which was on a larger die cut card. So I cut it out and stuck it on with a 3d foam tape pad. I love how I'm saying 'hello sunshine' and the August photo that was taken in Wales last year was cold, rainy and so blowy. Oh how I love our weather!!!  : )
 
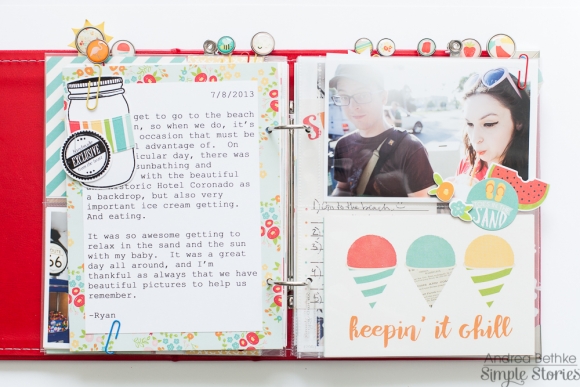
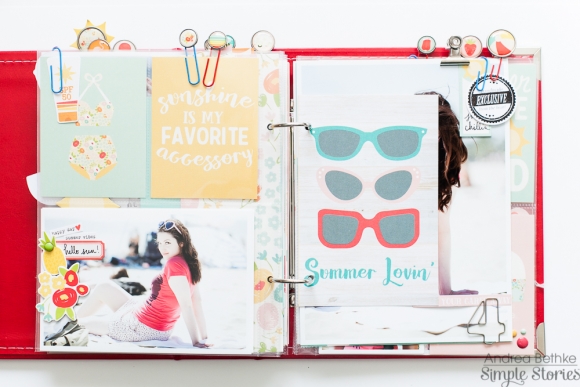
I love the little packs of brads. These are adorable! I used one of the clouds from the 'Bits and Pieces' pack and the other is one of the brads.
 
 
I also used some Maya Road flowers. They are rather bulky and I don't want my pages to bulk out my scrapbook albums so much, but I really loved the flowers and the colour matches perfectly, so I took one to bits. I removed the flower head from the stem and removed the larger petals from the back of the flower to give me these three individual flowers. I stuck them in place with a little pva glue and them added 3 more of the brads. I love the colour and added texture these add to my page. A perfect finish to my Summery layout.
__________________________________

Now for even more fun!!  Enter via the Rafflecopter widget below and we'll draw one lucky winner next Monday to win both a Summer Days & Cabin Fever collection kit!   

a Rafflecopter giveaway

After you enter, head on over to the Maya Road blog to see what their team has created.  

Want to follow Maya Road and keep up with all of their great projects & products?  Here you go!

Join us again here tomorrow for more inspiring projects!

SaveSave

Hi again, it's me Emma, I'd like to share with you today what I have been doing with the Summer Days collection which is one of the fabulous new simple stories releases. Now, I'm from the U.K. and you may be aware that we are all pretty much obsessed with the weather! Mainly I think because we often manage to have all four seasons in one day! I myself am at my happiest when the sun shines and that's why this Summer Days collection is perfect for me to use in my summer planner! 


There are so many items that come with this collection, papers, stickers, washi tape, bits & pieces, brads and chipboard stickers. This is what I find so wonderful about simple stories as you can find everything you are looking for, all co ordinating and working so beautifully together! 


As always I set up the front pocket of my planner first. I have used an assortment of the bits & pieces, chipboard stickers and cut out some of the elements from the 12x12 collection kit, they are full to bursting and I think look fabulously summery! 


I've then made a dashboard using paper & elements from the 12x12 collection kit and adding extra details with a black fine liner. 


I like to tie everything together by tucking papers into the Large side pockets and I use a border punch to just pretty up the edges. I have also slid the sticker sheets in here so I always have them at hand. 


I've used lots of the stickers and bits & pieces on my May monthly spread and the gorgeous washi tape...I'm a sucker for washi tape and I'm never disappointed with the choices that Simple Stories release, you will nearly always find that you can mix and match with all their other collections! 


I decided to make some fun paperclips with the decorative brads, it was super easy, just poke the split pin through the top end of your paperclip and then squeeze tightly once you've opened it. They actually hold in place really well! 


You'll notice on my monthly spreads I like to use the monthly date stickers, I also add these on my weekly pages, I find it handy when I'm planning things that I don't have to flip through to find dates, it's all there at the top of my page for me. 


I pretty much always have a doc it journal tucked into the back pocket of my planners, I like the idea that they are always at hand if I want to quickly do a couple of pages. 


A fun way to add some base colour to the pages is by using watercolour, I like to get a piece of clear cellophane and add splashed of paint to it, then press it onto the pages and it leaves an awesome organic splodge!!...yep! that's my technical term for it!! 


My handwriting is dreadful so I tend to journal in pictures, avoiding having to write!...I use pictures I print out, bits & pieces, washi tape and have fun sticking it on the pages. 


I hope I've given you a few ideas on how you too could use the Summer days collection in your planner or for journaling. 


If you would like to see more pictures of how I use this collection over the summer months then please pop over to my Instagram account https://www.instagram.com/heartsbyemma

Supplies

Hello friendsIt’s Dorymar back on the blog today with a fun project I am very happy that one of my favorite seasons of the year has arrived, Summer! Summer for me is a time for sharing and enjoying my family to the maximum, no school, no homework, my girls are hometime to enjoy the outdoors! I am from Puerto Rico so for me, there is nothing more fun than enjoying warm temperatures, the beach, the sand, the sun, refreshing drinks, etc. So, when I saw the beautiful, bright, and fun Summer Days collection I wanted to create something that reminded me of those elements that I love so much.  These amazing memories took me to the Summer of 2016, when my family had the opportunity to visit Kona, Hawaii!  What a wonderful trip! I decided to create an altered project: a super cute beach barthose we find at the sea shore -  and inside a beautiful hexagonal flip book mini album. 


¡Saludos a todos! ¡Por aquí Dorymar de nuevo en el blog con un proyecto muy divertido!  Muy feliz y contenta de que ya llegó una de mis estaciones favoritas del año, el verano. El verano para mi es ese momento de compartir y disfrutar con mi familia al máximo, no clases, no tareas, las chicas en casa, en fin, momento de gozar.  Como soy de Puerto Rico para mí no hay nada más divertido que disfrutar esas temperaturas cálidas, la playa, la arena, el sol, bebidas refrescantes, etc. y es por todo eso que cuando vi la colección de “Summer Days” quise crear algo que me recordara esos elementos que tanto amo de esta época y por supuesto lo que para mí fue el verano del 2016.  ¡El pasado 2016 tuve la oportunidad de visitar KonaHawaii ¡Un viaje maravilloso! Pues decidí crear un proyecto alterado de una barra de esas que encontramos a la orilla de mar y en el interior de ésta un mini álbum en forma hexagonal estilo “flip book”.   


As a base, I used a hexagonal box that I got in a dollar store with a diameter of about 6 ". Then in the center I drew a circle that allows me to detach the lid easily, besides simulating the center of the bar. On it I made a 5 inches tall wall with cardstock that I supported with two paper straws. After this, I covered the entire exterior of the project with the brilliant papers from the Summer Days collection. 


Como base utilicé una caja hexagonal que conseguí en una tienda de dólar con un diámetro de 6” aproximadamente.  Luego en el centro tracé un circulo que me permite desprender la tapa con facilidad, además de simular el centro de la barra.  Sobre ella hice con cardstock una pared de 5” de alto la que apoyé con dos sorbetos de papel.  Luego de esto, forré todo el exterior del proyecto con los brillantes papeles de la colección Summer Days. 


To make the bar roofI made a circle of 10 ½" in diameter and removed a small piece of its sides to form that pointed shape of the ceiling.  With two "Lazy Days" papers I covered this piece, cutting ¼ x 6 stripes. As you can see they are not evenly glued to make it look more real. Then with the beautiful elements of the collection I decorated the whole ceiling. 


Para hacer el techo, hice un circulo de 10 ½” de diámetro y eliminé un pequeño pedazo de sus lados para formar esa forma puntiaguda del techo.  Con dos papeles “Lazy Days” forré esta pieza cortando franjas de ¼ x 6.  Como pueden observar no están pegadas de forma uniforme para que se vea más real. Luego con los bellos elementos de la colección decoré todo el techo. 


For the mini, I used the bottom of the box as a measure.  It is a hexagon of 5 3/8 diameter that I traced in two pieces of "chipboard" to give it firmness. On the cover, I used the collection’s "Chipboard Stickers", "Decorative Brads" and "Bits and Pieces", to add bright colors and highlight the the summer theme. To give it a personal touch, I used liquid pearl, leaves, and flowers in combination with the papers. 


Para el mini utilice como medida el fondo de la caja.  Es un hexágono de 5 3/8 de diámetro que tracé en dos piezas de chipboard para darle firmeza.  En la portada utilicé “chipboard stickers”, “decorative brads” y “bits and pieces” todos llenos de brillantes colores y muy a todo con el verano. Para darle un toque personal, utilicé “liquid pearl”, hojas y flores en combinación con los papeles.   


The inside of the mini album is super fun because each page houses an element to search inside it. In the first pages, you can see a pocket where you have space to add journaling. When you open it, you can see that fun way of flip book where you can open one side and another. All has been decorated with the collection’s "Bits and Pieces", "Decorative Brads", "Chipboard Stickers" and "Enamel Dots". For the journal, used 2 of the 3 x 4 cards of the "Journaling Cards Elements" paper. 


El interior del mini álbum es super divertido porque cada página alberga un elemento para buscar dentro de él.  En estas primeras páginas puedes observar un bolsillo donde tienes espacio para guardar tu journal, al abrirla puedes observar esa forma divertida de flip book donde puedes abrir hacia un lado y hacia otro.  Todo decorado con los bits and piecesdecorative bradschipboard stickers y enamel dots.  Para el journal utilice 2 de las tarjetas 3 x 4 del papel Journaling Cards Elements”. 


I love to use the paper to the maximumthat is why I always do banners or elements with scissors to add dimension to the pages. On this page, I used the scissors to make fringes to give this fun touch. On the next page, you can see how with one of the 4 x 4 cards of the 4 x 4 Elements paper I made a flap that opens and inside you have space for two photos. On each page, you can see how all the beautiful elements of the collection enhance the design of the project. 


Me encanta utilizar el papel al máximo, es por eso que siempre hago banderines o efectos con la tijera para añadir dimensiones a las páginas.  En esta página utilicé la tijera para hacer flecos para darle este toque divertido.  En la página que le sigue puedes observar como con una de las tarjetas 4 x 4 del papel Elements hice un flap que abre hacia arriba y en su interior tienes espacio para dos fotos.  En cada página puedes observar como todos los bellos elementos de la colección realzan el diseño del proyecto. 


I continued with the flip book design pattern but in this case, I made a small waterfall to place 2 ½ x 2 ½ photos where you can place 6 photos. Inside I used a 3 x 4 card and with the Good Vibes Washi Tape, I made a pocket that holds two cards to use as space for journaling.  In the center, I made another pocket with more space for photos and journaling 


Sigo con el patrón de diseño de flip book pero en este caso hice una pequeña cascada para colocar fotos de 2 ½ x 2 ½ donde puedes colocar 6 fotos.  En el interior utilicé una tarjeta 3 x 4 y con el “Good Vibes Washi Tape hice un bolsillo que alberga dos tarjetas para utilizarlas como espacio para el journal y en el centro hice otro bolsillo con más espacio para fotos y journal.   


As you move the pages you still find hidden spaces that, when you open them you find a lot of space for photos and journaling. I made a side pocket with a 6 x 4 card from the Horizontal Elements paper.  Also, I made an insert that when you open it, you find photo and journaling. At the bottom, you can see a flap made with a 3 x 4 card and inside more photos. With the elements of the collection and part of the designs of the cards, I decorated all around. 


Según vas moviendo las paginas sigues encontrando espacios ocultos que al abrirlos encuentras mucho, espacio para fotos y journal.  Hice un bolsillo lateral con y con una tarjeta 6 x 4 del papel Horizontal Elements hice un insert” que al abrirlo encuentras foto y journal. En la parte inferior puedes observar un flap hecho con una tarjeta 3 x 4 y en su interior más fotos.  Con los elementos de la colección y parte de los diseños de las tarjetas adorne todo su alrededor. 


The more pages you go through, the more fun you have with the colors, the elements, and the details of the project. What is so amazing about the Summer Days collection is that you have many elements in the bits and pieces, the stickers, and the chipboard but also the elements of the cards and the papers.  You can use them to decorate the project as you can see in the following pages. 


Mientras más páginas pasas, más te diviertes con los colores, los elementos y cada uno de los detalles del proyecto.  Lo divertido de la colección “Summer Days” es que tienes muchos elementos en los “bits and pieces”, los “stickers” y los “chipboard” pero también los elementos de las tarjetas y los papeles puedes utilizarlos para decorar el proyecto como puedes observar en las páginas siguientes.  


I hope you enjoy this Summer that just begun with your loved ones, enjoy the outdoor activities, and create many memories to document on your scrapbooks. 


Have a great week!  Blessings and happy crafting! 


Espero que disfruten este verano que aún comienza, a gozar de las actividades al aire libre creando recuerdos para tu Scrapbook.   


¡Que pasen una feliz semana! ¡Bendiciones! 

SaveSave

SaveSaveSaveSave

Supplies

Hello friends! 

It's Kristine Davidson here today with two layouts featuring the Simple Set - Hello Lovely.  I used only the collection kit and some enamel dots for these layouts and it was so easy. I had a precut background all ready for me and I brought this to a crop a few weeks ago. It was easy to pack - just a kit, some cardstock and adhesive. A great way to create at a crop or a friends house! 

This is my first layout - called "Smile Big" 


As you can see I didn't use a large title for this page, I felt that the 3x4 element card was enough with a sticker on my photo. A nice easy title is something I like on my pages. I really don't like stressing about that too much. 

The colors are so nice in this collection - the navy is something i really enjoy with some pinks mixed it. It's really a beautiful kit. I used a Kraft cardstock for my background - something i used less of lately but really love the look. I layered some pieces of patterned paper and of course I used some dimensional adhesive on my die cut stickers. That's a given ;) 

 A few clusters around the elements card and photo just bring the entire page together.  Here is a sketch I created just for you based on this layout.

________________________

My second layout is called - Hello Lovely

Yes that's me being silly of course. It was taken at an event last March and I was playing with the photo booth props. It's so much fun to dress up and be crazy for a few minutes.  This is my version of Hello Lovely. Sometimes you've got to ' let it go! ' 

I used a digital die cut for the background - created by Paige Evans. It was so easy to create this page even if it looks complicating. I created this page in a few hours and really loved piecing papers and doing an assortment of flowers on this page. 

I created journal strips and then added a bit of watercolor on top so you would see the journaling and it wouldn't be hidden under the white cardstock and variety of papers. It could have been colored a blue or peach, but the pink adds more color to my page ;) 

You can see the cluster of stickers and also some of the paint splats I created. 

I hope you enjoyed my reveal today and of course we can't wait to see what you create with this collection! Don't forget to tag us on instagram using #SimpleStories and you can come follow me as well at instagram.com/KristineDavidson

Thanks for visiting!


Supplies

It’s always an exciting time when new product starts arriving here at the Simple Story offices. The warehouse starts buzzing and it’s all hands on deck—even our owner and president, Kevin Crowell, gets right in the mix. You can oftentimes find him deep in the truck moving product and adding humor to the chaos.


We’re all thrilled that our Carpe Diem A5 Planner Punch is officially in the house (woot woot), and they are shipping now to local retailers near you. We suggest you get out to your favorite store quickly, or get your order placed online, because the news about these punches has had the Twittersphere and book-of-faces buzzing ever since our announcement at CHA.


Once you get your punch, getting organized will never be easier. Punch your kids ball schedules, shopping lists, or make your own custom dividers.


Our 12x12 Paper Pads have also arrived in our warehouse and are now shipping. These paper pads are filled with colorful papers from our latest collections, with some gorgeous new options to choose from as well. The colors are beautiful, bold, and eye-catching, and having them in a pad makes for easy storage, options aplenty, and coordinating patterns a snap! Pick up one (or many!) of these pads and get to creating! They’re great for scrapbooking, card making, kids art projects, and home decor!


We can’t wait to see what you create with these awesome new products! And as always, if you’re looking for inspiration, be sure to check out our Pinterest boards here for ideas and eye-candy!

SaveSave

Hey everyone ! It's Mindi with you on the blog today. I have some pocket pages to share with you using the awesome All American Simple Set. This set is perfect for all of your Fourth of July photos and much more. It can be used for many other things as well. With July 4th right around the corner I thought is was time to get last years photos and stories documented. So let's get started. 
 
I am using the 6x8 album in black for this project as well as a variety of page protectors. It is so fun to mix up and work with the different variations of pockets. This first pocket page that I am using is a full 6x8 page and then some divided page protectors on the other side. I love to add in these full page photos into my album. 
 
 
On this first page I wanted to use either the big July or the 4th sticker to make sure that the reader would know what these pages are about. I went with the 4th sticker and added my journaling underneath it. I also added some embellishments up on the top of the page and some stamped stars on the photo. 
 
 
On the opposite side I have a photo and then some fun filler cards. I took this 4x6 card that has the outline of the states on it and spelled out Parade. Most of these photos are from our annual neighborhood parade on July 4th. You can add so many different things to this card including a big word like USA, or some journaling stripes. I just loved this card. 
 
 
The other side has more photos and a few filler cards that I custom made. 
 
 
This navy blue card I simply added a strip of red patterened paper to the bottom of to give it some color. I also added a firecracker sticker on the bottom as well as an enamel dot. 


I haven't really done much journaling about these photos I decided to add a journaling card on this next page. It also helps to break up the photos and filler cards on the spread. The word strip stickers were perfect to help tell my story about the neighborhood parade. 
 
 
This last set of pages is of what happened after the parade was over and the sun started to set. The fireworks show! 
 
 
We were fortunate enough to see many bigger fireworks that people were lighting off around us last year and so I snapped a few photos of them. This firecracker filler card was probably my favorite one of them all. I added the '16 to add in the year and then a word strip up above. 
 
 
They have these fireworks called smoke bombs and they are my kids favorites. I managed to get a half way decent photo of them playing in the brightly colored smoke. I added some journaling directly onto the photo and added a sticker as well. 
 
 
As I mentioned earlier that I used a lot of different sized pocket pages for this project. This last page has 2 4x4 pockets and a 2x8 pocket. I printed off 2 photos as 4x4's and added the July sticker to the top one. This whole simple set has these fun pinwheeled stars in it. I cut some out of the patterened paper and added a few to my journaling strip. It was a fun little touch and went well with my photos and theme. I kept this little strip pretty simple and finished it off with a few stickers and an enamel dot. 
 
 
Thanks for coming everyone ! I am so happy to have these fun memories now documented and look forward to celebrating again here soon. 

Supplies

Hi everyone!  Summer Solstice is fast approaching and where I live, the heat is already here.  Summer calls for bright colors, outdoor fun, and cool sweet treats and the Summer Days collection fulfills all of that.  

In my Ballerina  Carpe Diem planner, I stocked with 3x4 journaling cards, 4x6 sticker sheets, and ephemera pieces from this bright and bold collection. I also made a simple dashboard with the “Beat the Heat” cardstock and a few of the decorative brads.

For the calendar spread, I used the box stickers that fit perfectly in the monthly boxes, the Summertime Sweetness and Good Vibes washi tapes, and a few of the cardstock stickers.  I also glued a couple of the small sunglasses chipboard pieces onto paperclips to mark off pages.

To add some color and decor to my weekly pages, I mostly used the 4x6 stickers because they are smaller than the cardstock stickers and leave plenty for planning and scheduling.  I’m addicted to washi tape, so of course I added some along the punched holes to add a pop of color.


I hope you have fun planning your summer schedule with the Summer Days collection and it inspires you to capture more memories to come.91

Hi everyone! Jana Eubank here. The kids are out of school and the iconic question that goes "Mooom, what are we going to do today?" has already begun in our household. Haha! I don't know about you, but even though I love summer, when it's especially hot outside I think I'd rather stay in with the air conditioning and play with my scrapbook supplies!
 
Today I have a couple of layouts to share with you featuring the bright and happy colors of summer. This first on uses the Emoji Love collection.
 
WOW! WHAT A FUN DAY
 
All of my four kids' birthdays are in the summer. My oldest daughter has taken it upon herself to start a new tradition with her siblings by taking each one of them out for a special outing to celebrate their birthdays. On this day she took her youngest sister to lunch and to do a little bit of shopping.
 
 
While they were out together they took lots of selfies of their adventure ... which, of course, always includes silly faces! These are the kind of shots that are perfect to use with this darling collection!
 
 
I used the two speech bubble die cuts, "Love" and "Yay!" above this photo ... my daughter had picked up a pack of Pokemon cards while they were at Target and had scored a very RARE card. This is the celebratory selfie shot from that moment. Haha!
 
 
I used the striped Be a Unicorn paper to mat the largest photo, and then used the solid color 3x4 cards from the 3x4 Journaling Card Elements paper to mat the two smaller photos. I placed the two smaller photos on either side of the larger main photo and then layered up lots of delicious patterned papers behind them: the Choose Happy Paper, Yay Paper, Ha Ha Paper, and Be a Unicorn Paper (script). I tilted each of the layers differently for a bit of fun.
 
In the upper right corner I added a winky face, a epoxy metal clip, a sticker from the 4x6 stickers and a few enamel dots.
 
 
I cut out the script "Wow!" word from one of the 4x6 cards from the SN@P! pack for the first part of my title. For the second part, I used the pink letter stickers from the 4x6 sticker pack. The nail polish bottle die cut to the left of the title is a nod to the shopping they did on this day.
 
 
_______________________________
 
What kid doesn't spend many of their summer days riding their bike around the neighborhood with their friends?!  I gotta tell you ... every time I flip through the Summer Days collection I just get a smile on my face. I love this collection so much! I couldn't wait to play with it on this next layout!
 
 
First, I matted my photos with the diagonal stripe of the Sunny Days Paper and then adhered the them to the sweet yellow floral Hello Sunshine Paper. This floral has my heart. It was the perfect backdrop for these photos of my daughter on her bike.
 
I accented the top of the photos in the upper right corner with a bit of the striped Good Vibes Washi Tape and a couple of die cuts. The "Big Smiles" sticker is from the phrase stickers on the Combo Sticker Sheet.
 
 
I wanted to build a little scene in the bottom left corner of my photo strip. The sun looks like it is rising up over beach bus, beckoning you to come outside and play for the day!
 
 
I created my title on my electronic die cutting machine. I backed the openings of the letters with the pink chevron Summer Snapshots paper to tie it in with the same paper at the top of the page. A flamingo die cut and pinwheel stickers flank either side of the title ... and then a phrase sticker from the 4x6 stickers at the bottom of the title reminds you that it is definitely a beautiful day to get out and play in the sun!
 
 
I used a strip of the diagonal striped Sunny Days Paper to tie in with the photo mats at the top of the page and give the title and accents a place to rest.


Supplies

Pages