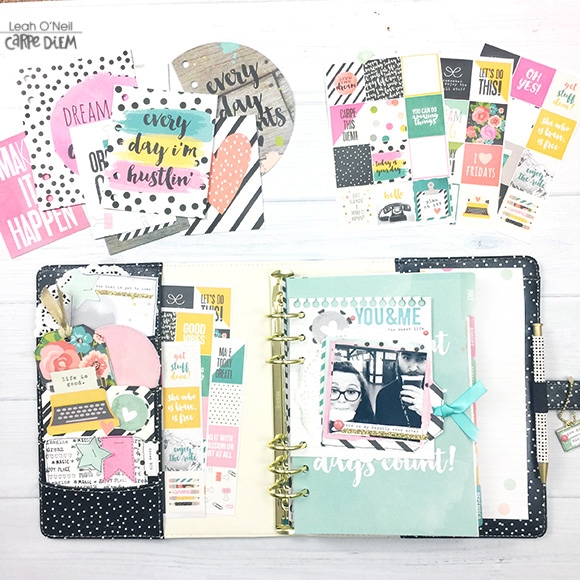
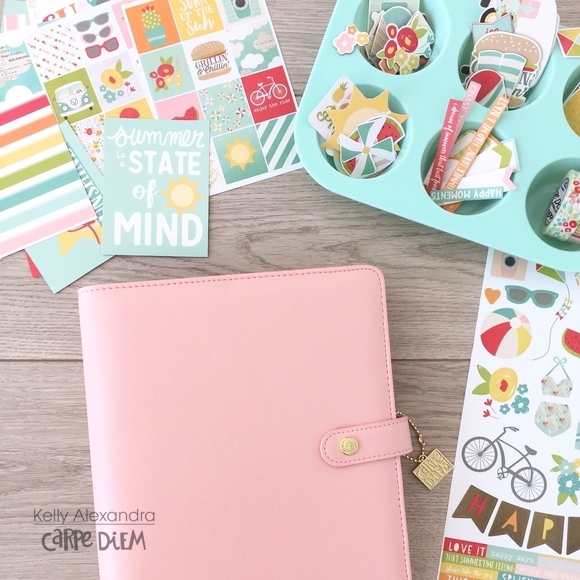
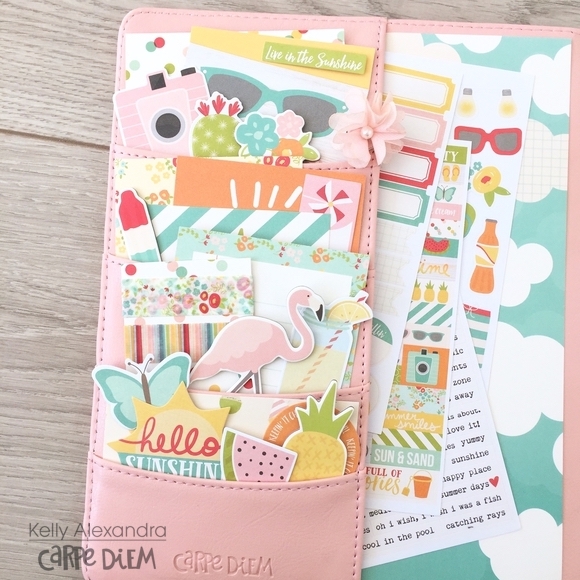
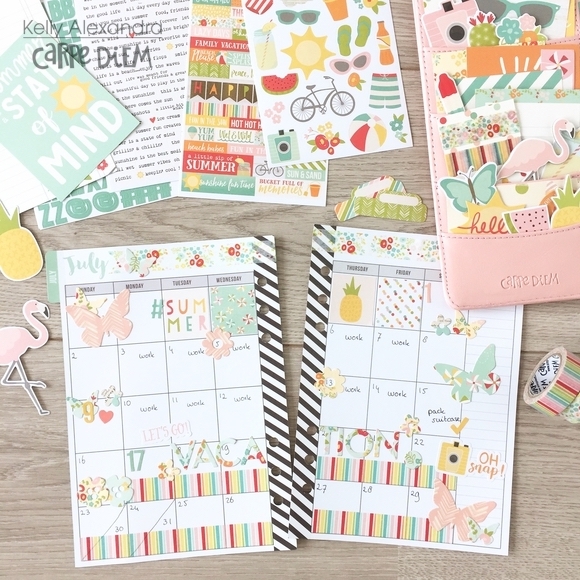
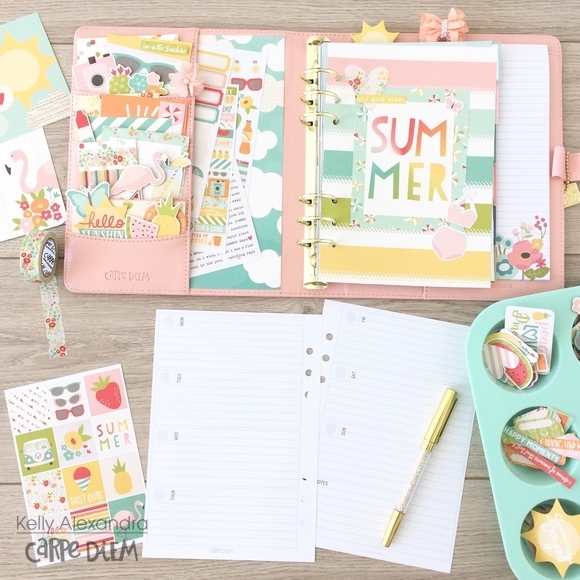
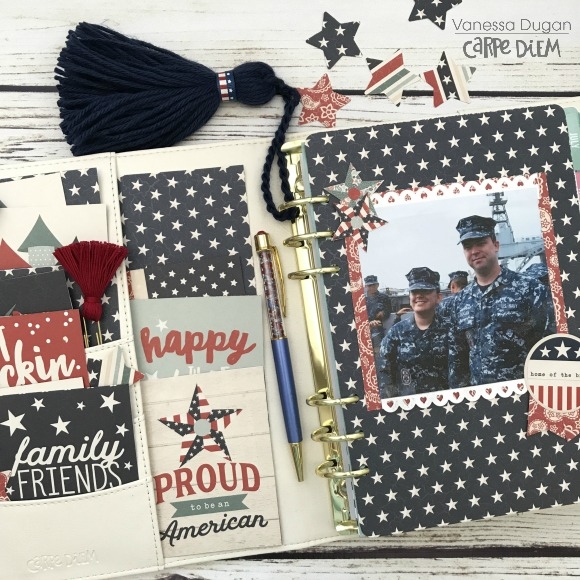
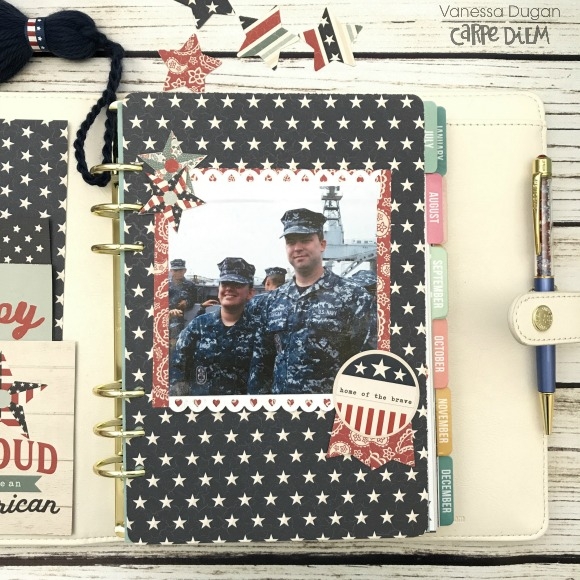
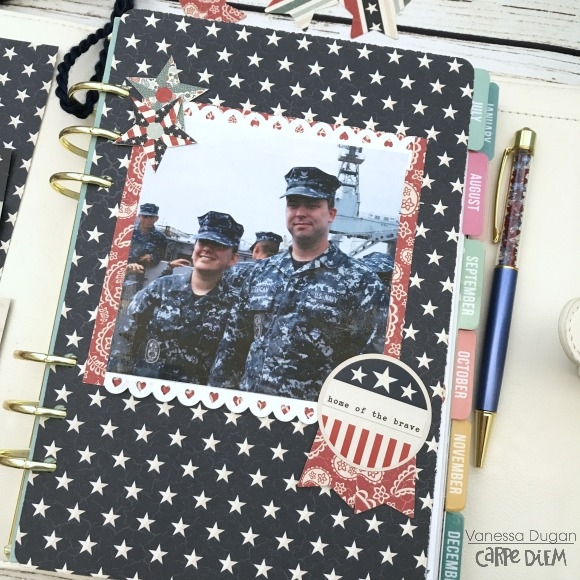
Hello everyone! It is Andrea here today and I want to share with you a fabulous mini-album/planner that I made using the Domestic Bliss collection from Simple Stories. I am loving this collection and this project because it really helped me to both get organized and also to stay motivated with all the things that I have to do around the house. It is also a great way to document a huge portion of my life.

I spend most of my life at home. By far! As a disabled person, and with the specific condition that I have, I am constantly stuck inside and in bed. I have limited mobility and am constantly in pain, so it is hard a lot of the time to try and get out of the house. However, despite this, I notice that the majority of my photos are from when I do get out of the house and am dressed up and somewhere fun or special, celebrating something, or going somewhere cool. These days that I often photograph though do not represent most of my life.

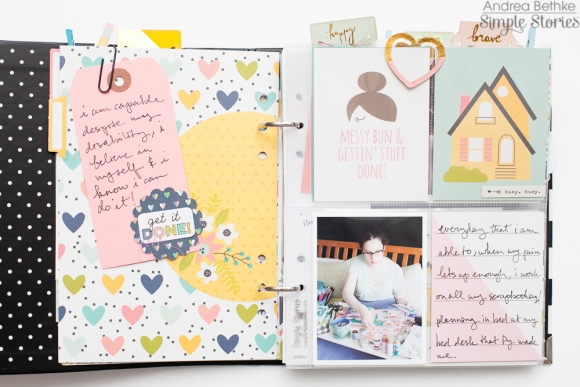
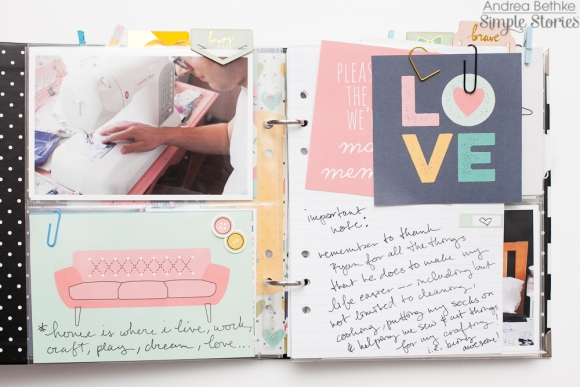
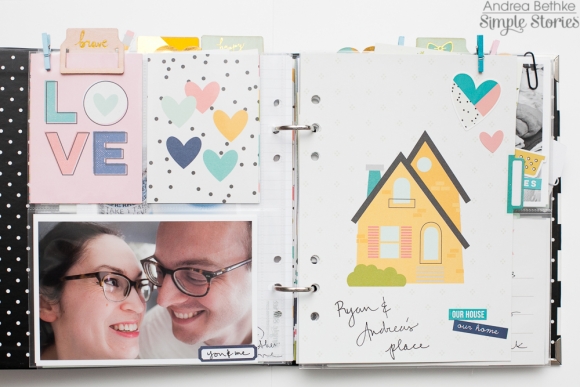
And while I do document days at home every so often in things like “week in the life” albums and other “daily” sort of projects, it occurred to me that I don't really have a mini-album that only talks about days at home like this and really focuses on life at home, in bed, doing my daily “work from home” work as well as average around the house things like cleaning, organizing, etc. And this is strange, because this is most of my life. It was nice to rectify this situation by finally making an album that documents this kind of thing. And Domestic Bliss is made to document the “home life” so it makes sense to use it for this.

I really like that this album serves both as a piece of documentation and memory keeping that is a scrapbook mini...but also a planner that can help me stay organized...AND also something to help me stay motivated and inspired! That is the beauty of this collection. I like how Simple Stories scrapbook stuff and Carpe Diem planner stuff in collections like Domestic Bliss, can be used together to make a project like this.

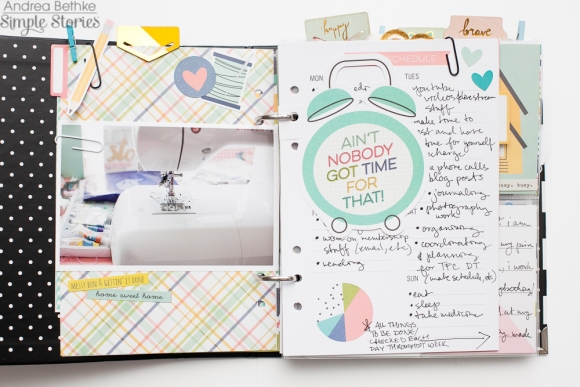
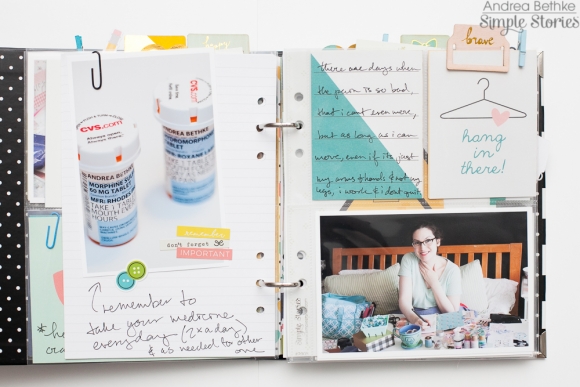
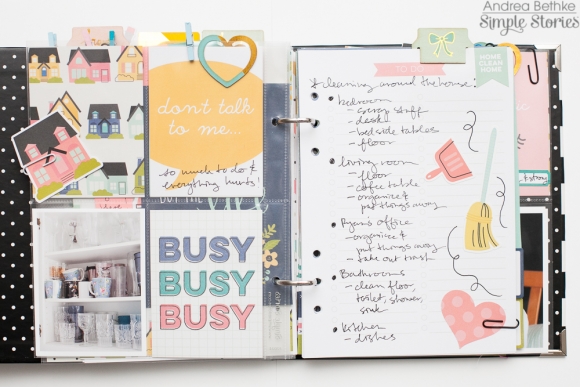
It has been hard to be motivated and inspired lately since this month has consisted mostly of me being stuck inside and in bed and in pain. This kind of thing happens sometimes. And on the really bad days, when I can't even sit up at my “bed desk” and do my work in bed (scrapping, planning, writing, designing, etc), I start to feel quite down on myself. I feel like I am not doing good. I feel like I am falling behind and that I am going slower. And I notice things piling up...especially things like laundry and cleaning up. And so I start to get frustrated and feel disappointed in myself. Even though I know I shouldn't and that I cannot control everything.

I think that I am not the only person that does this. I think a lot of us get down on ourselves, whether or not we have health conditions, with everything on our plates and the high standards to which we hold ourselves. Particularly women. And particularly creative women who do things like scrapbooking and planning. Perhaps this is because we are constantly documenting our lives and in that documentation, we compare what we do to what everyone else is doing and also to the perfect picture of how our lives should be in our mind.

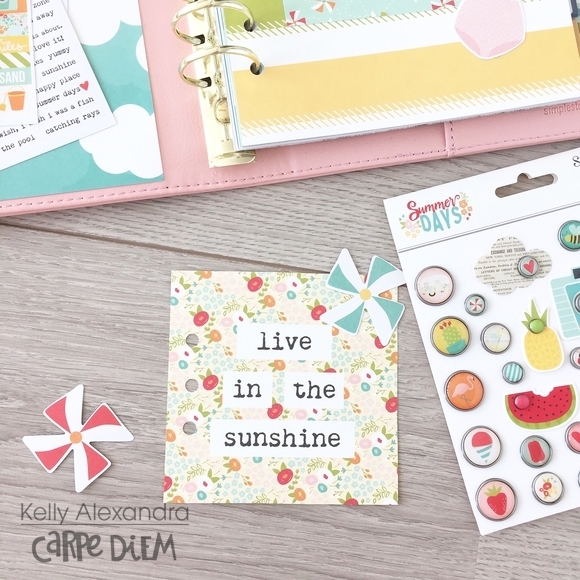
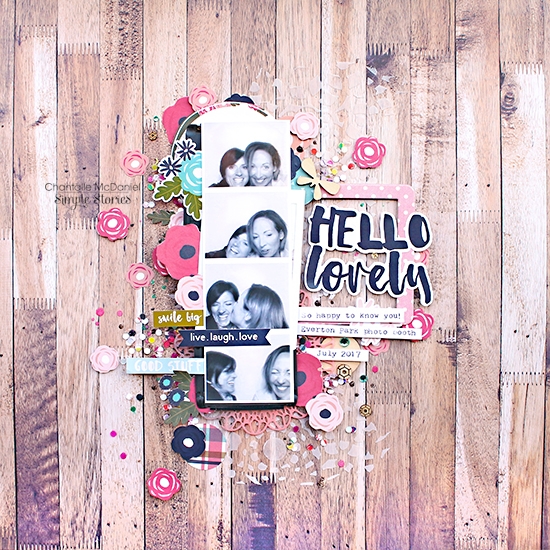
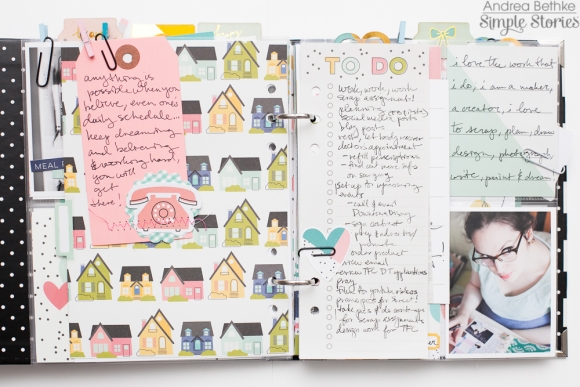
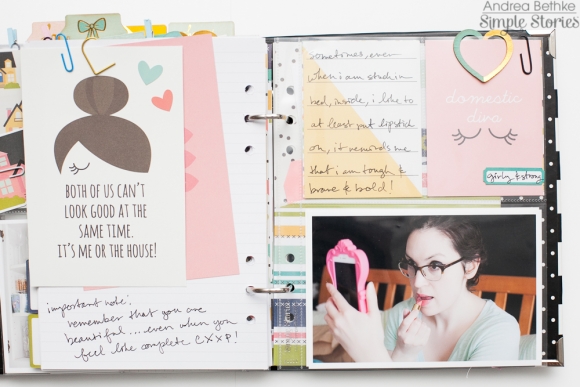
My life is beautiful and I love it and I love the work that I do, but for whatever reason, some days I feel down on what I am not able to do, instead of focusing on all that I do actually do. I like this project because the pics and decorative elements in it all serve to remind me of all the great stuff on those bad days and in the moments when I need a reminder.

I don't want to make myself feel bad about not doing enough or being good enough. I want to not feel this way and I shouldn't because the truth is I do a whole lot! Even if I was a healthy person, I would still be considered to be doing a whole lot by most people's standards. So, frankly, I should be proud that I do so much particularly when I do it despite having a disability. And I do feel proud some days, but I should feel that way everyday.

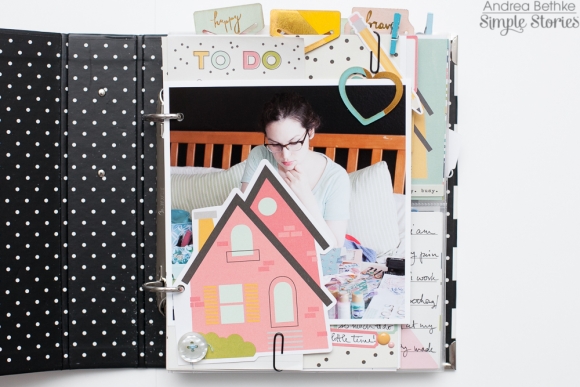
I should be proud of all I do and how hard I work. I made this album in large part to remind myself that in addition to having to do so many things, I am doing them. I am working on so much and accomplishing so much. And just because things might take me longer than I would really like, this doesn't diminish my accomplishments.

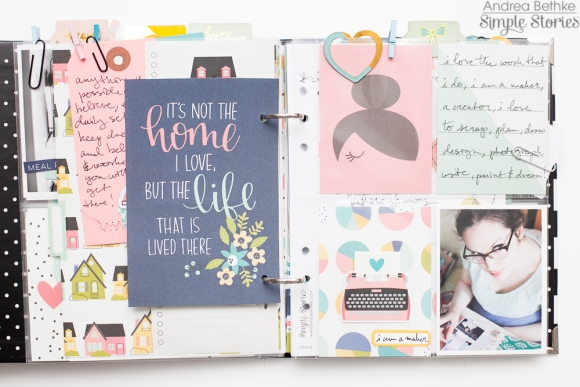
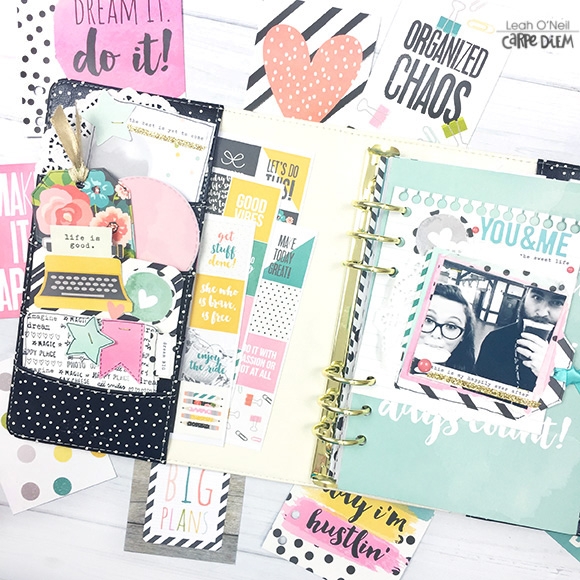
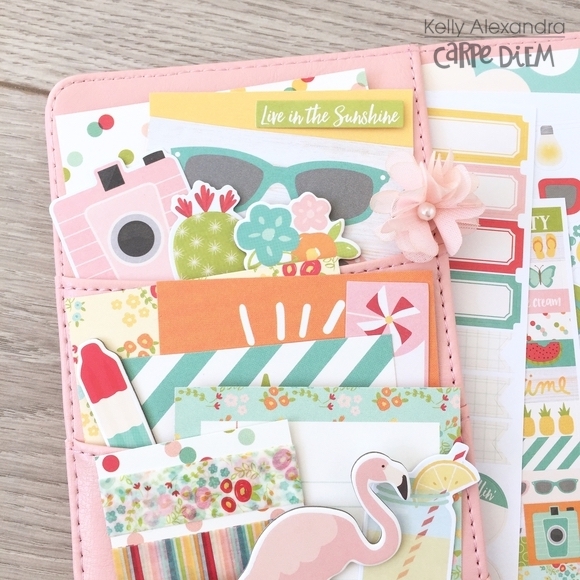
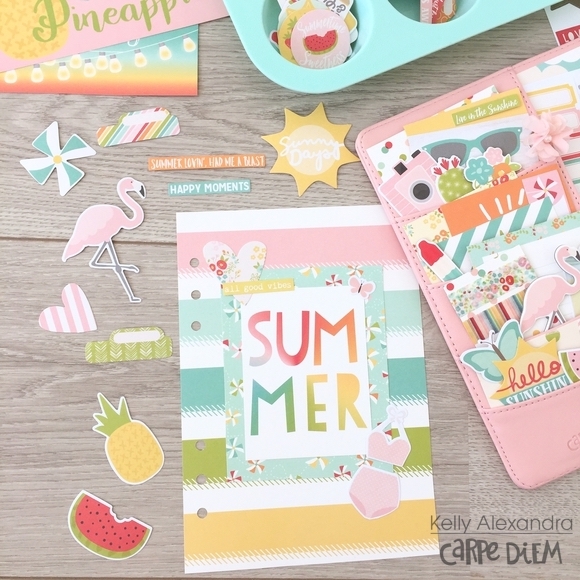
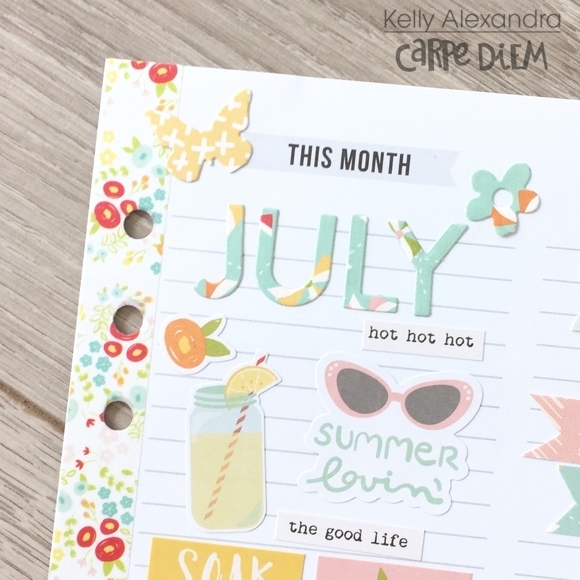
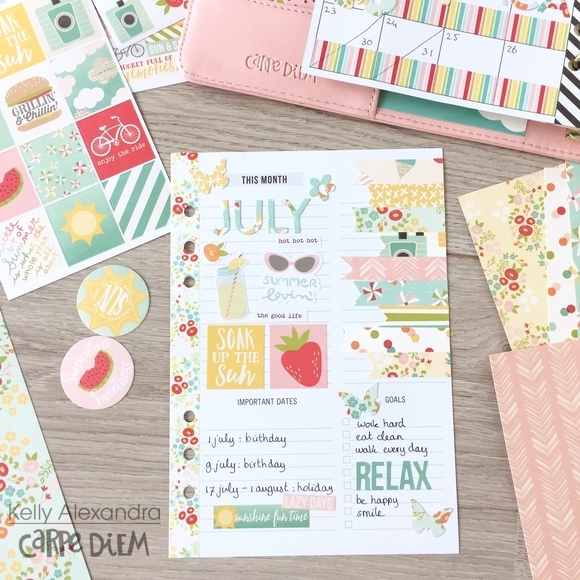
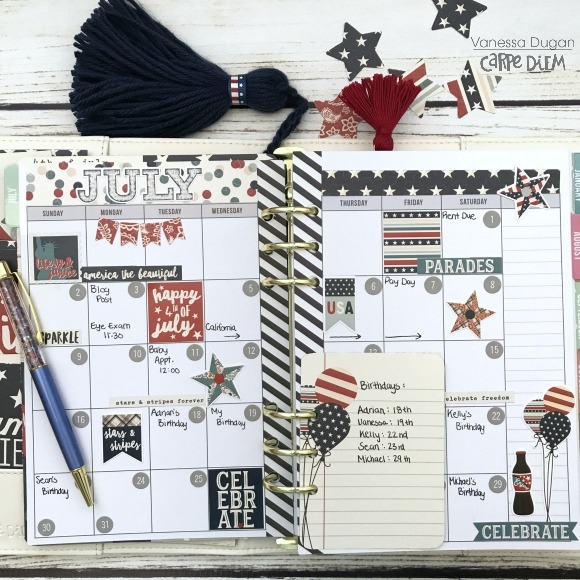
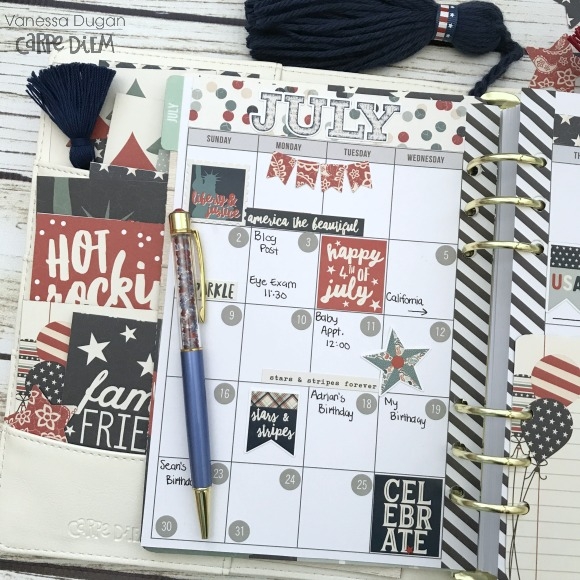
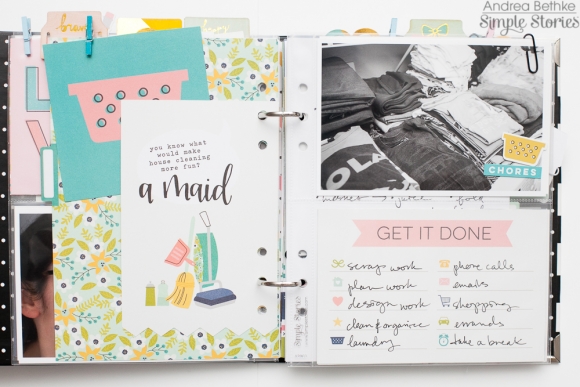
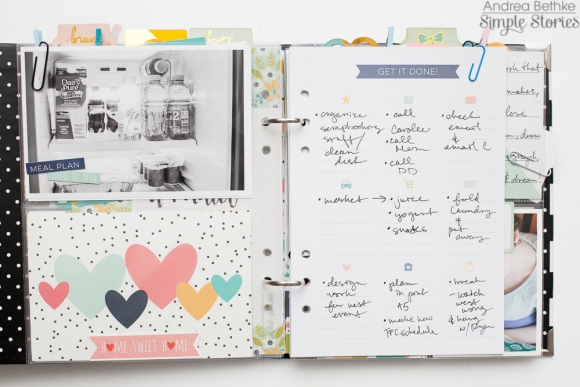
I made this project so that I could plan and document the days at home, doing my “work from home” work and also things like chores and other things to do around the house...but also so that I could have little notes of inspiration in there that would remind me that I am doing great.

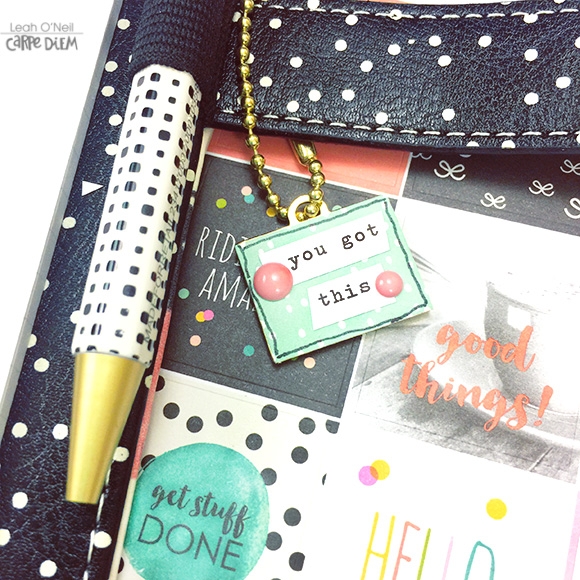
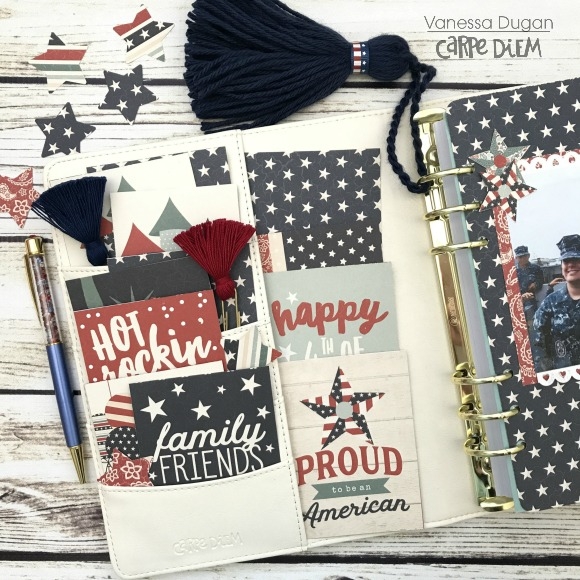
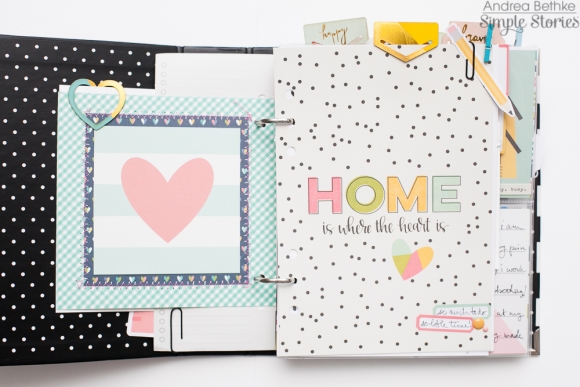
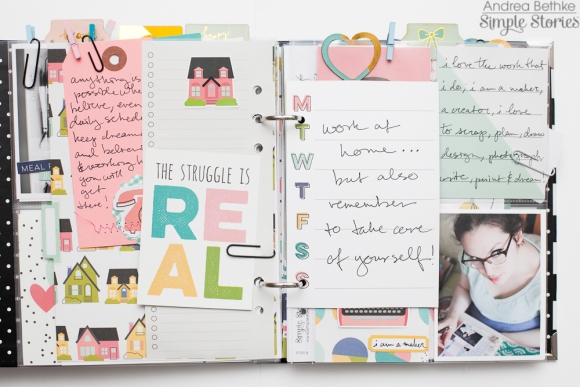
This album is filled with inspirational notes that remind me to keep believing and dreaming and that I can do anything! I love this project! And I think it is a great idea for all of us to make something like this so that we can all be reminded of how much we actually do and to be proud of it and to keep moving towards our goals, big and small!

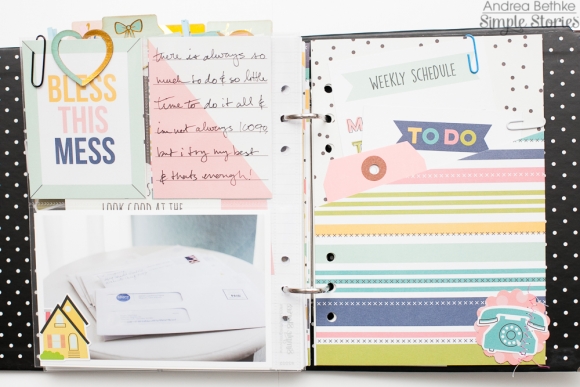
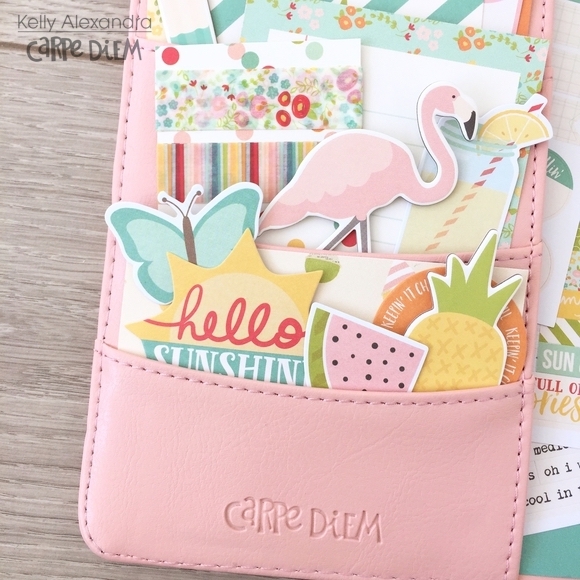
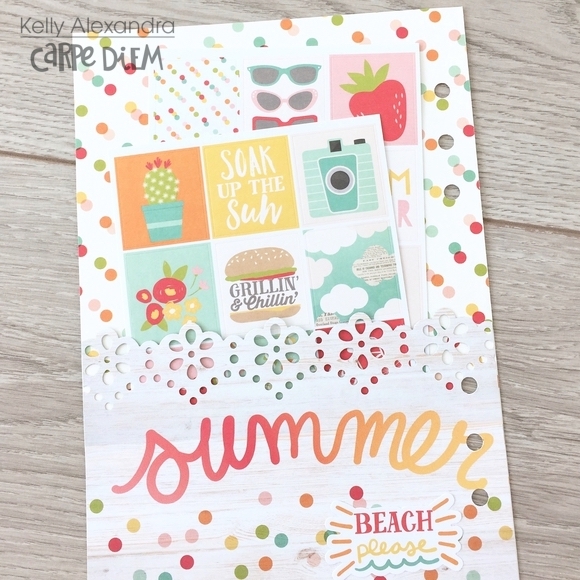
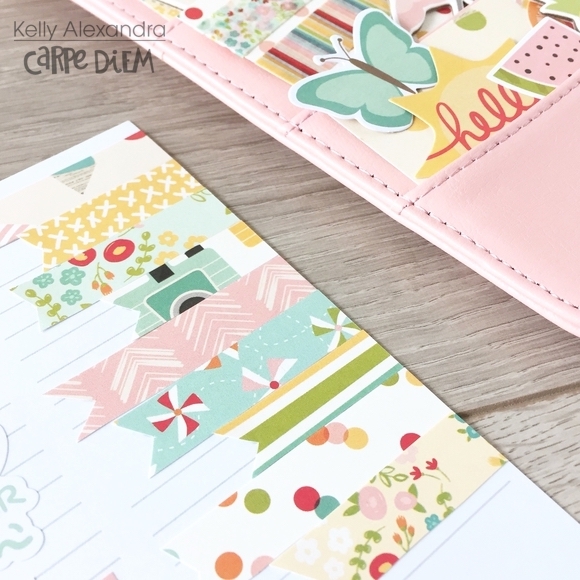
I hope you are inspired by this mini-album/planner hybrid project! And I hope that you are inspired to grab your Sn@p pocket pages, pocket cards, album, some stickers and other embellies, and a Carpe Diem planner set in the Domestic Bliss collection, and create something similar! It is important to document our home and work lives. But more importantly, I think we all need to be reminded sometimes that we are capable and amazing human beings who try our best and there is really nothing more impressive than that!

Hello Violet here, and I am wanting to share this month's page insert in my Carpe Diem planner. I will also share my Dashboard and pockets using the Summer Days collection. As I open up my planner it’s like I feel a small reminder of lazy Summer days. I almost can smell the suntan lotion inside. All the floral and retro bits and pieces, mint green, red, shades, bikini top, shorts and the beautiful sunshine make me just want to plan a getaway to soak up the sun!

My main focus was on my dashboard. What a perfect way to have your summer planner set up with some adorable flip flops! A Summer time must. I made them out of the collection kit paper and Decorative Brads.

'Good times & tan lines', is one of the element card quotes and I absolutely love it!  I stuffed my pockets with Bits & Pieces die cuts and more little flip flops. I used most of the brads on my ephemera. This is a cute way to embellish them. I made a divider and I just couldn’t pass up the cutest little camper element card. It was the perfect focal point of the divider.

This month is special, due to the fact that it is my son’s and granddaughter’s birthday and it’s on the same day! This month inserts are perfect for keeping track of all the important dates. I added a photo of my son and granddaughter in the birthday corner and a scripture in the important section. I love the variety Carpe Diem gives to us planner girls. It makes planning so much fun!

Thank you everyone for taking the time to stop by the blog. I hope I was able to inspire some of you. May you have a beautiful August!

SaveSave

Supplies

It's Kristine Davidson here, and I'm sharing 2 layouts with you today that I created using the Summer Days collection. This collection is filled with awesome images such as swimsuits, bikinis, pineapples, snow cones, VW vans, flowers, sunshine and so much more!

I am lucky to have a cousin that lives in the beautiful island of Trinidad and she was kind enough to "lend" me her photos of her cute boys playing at the beach.

My first layout is called SUMMER

This is a gorgeous beach pic of the boys playing with their beach toys and enjoying the beautiful white sand and sunshine.  I wanted to create a layout using tons of paper and layers were the way to go. I have almost every single piece of paper from this collection on this page!

It's fun to cut up pieces and just keep adding and adding. You'll see a close up of my layers a few pictures down.

Layering with embellishments is nothing new for me, as you probably know if you have followed Simple Stories the past few years. I enjoy taking pieces of die cuts, chipboard with some stickers and adding dimensional adhesives. I added brads in my cluster on this page which I really like.It's like an enamel dot but bigger! 

Here is a close up photos of some of the layers of paper I created on my layout. It's a great way to add dimension, color, and of course use up some paper scraps.


___________________________

My second layout is a grid format. If you find yourself stuck or unsure of what to create why not try a grid layout ? It's really a simple page which used lots of embellishments, 4x4 journal elements and as many pictures as you need.

I cut my pieces of paper to fit 3.75" x 3.75" to give me a nice white mat between each box. I decorated each individually to make a small layout maybe? A Little 3x3 layout on each square. Some are decorated more than others but overall each little square finishes a larger layout. I really enjoy creating these pages. They are probably one of my favorites. 

Here are a few more pictures - More details include dimensional adhesive and I added some glaze on top of a few details. Just to add a little extra. 
Yes that sunshine has a strand of Archie's hair. It never fails! Cat furr it is! 

 
These little diecuts make me want to put on my bikini (LOL) and head to the beach for some sun, sand, and watch the surfers which drinking my pineapple juice ;)
I hope you enjoyed my reveal today and of course we can't wait to see what you create with the Summer Days collection! Don't forget to tag us on instagram using #SimpleStories and you can come follow me as well at instagram.com/KristineDavidson

Thanks for visiting!


Supplies

Hello again, It's Emma.  My blog today is all about making dividers using the fabulous new A5 Carpe Diem hole punch!   I've chosen to use the Cabin Fever collection for my Marigold planner. 

I have to admit that this collection is not the style or colours I would normally turn to but that being said, I always like to try to push myself out of my comfort zone and explore new ideas!

This collection, as all the Simple Stories collections, is positively overflowing with products.  The first thing I did was cut the element pieces from the 12x12 paper collection kit, pop out all the chipboard stickers and fill this handy tray with everything I needed, so it was all at hand.

I picked out the coordinating washi tapes I wanted to use, filled a section with the bits & pieces and was all set to start creating!

The 12x12 papers are just perfect for divider making as they are double sided and a good quality cardstock so there's no need to laminate.

I choose the Marigold planner for this collection as the colours work perfectly with it.

I chose a selection of chipboard elements, bits & pieces and cut up some of the papers to fill the front pockets, I also used a border punch on another piece of co ordinating cardstock and tucked it in the large front pocket, I like to do this just to tie in all the colours. I do also like to keep the sticker sheets tucked in this large pocket so they are always to hand when I'm setting up my weekly pages.

The dashboard is one of the first things you see when you open your planner and I like to imagine it being like the front cover of a book, it's what makes you want to look inside and turn the pages!

Now, I just can't tell you enough how awesome the new A5 CarpeDiem punch is!!...I've tried using many different punches over the years and had many disasters!! This punch is so easy, there's no messing around trying to line it up as it does it all for you, literally slide your paper in until it won't slide any more, this means it's in position, punch, and away you go!!

Making these dividers was an absolute pleasure using the punch!

To make the dividers I draw round an existing divider on the cardstock I want to use to get the size and then I cut out with scissors, this is purely because I'm useless with a trimmer!!  I use a tab punch but it's really not necessary, you can again just trace the tabs and cut by hand.  I make the holes in all the dividers before I begin decorating. 

You'll see from the pictures that I like to use lots of layers on my dividers and I also like to mix the designs up by using differing techniques, for example I may layer with papers that are cut with nice clean lines for one divider but on the next I'll use papers that I have ripped roughly.

To make the different layers pop I like to add 'faux stitching' around the edges, and I'm quite happy to do this with quite a rough, some might say 'messy' finish, but the homemade effect appeals to me. 

We all have our own styles and that's what's so nice about making our own dividers because we have free reign to make them however we like!

So to say this planner is very different from my usual style I actually really like the finished look! ...it just shows, we should all try and push our boundaries and try new things!

I hope you have enjoyed reading this blog and possibly taken a little inspiration, if you would like to see more of my projects then please pop over to my Instagram account https://www.instagram.com/heartsbyemma

Supplies

Hello friends! It's Dorymar back on the blog today! I am so excited to share with you a beautiful mini album I designed with the spectacular Say Cheese III collection! Last July, my family and I went on vacation to Orlando, Florida to celebrate my girl’s 15th birthday at the Disney World parks! Among the places we visited, Magic Kingdom was our favorite and this collection was perfect to document such a wonderful time and important occasion in my daughter’s life! 

¡Hola amig@s! ¡Es Dorymar nuevamente en el blog hoy! ¡Les presento un hermoso mini álbum con la espectacular colección Say Cheese III! El pasado mes de julio estuve de vacaciones con mi familia Orlando, Florida celebrando los 15 años de mi jovencita, entre los varios lugares que visitamos, Magic Kingdom fue uno de mis favoritos y esta colección está perfecta para documentar este maravilloso e importante momento en la vida de mi hija.

I decided to create a mini album that recreates a View Master. Remember these? So much fun! You will find several view masters in the Say Cheese III collection. To design the mini album cover, I drew the view master from the collection and I used the Silhouette cut file "viewfinder" from Simple Stories for the pages.  The collection is super fun and colorful; it invites you to design and create! For each one of the pages of this mini album, you can see how the elements of the collection go so in tune with the classic photos that you take when you visit the magic world of Disney!   The mini album consists of 5 pages filled with lots of interactive elements. Inside the cover, I used die cuts, stickers, enamel dots and part of one of the journaling cards. To add a personal touch and enhance the elements, I used "glitter glue" and enamel dots. 

Decidí hacer un mini álbum que recree un “View Master”. ¿Los recuerdas? Eran muy divertidos. Si observas, vas a encontrar varios view master en la colección de Say Cheese III. Para crearlo dibujé el “view master” que tiene la colección y para que se observe más original utilicé el archivo para cortar” con la silhouette “viewfinder” de Simple Stories.  ¡La colección es super divertida y colorida, te invita a diseñar y crear! Pues en todas y cada una de las páginas de este mini álbum, podrás observar como lo elementos de la colección van tan a tono con las clásicas fotos que tomas cuando tienes la oportunidad de visitar este mundo mágico.  El mini álbum consiste en 5 paginas llenas de mucha diversión. En el interior de la portada puedes observar el uso de varios elementos como los “die cuts, stickers, enamel dots” y parte de una de las tarjetas de “journaling”. Para darle un toque personal acentúe alguno de sus detalles con “glitter glue” y “enamel dots”.

I used all the papers of the Say Cheese III collection to cover part of the pages. On the other half of the page, I used the reel designs that I cut with the silhouette. Around the photo, I created some small designs using the die cuts and the stickers of the collection. I am soooo in love with these papers! 

Utilicé todos los papeles de la colección Say Cheese III para forrar parte de las páginas de este mini álbum, en la otra mitad de la página, utilicé los diseños de carrete que corté con la silhoutte. Alrededor de la foto creé unos pequeños diseños utilizando los “die cuts” y los “stickers” de la colección. ¡Estoy súper enamorada de estos papeles!

On this page, I used a 4 x 6 Photo Booklet. Super fun! It gives you the opportunity to add more elements to the page; I placed several photos and cards from the collection. I also used glitter glue on this page and drew lines on the 4x6 card to further accentuate the details. 

En esta página utilice un Photo Booklet 4 x 6. ¡Super divertido! Te da la oportunidad de añadir más elementos a la página porque pude colocar varias fotos y tarjetas de la colección. También utilicé nuevamente “glitter glue” y tracé unas líneas sobre la tarjeta 4 x 6 para seguir acentuando los detalles.

On the following pages, I followed the same pattern combining the fun papers with the elements, mixing journaling cards, die cuts, stickers, chipboards, and other elements of the collection. I used everything on this collection! 

En las páginas siguientes seguí el mismo patrón combinado los papeles con los elementos, fusionando el uso de las tarjetas de “journaling”, “die cuts”, “stickers”, “chipboards” y demás elementos de la colección. ¡Utilicé todo de esta colección!

Here I used the "chipboard sticker" of Mickey's ear as a template to make both ears in a glitter paper. I added the "die cut" of the Minnie Mouse bow so when you put them together, you can recreate her ears. 

Aquí utilicé el “chipboard sticker”” de la oreja de Mickey como molde para hacer ambas orejas de en un papel de brillo. Añadí el “die cut” del lazo de Minnie Mouse para que al unir ambas cosas simule las orejas de ella.

To embelish this page, I added "sticky notes" and put them between the "die cuts" and the "decorative clip". I wanted to add a photo of the main Disney characters so I looked it up on the Internet, printed it and used it on this page. 

Para decorar esta página añadí “sticky notes” que intercalé entre los “die cuts” y el “decorative clip”. Quería añadir una foto con los personajes principales de Disney, lo que hice fue buscarla en internet, imprimirla y utilizarla en esta página.

Here with one of the 4 x 6 cards I made a pocket where I put several journaling cards and used ribbon to decorate. To add dimension to the project, I used 3D foam tape to glue the die cuts and stickers. 

Aquí con una de las tarjetas 4 x 6 hice un bolsillo donde coloqué varias “journaling cards”. También utilicé cintas para decorar y siempre para añadir dimensión al proyecto coloco los “die cuts” y “stickers” en tape dimensional.

This is a very fun page because inside every flap you’ll find photos and elements. I like to use chipboard stickers and place them looking like three-dimensional pieces. 

Es página es una muy divertida porque entre flap y flap vas encontrando fotos y elementos. Me gusta utilizar los “chipboard stickers” y colocarlos que al mirarlo parezca una pieza tridimensional.

Here I used a 3 x 4 Photo Booklet. I love them! You can adapt these booklets to any type of project and include more photos and beautiful cards from the collection. 

Aquí utilicé otro “Photo Booklet”, pero esta vez el de tamaño 3 x 4. ¡Definitivamente los amo! Se pueden adaptar a cualquier proyecto y te permiten utilizar más tus fotos y las hermosas tarjetas de la colección.

I purposely placed the elements on this page thinking of key things when you visit Disney world: the “view master” sticker, which inspired me to create this project, the Disney World castle in the "decorative clip", the heart that symbolizes love, the world globe sticker and the “magic” die cut. This collection is so perfect to capture all those amazing when you visit the magic world of Disney. 

La forma en que coloque los elementos en esta página tienen un significado muy importante, utilice las cosas claves que puedes observar en el mundo mágico de Disney: el “view master” en “sticker” que fue el elemento que me inspiró a crear este proyecto, observas el lugar más importante del parque de Disney World, el castillo en el “decorative clip”, también observas el corazón que simboliza ese amor que despierta al instante en las personas, otro elemento es el globo del mundo en “sticker”, donde el mensaje describe lo que cada persona experimenta al visitar este hermoso lugar, la palabra magia en “die cut”, pues esto es todo lo que encuentras en este mundo mágico de Disney. Esta colección está perfecta para plasmar el recuerdo de esta maravillosa experiencia.

Here I continued placing the elements in different dimensions and used the phrases and letters to highlight this beautiful experience. 

Aquí continúe con la técnica de colocar los elementos en diferentes dimensiones y utilicé las frases y letras para resaltar esta hermosa experiencia.

For the last page, I cut the camera from one of the 4x6 cards and made a pocket. Inside, I put 2 4x6 cards to add my journaling. In the background, I used the "Magical Memories" paper, a phrase that expresses well what our experience was and what I wanted to preserve forever in this beautiful mini album. 

La última página observas una cámara que corte de una de las tarjetas 4 x 6, con ella hice un bolsillo en donde coloque 2 tarjetas 4 x 6 para el “journal”. En el fondo utilicé el papel “Magical Memories”, frase que expresa lo que fue nuestra experiencia y lo que queda plasmado en este hermoso mini álbum.

Hope you liked my project and that it inspired you to create with the stunning Say Cheese III collection! Thanks for visiting the blog today!  Have a great week and happy crafting! Blessings! 

¡Espero que les haya gustado mi proyecto y que te inspire a crear con esta maravillosa colección de Say Cheese III! ¡Gracias por visitar el blog hoy! ¡Que pasen una feliz semana! ¡Bendiciones!

SaveSave

Hey Simple Stories fans! Nicole here today to share a few projects using cut apart/element sheets in different ways! I love how each Simple Stories collection has different sized element sheets that can be simply clipped out for you to get creative with!


For my first project “Summer is a State of Mind”, I started with the cut apart sheet from Summer Days. I was too tempted to use a lot of the different cards and patterns, so I chose a few favorites and clipped them down a little to make some simple banners on my page.


You can see that I varied the size and shape of the pennant designs and then added in some smaller sized patterned papers to add to the flow of the pennants.


 I love how the cards provided me a simple title for my page – one of the hardest things for me to decide to do on a layout is the title!


Now that my pennant designs were all ready to go, I was able to add some Cardstock stickersDecorative brads and Bits & Pieces to embellish each pennant quickly and easily too!


________________________________


For my second layout, I took a more simple approach to the use of the cut apart sheet in the Hello Lovely Simple Set. I chose the “Hello Lovely” 4x6 journaling card from the sheet and used it as the title on my project.


The bold black adds a pop! to the page and creates a great focal point for the layout to come together. I added in some simple strips of paper from the Hello Lovely Simple Set, mixing in a little blue paper from my stash.


All there was really left to do is add some Cardstock Stickers from the collection using foam adhesive to pop them off the page slightly, and of course a few enamel dots I had left over from the Life in Color collection.


Supplies

Hey, everyone! It’s Lori, marketing manager at Simple Stories, and summertime activities have been in full “swing” here at the Simple Stories offices! Every summer, we host lots of fantastic retailers and shop-owners during the Crafters Home tour where we socialize a little, create a little, and we all have a great time.

This tour takes place during the SPC show, which is a local tradeshow where we announce our beautiful new summer releases! This year’s party theme was a summer ballpark party, complete with popcorn, nachos, hot dogs and other delicious goodies!

Store owners arrived ready to have a great time creating with our marketing director, Layle Koncar, where they each made a fabulous 6x8 SN@P! Album project featuring our new Vintage Blessings collection. 

After class, we had time for photo ops (yes, that’s our CEO, Kevin, photobombing our retailers), shopping, and a local favorite, Zeppe’s Italian water ice. Yum!

We’re so thankful for all of our retailers and store-owners, and for their support of Simple Stories! It was a great week of fun and friendships. We can’t wait to see all of them again, soon!

SaveSave

Hey everyone ! It's Mindi here with you on the blog today. How's everyone's summer going ? I can't believe how fast it is flying this year for us. I am so happy to be sharing some summer pocket pages with you all. The new Summer Days collection is so fabulous. The colors are so pretty and soft. Perfect for all those summer memories. Let's get started shall we. 
 
Last summer we went and visited with my parents for over 2 weeks. As you can imagine, I had a whole bunch of photos from our trip so I divided most of them up into events/weeks, ect. This first set of photos is from when we visited the aquarium. The lighting is always so dark in these types of places. Not at all photo friendly but that did not stop me from taking a few photos of our day. The first one on the left is of the kids sitting in front of the big aquarium. 
 
 
Below the big photo I chose to go with another 4x6 pocket to add in a journaling card. I did have some stories that I included on the bottom part of this beautiful card. I added some letter stickers to spell out OH so it reads OH Summer. 
 
 
Moving over to the other side of the spread now I have 4 3x4 pockets. These were perfect for smaller photos and journaling. I also used this cute flamingo die cut piece to make a filler card. We did see some birds and flamingos during our day. This piece seemed like a perfect fit. I added a label on the bottom, and a cluster of other stickers. 
 
 
I felt like I didn't need any more journaling space so these last two pockets have a photo and a filler card. Although I did add some journaling onto this photo of my son and his friend the turtle. I spelled out the word Hi with the letter stickers from the sticker package. 
 
 
Let's move on to my next spread. This one is a bunch of misc. photos from our trip. 
 
 
We visited the farmers market, went hiking multiple times, chased down the Waffle Luv truck, and the kids read to their Grandpa on the tramp. Along with some fun photos I made a journaling card on this left side of my spread. I cut some of the washi tape from the collection to put underneath one of the die cut pieces. Isn't that sun just adorable ?!! It is one of my favorite pieces from this collection. Finishing it off with a little sticker heart and some star stamping on the bottom. 


This adorable trailer card was a favorite of mine. I used some letter stickers to say that we were in UT and added some journaling underneath. The photo next to it I left simple.  Although I do need to replace that label sticker on the top, I added the wrong year on there. Oh well, I will take care of it. 
 
 
Okay, one last spread to share with you. This one has photos from when we went to the local swimming pool. 
 
 
Isn't this swim suit card the cutest thing ever ? I added the hashtag JOY to the card and a few enamel dots for a fun touch. 
 
 
On this other side of the spread I chose some 4x4 pockets. That leaves a 2x8 pocket for whatever you want. I chose to add some journaling and then embellish the rest. 
 
 
This is what the bottom half looks like. This 4x4 filler card was the perfect fit for this page. Typically my photos dictate what type of pocket page I am going to use. This time this filler card was the beginning of this spread. I knew that I wanted to use that card and I went from there. It is really easy to crop down a 4x6 to fit in those smaller pockets. Go with what speaks to you and work with it ! It will turn out great in the end. 
 
 
I really had fun creating these pages. The Summer Days collection is so versatile that it has all of our summer activities and photos covered. Thanks for coming and I hope that you have found some inspiration today. Have a wonderful rest of your summer. 

Hi everyone, its Meredy aka @myplanningadventure.  I’ve been using my Carpe Diem Daily Inserts and it is a great way to organize your day.  It doesn’t take long to pretty up the page with decorative elements and I love that each day can have a different look, or even work together.  I am going to take you through a recent week of daily planning, and I hope you feel inspired to plan a bit every day.

I use my Black Speckle planner for daily planning, It’s a perfect mix of professional and playful—just like my day.  The new Carpe Diem A5 punch is my new best friend!  I always hand punched my holes after I added washi because I could never line up the page correctly in a multi hole punch.  The carpe Diem punch has a ridge that keeps the page in place and it punches perfectly to the Carpe Diem Inserts.

This planner stays at home and is primarily my tool to help organize my day.  Whether I am at the kitchen table, or at my desk, these daily inserts really help me to get my day organized.

One of my favorite aspects of decorating a daily page is you can really have fun with it!  When I am decorating a weekly layout, I feel extra pressure to make it just the way I want it as I will be looking at those pages many times throughout the week.  With a daily insert, I can just have fun—it doesn’t have to be perfect.  

Fourth of July was on a Tuesday, so I did a quick layout using the All American Simple Set from Simple Stories.  I used the stickers that came in the set to decorate the page and just made a couple of reminder lists—the day was for celebrating our freedom with friends (and maybe the freedom to take a nap as well).

In the morning, we went to a parade with friends so I made a quick Memory Page with some of the elements I loved from the All American Set.

This add in page turns this daily into a quick two page spread

Wednesday, it was back to work, and I had a lot to accomplish.  I break my To-do lists into Work and Home and I always try to add in an item or two that I am wanting to accomplish for myself. 

I used this decorative paper from the Domestic Bliss Collection on the back of the memory page I made on Tuesday.  I added an inspirational card, and a small piece of paper that I could jot down the items I need to pick up at the store.  I also used the Brads from Domestic Bliss to make a quick paper clip.

One of my favorite parts of decorative planning is layering stickers on the page.  I like to add in fun sayings or ephemera and add in smaller stickers like stars, hearts and arrows. 

Now it was on to Thursday and Friday.  I used similar colors on these two pages, but are different but work together.

Thursday was a mix of home, work and socializing.  I used ephemera pieces instead of alphas for Home and Work.  I didn’t have long lists this day so I dressed up the page by layering stickers and other decorative elements.

Friday was back to my standard Alpha Headers and Todo lists.  I love the Summer Days collection, such a fun way to celebrate the end of the week!

I hope you enjoyed seeing a week of my daily layouts!  Daily planning is a fun way to get some creative time in each day.  The pages are quick to decorate and a great way for me to practice some hand lettering.  Give it a try!

SaveSave

Supplies

Hi, Everyone! Jana Eubank here. This year our family took a road trip through the beautiful mountains of Colorado. Being in the mountains is my favorite place to be! I love enjoying the fresh air along with the sights and sounds of nature. You can bet that I took a lot of photos on that trip that I couldn't wait to scrapbook using the Cabin Fever collection.


ADVENTURE


The first thing I did was to pull out the Bits & Pieces pack. I sifted through all of the designs and selected several that went along with my photos. The red checked geotag die cut was perfect for calling attention to the photos of this beautiful waterfall.


I die cut the title from the Summer Camp Paper (red buffalo check) using my Silhouette Cameo 3 Electronic Die Cutting machine and the "Adventure" cut file by Simple Stories found here in the Silhouette Design Store (Design #199552). I added a pinecone decorative brad to the left side of the title.


I then used more Bits & Pieces die cuts and stickers from the Combo Sticker Sheet to create two clusters around the bottom of my photos. The floral clusters and word phrases are repeated in both clusters to tie things together.


_________________________________


This next page features a few snapshots taken closer to home ... in fact, they were taken in our backyard last fall as we enjoyed the fire pit one cool night.


FIRE PIT


I wanted a plain cardstock background, but decided to make it a little more interesting by die cutting stars all over it. I placed a second sheet of the same color of cardstock behind the die cut piece. The result is a subtle tone-on-tone texture that doesn't take away too much attention from the photos.


At the top of the photos I added the heart sticker matted with white cardstock. I added the date and a decorative brad for a bit of dimension.


I used my scissors to cut the fire from the 4x6 Vertical Elements Paper. It was the perfect size to accent my title! I couldn't resist adding the chipboard piece with the  marshmallows on a stick above it. Too cute!


At the bottom of the page I layered up a few chipboard pieces. Two wood slice circles overlap each other and anchor the rectangle chipboard piece. I love what it says! "Life is better by a campfire" So true!


I cut the journal block from the 4x6 Horizontal Elements paper and added it to the right of the photos. I used a black pen to handwrite my journaling and then accented the bottom with the Roughin' It washi tape and a floral sticker.


Thanks for joining me today! I hope you leave feeling inspired to pull out those outdoor photos and get them scrapbooked!


SaveSave

Supplies

Hello again creative planners! Leah here on the blog today to show you how I give the front of my Carpe Diem planner some “curb appeal.” I will be using the new Carpe Diem collection and showing you just how versatile a few of these products can be. I have shared many blog posts on here featuring decorated front pockets and dashboards, but this will be the first time I have filmed a video of the process, start to finish. I am SO excited to share it with you! 

I have taught an online class all about front pocket design and techniques if you want more thorough explanations of the “why” behind a lot of my decisions when decorating my planner pockets. You can find a link to that class in my Instagram bio. In this blog post and video, I will be showing you all about the “how.” I will take you through how I made several of the elements for the pockets using the Carpe Diem Dashboards and Pocket Cards set and a few papers from the new High Style 12x12 paper pad.

These pockets came together fairly easily, just by cutting and punching out a few basic shapes. When it comes to pocket decorating, I like to use a variety of shapes. For example, in these pockets I have a large circle, a smaller circle, a tag, small stars, a banner, cards with sharp edges, cards with rounded edges, and a die cut typewriter that I fussy cut from a pocket card. Having a few paper punches in basic shapes is always a good investment for creating your own die cut shapes, but I collected the punches I have over the course of several years. Several of these shapes can be hand cut pretty easily without paper punches. The circle is probably one of the hardest to hand cut but is still possible with the trusty technique of tracing around a cup onto paper and cutting it out, or you can get these awesome photo cropping tools from Simple Stories that make it super easy to cut different sized circles. They are much more cost efficient and portable than having to buy several different sized circle punches.

I also like adding some texture to my planner pockets by adding things like doilies, ribbon, and staples. Another common technique I use to add the illusion of dimension and texture, is to add doodled borders and hand drawn stitching to the edges of some shapes.

I made this pocket card from scratch using some white cardstock that I cut down to fit in the pocket, and then I used the Say Cheese III roller stamp to stamp words all over it. This gave me a cool black and white text background which added an interesting detail to my pockets without competing with all of the other colors I was using. You can get this effect with any word stamps, but the Simple Stories roller stamps make it so easy and quick to do, and I like how they always have a few shapes added in too. Like the Say Cheese III roller stamp for example, has an arrow and rows of hearts and stars that break up the words.

All of the patterned paper dividers in the New Carpe Diem monthly planner inserts are so beautiful. The collection has many of the same fun elements from the original Carpe Diem line, but there are some black and white images that give it a very trendy, modern vibe – kind of reminds me of some of my favorite pieces in the old “Life in Color” collection, but with the Carpe Diem colors and designs.

The monthly dividers are pretty enough on their own without adding anything, but I always like to jazz things up in the front of my planner. In this case, I used a smaller decorative dashboard from the collection and customized it with a photo and some fun layering. I love that because the dashboard is smaller, I get that personalized feel at the front of my planner but I can still see the monthly divider underneath.

In an older blog post (read it here!), I customized one of the Carpe Diem planner charms for one of my planners and got a lot of a great feedback on it! I did the same for this planner, but this time I filmed a quick tutorial to show you how incredibly easy it is to do. I will be posting that video clip over on my Instagram, so be sure to come say hello over there and check it out! Here is the YouTube video of my process for setting up the front of my Floral Dot planner, I hope you enjoy it! Hit “subscribe” while over on my YouTube channel to catch future Carpe Diem planner videos!

It’s no exaggeration to say that ours is a camping family.  My daughter was a Girl Scout, and my son a Boy Scout.   We were very involved with the troop and at one point my husband was even Scoutmaster.  It was a privilege to be a part of so many lives and watch these children grow into young adults.

I was so excited when I saw the Simple Stories Cabin Fever Collection!  It’s everything I love about the outdoors.   The papers are a wonderful mix of nature inspired elements like trees, animals and flowers.

The collection has all the survival tools you’ll need to get you through lots of layouts so you can capture all your favorite memories.  I love the clever sentiments you’ll find in the #3047 Cabin Fever 4x6” Stickers and Combo Sticker.

For this scene I hand cut borders of pattern paper to create a landscape.  It’s best to keep the lightest color in the foreground to add some depth to your scene.

I fussy cut some pine trees from a journaling card in the paper pack and tucked them behind the hilly landscape.  A circle paper punch makes an simple sunny sky!

The fun tent and campfire are chipboard stickers, and the bitty flowers are from the combo sheet.

_________________________________________

I’ve been sending a card in a care package to my son at summer camp for as long as I can remember. This was his last year as a Venture Scout – that means he’s 21 years old.

And while he’s no longer part of a troop that doesn’t stop him from going on adventures.  A few weeks ago, he and two friends who are also Eagle Scouts took a road trip to Colorado to do some exploring.

Of course he’ll always be my little boy; always in my heart and on my mind.   I packed them up some snacks for their trip and tucked a card inside his duffel bag so he doesn’t ever forget it!

I cut the sentiment from a journaling card.  The hiking prints are chipboard, and the fun compass is a decorative brad.  Do you spy some plaid washi? 

If you’re a camper too I just know you’re going to love this fresh new collection from Simple Stories!


SaveSave

Supplies

Hello friends! Jennifer on the blog today to share pages I created with one of the fabulous NEW collections!  Summer Days includes a variety of fun, bright patterns perfect to document those summer memories!   And with any Simple Stories line you always have a multitude of embellishments to choose whether it be coordinating stickers or washi tape! 

For my first layout, "Summer", I wanted to mix in lots of patterns on my layouts!   Using a background cut file helps me do so!   I chose a 12x12 starburst overlay with my favorite cloud pattern Beat the Heat. I then added in strips of additional papers to fill in the blank areas.  Once together, I trimmed it down to 11x11 because I wanted to allow the edge of my white cardstock to show.  I also incorporated the 4x6 Vertical Element Cards to tuck behind my photo and journaling card.  This is a great way to add color to your pages if you don't use the Journaling Cards for pocket pages! 

For my title, I used the cute "Summer" banner from the 6x12 Chipboard placing it just under my photo. I also added in a cloud/sun sticker from the Combo Sticker Sheet using foam dots to pop it up. 

I like to cluster my embellishments in the corners of photos or journaling cards doing a lot of layering!  Honestly, I can't even tell you how I come up with it; I just arrange them until it "feels" right.  LOL  If you weren't aware, Simple Stories has many fun designs in the Silhouette Shop including this pineapple! I used the bright yellow of the B side of Lazy Days then added the cute flamingo from the Bits and Pieces pack along with stickers and Decorative Brads.

Speaking of Decorative Brads, how cute is cloud/heart combo?  I am drawn to the vintage print on the cloud with the contrasting blue and red of the brad!  I had to include it on my page!  

The Combo Sticker Sheet always has a variety of shapes and sentiments to use on your projects! A big favorite are the tab stickers that are fun to tuck behind your photo or journaling card! I also adding in some colorful Good Vibes Washi Tape to fill in some white space!

You will also find lot of different shapes in the Bits and Pieces pack including this circle journaling spot and green/white arrow!  I used the Carpe Diem Make It Happen Roller Stamp to add a little sentiment under my date then finished with a small Decorative Brad and a piece of the Summertime Sweetness Washi Tape.

_____________________________________

For my second layout, I was inspired by the "Just Add H20" card on the 4x4 Elements Sheet and knew just photo I would use!  A few years ago, my husband caught this awesome pic of our daughter launching a water balloon at him! You can see the balloon mid-air (I don't remember if it met its directed target or not).  Water games are always a big part of summers here in Illinois whether it be running through the sprinkler or getting out some water balloons to cool down!  

I began with a white sheet of cardstock and added color by painting yellow spray ink across the middle with a foam brush.  I also incorporated blue spray ink adding some ink splats in random places.  After allowing to dry, I was ready to start adding in my papers!  

I again utilized some of the 4x6 Vertical Elements as well as pieces of the B side of Sunny Days and So Much Fun.  I also added strips of Sunny Days and Summer Snapshots at the bottom and top of my page. Using a border punch, I incorporated a small strip of the B side of Lazy Days at the bottom of my title card. I love using my sewing machine and so I ran a quick stitch through the strip then finished by adding the beach ball sticker (which I popped up) and well as a cute chipboard flower and a small brad. 

Here is where the Journaling Card Elements come into play again!  I love using the cards with ledger or white space for journaling! Since I don't care too much for my handwriting, I will use my typewriter if I'm at home.  I decorated the edges of my journaling cards with cute die cuts from the Bits and Pieces pack. Don't you love the bikini?  

Showing more cluster of embellishments as I usually do this to fill in some white space or accent my photos. The smaller brads remind of enamel dots and I think they are perfect to go alongside larger embellishments such as the chipboard sun!  Also, the tiny heart stickers from the Combo Sticker Sheet are perfect little additions, as well! 

Adding in a banner in the corner can also be a great way to add more color to your layouts! I layered many pennants then stitched through with my sewing machine as well as added a Decorative Brad and bakers twine from my stash.  

I used patterned hearts from both the Combo Sticker Sheet and Bits and Pieces pack to accent my photo! I also love the many sentiment sticker found on there as they are a nice touch


Supplies

Hi everyone, Kelly here and today I want to show you how I set up my planner for Summer.  Besides working, this month is all about sunny weather, relaxing and holiday to me, so it is important my planner reflects the time of year.

For this setup I am using all the stickers, papers and pieces from the Summer Days collection together with my Blush A5 Carpe Diem Planner. Before I start, I placed the washitapes and pieces in a cupcake tray for easy access and displayed all the stickers and papers on my desk.

The first thing I always do when I set up a new planner is filling the pockets with journaling cards, decorative bits and a little washitape sample! A little tip for keeping the decorative bits in place when you open and close the planner: take a bit of washitape, make a little roll and put it on the back of the ephemera and adhere it to the spot where you want it to be. This way you can easily remove it and it will not get damaged!

In the large side pocket I used the blue paper with clouds as a background and slided some stickersheets of the collection in there, to always have them on hand.

Now that my pockets are filled I created a new front dashboard. I cut the rainbow colored paper down to size, punched holes and decorated it with some cards and stickers! In the back of my planner I inserted a little notepad to write down things I need to remember.

The 4x4 Element have this awesome quote card: ‘Live in the sunshine’! I punched holes using the planner punch and simply put it in my planner. A quick and easy idea to decorate your planner!

Since I would always like to have multiple stickersheets in my planner, I created this pocket on the back of the front dashboard. I grabbed a 4x6 card from the cut-apart paper, punched a border with a flower pattern using a punch from my stash and adhered it to the bottom and sides of the page. I also used a few of the thickers to create diy paperclips, I adhered them with strong tape on some white paperclips.

For this summer I had the idea to make a bucket list with things I want to do. I decorated a page with a big flamingo and made sure I had enough space to write down a few lists.

I also created a pocket page by punching some extra holes in a SNAP pocket page and filled these with pattern paper, cards and stickers. I like to put these at the back of my planner.

Now that all the extra ‘Summer themed’ pages are done it is time to decorate the July monthly spread. I used some butterfly, flower and alpha dies to cut shapes and words from the patterned papers. With washitape I marked the days of my holiday!

At last, I wanted to decorate the ‘This month’ page for July. I used alpha dies to cut July from the patterned paper and used some scraps of paper to create a fun banner border to show of all the pretty colors and patterns.

I love the ‘this month’ page because it gives you room to write down important dates, appointments, and monthly goals. Since this month is all about holiday for me I used lots of stickers and did not write down any to do’s!!

On my instagram (https://www.instagram.com/createplannernl) I will share some more weekly spreads using the Summer Days collection in my Carpe Diem planner. See you next month!

SaveSave

Supplies

Hello Simple Stories fans and welcome to the blog today! One of the best things about SS collections for me, is that you get a brilliant selection of elements that all go together effortlessly. I love having some washi, that matching brad or enamel dot in just the right shade!  Sometimes though, it’s awesome to have a few bits and bobs that co-ordinate perfectly plus you know you will make use of every bit, for occasions like Halloween etc… Enter Simple Sets. I love them! I’ve created two pages to share with you today using ‘Old School’ and ‘Hello Lovely’ Simple Sets.
 
Hello Lovely
 
The combination of pink & navy was too pretty to resist for these fun snaps taken in a photo booth recently. 
 
 
The woodgrain print was a perfect base on to which to start my layering. This one is the Hickory/Cream Grid. The great news is that you can grab a selection of these useful papers in a Sn@p! Basics Pack which has 8 double sided sheets and is also available in a handy 6x6 size! Perfect for a variety of projects.
 
 
I started with a bit of texture paste through a stencil to echo the floral patterns in the Hello Lovely set. I purposefully didn’t add it in a uniform pattern. I just wanted it to show here and there.

Once the texture paste was dry, I began adding my elements. There is lots to choose from to hand snip if you enjoy fussy cutting!
 
 
Below my photo strip are some black plastic bits as well as an overexposed pic I probably won’t use. The black bits are the pieces that are left over from a pack of Instax film. I used a stapler to quickly bind them together and pop them behind the images I was scrapping. I really like the bit of interest they provide!
 
 
Stickers can be used like a die cut if you pop some talcum powder on the back of them. I’ve mounted this one on to some pop dots and used a chipboard frame from the Enchanted collection to highlight the title.

There are lots of little details on this page, like the confetti which I used to show happiness bursting off the paper. It was a bit of a labour of love adding adhesive and subsequently the teensy bits of paper, but it adds that extra element of fun to the page.

________________________________________

This page also uses an element from a Simple Set to create the page title. This phrase is so apt right now, so I cut a section from a 3x4 journalling card from the Old School Journalling Card Elements. My son will be completing his primary school journey at the end of this year and we are so excited and nervous for him as he starts a new chapter in his schooling career.

The background is a combination of Old School ‘Hall Pass’ and the 3x4 Journalling Card Elements B side. The chalkboard print is super cute! I also echoed the paperclip theme of Hall Pass by using some coloured paperclips as embellishments. You’ll notice my materials list is pretty minor for this page, but by using a mixture of elements, it can still pack a visual punch!
 
 
I pretty much used up the whole sheet of 6x12 Cardstock Stickers on this page. I ran them along the edge where the two papers meet, tucking some in and raising some up on foam dots. I’ve added some typed journalling above and below the title to draw the eye along the same line, so it doesn’t look like too sharp an angle jutting out on it’s own.
 
 
Thanks so much for joining me today.
 
Happy creating!


Supplies

Who doesn’t love a sale?!  Through July 8th, all Simple Stories designs are 25% off in the Silhouette store.  While you’re at it, make sure to grab this FREE fringed flamingo cut file design!

Visit Simple Stories here in the Silhouette online store for more than a thousand of your favorite Simple Stories designs!

Hello friends! Linsey here sharing a new altered project with an All American theme on this fine Independence Day! I'm definitely an all-American girl at heart, so it's no surprise how much I enjoyed creating this festive shadowbox to add to my Americana home décor! Come along and celebrate with us!


It is a breeze getting your patriotic groove on with the All American Simple Set! The 12x12 patterned papers are perfectly festive and coordinate great with the 6x12 cardstock sticker sheet. For the 3 small squares, the confetti side of Freedom was used in the background and 3 of the square stickers were placed in the center of each


A few extra sticker elements were popped up on dimensional adhesive dots and added to the small squares for extra interest. The stars and stripes balloon trio and bottle of cola are so much fun and scream USA! The "Independence Day" and "let freedom ring" sticker banners were super easy to add and can be used in so many other cool ways. I love how this collection mixes a fresh, modern feel with an Americana twist so beautifully. Super stylish and just what I was hoping for!
 
 
For the larger top portion, the 4x6" American flag from Journaling Card Elements was used in the background. Three firecracker stickers were placed on dimensional adhesive, each with a shiny enamel dot added to the base where it goes POP!
 
 
Of course, there has to be a focal point celebrating the day itself, so the July 4th stickers were added with a bit of dimension to honor our independence and all that it means.
 
 
And that's my All American Shadowbox! Thanks so much for visiting today and allowing me to share my project with you! I hope you've found a bit of inspiration in it. For those of you who are celebrating today, Happy 4th of July! Happy crafting, one and all!

Supplies

Hi everyone! It's Vanessa and I’m back today to show you how I did my set up for my Ivory Carpe Diem planner using the All American collection.

I filled the pockets with the 3x4 and 4x6 journaling card elements to add a pop of color and to use for memory keeping.  I also decided to add some festive tassel clips I made and of course a planner tassel!

For the dashboard, I used the back of the 3x4 journaling card elements cardstock, added a few of the cardstock stickers, and photo of my husband and I when we were in the Navy.  

For the calendar spread, I used all of the 6x12 cardstock stickers to create the 4th of July theme and used a flag paper punch and a star punch to use on the Celebrate cardstock.  

I hope you enjoyed my 4th of July theme dashboard and calendar and have a safe and wonderful holiday!

Supplies

Pages