See how easy? A few cute photos, a couple sheets of paper and stickers (Simple Sets are perfect for this), and a 4x6 Sn@p album! I'm doing these for gifts this year ... after all, who doesn't love pictures? Thanks for letting me share. Stop by Artsy Albums and say hi sometime!

Hi Everyone! Jana Eubank here. One of my very favorite techniques to use on a scrapbook page is fussy-cutting. On today's page, I did just that! I used my scissors to trim the florals from the Follow Your Heart paper of the Beautiful collection.
I also fussy-cut the title word from a page of the 6x8 paper pad.
I used the florals as page elements by adding them to the layout in a visual triangle.
Do you spot what design elements I used as a second visual triangle on this page?
Yes! That's right! The hearts and doodled flower stickers.
Have you tried fussy-cutting lately? It's a lot of fun and a great way to add a custom feel to your projects!

Hi everyone, today I want to show my Traveler’s Notebook setup for fall. I am using this TN to write down all my to do lists and other lists this fall.
For this setup, I am using the Cream Blossom Traveler’s Notebook and all the products from the Vintage Blessings collection.
I filled the pockets with cards, pieces and some washitape samples. From a pink dotted scrapbook paper I created a dashboard and decorated it with a 4x4 card and some stickers!
Next, I created a pocket to put some of the 4x6 sticker sheets in. I decorated the pocket with a borderpunch and some pieces from the bits and pieces pack.
I decorated the opening page of the notebook I am using with another 4x4 card from the cutapart sheet, some stickers and some diy leaves.
On the first spread I decided to write a list with all the things I love about autumn! The cute floral and bird washitapes are perfect for decoration.
I hope this blog inspired you to setup your own Traveler’s Notebook. For more inspiration you can look through my Instagram page createplannernl (https://www.instagram.com/createplannernl/)

Hey everyone! It’s Lori Linford, marketing manager at Simple Stories, and I’m so excited to share with you a little project we’ve been working on here in the Simple Stories offices.
As most of you already know, video has quickly become one of the most popular ways to share information online. We’ve seen lots of views and comments on our video tours, product close ups etc., so we decided to create a dedicated space here in our building so we can make even more great videos for our customers!
Welcome to Simple Stories’ dedicated video room. Isn’t it beautiful?! We’ve filled the room with off-camera lighting, tripods and of course, lots of beautiful things! (Aren’t those Carpe Diem planners all lined up in a row just gorgeous?!)
Stay tuned for lots of videos coming straight to you! You’ll be seeing all sorts of great stuff on Facebook Live, YouTube, Instastories and on our website. We can’t wait to show you even more great things from Simple Stories and Carpe Diem. Stay tuned!

The holiday season is all about making memories and creating traditions! I used the Very Merry collection to document one of my favorite family traditions: decorating Christmas cookies!
I love lots of layers! Here, I used the 3x4 Journaling Elements to add color and dimension to my page! I accented with Bits and Pieces die cuts and coordinating stickers!
How beautiful are the Very Merry Washi Tapes? I love to add small snippets of washi tape to layer under my other embellishments!


Hello friends, Dorymar here! I’m so happy to share two beautiful mixed media layouts I designed with the stunning Beautiful collection. This collection is gorgeous! It has some details in gold and pastel tones that I loved from the moment I saw it. This time I used photos to document my daughter's 15th birthday.
For the first layout that I titled Live Beautifully, I used the paper Be Amazing as the base. With a craft knife, I cut the flowers from the paper design to add dimension. I used several pieces of the Live Beautifully paper to add more layers and dimension on the center of the page.
To give texture to the page, I used cheese cloth, lace, stencil paste and mini prills. These elements in combination with the flowers from the papers give the page a vintage touch that when mixed with the colors, die cuts stickers and chipboards of this collection makes the project look elegant and subtle. You can put the page in a shadow box and decorate a wall in the home.
_____________________________
I titled the second layout "Beautiful and Amazing" and I used the Choose Happy paper as the base again, with the craft knife I detached the beautiful flowers from the paper and then added several layers of the Shine Bright and Life Beautifully papers.
With the fussy cutting technique, I cut the letters of the paper from the 4x6 cards and added dimension with foam dots. Around the photo I added texture with stencil paste, cheese cloth and mini prills. I focused on the flowers of the paper design to place the photo and cut flowers with the metal die cuts. When look at the layout, it gives you the feeling that the flowers come out of the photo.
I love how this project turned out! I placed both pages in 12 x 12 frames and will be part of the decoration of my girl's room. I hope this project will inspire you to use the diverse and wonderful Beautiful Collection from Simple Stories.
Happy Crafting!
The holiday season is all about making memories and creating traditions! I used the Very Merry collection to document one of my favorite family traditions: decorating Christmas cookies!
I love lots of layers! Here, I used the 3x4 Journaling Elements to add color and dimension to my page! I accented with Bits and Pieces die cuts and coordinating stickers!
How beautiful are the Very Merry Washi Tapes? I love to add small snippets of washi tape to layer under my other embellishments!


This month I am using the Black Vintage Floral Travlers Notebook with Vintage Blessings collection.
I used the VIntage Blessings digital files to print on acetate paper. It really adds a beautiful touch to your planner or TN!
I did the same with some vellum paper. I just love the sound of it when I turn my pages. I also made some pockets .
Dashboards are so easy to make and it really personalizes your travelers notebook. You will also notice some doilies I made using the 12x12 paper pads. Thank you to everyone who stopped by the blog!


Howdy friends, Happy World Card Making Day!
Are you participating, being craft & making cards today? We'd love to see your SImple Stories card creations! Post your card(s) on Facebook and/or Instagram with the hashtag #simplestoriesWCMD - we'll be keeping our eyes out throughout the day and doing some fun random giveaways!
Card maker extraordinaire Jeanne Jachna created these gorgeous cards in honor of World Card Making Day with our Beautiful collection -
___________________________________
Simple Stories hit the nail on the head when they named this collection BEAUTIFUL! It includes florals, hearts, and inspirational sentiments on black and white pattern paper with a subtle tint of pink and green, and elegant gold foil embossing.
The focal point of my card is a sentiment from the Bits and Pieces pack. The pack contains loads of embellishments like the pretty florals on my design.
The 6x12” Chipboard Sticker sheet includes even more florals and hearts, and the thick chipboard pieces add lots of dimension to your projects.
___________________________________
My second card features images with the soft pink tint I mentioned.
The classic floral print and gold accents make this collection elegant and formal. The fun gingham and polka dot prints give it a fun fresh feel!
See what I mean? Aren’t those gold chipboard hearts total eye candy?
This aptly named Beautiful Collection is dressed to impress!
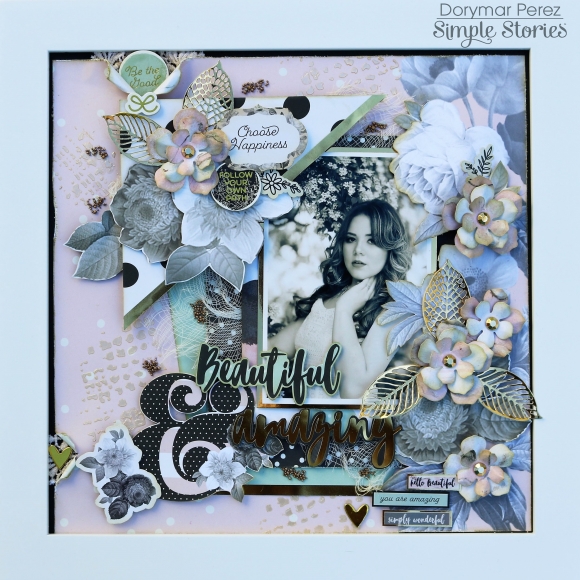
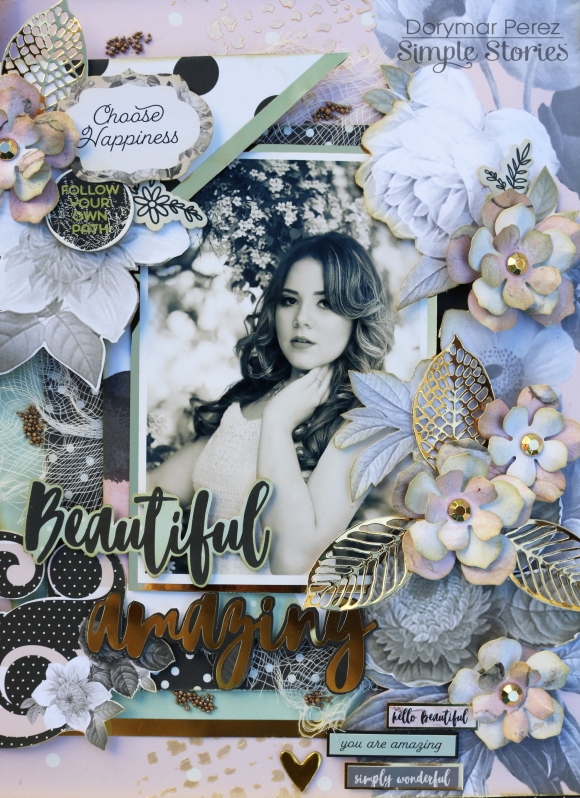
Hello scrappers! It's Lisa Dickinson here with you today, sharing some tips on getting mileage out of those paper collection kits! For me, that means they have to work with both girl and boy layouts. Even if the papers tend towards masculine (lots of plaid or wood) or feminine (lots of florals) I love to find ways to incorporate them into any type of design!
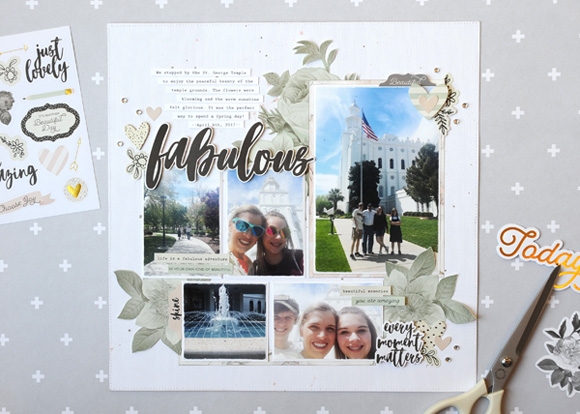
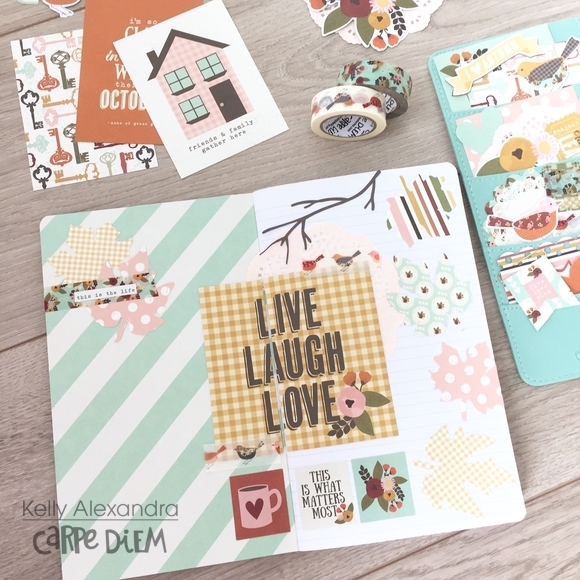
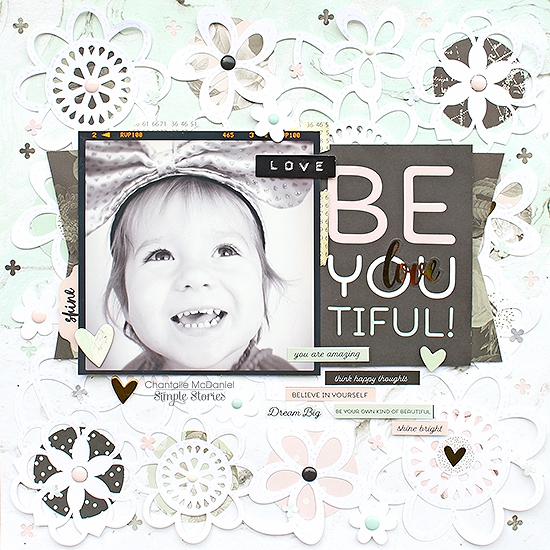
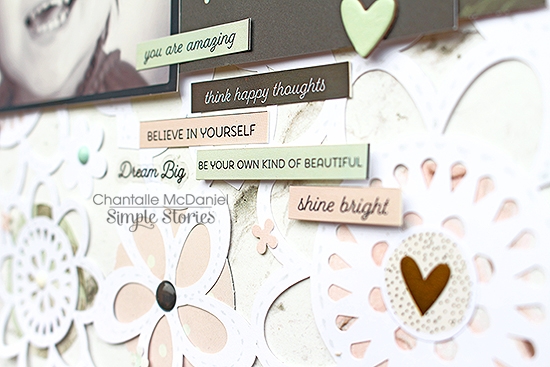
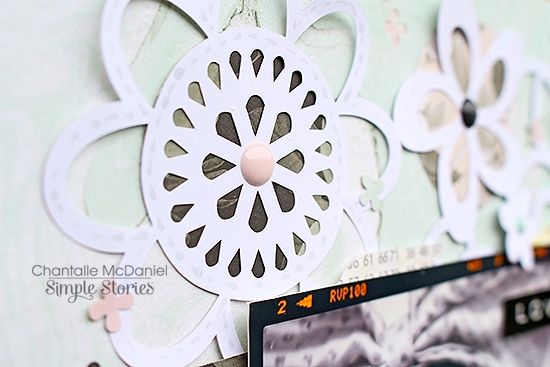
Today I'm working with the Vintage Blessings collection, a great mix of prints in autumnal colors and patterns. Since the first layout features my daughter, I wanted it to have a more girly feel. But instead of working with only the floral patterns or softer colors in the collection, I chose to add feminine flair by creating flowers from several of the patterned papers.
I hand-cut petals from a variety of papers and then adhered each bloom atop a piece of scrap white cardstock. Then I added machine stitching around each petal and adorned the centers with plain wood buttons. Once finished, I trimmed out each flower and adhered them on the page to frame my photo.
The resulting design has a definitively feminine feel even with plaids, ginghams and stripes included. And the flowy script title reinforces the page theme as well. Now, let's see how I used the same paper collection for a boy layout!
In this design, I wanted to focus on more masculine approach since the page is about my son. Though I used many floral papers, I incorporated them into a chevron pattern so they would seem overly girly. And I mixed in some darker plaid ad a few gingham patterns to balance the florals.
For the title, I chose the blocky die-cut Silhouette cut file, Love Today, and cut it out of gray cardstock to further reinforce the masculine theme. A few simple chipboard embellishments finish off this page!
So don't shy away from papers just because you think they'll only work for one gender! Try these tricks for using them on any type of page you might want to create!

I'd like to share with you how I've set up the Blush A5 CarpeDiem planner using the Bloom collection.
I took the brave decision to use a set of the Bloom personal size monthly inserts and use a variety of punches to make an assortment of bits & pieces to decorate the pages.
You can see here how I've used some of these to decorate the September insert.
I made tags to add the Bloom sticky notes onto and placed them in the front pockets of the planner, this was to not only make it look pretty, tie in the theme but also add functionality.
I didn't want to waist any of the paper from the personal inserts so I thought it would be fun to create a pocket page.
The Bloom sticker tablet was a great way to inject colour onto my monthly layout, I also used a black pen to doodle boxes, which I think have tied it all in nicely.
I hope you've enjoyed looking at how I've set my planner out, you can find lots more detailed pictures on my IG account https://www.instagram.com/heartsbyemma