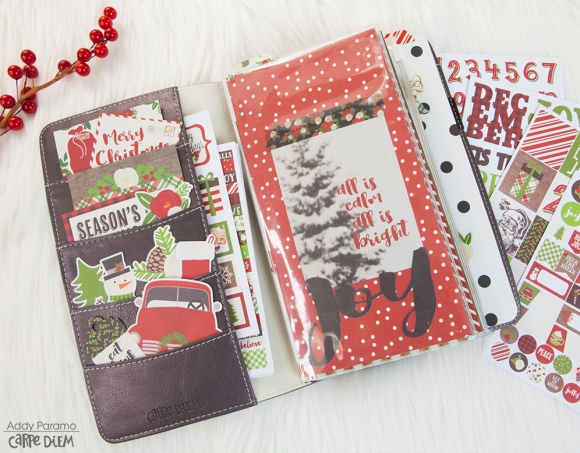
It's the beginning of December and the holiday spirit is in full swing at my house! Hello, Simple Stories Friends! Jana Eubank here. The minute Thanksgiving is over the Christmas music is a constant at our home and puts me right in the mood to do some Christmas scrapbooking!

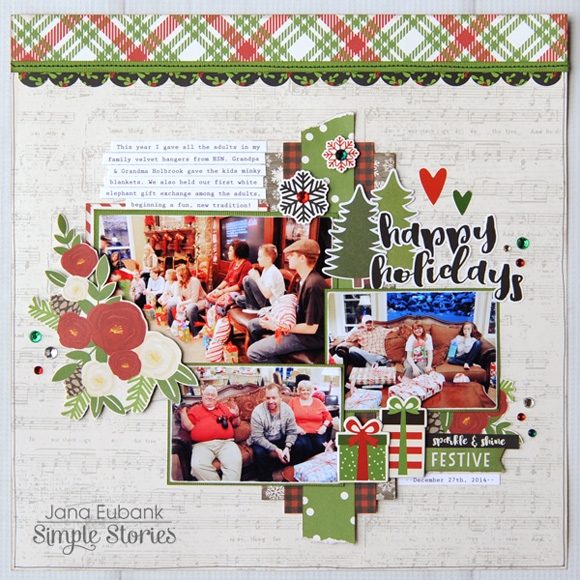
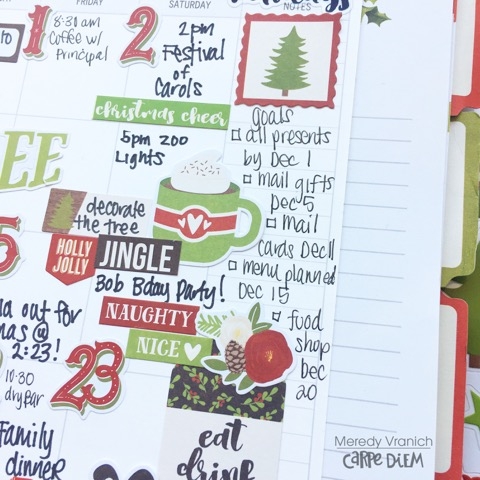
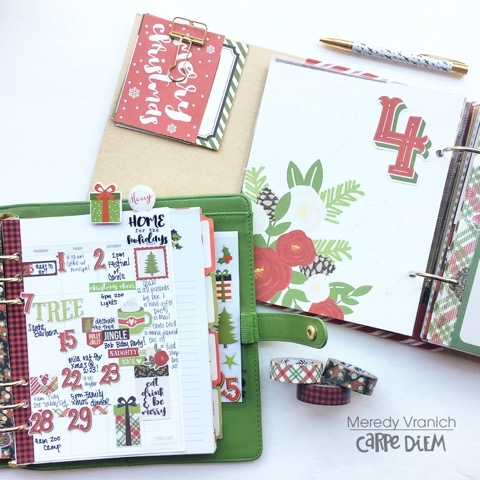
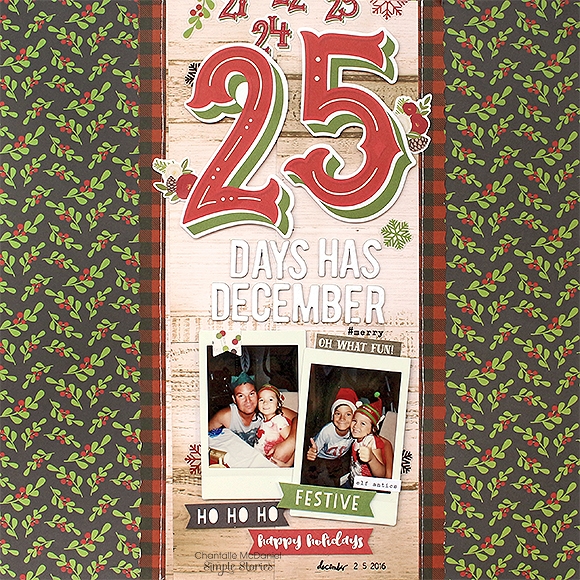
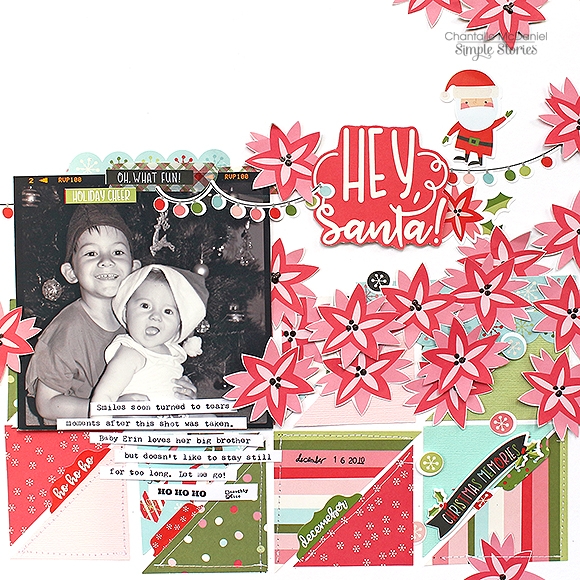
Most of my pictures from the holidays are a beautiful, chaotic mix of people, things, and colors. The Very Merry collection brings everything together with its classic red and green color scheme. 

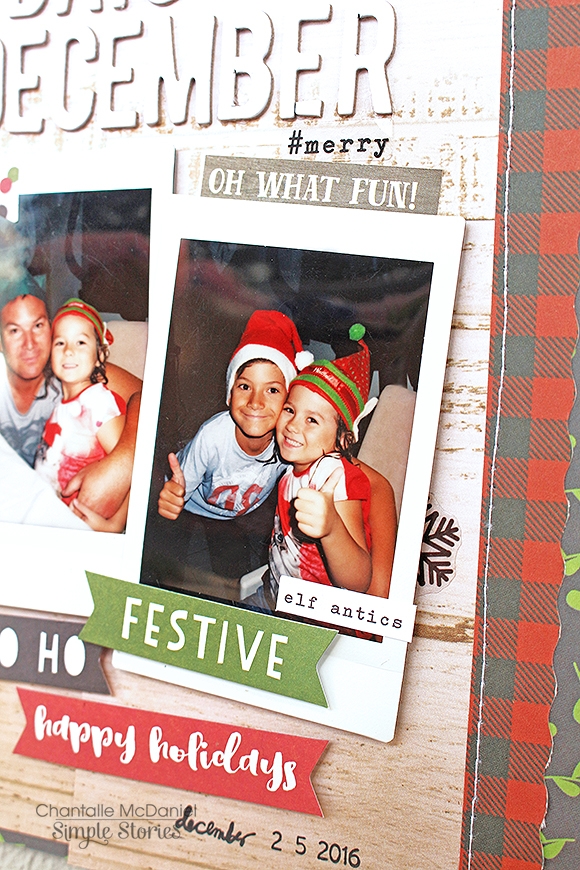
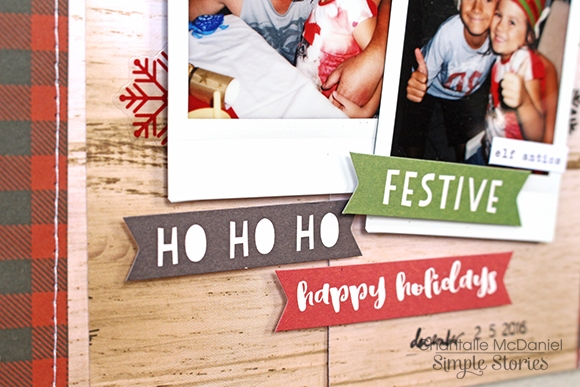
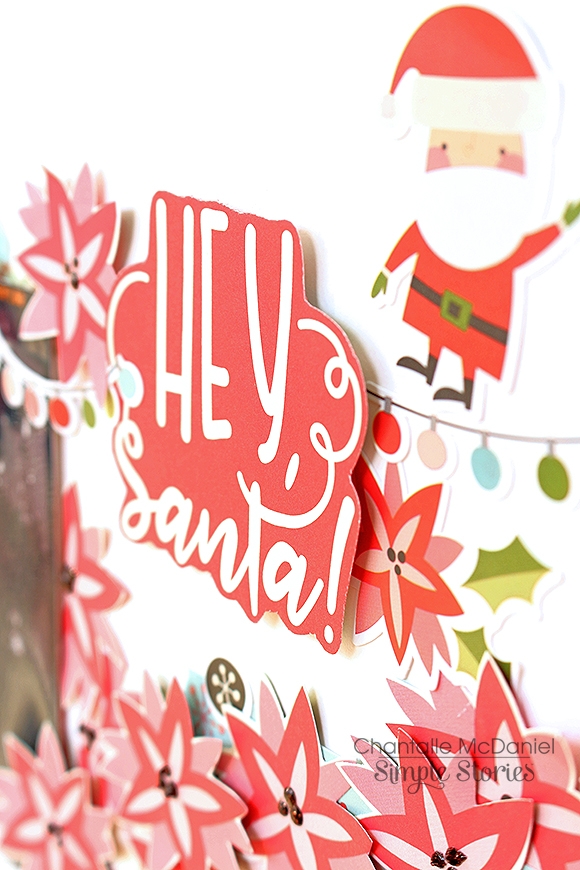
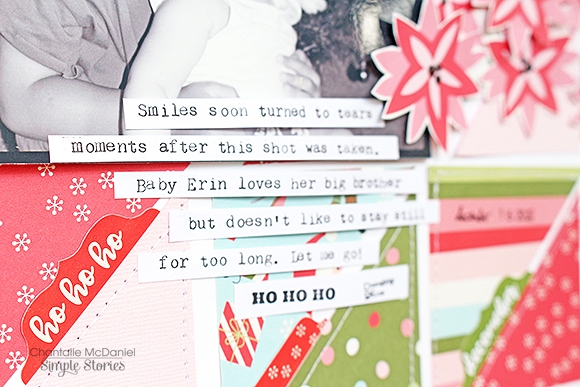
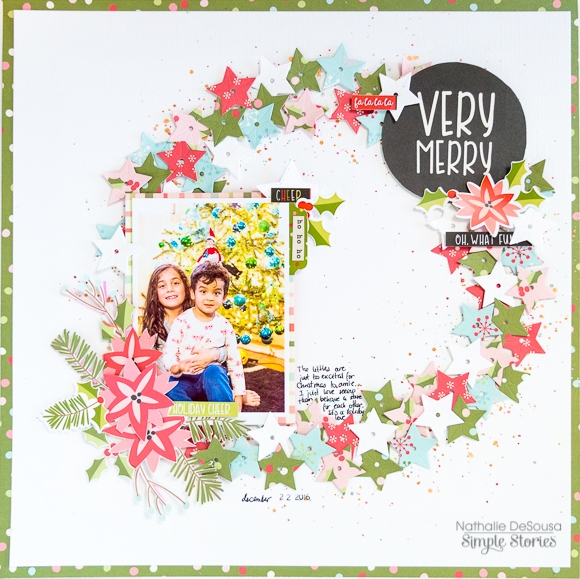
For this page, I placed three photos on a patterned paper axis running through the center of the page and then filled in the empty spots with a title, journaling and holiday elements.

I used the Combo Stickers for the title area of this page. I love how the black script of the title POPS against my mini forest of pine tree stickers.

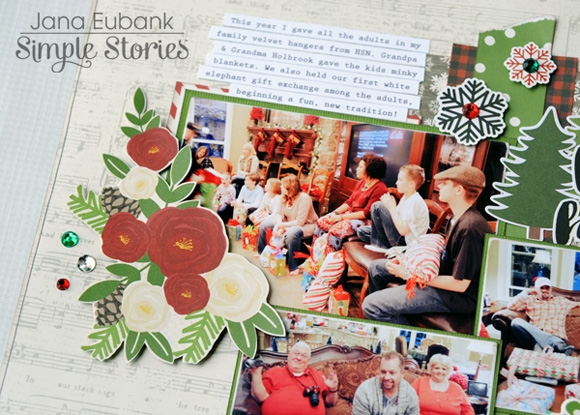
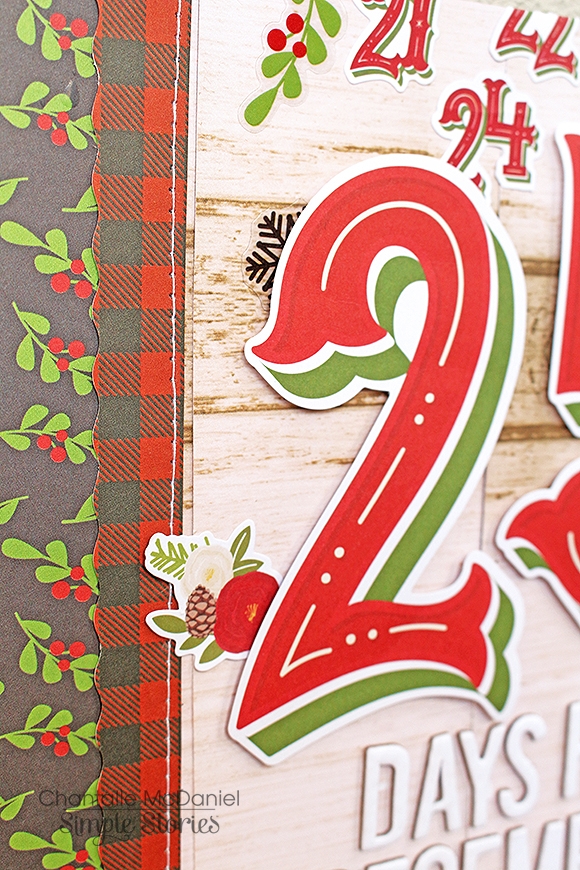
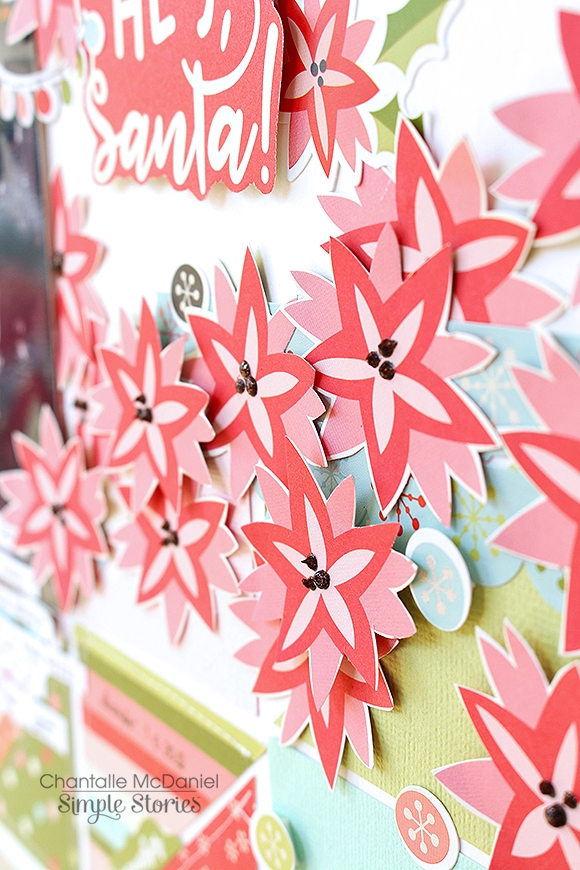
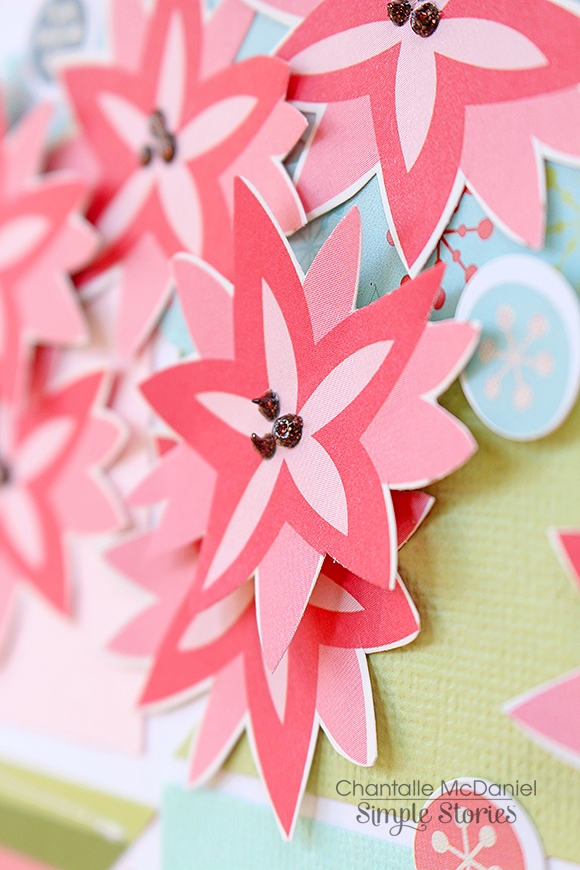
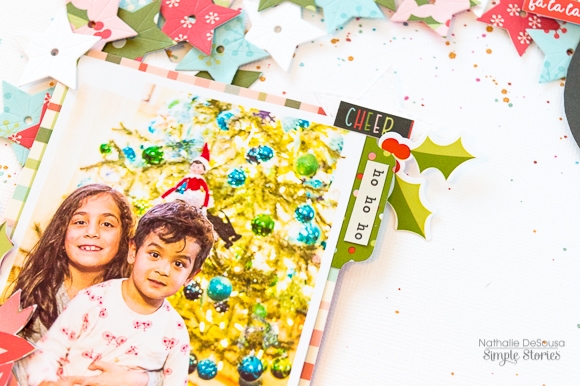
My main photo had an empty spot in the lower left corner, so I fussy-cut the large floral cluster from the Peace On Earth Paper to fill the spot.

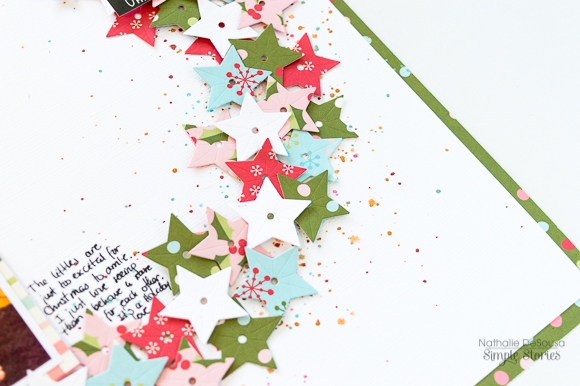
Another fussy-cut, floral cluster anchors the presents, and phrases in the bottom right hand corner of the layout.

I capped the page off with a strip of plaid Christmas Cheer paper and the scalloped border sticker from the Combo Sticker sheet. Reminiscing about Christmas' past gets me excited to gather together again with family this year!

Thanks for coming by!

Supplies

Hello Carpe Diem Girls, Its Meredy with today’s blog post. It is December and, as we all know, it can be a very busy month.  I am starting the holidays off on the right foot this year by setting up my planner, taking a look at my monthly schedule and setting some goals for myself.  

My Clover Carpe Diem works perfectly with the Very Merry Line and by using some of the decorative paper, bits and pieces and stickers my planner was looking quite festive in no time at all.

I don’t always do a monthly spread, but since there is so much happening during December I knew I needed to have it all in one place to help me keep on track.   I used washi, stickers, and bits and pieces from the Very Merry Line to decorate my pages.

I put this great December Calendar from the Bits and Pieces packet at the top of my page and will use this as my Christmas Countdown counter. Today, I get to mark off Dec 1st, just 24 more days to go!  (If you look close you can see I didn’t set my sicker down perfectly, I just left it because sometimes there is perfection in something imperfect.)

In the notes section of my monthly layout I wrote my holiday goals.  My daughter gets out of school on Dec 15th and I am determined to have it all completed before that date so I can have a fun and relaxed Christmas. I even set up my beauty appointments and ordered some new clothes so do not forget about myself as I do most years.

This year will also be my first attempt at a December Daily. I set up a Sn@p notebook with the Very Merry collection so I am all prepared. Stop by my Instagram www.instagram.com/myplanningadevnture to see how my December Daily progresses! Its not too late to start your planning and set goals for your month. Hopefully this post inspires you to get out in front of the holiday rush.

Supplies

Welcome back to the blog everyone!  It's Traci and I'm back to share a new Sn@p project I've been working on.  I just love black and white photos and when I saw the Beautiful collection, I knew it would work perfectly with some of my favorite family photos.

Although the photo above doesn't show it well, there is a really pretty touch of metallic gold in the collection.  The bow on the 3x4 accent paper, and the word "amazing" on the chipboard piece at the bottom are gold ... so pretty!
 

Thank you for letting me share my latest Sn@p album with you!  Check out the entire "Beautiful" collection here.  

Supplies

Hello again Simple Stories fans! Chantalle with you today to share a countdown-style page using the beautiful festive ‘Very Merry’ collection.

Instax snaps are a favourite of mine for scrapping. They are just small enough to really draw the eye in and one can use a couple on a 12x12 size page.

The design of this page is pretty simple, focusing the attention through a central band with busier pattern paper on either side. For this reason, I have kept the central paper pretty neutral, cutting several strips from a sheet of ’Tis the Season’. 

The outer botanical print is the 4x6 Vertical Elements from the collection. I wanted to pull out pops of the red, green and charcoal, so I’ve kept this busy print further out, then brought the red & black checked print in to co-ordinate with the large ’25’ from a pack of Very Merry Pocket Pieces.

To give the feeling of a little countdown, I have also added some numbers close to 25 from the top of the page. These are from a pack of Very Merry Stickers and would be fantastic for a planner or December album at this time of year.

The page has been finished off with some Clear Stickers (cut in half to go further!) some mini banners from a pack of Bits & Pieces and a touch of stamping.

A super simple page but I love the bold title and centralised theme.

Thanks so much for joining me!

Hello creatives! Welcome back to the blog. Leah here with you today, showing you how I have begun the process of setting up my Christmas traveler's notebook. Eventually, I hope to set up this TN to be a jack of all trades for me throughout the Christmas season. I want to have a notebook in here for planning, a notebook for my millions of holiday lists, and a notebook dedicated to documenting December memories. I'll be using the Very Merry collection to decorate this TN. So far, I have decorated my front pockets with bits and pieces from the collection and I have focused my efforts on assembling my December Daily notebook insert.

I created this notebook by taking the staples out of one of the Carpe Diem traveler's notebook inserts and disassembling it. I used one of the notebook papers as a template to cut down the 12x12 Very Merry patterned papers to the same size as the insert pages. I then mixed in the patterned papers with the white pages to create a thicker notebook. I got this brilliant and fun idea from Michelle Baxter @quirkyheart on Instagram. My goal was to have enough papers in my insert to do a 2 page layout for each day of December. I also printed out a couple of my favorite Very Merry digital papers onto vellum so I could add those in for texture.

Making this custom insert was very simple but it's a process, so I am taking my time with it. So far, I've just cut down the papers and arranged them in a way I like. I think I will hold off on sewing or stapling the papers together until later in December, that way I'm not totally committed to the current arrangement and will have more flexibility as I start documenting memories. I plan to add in a variety of 4x6 SN@P! pocket pages throughout the notebook and will use washi tape to tip them in.

I also took a little time to decorate the cover of my December Daily album/TN insert and start gathering and organizing my supplies I'm planning to use this month. I am not the best about finishing things...however, I do my best to set myself up for success in finishing my December Daily album by doing a little preparation before hand. I still have several things to do before December starts up. The inserts I'll be using for planning and listing will be simple notebooks without much décor, though I might dress up the covers to be more Christmas-y. If you'd like to see how this TN setup continues to develop, head over and follow me on Instagram and YouTube for updates. Have you, or are you planning to set up a Christmas planner and/or Christmas album? If you aren't following the Carpe Diem Planners Instagram, you will find some amazing inspiration there. So many BEAUTIFUL Christmas planner and TN setups have been shared already!

Happy Cyber Monday!  Today only, your entire purchase from our digital store is 50% off!

WIth ALL of your favorite Simple Stories collections in digital format, you're sure to find just what you need for all of your digital crafting needs!  Visit our digital store here and enter code CM2017 during checkout!!  

SaveSave

The Oh What Fun Simple Set has the right amount of papers and stickers to create that one of a kind page!  I loved incorporating the bright patterns to highlight this treasured photo from a Christmas past! 

I began with laying strips of patterned paper across my white cardstock background then adhered my photo. I cut the bright red/white dot print using the Simple Stories Circle  Wreath Cut File from the Silhouette Shop (cut file ##169333) and affixed to the center of my page.  


Once I  stitched through the Circle Wreath, I selected different stickers from the 12x12 Sticker Sheet to accent. A few of the shapes are affixed with pop dots to create some dimension (I'm a big fan of layers!)


The Sticker Sheet includes sentiments such as this that can be used as a title to your page! I added in another small sentiment sticker as well as stamped sentiments with my Classic Christmas Roller Stamp.  And how cute is the ornament garland?  

Hello everyone! It's Dorymar on the blog today to share some fun ideas using the beautiful Oh What Fun collection!

The Oh What Fun collection can be used to create so many Holiday-themed crafts such as ornaments, Christmas cards, home decorations, gift bags, tags, layouts, albums and so much more because it's stunning! The options are endless!

This time I designed a beautiful ornament for the Christmas tree, a card, a banner, a gift bag and a crystal block for home decoration.  I used all of the beautiful elements of the collection, cards, stickers, and papers to create these projects.  Love the bright colors and fun designs!

There are so many different elements to choose from in this collection!  I had lots of fun looking through the pieces! I loved all of them and wanted to create a bundle of hand-made crafts to celebrate the Holidays.

The collection invites you to create fun projects like its name, Oh What Fun!

Hope this inspired you to create beautiful projects to celebrate the Holidays with your loved ones!

Happy crafting!

Supplies

Hello Simple Stories fans and welcome back to the blog today!

The silly season is fast approaching and it’s a wonderful time to revisit photos of Christmas past. Personally, my shots are always pretty average. Every year I tell myself to play with lighting options before the big day but every year I’m bleary-eyed as my kiddos wake up before dawn, lol.

This page captures a super cute moment between my two when they were a bit younger. Erin was pretty comfy on her big brother’s lap but laughs soon turned to tears as she was asked to sit for one more snap! I’ve used the adorable ‘Oh What Fun’ Simple Set. I love the slightly less traditional colours of this collection and the characters are oh-so-cute!

One of my favourite prints was on a sheet of ’Tis the Season’. I couldn’t resist hand cutting a bunch of the flowers out to use as embellishments! The centres have been highlighted with a bit of glittering dimensional media.

Watch out there Santa! Two stickers have been combined from the Oh What Fun Combo Cardstock Stickers to make as if Santa is walking a bulby tightrope.

The title has been hand cut from the 4x6 Vertical Elements paper in the set. I haven’t cut right to the edge, instead, leaving a bit of the red as a border around the text.

Some typewritten journaling and machine stitching finish the page off…

I changed the idea for the design of this page a couple of times as I just wasn’t feeling it. Eventually, I found a sketch by Kristine Davidson that I liked and used it for reference. I cut a bunch of squares then snipped them in half, adhering and then stitching them down.

Thanks so much for joining me today.

Wishing you lots of fun with your Christmas crafting!


Chantalle

Hi everyone, as I am preparing for my December Daily I wanted to show you how I have setup my Christmas Traveler’s Notebook (TN). In this notebook I am able to write all my ideas and plan the daily projects.

For this setup, I used the Very Merry collection in the Aztec Black and White TN. I stuffed the pockets with bits and pieces and created a front dashboard.

I converted the black and white striped notebook from the Bloom collection into a Christmas notebook using a 4x6 red Christmas card and some washi tape.

With red, grey and green alpha stickers, I created a title for my notebook. The rest of the pages I decorated with lots of ephemera, stickers and washitape.

In the first section of my TN I have space to write all the ideas for the December Daily projects.

In the second section I am using the red number stickers from the 4x6 sticker pack to mark every project I want to make and show that day.

For the third section I created weekly overviews by using number stickers and washi tape. The fourth and last section is for more December lists and notes.

On my Instagram account (https://www.instagram.com/createplannernl/) I will show more of my December Daily prep in my TN. Have a nice day!

Spread good cheer & celebrate the holiday season with the Very Merry collection!  Traditional Christmas colors of bright red and green paired with classic icons, worn woodgrain, and festive florals combine in the perfect package to wrap up all of your happy holiday projects.  Take an up close look at some of the gorgeous products from the collection & inspiring projects from our creative team!

The limited edition 6x8 SN@P! Holiday Binder is a must have!  With the decorative woodgrain cover, silver metal corners, 2" rings and included inserts & pocket pages, it's perfectly suited for documenting your December memories.  Better yet, if you're doing an Ali Edwards 'December Daily' album, grab the Numbers Pocket Pieces and the SN@P! Pack to go with it for a quick & easy jump start on the project.

When it comes to paper crafting, it’s all about the paper, right?!  Regardless of what crafty holiday project you’re working on, paper is the perfect starting point.  These are some of the Very Merry favorites we’re mooning over, and judging by the speed at which they're leaving the warehouse, it looks like they’re some of YOUR favorites too!  

Washi tape, stickers, die cuts & SN@P! Cards – OH MY!  Very Merry is sure to have just the embellishment you need to add a gorgeous touch to all of your holiday projects. 

From layouts, to cards to planners & traveler's notebooks, you’ll be as excited as a kid on Christmas morning with this jolly collection.  Speaking of paper crafting & planning, here are a few projects to get you inspired to document your Christmas plans and memories. 

Be sure to check out & follow our Very Merry Pinterest board for more festive & fun holiday inspiration now and in the future!  Happy holiday crafting!

SaveSave

SaveSave

SaveSave

SaveSave


Hi, It's Lisa here today along with the 'Beautiful' collection once again.
 
This patterned paper with the big polka dots screamed out Disney to me. Anything with polka dots screams out Disney to me to be honest, but I knew this one would be a perfect background to one of our many new Disney photos.


Before even starting this layout, I knew straight away what I wanted to do with those big circles. Stick the strips of wordy stickers over the top of them and that's exactly what I did. I also added a few of the clear stickers and some of the bits and pieces too. It was fun attaching a few with staples. It just made a nice change.


I decided to edit my photo to black and white as it suited the page much better. I also added a warm tint. It really goes well now along with a big thick white border.
I used some vellum, letter size, to go under the photo and on top of the patterned paper. I just attached this with a couple of staples top and bottom and nothing else. This really added to the softness of the layout and the layers look really good.
 
 
I really love all the layers, the circles and the fun word strips on this page. As I had so many little phrases on the stickers, I didn't feel the need to add any additional journaling. The work was done for me!! It was so much fun to make.
 
Thank you for stopping by today.
Wishing you a fun and creative day.


Supplies

Hey everyone! It’s Lori, marketing manager at Simple Stories, here on the blog again sharing some of the fun we’ve been having while we’ve been out and about. One of the things we love most about working at Simple Stories is the opportunities we have to get out and meet our fabulous customers and fans! There are so many amazing people who love scrapbooking and planning and we’re thankful for all of you!

At the Pinners Conference in Salt Lake City, marketing director, Layle Koncar, had the opportunity to meet Kambrie. Her mother had brought her to the conference to enjoy a day together, and both of them attended our 2 Carpe Diem classes at the conference.

Layle loved chatting with them and told Kambrie’s mom what a great thing it is to see the younger generation interested in planning. Not only is Kambrie loving the hobby, but she’s also learning great life skills at the same time. Isn’t Kambrie the cutest?!

In October, our president, Kevin Crowell, and VP of sales, Sherman Crowell, attended Plannercon Europe where planner fans from all over came together in Belgium. There were 300+ planner enthusiasts from Belgium, France, Switzerland, Austria, the Netherlands, Germany, Spain, Luxemburg, Italy, the United Kingdom, Sweden, Denmark, Iceland, Finland, and even the United States of America and Canada!

Everyone enjoys the workshops, they shop, and they meet other planner nerds from near and far.

Looking to get to an event in 2018? We’d love to see you at some of the events we’ll be attending in the future! If you’re near Dallas, Minnesota or Salt Lake City, come visit us at the Pinners Conference in 2018! And if you want to attend Plannercon Europe next year, we hope to see you there as well!

Nathalie with you today.  It is starting to look at lot like Christmas, and what better way that prepare for the upcoming season, that to document last year's memories with the beautiful and super fun "OH WHAT FUN".

For this page, I wanted to take advantage of the colors in the papers of the collection, and what better way to display them than  to create a wreath to display a photo of my littles -niece and nephew-.

Using a die from Maya Road, I created a lot of stars that were arranged in a circle to create the wreath.

There are so many beautiful designs in the papers and cut apart cards from the  Oh What Fun collection that can easily be fussy cut to be used as clusters around the layout.  This layout's title was created using one of the 4x4 card from the cut apart elements page.

Here are just a few more close ups of all the details around the picture.   The poinsetta images are one of my favorite designs in this collection, and the perfect flower to give this layout that soft and Chrsitmasy look.

The "Oh What Fun" collection is by far one of the most beautiful and FUN collections for the upcoming Christmas season, and a must to document all those special moments.

Remember I am always a comment away if you have questions on how this came together.

See you all soon!

Supplies

December is just around the corner and that means we can get in the Christmas spirit. My rule is once I see Christmas product in stores I can be in the Christmas spirit which lets be honest it can be all year long. 

I am excited for this project as this will be my first year doing a December daily. 

We all know how much I love my planners and traveler's journals so I thought why not give it a try in my Black Vintage Floral Traveler's Notebook

I used the Very Merry collection to get it all set up and ready for December first. I used the Very Merry Collection 12 x 12 papers to cover my plain traveler's notebooks and decorate them with the different stickers and ephemera pieces. 

I also decorated all my pockets and multiple dashboards with the beautiful ephemera and cardstock sticker pieces. 

Can we just sit back and admire these number ephemera pieces! They are the perfect size and I plan to use the numbers throughout my layouts to document every day. 


This collection is so festive and is perfect for a December daily, monthly spread, scrapbooking pages and even cards. I love how all the pieces are so versatile and I can not wait to continue using it through the month.

The eye catching prints and colors of Oh What Fun are perfect to document your favorite holiday photos!  I adore the mixture of the traditional red and green with pinks and blues mixed in!  You could definitely use this collection for winter projects as well as Christmas!

I  used pop dots on a few of the cute shapes from the 12x12 Sticker Sheet to add dimension to my page!  Also included are numerous holiday sentiments such as the ones seen here!  I  finished by using my Classic Christmas Roller Stamp to add a few  additional sayings!  

I  created a border across the middle of my page using my circle hand punches to incorporate the fun patterns of the collection!  I  mixed in a few of the smaller sticker embellishments as well to accent.

Are you making your own Christmas cards to send to friends and family this year?  It a great way to send a one of a kind card that will be treasured!  It’s even more fun if you make it a family project and get the kids involved!  The Simple Stories Oh What Fun! Collection Kit has everything you need to make lots of beautiful cards with paper to spare for some gift tags too! 

The 12 x 12” pack includes pattern paper in traditional red and green with a pop of aqua blue to keep it fresh.  Some of the sheets in the collection have cut apart journaling cards on their reverse side perfect for cards and documenting/scrapbooking.   

The pack even includes a 12”  sticker sheet loaded with sentiments and images to use as focal points on your projects This card has a pattern paper background embellished with stickers from the combo sheet.

You’ll find the perfect image for everyone on your list.  The pack includes poinsettias, holly, ornaments, presents, and even a cute Santa Claus!

Don’t forget to send one to everyone on your “nice” list!


The Simple Stories Oh What Fun! Collection is a great investment with lots of possibilities!  It’s sure to make the season bright!

Supplies

Hi planner friends! I’m back today to give you a quick look at my Persimmon Carpe Diem planner with the Happy Harvest collection.  I made a new dashboard for this month with a photo of my son and using the Grateful Hearts cardstock and added a few decorative leaves I found at the craft store.  They’re all glued down so nothing will fall off once I close the planner

For the monthly spread, I kept it simple and used the Happy Harvest  6x12 cardstock stickers to fill in a few of the boxes and used a small banner punch to add a banner along the top.  

I hope you enjoyed having a look inside of my Persimmon Carpe Diem planner and setup from the Happy Harvest collection.  Happy planning and have a wonderful holiday!

Pages