Front of Planner Set Up
Hello again creative planners! Leah here on the blog today to show you how I give the front of my Carpe Diem planner some “curb appeal.” I will be using the new Carpe Diem collection and showing you just how versatile a few of these products can be. I have shared many blog posts on here featuring decorated front pockets and dashboards, but this will be the first time I have filmed a video of the process, start to finish. I am SO excited to share it with you!

I have taught an online class all about front pocket design and techniques if you want more thorough explanations of the “why” behind a lot of my decisions when decorating my planner pockets. You can find a link to that class in my Instagram bio. In this blog post and video, I will be showing you all about the “how.” I will take you through how I made several of the elements for the pockets using the Carpe Diem Dashboards and Pocket Cards set and a few papers from the new High Style 12x12 paper pad.
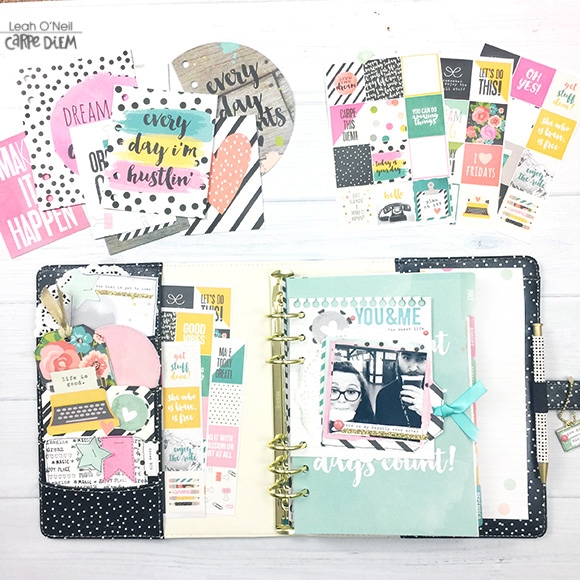
These pockets came together fairly easily, just by cutting and punching out a few basic shapes. When it comes to pocket decorating, I like to use a variety of shapes. For example, in these pockets I have a large circle, a smaller circle, a tag, small stars, a banner, cards with sharp edges, cards with rounded edges, and a die cut typewriter that I fussy cut from a pocket card. Having a few paper punches in basic shapes is always a good investment for creating your own die cut shapes, but I collected the punches I have over the course of several years. Several of these shapes can be hand cut pretty easily without paper punches. The circle is probably one of the hardest to hand cut but is still possible with the trusty technique of tracing around a cup onto paper and cutting it out, or you can get these awesome photo cropping tools from Simple Stories that make it super easy to cut different sized circles. They are much more cost efficient and portable than having to buy several different sized circle punches.

I also like adding some texture to my planner pockets by adding things like doilies, ribbon, and staples. Another common technique I use to add the illusion of dimension and texture, is to add doodled borders and hand drawn stitching to the edges of some shapes.

I made this pocket card from scratch using some white cardstock that I cut down to fit in the pocket, and then I used the Say Cheese III roller stamp to stamp words all over it. This gave me a cool black and white text background which added an interesting detail to my pockets without competing with all of the other colors I was using. You can get this effect with any word stamps, but the Simple Stories roller stamps make it so easy and quick to do, and I like how they always have a few shapes added in too. Like the Say Cheese III roller stamp for example, has an arrow and rows of hearts and stars that break up the words.
All of the patterned paper dividers in the New Carpe Diem monthly planner inserts are so beautiful. The collection has many of the same fun elements from the original Carpe Diem line, but there are some black and white images that give it a very trendy, modern vibe – kind of reminds me of some of my favorite pieces in the old “Life in Color” collection, but with the Carpe Diem colors and designs.
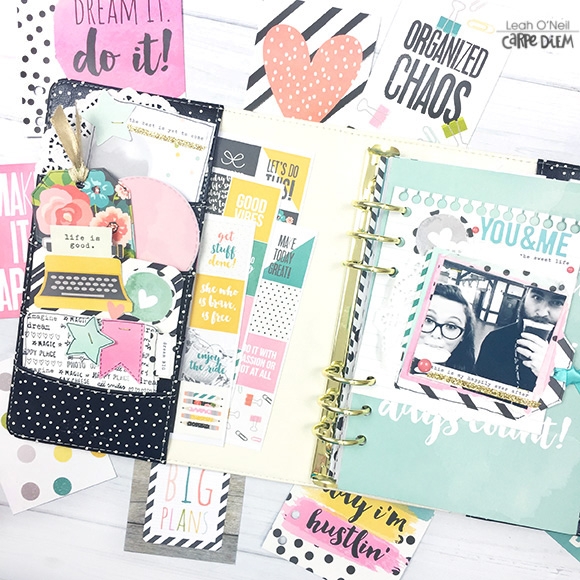

The monthly dividers are pretty enough on their own without adding anything, but I always like to jazz things up in the front of my planner. In this case, I used a smaller decorative dashboard from the collection and customized it with a photo and some fun layering. I love that because the dashboard is smaller, I get that personalized feel at the front of my planner but I can still see the monthly divider underneath.
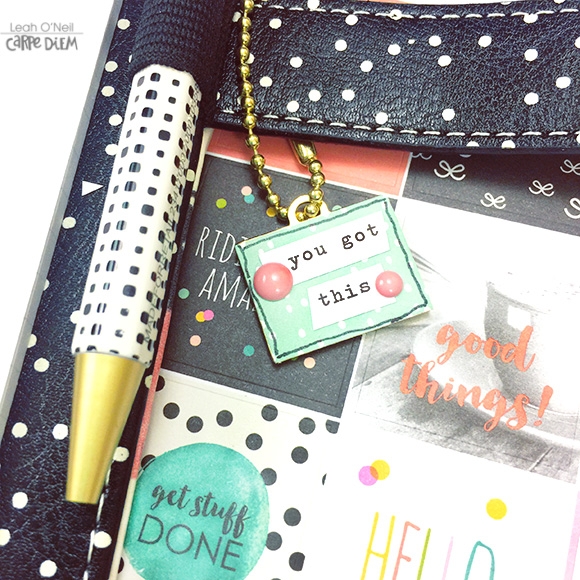
In an older blog post (read it here!), I customized one of the Carpe Diem planner charms for one of my planners and got a lot of a great feedback on it! I did the same for this planner, but this time I filmed a quick tutorial to show you how incredibly easy it is to do. I will be posting that video clip over on my Instagram, so be sure to come say hello over there and check it out! Here is the YouTube video of my process for setting up the front of my Floral Dot planner, I hope you enjoy it! Hit “subscribe” while over on my YouTube channel to catch future Carpe Diem planner videos!
