August 2019 Blog Posts

Hi everyone! It’s Tara with Secretbees Studio  We might be in the thick of Summer but it is not too early to start getting those paper crafted Halloween albums and decorations started. Especially since Simple Stories has some of the cutest holiday paper collections ready for you! The Say Cheese Halloween collection is full of bright magical colors and so many bewitching patterns. Plus this collection has the happy kids dressed up in their most adorable costumes along with not so scary pumpkins, ghosts and spiders. All in all, this collection will add so much fun to any holiday project!

This sweet wallet mini album is perfect for holding lots of Halloween memories and it has lots of pockets and interactive elements! When closed, it measures 8.5" x 4.25" but it opens up to reveal lots of openings and pockets like any great wallet.

The bottom section has its own 'credit card' slots that holds four of the 3x4 journal cards and a gusseted pocket that holds 4x6 journal cards. All have been decorated and embellished with the charming stickers and bits & pieces.

The center section folds out on both sides to reveal several photo spots including a couple of small flip out sections and a pocket! The large center holds another photo flip that showcases the super cute 4x6 journal cards with photo holders on the backs. Check out the walk through with instructions on making your own photo wallet like this one on my YouTube channel!

Supplies

Hi there Simple Stories Friends! Nathalie with you today with a new layout that brings a not-so frightful approach to Halloween memories.   When i saw the Happy Kids Bits and Pieces of the new Say Cheese Halloween collection from Simple Stories, i did a small inner cheer as i had the perfect picture for it.  Hence this page.

I wanted to bring color and playfulness to this page, so i opted to use lots of the patterned papers, and what better way than to create a large title for the page.  I chose a few cut files from the Silhouette store to cut the words from some of the collection's papers.   A chose to cut an offset of the words out of the Say Cheese 4 Basics papers and then hand stitched the words to the black cut out.

Before building the page, i chose to trim and distress the edges of the Frankly Frightful paper, then stitched it to the  Hey Pumpkin paper.   A few sticker details were added to the distressed edges, followed by drops of black and white ink around the page.

The title was glued on a bit of a slant, then i nestled the pictures atop the title, and started adding embellishments around them. I chose to complete my title with one of the phrase stickers from the ephemera pack

To finish the page,i added a few lines of journal to the side of the title,followed by a pair of the Happy Kids Bits and Pieces that match closely their costumes.  Just love these little pieces of joy.  

I LOVE how this turned out!  The new Say Cheese Halloween from Simple Stories is one of the cutest and not-so frightful collections around, you are going to fall in love with it!  

XO

Supplies

Hi friends!  It’s Jeanne here today!  And I’m so excited to share EIGHT Halloween cards made with the Simple Stories Happy Haunting Collection!

This beautiful colors of this collection include the traditional orange and black you associate with Halloween, with the unexpected addition of PINK!  This gives this collection a fresh look with a sweet twist.

The collection has so many beautiful prints too.. plaid, gingham, zig zag stripes, colorful dots, starry skies and florals too!

The chipboard stickers are great for adding dimension to your projects.  I cut the garland included on the sheet in two pieces to embellish this card.

The 3x4” pocket/journaling cards printed on a 12” paper in the collection kit are perfect for  layering over pattern paper and embellishing.

You’ll also find Icon Bits and Pieces that are great for making scenes and embellishing, as well as Journaling Bits and Pieces that are great for adding hand written sentiments and documenting your journaling pages.   Some of these die cut pieces include printed sentiments like the speech bubble on this card.

I like to arrange the bits and pieces and chipboard stickers on a piece of clear plastic the same size as my card base before I commit and adhere them in place. 

I powder the back of stickers from the Collection Kit Sticker sheet so I can arrange them without them sticking to other elements.  I adhere them with liquid glue when I decide where to place them.

You’ll have lots of fun making with this collection and your card recipients will be delighted with your one of a kind creations!

Supplies

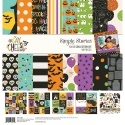
Hi everyone, Odessa here with a cute mini album I’ve been working on. I love to take photographs and have a bunch that I just love from our summer camping adventures so far this year so I decided to print some of my favourites and put them together in a 4x6 SN@P! album with the Simple Stories Happy Trails collection. We’re all about camping in my family so when I saw Happy Trails I knew it would be perfect for documenting so many of our summer adventures!

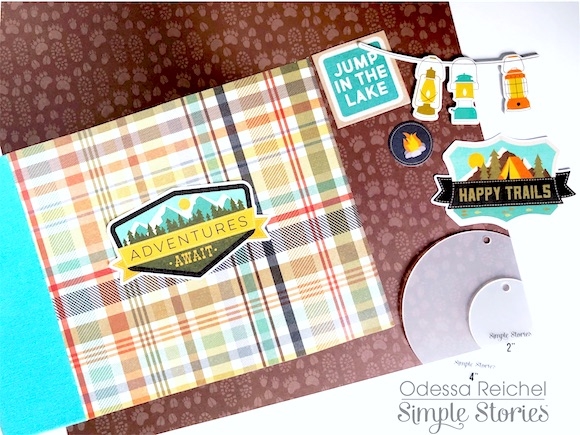
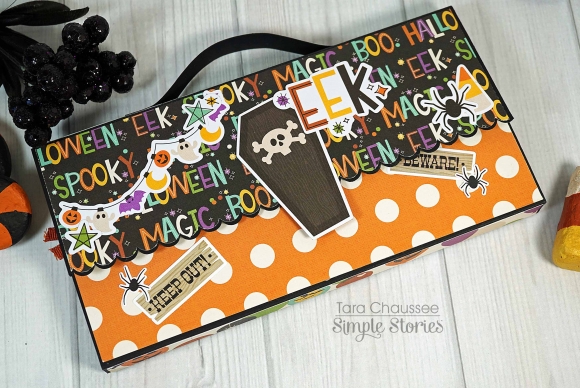
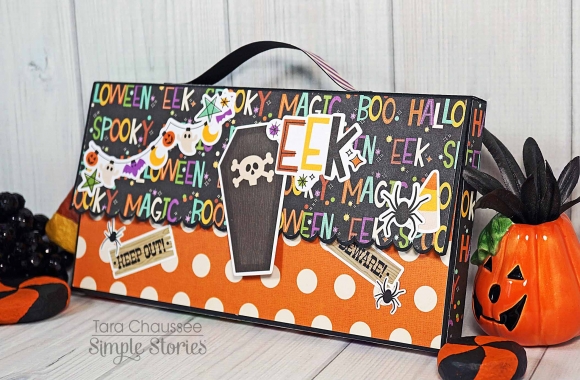
I started out by embellishing the cover of my album. I love how the chipboard covers of the 4x6 SN@P! albums can look good plain or are super easy to embellish. I picked the fun plaid print from Happy Trails and used one of the Bits & Pieces to make a simple yet perfect cover for family adventures.

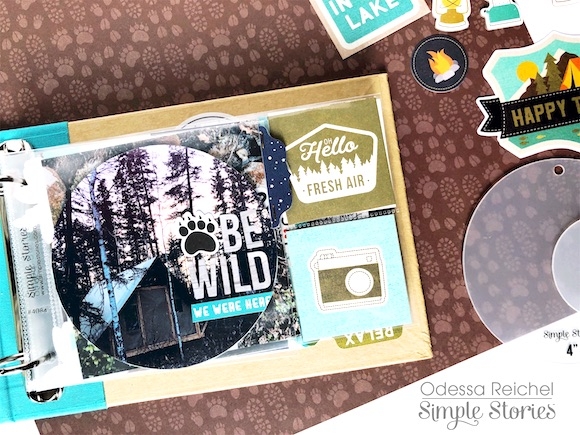
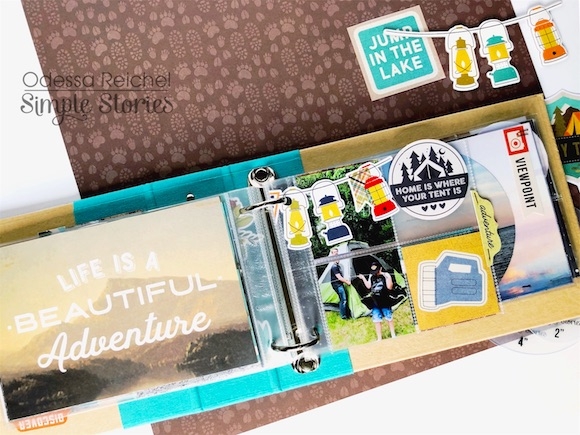
I love circle photos! I used one of the Circle Photo Crops to cut a 4x4 photo into a 4x4 circle and stuck it in a 4x4 square protector to create a page with a bit of depth from the empty space around the photo. Layers are so much fun in a mini album and that empty space is a great way to add some in. I added some alpha stickers and a word sticker along with a little tab on the edge from the Combo Sticker sheet.

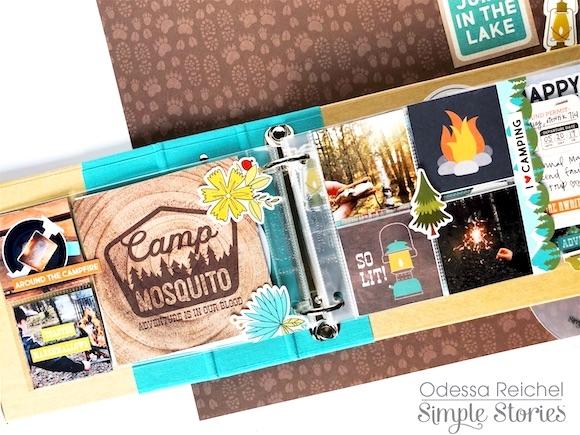
I like to mix in lots of different photo, page protector and journal card sizes in a mini album as well and this page has a bunch! There are some mini 2x2 photos along with a 4x4 journal card on the  left. I used some of the stickers from the Happy Trails Combo Sticker sheet on the outside of the protector so they went over the edges of the pocket for a bit of fun. 

On the right side I cut down 2 of the 2x2 pockets on the page protector so it was square and filled it with some fun 2x2 campfire photos and journal cards. I stuck a chipboard sticker right in the middle of the pocket and then used the scalloped border from the Combo Sticker sheet on the edge for some more layers! I like to add things to the edge of smaller protectors to make them a bit more obvious.

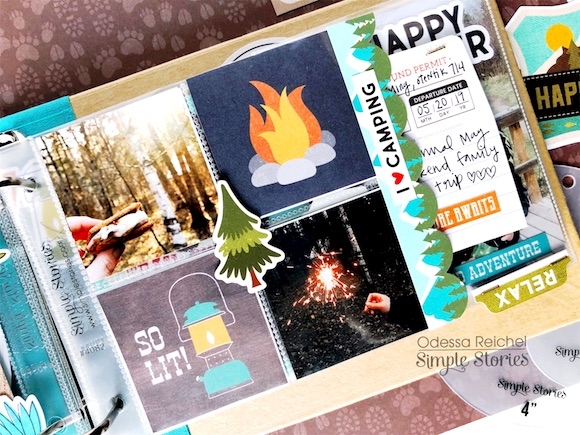
On the other side of the smaller protector I cut a 4x4 photo into smaller squares and put them in the protectors for a tiled look with some phrase stickers and a chipboard sticker. I also used a Photo Flip on this page. I really wanted to include the campground permit from the Bits & Pieces so I placed it floating in a 3x4 Photo Flip with a little Happy Trails tab sticker on the bottom to make it more interactive.

On the other side of the floating embellishment I cut down a piece of Happy Trails cardstock to the same shape. When it’s flipped up it reveals a cute photo of my boys.

Here’s another spread with a cut down protector to get 4- 2x2 squares. I used one of the beautiful 4x6 Happy Trails cards on the page because it was just so perfect and then filled my squares with photos and 2x2 cards. The lantern banner is put on top of the protector so it extends over the top and even over the hole of the page protector.

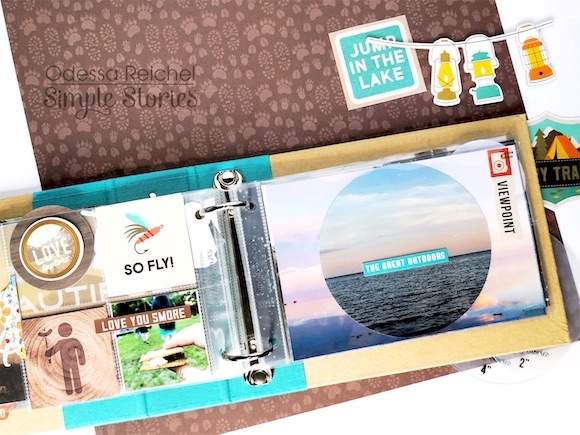
On the other side is an obligatory smore camping photo with some fun puns next to a full 4x6 photo. I had a ton of beautiful sunset photos from a perfect camping spot right next to a huge lake. I used two in this pocket by using a Circle Photo Crop to cut another 4x4 circle and then laid it over a regular 4x6 photo. I used some simple phrase stickers and Bits & Pieces to add some words to the page.

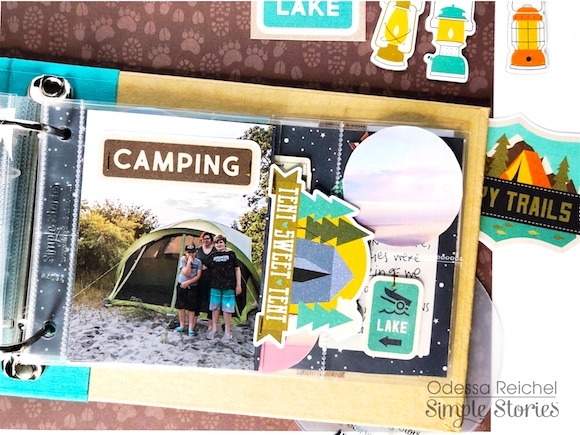
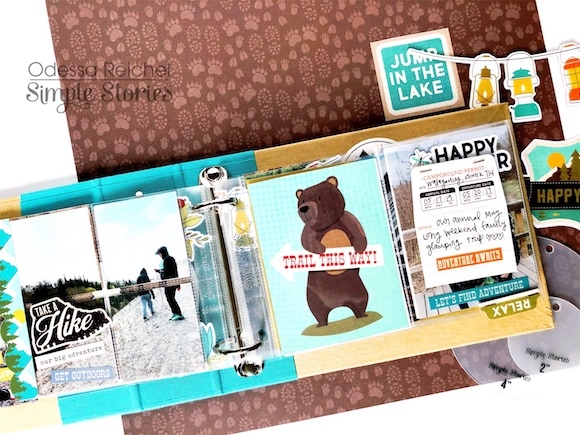
I really like the single 3x4 photo pockets for the 4x6 albums. I put a nice photo of my boys and I in front of our trusty tent. I really wanted to use the Tent Sweet Tent embellishment from the Bits & Pieces but it was a little large for the photo. I decided to use it as a tab and cut down some Happy Trails cardstock to the same side and attached them like I would tabs. I really like how that turned out! There are so many layers peeking out here, I just love it!

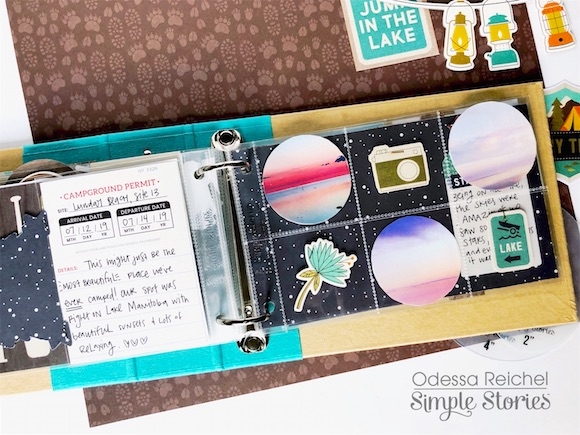
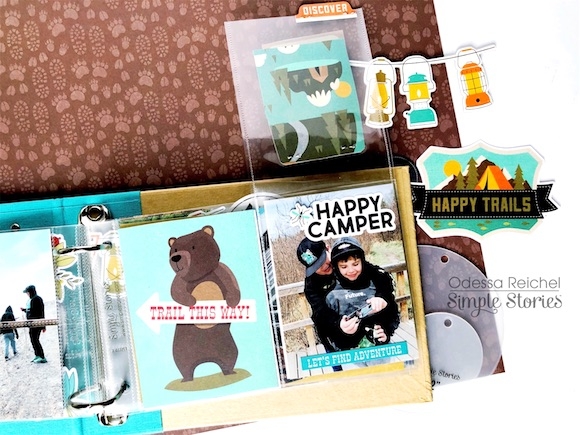
On the other side I used the Campground Permit journal card cut from the Happy Trails cardstock next to a ton of cute sunset photos! Like I said, I had a bunch, so I took some of my favourites and used the Circle Photo Crops to make a bunch of 2x2 circles to put in the pockets. I added in some various Happy Trails embellishments in the empty pockets with nothing around them to get a fair bit of the next page peeking through. I used the reverse side of the Happy Trails 3x4 Elements Cardstock for some night sky vibes as a good background for my photos.

I hope you enjoyed this peek in my mini album and that I’ve inspired you to have some fun with different photo sizes, shapes and layers!

Supplies

Hello Friends!

It's Kristine Davidson here to share a layout with you! I created this "Creepy" Layout using the Say Cheese Halloween Collection. The colors and pattern designs in this collection are so perfect for those spooky pictures!

I used the Spooktacular paper for the base of my layout. I could have used a black piece of cardstock but I find that using a piece of paper makes a cohesive page with the other patterns. I then layered some different pieces on both sides of the 6x12" (Orange with Bats) Frankly Frightful paper. You can add a variety of colors on your layout using this collection. This combination was my favorite.

Once my base of papers is adhered to my page I start decorating with some Bits & Pieces. I used bats, stars, bottles, and a few more extras to make this picture stand out.

I really couldn't help myself and add a little witch to my layout. I find these to be soooo cute. She was perfect for that space ;)

I added a 3x4 element card to my page. This can be any of the great selection from the Element papers. I used this one because it really went well with my journaling and the photo. I did trace the edges with a black marker to have it blend better with my black details.

I hope you like my page and anxious to create your own Halloween Page! Come visit us on Social Media because we love sharing more Simple Stories pages with you.

Supplies

Hey y'all! It's Courtney here! Today’s layout is made with the amazing Happy Haunting line. How fun is this line? When I saw it I knew exactly what picture I wanted to use.

For this layout, I cut out 2-inch strips that varied in length. After that, I randomly placed them on the background page which is Utterly Spooky. I used a few different pages for the strips. I used both sides of Hocus Pocus, Fright night, Bootiful, and the 2x2 elements. I used some black crate paper, the bat border sticker, and the spooky house border sticker to add some different dimension and texture to my pattern.

All of my clusters we're a mixture of the chipboard, the combo sticker sheet, the icon bits, and pieces, and the Happy Haunting journal pieces. I embellished each cluster with the small enamel dot from the Spring Farm House collection. I added a tab, tiny word sticker,   and a flower to my photo from the combo sticker sheet.

I hope you are inspired to use this collection!

Supplies

Pages