February 2016 Blog Posts

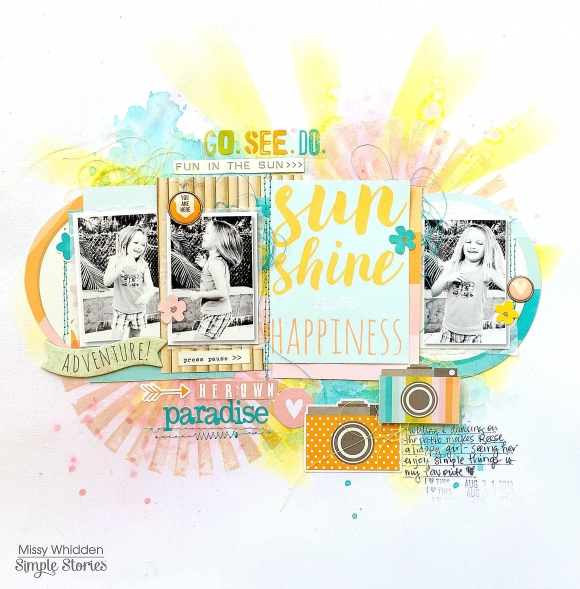
Hello everyone! Chantalle with you with today. It’s great to be back on the blog with two pages, which both have one of my favourite family photos. It’s so rare that we get a good one of all of us (I’m usually the one behind the lens!) but it inspires me to just grab a passerby to snap a quick shot - you never know, it could be a gem! As you will see below, it’s amazing how a simple colour scheme can influence the feel of a photo.
 
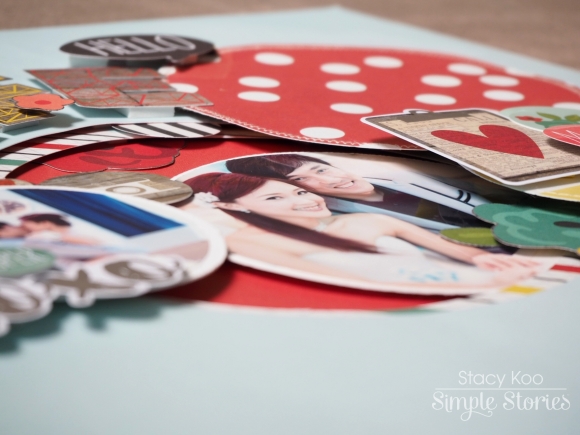
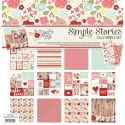
In my first page, titled ’Live, Life, Love’  I’ve used the gorgeous Life in Color. I am continually surprised by this collection. Each time I look at all the elements, I find something new to drool over! I’ve really embraced the artistic side to this line, drawn to just creating freely, knowing it will all coordinate perfectly.
 
 
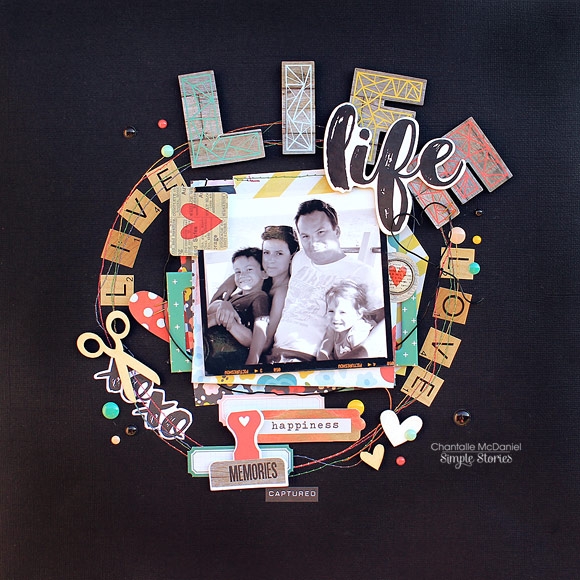
At a very busy time in our family’s life, I am being reminded that we need to hold on tight to each other. The circle of life goes on and on! I’ve used the letters in the Bits & Pieces pack to spell out the word ‘life’ and then reiterated the idea with a chipboard sticker with the same word. 
 
 
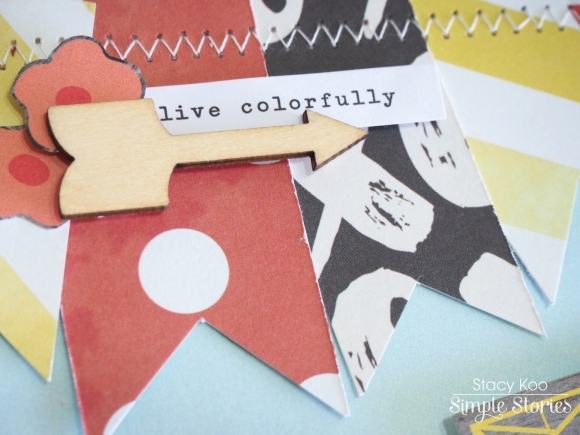
Lots of layering is contained within some machine stitching. Sn@p! cards are an easy way to create a stack with minimal effort as they are pre-cut and ready to go. I’ve used some rainbow thread which is so striking against the black card. Tip: Makes your chipboard frames literally stretch further by snipping them in half.
 
 
The heart is fashioned out of some thin flexible wire. I’m loving this textile at the moment! It adds a sense of delicate grunginess to the page.
 
 
One heart-shaped wood veneer has been painted white so the two don’t blend in to each other too much. It’s tricky to see in this pic, but the happiness tag, with its lush silver foil, co-ordinates perfectly with the black and white photo.
 
 
************
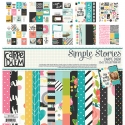
In this page you can see what a difference it has made by removing the dark frame and focusing more on the lighter areas of the photo! Carpe Diem was a great choice for something fun and vibrant. I keep seeing lots of large letters around at the moment and they look fabulous! I had to try it out for myself, so I cut the title out using my Silhouette Cameo. Behind the letters, I have filled the spaces with different elements, trying not to take away from the words themselves too much.
 
 
Behind the word ‘My’ we have some super cute ‘Fist Bump’ paper. I’ve played with the dot pattern, popping some circular cardstock and chipboard stickers over a few of them. I’ve also applied a good dose of Glossy Accents over some of them so give them a nice pop of height and shine.
 
 
Inside the ‘F’ of Family, I have gathered lots of hearts from the collection. Tip: It’s always a good idea to add a bit of extra adhesive to chipboard stickers, just in case.
 
 
Inside the ‘M’, I have used some alphabet stickers from the Expressions cardstock sticker sheet to spell out the word ‘family’ repeatedly.
 
 
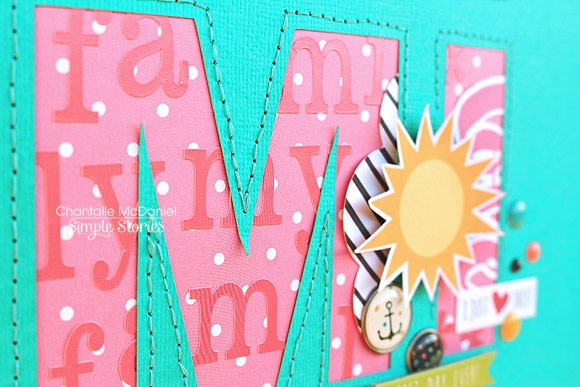
Bits & Pieces are also tucked inside the letter, with a bright sun topping it off. This was hand cut from a sheet of ’Total Chaos’.
 
 
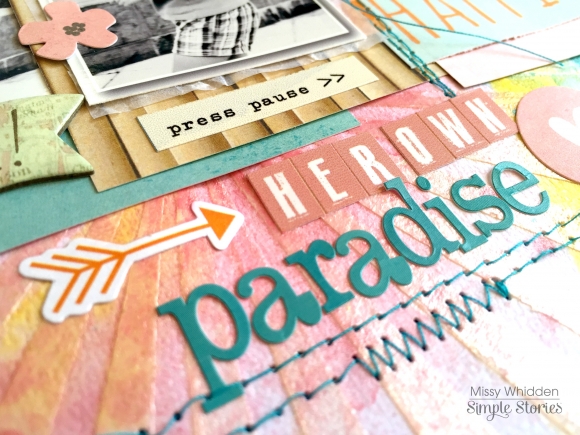
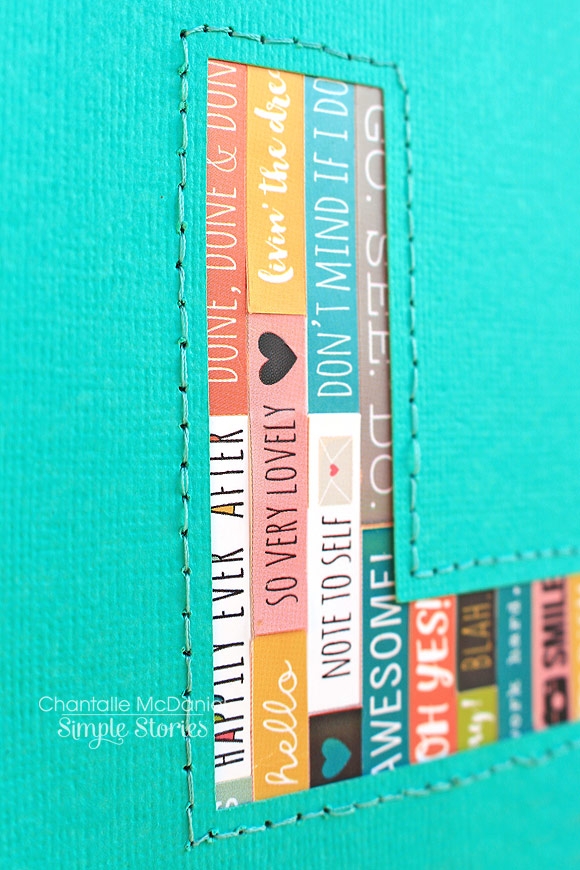
For the ‘L’ I have used lots of little phrases, also from the Expressions cardstock sticker sheet. I really loved the mixed up effect of all the different letters and their contents but I felt it needed something to bring it all together. Enter a very slow and painstaking backstitch! It really was worth the effort I think, adding a bit of texture and unifying the elements.
 
 
Thank you so much for stopping by today. I look forward to sharing more with you again soon!

Supplies

Hello everyone! I’m Stacy Koo and I’m sending sunshine from the far end of the globe – Singapore!

It is such a thrill joining this team of talented ladies and working with my favourite brand of papers! I am excited to share my first project as a Simple Stories Creative Team Member today!

This same year marks another milestone for me. I recently got engaged with my boyfriend of 9 years and now embarking on a journey as husband and wife. With the traditional wedding coming up in another 4 months’ time, I am kept super busy with the preparations and decorations! We registered our marriage earlier in May 2015. I wanted to document down this set of memories, and in the following layouts, you will be seeing some of the photos taken during the ROM.

Life in 2015/2016 is showing me lots of new challenges and milestones completed. “Life in Color” collection from Simple Stories must really be the answer to my layouts’ needs! I love the vivid colors of the collection very much!

This is my first layout which I have concentrated on circular elements as the main shape of focus here. 

Started working on the negative space behind the light blue pattern paper, and then decided that I wanted to work with the positive side as well. This page comes up a little more bulky than usual because of all the 3D formations, but it works for me fine. 

On the positive spaces, I layered the elements with different depths to create more visual effects. After cutting the circular shape for the pattern paper, I also added sewing details to enhance the shape. Since this ROM took place in May, I added in the circular month as part of the embellishment detail. I love the “Bits and Pieces” pack in this collection. Simple Stories has filled it with so many choices and I am spoiled! 

See what I meant about the bits and pieces pack? Add the little piece “Today” with the memories tag in the “6x12 Chipboard pieces” and the embellishments start to hook up in amazing coordination! 

Finally, because the pattern papers are so attractive, I decided to make a little banner strip right at the top corner of the layout, to showcase the vivid colors and complement the rest of the elements.

************

On the second layout, I decided on a cleaner grid page. After printing out all the photos, I noticed that these 2 photos had a significant complement to each other. It seems like my husband and I were looking at each other when the photos were placed side by side to each other. Hence, I decided to use a more grid form to this layout.

In addition, I was inspired by “Life in Color – Happy Little Moments” pattern paper. The triangular concept of the paper appealed to me and I started the arrangement of embellishments with the triangular cut in mind. 

I wanted to create some white space around the photo. Hence, to make it more prominent, I used a black marker pen to doodle some dotted lines to create emphasis on the main layout elements.

To top things up, I added some enamel dots scattered all around the layout. It helps to fill up the empty spaces yet not cluttering. I love the multiple colors and sizes of enamel dots in the series. Play along with different colors and sizes to create more (yet simple) attraction to your layout!

Hope you liked these layouts that I have shared with you today!

Hi, I'm Violet and I am a planner Addict! I am so excited to share with you how I have been using my Aqua Carpe Diem Planner. I used several  embellishments and packages from Simple Stories to make bits and pieces to add to my planner in a creative way. I am honored and thrilled to be chosen for the Simple Stories Creative Team. I want to say a great big thank to everyone who is involved in this process and allowing me this opportunity. Now, let the planner Fun begin!
 
One of the easiest accessories you can make or add to your planner are paperclips. They are fun and add character. I used the Carpe Diem and Life in Color self-adhesive Bradz, chipboard stickers and frames, by simply glueing them to a paperclip.  You will also spot the Carpe Diem Plastic decorative Clips.
 
 
For the Love of pockets! I used the Carpe Diem Snap Pack 3x4 cards to insert in the pockets to add some more color. Tucked safely in the large pocket is one of my favorite Carpe Diem Snap pages. Now this was the fun part, I placed the paperclips I created inside the pockets to give it some extra charm. Speaking of charms, notice the Carpe Diem chain of charms, dangling from the top of my planner, it makes my heart skip a beat.
 
 
Lets talk about the Carpe Diem sticky note bookmark. I was so inspired by this that I decided to make some extras. I used the Carpe Diem 12x12 designer cardstock paper and stickers. I traced around the original bookmark and added stickers to the top to work as a tab and laminated them. How cute and adorable and a great way to mark my spot in my planner.
 
For the  second week of February I couldn't wait to decorate my weekly pages. I used the Simple Stories You & Me stickers, and punched hearts out of the 12x12 cardstock paper and glued them to the pages. The Carpe Diem Word Label, icon and calendar stickers are a perfect way to keep track of my appointments, schedules and everyday activities. 
 
 
Valentines is my favorite holiday because of the colors and what it represents.  My pocket spread consisted of You&Me and Life in Color double-sided signature element pieces. 
 
 
My current planner set up is bright and happy and full of wonderful events. I keep track by using the Carpe Diem word label, icon, calendar and Insta Quote stickers. I lined the bottom of my planner with a thin layer of You&Me scrapbook paper and punched flags out using the same paper to add some character to my weekly pages. I love to outline everything because it makes everything pop and by adding enamel dots to the stickers it adds that special element of planner cuteness.
 
 
I truly enjoyed this month and all it has brought me. 
 
 
My second granddaughter was born and I celebrated my 20th wedding Anniversary. My son will be celebrating his 3rd wedding Anniversary and we will be celebrating my daughter-in-law's birthday this week. 
What a joy it is, to be able to plan such special events in my Aqua Carpe Diem Planner. Thank you to everyone who took time to stop by the blog. You can find me on Instagram @imvintagerose and www.imvintagerose.blogspot.com


Supplies

Hey there, friends!  Missy here with my very first blog post as a Design Team Member!  I’m beyond excited to be working with such talented ladies and such amazing products.  I decided to work with the You Are Here collection for my projects.  I love creating layouts, and I love incorporating die cuts and mixed media into my designs.  I also wanted to show how this collection can be used with color photos vs. black & white photos and also travel vs. non-travel photos.

For my first layout, I used a color travel photo.  My husband and I vacationed in St. Maarten right before New Year’s, and we took a day trip to Loterie Farms.  We went hiking, zip lining and ran through a fun obstacle course.  The photo in this layout is of me walking on a high wire in between some trees.  It was a first for me, and I can’t wait to do it again!  I wanted to create a “forest” feel, so I cut a background die cut pattern of leaves.  Behind that, I used white gesso and some blue spray inks to create a watercolor look.  I wanted to bring that bright blue into my background.

I layered a few papers from the 6x6 Paper Pad under my photo along with some tissue paper from my stash and added pop dots.  I love all of the fun die cuts in the Bits & Pieces pack, and this flower was perfect to layer here.  One of my favorite techniques is to add tangled thread under photos, papers and embellishments.  I think it creates awesome texture and gives an extra pop of color.  This cute brad was the perfect addition to this part of the page.

I love that Simple Stories gives such a variety of sizes in embellishments.  I found a large, medium and small flower embellishment to layer all together here.  And there are always so many colors!  This made it very easy to bring in all the colors of my layout to this area.

The bright orange alphas were perfect for creating my title, and I paired them up with the smaller blue alphas.  I love that you can get a few different colors & fonts on one sticker sheet.  I ran this through my sewing machine here, and then added another brad and a few sentiment stickers. 

Here’s one more close up of the leaf die cut.  I love the pop of green, and I like how it gives my background some interest without being overwhelming.  The leaves tie into my photo and create a nice tropical and jungle feel.  And this patterned paper cut beautifully in my Silhouette Cameo.

***********

For my second layout, I am using three black and white photos of my daughter twirling and jumping all around our patio.  She’s a special little girl, and she loves the simple things in life.  Sometimes she just looks so happy doing her own thing, and it made me think of how she creates her own little paradise here at home.  This collection showcases my idea very well.  As I said earlier, I love mixed media.  I used two different sunburst stencils.  I used a light pink texture paste through the small one and some yellow distress ink through the large one.  I also used blue and pink spray inks to create the watercolor effect.  This is a great way to create your own background.  I chose colors from this collection, so adding layers and embellishments was easy.

Here you can see the texture on the background and the pretty mix of colors.  I used several of the 3x4 SN@P! Pack cards.  They are excellent for layering and even fussy cutting.  I mixed and matched the pink and blue alphas for my title here and added some machine stitching.  I also added in a chipboard piece and a sentiment sticker.

Here’s a closer look at that cute chipboard banner piece.  That orange and pink circle element was cut from one of the Snap cards.  I love that these are part of the Simple Stories collections…you don’t always have to have 12x12 or even 6x6 papers sometimes!

Here’s the top of the layout.  You can see the SN@P! cards layered together and the color & texture above them.  I also used one of the Clear Stickers at the top.

Here’s one more photo of the top of the page.  I absolutely love the Simple Stories brads!  I love that they’re adhesive and stick well anywhere on your page.  I stuck this one right on top of my photo.  Once again, I added a few colors of tangled thread for extra texture and pops of color.

Thank you so much for stopping by today!  I hope these layouts inspire you in some way.  See you soon!

Hi there!  It’s Shei on the blog today, sharing my first Simple Stories post! I’m beyond thrilled to be part of an amazing team of talented ladies!! Let’s get started!  For my first layout I used the new Life in Color collection. I really like this line ‘cause it’s gorgeous and versatile. You can use it to document any theme.

I chose white cardstock as my background. I love the brightness that the white color brings to the whole project. One of my favorite Simple Stories’ embellishments are the chipboards frames, so I used them as my starting point. I chose seven frames with different sizes and I distribute them without apparent order, adding dimension with dimensional adhesive. Before that, I glued my picture and some paper pieces (Big Memories b-side paper, Happy Little Moments paper and one card from 3x4 Journaling Card Elements paper) on b-side of some frames.

Once I had the frames glued I stuck my tittle “Love, laugh, live”. I used the Scrabble words from Simple Stories’ Fundamentals Cardstock Stickers ‘cause I fell in love with them when I first saw them.

Next came the embellishing! (my favorite part). For that I used flowers, hearts and arrows from Fundamentals Cardstock Stickers and some stickers from 4x6 Sticker Sheets (I really love the black & white word label stickers). I also added another favorite Simple Stories embellishment - the self-adhesive Bradz (what a wonderful idea these Decorative Bradz!).


The next layout I’m sharing with you today was again created with the beautiful Life in Color collection. I started this page drawing a cross on a white cardstock, so the background was divided into 4 parts. Then I used three papers (the b-side parts of Happy Little Moments, The Good Life and So Much Happiness papers) to cover three of its four parts.

I glued my picture on the intersection of these patterned papers and I created a cluster of embellishments with flowers stickers from 4x6 Sticker Sheets and Fundamentals Cardstock Stickers. I also cut some flowers from 4x4/4x6 Vertical Elements paper. 

I used different elements for my tittle. The picture of my boyfriend and me was taken some months ago at childhood friend’s wedding. I wanted to document these fun moments I’m living with him, so I wanted to use the word “Enjoy” in my tittle. For that I used the Expressions Cardstock Stickers and I added a sticker from Fundamentals Cardstock Stickers with the sentence “happy little moments”. I also added a heart sticker from Fundamentals Cardstock Stickers behind the tittle.

Again, I used my favorite Simple Stories’ embellishments, the Bradz, to accent my journaling and a frame (half frame in this case) added at the bottom of the page.

Thank you so much for taking the time to read my post! I hope you enjoyed my layouts! See you next month!

Never stop smiling! Kisses!!

Hi Everyone! This is Jennie with my first Simple Stories post! Even though I still have to finish a few spreads on my 2015 album I decided to jump right into 2016 with Carpe Diem!


My daughters and I loved the puppy with flowers so I had to use it in our cover! That doggie might be my favorite image from this collection. It has been my favorite since the Carpe Diem Planner Collection came out!

 
This year I decided to use photos of the family in the intro and to frame them I used the Carpe Diem Chipboard Frames. At the bottom I added the Washi Paper from Life In Color and our names using the smaller alphas from the Expressions Cardstock Stickers.
 
 
I also wanted to share my first spread of the album! In this first week I always share my goals for the year. I also took a screen shot of my Goodreads challenge for the year which is to read 20 books.
 
 
Here is a close up of the left side and a few photos of my toddler driving and terrorizing the village. I love to use the die cuts or stickers in the center of these collages and that circle was perfect! Last year I promised to use my handwriting more often and I’ve done quite well with that promise. It might not be super neat but I want future generations to enjoy my handwriting as I enjoyed my mother’s. It also takes less time than typing.
 
 
One of the supplies I use up way too fast are alpha stickers. I love to use them on my weekly title cards. This first week was kind of confusing because according to the EpochConverter (which is what I use to track my weeks) the first week started on January 4 and that is why I added 0.5 in the title. I don’t like to add those days to my past album and I had to document those first days of what promises to be a crazy year.
 
 
These are my goals for the year, ironically I’m failing at sleeping more. I love these little pencil stickers! I’m so happy they made a scrapbooking version of this line because when I saw the planner version I wished I could do pocket pages with it and now that I get to do that it’s even better than it was in my head.  
 
 
 I like to leave extra space in my photos to add little sprinkles like the phrase sticker in the Expressions Cardstock Stickers or the Clear Stickers like the ones I used around my daughter.
 
 
I am so happy about these self adhesive Bradz! I loved the look of brads but the prongs used to drive me bonkers!
 
 
I am so happy to be a part of this team! Can’t wait to share the rest of my year with you! Have you started your 2016 album? If you want to share your Pocket Pages using Simple Stories make sure you share it with us! Tag us on Instagram @simplestories_
 

Hello planner friends! Leah here and I am so excited to be a part of the Simple Stories Creative Team this year! I cannot wait to show you how I have been using the products from the Carpe Diem Scrapbooking Collection to customize my platinum Carpe Diem planner.

One of my absolute favorite things to do in a new planner is setting up the front pockets. I love to create fun pieces to decorate them with so that when I change up my front pockets later, I can use the decorative pieces elsewhere in my planner. The Simple Stories Carpe Diem Scrapbooking Collection offers all sorts of beautiful embellishments to get crafty with, like washi paper tape, ephemera bits and pieces, chipboard frames, stickers and a SN@P! Pack full of goodies! I layered these embellishments to create the little cards you see below. 

The floral details in the Carpe Diem Collection are my favorite! You can see that those florals tend to find their way onto everything I have made here. I love using the paper washi tape as a background to the Word Label Stickers, it really makes the motivational messages pop off the cards! I also used a few of my paper punches to cut out some patterned papers from the 6x6 Paper Pad and then used those shapes to add layers to the cards.

Now time to get all of these pretties into the pockets! 

Most of the embellished cards just get tucked into the pockets like you see above. However, I wanted to put the card with the coffee cup in the bottom pocket and I wanted it to be fully visible. In order to do that, I took a scrap of paper I had punched earlier and glued it to the back of the coffee card to create a flap that I can tuck into the bottom pocket, so the full front of the card would remain exposed. 

Above, you can see what the pockets look like fully loaded! I use a Glue Arts GlueGlider Pro+ loaded with a repositionable tape cartridge to secure any pieces that might feel loose, but any non-permanent adhesive tape will work to help keep everything in place.

Another simple way to add a personalized detail to your planner is to add or change out your planner charm. Each Carpe Diem planner comes with one metal charm already on the strap, but the Carpe Diem Collection has a set of four metal charms you can buy to customize your planner even more. Did you know that the Decorative Bradz from all the new Simple Stories collections have a top row of brads that are the exact same size as the circle Carpe Diem charm? Of course, I chose the gorgeous flower brad from the Carpe Diem collection and stuck it to the flat side of the charm. 

All that was left to do to finish customizing the front of my planner was to stuff the front secretarial pocket with a bunch of super cute planner stickers for on-the-go planning. I also cut down my favorite 12x12 floral paper from the collection to use as a front dashboard and voila! Here is the full view! Hop on over to my Instagram account if you would like to see more of the projects I have created using this charming collecton from Simple Stories!  


Hello everyone! Marcia here today with some layout inspiration for you. My cutie patootie nephew recently celebrated his second birthday. I couldn't wait to scrap this picture of him using the new Simple Stories Let's Party collection. Take a look ...


I just adore this background paper with the two party goers on it and I didn't want to cover them up, so I created my photo and embellishment cluster in the opposite corner. Here I layered papers, stickers, chipboard stickers, decorative brads, bits and pieces die cuts, and some fun enamel dots.


The Number "2" is a Pocket Piece, it was designed to fit into a pocket page. I thought it would be fun to include on a traditional layout too. These pocket pieces have different colored dots on them which work really well for embellishing with the enamel dots.


I love adding a little dimension to my layouts by using foam tape underneath some of the stickers and bits and pieces die cuts.


My second layout is also from a birthday party, but not a kid party. We were celebrating my Dad's 75th birthday, my niece's 30th, my daughter's 24th, and my nephew's 18th at Twin Cities Whirlyball. What is Whirlyball? Think of lacrosse in bumper cars. So Much Fun!! Since the bumper cars were yellow and red, I decided to use the new Simple Stories Life In Color collection. I really love how versatile this collection is.
 
 
I had a lot of photos and wanted to include as many as possible, but I did not want my layout to look crowded. I opted to die cut a film strip using my Silhouette that I could frame some smaller photos in. I pulled other camera elements from the Life In Color collection to coordinate with the film strip like this decorative brad and the cameras on the washi paper tape.


I tucked a couple tags under my photos in the upper right. This is a fun way to hide more journaling. Along with the tags is a clip I embellished with another decorative brad.


I included one more chipboard sticker camera in the lower right under my journaling. The washi paper tape is so fun to use. I added another red strip here to draw in the eye.
 

Thanks for stopping by today.

Supplies

Pages