August 2019 Blog Posts

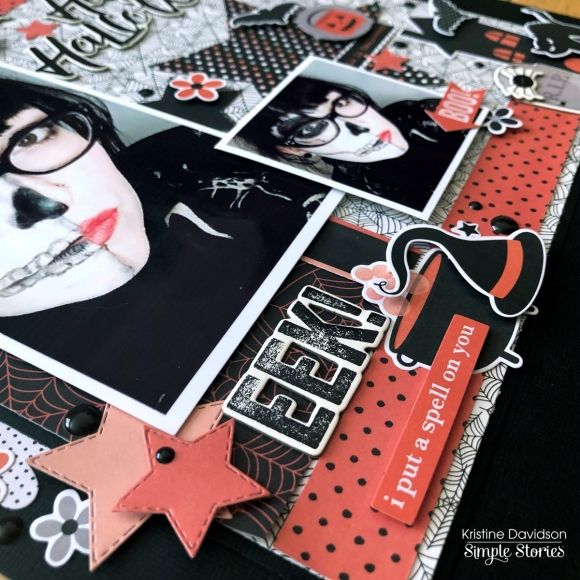
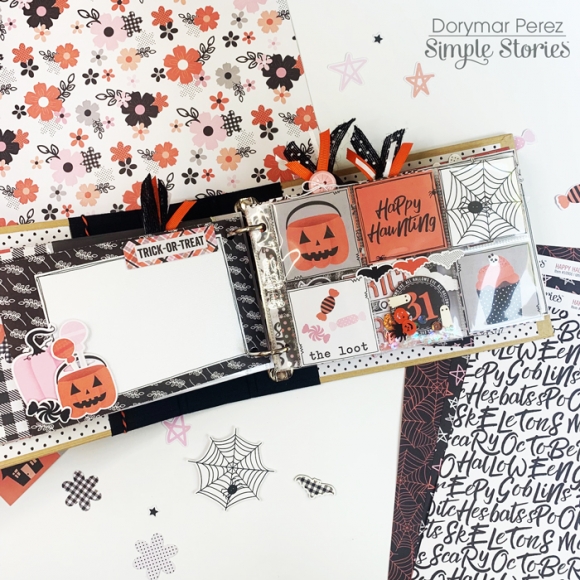
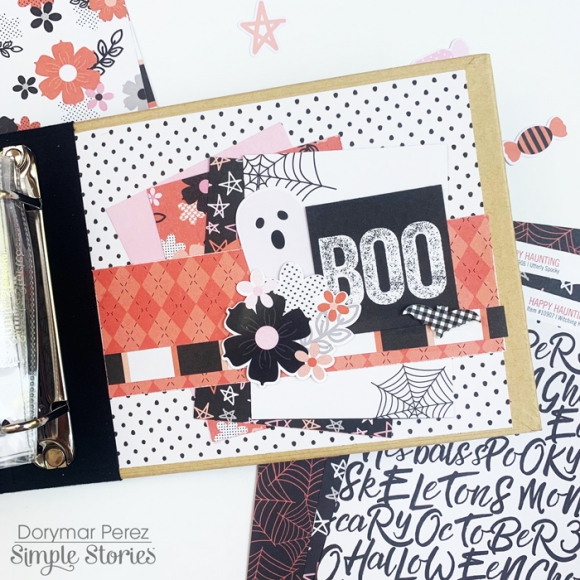
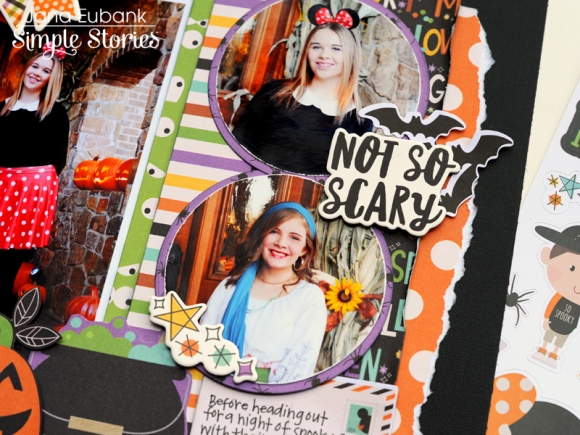
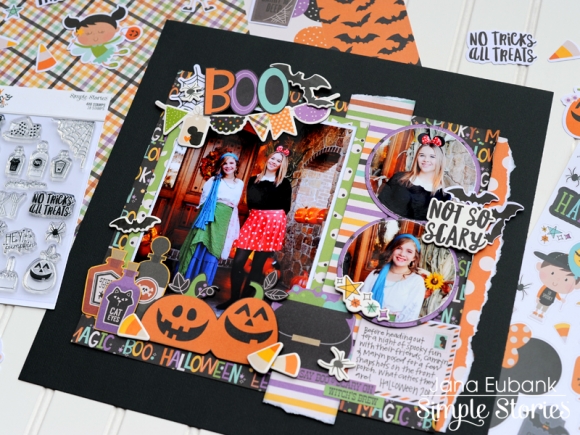
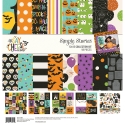
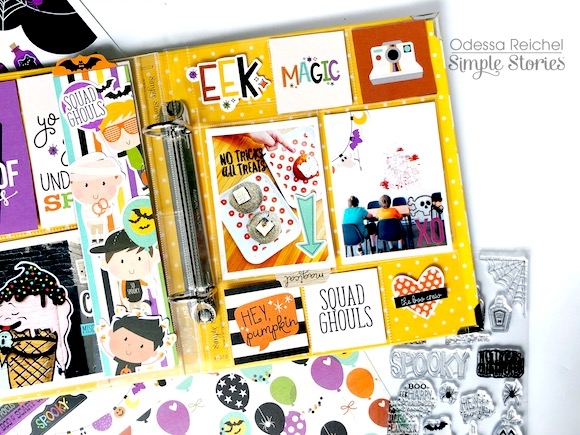
Hi! Odessa here with a cute SN@P! layout using Say Cheese Halloween. I paired my layout with the Yellow Designer binder because I love the polka dot pattern on the inside and the yellow goes great with the spooky colours in Say Cheese Halloween.

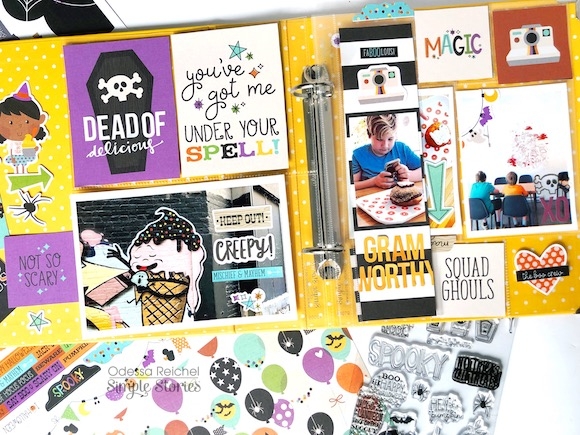
The colours and icons Say Cheese Halloween are so fun and playful, so I had so much fun putting this layout together! I’m really into adding interactive elements to my pages lately so there is a photo flip as well as a little protector strip that’s kind of like a bookmark. Around it are lots of cute photos and journal cards from Say Cheese Halloween.

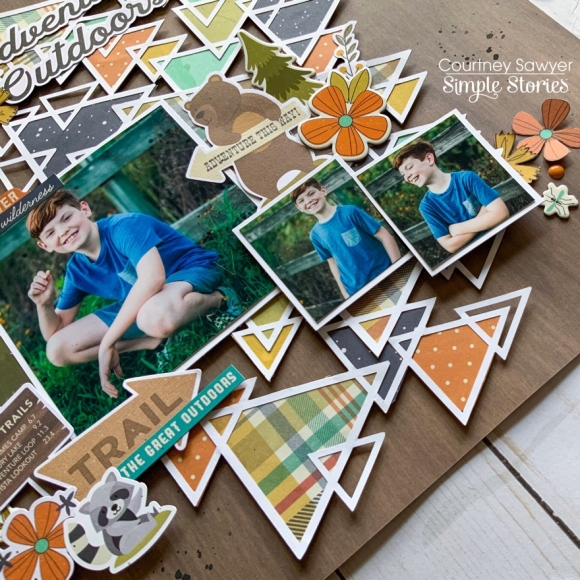
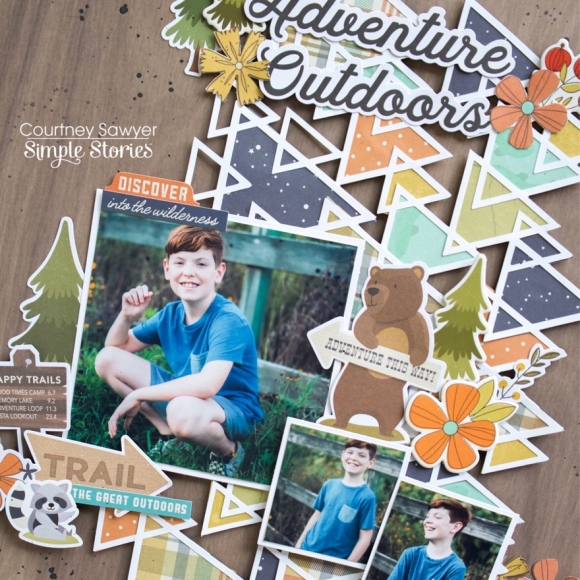
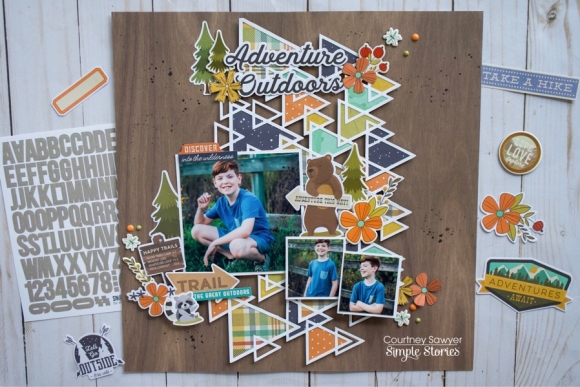
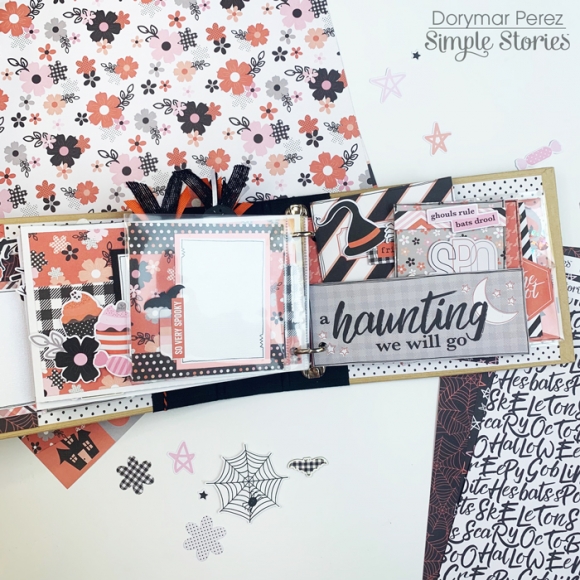
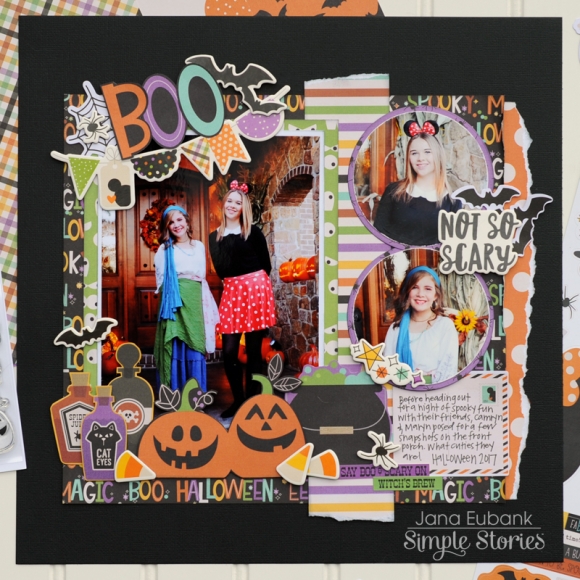
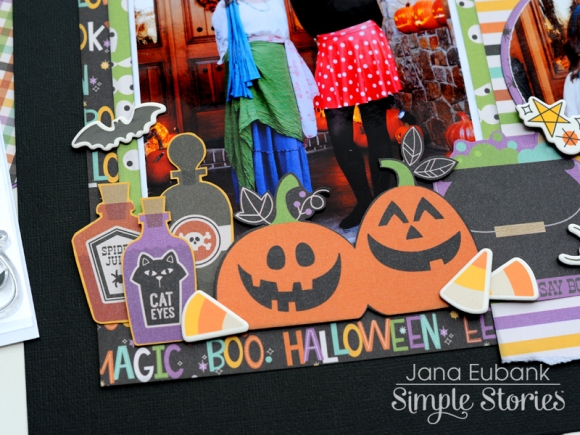
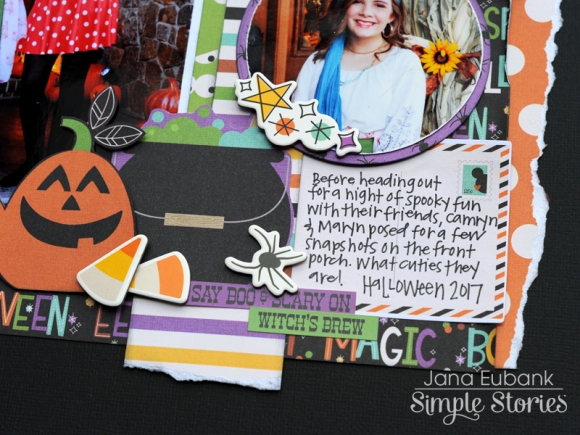
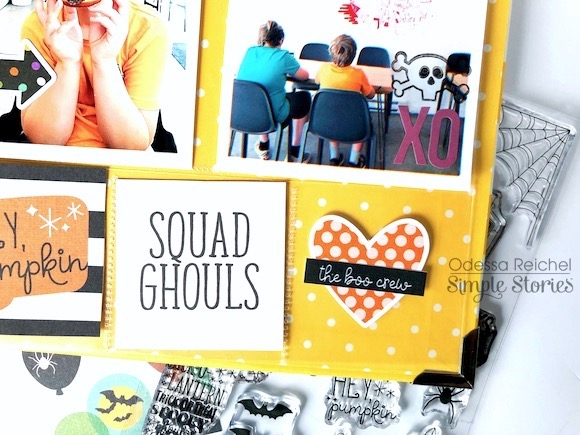
On this page I used a couple of the journal cards from Say Cheese Halloween and a photo from the adventure I was documenting with my kids. I embellished simply with word stickers, stickers, embellishments and alpha stickers to tell my story in a bold graphic way that matches the collection.

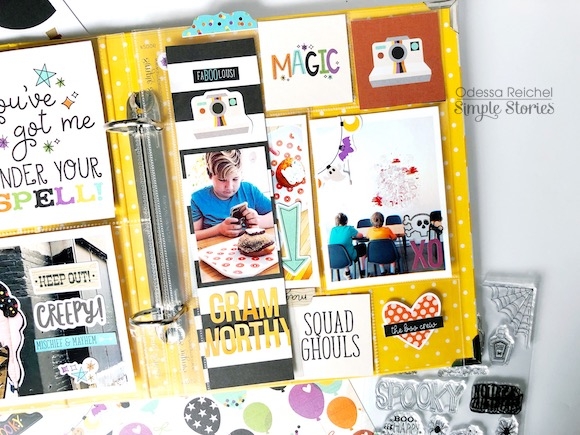
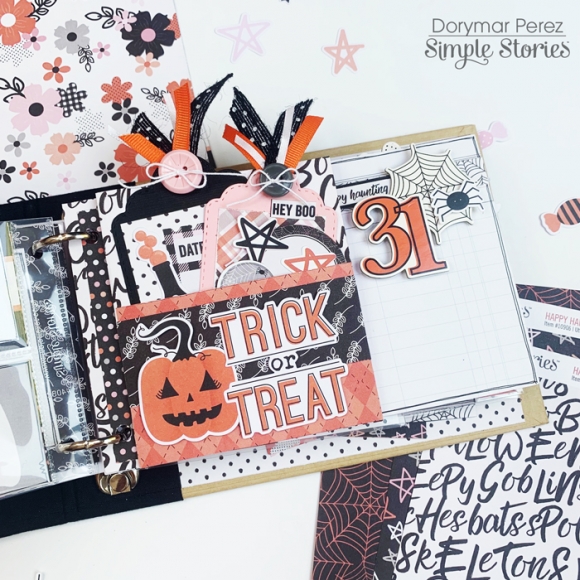
In the middle of the layout is one of my current fav elements. I use the Page protector with a long 2x8 strip with two 4x4 pockets. I cut off the 4x4 pockets to make a long strip that’s kind of like a bookmark in the middle of the page and fill it with fun! I put a photo I really liked in it on the black and white stripe of the Frankly Frightful cardstock and added some stickers to finish it off along with a tab sticker on the top.

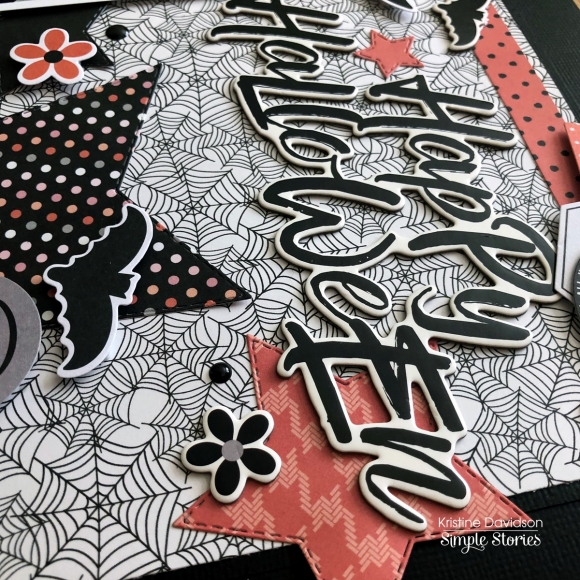
On the other side of the 2x8 sticker I layered some of the adorable kids from the Say Cheese Happy Halloween Kids Bits & Pieces that reminded me of my boys. Adorable!

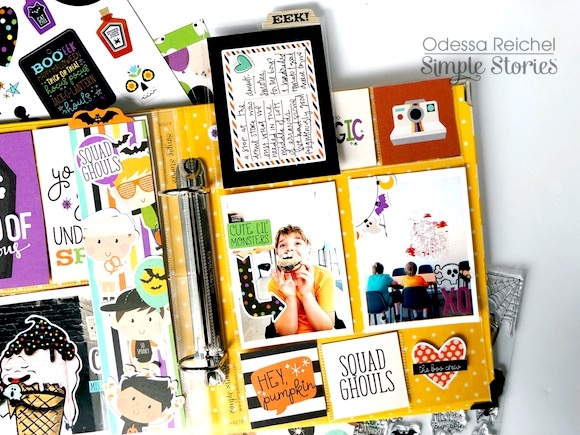
I really really like the Photo Flips. They might be one of my favourite Simple Stories accessories and I use them a ton! They’re great for adding that one extra photo to a layout that you couldn’t fit in the pockets or adding more dimension to a story. Under our doughnut photo I squeezed in some journalling and a photo of my son in full donut bliss.

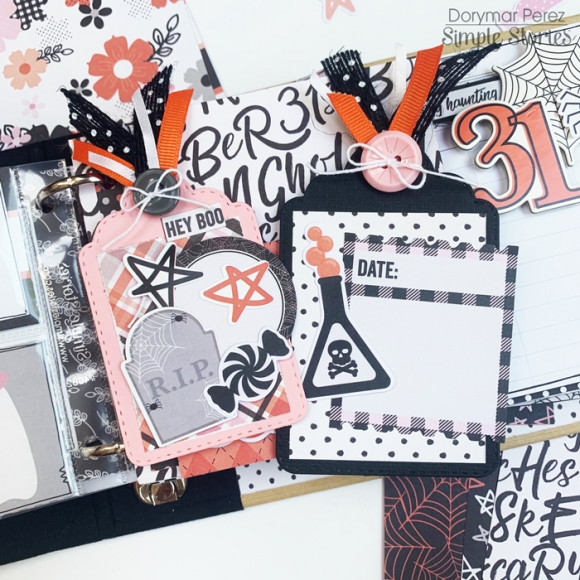
I filled the little 2x2 pockets on the page with some cute embellishments and journal cards. Say Cheese Halloween is such a fun collection! I didn’t have any great recent Halloween photos to use so I used the collection with some everyday photos and love how they worked together. Everyday can be Halloween!

Supplies

Hello Friends!

It's Kristine here today and I'm sharing a Halloween Layout I created using the Happy Haunting Collection. This collection contains some great Halloween colors such as black and orange but throw in a little pink and you have a collection that can be used for summer, fall or Halloween layouts. I chose to create a Halloween page. I used a photo of my cousin's painted face for her last Halloween party. 

I wanted to add some color on this page and kept it to the orange, black and white colors. I tried not to add pink because I'll keep those elements for another page. 

 I started created my layout using a piece of black cardstock. White was also a good option but I wanted more black on my page. I cut a piece of paper 10x10" to fit and then added some orange for color on the top and bottom.  I created some star shapes and added those on my layout using a multitude of colored papers. 

I wanted to used multi photos on this page but I only had 1 picture to work with. I printed a 4x6 and then decided why not use the same picture but smaller. I added some dimensional adhesive on the back to add dimension to those photos. 

Adding lots of chipboard pieces as well as Bits & Pieces just completes my page. I really can't go without decorating or adding clusters to my page. The little scary cat, the RIP tombstone and some bats in the mix just add lots of texture and dimension as well to my page.

I finished off my page by adding Happy Halloween with the chipboard pieces from this collection. It fits perfectly on the top right of my layout. 

To add more details I added some enamel dots and voila! EEK!! Grab this Spooky collection from your local scrapbook store and enjoy! Visit us on Social Media @SimpleStories_ and @KristineDavidson

Supplies

Hey y’all! It’s Courtney here sharing the layout that I created using the awesome Happy Trails collection. This collection was calling my name with all of the amazing colors and icons it has to offer. I’m really into the mustard yellows, aquas, and oranges right now. Here’s a look at the layout that I created.

For this layout I knew I wanted to use a cut file and I knew I wanted something like mountains or triangles to give me that mountain look. I went with a cut file that I have actually used before, but I went a different direction with it, literally. This cut file is a free file from Paper Issues and it’s called It’s Geometric. I turned it sideways and backed it with a few of my favorite pattern papers. I cut this one out in white so the colors would really pop against it. I added some dimension to the cut file with foam tape to help separate it from the background.

I printed three photos out for this layout and I was originally only going to use one, but I loved how the 2x2 photos looked with the 4x4. These pictures of my oldest are some of my favorites   and I thought the colors were perfect for this collection.  They were all matted in white as well to help them pop.

I created three clusters around my photos using a combination of the sticker sheet, the icon bits and pieces, the journal bits and pieces, and the chipboard. I added a few enamel dots from the Oh Happy Day collection along with the cute little mosquito’s to create my three. Then I finished my layout off with some black paint splatters.

I hope that you get inspired by this layout and I can’t wait to see what you create!

Supplies

Hello Simple Stories friends! The finishing line of summer is getting closer every day, but I am sure there were so many great memories to be thankful for! Anya here today and I have another mini book I like to share with you. If you've been to Disney recently, or may still have photos sitting in the box for years, this one is for you!

I've been wanting to create a mini book in the Mickey Mouse shape for quite some time and Say Cheese 4 collection seemed like a perfect fit for it! I created the shape of the mini book in the Silhouette Studio and cut all of the pages from black cardstock first.

Then, I covered each page with a piece of patterned paper that was a bit smaller in size, which I created by using the Internal Offset feature and decorated each page spread with journaling spots, photo mats, ephemera and stickers. For the cover I used a lot of chipboard pieces and some stickers. It was a lot of fun to create this one!

Supplies

Hey there Simple Stories fans! Nicole here today to share a non-traditional project using the new Happy Haunting collection! I know that this is a Halloween themed collection, but I love the pretty mix of colors and couldn't resist creating a non-Halloween themed project using this collection.

I punched several flowers from various papers in the collection, using a lot of the b-sides of the papers. To add some neutrality to the flowers, I punched smaller flowers using some simple white cardstock. I decided to adhere my photo first, overlapping the fun bold striped paper in the collection.

To finish off each flower, I stitched on a simple button in co-ordinating colors and then popped the flowers with some foam adhesive. I love how you can stretch a themed collection into an everyday one, with a simple paper punch and a little creativity!

I hope you are inspired to try a non-traditional page using a traditionally themed collection!

Supplies

Hello! It's Jennifer on the blog today to share a layout I  created with the very fun Happy Haunting! I  am a huge Halloween fan so I  always look forward to the new collections from Simple Stories!  Happy Haunting definitely doesn't disappoint with its bold prints as well as the greys and pinks mixed in with the traditional colors! And the ephemera is adorable without being too cute-sy! 

I  began with the black dot print of the B side of Utterly Spooky as my base. I  then adhered a 6x12 portion of Hocus Pocus to the top. At the "seam" of the two patterns, I  added in additional prints to layer under my photos (which I  matted onto white cardstock).  

For my title, I  used the cute "BOO" die cut from the Happy Haunting Journal Bits and Pieces as well as the floral tag you see hanging down. I  had some Halloween colored bakers twine in my stash and thought it would look cute tied onto the end of the tag. 

 I also  utilized much of the die cut flowers from the Happy Haunting Icon Bits and Pieces pack adhering them in clusters at the corners of my photos.  A few of them are affixed with pop dots to add dimension. 

Here is a close up of my second cluster of flowers. This time I  added the cute girl ghost with pop dots, as well as a pink pumpkin. This layout is for my daughter so I  decided to "go girly". However, Happy Haunting has elements that will work for feminine or masculine projects.  You can also see I  added a journaling spot as well as little sentiment stickers from the Combo Sticker sheet. 

After I  thought I  was finished with my layout, I  felt like it needed something more. I  adhered a small strip of patterned paper at the top and bottom of my page, stitched through with my sewing machine, and then tore the edges as shown. I  felt like this helped to break up the smaller patterns.  I  also added some of the smaller die cut flowers around my title accenting with enamel dots from my stash. 

Thanks for stopping by the blog!  You can see Happy Haunting in its entirety by clicking HERE!  Have a great day!

Supplies

Hi friends! It’s Dorymar with a scary cute 4x6 SN@P Album using the new Happy Haunting Collection! One of the things I loved about this collection is the mix between cute and mysterious. I adore how pink makes a triumphant entrance among the typical dark colors of Halloween.

I love the plain chipboard cover of the 4x6 SN@P because it allows me to use the collection papers to make the perfect complement between the cover and what I’ll create and document in the inside of the album.  I selected the black spine album and I  decorate it with some pieces of the collection.

I selected one of the Snap album pages as a base and match it with two stripes that I cut from the papers. Then, I extracted with a scallop die the big 31 circle from the 4x4 journaling cards.  The collection has a lot of super usable icons that were easy to decorate the cover.

I did a title page with a combination of chipboard, die cuts and phrase sticker.  As a base I cut a 4.25 x 6 piece from "To Die For" paper. All together are the perfect match!


Between pages I made some brackets and decorate it with a mix of pieces from the collection, back of these pieces you can put photos or journal and you can use it anywhere else you would like in the album.

I love to create pockets, flip and flap to give an interactive touch to the album.  In this case I love the super cute ghost of this collection, you can see the big eyelashes of the ghost girl, looks Spooktacular!  I selected one of the 4x4 cards and scored on the top to create a fun flap inside the 4x4 pocket page from the Horizontal Pocket Pages Variety Pack.

In this flap I used one of the tags from the Happy Journaling bits and pieces and match with the Spooky phrase and some pieces from the bits and pieces to decorate cluster to the photo mat, I added some ribbons and bottoms to give the cute touch that match perfectly with this cute Halloween collection. 

I really love the 2x2 pocket pages because it allows me to selected my favorites 2x2 cards and combine them with elements of the collection.   I can add messages, photos and make small shakers.

Here I did folded 4”x12” flip page, I created a small pocket with fun tags in the inside.  When you flip the page, you can find space to add photos and fun phrases from the stickers sheet.

Customize tags are one of my favorites, I really love to create my own fun embellishments using a combination of the die cuts, sticker and phrases of the collection. This is the result; they look really nice!

In these pages I used a couple of the 3x4 and 4x4 elements along with some of the stickers to create and decorate inserts to add space for journal and more photos.  It’s fantastic!

I really love to create this project with this different Halloween Collection.  Simple Stories collections make it so easy to put together in every project. I hope this project inspired you to create a fun one using this super cute Halloween collection. 

Happy Scrapping!

Supplies

It's been so much fun to see everyone's creations with the Say Cheese Halloween collection this week on the blog. Hi, Everyone! It's Jana Eubank. I'm here to finish out the week with a scrapbook page!

The colors in the Say Cheese Halloween collection are so vibrant and fun! I especially love the addition of teal and green because they go so well with my daughter's gypsy costume in the photos I'm using today.

I fussy-cut the "B-O-O" letters from th2 2x2 Elements paper to use as my title. I placed the letters across the top of the chipboard banner piece and then added a die cut web (Bits & Pieces) and the chipboard spider and bats.

I am loving the purple in this collection. I cut my photos in circles using the Circle Photo Crops and then matted them with the purple, spider-patterned So Creepy paper. I then accented the photos with the chipboard stars and "Not So Scary" phrase, as well as some die cut bats  (Bits & Pieces).

At the bottom of the page, I fussy-cut several icons from the Elements papers. The potion bottle ingredients are cooking up something interesting in the neighboring cauldron (both from the 4x4 Elements paper) while the jack-o-lanterns look on with their silly and friendly grins (4x6 Elements paper). Good thing they have some chipboard candy corns to snack on while they wait for the concoction to finish brewing! *wink*

I added journaling to the postcard die cut from the Bits & Pieces pack in the bottom right corner of the page. I then added a few phrase stickers from the Combo Sticker Sheet, as well as a chipboard spider.

This not-so-scary, colorful Halloween page was so much fun to put together! Have you thought about what costume you want to wear for Halloween this year?

Supplies

Pages