April 2020 Blog Posts

Hello Simple Stories friends! It’s Jen today with a project that has me dreaming of vacation, and what better way to those document special trips than with the Going Places Collection. I have to admit that I’ve been in a bit of a creative funk lately. Whenever this happens, I look through layouts that I have made in the past as a source of inspiration. Today’s project is actually one that I lifted from myself!

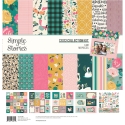
The Going Places Collection is great for any travel-themed project you may be working on. While this layout documents a trip to California in 2017, I also have plans for using the collection again for one of our trips to Mount Rainier. The possibilities are endless!

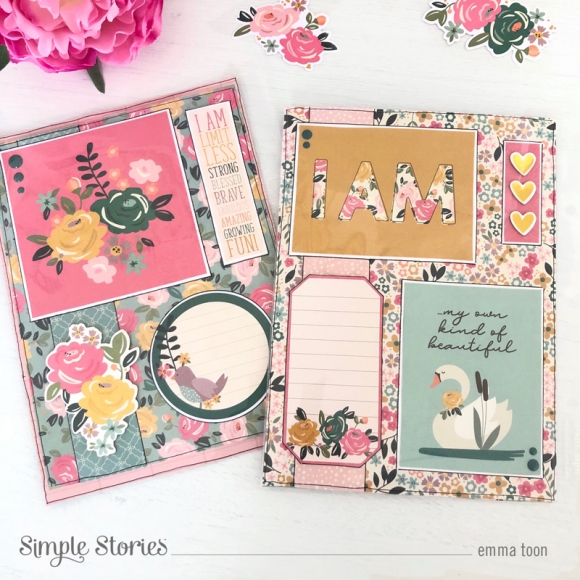
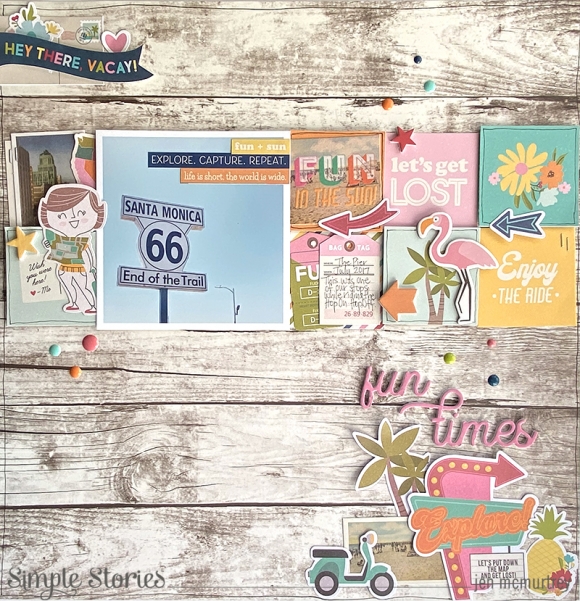
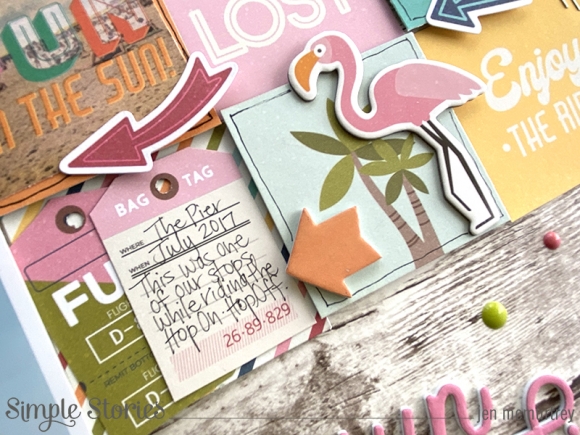
After printing my photo, I cut 2” x 2” squares from a piece of patterned paper and aligned them all in a row across the page.

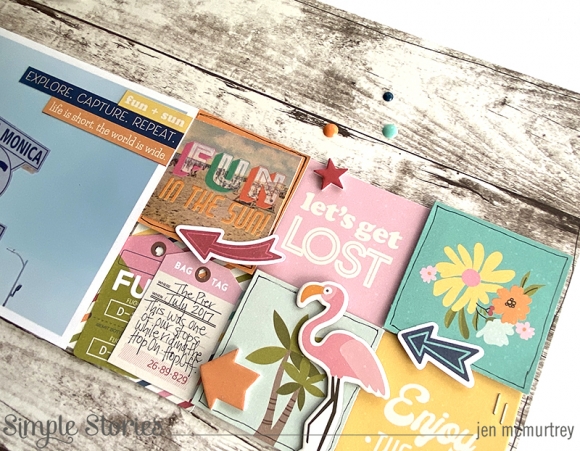
On each of the squares, I either added embellishments or doodled a border around the outer edges. I love adding all of the fun bits and pieces to the squares – they look so cute! This is also where I added a bit of journaling by fussy cutting tags from patterned paper. They were the perfect size!

Above and below the photos, I created clusters of embellishments to create a visual line that runs diagonally from the top of the layout to the bottom. To complete the project, I added a title using the foam stickers along with enamel dots for pops of color.

Lastly, I hand doodled a border around the entire project to tie in with the doodles on the smaller squares.

I love the whimsical feel of this project and can’t wait to create another with this fun collection.

Thank you so much for visiting today.

Supplies

Hello there! It’s me, Tya Smith up on the blog today! I so excited to share my latest batch of handmade cards using the super adorable “Hip Hop Hooray” collection. This sweet collection is chock full of so many Spring and Easter themed elements and papers. I decided to create 4 cards focusing more on the Easter themed elements – I mean just how cute are those bunnies?

Let me show you each of the cards close up!

The first card uses the awesome Bits and Pieces ephemera as the “Happy Easter” sentiment.  I love that these are the perfect size for card making. I made a banner out of the pretty pink gingham paper from the 6x8 Paper Pad. I also used a couple of stickers from the Combo Cardstock Stickers up in the corners next to the title that I decorated with some of the Enamel Dots. I also added an orange brad in the center of my twine bow from the Decorative Brads. 

I loved the addition of the wood grain paper in this collection. I used it as the background of this card and then fell  in love with this adorable 3x4 card from the 6x8 Paper Pad. I decorated the card with some of the Journal Bits and Pieces, Chipboard, Stickers , Enamel Dots and various dot pattern papers from the 6x8 Paper Pad. I love the little bow on the bunny with the flower sticker center.  I like to look for fun little ways to add dimension to the 3x4 cards.

This card features the cutest little girl bunny ever! She is from the Chipboard stickers and I just loved her cute little face. I added a flower sticker to her with and enamel dot in the center. You can dress up the Chipboard stickers too! Those adorable wood grain hearts are from the Bits and Pieces and I staggered a few on the card with some word stickers from the Combo Cardstock Stickers. The cute bunny girl is placed on a floral wreath which is from the Bits and Pieces.

The last card to wrap up my project is just so fun! I loved the sentiment here since it matched the name of the collection and it’s a throwback to one of my favorite 90’s hip hop songs – so cute! It is found in the Journal Bits and Pieces. Little Bunny Boy makes his cute face show here – he is from the Bits and Pieces. I tucked 3 carrots behind the sentiment and they are also from the Bits and Pieces. This card is finished with some bakers twine, enamel dots and an Easter Egg border which is from the Combo Cardstock stickers.

Thank you for stopping by the blog today and getting a closer peek at my card creations. I am so excited for this new time of year and for the Easter holiday coming up. These cards would be great to put together and give to your “Egg-stra” special someone! I hope I have inspired you today to make a few of these cards! Thanks again and Happy Crafting!

Supplies

Hello friends, it’s Kylie back with you today with a brand new layout to share. I’ve been enjoying creating with the Simple Vintage Garden District collection and even though the days are getting cooler here for me in Australia I wanted to create a ‘Spring’ themed design. When I first saw this collection I immediately fell in love with the pink gingham side of the ‘Celebrate Today’ paper. I have created this layout based entirely around my love for this paper.

To begin with, I trimmed a 1cm (10mm) edge off each side of the ‘Love More’ paper before adhering it over the top of the ‘Choose Happy’ paper. Next, I trimmed a 1.5cm (15mm) edge off each side of the ‘Celebrate Today’ paper. Using a ruler and pencil I measured 1 inch from the edges all the way around and used a craft knife to cut out a ‘frame’. With the square off cut from the middle, I trimmed an extra 0.5cm (5mm) edge off each side. I machine stitched around both the frame on all edges as well as the square to give a nice texture. The frame piece of paper was adhered to the background and I adhered the square over the top, turned onto one corner, similar to a diamond shape.

Using a die from my craft stash I have cut two doilies from the Basics Paper Pack to be tucked in behind my photo.

I loved the layered frames and selected one to mount my photo to. I have also added one of the floral borders in the Chipboard Stickers to adhere to the top of the frame. I wanted to create as much dimension and as many layers as I could.

Using both the Bits and Pieces as well as the Floral Bits and Pieces, I layered many below my photo. I’ve used a ‘stacks on’ method, carefully building the layers so they had balance and dimension. I used foam tape on many which helps to add the necessary height.

This was a fun layout to create and I love all the different paper patterns and floral embellishments together.

Thanks so much for stopping by the blog today. I hope my layout has given you all some inspiration with your own creating.

Take care!

Supplies

Hello friends! It’s Mik here from Papermiks on the blog today! Today I’ll show you a Sn@p! inspiration using the beautiful Going Places Collection. I love traveling and making albums to eternalize each trip. It is a passion of mine.

To make the cover I used a paper from the 6x8 paper pad, SNAP Cards, Foam Stickers and Ephemeras. I stitched two pieces of happy travel paper to make a suitcase belt and then used some brads in the corners so we could have ourselves a “suitcase album”. I liked this.

As I still don't know which trip I’ll add to this album, I wrote “Destination: Happiness”. This way any destination will be perfect.

For the first page I decided to use a lined page so there I can write some notes about my destination: Happiness trip.

For the inside I chose pocket pages and some flip pockets. This allows me to have more space for photos and it also gives my album an interactive touch.

Here, as you can see, I decorated with an “Adventure” cut file. I love using cut files on my pages and I liked how it ended up looking.

I hope you got some inspiration from this idea and enjoyed it! And don’t forget this:

“On the way to happiness, there are no obstacles. There are only opportunities.” Paramahansa Yogananda

Thanks for stopping by and have a creative day!

Supplies

Hi beautiful Simple Stories friends, Cristina here with a new project I made with a brand new collection I love the most, I Am. I am totally in love with this collection and especially for this new edition full of my favorite colors but also with unusual combinations but so well matched that it is impossible not to fall in love with.

I decided to use this wonderful collection to make a mini album, 4x6" size, because I would be able to use as much as possible all the decorative elements and embellishments of which this collection is full. I chose to make a mini album to send a gift to a dear friend who asked me to use her photos of her recent trip to the States and so I did.

I chose a very easy way to make my project, without a front cover and with a ring binder to support the pages. 

I alternated the pages of patterned paper with page protectors of various sizes to adapt photos of different sizes.

To make my album more sturdy I made a back cover using a chipboard sheet that I covered with two patterned papers by the 6x8 “ pad which was perfectly suited for its vertical size.

I chose to sew some embellishments to give movement and added various elements as chipboard and brads wherever possible.

The designs are very original, versatile and perfectly chromatically balanced with each other.

I love to use so many layers and foam double tape to add 3d effects because I think this helps to focalize attention on the picture.

I’m a pink addicted and therefore if you are also you cannot fail to add this collection to your stash and we can’t wait to see how many beautiful projects you’re going to make with it.

So please don’t forget to leave us a comment below and tell us which is your own idea on how to use this collection, maybe so different than mine.

Thank you so much for joining me today and see you to the next post.

Bye.

Cristina xxx

Supplies

Have you checked out the Simples Stories Best Year Ever Collection?  It’s celebrates the things that make each month special - the holidays and changing of the seasons.   This collection is wonderful for embellishing planners, or documenting special occasions throughout the year.  I’m a card maker so I thought I’d make a card to celebrate holidays or seasonal birthdays.

January celebrates winter!  I made a fun scene cutting pattern paper from the 6x8” pad to create colorful snowdrifts for the cute snowman!  The snowflakes are a mix of chipboard, decorative brads, stickers and bits and pieces.

February is sugar sweet with hearts, a calendar page and yummy treats! The layout of each card is the same.  A foam sticker with the month is at the  top right of each card and coordinating foam stickers are along the left attached horizontally. 

Lucky me!  March is a fun mix of rainbows and shamrocks.   The washi tape in this collection features a rainbow stripe roll, a floral and a third printed with the months of the year. 

There are no clouds to chase away in April because we know that spring flowers will follow soon!  The 6x8 pattern papers are perfect for card making.  They feature a smaller pattern print and each sheet when cut in half will cover two A2 size cards.

This collection has many beautiful embellishments.  These May flowers are surrounded by little chipboard butterflies and enamel dots in coordinating colors.

June is a tropical paradise.  A flirty flamingo and juicy fruits are candy for the eyes.  Even the little decorative brad has a pineapple on it.   I adhered the printed and die cut bits and pieces with adhesive foam tape.  It’s easy to make your own with inexpensive craft foam and double sided tape.

July is all things summer – fireworks, barbeques, and of course the stars and stripes.   I added small sentiments from the 4x6 sticker book to each of the cards. 

In August we’re getting out of the house and heading out for a picnic!  The van is packed and we’ve got some yummy berries in the basket!

September is back to school.  A lined piece of patterned paper looks like a sheet from a notebook and is topped with a pencil and books, a sneaker and a decorative brad that reads “best year ever”.  Little foam sticker paper clips add some washi are fun embellishments.

October brings Jack O Lanterns, Bats and a Ghost.  I love a pop of teal with the orange so I added extra blue enamel dots.

November is sweater weather.  I arranged pumpkins and leaves as a focal point for this card.   I embellished the card with decorative brads and green enamel dots for a pop of color.

Simple Stories combines all the things you love about each month of the year so it really is the best year ever!


Supplies

Hey everyone, Michelle here today with a new layout to share using the Simple Vintage Garden District collection.  If you're like me and love to work with florals this collection is for you!  The pretty and soft floral patterns are perfect for any feminine project.

One of my favorite items in this collection is the big chipboard frames.  It's so easy to make a big impact on your layout just by adding one of these frames.

The final touches of this layout was just adding bits of ephemera and chipboard pieces.  It was hard to limit myself to just a few, they 're all so pretty!

This sweet black and white photo of my daughter was perfect for this collection.  Any photo can be made to look vintage just by printing it in black and white.

Thanks for stopping by!

Supplies

Hello, it’s Emma here today to show you how I’ve started using the fabulous I Am collection in my Pink Sn@p! Binder. Never before have I needed to hear all these positive quotes!! The I Am collection is the perfect kit to be using right now in these difficult times!!

I have decorated the front of the binder with (yes you guessed it!) one of the big blousy floral 12x12 papers from the Collection kit. I added more interest by using a layer of bold pink paper and embellished that with gold ribbon, doilies, chipboard pieces and the words ‘just me’ from the gold puffy stickers. 

As you know I’m still quite new to sn@p! binders, so I’m still finding my feet...but what I have found is that I’m really enjoying doing large 6x8 layouts to fit in the pocket pages. 

Like I said, the quotes are just lovely! This page I did with the gorgeous house images sums up everything right now! ‘Home is where the heart is’!

...and this one, ‘Positive Mind, Positive Vibes, Positive Lives’ Lets all stay positive, it’s all going to be ok!!

I’m going to fill this binder with positive quotes, you know when you stumble across one, remember to write it down! This is my place to fill with positivity! Stay safe! Stay healthy! ...and hold your loved ones tight!!

Supplies

Pages