Cardmaking Tips By Anya Lunchenko
Hello Simple Stories friends! Anya here today and I would like to share with you a few cards that I created using the gorgeous “Simple Vintage Garden District” collection and a few cardmaking tips along the way. Here are all the cards we will be looking at today:
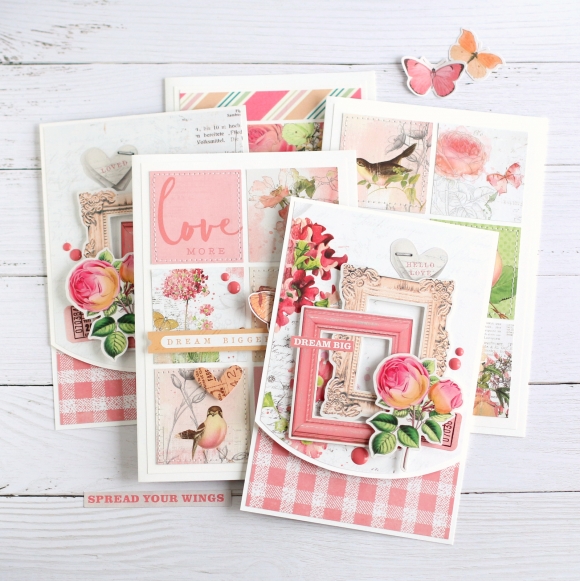
For my first two cards I used a sheet of patterned paper with 2x2” elements. I have shared a similar card idea before, but is is totally OK to repeat your favorite designs! With all the beautiful cut apart pieces Simple Stories provides in each paper lines, I feel like creating same card for every collection.
To create these cards I used six coordinating 2x2” element pieces for each card that were cut to 1.75” squares and adhered to a piece of white cardstock. I stitched around three of them with sewing machine to add texture and adhered that whole piece to a white card base. These pieces are pretty enough you don't need a whole lot of other decorations. All I did is added a few popped up stickers and a few enamel dots to finish this set of cards.
Next two card have an opening at the bottom instead of the usual side. To make them a little unique, I made the front panel a little shorter with a rounded edge. To create round edge you can use a plain desert plate as a template as I did here. I covered the bottom of the back panel with 2” strip of gingham patterned paper and decorated the front as usual.
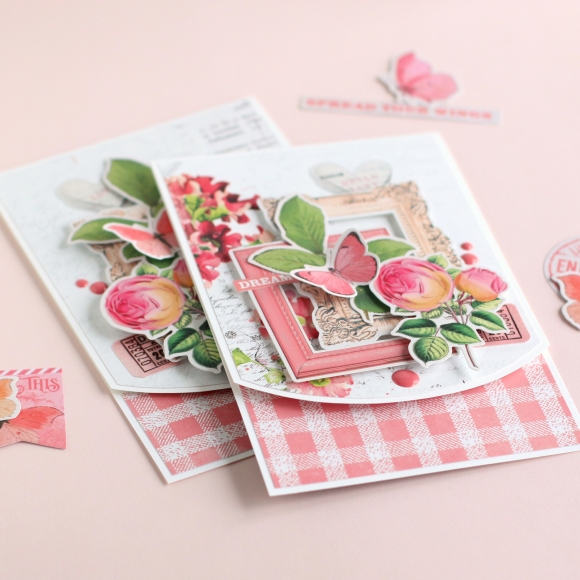
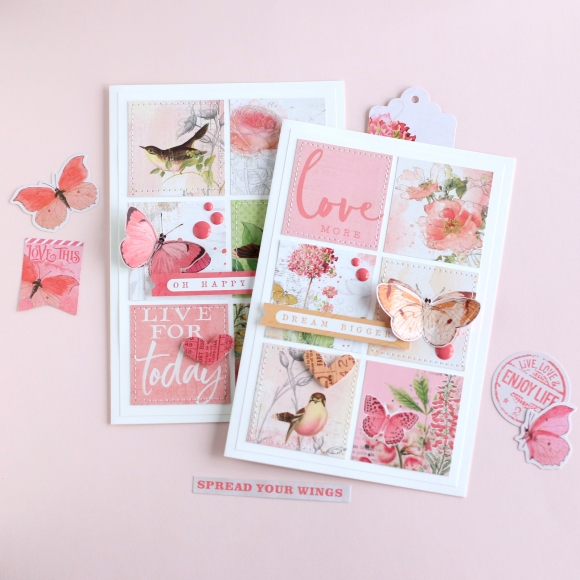
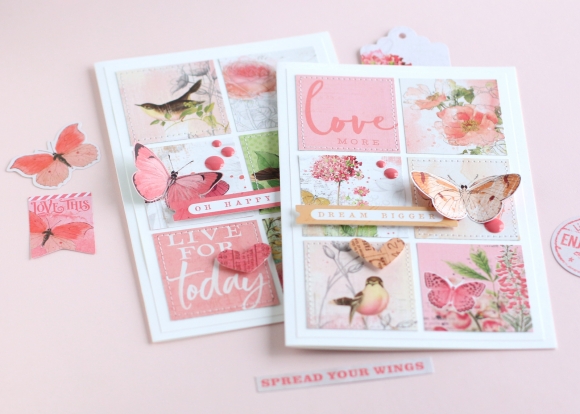
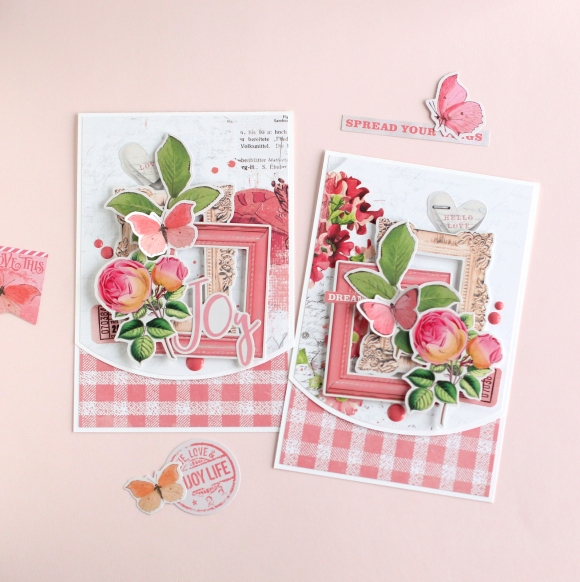
Layers always look good in any project. I love adding layers to my cards, and sometimes I fell like adding more layers, while other times I like to leave them on a clean and simple side. Here I want to show you same cards with less and more decorations and you decide which option you like best.
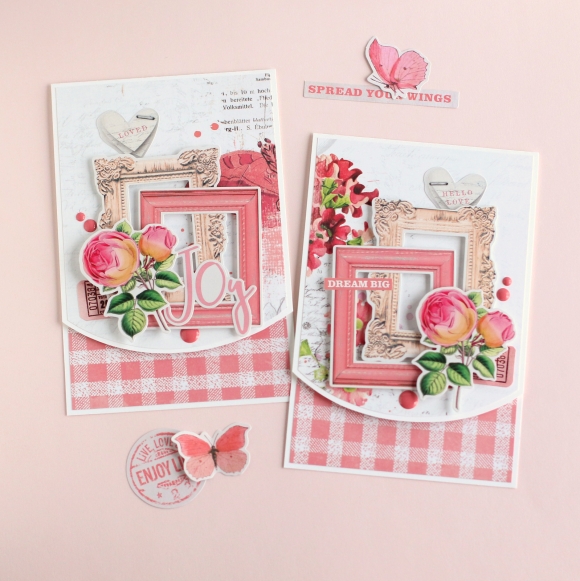
This first option has enough layers and looks good just like that, but I also wanted to show you that adding a few more pieces also looks great. I found green foliage pieces and butterflies and added those on top of layered frames. Play with your choices and find the best balance that makes your eyes happy when you create.
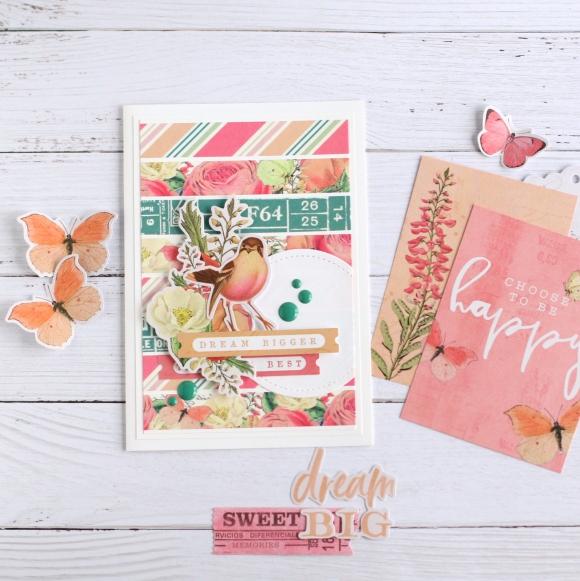
And for my last card today I used three rolls of washi tape to create the background piece. I trimmed a piece of white cardstock and added strips of washi tape alternating colors and patterns that looked good to me.
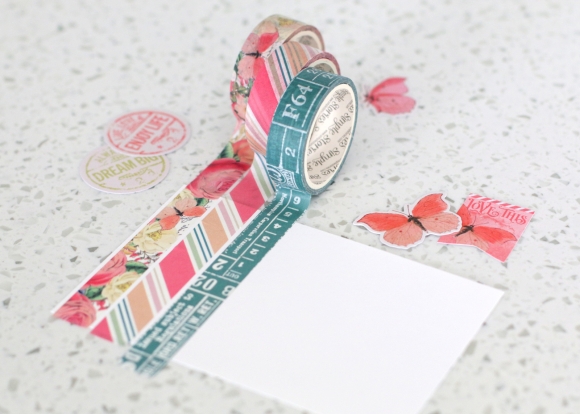
After covering the whole piece you can either cut off edges or fold them to the back as I did here. I adhered this piece to another piece of white cardstock and then adhered everything to a card base.
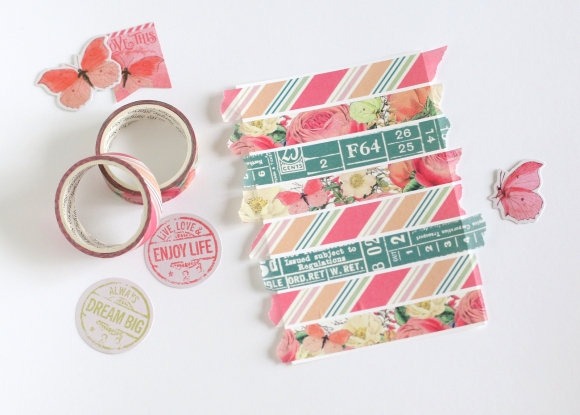
From this point I treated it as a usual card with a piece of background paper. Added a piece of white die cut circle gave me a good spot to add decorations. Keep in mind, that our background is bright and colorful enough and does not require a whole lot of decorations. A few popped up elements and enamel dots finished this card.
I hope you found these tips helpful and may try applying some of them next time you create your own set of cards.
Supplies