Creating With Happy New Year
Hello Friends and Happy New Year!
I am going to be honest I can't wait for 2016 to be over so I can turn the page to 2017. I always love the start of a new year since It seems to be time for a new outlook, new resolutions, new ideas, and really a fresh start.
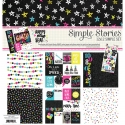
I created a layout and 2 cards for you today using the Happy New Year Simple Set. This collection has all the bright colors with a bit of black to showcase those festive pics. I really love a pop of black on my pages and this collection was soooo easy to use.
My first layout is called "Countdown"
I've had this picture of myself and my friends for the past year or so, it was suppose to be a serious rock star pic but ending up being me looking angry, Tanya looking like she wants to punch someone and Stephanie's happy go lucky LOL!!! Love those girls. It was the perfect picture full of " Happy New Year " colors. I couldn't resist.
I created this layout with a pattern paper foundation instead of cardstock. I really liked the numbers on the left hand side to be my countdown to the new year. I wanted lots of color under my picture so I created layers with die cuts stickers and also cut up pieces from the 3x4" journal cards.
The Simple Sets have great stickers and being a die cut addict I sometimes need more. I chose to use the 3x4 and 4x6 cards exactly for more " die cuts". I cut up a few cards for more patterned papers, and I used a circle punch for the " Count Down " title. It's so easy to add more details by just cutting up some patterned papers. This collection has 2 sheets of each patterned paper, perfect to cut up! Don't be afraid! Instead of hoarding some papers for something else in the future, use what you have on a current page. Cut up shapes, small strips of papers, and even extra " party hats! " to make that special page.
Have Fun with it ;)
__________________________________________
The second card is Par-tay!
Send out an invite for a countdown party! Your guests will love the personal touch and think you are super creative! I took a 4x5 piece of paper and cut it diagonally to add stars at the top and and a black bottom. I added some dots under my die cut gave it dimension and then a few stars and enamel dots -- voila!
Thank you so much for reading and being a fan of Simple Stories! To see more of my work you can find me on instagram @KristineDavidson


