August 2020 Blog Posts

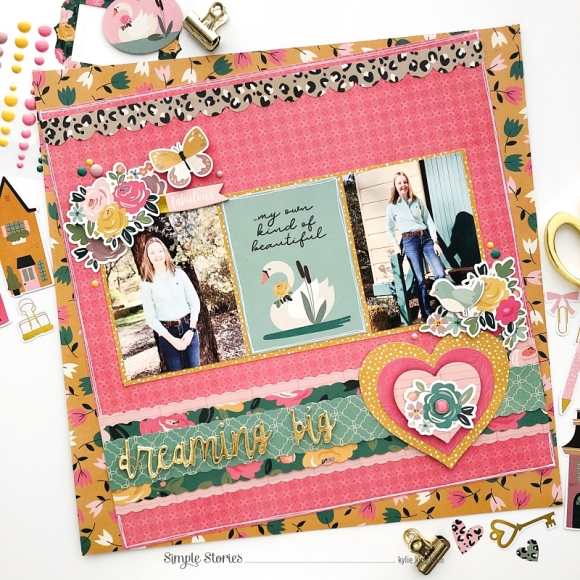
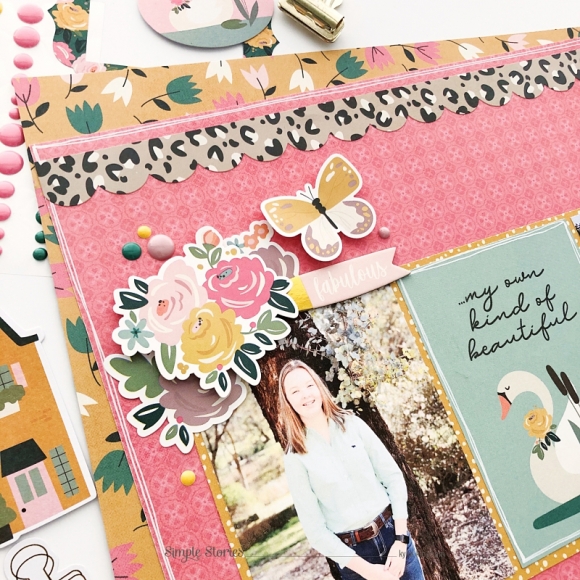
Hello Simple Stories friends! It’s Jen today with a layout using the new Cozy Days collection. Fall is without a doubt my favorite season – the beautiful leaves, going to football games (usually), and of course pumpkin spice lattes. This year autumn activities may look a little different, but I know I will enjoy it just the same.

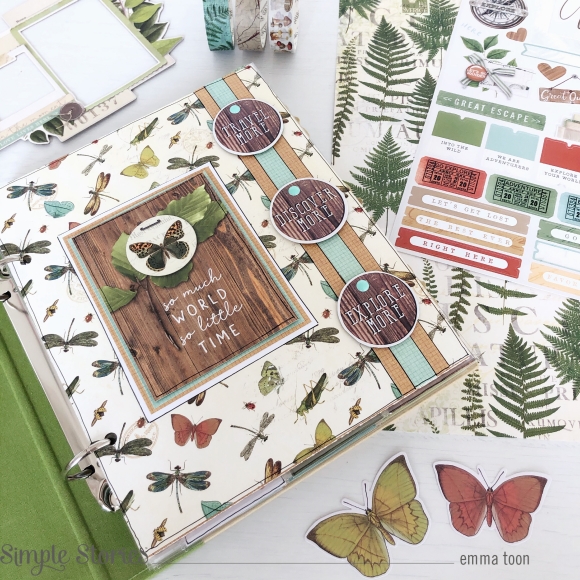
When it came to using Cozy Days, I literally could have used every single piece. There is not one thing in this collection that I do not love. With that being said, let’s take a look at my layout.

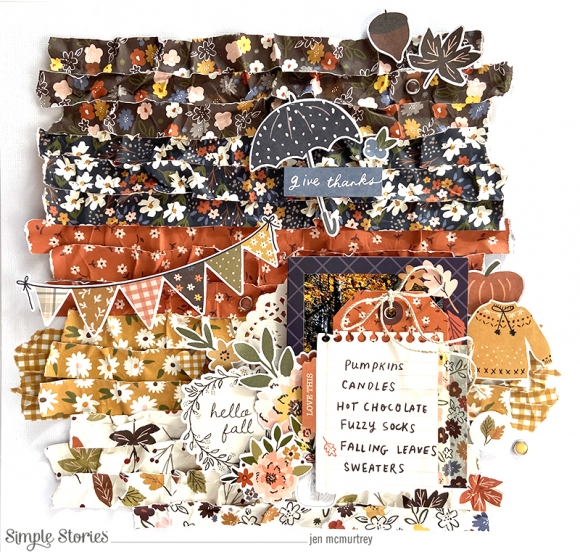
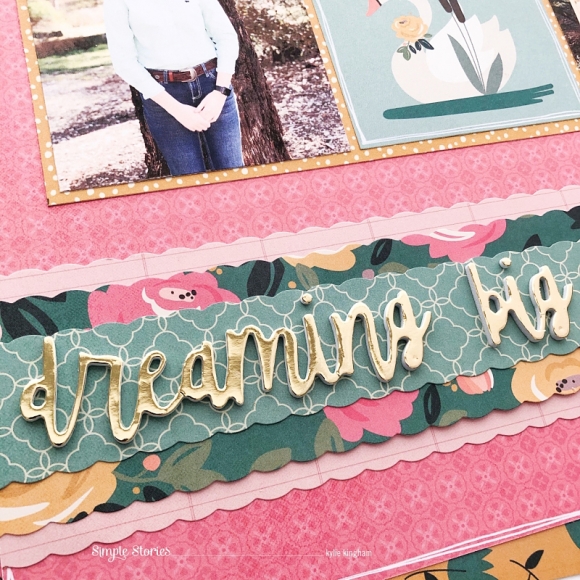
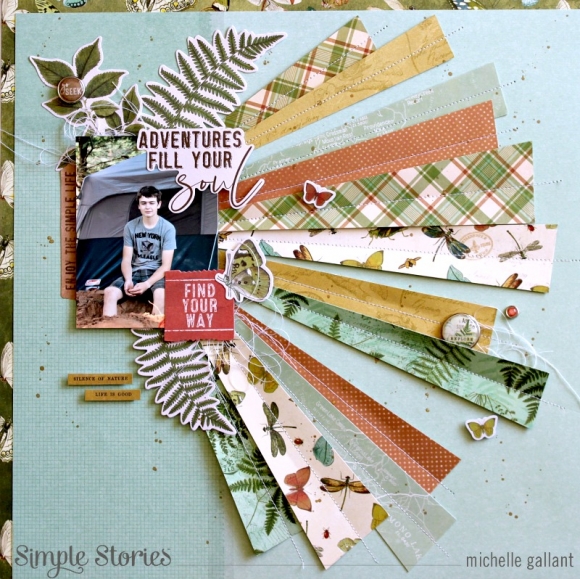
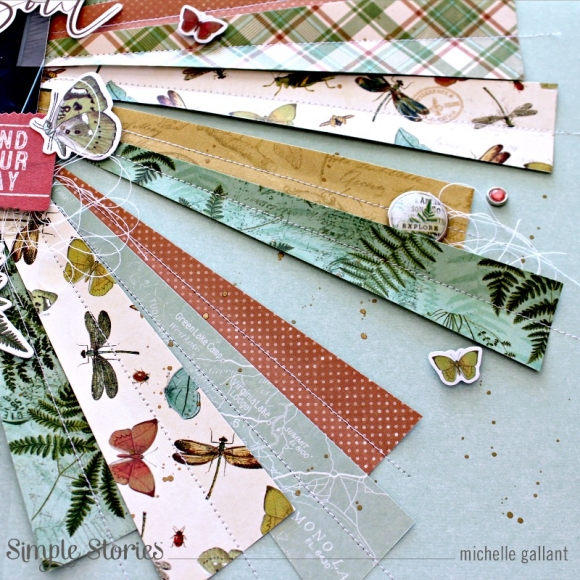
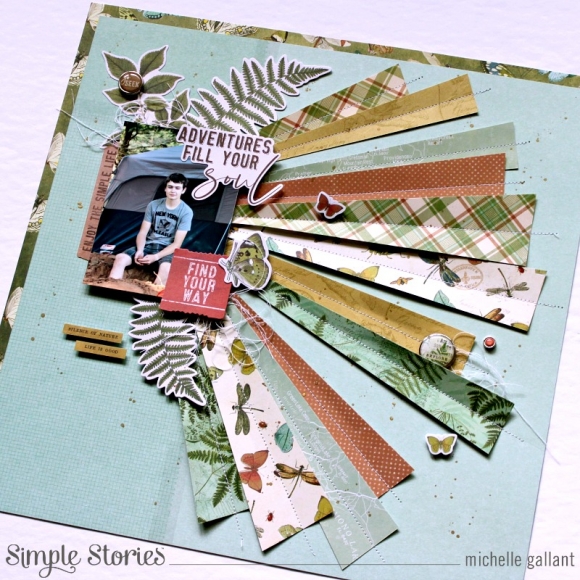
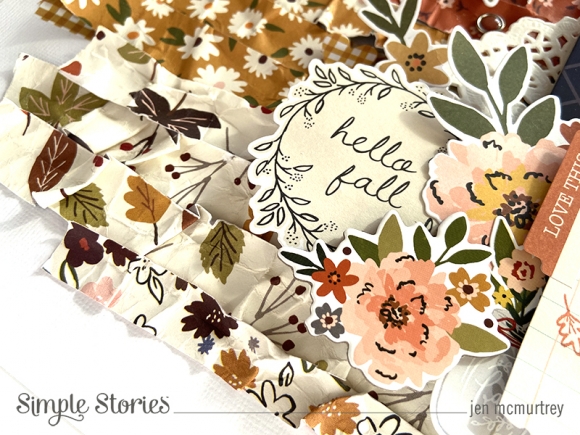
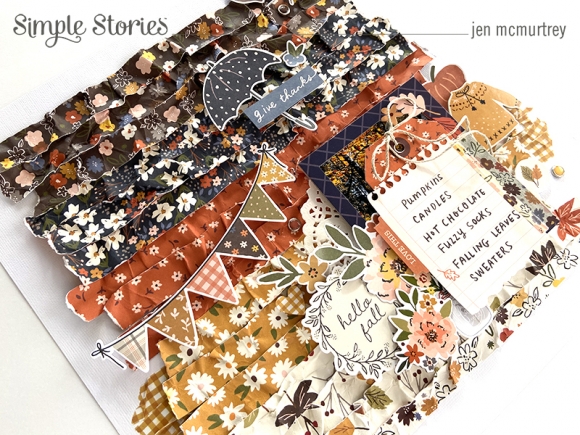
Adding texture to projects is one of my go-to methods, which is exactly what I did here. After choosing several of the floral-patterned papers, I cut three strips from each that were ¾” wide. Next, I took each strip and balled them up in my hands, rolled them around, and did my very best to make them look like they went through the laundry. LOL!

Once the strips of paper looked good and worn, I attached each with my ATG making sure to wrinkle and fold them as I went.

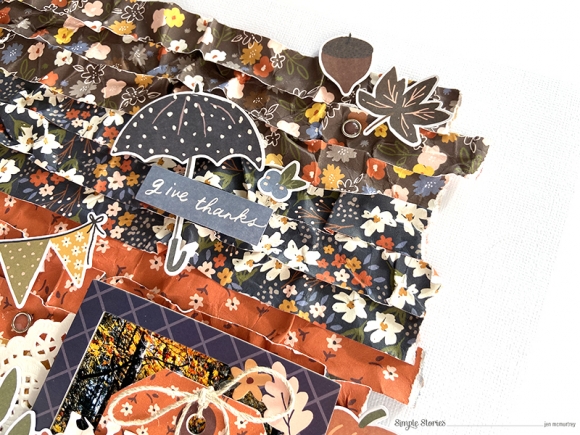
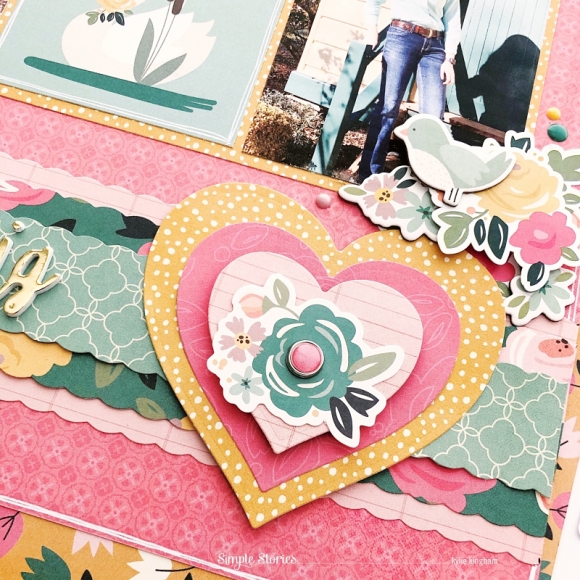
Embellishments followed, and I tried to keep like colors together . . . meaning I used orange embellishments on the orange patterned paper, etc. At this point, I did not yet adhere them to the background because I was still working with the placement of the photo.

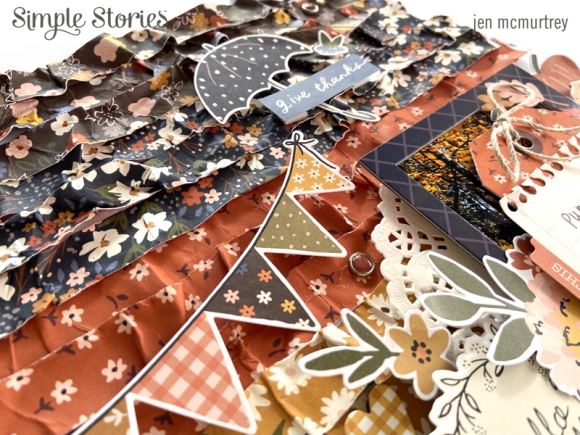
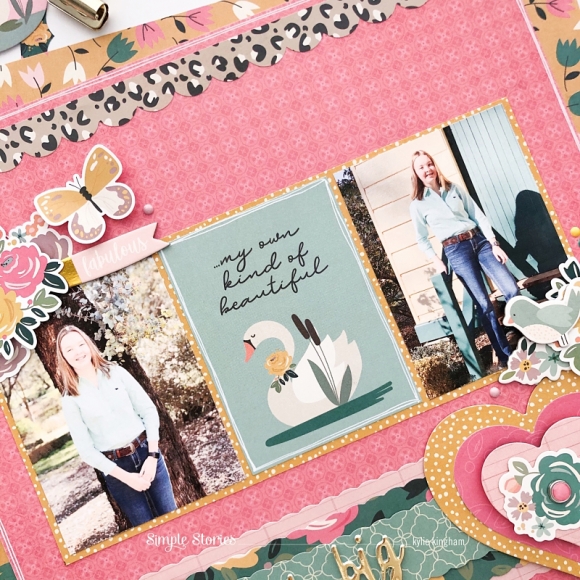
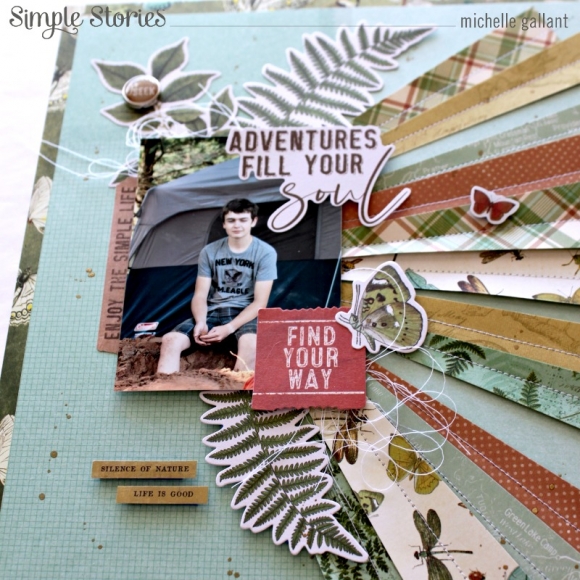
For the photo, I selected a cardboard frame to use with it and adhered both to the layout with foam squares. This particular frame has an adorable raccoon on it, but I decided to layer flowers and a sentiment with it.

I fell in love with the cute tag die cut that looks like notebook paper that’s been torn out (must be the teacher in me). To give it a bit more color, I stamped the leaf onto it using orange ink. Next, I adhered it to the frame with washi tape and put my journaling behind it.

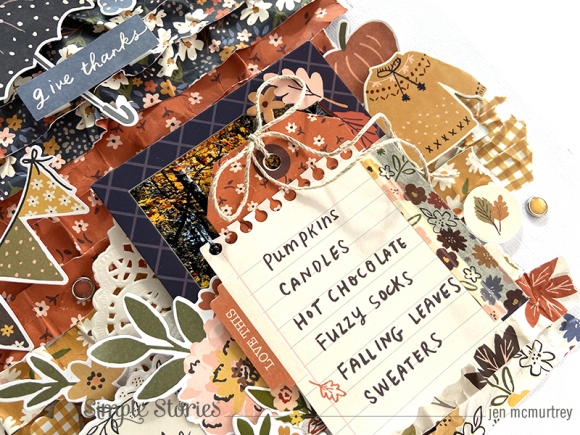
I hadn’t planned on covering the photo in the beginning but I like how it turned out.

After completing the embellishments on and around the photo, I adhered everything to the page.

The colors and patterns in the Cozy Days collection absolutely warm my heart, and I cannot wait to create more projects with it.

Thank you so much for stopping by today! I hope that you have been inspired to document your favorite fall memories with this lovely collection.

Supplies

Hey there! Tya here! I am up on the blog today sharing my latest batch of handmade cards! Sooo – is anyone else totally over summer and ready for fall already? It has been 100 degrees all week in my neck of the woods and working with the adorable Boo Crew Collections has me all sorts of excited for Halloween and all things fall!

So the Boo Crew collection- where can I start!! Um – first off – it’s SO MUCH FUN! I am more a lover of the cute, whimsical side of Halloween and this collection definitely fits the bill!  And the colors and patterns are adorable! Today, I am sharing 7 cards with you using this super cute collection- so here we go!

Card 1 features one of the cutest skeletons you will ever see! He is from the Bits and Pieces and I knew he needed to be front and center and I also loved the “Creepin’ it Real sentiment from the Journal Bits and Pieces. I also used a tag that is from one of the newest pattern paper types.  The “Boo Crew Tag” 12 x 12 paper is full of tags printed on both sides of the paper.  These tags make a great base for layering up all of my embellishments! I will for sure be using these over and over again!

Card 2 is a fun one. I made this card with some cream cardstock and used a metal scallop border die to cut a border in the front. The front flap will now lift up and reveal all the cute stars on the pattern paper showing underneath. How cute is that cute black kitty on a broom in the center of my card? Love it!

Next up we have Card 3…Lately I have been having fun making shaker cards – so I had to make one with some fun Halloween theme confetti inside it.   The cute ghost standing next to the haunted house makes a great decoration along the bottom edge and a fun “Happy Haunting” sentiment tie this card all together!

Card 4 is where I had some fun with the Starry Night 6x6 Stencil and some grey ink. I inked the back of some cream cardstock and then added my decorations on top of that paper. It’s fun to get inky sometimes! The candles and skulls were even super cute – so they had to be placed on this card! EEK!

Card 5 has another cute character on it. The mummy here trick or treating made for a fun “candy” themed card. And I forgot to add that I am completely in love with our Decorative Brads.  The now have an adhesive back instead of the prongs and I love them so much!! You can see them on the stars on my card.

Card 6 utilizes one of the 4x6 Cards from the 4x6 Elements paper.  These are great to use on cards and just need to be trimmed down a little bit on the sides to fit the card base. You can’t have Halloween without some Pumpkins! I also added a fun “Hey Pumpkin” sentiment from the Foam Stickers – they make great statement!

Card 7-our last card is a Slimline card. These are a new shape in the card making world and they are a lot of fun to decorate.  These cards measure 3 ½ x 8 ½ in size. I used a couple of metal dies from Mama Elephant to make the scallop edge and the window panel as well. I popped the window panel up with some foam tape and then stuck some cute ghosties and candies in the windows peeking out. I added some stars from the Foam stickers around the windows as well…  I love how this card turned out.

I had so much fun playing with the “Boo Crew” collection! I hope these cards have made you excited to get your Halloween crafts going! If you are a Halloween fan – you will definitely need this one in your collection! Thanks for stopping by today – Happy Crafting Friends!

Supplies

Hey everyone! It’s Kylie back with you today to share a very ‘girly’ themed layout with you all. I recently took some photos of my daughter which doesn’t happen too often these days. (**teenagers) I wanted to create something special to add to her album and decided to use the super pretty ‘I Am’ collection which would be perfect.

To begin, I trimmed a piece of the 4 x 4 ELEMENTS paper to 11”x 11” and adhered it on an angle over a piece of the AMAZING paper. Once in place I added a hand drawn border using a white marker pen as well as the border strip from the sticker sheet. It was adhered close to the top edge of my page.

I decided to create a decorative border to place on the lower half of my page. I did so by layering papers BLOOMING, (both sides were used) and the 4 x 6 ELEMENTS. A layered heart was created using multiple sized punches from my stash and I centred them with one of the decorative brads.

Using the super beautiful gold phrase stickers, I created a large page title and adhered it to my border.

My photos were printed 3”x 4” and I positioned them with one of the 3 x 4 element cut aparts, backed with the 2 X 2 ELEMENTS PAPER as a large banner throughout the middle of my layout. Using the floral elements from the sticker sheet and the chipboard stickers I created a few clusters of blooms to support and embellish my photos.

Once completed I was super happy with my page. There are so many gorgeous prints, colours and embellishments in the ‘I Am’ collection, making it super easy to bring your page together.

Thankyou so much for stopping by today. Until next time,

Kylie

Supplies

Hello friends! It's Mik here from Papermiks on the blog sharing a new flipbook inspiration. What can't be missing from your summer? For me it’s BBQs in the backyard, picnics, blue skies, pool and lemonade! And we can find all those and much more in Simple Stories' Summer Farmhouse collection. This is a beautiful and lovely collection and today I’ll show you a flipbook idea for a romantic and happy summer.

To make this beautiful and lovely cover I used a 6x8 pad paper, a 4x6 Sn@p! card and a 3x4 card. I wrote “Hello 2020” with the Foam alpha sticker and used ephemeras to give it a lovely touch. Finally, I pasted a yellow ribbon on the left side, and we have this adorable cover.

For the first page of my album I decided to make a flip page. As soon as you open the album, we have a card where I’ll write my romantic summer’s top ten.

When we turn the page, the fun begins. I made several flip pages. Interactive touch and many photos = Fun!

I love making frames using a washitape, and here you can see how beautiful it is a decorated page using a washi. I really love it!

Making cards, to my minialbum, is another passion. So here I used a 4x6 card and decorated it with 2x2 cards, washitape and stickers.

It’s look super fun, isn’t it? I hope you’ve got some inspiration from this idea and enjoyed it! Thanks for stopping by and have a creative day!

Supplies

Hi beautiful Simple Stories friends, Cristina here with you today to show you a new project I made with the fun and summery Summer Farmhouse collection. I made a mini album to make a gift to a lovely friend and this collection was perfect to make a ring album full of amazing designs.

I decided to make a mini album because I really like this collection and I wanted to be able to use it as much as possible. I chose a ring album that has a very versatile binding and that allows you to choose the structure of each page as you go ahead. Since most of the photos chose were made vertically I chose to make a vertical binding for 4 + 3/4 x 9 + 1/4 inches sizes.

This kind of binding is also very suitable to add page protectors and those chosen were obviously of a different size so I cut them out at the junction point of the pockets and sewed them to the photo inside to solve the issue of the side left open.

I also added some cut file with beautiful sentiment to sew them to the pockets, I really love how they turned out because that was the perfect mood I wanted to have.

This summer collection is really different than other because it is full of original designs suitable for creating summer pages but not necessarily sea-themed. Then all the papers have very high quality, It does not flake on the score or tear when you are wrong to attach
a sticker and you have to remove it. It has a high weight and has a wonderful smell, yeah I love to smell paper and the Simple Stories ones have a smell that I totally love.

I hope my project can inspire you in some way so thank you so much for joining me today and see you next time.
Bye.
Cristina xxx

Supplies

Hello my crafty friends and thanks so much for stopping by!  Did you know that birthday cards are the most popular cards to send?    That’s no surprise because birthdays are always a good excuse for celebrating and I mean…. Who doesn’t love cake?   LOL!

Today I’m sharing NINE cards made with the Simple Stories Birthday Blast Collection!   I guess I got a little carried away!   I couldn’t resist the bright colorful papers and all the adorable images perfect for the  little explorers in your life!

This collection is loaded with robots, space ships, aliens and did I mention cake?   YES!!! There’s yummy sweet treats too, along with all the traditional party goods you might expect like balloons, confetti, party hats and streamers!

All of my A2 size cards were made using the 6x8 paper pad.  If you cut the sheets in half they are perfect for covering two card bases, and the smaller print makes it easy to see all the printed images on the smaller size canvas.

You’ll find loads of embellishments including chipboard, washi, bits and pieces, decorative brads and enamel dots.  I used EACH of those items on ALL of my cards.  Can you spot all the bling?

And if that isn’t enough to make your heart happy how about silver metallic foil accents on the die cut bits and pieces, stickers and chipboard?  

I always arrange the elements on a clear piece of plastic the size of my card base.  This helps me figure out the placement before I commit and adhere them in place.    To select the background papers I pick up the sheets and lay them over the different colored papers.  Because the plastic is clear I can see how the elements will look on any particular pattern.

I’m a big fan of the thick chipboard pieces.  They add lots of dimension and give an expensive look to a design.  To make the die cut bits and pieces stand up, I make my own adhesive foam tape.  I adhere double sided adhesive tape sheets to inexpensive thin craft foam.  The large sheets make it easy to cut a piece to any size or shape embellishments without having to peel a bunch of squares.   It saves some money too so I can buy more pattern paper!!!

This collection really captures the fun and excitement of a birthday party.   You can’t help but smile when you see the rainbow colors and adorable images that will have you feeling like a kid again!

You’ll love the Birthday Blast collection for celebrating the little (or maybe a little older) rocket man in your life!

Supplies

Hey everyone, Michelle here today with a new layout to share using the Simple Vintage Great Escape collection.  We spend a lot of time outdoors in the summer so I was really happy to see this nature themed collection!   The colors can be used for any type of layout.

I cut some random strips of paper to create a starburst effect for the background of my layout.  I added a simple line of stitching in each of them and lifted the sides a bit to add some dimension.

I used a photo of my son from a camping trip a few years back.  I embellished the layout with some ephemera, stickers and brads.

The soft neutral colors of this collection make it very easy to use,  It matches with everything!

Thanks for stopping by!

Supplies

Hello again, today I’d love to share with you how I’ve used the Simple Stories Great Escape collection in my Green 6x8 Sn@p! Binder.

I’ve covered the front of the binder in the Wild and Free 12x12 paper from the collection kit, and then layered it up with a frame where I slide one of the cut a part images behind, and then plenty of chipboard pieces, bits and pieces, and I even threw in some brads for good measure!! You can never have too many embellishments...right?! Oh and if all that wasn’t enough, I chose some cute ribbons to tie around as a finishing touch!

You can also see on these close up photos how I used some gold twine and enamel dots to add some extra detail to it all! I have to say, I’m pretty pleased with the finished result! 

When you open up the binder you see the ‘front page’, I cut out a 6x8 sized page from the Adventure 12x12 paper and used three round stickers which I put foam sticky pads behind to lift them. 

I always enjoy making extra fun things for my binders, here’s a pocket folder and some cute little tags. You can make tags to journal on or even add photos too. 

I’ve used a lot of the ephemera from the foliage bits and pieces pkg to decorate the cards to fit into these 6x4 pockets, and also some tags from the.

One of my favourite pocket pages to fill are the 2x2 insta pocket pages which I like to mix up with the 2x2 element paper and areas to add my own photos.

Here’s a couple of full pages I’ve made, one to fit inside a 6x8 pocket page and one that I’ve punched holes in, so it can go directly into my binder. This collection is filled with so many fabulous elements, I’m pretty sure it will be a must for everyone!!

Hope I’ve given you a few ideas of different ways it can be used. If you’d like to see more of how I use simple stories products, pop over to my IG page

Supplies

Pages