August 2020 Blog Posts

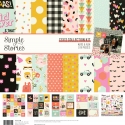
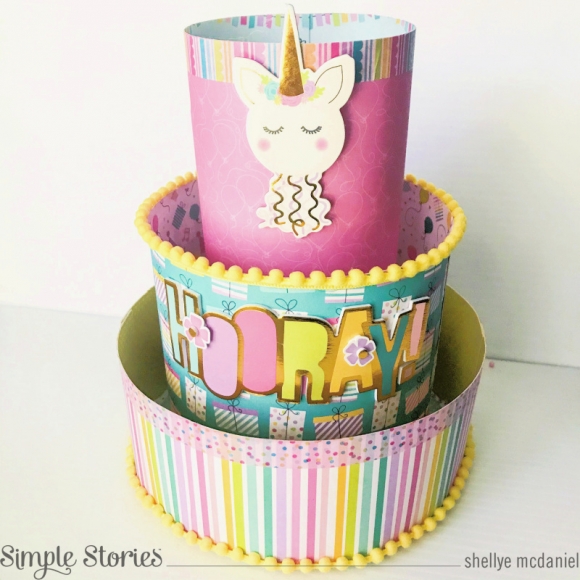
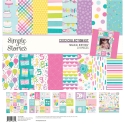
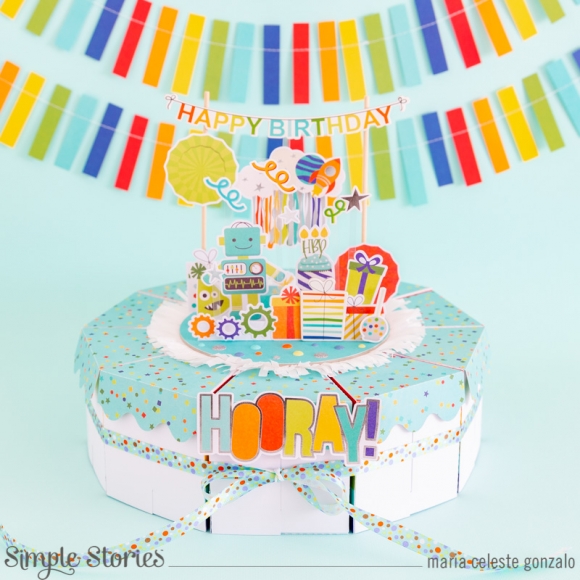
Hi! I feel so happy to be back! I'm Celes from GuiadeManualidades.com and today we are going to have a party… a birthday party!  Birthday Blast Collection is an amazing and wonderful paper collection to create very special details for a birthday.
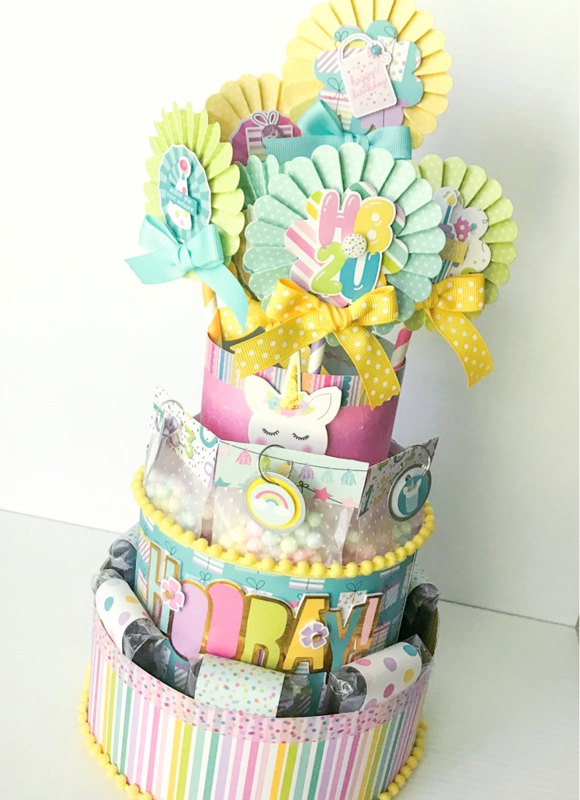
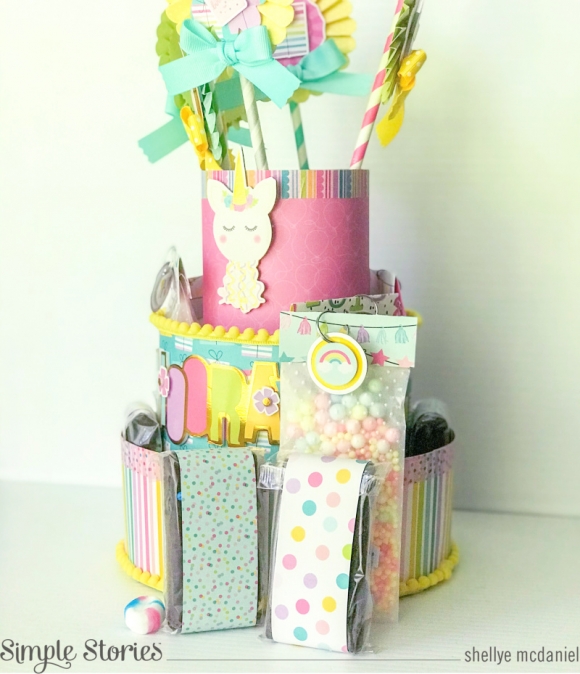
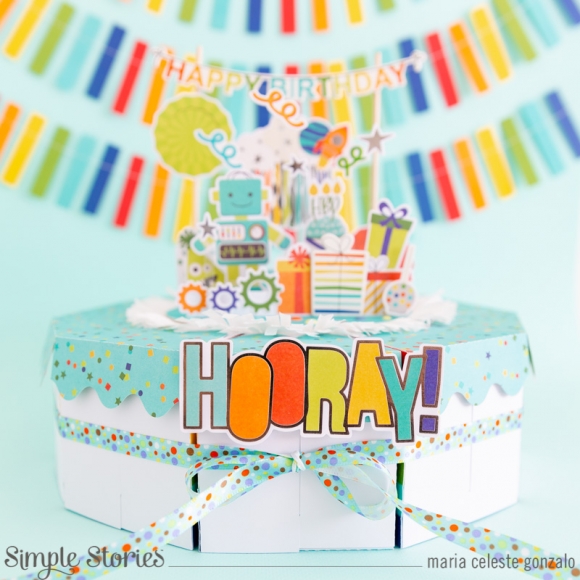
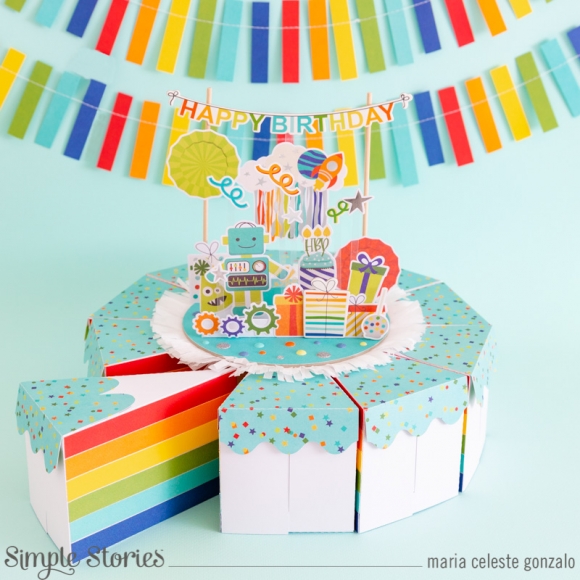
This project has two ideas: a cake made of sweet treat boxes and a very special cake topper.
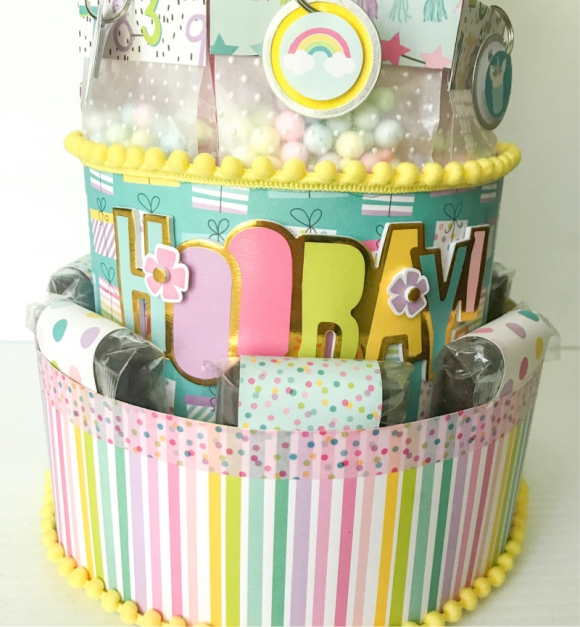
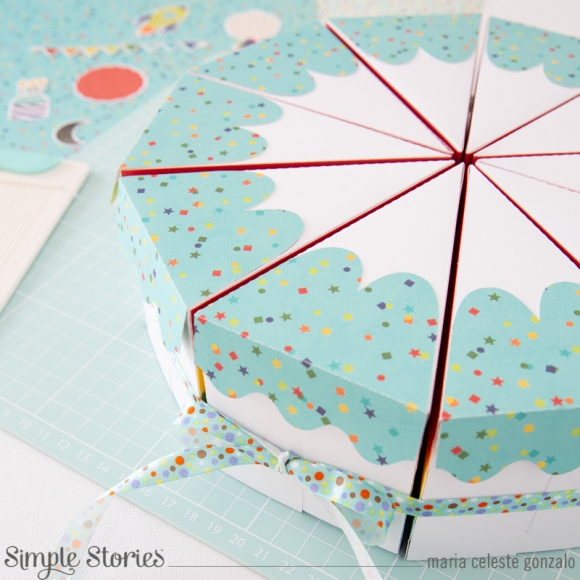
Boxes:

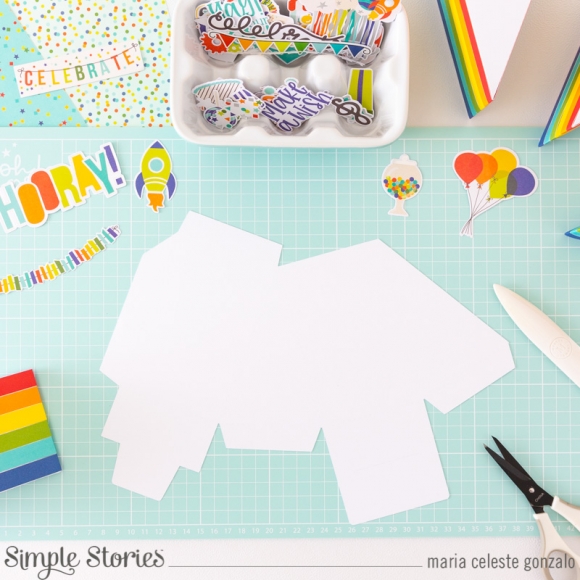
For this project you can use a cutting file from your own cutting machine. In my case, I used a cutting file from my Scanncut Canvas. But, if you have an .SVG file or a .Studio3 file from your Silhouette machine you can use it too. Depending on which cutting file you use, you will need 10 boxes to make a cake. In that case, you will need 10 white cardstock of 12”x12”. Cut 10 boxes and choose one design paper from your paper pad.

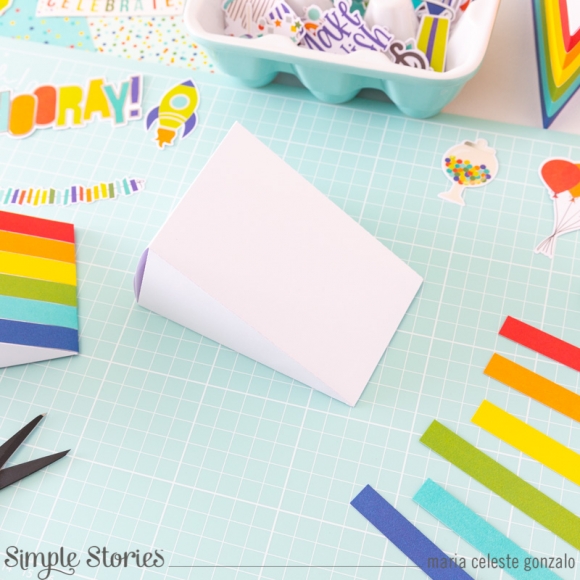
Assemble all the boxes and glue them in the indicated paper tabs.

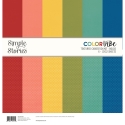
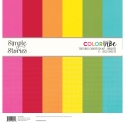
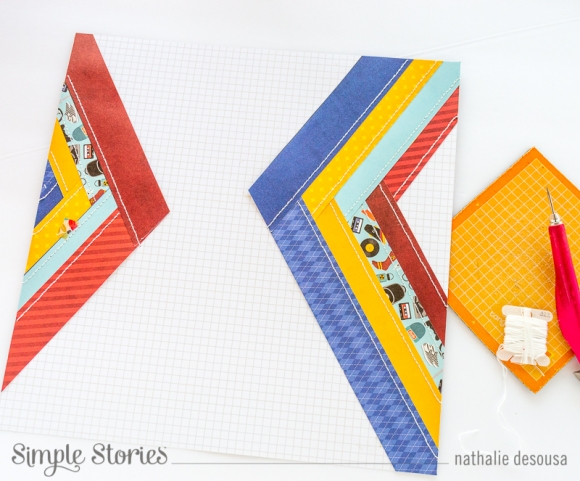
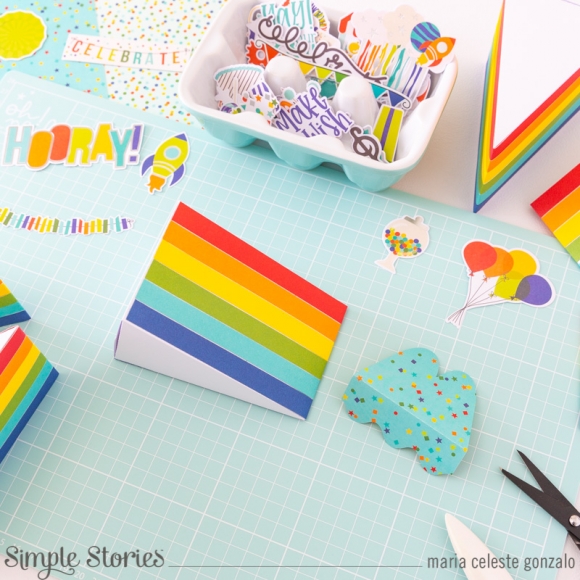
To decorate all boxes, you need to cut 5 or 6 paper strips (depending on the size of your box). I used Color Vibe Collection “Brights" and “Bolds” pads. Glue each strip and complete the “rainbow” in every box.

Then cut the cake decoration (Decor File) using the design paper that you chose before. Put all the boxes together and use a piece of ribbon to make de cake.
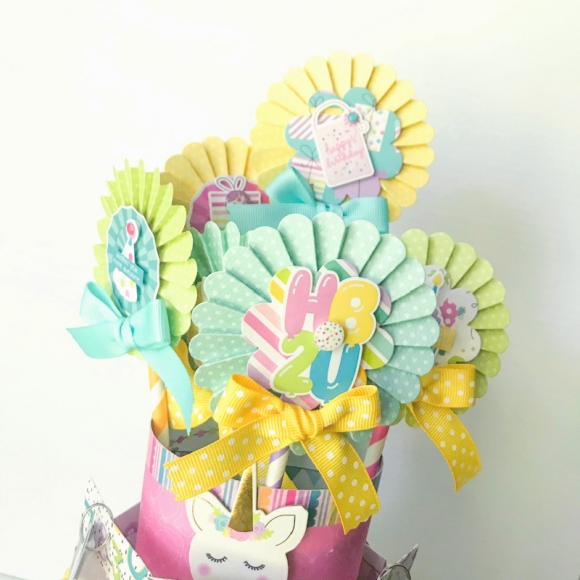
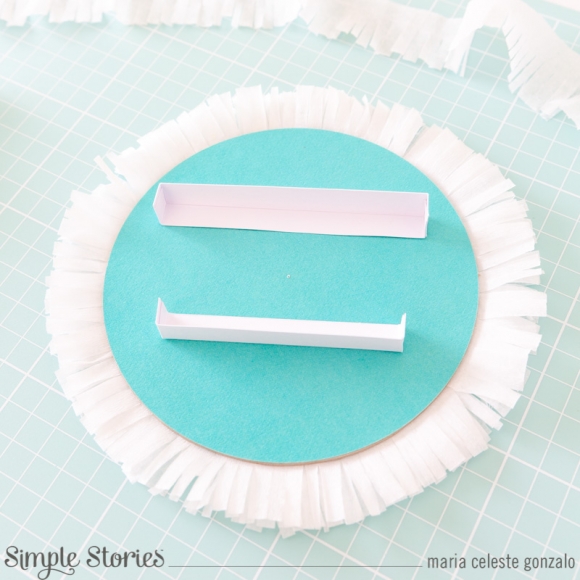
Cake Topper:

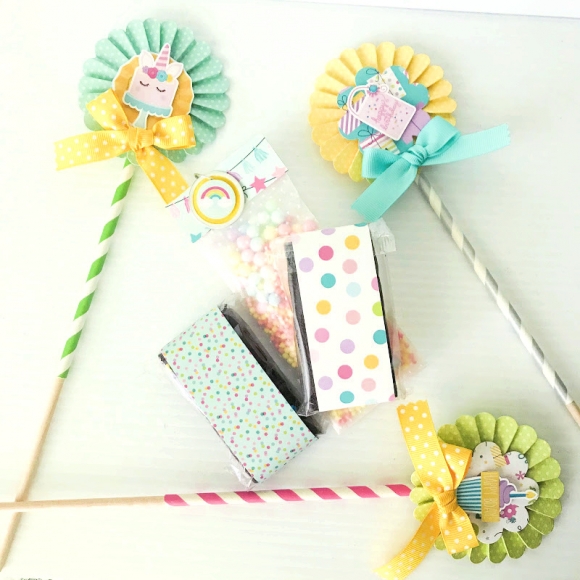
For making the cake topper you need one piece of stable cardboard of 5” of diameter. Cover that piece with one of the papers of the Color Vibe Collection. Besides, cut some strips of white crepe paper and glue them to the base. Next, you need to cut two pieces of white cardstock of: 4 1/2” w x 7/8” h. Score them in 3/8” at each end of the paper (wide) and 3/8” at the base (high). You are going to make small bases to prepare the different layers of the cake topper.

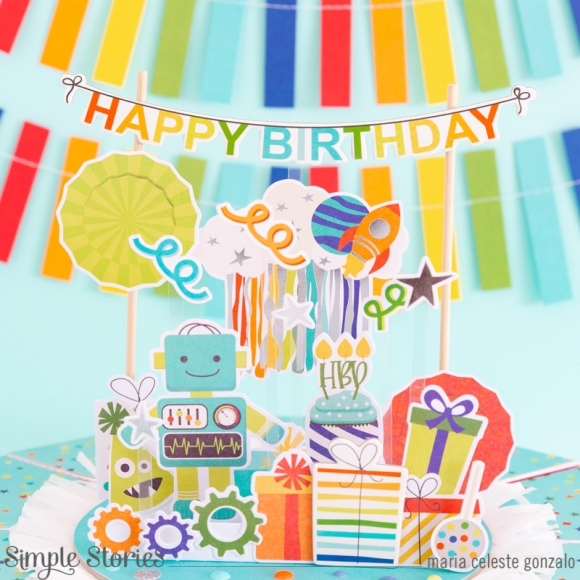
Use all you have to decorate… die cuts, stickers, chipboards, brads, washi tapes… Play with all of them! I used acetate to add some special details and I prepared a third layer with two sticks for brochette. I love to decorate and make such funny and happy layers!  See all the details in these photos.

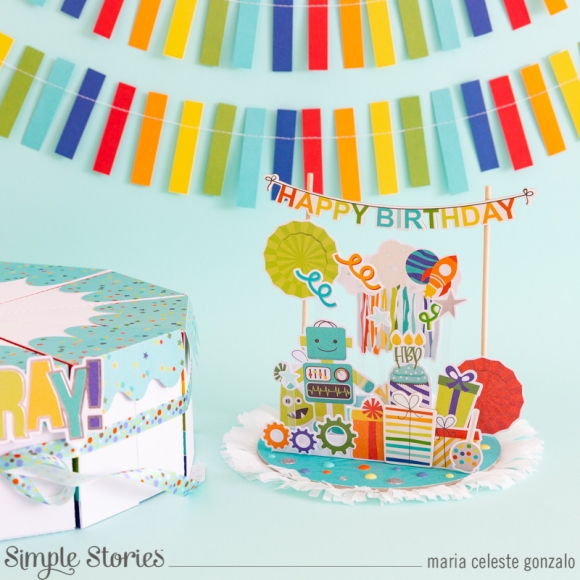
You don't need to glue the cake topper to the cake. It’s possible to add another detail to the cake like a word or a phrase.

Isn't it a lovely idea? I hope you like it!

See you next time!

Supplies

Hi there! Nathalie with you today to share a new page that is all about boys and their magical bond.   It is always a treat when a masculine line is perfect to document those especial people in your life.  The new BRO & CO collection from Simple Stories is just perfection in a kit, which made this page come together easily...

I wanted to play with paper for this page, so i started by cutting the strips from the So Rad! paper and then cut strips of paper that matched the colors of the paper ( Total Legit!, Killin' It!, You Rock!, 2x2 Elements).  

I used the Birch/Grid Sn@P basics paper as the background for the page, and created the chevron pattern with the paper strips, making sure they formed that weaved pattern as they met in the center of the chevron.  Here is where i handstitched the strips in place.

The picture was backed and layered with the Level Up! and So Rad! papers, and then placed in between the chevron lines.  There are so many cute and fun embellishments, it was easy to create clusters around the page.

The foam stickers in the collection are a must have!!! I combined them with the Color Vibe Navy Foam Alphas to complete the title work. A few more stars, brads and stamped images complete this layout.

This layout was so fun and easy to put together, and i love how the design and colors bring the focus to the picture of my son and nephew.   Remember to check the BRO& CO collection, you are going to love it!

Supplies

Hello Simple Stories fans, It’s Dorymar with you today to share a new Snap Album with the colorful Going Places Collection.  This collection is very versatile because you can document all types of vacations they can be by airplanes, by cruise, by train even road trips. It has tons of beautiful patterns and bright colors. Check it out!

On the cover I wanted to recreate a city vacation scene, for that, I used the beautiful paper with aqua stripes and matched it with the passport stamp paper included in the 6x8 Coordinating Paper Pad as my background.  For the city view, I used one of the 4x6 cards included in the collection, and then I added fun icons from the chipboard stickers and sticker sheet. For finishing touches, I added a little touch of glitter glue to highlight the moon and blonde hair of the girl. I think the cover looks so fun and cute.

I love decorating the chipboard dividers that the Sn@p Albums includes, but this time I wanted to focus on creating the layouts for my 6x8 pages. For all the layouts that you will see below, I used the papers included in the 6x8 Paper Pad because they have the perfect size for the 6x8 pocket page.

For this layout I want to keep the concept on the cover, the City Vacation.  I am in love with the people and cars included in the collection.

A few close up!

One thing I love about this collection is the bright colors, because they blend easily with any type of travel photo. This collection is ideal for someone looking to simply collect multiple trips and keep a journal. With the grouped elements, the different layers of beautiful papers and the perfect photos, your project is sure to be the perfect one for any trip.

I could not stop incorporating the pockets and flaps that I love so much; they allow me to use all the beautiful elements that the collection has. I used a few of the page’s dividers included in the album to make them interactive and this show the adorable figures of the project. Below you can see each one in detail.

The journal bits and pieces pack has a lot of tags and postcards, they are perfect for add journaling of just to create a beautiful decoration in your layouts. In my case, I used them in strategic places to highlight various areas of my project.

Thank you so much for stopping by!

Happy Crafting!

Supplies

Hello everyone! Anya here today and I am happy to share a little travel project that might come handy to take along on your next trip or to record the memories of your recent adventure. I never get tired of little mini books, they are fun to create and are able to include all the photos you want!

For these arrow-shaped mini books I used the Going Places collection and a simple arrow cut file. With the help of a digital cutting machine it's easy to make a couple of books at once. How awesome it would be if we can write our stories in one of them and let our children fill the other one with the stories from their points of view. It's amazing how different we see things sometimes.

I like to use plain cardstock for the base of my pages and overlay each page with patterned paper. This way it make the pages a little sturdier and I always appreciate a thing white border. For me mini book don't require too much planning, which make it a rather simple project to create.

When I am making a mini book ahead of time, I don't decorate every single page, leaving myself more options in photo placement and story telling when time comes to fill the book, but a few photo flips are a must, since we always bring a lot of pictures back.

Hope this will inspire you to make a mini book if you haven't made one recently.

Supplies

As a mom to three boys, I feel like I am always scrapbooking boy birthdays! Because of that I am always happy to get my hands on a new boy birthday collection that has great patterned papers and embellishments.  Birthday blast has those and so much more!  Christine joining you today to share an Epic Boy Birthday Layout! 

This layout contains lots of layers with the patterned papers and various banners really being the highlight.  I made use of papers from both the 6 X 8 paper book and the 12 X 12 papers.

I was drawn to the wonky striped paper "Yay" and decided to use that as a unique base beneath my photos and patterned paper.  I cut them out and then distressed the edges so that they would add some neat texture. Because the stripes weren't perfectly straight, I was able to keep that from being a distraction by doing the distressing. I chose which color stripes to use based on the colors in my son's shirt.

I also made use of several of the birthday present shapes in chipboard, cardstock stickers, and bits & pieces.  I added a "9" to one of them from the 6 X 8 sticker pad to help personalize the story.

The title is probably my favorite part of this layout.  His shirt says "epic" on it, so I knew that I wanted to include that word.  By combining the Color Vibe Foam Letter Stickers with the script cardstock stickers, I was able to create a really eye catching and colorful title.

If you've got another boy birthday layout to capture, get your hands on Birthday Blast and have a blast ;) creating with it.  Be sure to swing by my YouTube Channel to see the full video on how this came together!

Supplies

Hi! Odessa here with a peek in my Flipbook today. Animal print is my favourite colour so when I saw Kate & Ash I was so excited. So many patterns, great colours and fun embellishments. I couldn’t wait to use it!

I am still loving using the SN@P! Flipbooks. Pocket scrapbooking is my favourite kind of memory keeping and it’s a nice way to focus on smaller life chapters rather than big volumes. I picked the Blush Flipbook to go with Kate & Ash and got to work decorating the cover. I used a few different cardstocks from the collection here. I used Super Like! to cover the front of the Flipbook and then cut instant photo style frames from Good Vibes, Awkward, 3x4 Elements and Whatever! I mix and matched frames and squares from inside them and stuck it all down on the cover. I added some Chipboard Stickers and a few phrase stickers from the Combo Sticker sheet on top. I finished the cover off with a few well placed brads to make it look like the instant photo frames were pinned up.

The pinks and gold hues were just what I needed to go with some spring photos so I got to work adding those in with some journal cards and all the embellishments. I’ve come to terms with the fact that I am a bit of a maximalist when it comes to stickers and enamel dots. I used a few photos with instant photos inside to carry the theme from the cover and just had a lot of fun with it. I really like how the 3x4 cut out from the 2x2 Elements cardstock looks in a pocket.

I really like how the 3x4 cut out from the 2x2 Elements cardstock looks in a pocket. Add in some of the sassy words and phrases and cute washi and this collection was so easy for me to use.

Here I used the back side of a 3x4 Element and layered lots on it to make a bold journalling spot. I used one of the Journal Bits & Pieces layered with lots of enamel dots, stickers and brads. The Colour Vibe Lights Alpha Sticker Book helped me add the finishing touch with some words in the middle.

This spread is so bright, I love it! More instant photos and just general life. I did a lot of sewing this spring and the pocket in the left lower corner is made by sewing a scraps from my project (which match Kate & Ash pretty perfectly) with FAB from the Cardstock Sticker sheet on top. I had fun adding in the 3x4 Elements, it was hard picking which ones to use because they were all so good.

Little clusters of tiny embellishments makes me so happy! I used lots of little enamel dots and hearts from the Cardstock Sticker sheet to liven up this photo with one of the cute phrase stickers. My nails in the photo even matches the golden colours in Kate & Ash. Love it!

I had a little to much fun embellishing our cat. I used Journal Bits & Pieces, chipboard stickers, brads, enamel dots and more to make the photo as sassy as she is. If you’re looking for a collection with on point colours, a little sass and all the animal print, Kate & Ash is perfection!

Supplies

Make your next unicorn-themed birthday party fun and functional with this tiered cake "Favor Tower". Not only does it make an adorable centerpiece, but kids will love picking out their treats and favors from the different sections!

You most certainly can make this in any heights and circumferences that you wish, but here are the measurements that I chose: 

Bottom-7.5D X 3.5"H

Middle-5.5"D X 5.5"H

Top-3.5"D X 8.5"H

For the side walls I cut strips of paper that were 1/2" more than the heights listed above. I made a 1/2" fold along one edge to create a flap.  I made small cuts all along the flap (up to the score line) so that the strips could easily be formed into a round shape.  The flap was then used as a footing and glued to a base circle that was also cut from patterned paper.  The process was repeated with the other two tiers.

Inside the bottom tiered I added pre-packaged brownies that were then wrapped in strips of paper!  You could also add stickers, or let the kids decorate the fronts with die-cuts and stickers.

To the middle section, I packaged glassine bags with candies and then topped it with a bag topper and a cute charm.

Did you know: (most) paper straws fit easily over a 3/16" wooden dowel!  After adding paper straws, I embellished the tops of the dowels with a layering of papers, stickers, die-cuts and ribbon bows!  Kids love these fun wands and will enjoy sliding the straw on and off for use.

In finishing the tiers I also used some of the foam stickers, washi tapes and chipboard stickers from the "Magical Birthday" Collection.  

Thank you for stopping by!

Supplies

Hello friends! It’s Jen today with a layout using the Summer Farmhouse collection, which is one of my favorite Simple Stories releases. The cute prints and bright colors make me so happy!

This summer has been different from those in the past in that we haven’t been able to take a vacation. Because of this, I have spent a lot of time looking through and printing some of our older family photos. This picture of my three kids is one that I just love - they are all sitting together and actually smiling! Bonus!

To begin this project, I used oxide inks to create a mixed media background. First, I mixed one color with water and used the smushing method to apply it to the white cardstock, followed by the next, etc. Next, I used the Summer Farmhouse stamps with the same inks and stamped flowers on top.

The next step was to cut several flowers and leaves using the Flowers cut file from the Silhouette Design Store.

After adhering my photo with foam squares, I began layering flowers across the page. Each of the flowers and leaves is adhered with foam as well to give them dimension.

The flowers and inks complement one another perfectly and bring so much depth to the layout.

The color and dimension from the inks and flowers looks amazing. To give them even more texture, I added enamel dots to the centers of each of the large flowers.

Because the flowers are so detailed, I kept the title and journaling to a minimum. To anchor the white space, I added strips of torn washi tape along the top and bottom of the layout.

I love the dimension on this layout and can’t wait to create with this gorgeous collection again. Thank you so much for stopping by today.

Supplies

Pages