09.15.17
Family Love
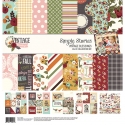
Hello everyone. It's Mindi here with you today. I am so excited to be sharing some pocket pages that I have created with the new Vintage Blessings collection. This collection is full of fall inspired colors and elements as well as a Grateful/Family theme as well. That is what I chose to focus on and I had a bunch of great family photos to use. These photos were from a few years ago when my parents were here visiting for Thanksgiving. We thought it would be fun to go and take some family photos.

When I started putting these pages together I thought it would be fun to add a starter page. I thought that It would be different to have a see thru element to divide these pages in my album. These transparency sheets from Grafix are perfect for these types of projects. You can find them in some craft stores and also at Scrapbook.com. I cut it down to the same size of the pocket page protectors and then I cut it down to be 3.5 in width.

Since it was going to be a see through element I played around with some of the die cut pieces and ended up using the word Family. It was a great fit as it layered on top of the photo so nicely. I placed it sideways and on the edge for a fun and layered element.

Let's talk about this first page for a minute. I knew that I wanted to include a photo of all of us to begin this set of pages. The other bit of information that I wanted to add was the date and what these pages were about. This pink doily paper looked like a great place to add some stickers and other embellishments.

Here is a look at the next set of pages. This top left journaling card was so cute with the row of houses on the bottom and it had lots of room for some journaling up above. I added the story about how we originally had plans to have our photos taken by a professional photographer friend of mine but one of my kids was super sick. We waited a few days so that she could get feeling better and headed out to try and get some family photos on our own.

One of the things that I wanted to do is to include photos and pages not in page protectors. I had so many photos that I wanted to include that I enlarged this one of my son and added in my album. There was some white space on the photo that I added in some journaling and a sticker that says JOY.

I took one of my favorite photos and enlarged it so that it went all the way across my album for a dramatic look. I kept the embellishing pretty simple so that it didn't take away from the photo.

On the other side of my big photo I wanted to balance out the photos with some patterned paper and embellishments. I layered some washi tape and some stickers underneath the big house sticker.

Putting together a collage of photos is always a great way to add more photos to any project. I added 4 smaller photos together and printed them to use on this page. This bird patterened paper was simply too cute not to use in a major way. So I cut it down and added my photo collage to the corner and finished it off with some embellishments. I sure love the photo stickers. I think I used them on every page.

On the other side of the photo collage page I wanted to add in another non photo page. I went with this pink polka dot paper and then embellished it with this darling quilted heart and then some other stickers and die cut pieces. Opposite from the pink page I added in a photo and a journaling card. The two cute birds were a perfect combination to the photo of my two boys. I layered some stickers and journaling in the middle of the journaling card.

Here is a look at my last set of pages. A few last photos and journaling cards. I continued with using the same similar embellishments, stamps, and enamel dots for a consistent look.


Thank you so much for coming over to the blog today. Putting these pages together was so fun. I hope that you found some inspiration today.


