Wander More!
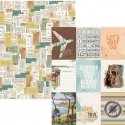
The Simple Vintage Traveler collection was just the inspiration to get some pictures of a family trip printed and in an album! As soon as I saw the colours I knew they’d go perfect with the majestic mountains and dreamy blue-green lakes we saw camping in Jasper National Park a bit over a year ago. I started with a Robins Egg Stripe Designer binder because it went with the collection so well and got to work adding in photos, paper and more.

This first spread have a couple of my favourite photos of our trip. I went with a large 6x8 photo on the left and a 4x6 and a journal card on the right. I really like the layered chipboard frames found in the Vintage Traveler collection. They don’t fit in the pockets because they’re more geared towards larger layouts but I found that attaching one to the outside of the page protector to be just what I needed to frame my photo. I kept the rest of the page simple with a cute journal card with a chipboard geotag.

Embellishment clusters make me happy and were just what my big 6x8 photo needed! I just started pulling stickers, chipboard pieces and die cut Bits & Pieces and stuck them down to give the story some words.

This spread has a combination of photos and journal cards in pockets as well as an accent pocket. I used a postcard style SN@P! card to add some journalling to my spread. The card is really cute and keeps the whole travel theme up great. I added some faux tickets stickers and die cut pieces to give it a bit more dimension. Underneath is a photo of my husband and boys I just added some simple phrase stickers. The super cute vintage cluster style stickers in Vintage Traveler are a great layer under phrase stickers. On the right I have some smaller photos and cards. I collected a bunch of various bits and pieces throughout our trip like the soda label on this page. Along with the cute bingo-y card and (of course) a coffee shot I added in a bit of our between adventure life.

In one of the pockets I simply placed one of the large geotags from the Bits & Pieces. It gives the page a bit of a breather and adds in some fun layering between pages. I love the amount and variety of geotags in Vintage Traveler!

On the next page I documented life around the campsite in the evening on the left and a map to start off documenting the next days’ adventure. I used some simple stickers and die cuts with my photos on the left and a photo flip (seriously, one of my favourite Simple Stories things!) to add some journalling space. I left the back of the geotag from the other side plain because I liked the way it looked there. On the right I used one of the square pocketed page protectors that Simple Stories makes. I cut down a map to fit in the 2 larger 4x4 pockets and filled the smaller 2x2 pockets on the side with some of the 2x2 cards from the collection.

I love including maps in travel albums. I save pretty much every tiny piece of paper that I can so I have a few of them in my Alberta trip scrapbook. This map was perfect because we had spent the day following it and checking stuff out. I marked some of the main spots we stopped with chipboard geotags and then used some of the Simple Stories alphabet stickers to add a title. I embellished the title with some phrase stickers from the sticker pack and combo sticker sheet, added a cute car die cut from the Bits & Pieces and it was a done page.

Finally, I added some journalling and one more picture of the boys enjoying campsite fun in a Photo Flip on the other side. There are some really great journal cards in Simple Traveler that gave me space to get our story down in a way that looked like more travel ephemera. I had been putting off documenting this trip because it was hard finding a collection that did all the gorgeous landscape shots I took justice but I can’t wait to finish up my album with Vintage Traveler now.
Supplies