Are you as excited about Say Cheese 4 as I am?!  I could not wait to get my hands on this collection so creating this album was almost as fun as taking my boys to their favorite theme park! 
 
For my opening spread, I wanted my pages to have a waterfall effect so that I could see several of the fun patterns as soon as I opened the album.  Then I used one of the new metal dies to cut out the Yay!
 
 
I used another one of the large metal word dies for the pocket shown above.
 
I love the chipboard stickers that come with the collection.  There are two sets ... cute icons (the banner above), and a fun set of words ("Happy" in the photo below).
 
The Say Cheese 4 6x8 binder comes with extra pages including this polka dot pocket!  Perfect for maps, tickets, autographs, and other memorabilia.

The 2x2 element cards are great ... cute phrases, icons, and lots of adorable kids!


I can't wait to add more photos and lots of journaling to this album! Visit me over on my blog at Artsy Albums, and stop by @artsyalbums on instagram to see more of my creative adventures!


Spring Break is one of my favorite time of the year. Why? It's when my family always plan to travel somewhere new. 
 
I've set up the new A5 Teal Planner with the Simple Vintage Traveler. This planner set up is making me more and more excited for my family's upcoming trip.
 
"Pocket Love" full of bits & pieces
 I'm ready to explore the world.  There are so many places that I have yet to see and visit. I've created my dashboard using the quote "There's no time to be bored in a world as beautiful as this" to be the highlight. I layered couple of 12x12 paper to create this dashboard. I decorated it with chipboard stickers and I layered couple of the washi tapes together.
I just thought it's perfect for my family's adventures. Life is an adventure.
 ...and so the adventures begins. Where will my family go to next for Spring Break?  I can't wait to document new memories in my travel planner.
I've always love creative planning in my A5. Horizontal Weeks is perfect for my planning style. I have so much room for stickers and other decor. I used the number stickers for the dates. I love how the word "Travel" looks perfect to the right side of my planner.
 I enjoyed using the "see the world"  stamps in my weekly layout. I've used black ink with the stamps which is super simple yet it adds flair and character. I'm not very fancy when it comes to stamping. Black ink is all I need. No coloring needed as I don't have patience and the time.

Thank you for stopping by and viewing my travel planner set up.
Where to next? Follow me on my Instagram to see where we're going next.

Supplies

Hello! It's Jennifer on the blog today! I'm so excited to share a page I  created with the new Spring Farmhouse collection! There is so much to love about this line from the floral prints to the fun embellishments! And it can be used for just about any theme project! Spring Farmhouse was perfect to scrap an older but favorite photo of my niece playing in my grandparents' garden.

I  began with trimming a piece of white cardstock to 11x11 inches. I  then adhered it to the beautiful floral of Live Simply and stitched around the edges to finish. For my title, I  used the "bloom" script from the Combo Sticker sheet which has numerous sentiments and beautiful florals to accent your project. You can also spy some of the pink gingham Washi Tape that is included in the collection! I  love adding small swatches to break up white space or accent my photos.

Using my electronic die cut machine with white cardstock, I  cut this floral wreath to adhere around my photo (Floral Wreath by Wild Pilot #275492) I  chose the green/white dot print of Plant Smiles and small floral of the Spring Farmhouse 2x2 Elements to back the intricate spaces of the flower. I  then added smaller embellishments from the 4x6 Sticker sheet and Bits and Pieces to accent. 

The Spring Farmhouse Bow Clips are a wonderful addition to the embellishments! You receive four in a package so there are plenty left over for additional projects! I  chose the black gingham Bow Clip to accent the top corner of my photo

The Bits and Pieces pack always includes fun journaling spots such as the deco shape shown. I  then layered flowers from the Combo Sticker sheet as well as a fun black gingham chipboard heart!  You can also see that Enamel Dots have returned! I  love sprinkling them around my pages because they give dimension and color!

I  again used the pink gingham washi tape at the top of my page as well as added additional flowers around my wreath. I  love this little sentiment found in the Bits and Pieces; I  thought it would go perfect with my photo

Thank you for stopping by the blog today!  Check out the entire collection by going to the Products page! While there, you can see all of the fun new Simple Stories collections! Have a great day!

Hi everyone! If you have a special boy in your life that is celebrating a special occasion or needs some extra love and affection, make any day a party with the bold and bright 'Lil' Dude' paper collection from Simple Stories! This collection is full of everything boy- trucks, dinosaurs, frogs and dogs along with the coolest boy sentiments!

This fun party set includes treat holders, cupcake wraps and a cute drink bottle! All super easy to make and they look even more fab with all of these awesome embellishments! I used a Silhouette cut file to make these adorable popcorn boxes that can hold all kinds of edible goodies or prizes. The papers in this collection have great prints on both sides so they look wonderful inside and out!

For the cupcakes, I simply traced a cupcake wrap that I had on hand onto the patterned paper and then cut them out. I then wrapped them around the cupcake and taped them together in the back before layering on the charming stickers, chipboard and Bits & Pieces. Voilá, the cutest treat ever!

For the milk bottle wrap, I cut strips of the patterned papers with decorative scissors to add details around the edges and then decorated them with more of the marvelous stickers and chipboard, layering some with foam adhesive for dimension. You could easily do this with water and juice bottles too! The treat holder is cut from a die and is also embellished with more bright pieces from the collection! These cool touches will bring a smile to any boys face and make for the raddest party ever!

Supplies

Hello again, it’s Emma back today!! I keep saying how I can ‘smell spring!’, it’s definitely in the air!, can you feel it? This month I’d like to share with you the glorious new Spring Farmhouse Collection! I have decided to set it up in the new Hello Floral A5. 

How bloomin’ gorgeous is that!! Of course I’ve used the Hello monthly inserts in it!! Well, it would be rude not to, wouldn’t it!! Ok, let’s take a look at the Spring Farmhouse Collection, it’s full of beautiful spring colours, and I’ve chosen to pick up a lot of the yellows for my set up, unfortunately taking the photos for my blog, I found the yellows just didn’t show up just how sunny and cheerful they really are! So, you’re just going to have to put your ‘sunshine’ tinted glasses on and use your imagination!!

I don’t really need to say again, just how much I love to stuff my pockets full to bursting with off cuts of the paper I’ve used on the dividers and plenty of the chunky chipboard pieces! 

I’m not sure what it is, but I have quite a soft spot for wellies!! ...don’t get me wrong, I’m real life I’m a complete flip flop lover but when crafting I love to use a wellie or two!! I’ve used the black and white check throughout to tie everything together and that of course is what made me choose to use the A5 Hello planner for this collection, as you can see the gorgeous check lining! 

For my March monthly pages I’ve once again grabbed the Number Sticker Tablet for numbering the days, this really is the most useful sticker tablet I’ve ever come across!! I’ve also used the delicate nude check washi which works so well with the watercolour touches on the monthly insert pages! I’ve also used lots of the stickers from the 12x12 sticker sheet. A very easy and simple style to decorating! 

See!!! I told you I had a thing for wellies!!! When I saw the new metal dies that Simple Stories had bought out to go with the new collections I squealed with delight!! ...and when I spotted the Wellington boot die, well, I knew I had to use it!! I cut out a few in two different papers and chopped the tops off and swapped them over, I think it looks quite fun and will definitely make me smile when I turn the page!! 

There we have it, a quick look at what I’ve done so far with the spring farmhouse collection. Hope you’ve enjoyed it and I’ve encouraged you to have a play around with the metal dies! If you would like to see more pictures using Simple Stories products then checkout my IG account  Heartsbyemma (@heartsbyemma) • Instagram photos and videos

Hello Simple Stories Friends and Fans!  

Nathalie with you today with a super fun layout that features the new Say Cheese 4 collection.  What can i say!, Simple Stories has created the perfect collection as it can be used to document your memories at the theme park as well as your every day memories.  There are so many embellishments, papers, and designs to chose from that it makes is so easy and fun to create projects.

The inspiration for this page of my Goddaughter ready to visit the most magical place on the world was her head band.

I used the stencil as a guide to create the silhouette of the mouse head on white paper.  Next i used a few paper edge punches to create the scalloped paper strips out of all the black color papers that i found in the SAY CHEESE 4 collection, basic paper pack and 6x8 paper pad.   I glued the strips together on the paper silhouette and stitched around the edge of the silhouette to hold them all together.  All the extra pieces were trimmed so that the silhouette can be easily recognized. 

To keep the focus on the head band, i drew and cut  the image  of the bow onto the b side of the 4x6 Element paper of the Say Cheese 4 collection, and use some white thread to hand stich it to a piece of white cardstock.  Once the image was completely stitched and detailed, i fussy cut the cardstock leaving a small offset around the image, and glued it straight onto the head silhouette.

The B side of the Make a Wish paper serves as the base for the page.  A bit of white acrylic paint was added as a background for the head silhouette.   Once the piece was glued to the page, i used some of the Sn@p cards to back and pictures and glued to the layout.   There are so many embellishments to  chose from that it was so easy to create clusters of stickers, ephemera around the pictures.

Now, to complete this page, i used the new Fun Large Words Metal Die to cut part of the title from 6x8 paper - i used some white cardstock die cuts to create depth on the die cut-, and then used the  Happy Words Stamp and Dies to create the word "day".  To just finish this page, i added a matching bow clip to  the title, and a few lines of journal around the mouse head silhouette.

Stylized picture

I am totally in love with this collection, and the possibilities (trust me i have created a few layouts with it already).  Whether you love the theme park or just want a fun colorful collection, the new SAY CHEESE 4 is definitely one  of the funnest releases from Simple Stories this year, and a must  for your documenting.   You can always contact me if you have questions on how this came together.

XO

Jeanne here today!  Spring is in the air and my thoughts are turning to warmer weather and spending more time outdoors!   Easter is one of my favorite holidays for just that reason.  I love having a house full of people to share a good meal, but sometimes the kids get wrestles.  Easter is eggstraspecial because it’s usually the first get together of the year that we can step outdoors.

I made 6 cards to share today, all made with the Simple Stories Bunnies and Baskets Collection.  This is a 12” paper pack that includes a sheet of journaling cards, as well as a sheet of cardstock stickers.

The cut apart journaling cards make the perfect focal point for your cards.  Isn’t this bunny adorable?

The cardstock stickers are great for embellishing your cards.  The stickers are thicker than regular stickers.  To make them easier to work with I use my embossing buddy and powder the sticky adhesive backs.  This makes them easy to move around while I’m deciding for the perfect placement.   When I’m ready to adhere them I use liquid glue or adhesive foam squares to set them in place.

The cardstock sticker sheet even includes sentiment strips with sweet sayings.

I think the collection kit is a great value too!  All the elements are color coordinated and look at all the cards I make.  I still have an entire sheet of journaling cards and lots of paper to make more with!

There are 6 12 x12” double sided pattern papers in the pack.  I cut them down to 4x6 to make them more manageable for card making.   

I know your friends and family will appreciate the time you take to make a hand made card.  The beautiful papers and sweet images will announce the season and brighten their day!

Supplies

Hello my friends, Iris here with all the farmhouse feels in a layout using the lovely Spring Farmhouse collection.  There are so many adorable - and very relevant - icons in this collection, that I wanted to use all of them.  And as you can see on my page, I used quite a bit!  

I made this layout to document one of the areas in my house, which in it's past life was a very dated, 90's (alcohol) bar, but we recently remodeled and transformed it into my very own coffee bar.  To echo the chalkboard wall we have in that space, I started off with the black solid paper from the new Simple Basics Kit that coordinates with this collection.  Having coordinating solids really is going to open up the options when scrapping with our beloved Simple Stories collections!

I built many layers behind my photo, including several papers from the 6x8 pad and one wood grain from the Snap Basics 6x6 paper pad.  I then created clusters at the bottom left and top right corners with stickers, chipboard, doilies, and one of the adorable bows that are my new favorite embellishment! 

This wasn't going to be enough for me, so I decided to build a "shelf" on my page (using the long scallop border sticker) to house #allthethings. :D Just as on my coffee bar shelves, I placed signs, lanterns, vases, greenery and a tiered organizer with cute things, all curtesy of the combo sticker sheet, the 4x6 sticker sheets, and the chipboard set. Some of the flat stickers I propped up on foam, and I also did that with the scallop border sticker.  I backed the shelf area with the soft seafoam green gingham of the Well Said paper

I wrote my journaling with a white Uni-ball Signo pen and added some artful splatters and trios of enamel dots to the background.  Yay for the return of the enamel dots!  I added a thin border from the seafoam green gingham to the bottom edge of the page to balance out the top.

Finally, I created a pocket behind my photo and layers. (yes I had to tear it off the background because I did not plan ahead, but the layers and embellishments were all stuck together so they came off in one hunk)  I cut a piece of scrap cardstock to the size of the bottom-most layers so that it wouldn't stick out, added Scor-Tape to two sides, and attached that to the background, adding all the layers on top. Then I cut a rectangle of scrap cardstock that I attached to the backside of my before photo.  I placed one of the sticker tabs with a typed "PULL ME" on the end of the cardstock rectangle, covered the gap with one of the phrase stickers, and when you slide the extra photo in the pocket, the "PULL ME" tab handily nestles in place with the other embellishments to the left of the photo.

I know that last bit was quite a mouthful, so I invite you over to my Youtube channel to check out the process video. :) I truly enjoyed working with this lovely collection and I know you will too.

Supplies

Hello everyone, it is Kelly here today with a new blog! I just got my creative team box filled with products from the new Spring Farmhouse collection and it is absolutely gorgeous. I decided to switch my A5 planner to the Blush color and setup the pockets with the new collection.

In this collection you can find a whole set of only floral bits and pieces!! I used them in my front pockets together with some pieces of paper and floral chipboard pieces.

Besides the floral bits and pieces set in this collection you can also find enamel dots and bow paperclips. These products got me inspired and I made some of my own paperclips. Two flag paperclips, a layered butterfly clip and a scalloped round clip. I decorated the paperclips with some word stickers, floral pieces and the enamel dots.

I cut the ‘Love a lot’ paper as a front dashboard and used the Carpe Diem punch to punch the six holes. I decided not to decorate the dashboard because I just love the floral print. However, I did cover the paper with a gold dotted acetate piece from my stash.

For my horizontal weekly spread I used a few of the floral bits and pieces as main decoration. I also used the Planner basics sticker tablet and the Bloom sticker tablet from Carpe Diem for some functional stickers to finish the spread. I left enough blank space in the spread to write down all my to do’s and appointments for the week.

I hope you enjoyed reading this blog and you can find more fun planner inspiration on my instagram account.

Have a lovely day!

Supplies

Hello Simple Stories friends!

Marcia here today with an adorable layout that I created with the new Simple Stories Little Princess collection. This collection is so cute!!!! It's perfect for those little girl layouts, but versatile enough with lots of pattern papers that could do double duty on birthday layouts and more. My two girls loved to dress-up when they were little and pretend that they were fairy princesses. On my layout today, I am scrapping one of the dress-up photos I have of my daughter, complete with ballerina tutu, magic wand, and baggy tights, lol.  I wanted to create a fairy tale scene for my background so I decided to create some fluffy clouds using a stencil and distress ink. It was the perfect backdrop for a dragon protecting a castle, a beautiful princess, a magical swan, and royal banners. 

I used die cuts from the Tags & Frames pack to create a grid based layout. I embellished each frame with fun, adorable die cuts from the Bits & Pieces pack as well as chipboard and stickers, creating little make believe scenes within my frames.

Of course my little princess needed a frog prince who desperately needed a kiss to embellish her photo. Check out these cute bow clips too!

The banners were created from lots of different pattern papers. These I stitched together with my sewing machine before adhering to my layout with foam dots. I love how bright and colorful they are! 

If you have girls, the Little Princess collection is a must. It is perfect for documenting your little girl's adventures in the land of make believe. Thanks so much for stopping by today! Enjoy the rest of your week.

Supplies

Hi, Odessa here with a SN@P! layout using one of my favourite collections, Dream Big. I love the saturated playful rainbow of colours and fun imagery. 

I was looking through my supplies for the perfect collection to go with some winter fun photos. I just love the contrast of the white snow against all that colour! I made a two page spread with some fun extras - a shaker divider and a photo booklet. I had so many photos that I picked my favourites to go in the pockets and featured the rest in the booklet.

The left side is the simple part of the layout. a couple of photos and a cute journal card from the collection. Dream Big has some great embellishments and I used stickers, puffy stickers, bits and pieces and chipboard stickers on this page.

In the middle of my spread I made a cute shaker just because I really wanted to make one. I used one of the Insta-Pocket Pages cut down to a long single pocket. I slid a strip of the Be Younique cardstock down the side of the page protector to make it stand out a bit more. I used the Believe stickers from the combo sticker sheet and then added a few chipboard pieces and a bunch of confetti made with a hole punch and some of the Dream Big Cardstock. I added a tab sticker from the combo sticker sheet and sewed it up with my sewing machine. Now I want to make all the shaker pockets!

On the right side it looks like a couple of pocket cards and a 4x6 photo but one of the pockets is actually a photo booklet! I had a bunch of photos from that day and didn’t feel like they’d be great as a bunch of layouts. The photo booklet pulls together all of those extra photos into one layout with an added surprise.

I used the backside of Dream Big 3x4 cardstock to make a cute pocket card with some of the chipboard stickers. They’re supposed to spell out Dream, but Rad fit better in a 3x4 pocket. I embellished with a few more stickers to make a personalized journal card. Next to it is my photo booklet. I covered it with the Be Younique paper to make it match the rest of my layout a bit better and added some stickers for extra cute. Finally I added a tab to make it a little more obvious.

I lined the inside cover with the backside of the Dream Big 4x4 element paper and filled the pockets with my extra photos.

I kept the embellishment in my photo booklet simple with mostly just phrase stickers. I love how phrase stickers look on instant photos!

I just love that sideways adorable sticker. Dream Big might be thought of as a more “girly” collection but I didn’t let that stop me from using it with photos of my boys!

Finally, I used one of the 3x4 journalling cards to add some words to my layout. If you have a ton of photos I recommend giving these little photo booklets a try! They slide nicely into the pocket pages and are great for collecting images together. I put it all in the Robins Egg Striped Designer Binder which might be my favourite Simple Stories binder ever.

Supplies

Hello creatives! Leah here with you today with a super fun tutorial on how to upcycle a Carpe Diem Planner packaging box into decorative and functional storage for your craft or planner supplies. How many of you have kept the pretty packaging your Carpe Diem planners and traveler’s notebooks came in? I have quite a few and I never throw them away because they are so cute and functional. I love to use them just as they are for little storage trays for my supplies when I am working on a project. I have been wanting to dress one up for a while and since I’m working on setting up my new craft space, this felt like the perfect time to give it a whirl. Of course, I turned the camera on so I could share the process with you.

I’m not sure how much the packaging boxes differ in size with each size planner, but for this tutorial, I am using the box for an A5 planner.

Editing this footage was a challenge because there was so much to share, and some trial and error. Even after whittling it down quite a bit, the video still ended up being nearly 20 minutes long. You may want to go grab a beverage and get cozy before hitting play on this one. ;)

Insert video

I love that this box is not only providing storage now, but it’s also displaying the products right in front of me on my desk, which entices me to use them.

As you saw in the video, the pockets attached to the back of the box are really easy to make and switch out, so I definitely plan to do this again with whatever collection I work with next!

Here are some closer photos of the finished project and the different pieces.

You can rearrange the two separate pockets in any way you want to within or around the box, but the best part about these is how you can tuck them into your planner to take some of your supplies with you on-the-go.

Displaying some of my favorite products around me is something I have always done to motivate and inspire me to create whenever I’m in a creative rut. Now I can do that with this box and get the duel functionality of some added storage as well. The display box can easily lay down and looks just as cute as a tray. Because all of the pieces I made are flat, I can also throw some other supplies in there too if I want to move around to another part of the room or in the house.

I’m curious, what other ways have you all been using the packaging boxes that your Carpe Diem Planners came in? Tag me over on Instagram @sunny.leah to show me, and let me know if you give this tutorial a try! Until next time friends, happy creating!

Hello Friends,

It's Kristine with you today to share a layout using the Kissing Booth Collection! I cannot get enough of this collection with it's super cute patterns and lovely die cuts. I created another layout using my cousins wedding picture. It's perfect for this collection isn't it?

My layout is called KISS ME.

It measures about 9x12 but I added it to a piece of white cardstock to make it 12x12. I used a black cardstock to mat the layout and create a contrast with the pink/red colors.

I used a quote from one of the 4x6 element cards for my journaling. I didn't want to add my own journaling for this personal layout so I thought that using the quote would be perfect to add some words to the page. Those elements cards are perfect to cut apart!

I printed a picture that measures 5x5" square and I really love this size. I added dimensional adhesive to the photo, the journal strips, and the chipboard pieces.

Adding a few enamel dots, paint splats and some of those tiny puffy hearts created a great little details for me.

Such a great collection to play with - for weddings, valentine's day and many of those special moments. I hope you have a chance to create with this KISSING BOOTH collection and please share your creations with us on social media! You can find me @KristineDavidson and @SimpleStories_

Supplies

Hello, I’m Cara and I am addicted to travelling! I love a clean hotel room with a puffy white bed and it’s cute little tea and coffee bar. I love to visit new things and learn about new cultures. And I love getting away from the everyday to experience something new. I’m not home a week from one trip and I’m dreaming up the next. 

A Traveler’s Notebook is the perfect place to plan and document your travels, that’s what it was originally for! It’s in the name after all ;) Simple Stories' new Simple Vintage Traveler is a perfect pair to set up a Traveler’s Notebook just for travel. In it you could plan out your travels before you leave, house all your documents while you are away and even document all the fabulous sights you see.

I chose the Cream Dot TN and added some Black Speckle Washi and paper to make the pastel colours from the collection pop. 

I started with the pockets because it’s my favourite thing to decorate. I wrapped some washi on a card and added stickers, chipboard and die cuts in various sizes and shapes, sprinkled a few enamel dots (the new Spring Farmhouse dots match perfectly) and I love how it turned out.

I tucked that black speckle paper into the long back pocket, along with the Take Detours paper, added some ribbon trim and a tab and the pockets look fab!

I covered 3 TN inserts in papers from the collection and decorated those as well. I decided to keep the back 2 relatively flat with stickers, washi and die cuts only.

For the front insert, I also added some chipboard and enamel dots as I don't mind these bumpy items in the front.

I think my favourite bit is the dry-erase packing list that I made with one of the Layered Frames. I used a permanent waterproof pen to write the list and I can check it off with a dry erase marker. 

To make my TN the star of the show when I travel, I added lots of clips and tabs to the tops and sides, with extra hot glue so they’ll hold up in my carry on.

I also hot glued a chipboard hot air balloon and some ribbon to make a TN swag for the front cover.

If you’d like to see my process video, click here:

Travel TN Setup

Happy planning and happy travels! 

Even though I’m looking forward to spring it’s still snowing!!!! It’s a good time to pull out your snow pictures and get caught up on Scrapbooking!!! This adorable line Freezin’ Season has all the papers, stickers and embellishments you need to scrap up a darling page!!!!


Supplies

Hello friends it’s Kylie back with you today on the blog and I have been busy documenting my month with help from the February printables. If you haven’t had a chance to check out the printables yet, you will find them HERE There are 3 different sizes you can print to suit- A5, Personal or Traveler’s Notebook.

One of my New Year resolutions was to focus more on self care and positive thinking.So I have been planning, documenting and memory keeping in my Typewriter Floral Traveler’s Notebook, using one of the Grid Notebook inserts.

I like to use a thicker quality paper (around 160 g/m2 )for printing, as I like them to be nice and sturdy but regular printer paper is fine too if you prefer.Once they are printed you can enjoy fussy cutting them out.

There’s a great variety for February! These cards are some of my favourites…..

Another of my favourites is the ‘Currently Loving’ page. It’s something you can add to each month and reflect back on. It would be fun to see and compare how that changes from month to month.

I used my typewriter to fill mine in, then all I had to do was cut and adhere into my Traveler’s Notebook. I’ve used a corner punch to round my corners a little.

I’ve added some outlining to my ‘Love this Life’ feature page to help it really stand out in my notebook. There are also some of the smaller printables,  as well as a few stickers from the ‘Good Vibes’ collection used.

Using the ‘Mug Life’ stamps, I added them to the small printed banners. I thought these would be great as a title, an overlay or page tag.

I wanted to record several happy memories for the month and I have used some of the 3 x 4 printable cards to enhance my pages as well as the ‘Plan It’ and ‘Good Vibes’ stamps.

I found some inspiration from Pinterest for ‘Self Care’ to which I have typed out and added into my pages.I love the coffee cup and the best part is I can print more than one!

With help from the ‘Make a List’ stamp set I will be using this page for goals and special notes for the month.

I hope you have enjoyed seeing my Traveler’s Notebook today and it inspires you a little with your own.

Until next time,

Kylie

Hello everyone!!  Jackie G here on the blog today to share a meowgical boxed card set with you using the Dream Big collection!!  I decided to challenge myself to only use scraps for this project, and that is exactly what I did!! I did have to get super creative and piece a couple of smaller scraps together to create larger panels, but it worked!! 

Scraps are perfect to make cards with!!  Pair them with some leftover stickers or other elements and voila, you will have a plethora of cards in no time!!  In this case, I used leftover bits and pieces I had along with some of the puffy stickers and 4x6 stickers.

Of course, I couldn’t just stop at a handful of cards.  I still had a handful of scraps so decided to make a fun little box to put the cards in!! I think it would make a wonderful box set to gift to a friend. 

So, I encourage you to bust out your scraps and use them up!!!  What better way to get rid of them…and make room for some new product!!!  Be Meowgical and give it a try!!

Thanks for stopping by!!

Supplies

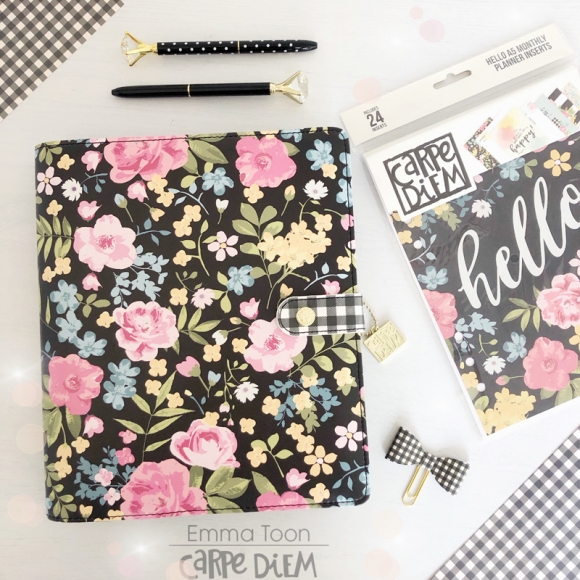
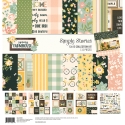
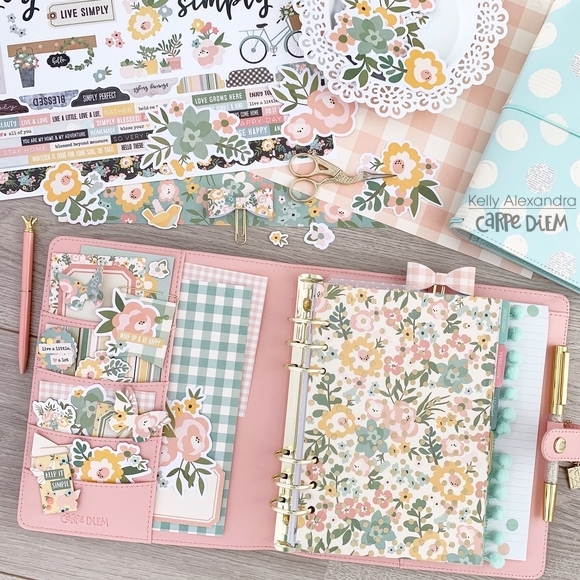
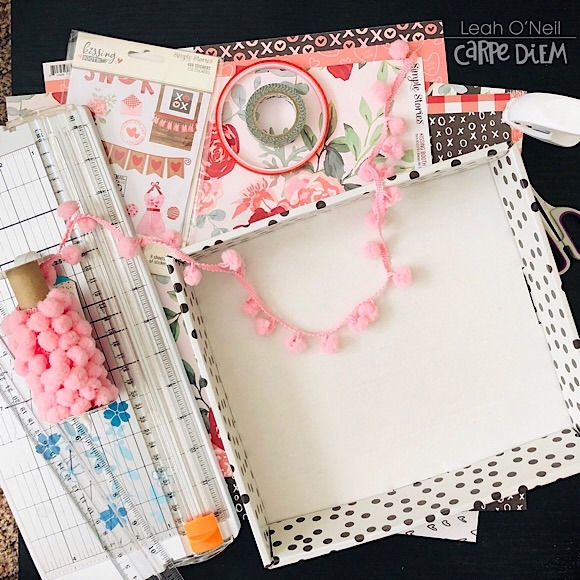
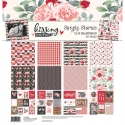
Hey planner enthusiast! It is Rachel again, and I on the blog today sharing my A5 Planner setup for February that I am just SMITTEN with it! I not only love this beautiful blush pink planner, but I am also swooning over the Kissing Booth Collection! The pinks and reds with the pops of black and white - its perfection!

Probably the hardest part of setting up a planner for the month is figuring out which gorgeous papers to use. This collection did not make it easy on me!

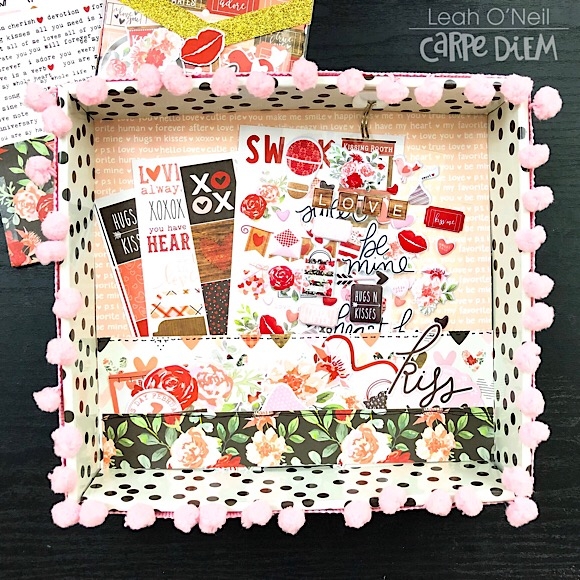
This year, I am using the Good Vibes Monthly Planner inserts, but I decided to just alter the February divider a little bit with the element cards and combo stickers. You don’t always have to create a monthly dividers from scratch! Use the dividers you have, and just alter them a little to fit the theme you are going for.

Another trick? Use a removable adhesive on your altered divider. You can always make it permanent later!

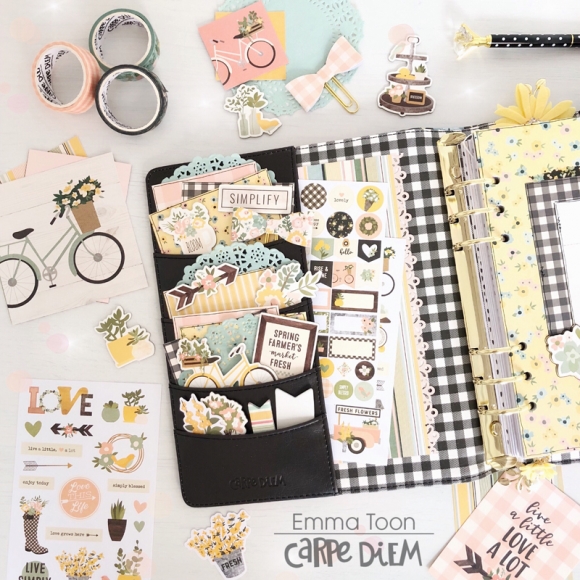
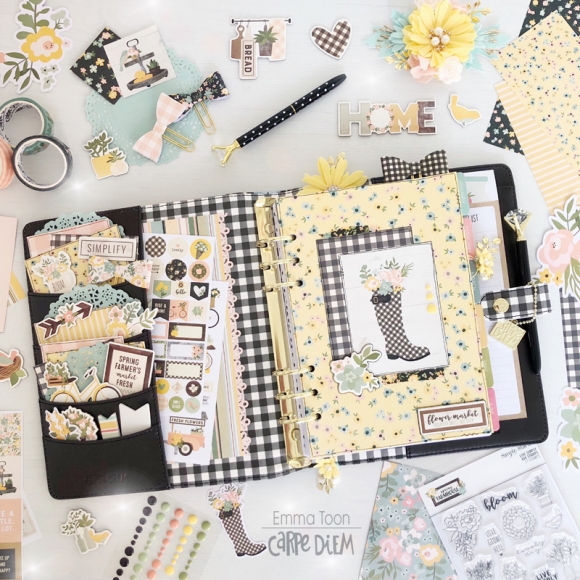
This month, I am switching things up in my A5 planner to better fit my needs. I decide to put all of my necessary sections right behind my monthly divider and move the rest of the monthly inserts to the back of my planner. Since this planner is for all things home and personal projects, I made different sections based my needs. To make these sectioned dividers, I pulled out some of my favorite DIY divider tools - My divider templates, a scissor or paper trimmer, my 6 hole punch and my Labels A5 Sticker tablet. With just these tools you can make a planner divider out of anything!

My dividers are pretty simple this month for two reasons. One, I just couldn’t bring myself to cover up these papers (sorry, not sorry)! And two, this planner often bulks up pretty quickly, so I’ve learned to keep the dividers pretty simple so that I have a smooth surface to write on. Plus, that means I can add in some sticker storage, which is a higher planner priority for me!

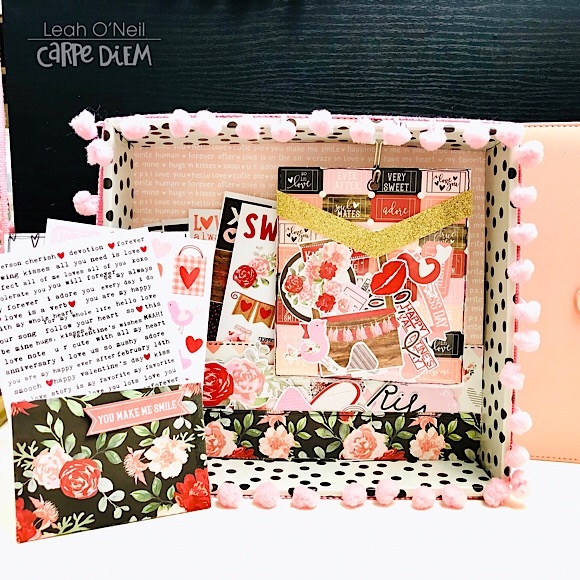
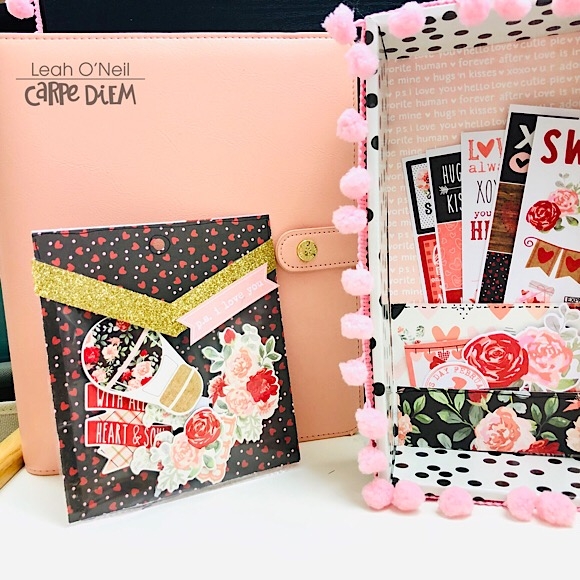
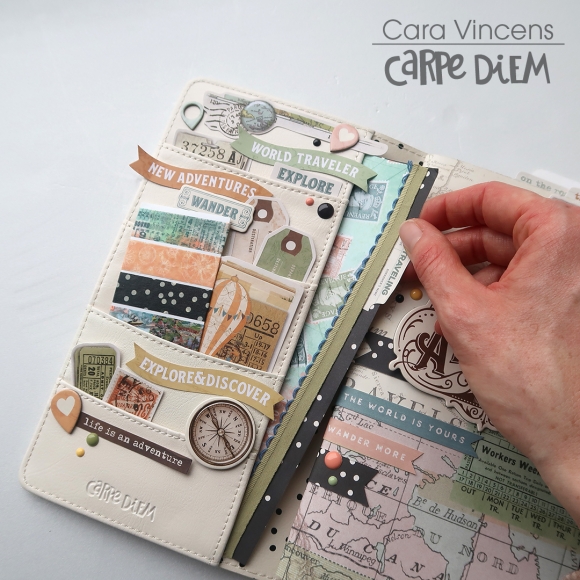
I mentioned that I moved all my monthly inserts to the back of the planner. While the tab colors are beautiful, they didn’t match my theme for this month, so I decided to add in a 6X8 pocket page with a trimmed piece of paper from the collection to separate the sections. Fun Fact: this planner punch is AMAZING! It is quite heavy duty and punch through pocket pages with ease! I have also used this punch with laminated pages too. I have had my fair share of 6 ring punches since my planner addiction began, and this one is by far the best!

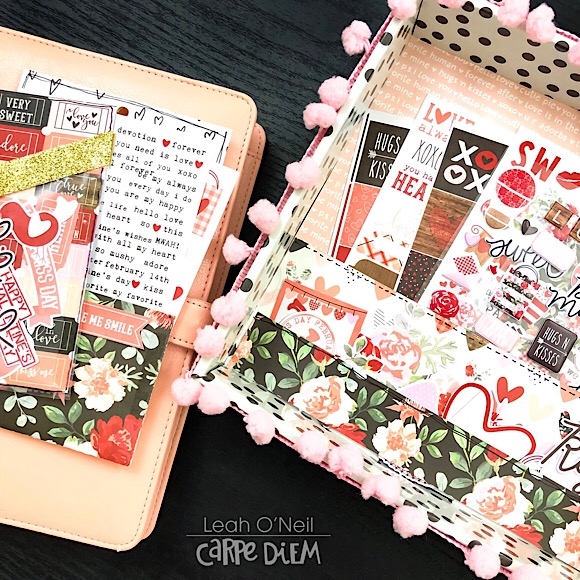
Here is the pocket page inside the planner. The monthly inserts are behind and easy to reference, but are not interfering with this months setup! Added bonus: this pocket page can act as storage for important papers, receipts, and photos collected throughout the month.

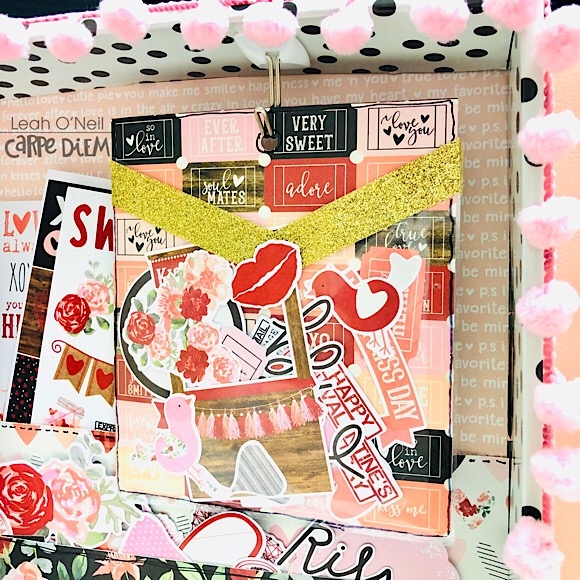
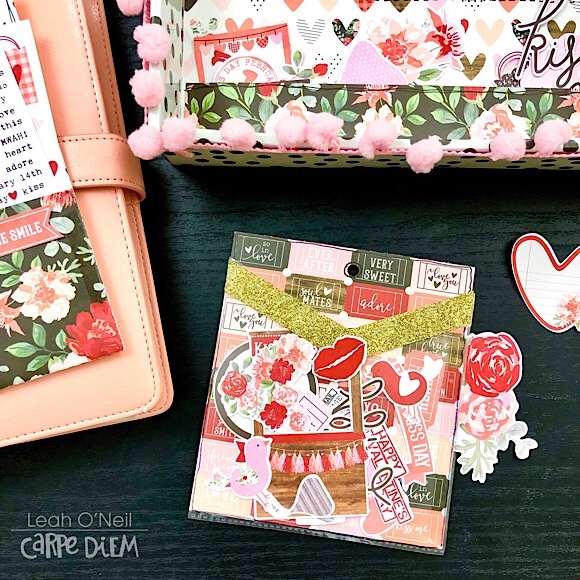
Again, that punch for the win! I re-punched a 4x6 pocket pages easily for sticker storage in my planner. If the stickers aren’t with my planner, I’m less likely to use them so onboard storage is a must for me.

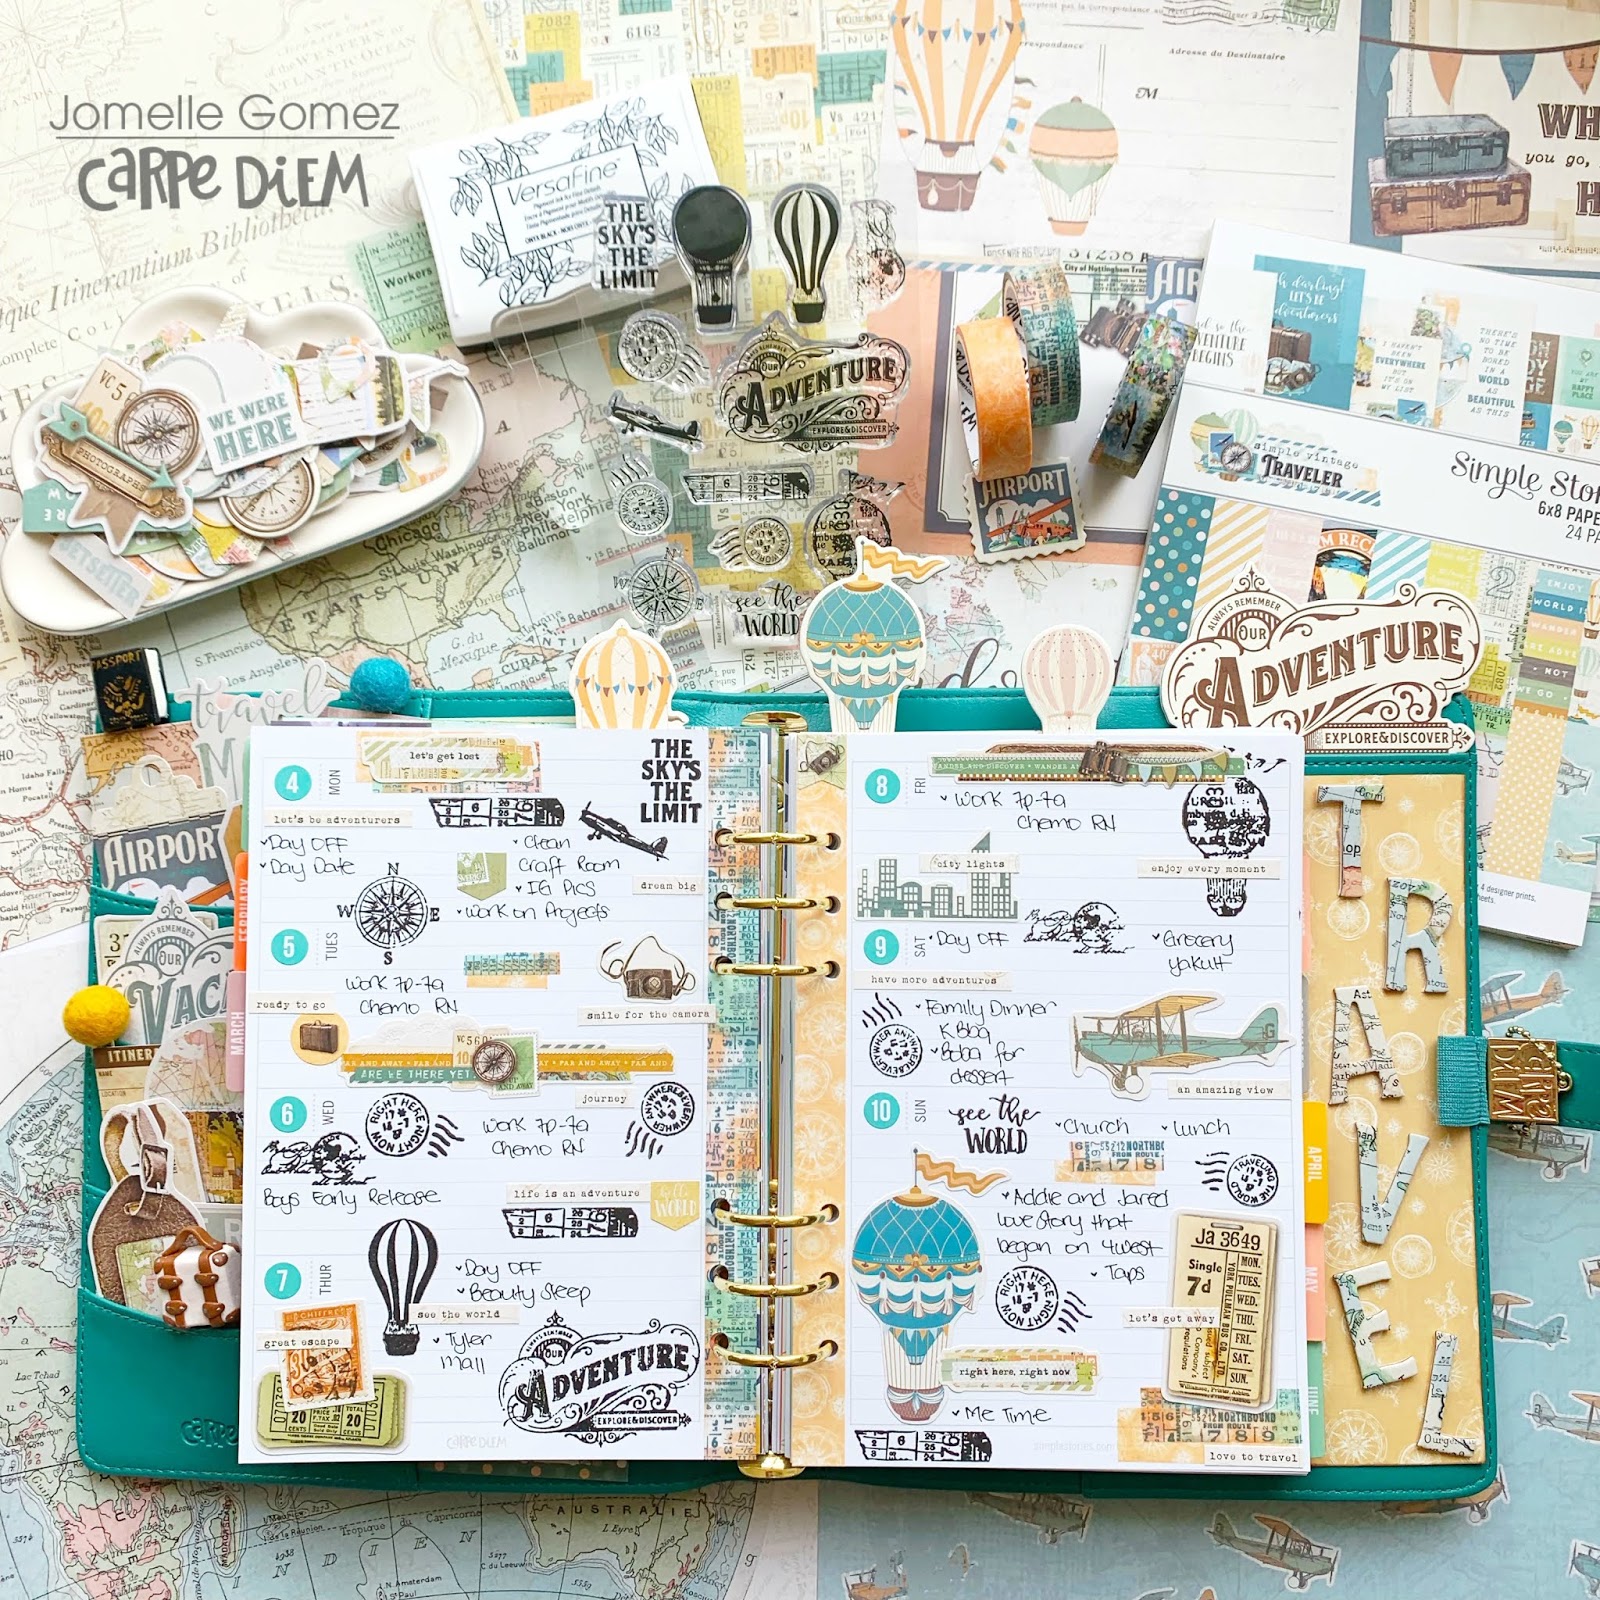
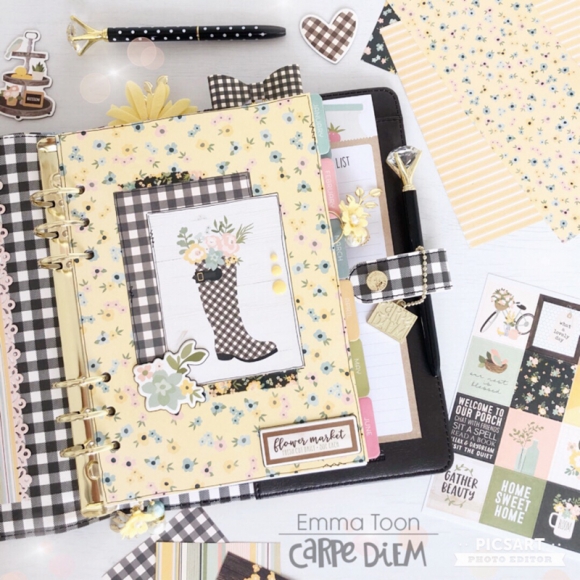
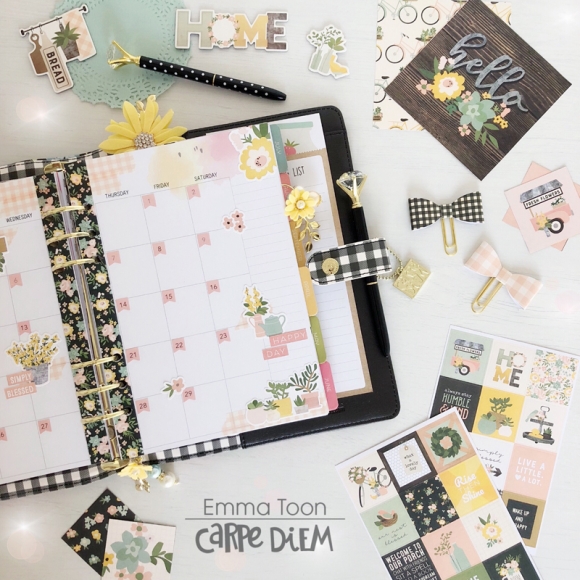
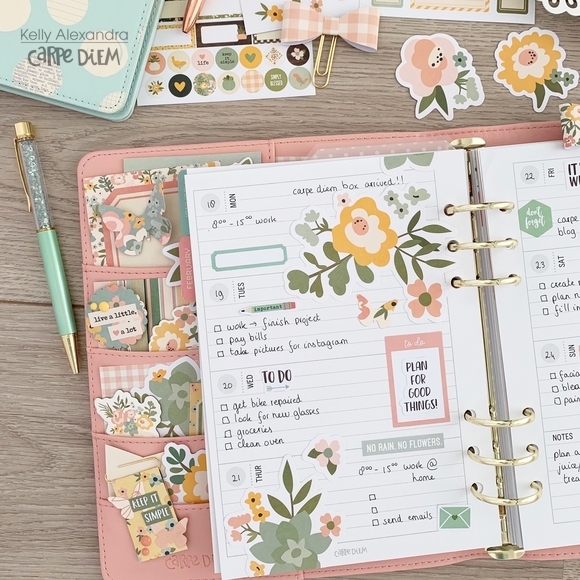
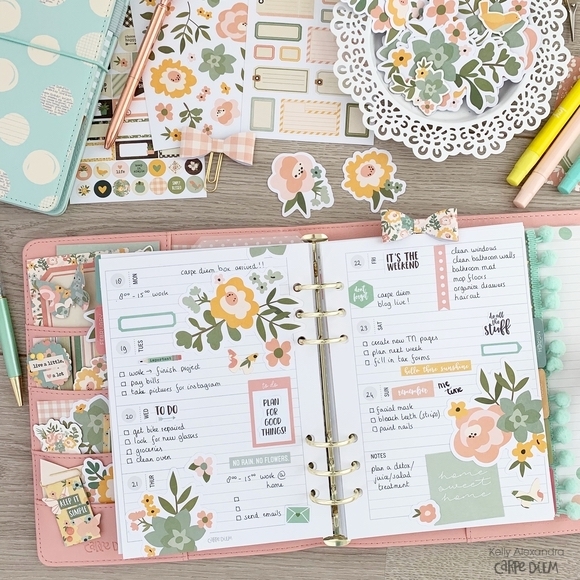
And now for the planner pages! Here is my monthly setup for February. I used scraps from the divider papers along the top of the pages and as faux washi to mark off a trip I’ll be taking this month.

I love using the insta square stickers from the 4x6 Sticker pack on the monthly pages and layering label stickers over them.

One of thing I am most excited about this month is the opportunity to attend the Chicago Planner Conference! A weekend with other planner enthusiast - yes, please!

My Monthly dashboard helps me remember the big events for the month, set a few goals and have another place to add all the pretty things! I love that the Carpe Diem version of this page is very simple and easy to customize.

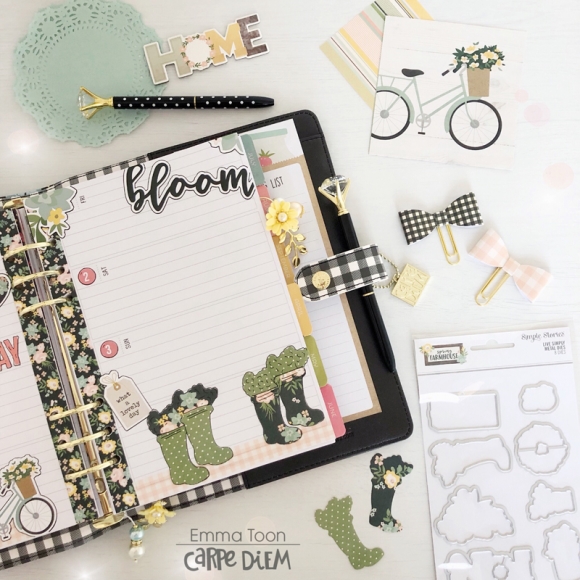
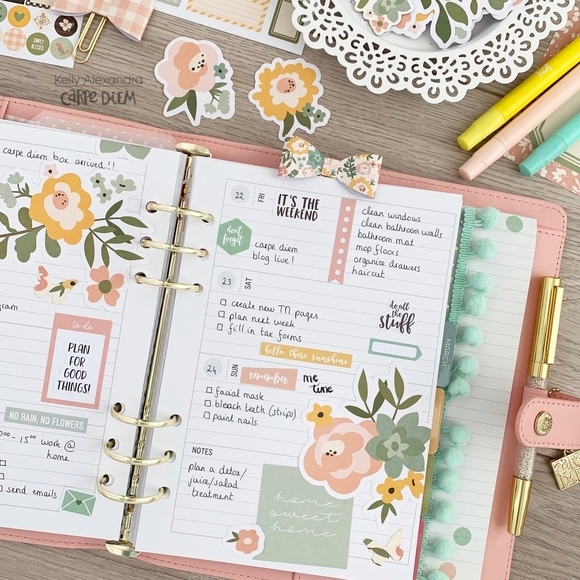
I think it is safe to say that I LOVE how this weekly spread turned out! If you have been following me for a while, then you know I am all about making planner inserts work for you. These appointment inserts usually come with Monday through Thursday on the left side of the page, but my brain likes to Monday through Wednesday on the left side.

Since these inserts have such a simple layout, it was pretty easy to just shift the days of the week over. I used Alpha stickers to mark the days of the week. I even was able to add a sidebar on the left hand-side to track a few things (like happy mail!)

These inserts have an hourly schedule on Monday and Thursday. I didn’t need it, so I covered it with circle stickers to use for daily tasks I left plenty of space on the weekend to record my highlights from the planner conference, too!

I hope you enjoyed this pink peak inside my planner for February. At the end of the month, I will share a flip through of the completed pages on instagram, so make sure to check it out!.

Supplies

Pages