Hello everyone!!  Jackie G here on the blog today to share a couple cards with you using the beautiful Spring Farmhouse collection!!  This is one of my favorite collections!!  I know I say that a lot, but this collection is beyond amazing!!  My all-time favorite thing to craft with are flowers, and this collection does not disappoint!! 

I didn’t use many papers to create these cards, but instead allowed the 3x4 Elements, Floral Bits & Pieces, and the Spring Farmhouse Bits & Pieces do all the work for me!!  Especially those flower pieces!!  Don’t get me wrong, I absolutely love making very intricate cards, but sometimes all you need are just a couple elements to really make a card pop!!

Speaking about popping, I made sure you use LOTS of dimensionals on each of these cards to really draw some interest.  Some elements I even doubled the height of the dimensionals so it looked very realistic.  You can see this example on my “hello” card.

I hope you love this collection as much as I do!! Enjoy!!

Supplies

What's more fun than spending Spring Break at the happiest place on earth? This year my family was able to enjoy and create new magical adventures at Hong Kong Disneyland.
 
As soon as I saw the new Say Cheese Collection, I'm already imagining in my head what am I going to use it for. Say Cheese 4 is perfect to document all the happy memories my family experienced and will experience at all the locations for the happiest place on earth.
 
 My weekly layout. I used the letter stickers to create "Hong Kong Disneyland" I wanted it to be the main focus as soon as you look at this spread.
 On this page, I did the same thing for the word "Spring Break" 
When you look at both pages of my weekly spread, you will see "Hong Kong Disneyland" and "Spring Break" right away. 
I used washi tapes, stickers and bits & pieces to create my magical layout.
Planner Pockets full of magical elements. If you didn't noticed, I added 3 kids in all my layouts/spreads. They represent my 3 wonderful children. You will see 2 boys and a little girl. You can find them here in my planner pockets. Now go back and check them out in my weekly spread. You will also see them in my monthly spread.
 As you may already know, I love and enjoy decorating monthly view of my planner. I love using the yellow number stickers for the dates.

I labeled my Doc it journals according to Disneyland we have visited and plan to visit in the near future. I will be documenting our magical adventures in each of the Disneyland we have visited. I can't wait to visit Paris Disneyland.
Are you also a big fan of Disney? If so, what are you waiting for? Grab the new Say Cheese 4 and starting planning your dream vacation. 
To be able to visit all the Disneyland Parks locations is in our bucket list. We are hoping to go to Paris soon. All we have left is Shanghai and Florida. 

Hello, Simple Stories Fans! Have you checked out the latest Simple Sets? With six papers (2 each of 3 designs) and a coordinating 6x12 Sticker Sheet, they are the perfect solution for a quick project or two!

Today I am working with the Springtime Simple Set. Butterflies and flowers are not only perfect for Spring, but work great for everyday memories, as well. This page is about my daughter achieving recognition in her writing class at college. Definitely, a "bloom where you're planted" moment for her!

Butterflies are a perfect symbol for growth and transformation, as well as following your own path. I fussy-cut the butterflies from the 3x4 & 4x6 Elements Paper and then adhered themto the page with foam squares as embellishments.

I layered several of the stickers together in this embellishment cluster, anchoring them with strips of patterned paper across the bottom and a scribble-style circle that I die cut using my electronic die cutting machine.

On the opposite side of the photos I used several patterned papers from my scrap bin and some metal dies from my stash to create a pair of dimensional flowers.

I hope this page will help my daughter remember to always celebrate her accomplishments! There is so much in our lives to be grateful for!

Thanks for stopping by!

Supplies

Hello everyone! It’s Dorymar Pérez here today and I couldn't be more EXCITED to be back with the Simple Stories Design team, a group of amazing and talented designers! I’ve always LOVED Simple Stories and being part of this team for the 2nd time is a dream come true!

For my first blog post this year, I want to share a beautiful and chunky album I designed with the Say Cheese 4 Collection. The collection is absolutely stunning: it is fun, colorful and playful – perfect to document those magical memories!

I selected the Say Cheese 4 6x8 Album for my project and embellished its cover with a piece of the All Smiles Patterned Paper, the castle card from the 4x4 Elements Paper, and different elements from the Bits & Pieces and the Happy Kids Bits & Pieces. Then, I added “Magical Memories” from the 6x2 Chipboard Word Stickers and some rhinestones. I love how it turned out!

When I travel, I like to keep memorabilia from my trip, so I used a black cardstock to create a big pocket and two small ones on the inside cover.  I wanted it to look like a traveler’s journal, with cute embellishments from the collection.

For the left page of the next spread, I used both sides of the All Smiles Patterned Paper, the back of the 2x2 Elements Paper, elements from the Bits & Pieces and stickers. When working with the Simple Stories albums, I like to embellish even more the sn@p pages that come with the album, so I used stickers, Bits & Pieces, patterned paper and a piece of yellow ribbon to make it stand out more.

The next spread has a combination of a sn@p page and a pocket page. As you can see throughout my project, I try to always maximize the elements of the collection. I am also a huge fan of clustering embellishments and fussycutting those images from the patterned paper that I really like. This gives dimension to the pages and provides an interactive look to the project.

When I designed this project, I wanted to create pages for the different activities that we enjoyed in the Happiest place on Earth.  In the following photos, you’ll see pages dedicated to document everything from waiting in line for the rides, photos with characters, autographs, food, etc.  I used the collection’s washi tape to decorate some of the pages - it is so cute!  Also, I added yellow ribbon, twine and buttons to add more dimension to the pages.

This was so much fun!  I hope you like this album as much as I enjoyed designing it and that it inspired you to create!

Happy scrapping!

Hello everyone!!  Jackie G here on the blog today to share a couple cards with you!!  Let’s talk about scraps.  We all have them at the end of a project and sometimes they are SO HARD to get rid of.  I definitely can’t be alone when I say…I hoard scraps!!!  It’s so hard to throw those pieces away regardless of their size…I struggle!!  I know I’ve talked about this many times before, but let’s use those scraps to make some cards!! 

If you saw my previous design team blog post, you saw I created a very large mini album using the Say Cheese 4 collection.  I used majority of the collection with very little scraps left, yet I still kept them!! Oopies!!  So here is what I came up with.  Left over stickers created this custom background for my first card!!  I backed them up with some black cardstock extra interest. 

Next, I used the Say Cheese 4 Happy Kids Stamp collection and word dies to create my next card.  It was definitely a challenge with such little pieces to work with, so lots of pop dots to add some dimension!!

Lastly, I wanted a “wow” card so used the couple Happy Kids bits and pieces I had left to create an easel card.  I absolutely love making these interactive cards!!  Using some scrap acetate to make the children look like they are jumping for joy!!

Enjoy!!

Hello friends! It’s Kylie back with you all on the blog today with some more planner inspiration. I have been setting up my new A5 Pink Planner for April and I am SO in love with this colour. It is the pinkest of pink I ever did see! I knew the new ‘Little Princess’ collection by Simple Stories was going to be perfect in this planner and I love how this collection brought out my inner little girl. Castles, Princess’s, a dashing Prince or two and cute Dragons. How could you not love it?? Let me share how I have brought everything together for some Planner happiness this month:-

By now you know I love to stuff those planner pockets full of pretties. Whilst it may not have any practical purpose for planning it makes me feel happy when I see my open planner on my desk or when I first open it up.I created some cute planner cards featuring positive affirmations and added some trims from my stash before slotting them into my pockets with some extra tags and die cuts.

This card is a favourite! I used one of the frames from the Tags and Frames die cuts to back one of the 3 x 4 elements.

Each month I really enjoy creating my own custom dashboards and dividers. SO easy to do with the A5 divider templates! Just trace and cut from your favourite papers.

I layered lots of different papers for this first divider, before adding many varying elements from the collection to include the Chipboard stickers, Die Cuts and the Tags and Frames.The enamel dots were perfect for adding centres to my flowers.

I used some pom pom trim from my stash to add a border to this next dashboard. I also created a little gathered edge with some of the wash tape.

The little Prince and Princess from the 6 x 4 element sheet was too adorable to not use on a dashboard. I’ve surrounded it with some torn layers of paper and a doily from my stash.

For April I am using my Vertical weekly inserts and snapped a photo of a week before the pen. Some washi was used down the inside edge of my inserts for colour and reinforcement. I also added some paper to the bottom edge of my pages for more colour. They are almost too pretty to write on!!

Thanks for stopping by today to see my April planner!

Kylie

Supplies

Hello everyone! It's Jennifer on the blog today to share a layout I  created using the beautiful Spring Farmhouse collection!  This by far is one of my favorite lines of this year; probably in my top five Simple Stories overall! The soft pastel pinks, greens, and yellows are perfect for springtime themed projects and I  love how the black and white gingham is mixed in!  I  documented favorite photos of my kids from a beautiful Easter day (when I  could still get away with dressing them in matching outfits!)

I   began with backing my white cardstock onto the beautiful floral print of Love A Lot. I  then adhered a 2x11 piece of the green gingham of Well Said to the center.  I  adhered and stitched through thin strips of the B side of So Blessed, pulling up on the edges to give it a distressed look. I  was then free to adhere my photos as well as this beautiful sentiment from the Bits and Pieces.  

The Bits and Pieces pack has a variety of shapes to accent your project such as the cute journaling spot I  used here.To accent, I  affixed one of the coordinating Enamel Dots to the center of the flower, as well as utilized a tiny heart sticker from the 4x6 Sticker sheets.  

I  did not want to overload the center of the page with too many embellishments so I  chose a few of the smaller circle stickers from the 4x6 Stickers as well as a floral cluster from the 6x12 Chipboard.


Using a hand punch in my stash, I  created a fun banner to adhere across my page using some of the great patterns in Spring Farmhouse! Using liquid adhesive, I  affixed some black/white bakers twine to the top of my banner to complete the look. I  also added two of the sentiment stickers from the Combo and 4x6 Sticker sheets.  You can also spy some of the fabulous Spring Farmhouse Washi Tape at the bottom. 

One of the many new additions to the embellishments are the Bow Clips! I absolutely adore these and love clipping one at the top of a photo! It adds so much dimension (and cuteness) to your project! 

Thank you for stopping by the blog today! You can see the entire collection by clicking HERE! Have a great day!

Hi everyone! It’s Tara with Secretbees Studio. Get ready to smile from ear to ear with this amazing album that has been decked out in what has to be the cutest paper collection ever! 'Say Cheese' has been around for a long time but Simple Stories has really outdone themselves with this fourth version that is not only filled with the well loved bright colors and images of past collections but is super extra with the addition of happy kids!

Because this collection is so fabulous, I wanted a big book that would really show it off and this large gate-fold album was just the ticket! I found the design for this album online at yourbookofmemories and couldn't wait to get started! This album has multi flip-out pages and pockets and every turn and flip is a magical surprise that conveys the pure joy of Disney!

This album measures 9.5 inches square when closed and is over 2.5 inches thick! Inside, it unfolds to reveal 4 large pages that alternately flip and open to even more pockets and photo/journaling spots! Plus, the front flaps have their own marvelous surprises! On one side there is a large pocket that holds not only photos and mementos but also a small notebook to record all of your memories. The other flap starts out like this:

goes to this:

and then this!

With each turn of a page, the revelations keep coming and are made even better with this adorable collection that screams happy and fun! Following are some of my favorite sections of the album but to really see all of the stunning detail, watch the video at my YouTube channel and be prepared to want to create a magical album of your own!

"Laughter is timeless, imagination has no age, dreams are forever" - Walt Disney

Hello, it’s Emma here to wish you a Happy Easter and share my Easter set up! I’ve used the Bunnies & Baskets Collection by Simple Stories of course! It’s so ‘me’ pastels and florals!! My favourite!! This is one of Simple Stories ‘Simple’ sets, there’s three designs which you get two 12x12 sheets of each, and a set of 6x12 cardstock stickers. I’m wanting to show you how with one of the ‘simple’ sets you can still set up a whole planner! I’ve chosen to use my A5 Robins Egg Carpe Diem planner, the colours work so well together...look!

I have made die cut pieces to fit in the pockets by sticking the stickers on to off cuts of the paper and cutting them out, I also used foam sticky pads to lift them and give the look of chipboard pieces! 

I also used a doily which I cut up to fit in a couple of the pockets and then used some more off cut paper and voila!! Pockets filled and looking super pretty!

One of the paper designs has 4x6 cut apart elements, so I cut these up to use for decoration on my dividers and dashboard. 

Using the Carpe Diem planners A5 templates and the A5 punch makes it so easy to make dividers, and for the dashboard, I simply traced around, missing out the tab! 

You can see how using the cut apart elements, and a sticker raised up on a sticky pad, how simple it is to create a decorated dashboard, and you can use this throughout your decorating of dividers too. I used some Pom Pom trim also running along the edge of a separate dashboard which I placed behind my decorated one, pom poms are a fun way to add more interest to your set up!!

Here’s the dividers, I used a heart punch to make the tabs, I’ve shown how easy this is in a previous blog. How lovely are all these papers together, such beautiful pastels!! So, there we have it, my nice and simple Easter set up! Have a great Easter, hope the Easter bunny visits!! If you would like to see more pictures Simple Stories products then checkout my IG account.

Supplies

Hi there! Nathalie back with you today.  I am so blessed to continue working with Simple Stories for another term, i truly love their products and the people behind the scenes. As we start a new season, Spring -here in the Northern Hemisphere-, we are also getting ready to celebrate Easter, so i want to share with you a new project created with the new Bunnies and Baskets collection.

For this layout, i chose a cut file from Handipaper to be the centerpiece of the page, and cut it from white cardstock, backed it all with vellum.  To add color to the flowers, i used some Vicki Boutin Art Crayon and Stencil Brush to add color to the back of the vellum, then backed the entire cut file with the Black/Cream basics paper from the Spring Farmhouse collection.

To build the layout, first, a piece of the White Dot/Chestnut Sn@p Basics paper was hand stitched to the b side of the Easter Blessings paper.  I set the bunny on the right corner of the paper, and layered a few Easter egg cut outs (also from Handipaper) along the bottom part of the layout.

I used the other papers from the Bunnies and Baskets collection to create layers behind the picture of my little niece and nephew from a few Easters back, and  then tucked the picture to the left side of the  bunny.  I fussy cut a few florals from the the Easter Blessings paper and  used them to create clusters around the layout along with the stickers from the collection.

For the title of this page, i simply used the large word sticker from the collection, and propped it with some foam adhesive.  A small cluster of fussy cut florals and stickers complete this page.

I really love how this turned out and how cute the picture of my littles looks nestled around lots of Easter icons.  The new Simple Stories' Bunnies and Baskets collection is sure to bring the special touch to your Easter memories. 

Til next time,

Supplies

There are several young gentlemen in my life who are graduating college soon.  I know they’ll be anxious to start their careers, but I hope they can and will take a break from all their studying for a little time to explore the world. It may not seem like it to them, but this is the best time in their life to travel.  Most of them are not committed to a partner, a career, or house payments yet so they are more free to travel before they settle into a routine.


I made some pocket cards with the Simple Stories Simple Vintage Traveler Collection to inspire them.  These cards are a little different because the cover half panel is actually a pocket perfect for stuffing with little treasures. 

I rounded the tops of the card bases with a ¼” corner rounder.  I adhered the shorter pattern paper panel on three sides (in a U shape) leaving the top of the panel open for gift cards, cash.. wouldn’t a plane ticket be amazing?


The collection has everything you need to embellish these pretty pockets.. chipboard, bits and pieces, stickers and washi too!

These pocket cards will delight all the travelers on your list and hopefully encourage a new generation of explorers.

Hello, it is Kelly here today with a new blog. I am a bit ahead of time but I already created some fun happy Easter spreads in my planner with the new cute Easter Simple Set called ‘Bunnies and Baskets’.

Because I know I have much to do in the Easter weekend, I decided to create a decorated to-do page. I used a basic lined paper and fussycutted florals from the ‘Easter Blessings’ paper (#10686). I fussycutted a third of the paper and glued them on the side of the lined blank paper. I draw some check-off boxes and used a to-do sticker to finish the page.

I always spend Easter with my family and to create a spread in my planner to document this year’s Easter celebration I created a flip-out page. I used a border punch from my stash to create a fun border of the part of the page that flips. I decorated the page with florals, pieces of paper and a notecard. The page is now done, I only have to add some photo’s and journaling. Love the little bunny ears at the bottom right of the page.

One of the papers in the Simple set is filled with little Easter eggs in fun colors (paper ‘The hunt is on’, #10687). I fussycutted a few of them and glued them overlapping in a row on the middle of the vertical planner page. I added some functional stickers to finish the spread!

I hope you enjoyed reading this little Easter blog and you can find more planner inspiration on my instagram account.

Have a nice day!

Supplies

The Simple Vintage Traveler collection was just the inspiration to get some pictures of a family trip printed and in an album! As soon as I saw the colours I knew they’d go perfect with the majestic mountains and dreamy blue-green lakes we saw camping in Jasper National Park a bit over a year ago. I started with a Robins Egg Stripe Designer binder because it went with the collection so well and got to work adding in photos, paper and more.

This first spread have a couple of my favourite photos of our trip. I went with a large 6x8 photo on the left and a 4x6 and a journal card on the right. I really like the layered chipboard frames found in the Vintage Traveler collection. They don’t fit in the pockets because they’re more geared towards larger layouts but I found that attaching one to the outside of the page protector to be just what I needed to frame my photo. I kept the rest of the page simple with a cute journal card with a chipboard geotag.

Embellishment clusters make me happy and were just what my big 6x8 photo needed! I just started pulling stickers, chipboard pieces and die cut Bits & Pieces and stuck them down to give the story some words.

This spread has a combination of photos and journal cards in pockets as well as an accent pocket. I used a postcard style SN@P! card to add some journalling to my spread. The card is really cute and keeps the whole travel theme up great.  I added some faux tickets stickers and die cut pieces to give it a bit more dimension. Underneath is a photo of my husband and boys I just added some simple phrase stickers. The super cute vintage cluster style stickers in Vintage Traveler are a great layer under phrase stickers. On the right I have some smaller photos and cards. I collected a bunch of various bits and pieces throughout our trip like the soda label on this page. Along with the cute bingo-y card and (of course) a coffee shot I added in a bit of our between adventure life.

In one of the pockets I simply placed one of the large geotags from the Bits & Pieces. It gives the page a bit of a breather and adds in some fun layering between pages. I love the amount and variety of geotags in Vintage Traveler!

On the next page I documented life around the campsite in the evening on the left and a map to start off documenting the next days’ adventure. I used some simple stickers and die cuts with my photos on the left and a photo flip (seriously, one of my favourite Simple Stories things!) to add some journalling space. I left the back of the geotag from the other side plain because I liked the way it looked there. On the right I used one of the square pocketed page protectors that Simple Stories makes. I cut down a map to fit in the 2 larger 4x4 pockets and filled the smaller 2x2 pockets on the side with some of the 2x2 cards from the collection.

I love including maps in travel albums. I save pretty much every tiny piece of paper that I can so I have a few of them in my Alberta trip scrapbook. This map was perfect because we had spent the day following it and checking stuff out. I marked some of the main spots we stopped with chipboard geotags and then used some of the Simple Stories alphabet stickers to add a title. I embellished the title with some phrase stickers from the sticker pack and combo sticker sheet, added a cute car die cut from the Bits & Pieces and it was a done page.

Finally, I added some journalling and one more picture of the boys enjoying campsite fun in a Photo Flip on the other side. There are some really great journal cards in Simple Traveler that gave me space to get our story down in a way that looked like more travel ephemera. I had been putting off documenting this trip because it was hard finding a collection that did all the gorgeous landscape shots I took justice but I can’t wait to finish up my album with Vintage Traveler now.

Supplies

Hello Friends! it's Kristine Davidson here today and I'm so happy to be a designer for another year. It's a pleasure designing for Simple Stories and I'm glad I can share these beautiful products with you!

This layout is called Simple & Sweet using the Spring Farmhouse collection. As you know I don't fuss about my titles that much and this layout is no exception. I used a diecut from the Bits & Pieces and found one that would be perfect for my niece's attitude and simple pleasures. If you ever feel stuck with a title perhaps look thru those diecuts and pick one that you can relate with. You can always emphasize a title by adding dimensional adhesive or surrounding it with flowers or other embellishments.

I started my base with an Elmwood background from the SN@P! Basics Paper Pack. If you don't have this collection in your stash -- go buy one! It is a must have. I wanted this layout to have layers and have of those gorgeous 6x8 papers.  I love the smaller paper patterns because they allow me to use small photos and they don't overcrowd my page or photos. Does that make sense? I also wanted to mat some of those papers and I used the Simple Basics Kit that match the Simple Farmhouse collection beautifully.

The Simple Basics Kit includes solid colored cardstock papers that can be used for cards, base colors on a layout and so much more. I used these papers to mat my patterned papers. You can see on this picture that I have them matted in assorted colors. I love that little extra pop of color. Cute right?

Adding those solid colors behind my patterns added some extra color on my page and made them visually pleasing. Try something new today! Maybe you have left over cardstock or solid colored papers that you can use on your next layout. Give it a try! Visit Us on Instagram @SimpleStories_ and @KristineDavidson for more projects using Simple Stories.

Chow for Now!

Hi, it’s Cara here today with a project that is very close to my heart. If you don’t already know, I have 6 children. And you know what that means… lots of children, LOTS of odd socks! I’ve really tried to control this problem but it’s just too big and I have too many mateless socks. It has simply got out of control! So what is a planner girl to do? Set up a new planner, of course!!

I feel like I am constantly in that scene of Monster’s Inc, where a monster comes out of a door with a sock stuck to his back and someone starts screaming '23-19! We have a 23-19!’ 

This orphaned sock thing is a huge problem in my house and I’m determined to make it top priority in my life. I am going to dedicate this entire planner to keeping track of all the single socks in my house. I wanted to make this planner really special, to really make it stand out amount the others in my planning system and that’s why I chose the Typewriter Floral Traveler's Notebook and my absolute favourite collection, Hello which matches perfectly with the Simple Stories I Am… collection. It was really surprising to me that there are no sock stickers in any of the the Carpe Diem sticker tablets. I can’t be the only one who wants to set up a sock planner, right? Luckily there are quite a few cute laundry basket ones.

I love to decorate the pockets of my TNs and this one was no exception, lots of butterflies and flowers and that oh-so-adorable sneaker!! Sneakers go on over socks so I thought it was completely fitting. I also added some washi wrapped around a card to have on hand while I plan for my odd socks.

I decorated the covers of the inserts (seen above) so that they inspire me in this big project that I’m undertaking. If I’m going to tackle these socks, I’ll need the motivation! I think the most important part of this planner is the odd sock tracker. I’m going to catalogue each of the odd socks as they come out of the dryer and when I see an odd sock around the house (under the couch, in the front closet, or in the bottom of a hockey bag) I’m going to track it using the fab little stickers from the Calendar sticker tablet. Aren’t those little laundry baskets darling?

This challenge is probably going to be a busy one (so many odd socks), so I've chosen to do daily spreads for this month. I’ve decorated this first spread with some gorgeous stickers from the Hello Sticker tablet and the 4x6 stickers from the I Am… collection. There’s lots of room for me to plan out my sock hunts and mateless sock tracking.

Since today is the first day of a new month, I think it’s the best day to start this ambitious project. Wish me luck!

To watch my process video for this planner setup, pop on over to my YouTube channel here: Cara’s YouTube channel

Hello Friends! It's Kylie (http://www.instagram.com/paper_sweetpea) with you all again today. I'm so happy to be sharing my latest blog post with you and the insprition behind it. When I first saw the Say Cheese 4 collection by Simple Stories released I instantly had a light bulb moment. There are so many creative ways to use this collection but for me I knew it would be perfect to use creatively in my two children's planner.

Like many parents, I'm kept busy with school, after school activities, sports, appointments etc. For a while I had wanted to keep a seperate planner for keeping everything together, so now with the help of the Say Cheese collection I have it set up all ready. I am using my beautiful Black Speckle A5 planner.

I thought the Happy Kids Bits & Pieces were just too cute and perfect for using throughout my pages, on my dividers and for filling my pockets!

Keeping embellishments and papers in my pockets not only look pretty but it also helps for when you are planning on the go!

I've divided my planner into two sections. One for each of my munchkins! Using my A5 divider templates I created a divider for each of them, layering some beautiful papers. The Fun Words metal dies were perfect for adding a title to each divider in contrasting papers.

I also created a pocket divider for storing some photos in. I cut out one of the 4x6 elements to use as my pocket. It was pretty much a perfect fit for my divider, I only had to trim off a little from the side edges. Using double side tape I added it to both sides as well as the underneath, before adhering to my divider page.

This is my second divider, perfect for my son! I've layered lots of the stickers, chipboard stickers and die cuts. I thought they all turned out really cute!

I'm using my horizontal inserts in my planner and use each day to map out activities I need to remember. I've used the Happy Kids stamps as well as the die cuts for my pages. The stamps would be beautiful with colour added to them but I decided I like the monochromatic effect for my pages. 

The Happy Words metal dies were the perfect size for using as highlighted or sub titles in my planning. By using them with various papers really added some nice colour. 

My son has a birthday in April so I love how I have been able to record it with the Say Cheese collection.

Thanks for checking out my latest planning! I hope you have found it interesting and inspirational!

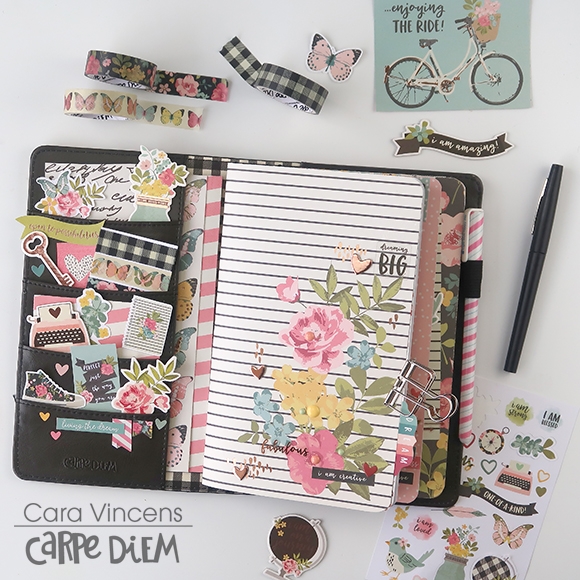
Hi Planner Friends! It’s Rachel and I’m on the blog sharing my travel planner setup for this summer using the Simple Vintage Traveler Collection ! It is never too early to start planning, right? We have two great trips coming up this summer and with a big move as well, I thought it would be a good idea to get this Aztec Traveler’s Notebook ready to go before all the moving and traveling begins!

For both trips, we will be traveling lite, so I wanted to try and prep this travelers notebook ahead time to limit the amount I am bringing on the trip.

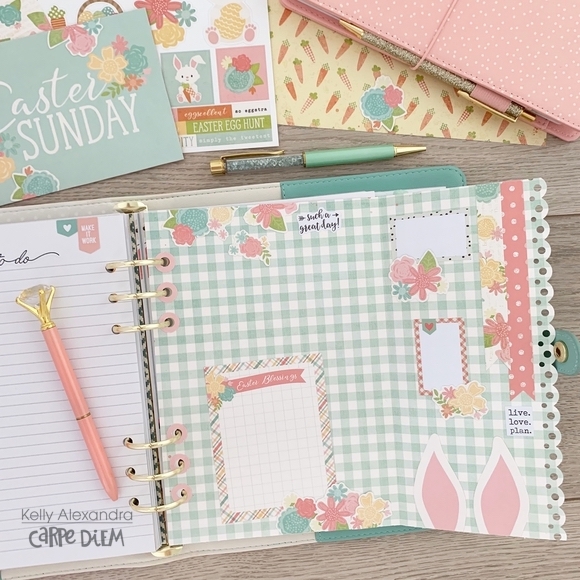
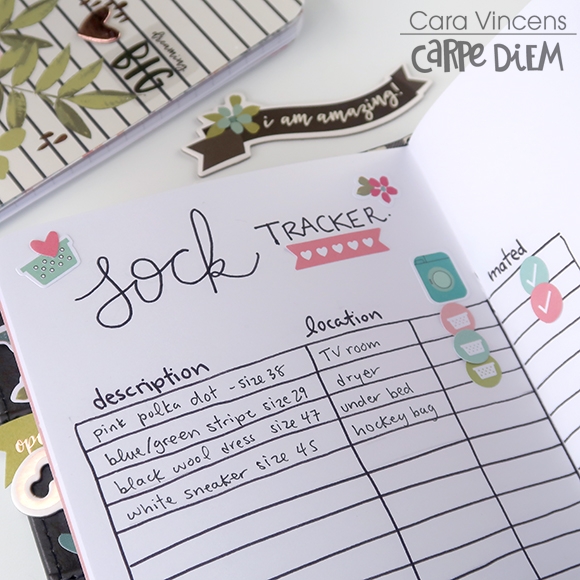
To do this, I decided to not only decorate the covers of the inserts, but also a majority of the insert pages. I used the Combo Stickers, papers scraps from the decorated covers, washi, 4x6 stickers and the stamps. With pre-decorated pages, I will be better able to focus on documenting instead of decorating while I’m on my trips.

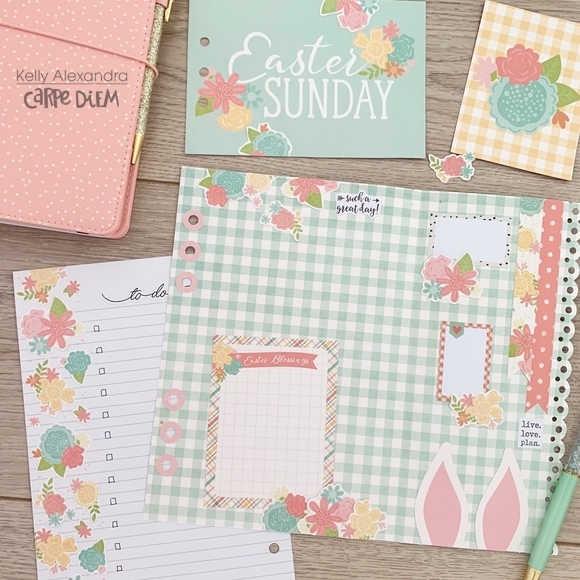
I have three inserts inside this travelers notebook cover. The first insert is a slimmed-down weekly insert with only the number of weeks I will need for my two trips. To do this, I simply removed the staples from a weekly insert and pulled out the pages I needed. I also added two dot grid insert pages and adhered June and July monthly printables to these pages. I am left with an insert that is totally customized to what I need, and a lot less bulky! I kept the Kraft paper cover and decorated directly on top. I used the Take Detours Paper from the collection and decorated with the Combo stickers and 3x4 card from the SN@P pack that I fussy cut to use as a big label to write the dates and places we will travel to.

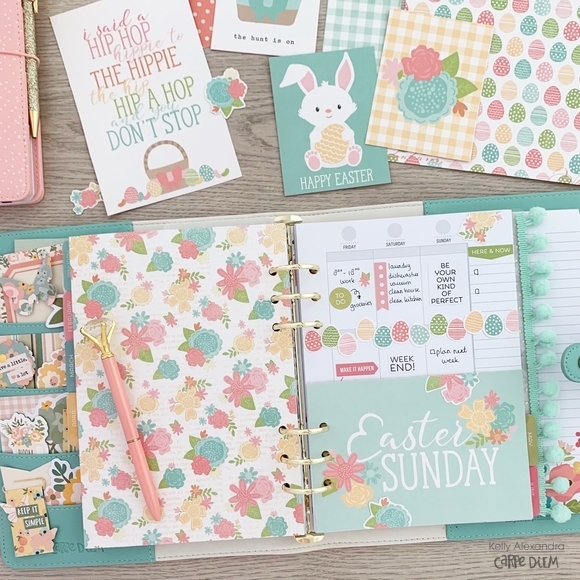
One thing I love about this collection is the muted colors, that will easily match any kind of travel photos that I take, or memorabilia I collect. I am also a big fan of the vintage vibes along with the photo real elements. This collection is great for someone looking to just add photos and journaling. With the pre-made clustered elements so much of the decorating “guess work” is done for you, allowing you to focusing documenting the memories!

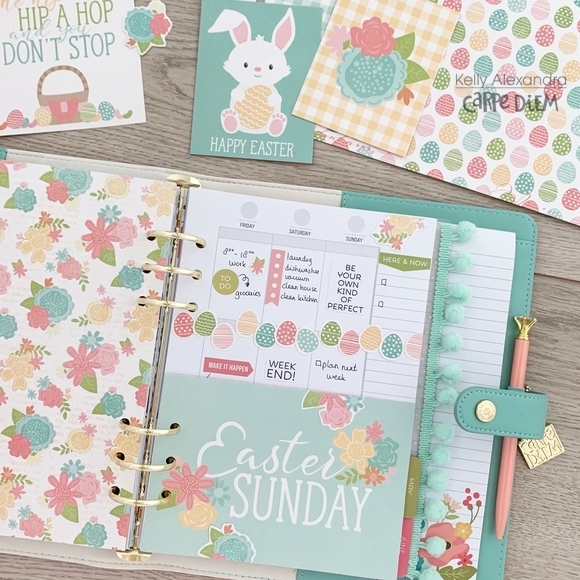
The second insert is the more “functional” insert . The cover was super simple to put together (again, this collection does the heavy lifting for you!) with a trimmed down piece of the Off the Grid Paper, Combo stickers and SN@P Cards, washi tape and 4x6 Stickers!

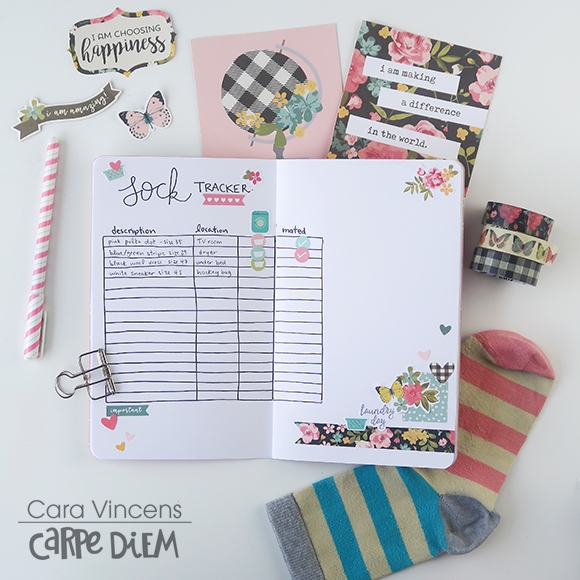
This lined insert will house all the logistics of our trips including our flights, accommodations, packing list, agendas, transportation and lists like things to do and places to eat. I have pre-decorated a few pages but, for the most part, this insert will be a lot of pen and paper. It is always nice to include one insert like this that you don’t mind looking a little messy. With very minimal trimming, I can also half letter size pages into the insert, or slip inside the elastic band.

The third insert is my memory keeping insert. This graph insert will be part journal, part scrapbook and part junk journal (for all those receipts, brochures, business cards, map I inevitably accumulate during my travels). On previous trips, I would have separate notebooks for each and would always come home with three, half-completed inserts. My goal is to fill one insert with all my travel memories from this summer, and not hold onto a bunch of items I think I will use later to document(and never do!)

To make it a little easier on myself, I have decided to prep a few pages outside the insert using the the 6x8 paper pad and from the Simple Basics Kit. Having a few unbound pages gives me dedicated spaces to create more scrapbook type layouts that I can adhere into the notebook once they are completed. This is especially helping if I plan on stamping, as it gives me a flat surface to stamp on. For two of the pages, I used the layered frames, removed the extra cardboard from the back and adhere only part of the frame so that I can slip my photos right inside. I will be able to add a little bit of journaling, and those memories will be documented!

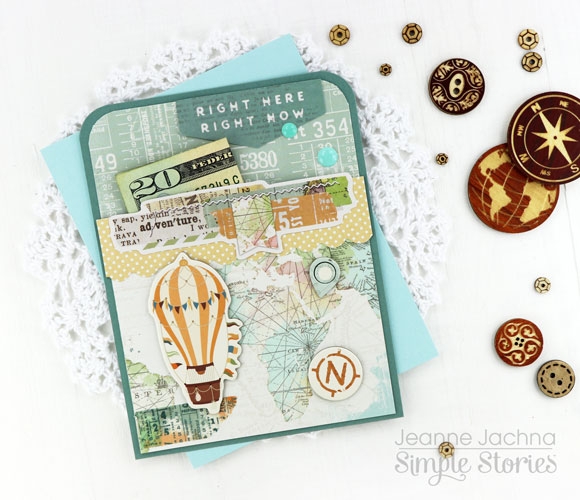
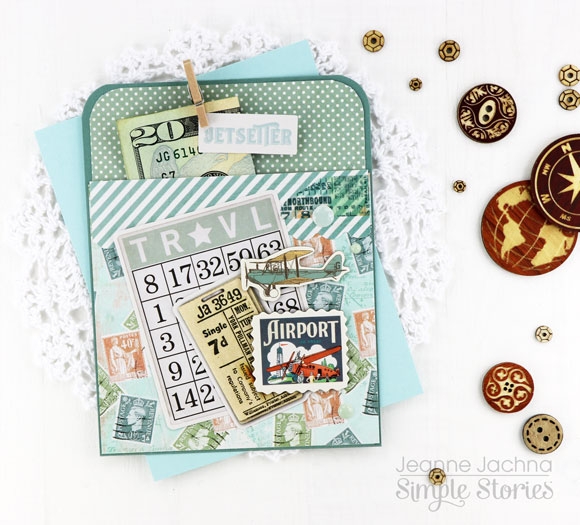
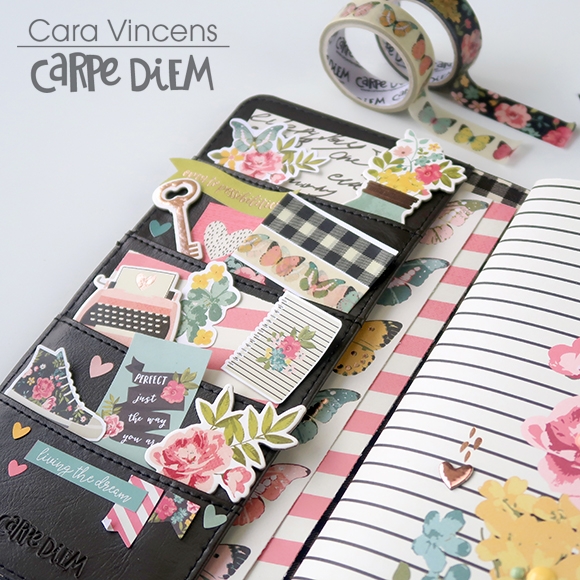
We can’t talk about a planner setup without talking about the pocket! I used mostly elements from the bits and pieces and a few scraps of paper. When traveling, my goal is to have pockets that aren’t bulky, with decorated pieces I can add to my pages later. If my pockets are bare by the end of the trip, that is good, because it means I did some documenting on my trip!

I hope you enjoyed this look inside my travelers notebook! What are best tips for documenting your travels?

Supplies

I tend to get snap-happy with my camera on holidays and always have many photos I love and want to include in our scrapbooks. Two-page layouts to the rescue! Hi, everyone! Jana Eubank here! Today I have a double page Easter layout to share with you using the Bunnies & Baskets Simple Set.

I placed my photos in two rows, but wanted to call more attention to the group shot of my kids. I matted this photo with yellow cardstock, and then placed it on a block of The Hunt Is On paper, with it's cute Easter egg pattern. In the corner I added a cluster of stickers accented with a button.

I fussy-cut the large characters and icons from the 3x4 & 4x6 Elements Paper to use for my layout. They are the perfect scale for a double-page spread! I also used the journal card to house my journaling on the left page.

I wanted my title to really stand out and decided to create a little scene with the bunny and basket next to the "Hoppy Easter" sticker. I die cut a sunburst on my electronic die cutting machine to place behind the bunny, anchoring all of the elements together in one cluster.

Before adding the sunburst to the page, I used my sewing machine to zig-zag stitch along each ray, creating lots of texture! Manually die cut clouds and enamel star stickers from my stash round everything out.  

Finally, I added this cute chick in the bottom right corner of the layout with more die cut clouds and a phrase stickers from the 6x12 Sticker Sheet. 


Supplies

Pages