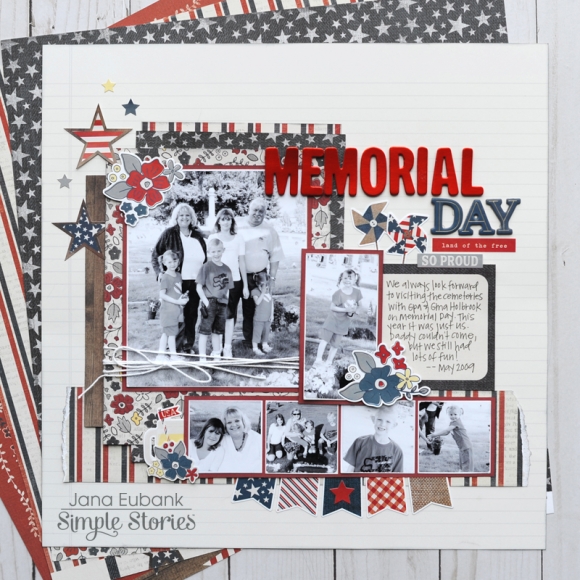
Memorial Day always marks the beginning of Summer.  Living in a small town in Indiana our patriotism runs strong.  You’ll find American flags hanging from street lights and on front porches.  There will be home town celebrations and parades and don’t forget the fireworks!

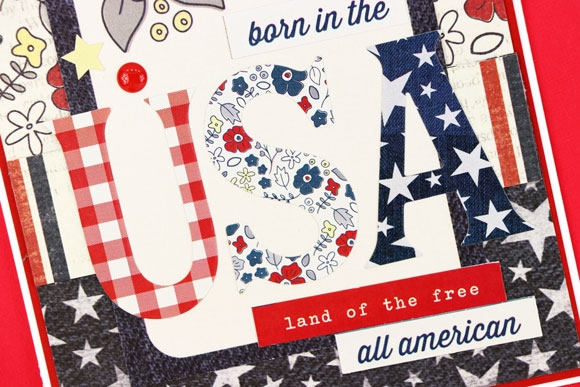
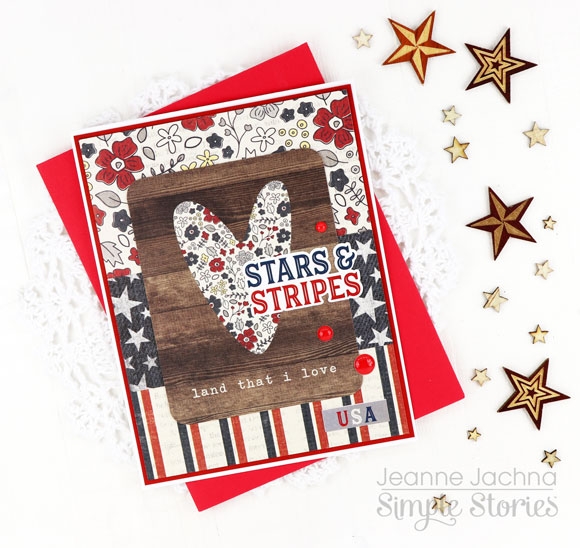
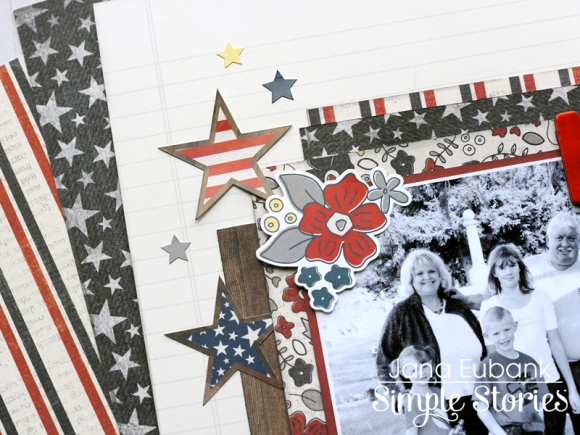
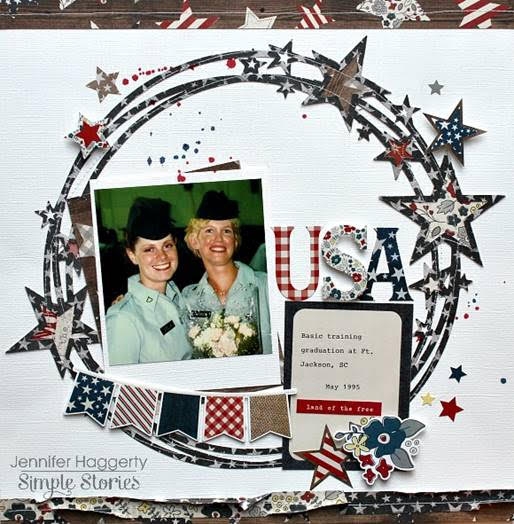
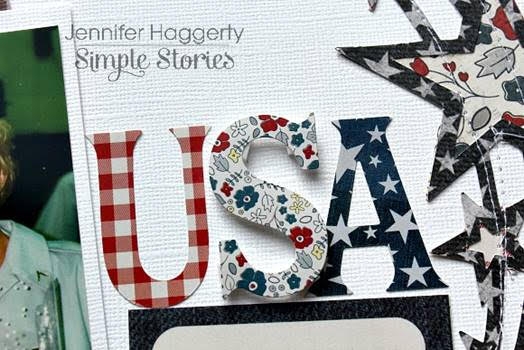
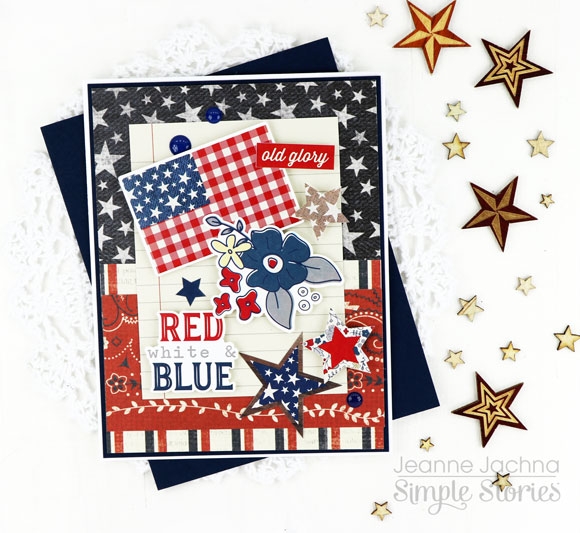
The red white and blue color combination of the Let Freedom Ring Collection is especially welcome this time of year.  The floral prints, gingham and woodgrain have a country feel that will get you thinking of backyard bbq’s and sipping lemonade from a mason jar!

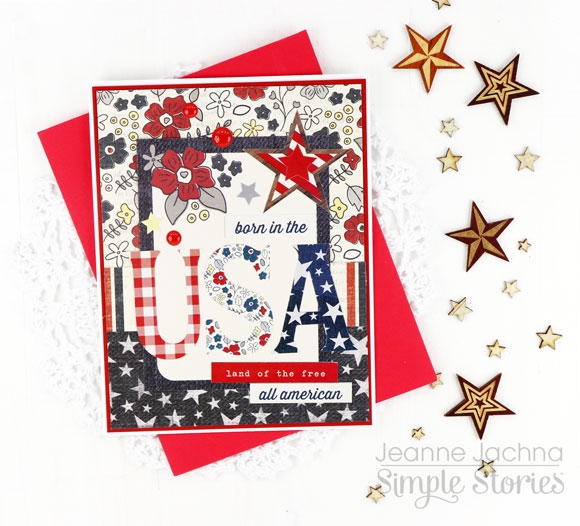
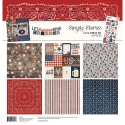
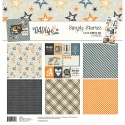
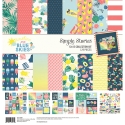
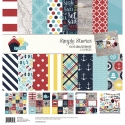
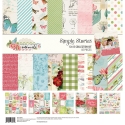
The collection kit is a great value.  It’ includes 6 sheets of 12x12” cardstock and a sticker sheet.   Two of the sheets have journaling cards printed on one side, and pattern paper on the other.   These are great for making cards or journaling.  

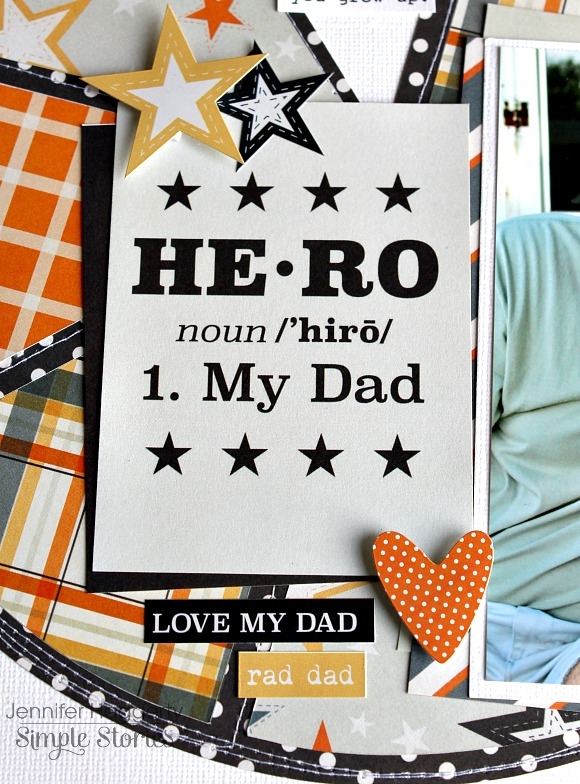
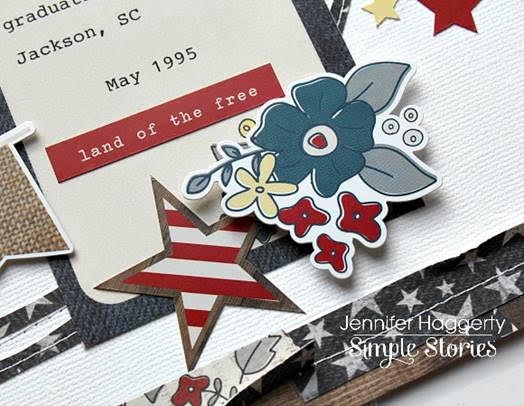
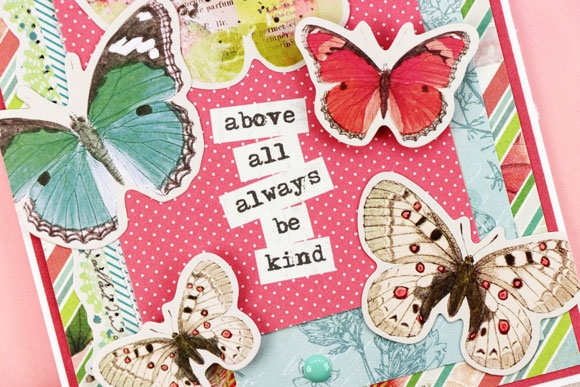
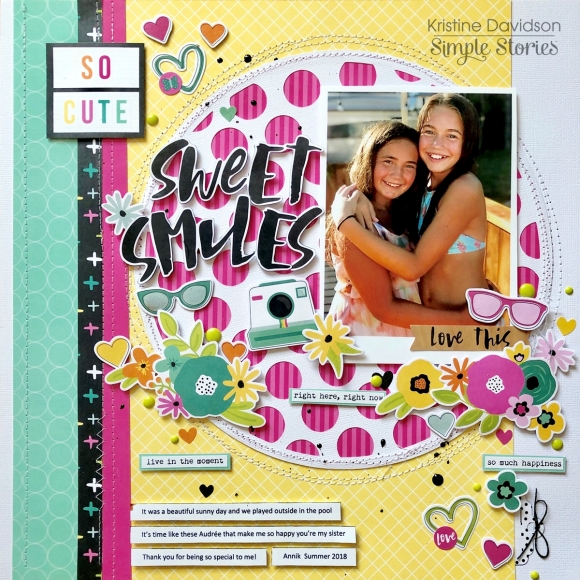
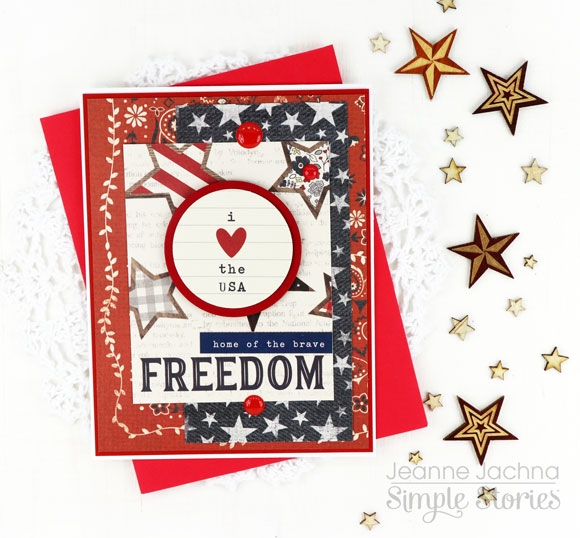
I used a circle punch to cut this sentiment from a journaling card to make it the center of attention.   It’s layered over a second 3x4” card that says “FREEDOM”. 

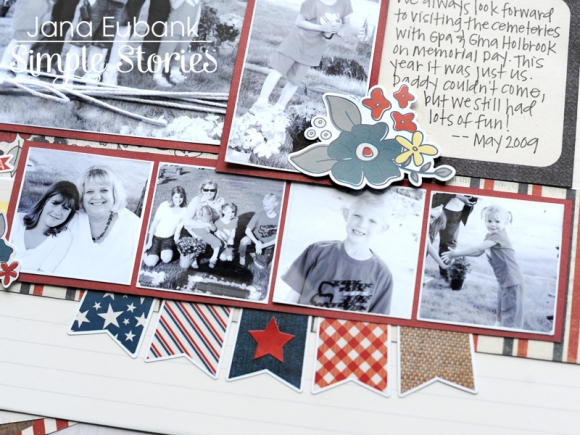
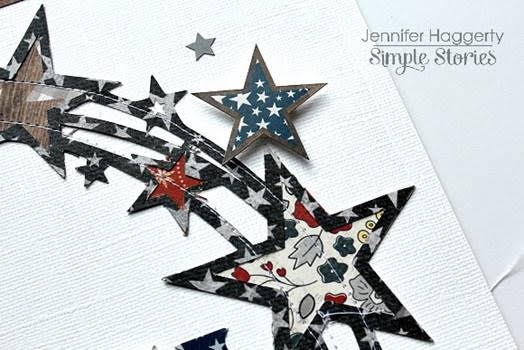
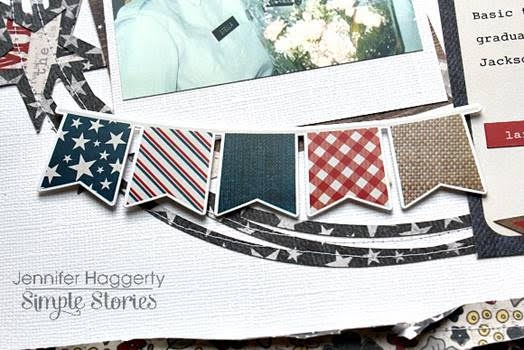
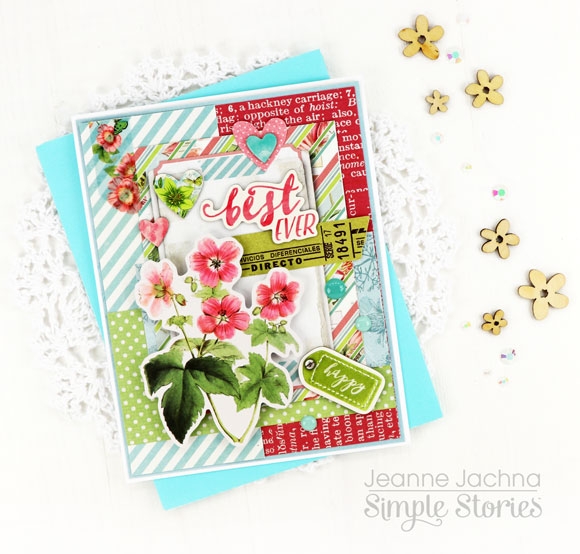
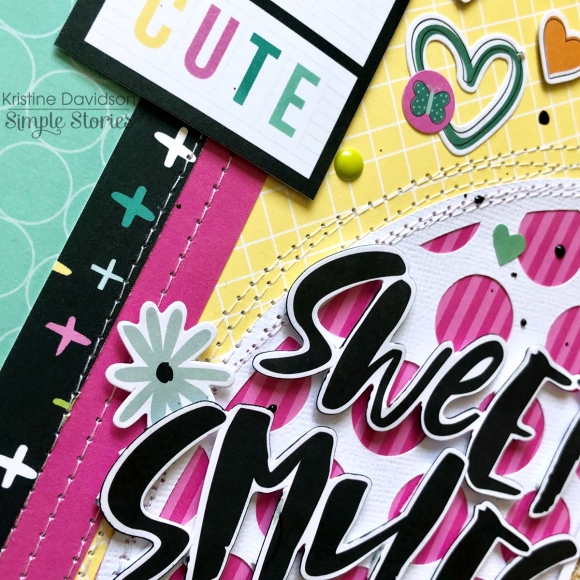
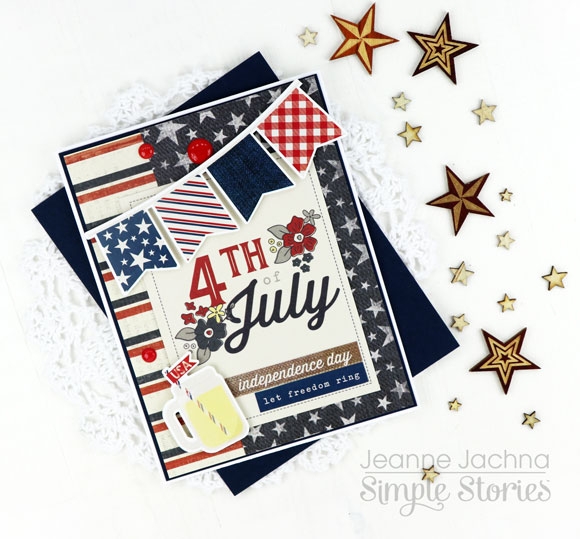
I adhered some of the stickers with adhesive foam tape to add dimension.  This helps bring the cards to life and make them something special to behold.

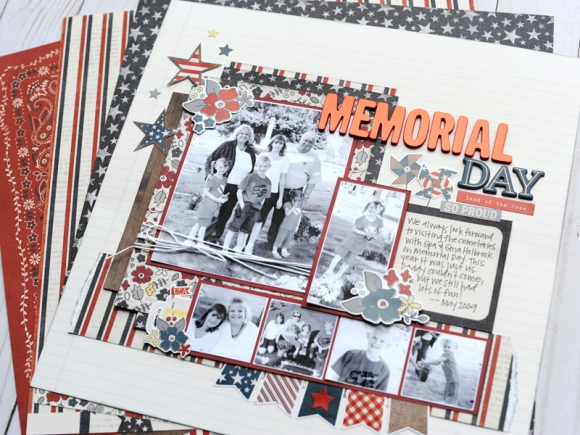
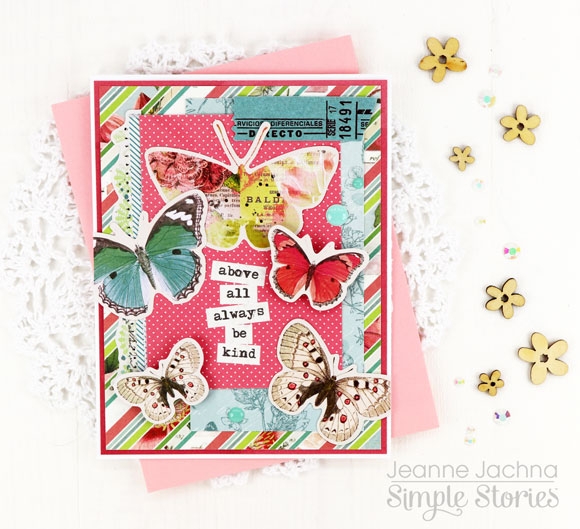
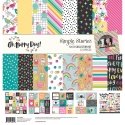
The collection kit includes just about everything you need to make all of these cards.  I used my own cardstock for card bases and mats, adhesive and some Simple Stories enamel dots I had left over from other collections.   Everything else.. papers, 3x4 cards,  stickers are all included in the kit.

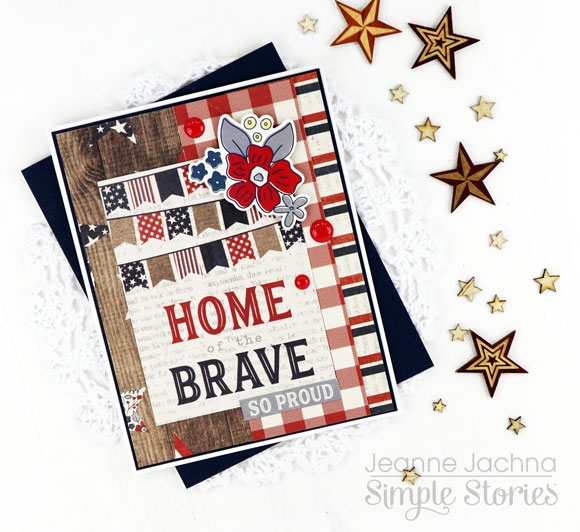
Make your July 4 event more memorable with the Simple Stories Let Freedom Ring Collection!


Supplies

Simple Stories is excited to announce our NEW Mid-Summer Release!
 
Explore the great outdoors with the HAPPY TRAILS collection by Simple Stories. You'll find yourself pining away for twinkling night skies and crackling campfires, as you enjoy creating with its earthy colors, warm woodgrains, cute characters, and off-road icons. It's the perfect way to document majestic moments spent under the stars!
 
View the full HAPPY TRAILS collection HERE. Visit us on Facebook & Instagram for chances to WIN the new HAPPY TRAILS product before you can buy it; stay tuned tomorrow for even MORE new product reveals!
 
Shipping to retailers end of June 2019.

Hi! Today I’m here with a spread using the Dad Life Simple Set. I don’t tend to do a lot of a layouts about what a great dad my husband is specifically, but I think it shows across my albums and layouts. The Dad Life set was perfect for putting together a couple of pages that celebrate how awesome he is! With lots of bold oranges and neutrals it was the perfect choice to highlight some photos of him in his element, having fun camping with our boys. I used the Black Stripe Binder which goes really well with the collection!

I mostly used just the Simple Set in my pockets, the only thing I added were some Simple Stories letter stickers I had on hand in a well matched orange and black. I like how Dad Life uses those colours heavily without looking like a halloween party. The playful plaids and stars are so fun. I picked out a couple of great photos: one of my husband and youngest son, one of my husband in his fav camping place, keeping the campfire going and one of his sweet coffee set up which went perfectly with the Dad’s Rocket Fuel card form the 3x4 and 4x6 Elements Cardstock. I love the plaid Papa Bear too, when they were younger I referred to the boys as the bears so it’s pretty perfect. I embellished with a combination of the sticker sheet as well as cutting up some of the cardstock in the collection. These Simple Sets are so great for working on a specific theme because everything works together so well.

This photo was one of my favs from my whole batch of way too many from our camping photos so I knew I had to feature it. I cut down a piece of the cardstock to 4x6 to fit in the pocket and got to work. It’s a mini layout within a layout. I added a very thin mat to the photo with the black and white dot cardstock and then added an asymmetric plaid cardstock with a wide, hand torn edge on the right side to add some depth. I then added some of the great hearts and phrases from the sticker sheet and some letter stickers to finish it off. I felt like the orange or black letter stickers would get lost on their own, so I stuck down the black ones first and then layered the orange ones on top offsetting them for some dimension.

The Papa Bear is just so cute I had to get it in my pockets! I embellished the adorable plaid bear with some star stickers and a couple more stars cut out from the star patterned cardstock paper from Dad Life. The sticker sheet had a fun square sticker with a Papa Bear hat which I fussy cut to give the bear a bit of attitude.

If you’re looking to celebrate a dad in your life, the Dad Life Simple Set is fun and ready to go with everything you need to fill your pockets with a dad-centric layout.

Supplies

Hello and happy Monday to you! It's Jennifer on the blog to share another awesome Simple Set!  For my page, I  used the new Dad Life collection! Don't you love the colors and prints? The blues and oranges go so well together which are perfect for just about any masculine themed project! I  began with a white cardstock background and added a pie chart cut file with the B side of My Hero.  I  then filled in the "pie pieces" using the other fun prints (my favorite is the plaid on the B side of the 3x4 & 4x6 Elements!). 

From the Dad Life 6x12 Stickers, I  affixed the #1 Dad sentiment with pop dots at the bottom of my photo. I  also added two of the cute heart stickers to accent! 

I  cut apart two of the 3x4 Elements and layered them to the left of my photo. Again I  used some of the stars and hearts from the sticker sheet to accent. The 6x12 Stickers also have three rows of sentiment stickers such as the ones I  placed underneath the 3x4 Element. 

On the outside of my circle, I  used more of the star and heart stickers as well as enamel dots from my stash!  You can also see that I  added some stitching to the outside edges of the cut file using my sewing machine. 

I  left my top "pie piece" empty so I  could add journaling.  Using additional white cardstock and my typewriter, I  adhered my strips to fit the space.  

Thank you for stopping by today!  Check out the entire Dad Life collection as well as the rest of the Simple Stories lines by going to the Products page!  Have a great day!

Supplies

Hey y’all its Courtney here today and I am sharing the layout that I created using the Heart Collection. I love how versatile this collection can be. Today I am using it to document an older picture of my two oldest kiddos. The colors were perfect for both of them and can we talk about all of the hearts and floral pieces that are in this collection.

I backed a free cut file that I grabbed from the Paper Issues website and I backed it with 5 different patterns from the 6x8 paper pad. I love using multiple papers and I love that cut files make it really easy for me to do. After I backed everything I auditioned different pattern papers to see which ones I loved as a background. I chose to go with the paper So loved, and cut it down a ½ of an inch on the top and one side. Then I backed it with the floral paper that is the b side of the 2x2 elements.

There are a few elements that I always love to include in my layouts enamel dots and tiny word stickers/ word from the combo sticker sheets. I tend to not do a lot of journaling so I use the word stickers in its place.

I knew that I wanted to add the word remember from the Combo Cardstock sticker sheet on top of my title. I created a ton of different clusters around the page out of the flora’s and the hearts. I did add foam to the cut file and a few of the elements to create some dimension. Most of the clusters are a combination of the chipboard, bits and pieces and the 4x6 sticker. I love the look that thy give when they are layered next to each other.

I hope my layout inspired you to get creative and use collection for something other than their intended purpose!

Supplies

Hello Simple Stories friends! Anya here today and I am happy to share a tiny mini book I created with the “Dad Life” collection. This mini book measures about 4.5x5” but has enough space for up to fifteen 3x4” photos and some space for journaling.

Each of the pages in this album are made like pockets with an opening at the top that can hold additional noted, letters, or journaling. I filled the pockets with tags at the moment, that can be used to write those special messages to dad.

I decorated each page spread with patterned paper, journaling cards and stickers, using pop dots for some of them for dimension.

This tiny little book can be used to hold some of your favorite moments about your father or it can be given as a little gift for someone else to fill it with their own memories: all they need to do is print some photos, adhere them to the photo spots and write a few notes!

Supplies

It's Nicole here today to share a project I created using the Sunshine and Blue Skies collection. This fun collection is perfect for capturing all those spring and summer memories! I just love the ombre tones in the papers which is perfect to bring together a lot of the different patterned papers in this collection.

I started my project by gathering together several papers from the 6x8 paper pad. I mixed up several patterns to line the inside of these big words that I cut on my digital cutter. This is a great way to mix up patterns and colors on your project.

I like to mount shapes like these with foam adhesive so the design POPS! I kept the embellishment minimal, by using stickers from the Combo sticker sheet in some of the empty spaces on the layout.

Keeping the background a neutral color helps all the colors and patterns of the paper pop, and if you add a busier pattern behind it also helps draw together your project.

Thank you for stopping by today! I hope you are ready for summer and are inspired to capture some of your spring/summer memories with the Sunshine and Blue Skies collection.

Supplies

Hi everyone!  It's Dorymar, back to share my Summer Sn@p album with you.  The Sunshine and Blue Skies Collection is so fun, the colors, all the palm trees, the sun, the phrases are amazing.  These pages were especially fun for me to create because Summer is my favorite season. I’m from the Caribbean and the warm weather, beaches and sand are my life.

When I first saw the New Robins Eggs Sn@p Binder it goes perfectly with this collection.  One of the things I love the most in creating a Sn@p Album it’s to decorate the cover.  In this case I use the cute pool people from the Bits and Pieces and the colorful surf boards form the 4x6 card and put them together.  Then I added the Summer Word from the Sticker Sheet and the results were fantastic.

Another thing that I like best about Sn@p binders is the natural color because I can paint it and combine it with any collection. In this case I painted all the edges of the binder and the dividers with white color that go perfectly with this collection.

The binders have a lot of space for photos and to document stories, but I always like to add custom pockets and flaps for photos. In the spread on the right side I create a flap with the 3x4 card and in the other side I put some pieces to gives a different touch. I love the tags, always in my projects you can find them in any space.  In this case in the 6x8 layout, I used the 4x4 card to create a pocket with a tag.  I add ribbons and elements of the collection to give a fun look. 

Also, I love to create layouts inside the binder using the dividers of the binder as a base. This adds fun spaces for photos and other ways of working with the elements of the collection. I love how all the elements match together and how they look with all the layers.

I created a flap using the Navy/Emerald paper as a base to add space for picture and journaling, the fun 2x2 cards have many fun summer phrases. I decorated the belly band with a few die cuts from the bits and pieces.

I used the fun pieces of the collection to create a fun collage on the left side of the space for a picture, then added some word stickers from the Combo Sticker Sheet to decorate it. 

For the full page 6x8 layout I embellished with the chipboard stickers and some coordinating bits to keep that summer feel.   

I hope you enjoyed the project and I also hope it inspired you to use this fun collection. Please come join us on Social Media @simplestories_ and myself @dorymar_pl.

Happy scrapping!

Supplies

Hello! Jana Eubank here. I am grateful for parents who have instilled in me a reverence for Memorial Day. It's a time to pause and reflect and to think of those who have sacrificed so much for our freedom and well-being. I am so grateful to live in a peaceful place and thankful to those who have protected the rights I enjoy every single day. I think of our service men and women, as well as my ancestors who have paved the way for my family.

I  created this page with the Let Freedom Ring Simple Set. I used the Maple/Cream Notebook as the base and also brought in some Dark Red/Cream solid paper from the Say Cheese 4 collection.


I added several patterned paper layers behind my main photo and then sprinkled star stickers from the Let Freedom Ring cardstock stickers in the top left corner.


I used letter sticker from my stash for the title, and then filled in the spaces with the Let Freedom Ring pinwheel  and phrase stickers.


I used one of the 3x4 cut apart cards for my journaling and then accented it with a floral sticker. I placed the banner sticker at the bottom of the page, tucking it underneath my photo strip. 


As my children have grown, busy schedules have crowded in and I miss these drives to the cemeteries. I miss it and definitely want to make the time to do this with my family again. 


Wishing you a peaceful and gratitude-filled day as you ponder the people who have sacrificed to bless your life!

Supplies

Happy Friday, Simple Stories Friends! Jana Eubank here with a double-page layout featuring the super-fun Sunshine & Blue Skies collection!

Four years ago my family checked off a bucket list item when we took our summer vacation to the Outer Banks in North Carolina. We stayed in a beach house and spent our days playing in the ocean, collecting shells, and eating good food. It was amazing! The Sunshine & Blue Skies collection is perfect for scrapbooking all of the beach photos I took while we were there!

I pulled out the Say Cheese 4 Fun Words Large Metal Dies to create my title. I die cut the title three times. Two layers are from Navy/Emerald paper, and the third layer is from the navy dot side of the Let's Escape paper. I layered them all together with foam tape to give the title lots of dimension.

I LOVE the Pool People Bits & Pieces and couldn't resist creating a little scene with them below the title. I surrounded them with phrase stickers from the Combo Stickers and 4x6 Stickers, and added in more accents from the Bits & Pieces pack and Chipboard Stickers.


I used dies from my stash to compliment the Sun die cut at the top of the page. I used foam tape to add a couple of leaf stickers and a phrase from the Combo Sticker Sheet.


This embellishment cluster on the right page was a lot of fun to create. I love combining die cuts in an "L" shape to accent the corner of my photos. I also added another Say Cheese 4 die cut word to this side, as well, accenting it with the hexagon umbrella shapes, phrase stickers (4x6 Stickers), and adorable polaroid camera sticker!


I love how beachy this collection feels! It was the perfect way to document our beach adventure on the East Coast!

Supplies

Hello!  It's Jennifer here today to share a layout I created with the new Let Freedom Ring Simple Set! This collection has the traditional patriotic colors along with a beautiful woodgrain and ginghams! I scrapped an old photo from when I graduated Army basic training but you can use Let Freedom Ring for 4th of July or Memorial Day! 

I began with using the blue/white star print of the B side of Independence Day and a fun star circle cut file. I used the remainder of the patterns to back the negative spaces of the larger stars.  To accent, I used a few of the star stickers from the 6x12 Sticker sheet popping a few up with foam tape. 

For my title, I utilized the cute "USA" letter stickers and placed it at the top of my journaling spot. I  just love that the three letters have different prints!  

The 3x4 and 4x6 Elements have a lot of adorable cut aparts including the one I used here! I typed up my journaling as well as added one of the floral clusters and sentiments from the 6x12 Stickers. 

I'm always a big fan of banners so I was excited to see this cute, but simple sticker banner! I used foam tape to adhere the banner across the bottom of my photo to help break up some of the white space. I finished my page by adhering strips of All American and Independence Day at the top and bottom. I stitched through with my sewing machine, as well.  

Thank you for stopping by today! I hope this inspires you to do some creating with this fun, new Simple Set! Have a great day!

Hi everyone! It’s Tara with Secretbees Studio . Summers are all about vacations and I happen to think vacations in warm, sunny weather are the best! Most cruises take you to beautiful tropical destinations and you know you're going to take a ton of photos while you are there! Here is some adorable inspiration for a vacation cruise mini album you can create and have all ready for those wonderful photos!


I made the suitcase, which measures 5.5" by 7" by 3",  from a tutorial I found on YouTube. The base was made with the coordinating Simple Basics paper and then topped with the bright and playful patterned paper of the Cruisin' collection. You can never go wrong with plaids and polka dots! 


I added a few travel 'stickers' to the outside of the suitcase along with a shaker luggage tag that is topped with some of the super fun Bits & Pieces and a sweet shell charm! 


The inside of the suitcase is just as cute decorated in more of the fun patterned papers. The mini, which is 5" by 6.5", fits perfectly inside and only enhances the cuteness! It too is decked out in the charming patterned papers along with a large journal card and adorable chipboard!


I made a matching latch on the mini to coordinate with the suitcase and added some more ocean charms to the spine. It is a travelers notebook style mini with elastic cord to hold some of the inside components and the fun continues when you open this awesome mini!  


On the left side I used all of the 4x4 journal cards to create a photo flip and accented each with small stickers from the collection! On the right side, there is a small travelers notebook and you can see that I used the matching stamps to add color to the pages! There is also a folder to hold more mementos and a insta-pocket photo page too!


You too can make an adorable mini like this and be all ready for your next cruisin' vacation or better yet make it as a wonderful gift for someone! They will love you for it! Check out the walk-through of this super cute suitcase and album on my YouTube channel.

Supplies


Hi, there!  Nathalie with you today with a new project fit for the upcoming Father's Day weekend, and what better way to celebrate and document those sweet memories than to use the new Dad Life collection from Simple Stories.


To start this page, I used cut file design # 249913 from Paige Evans - Silhouette Store- and cut the Star wreath out of white cardstock.


The stars in the die cut were back with papers from the Dad Life collection. A few of the stars were kept blank so that they create a few breaks from all the patterned paper stars and to help create a dimensional look for the  page


Once the wreath was ready, it was glued to the background (Say Cheese 4 basics paper) so that it sit a bit off the layout. Carefully, I trimmed the excess and then glued it to other side of the page, so that  it reads as a link of circles.   


The picture was backed and layered with papers from the collection and then glued onto the layout. Using stickers and fussy cut images from the collection, clusters were created around the picture and layout. One of the large stickers was then propped with foam adhesive so that it serves as the title for  the page.


I hope this has inspired you to check the new DAD LIFE collection from Simple Stories. It is the perfect collection to document your Father's day celebrations or daily life.


As always please do not hesitate to ask me any questions.


XO


Supplies

Ever since I was a little girl I have loved gardening.  I give all the credit to my grandmother who was always patient and willing to include me in her passion.  Her garden was always a delight to behold and I try to carry on that tradition today.

In the winter months I remember looking though her books of botanical drawings.  These were the “off limits” books that I was only allowed to handle when we would look at the pictures together.

The Simple Stories Simple Vintage Botanical Collection reminds me of those treasured books. The images of flowers and butterflies in this collection are exquisite and so life like.

The collection includes chipboard stickers, bits and pieces die cuts, stickers and washi so there are so many possibilities for greeting cards, layouts and more!   Everything is beautifully coordinated and a pleasure to create with.

I start my cards by arranging elements on pieces of clear plastic the size of my card fronts.   When I’m happy with the arrangement I can pick up the plastic and see how it looks layered over different papers.   The clear plastic lets me see the paper so I can choose the perfect one before I commit and adhere the images to the card.

When layering paper I try to alternate dark busy patterns with lighter more solid ones.   Simple Stories has added “Basics” to many of their new collections.  These are solid card stock colors coordinated to work with the pattern papers.  I used Basics papers to add matts as the first layer to each of my card designs.

This collection really is a feast for the eyes and will delight all the gardeners and flower lovers in your life.

Supplies

Hi! Odessa here with a couple of pages using the super fun Oh Happy Day collection. Both of these pages incorporate non-traditional photos with the fun colours and graphics of this collection. I love all the little cameras, coffees, hearts and cute phrases, they worked perfect with the pages I was working on. I picked the bright Pink Stripe Designer Binder to go with this collection to keep the fun vibes going.

I knew I wanted to incorporate some of the Instax photos my son took on our trip but in a way that kept them all together as a look into his viewpoint. A little collection of photos like this seems what the Simple Stories Photo Booklets are made for! Knowing that I wanted to incorporate them into my album as a whole I used one of the pocket pages that features 2x2 squares along with a big 4x6 pocket in the middle which I could slide the Photo Booklet into. 

The left side of the layout is pretty simple with some photos and a big graphic journal card. I used a lot of the camera icons from Oh Happy Day throughout this page since photos and taking them was the focus. I added in a little photo I had printed with my portable printer and then attached to the gorgeous photo cardstock from Oh, Happy Day. I sprinkled some cute stickers, chipboard and enamel dots (can I just say I am loving the coordinating enamel dots) to embellish my photos. 

I had a lot of fun embellishing the Photo Booklet with Oh Happy Day. I covered it in a cute dot pattern cardstock from the collection and added some stickers and washi to the front. Along the back of the booklet I used the scallop boarder from the combo sticker sheet to add some fun dimension along with one of the adorable Oh Happy Day bow clips! I also embellished a plain paper clip by adding in some strips of folded over washi from the collection just for more fun. I slid some 2x2 cards and Bits & Pieces to fill up the pockets to keep it less busy around the Photo Booklet.

Inside the photo booklet I cut down some of the coordinating solid cardstock from the Oh Happy Day Simple Basics Kit as a simple background to the photos. The coordinating cardstock was a great way to keep the fun colours throughout the booklet without overpowering the tiny photos. I added some simple phrase stickers to the photos to keep the embellishing simple. The big instant camera is cut down from one of the 4x4 cardstock elements.

On this spread I have some standard SN@P! pockets with a cute insert in the middle to hold a photo strip. The photos on this page are from a fun trip to the mall which is a perfect thematic match for Oh Happy Day! The left side is some cute photos of my boys and 3x4 Element cards to go with them (and a ton of embellishments, of course!)

I cut down one of the Insta Photo Pockets for this page. There’s one with a long vertical pocket and two 4x4 pockets that is perfect for making these little inserts. I slid in a photo strip that I wanted to include with the layout as a stand out element and attached some tab stickers from the Combo Sticker sheet along with some phrase stickers.

On the back of the photo strip I added my journaling and some stickers to tie it into the rest of the layout. On the page facing that I finally got to use ALL THE COFFEE STICKERS on a photo of a coffee cup and a bit of sass with a “normal is boring sticker” on a funny photo of my guys. I hope you’re inspired with some new ways to add non-traditional photos into your pages!

Supplies

Hello Friends! 

I played with the Oh Happy Day! Collection this week and excited to show you my layout. The colors for this collection are so bright and vibrant - gorgeous for summer pics! I wanted lots of colors on this page and well maybe I over did it with embellishments cut I couldn't stop! I used a picture of my friends girls enjoying a day outside together. They are the cutest gals and have "sweet smiles!"

I started creating this layout with a white cardstock base. I wanted to add a cut file but wasn't sure where and what I wanted to do so I took this circle one and added the bright pink patterned paper behind it. 

I added a piece of yellow paper about 8x12" and sewed the cut file on top of it. I did some messy sewing for this one. I wasn't worried about straight lines. 

I added some other papers to the sides of my layout - 3 different ones actually and sewed them as well. Adding some diecuts from the Bits & Pieces package was really easy. I took mostly the flowers and hearts with a few other misc items such as sunglasses,  and the camera. I formed small clusters surrounding my cut file and well maybe went a little crazy with the hearts and enamel dots. 

All these gorgeous colors I couldn't stop! 

To create the title I used the Sweet and Smile words from the Bits & Pieces package - I was lucky enough to have an extra package and used the S from another word in the package to create Smile(s). 

To add some dimension and give it a contrast on the white cut file I used a black brush marker and traced the edges of the words. This gave me a bit of black detail and kind of make the title stand out a bit more. I of course added dimensional adhesive on the back of my words.

Are you ready to get your own Oh Happy Day collection pack? It has so many awesome papers and fun diecuts too.  Hopefully I gave you a bit of inspiration or atleast something to think about for your next layout. You can find more projects on our instagram accounts - @SimpleStories_ and @KristineDavidson. 

Have a great day friends!

Supplies

Hey y’all Courtney here and I’m sharing the layout that I created using the super adorable Sunshine and Blue Skies collection. Every piece of this collection is absolutely cute from the normal summer icons to the trendy floats and people. The colors and prints are what really drew me into it though.  Here is a look of what I created and I hope it inspires you to scrap some summer layouts!

So the main papers I used for this layout came from the 6x8 paper pad and I also used two sheets from the collection pack for my main layout. The main background page is Sunkissed then it’s backed with On Holiday.

I used my silhouette to create my large title and cut it in white then I used the 6x8 pad to back it. You can use any font that you like and just add an offset to it. I used a different patterned paper for each letter. Did I tell you that I am in love with all of these patterns? This was the best way for me to not have to choose which one I went with, and there is still a ton that I didn’t use on this layout!

I spaced my cut file out so that I could add three photos and three clusters to stick with that rule of thirds. Each photo is cut down to 2 ¾ by 3 ¾ so that could back them with the wood grain printed 3x4 elements. This allowed me to have some more neutral going on. Each photo also had a little piece of branding strip cut down layered with gold glitter washi, a phrase sticker, a cute icon, and an enamel dot. This technique is a go to for me when I do pocket pages also. It just adds just the right amount for me. All of those elements came from the 4x6 sticker sheets.

I created three clusters that I thought went well with the photos and the theme I was going with. This layout is created with pictures from my four year olds first beach trip. I used both the bits and pieces and pool people bits and pieces to create the look that I wanted. A few of the elements are popped with foam to help them stand out a little more.

I finished the layout with a few more word phrases at the bottom and sprinkled some enamel dots throughout.

Thanks for stopping by! I can’t wait to see how you use this collection!

Supplies

Good morning everyone! The time of vacations and traveling has arrived and one of my favorite ways to document those memories are by creating a mini book. Anya here today and I would like to share with you an album I created using the Simple Vintage Traveler collection.

For this mini book I used some heavy weight cardstock, faux leather and patterned paper to make an album cover, and white cardstock for the pages, which were sewn to the binding piece and then glued inside the cover. It may sound a little complicated, but once you make one you get the hang of it.

I really enjoyed the soft color pallete in the Simple Vintage Traveler's collection! I used the patterned paper to cover all the pages and then decorated them with chipboard frames, stickers and ephemera pieces.

One of my favorite ways to add photos to these mini albums is by including a folded piece of white cardstock, which I like to cover with one of the journaling cards from the collection. By gluing this piece down, it creates two spots for photos when you flip it open.

Also, I made a few long pockets, which can hold extra pictures and ephemera. These additions make the album more fun to look through and these pockets can hold larger pieces.

I hope this inspired you to document your next trip in the album you make from scratch. It gives you total freedom by choosing your own custom size, color of the cover and the number of pages inside!

Pages