Jennifer Haggerty's Blog Posts

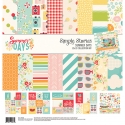
Hello friends! Jennifer on the blog today to share pages I created with one of the fabulous NEW collections!  Summer Days includes a variety of fun, bright patterns perfect to document those summer memories!   And with any Simple Stories line you always have a multitude of embellishments to choose whether it be coordinating stickers or washi tape! 

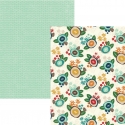
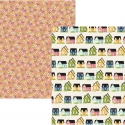
For my first layout, "Summer", I wanted to mix in lots of patterns on my layouts!   Using a background cut file helps me do so!   I chose a 12x12 starburst overlay with my favorite cloud pattern Beat the Heat. I then added in strips of additional papers to fill in the blank areas.  Once together, I trimmed it down to 11x11 because I wanted to allow the edge of my white cardstock to show.  I also incorporated the 4x6 Vertical Element Cards to tuck behind my photo and journaling card.  This is a great way to add color to your pages if you don't use the Journaling Cards for pocket pages! 

For my title, I used the cute "Summer" banner from the 6x12 Chipboard placing it just under my photo. I also added in a cloud/sun sticker from the Combo Sticker Sheet using foam dots to pop it up. 

I like to cluster my embellishments in the corners of photos or journaling cards doing a lot of layering!  Honestly, I can't even tell you how I come up with it; I just arrange them until it "feels" right.  LOL  If you weren't aware, Simple Stories has many fun designs in the Silhouette Shop including this pineapple! I used the bright yellow of the B side of Lazy Days then added the cute flamingo from the Bits and Pieces pack along with stickers and Decorative Brads.

Speaking of Decorative Brads, how cute is cloud/heart combo?  I am drawn to the vintage print on the cloud with the contrasting blue and red of the brad!  I had to include it on my page!  

The Combo Sticker Sheet always has a variety of shapes and sentiments to use on your projects! A big favorite are the tab stickers that are fun to tuck behind your photo or journaling card! I also adding in some colorful Good Vibes Washi Tape to fill in some white space!

You will also find lot of different shapes in the Bits and Pieces pack including this circle journaling spot and green/white arrow!  I used the Carpe Diem Make It Happen Roller Stamp to add a little sentiment under my date then finished with a small Decorative Brad and a piece of the Summertime Sweetness Washi Tape.

_____________________________________

For my second layout, I was inspired by the "Just Add H20" card on the 4x4 Elements Sheet and knew just photo I would use!  A few years ago, my husband caught this awesome pic of our daughter launching a water balloon at him! You can see the balloon mid-air (I don't remember if it met its directed target or not).  Water games are always a big part of summers here in Illinois whether it be running through the sprinkler or getting out some water balloons to cool down!  

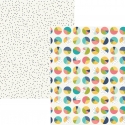
I began with a white sheet of cardstock and added color by painting yellow spray ink across the middle with a foam brush.  I also incorporated blue spray ink adding some ink splats in random places.  After allowing to dry, I was ready to start adding in my papers!  

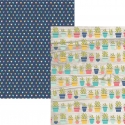
I again utilized some of the 4x6 Vertical Elements as well as pieces of the B side of Sunny Days and So Much Fun.  I also added strips of Sunny Days and Summer Snapshots at the bottom and top of my page. Using a border punch, I incorporated a small strip of the B side of Lazy Days at the bottom of my title card. I love using my sewing machine and so I ran a quick stitch through the strip then finished by adding the beach ball sticker (which I popped up) and well as a cute chipboard flower and a small brad. 

Here is where the Journaling Card Elements come into play again!  I love using the cards with ledger or white space for journaling! Since I don't care too much for my handwriting, I will use my typewriter if I'm at home.  I decorated the edges of my journaling cards with cute die cuts from the Bits and Pieces pack. Don't you love the bikini?  

Showing more cluster of embellishments as I usually do this to fill in some white space or accent my photos. The smaller brads remind of enamel dots and I think they are perfect to go alongside larger embellishments such as the chipboard sun!  Also, the tiny heart stickers from the Combo Sticker Sheet are perfect little additions, as well! 

Adding in a banner in the corner can also be a great way to add more color to your layouts! I layered many pennants then stitched through with my sewing machine as well as added a Decorative Brad and bakers twine from my stash.  

I used patterned hearts from both the Combo Sticker Sheet and Bits and Pieces pack to accent my photo! I also love the many sentiment sticker found on there as they are a nice touch


Supplies

Hello friends! Jennifer here on the blog today to share some pages I created using the new Cabin Fever collection!  The weather is getting warmer here in the US so that means getting outdoors!  Where I live many people love to camp and I was excited to see this fabulous line!  Truth be told, I don't love to get out there and "rough it" but definitely enjoy being among nature!   Both of my kids have attended church camp during the summers just north of our city and Cabin Fever is perfect for their photos! 
 
 I used the new Geo Background (#19848) Simple Stories Silhouette Cut File as the base of my first layout "Explore".  I wanted to show off the many rich patterns and colors of Cabin Fever so using a background cut file is a perfect way to do so!  I honestly can't tell you which pattern is my favorite because I love them all!  
 
 
The 3x4 Journaling Card Elements are perfect to add journaling or layer small embellishments around your title! I did both using pieces from the Combo Sticker Sheet as well as one of the Decorative Brads! Using pop dots or foam tape with embellishments can add some depth to your page just as I did with the fire die cut.  I usually find this helps fill in space between  photos and/or journaling spots.  
 
 
If you don't do much pocket page scrapbooking and aren't sure what to do with the 4x6 Horizontal and Vertical Elements, they do make great layers under your photos!  I like to add at least two contrasting colors to help my photo "pop"!  I also have a habit of matting my picture onto white cardstock  as well!  What can I say? I love layers!  To break up the page, I used the tartan plaid border sticker from the Combo Sticker Sheet and the "Wild and Free" Die Cut from the Bits and Pieces pack. 
 
 
I love that the Decorative Brads have a multitude of sizes and shapes to choose from!  Here, I paired one of the smaller brads with a larger plaid.  Brads are a nice accent to bring you pages together!  


__________________________________
 
 
For my second layout, "Camp 45", I started with kraft cardstock as my backround.  Again, using my Silhouette, I cut different size circles from a few select patterns (using both sides of the page).  I then layered my circles across the center of my layout and stitched through with my sewing machine.  I also added strips of favorite accent prints at the top and bottom of the page (and again stitching through...I sew on everything!).  
 
 
Camp 45 is the name of the camp my daughter attended that summer...it was for fourth and fifth graders and her first time being away from home for more than a night.  It's only 20 min away but I may have cried when I dropped her off!   Again, there is that 3x4 Journaling card! They are so nice to tuck next to your photo and add a title and a few embellishments!  I used the "CAMP" from the Camping on the 6x12 Chipboard along with cutting my "45" with my Silhouette and backing with yes another 3x4 Journaling Card! :)  
 
 
I punched two smaller holes at the top of my Journaling card to add brown baker's twine to the top!  I thought it gave the card a little bit of dimension!  
 
 
Using hand punches, I added smaller circles to the fringes of my photo as well as added die cuts and smaller Decorative Brads.  Also, you can spy at the top of my photo some of the lovely Nature Hike Washi Tape!
 
 
Here, I used the remainder of my tartan plaid scallop border sticker to break up the page...you can also spy a small section on the other side of my journaling card!  I love using repeating shapes on a page when you want to include lots of color and prints!  
 
 
Thank you for stopping by today!  I hope this inspires you to do some creating with Cabin Fever! You can check out the collection in its entirety by going to the Products Page!  Have a wonderful day! 


Supplies

Hello friends!  It's Jennifer on the blog and I'm very excited to be a part of the Simple Stories team for another year!  I will be creating layouts but you may see a mini book from me from time to time!  Today I'm sharing pages I created using the new Domestic Bliss collection!  This lovely line is full of beautiful colors and prints that are perfect for just about any theme!  
 
For my first layout, "Home", I started with the gorgeous blue/grey wood plank print of the B side of Bless This Mess! (This sheet is probably my favorite out of the collection as it has a beautiful plaid print on the opposite side).  Going through an old photo album, I found this black and white picture of the first house I remember living in.  The address and a date were written on the back; I assume it was taken by the realtor.  I have lots of memories of this house: some good, some bad, but definitely part of my story.  
 
 
Using white cardstock, I cut a circular cut file on my Silhouette (Geo Globe from The Cut Shoppe) then added in different patterns from the collection. I finished by stitching the edges with my sewing machine (honestly I sew on everything!).  You can also spy one of the cute tags under my photo from the Bit and Pieces pack! I added some navy and white bakers twine from my stash to accent. 
 
 
​The colorful "HOME" chipboard letters found on the 6x12 Chipboard Sheet make the perfect title for my page!  I love the bright colors! I added in a sticker from the 
Combo Sticker Sheet as well as coordinating Enamel Dots to accent my title. 
 
 
I thought the chipboard and die cut houses would look cute next to my photo! I placed them across my page almost like a street adding in die cuts and one of the cute
 
 
I'm not a fan of my handwriting so if I have a choice, I will use my electric typewriter.  I used the B side of Domestic Diva because I love the bright yellow! And it was different than my usual white card stock. I think I could've written a book about this one photo; its funny how a picture can bring up so many memories!  
 
 
________________________________
 
For my next layout "Love Was Here", it is ALL about memories.  When I first saw Domestic Bliss, I knew I wanted to scrap about my mom in her kitchen. The minute you walked in the door she had a smile and a hug for you.  Next, she was offering to cook you something or get you a drink; that's how my mom showed her love to others. 
 
I used the colorful florals of "Work It Girl" (don't you love the titles?!) and used the Simple Stories Crosses Background Silhouette cut file for my background.  I backed the crosses with different patterns then stitched around the edge of the cardstock.  
 
 
Using one of the ledger prints from the SN@P! Basics Paper Pack I cut a tag from my Silhouette to hold my title. I used the letter stickers from the Combo Sticker Sheet as well as black alphas found in the Say Cheese III collection.  I "popped up" my tag using some foam tape to give it some dimension above the surrounding embellishments.  I love how  Simple Stories gives you so many little pieces to decorate and accent your pages!  
 
 
Another fun Simple Stories cut file, Heart Polaroid, I used with the B side of Mom Rules.  I then added a cute chipboard plant as well as smaller stickers and die cuts! And don't you love the hanger with the heart?  I thought it would look cute "hanging on the line" across my page.  
 
 
Showing more of the coordinating die cuts and stickers that are part of the collection! I used brown bakers twine to hold my pieces and added in mini wood clothes pins. 
 
 
​I also used one of the chipboard clothespins to "hold" my photo as well as used the adorable "mom" Epoxy Metal Clip.  
 
 
​I probably will go back later and add journaling to my page. Honestly, I had so much emotion even putting this page together and there is so much I wanted to say.  For now, I think just scrapping the photo was enough since its still difficult to create pages about my mom. I miss her so much...what I wouldn't do for one more day to sit at her kitchen table with her! 
 
Thank you for stopping by today! I hope you will check out all that is included in Domestic Bliss as well as the new releases!  You can check out everything by visiting the Products page! Have a wonderful day!  

SaveSaveSaveSaveSaveSave

Supplies

Pages